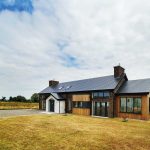
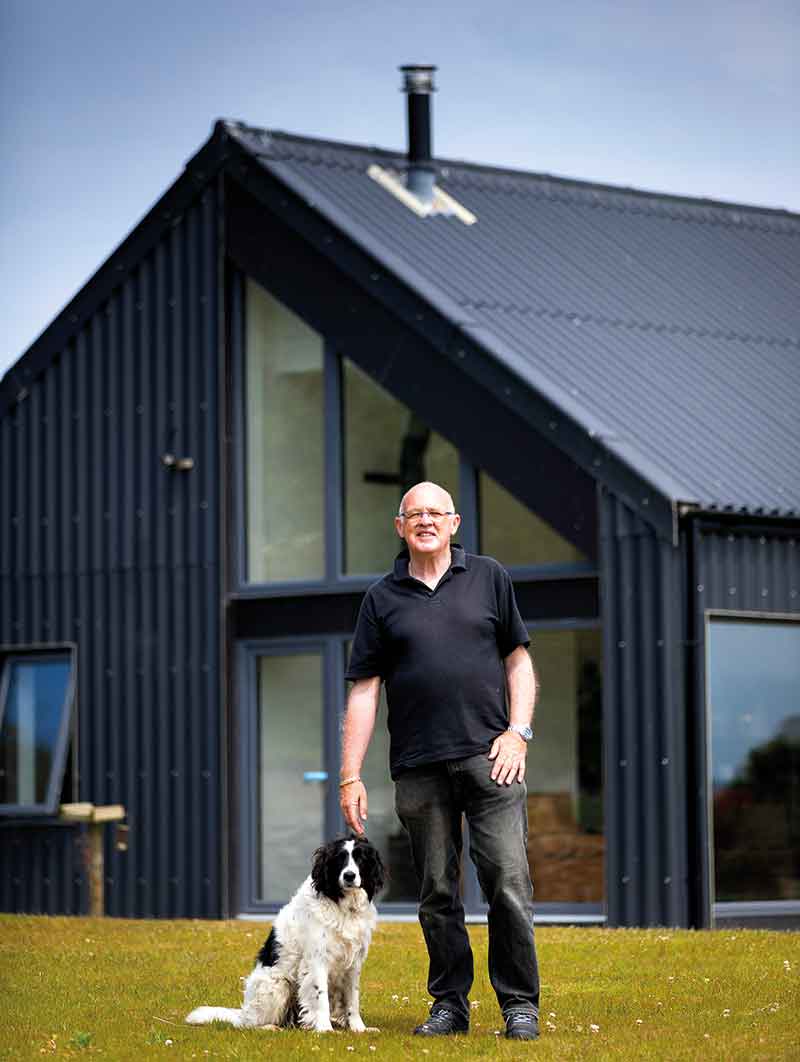
Ken Gill’s rectangular self-built home in Co Down is low cost and energy efficient.

In this article Ken talks about:
- How he came up with the shape and size of his house to maximise energy efficiency
- Choice of timber frame and working with a kit supplier for design and installation
- Reasons for choosing fibre cement cladding
- Finding windows suitable for seaside location
- Direct labour tasks, from pouring foundations himself to hiring trades
- Floor covering options and flat pack kitchen
- Top tips to keep on top of the budget
- Floor plans and specification
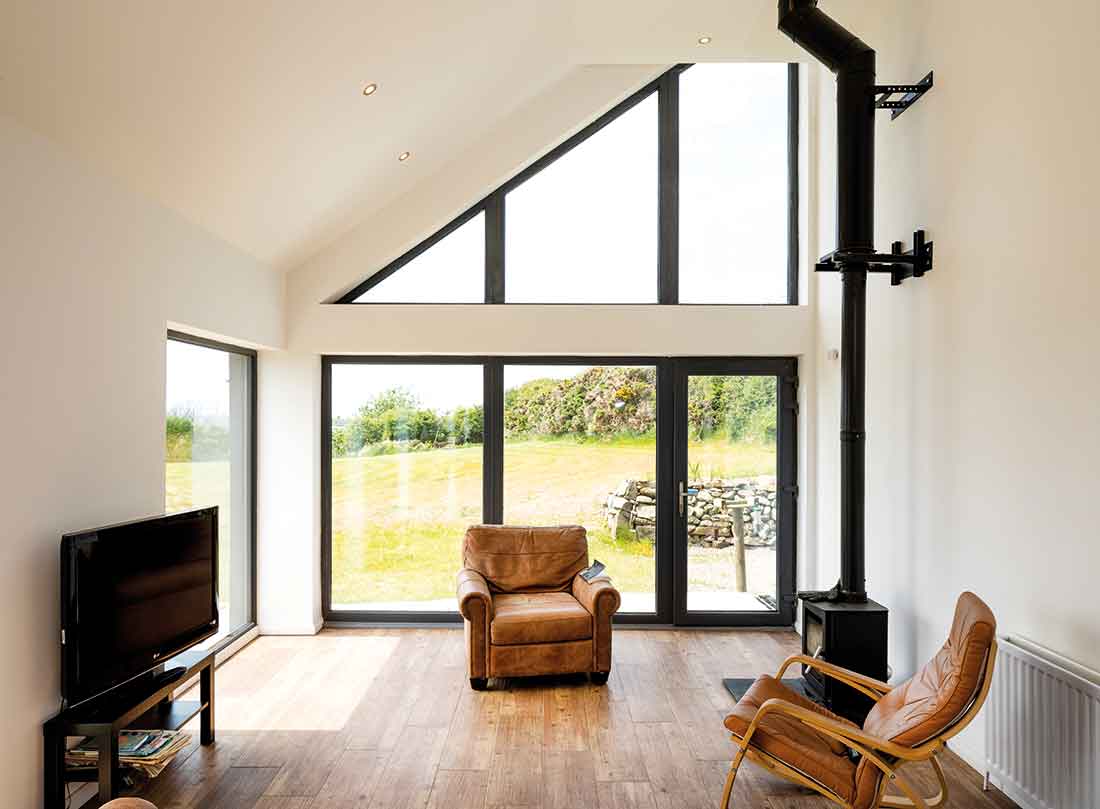
In the coldest two weeks of January 2019 Ken only had to turn on the heat in the house for an hour. “Any bit of sun that gets into the house through the windows keeps the house warm,” he says. Even though Ken is very happy with this result, and it’s one self-builders often strive for, it was not the one at the forefront of his mind when he first undertook the project.
Decades ago, when Ken moved away from home and sold up the farm, he kept part of the land. That’s because he knew that one day he’d eventually be building on it to retire to with one side facing the sea and the other a mountain.
“The rural location appealed to me and at the same time it’s only 10 minutes away from the village. The neighbours are close yet the location is private,” he explains.

‘I choose a quick construction method, timber frame and roof timbers with wall panels formed on site; it only took two to three days to build.’
Ken
House size: 124sqm
Plot size: 0.56 acres
Total project cost: £115,000
SAP (EPC): 85 (B)
Airtightness: 0.9 m3/h.sqm @50Pa
He came back a bit earlier than originally planned. “My mum got sick and I needed to be near her,” says Ken. But building on this dream plot wasn’t easy. “The planners don’t like houses in prominent places. It was even more complicated to convince them because we’re in an Area of Outstanding Beauty.

“Following an unsuccessful planning application I hired an architectural practice; the new design and application were lodged and approved in just under a year.”
Ken also had to apply for a discharge licence for the packaged onsite wastewater system he installed. “We got it tested recently and the water that comes out of the system is 95 per cent pure,” he says.

Decisions, decisions
“Because I waited five years to build the house, because of the planning delays, it gave me time to do lots of reading,” says Ken. The more he read the smaller and more energy efficient his house got.
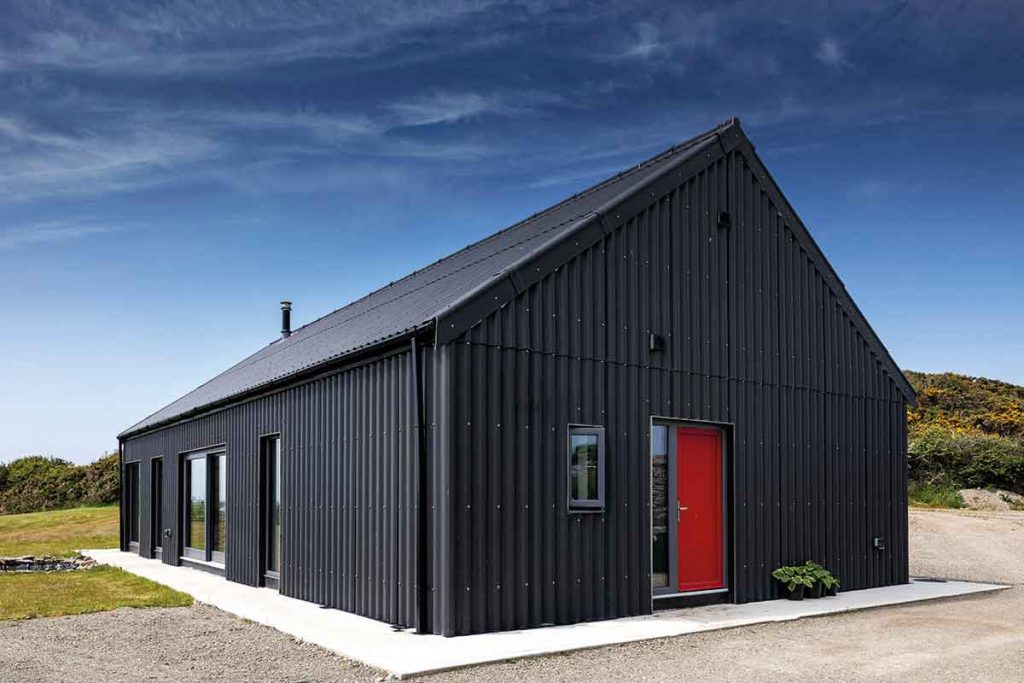
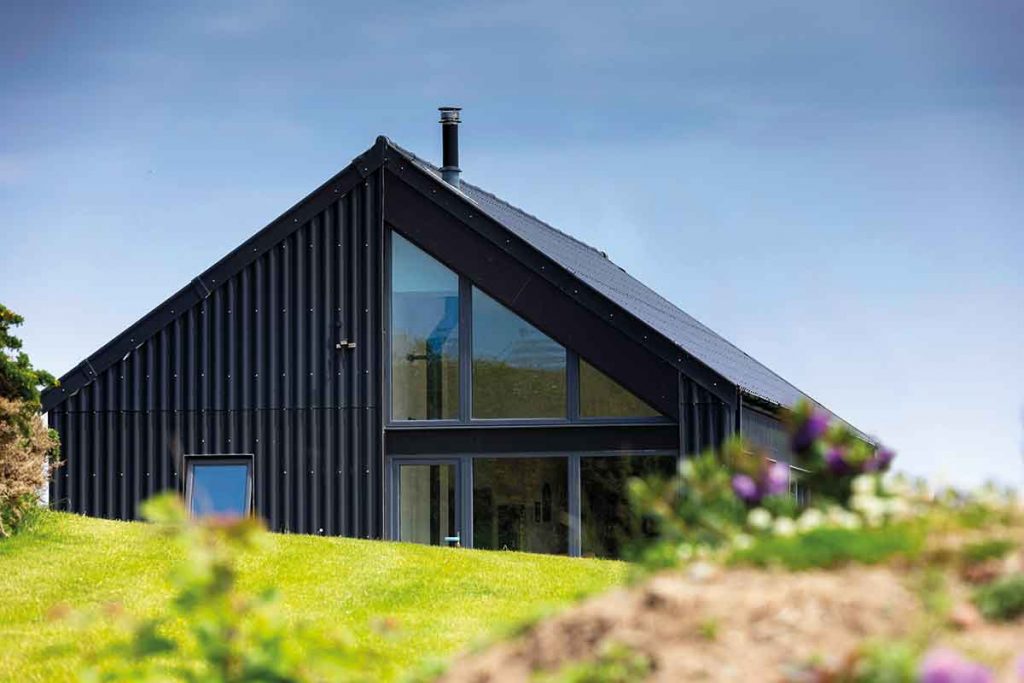
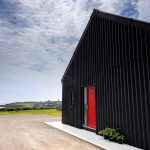
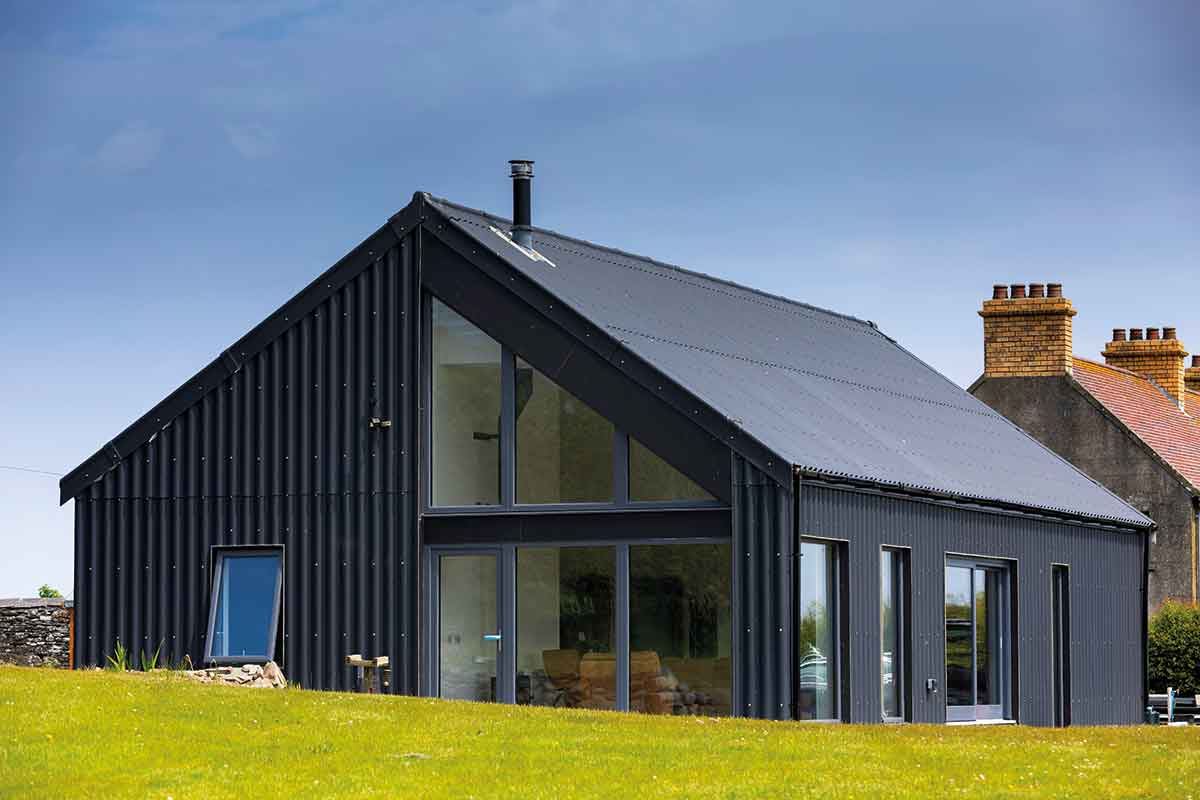
“I stuck to a rectangle in part because it’s an exposed site and complicated roof designs such as one with valleys will funnel wind in. It’s also the cheapest way to build.”
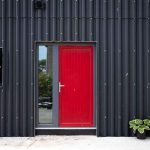
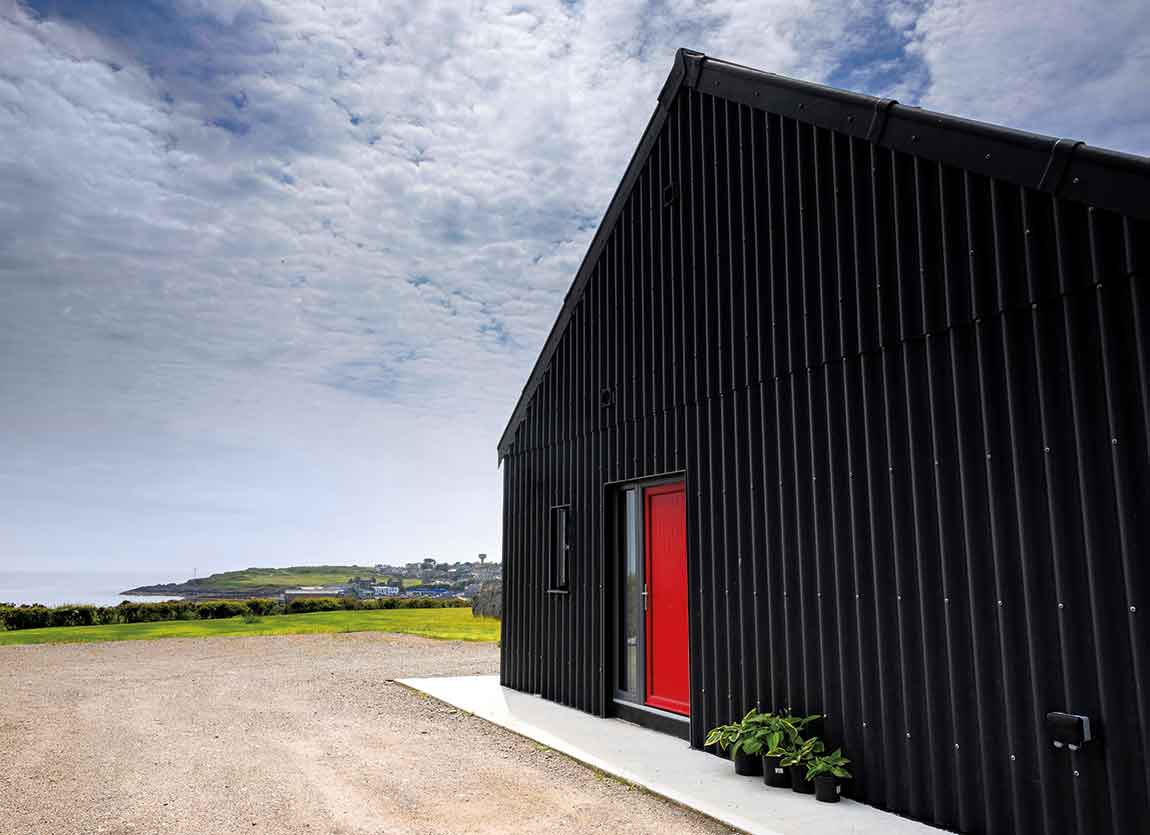
As for the fibre cement cladding, Ken came across the finish in Scotland. “I wanted a low impact visual aesthetic and black is a colour that would have been traditional on farms. Sheds would have been tarred in the past and this contemporary version reminds me of them.”
The fibre cement cladding is fixed with stainless steel bolts to prevent rusting from the salt spray. The choice of windows also had to factor in the seawater. “Aluminium oxidises quickly so we couldn’t go with alu-clad; instead I chose timber,” explains Ken.
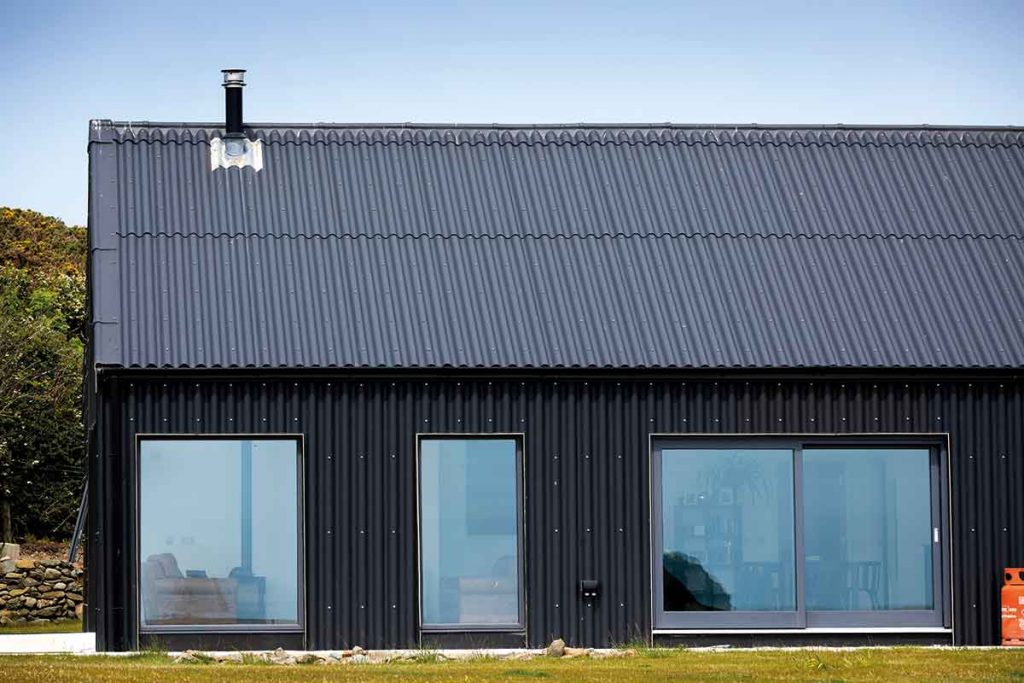
“The windows do streak occasionally. I made sure they were accessible so I could clean them myself with the ladder.. They are all triple glazed and I chose a grey black colour – exactly what I wanted.”
For Ken, timber frame seemed like the most straightforward way to get an energy efficient house. “I chose a quick construction method, timber frame and roof timbers with wall panels formed on site; it only took two to three days to build.”
“When the time came to figure out how I was going to build the house I was sure of what I wanted. I didn’t want anything I didn’t understand or that hadn’t been tried and tested. I wanted the house to be well insulated and economical to heat. It gets so cold in mobile homes, which is where I was living during the build, that this became a bit of an obsession.”
Getting the timber frame and cladding to site was also logistically easier than blockwork. “I had to arrange with the neighbour access through his field to bring the timber frame sections to the site; he kindly allowed us to bring in a lorry on his land and crane it in. I wouldn’t have been able to do it without him.”
The design fed off two core ideas; the first one of course was the views. “The only way someone can look in is if they’re on a boat,” says Ken of any privacy concerns. “I’m very lucky in that there’s only me, (and the dog), I had no one else to please when designing the house,” continues Ken.
“I like the fact that you don’t notice the building. It wasn’t built to impress, it was built for me. A lot of my neighbours thought I was crazy, that I should be building a family home.”
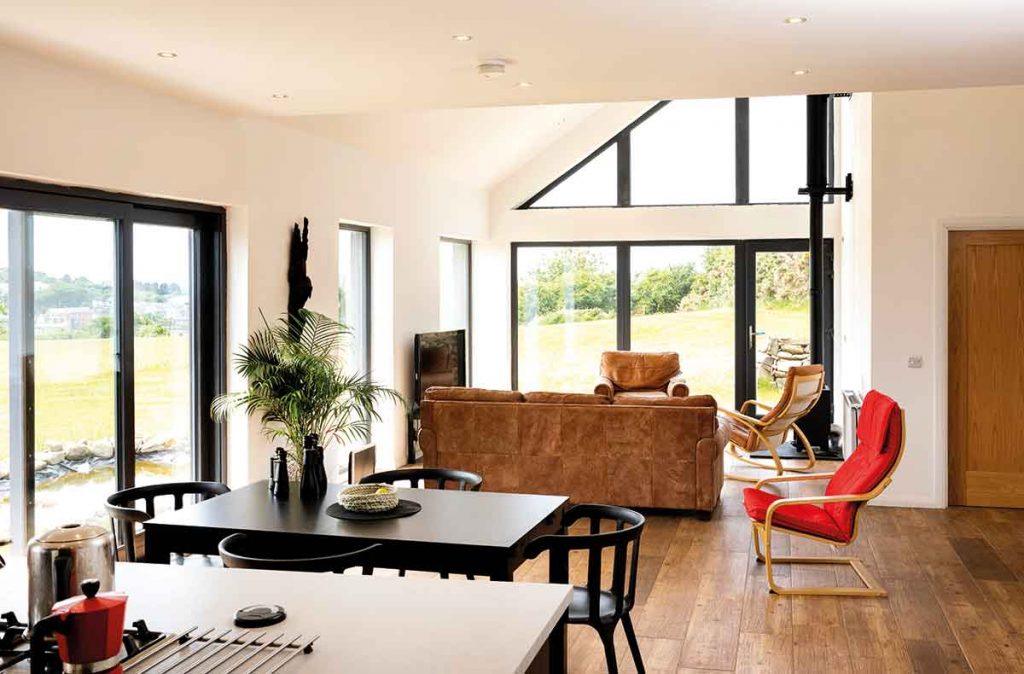
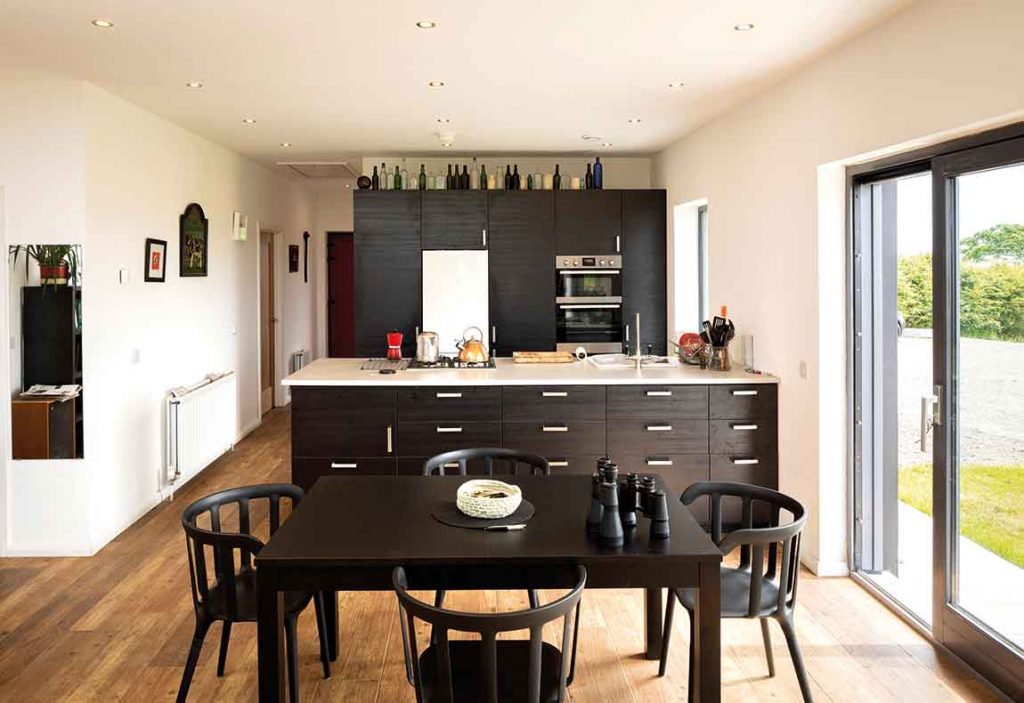
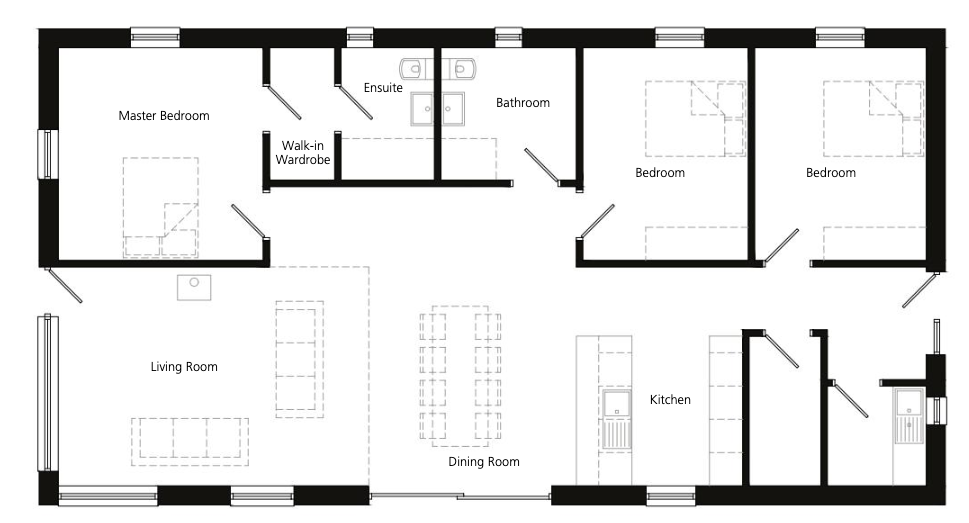
The second aspect was about getting the flow right. “By reading an awful lot I knew I didn’t want corridors, so I kept the passageways to a minimum. I think design is mostly about analysing how you are going to be living in the house.”
Ken doesn’t think the rectangular shape limited his options. “By sticking to a rectangle, you get no surprises during the build and yet I think you can still do a lot with the layout,” he adds.
“You can get creative with an open plan design, without doors or corridors. Because the airtightness is very good we didn’t need to factor in airlocks; in older houses you’d have a porch to keep the draught out of the front door and you’d have corridors to close rooms off from one another. You don’t need any of that with an energy efficient house.”
Sequenced
“After many years of wrangling we eventually got planning permission in January 2016; after that I chose the timber frame company in March and we started work on site the last weekend in May. Things hadn’t picked up by this stage, it wasn’t until the following year that building took off again so I was in a buyer’s market,” explains Ken.
“I got the timber frame package priced around; the architect had some contacts and we went to two to three timber frame companies. I chose the one whose pricing was right and the one I had the best rapport with; we understood each other for the design.”
“I did the foundations with a local contractor; the timber frame company gave us diagrams and we followed them to pour the foundations. The substructure is your biggest unknown because you never know what you’re going to hit. We were lucky in that we sit on good gravel which saved me money not having to buy any for the groundworks.”
The timber frame company helped tweak the plans too. “I felt the bathroom was too big for my purposes so we made it smaller and put in a walk-in wardrobe instead.”
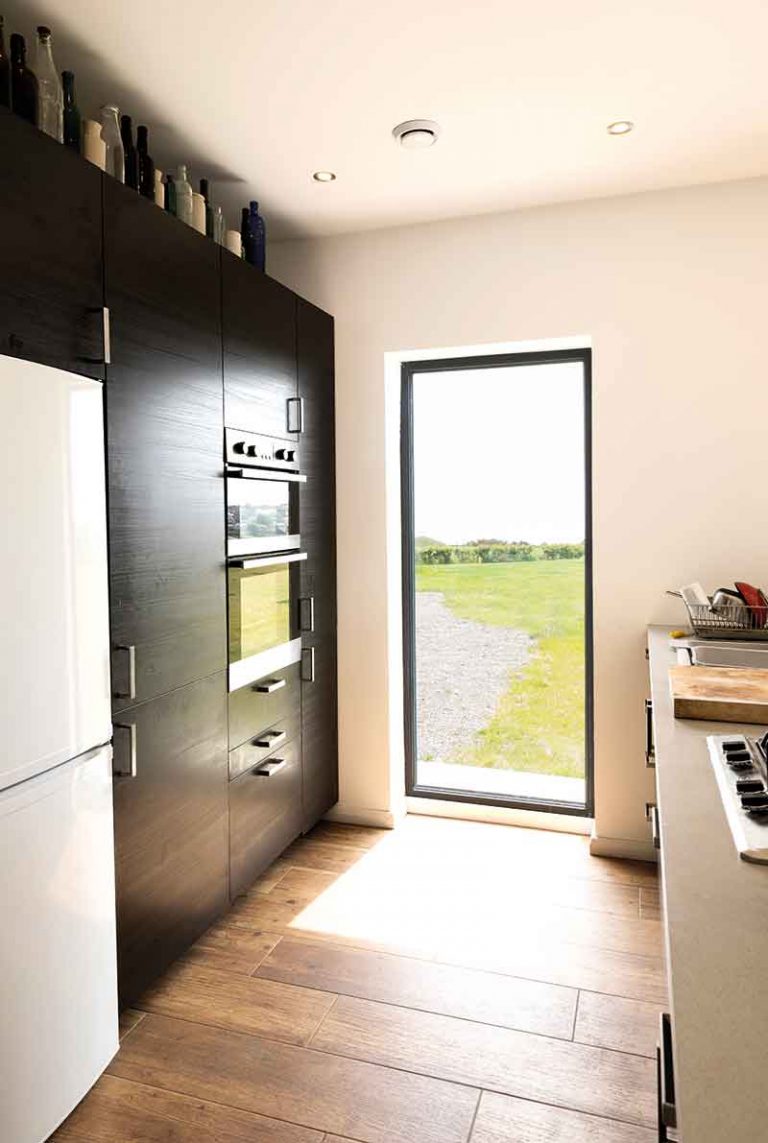
“After they craned in the wall sections, the timber frame supplier put in the windows, insulation, plasterboard, and the fibre cement cladding. I brought in a local electrician and plumber and sourced the bathroom fixtures and fittings. I also chose a flat pack kitchen.”
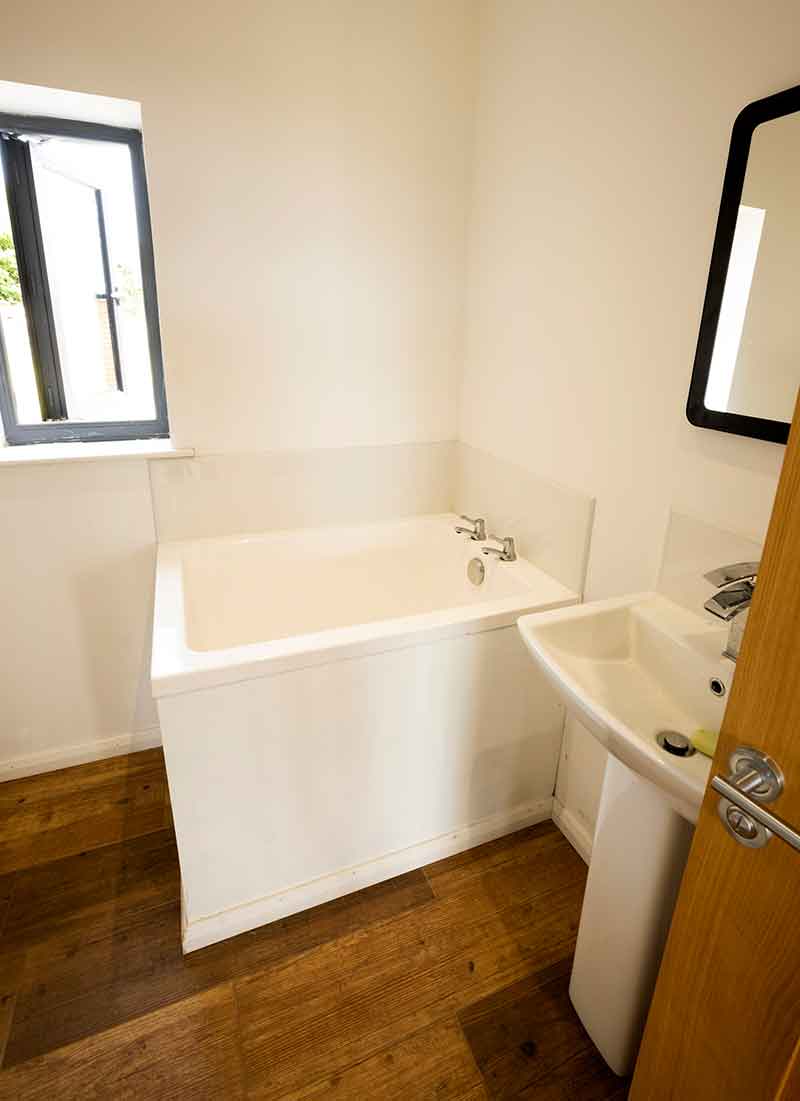
For the bath, Ken had his heart set on one that was square in shape. “I wanted a Japanese style bath because there’s always something sticking out of the water if you’re lying down, and I just get cold.” The bathroom also has a walk-in shower.
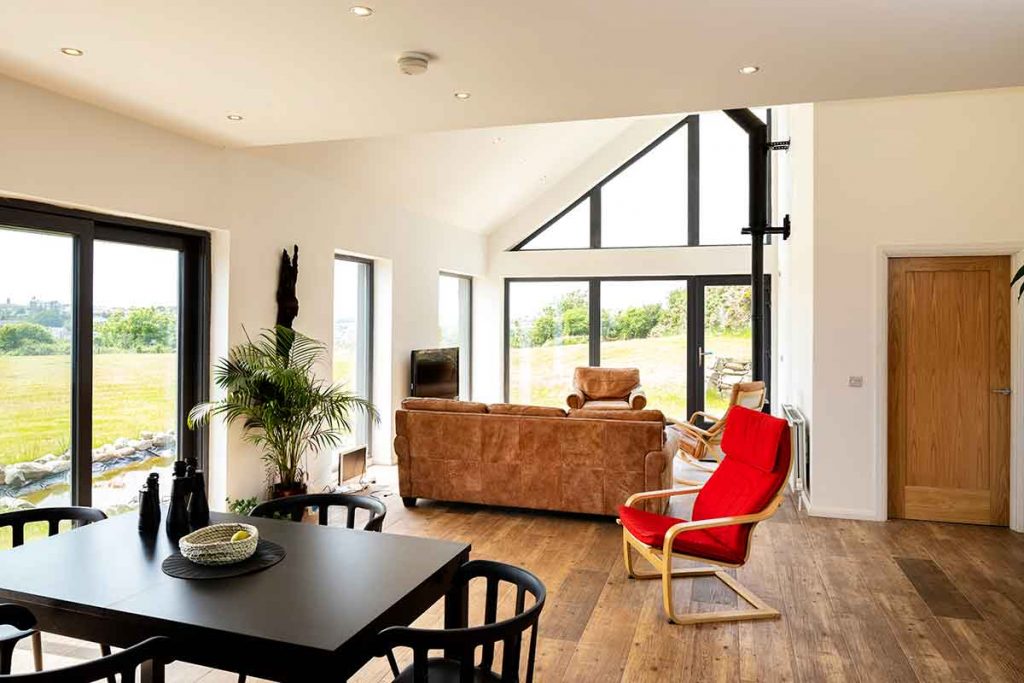
The big question during the build was what to do for the floor coverings. “I wanted terracotta but that was really expensive; I went to the tile store and they convinced me to try wood effect porcelain tiles. I had my doubts because my mum had used these to disastrous results.”
“I thought long and hard because I was aware any kind of covering could get bleached from the sun. I thought laminate might wear too quickly so I used the wood effect tiles throughout the house. This helped save on cost and has worked out really well; I’m very pleased with it.”
Ken’s top tips
Think single storey. For my three bedroom house the bungalow style is more than enough; it gets more expensive and complicated to add a second storey. As I had the double height windows I used wall hangers and a lower ceiling to soften the effect. That’s a good set up for entertaining.
Dryline. I didn’t want to skim coat the plasterboard so went for what’s referred to as drylining; the plasterboard sheets are butted against each other and sealed with a mesh which you can simply paint over.
Stud finder. To hang just about anything on timber frame walls, you need to find the studs. I use a plastic bag with a magnet in it to find the plasterboard nails.
What would you change? The site is an acre which means I have a very big lawn to cut! The only thing I’d change in the house is the light switch in the guest bathroom; it’s on the opposite side of the door handle. It’s a bit awkward to turn on but it’s only used once in a while.
What’s your favourite part of the house? I love the windows, they offer tremendous views. Sitting looking out; you can see so much. The house is designed so the south facing side offers views to the sea. That’s the living area. To the north are the bedrooms. I just love living here!
Would you do it again? I would even though I don’t plan to because I built this house to retire in.
What would you tell a budding self-builder? People say it’s stressful but it wasn’t for me. It actually was a pleasant and easy experience. The foreman for the timber frame company told me not to worry; his mantra was: everything gets sorted. And he was right. It always gets built in the end. But it’s true that I was very fortunate in that I could rely on word of mouth for the tradesmen. I knew the people I was getting were good.
Energy Efficient Rectangular Home Specification
Walls: Vertical black fibre cement corrugated wall sheets on timber counter battens to provide ventilated void on breather membrane on OSB board on external timber frame kit on airtightness membrane on timber counter batten on 40mm PIR insulation on 12.5mm plasterboard, U-value 0.16 W/sqmK
Floor: Sand/cement screed on vapour control layer on 150mm graphite EPS insulation on 1200 gauge DPM on 150mm cast in situ concrete slab on 225mm thick bed of compacted hardcore, U-value 0.14 W/sqmK
Roof (fink truss over the kitchen, utility and guest bedrooms): Vertical black fibre cement corrugated roof sheets on timber battens on breather membrane on trussed rafters on 400mm mineral quilt insulation laid at ceiling level on airtightness membrane on 12.5mm plasterboard, U-value 0.11 W/sqmK
Vaulted roof (monopitch roof to suit double height and corner glazing): Vertical black fibre cement corrugated roof sheets on timber battens on breather membrane on vaulted trussed rafters with glass mineral wool between 40mm PIR insulation on airtightness membrane on 12.5mm plasterboard, U-value 0.15 W/sqmK
Windows: triple glazed, aluclad, argon filled, overall U-value 0.8 W/sqmK
Suppliers
Architect: Gareth Boyd of 2020 Architects, 2020architects.co.uk
Timber frame company: Kilbroney Timber Frame insulated with ‘Earthwool’ frametherm Roll 35 between studs, kilbroneytimberframe.com
Fibre cement corrugated sheets: Neptunas SVK by Rilco, rilco.ie
Floor insulation: Kingspan Aerofloor Platinum, kingspaninsulation.com
Kitchen: IKEA, ikea.co.uk
Try our new ‘Selfbuild Cost Calculator’. Fill in details and instantly get a rough estimate for your project