A self-build is often first and foremost about creating a family home, but in many cases it can also yield a profit. As did this project in Co Armagh.
In this article we cover:
- House value vs cost to buy the site and build the house
- Cost details of big ticket items
- Why they chose to self-build
- How they went about finding a site
- How they went about designing the house
- Difficulties with planning permission
- Wastewater and electricity setbacks
- Top tips for a successful build that stays on budget
- Interior design: how to nail the minimalist style
- Savings on the kitchen design choices
- Weighing benefits of heat pump and solar technologies
- Timeline and supplier list
- Full specification and floor plans
Overview
Size of house: 250sqm
Bedrooms: 4
Plot size: 1 acre
Site cost: £107k
Build cost: £396k (£443k including all fees, connections etc)
House value: £600k
EPC (SAP): A (93)
Heating: oil boiler with wood burning stove
Ventilation: mechanised centralised with heat recovery
Build method: block and steel
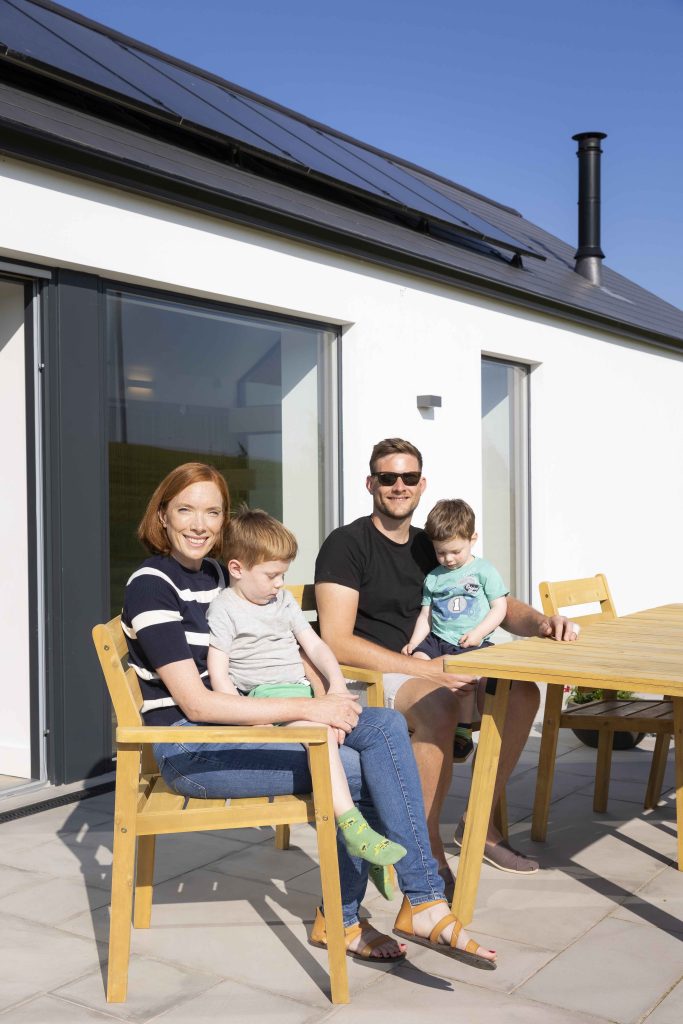
Stuart and Katie loved living in the Rosetta area of Belfast, however, they became increasingly aware of the drawbacks of their three-bedroom semi-detached house, such as the lack of natural light and sun in the garden and restricted internal space.
They knew they wanted to find solutions in their next home, but they quickly realised that buying a four bedroom detached house in the same rea of Belfast – that ticked all their boxes – would be beyond their budget. So, they decided to explore building sites instead.

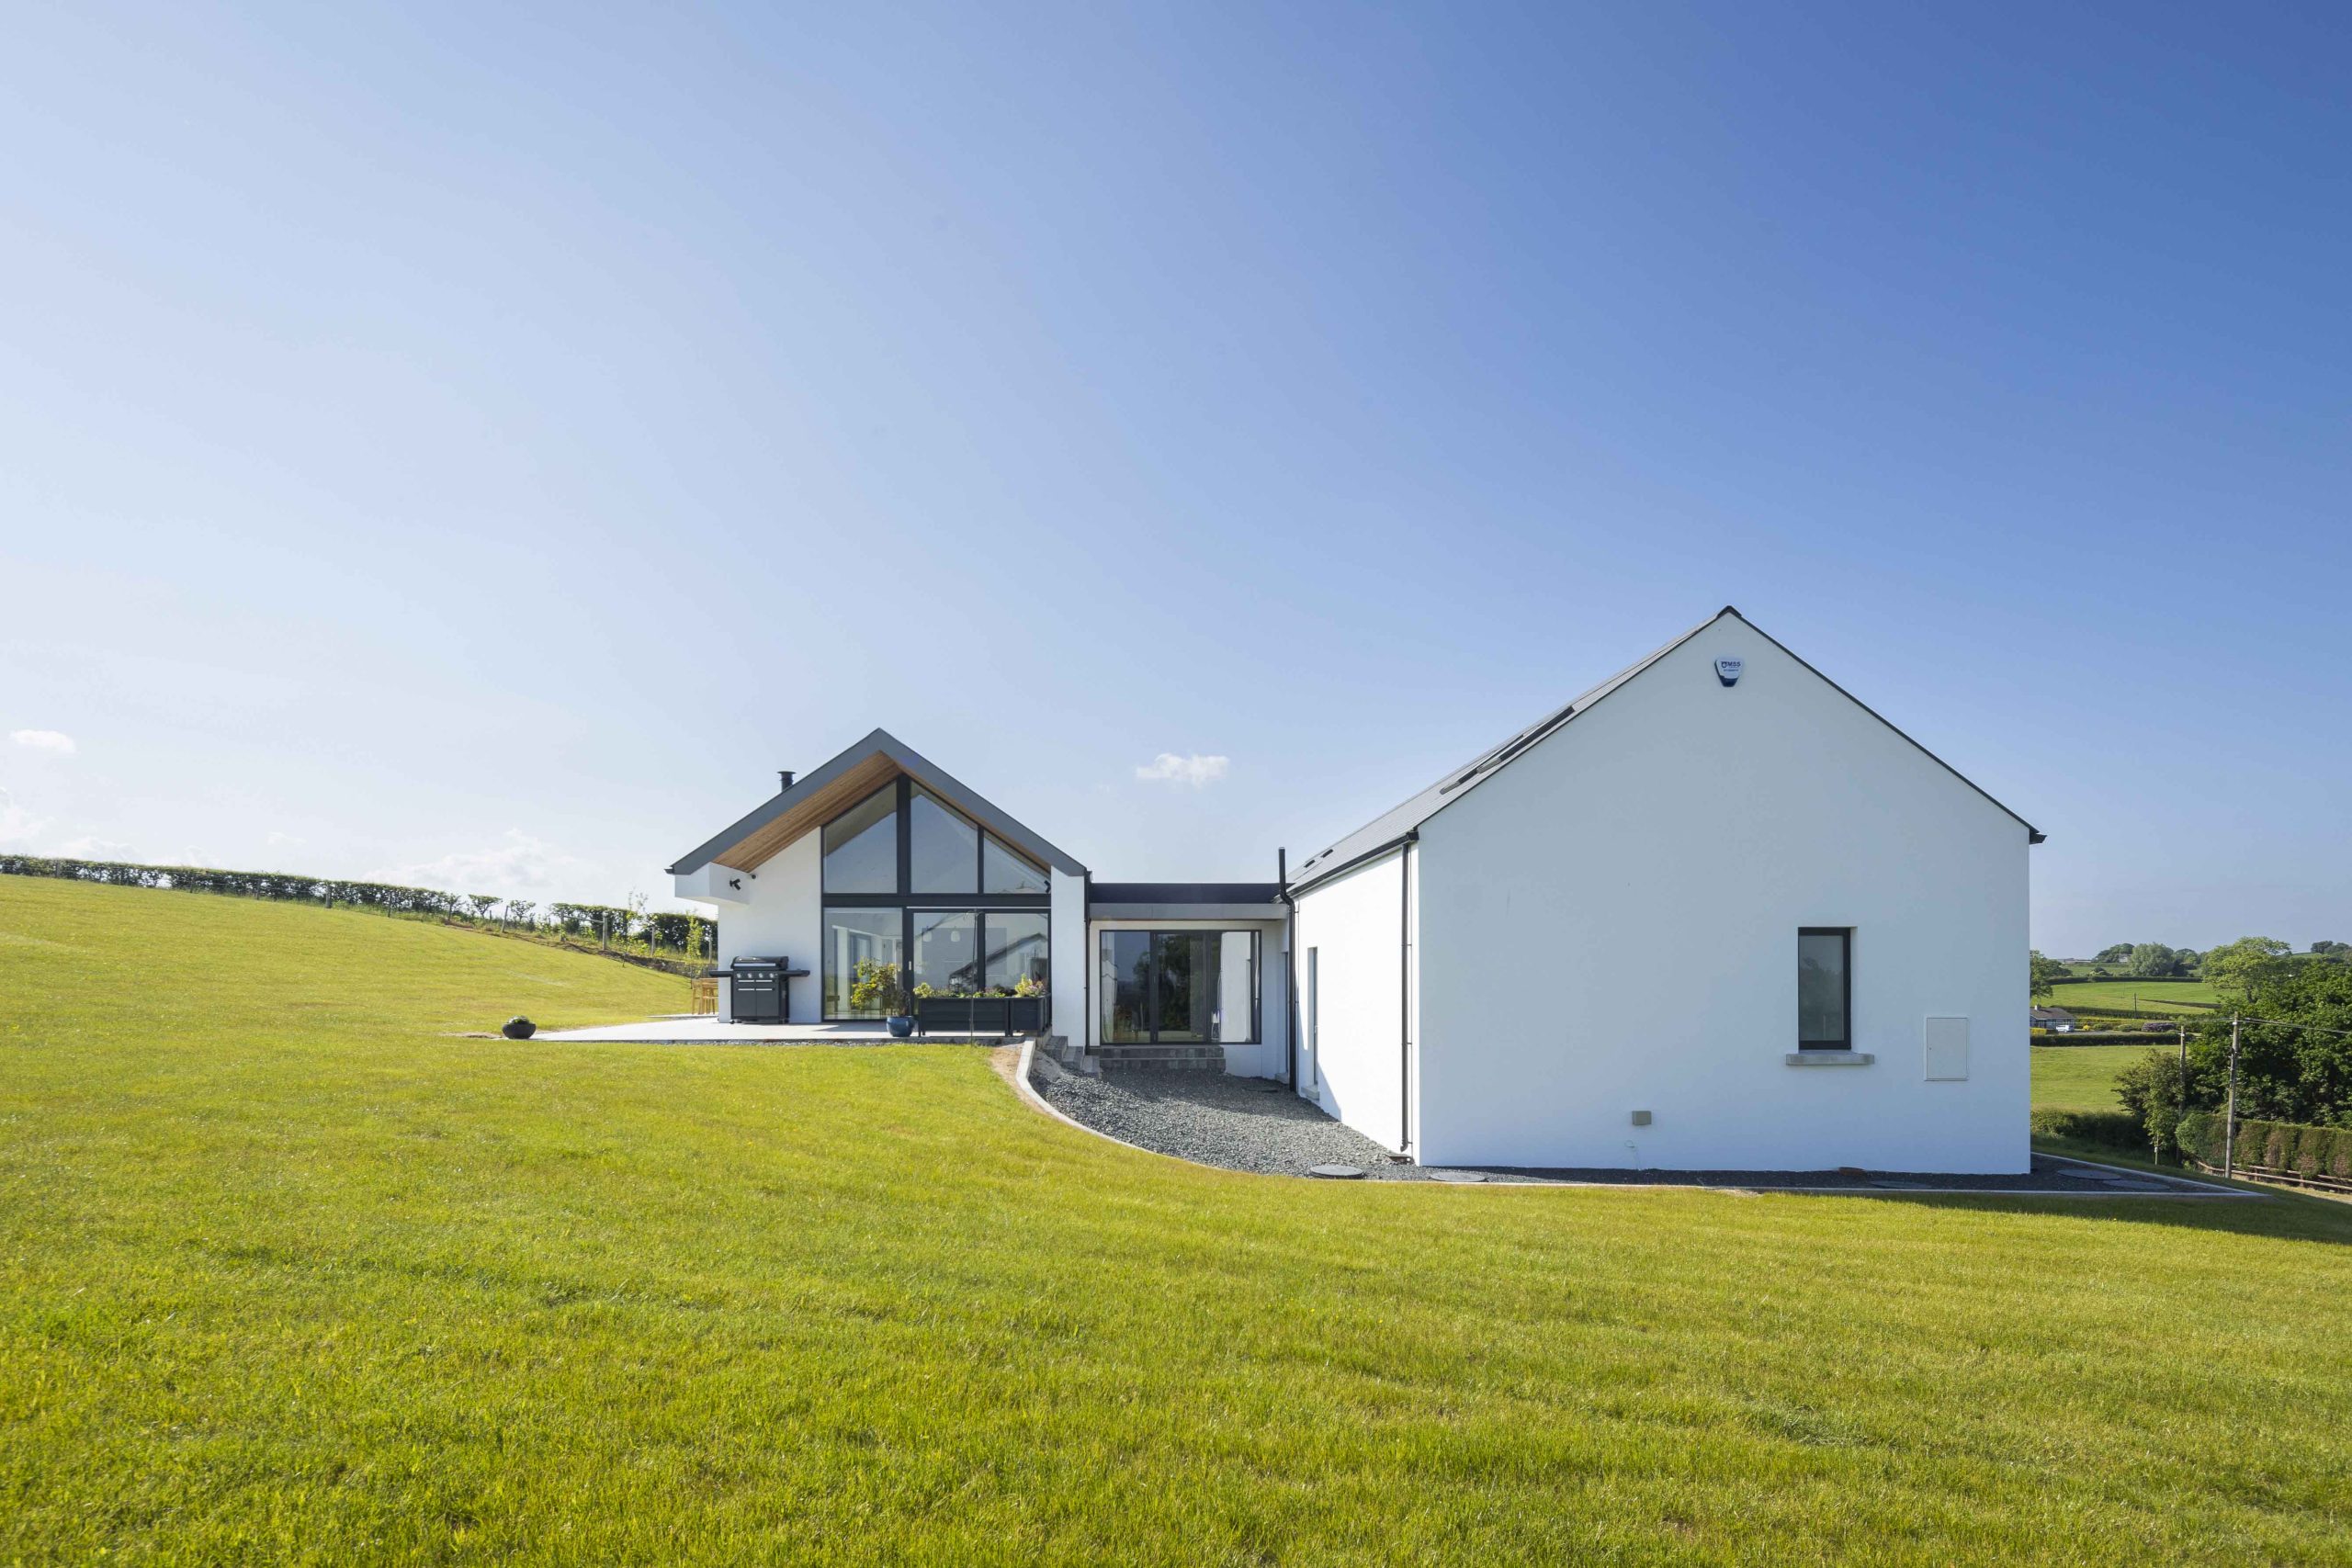
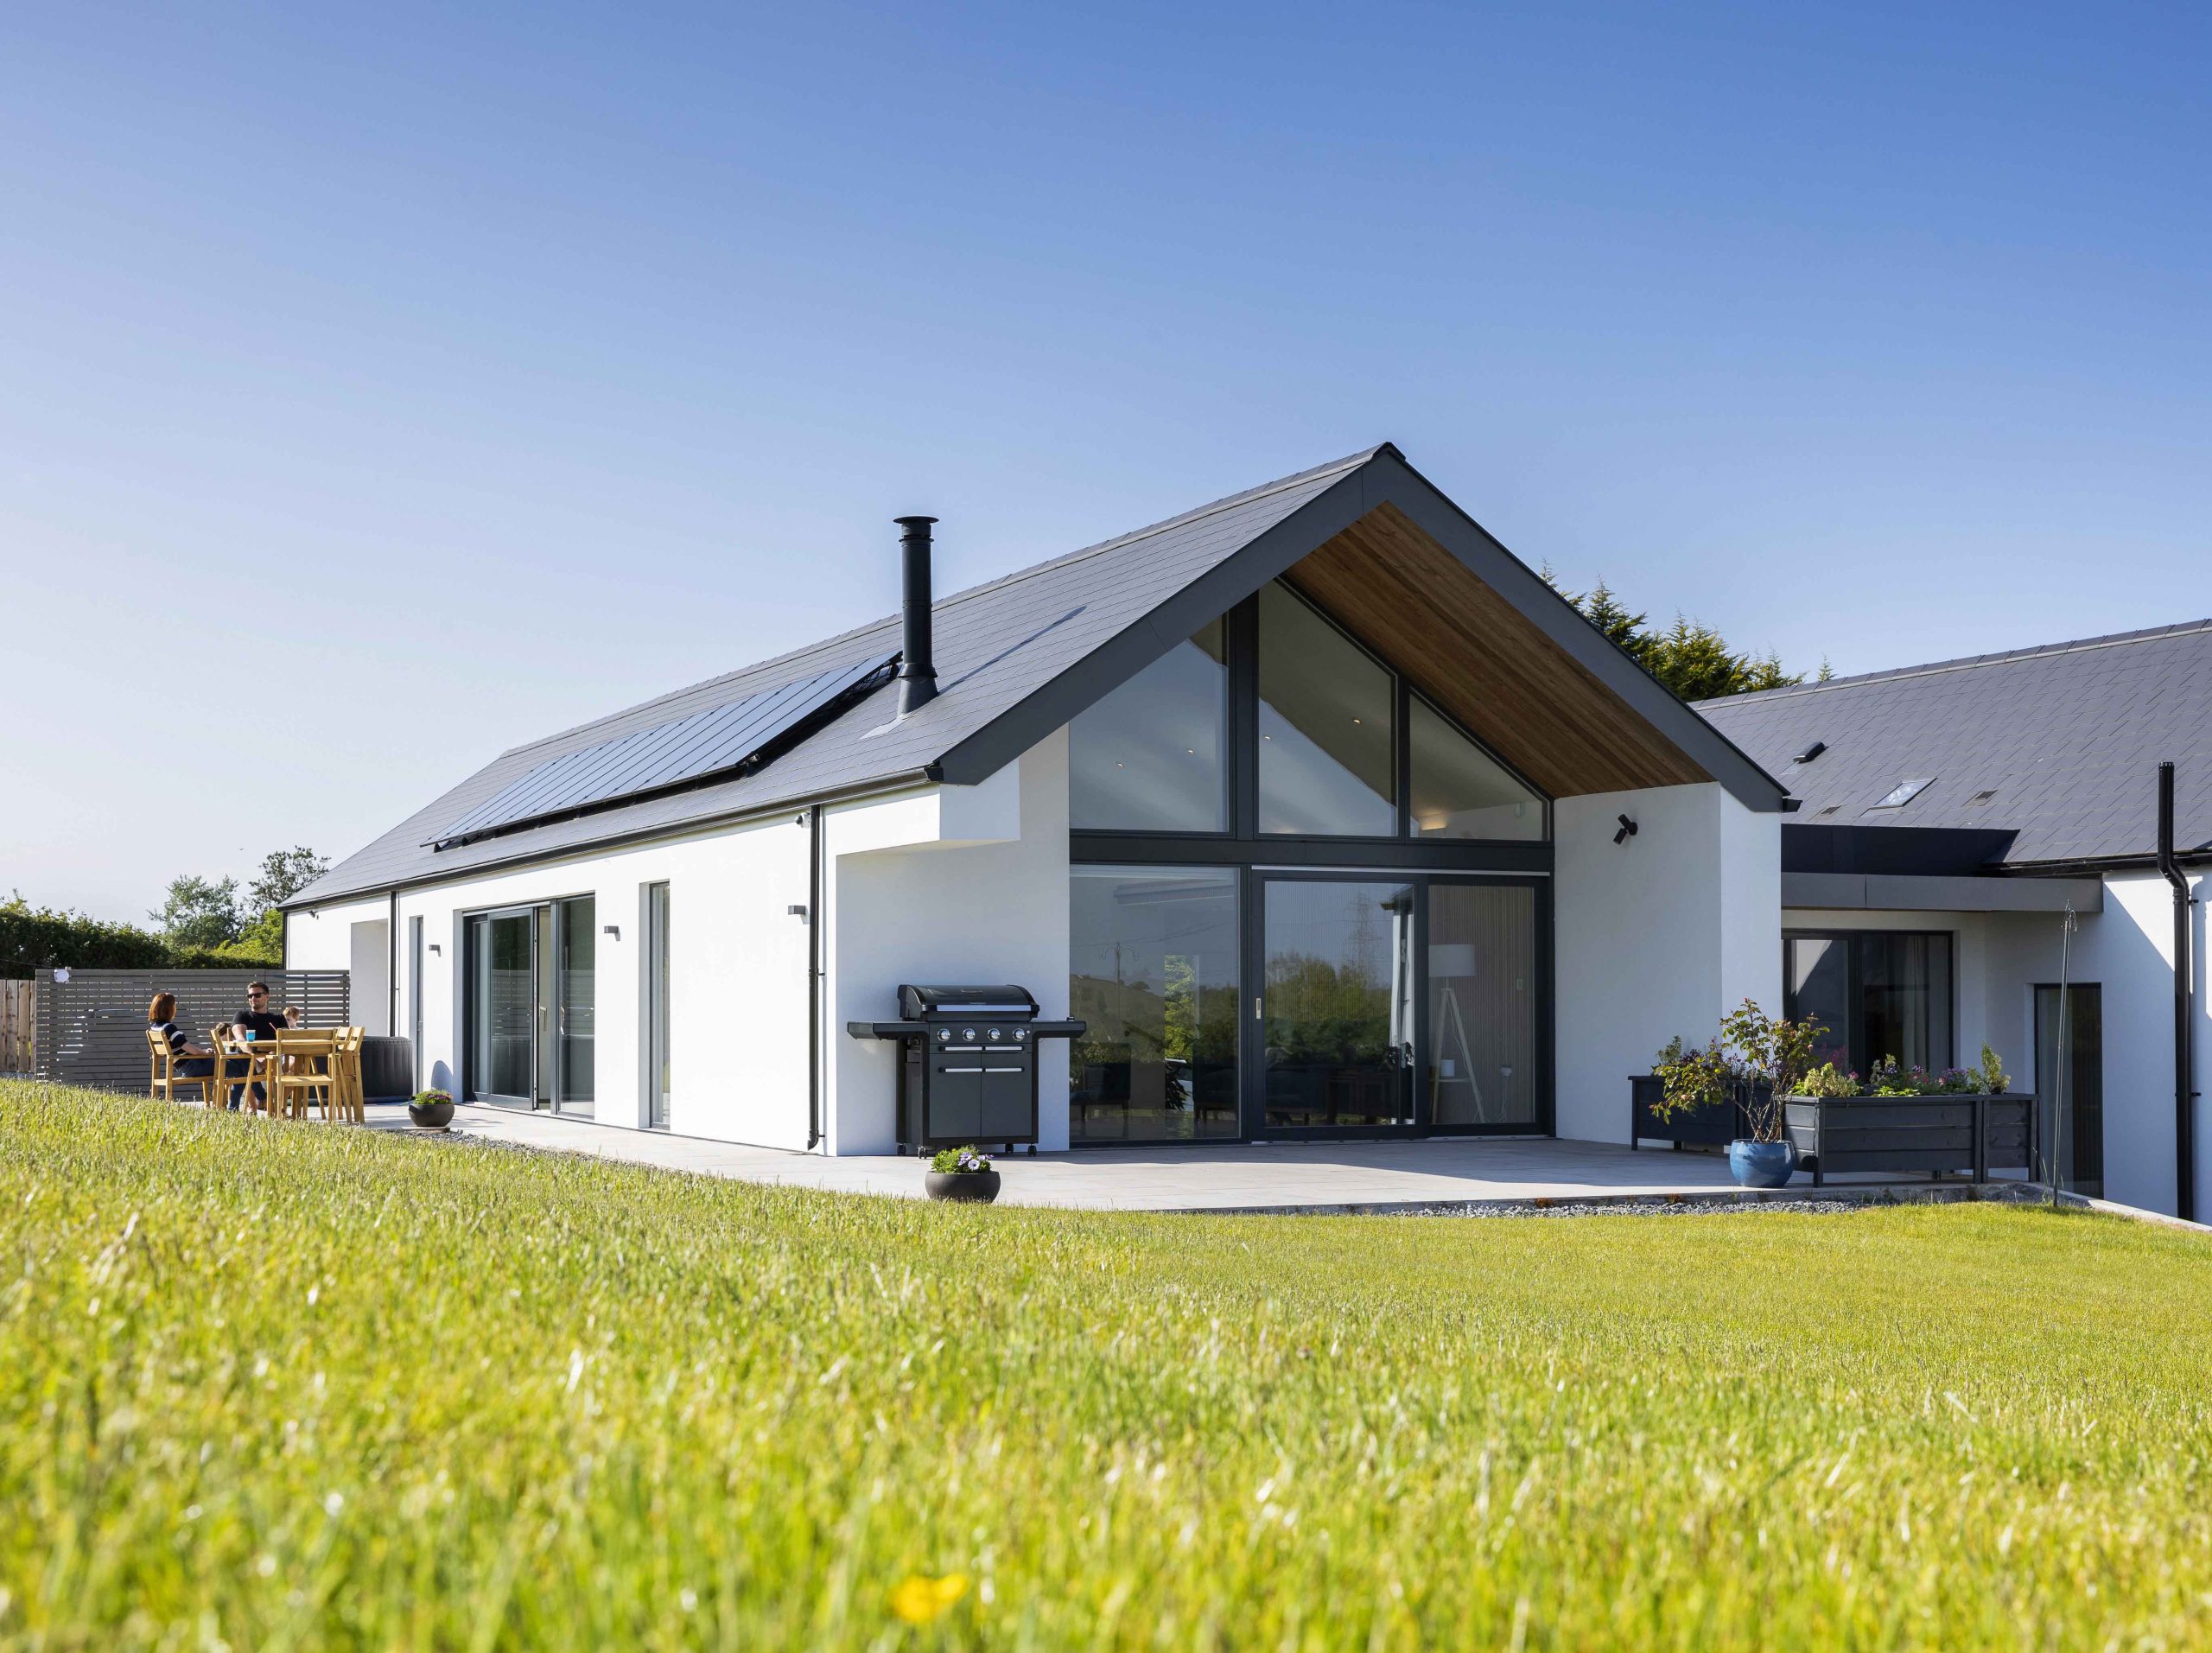
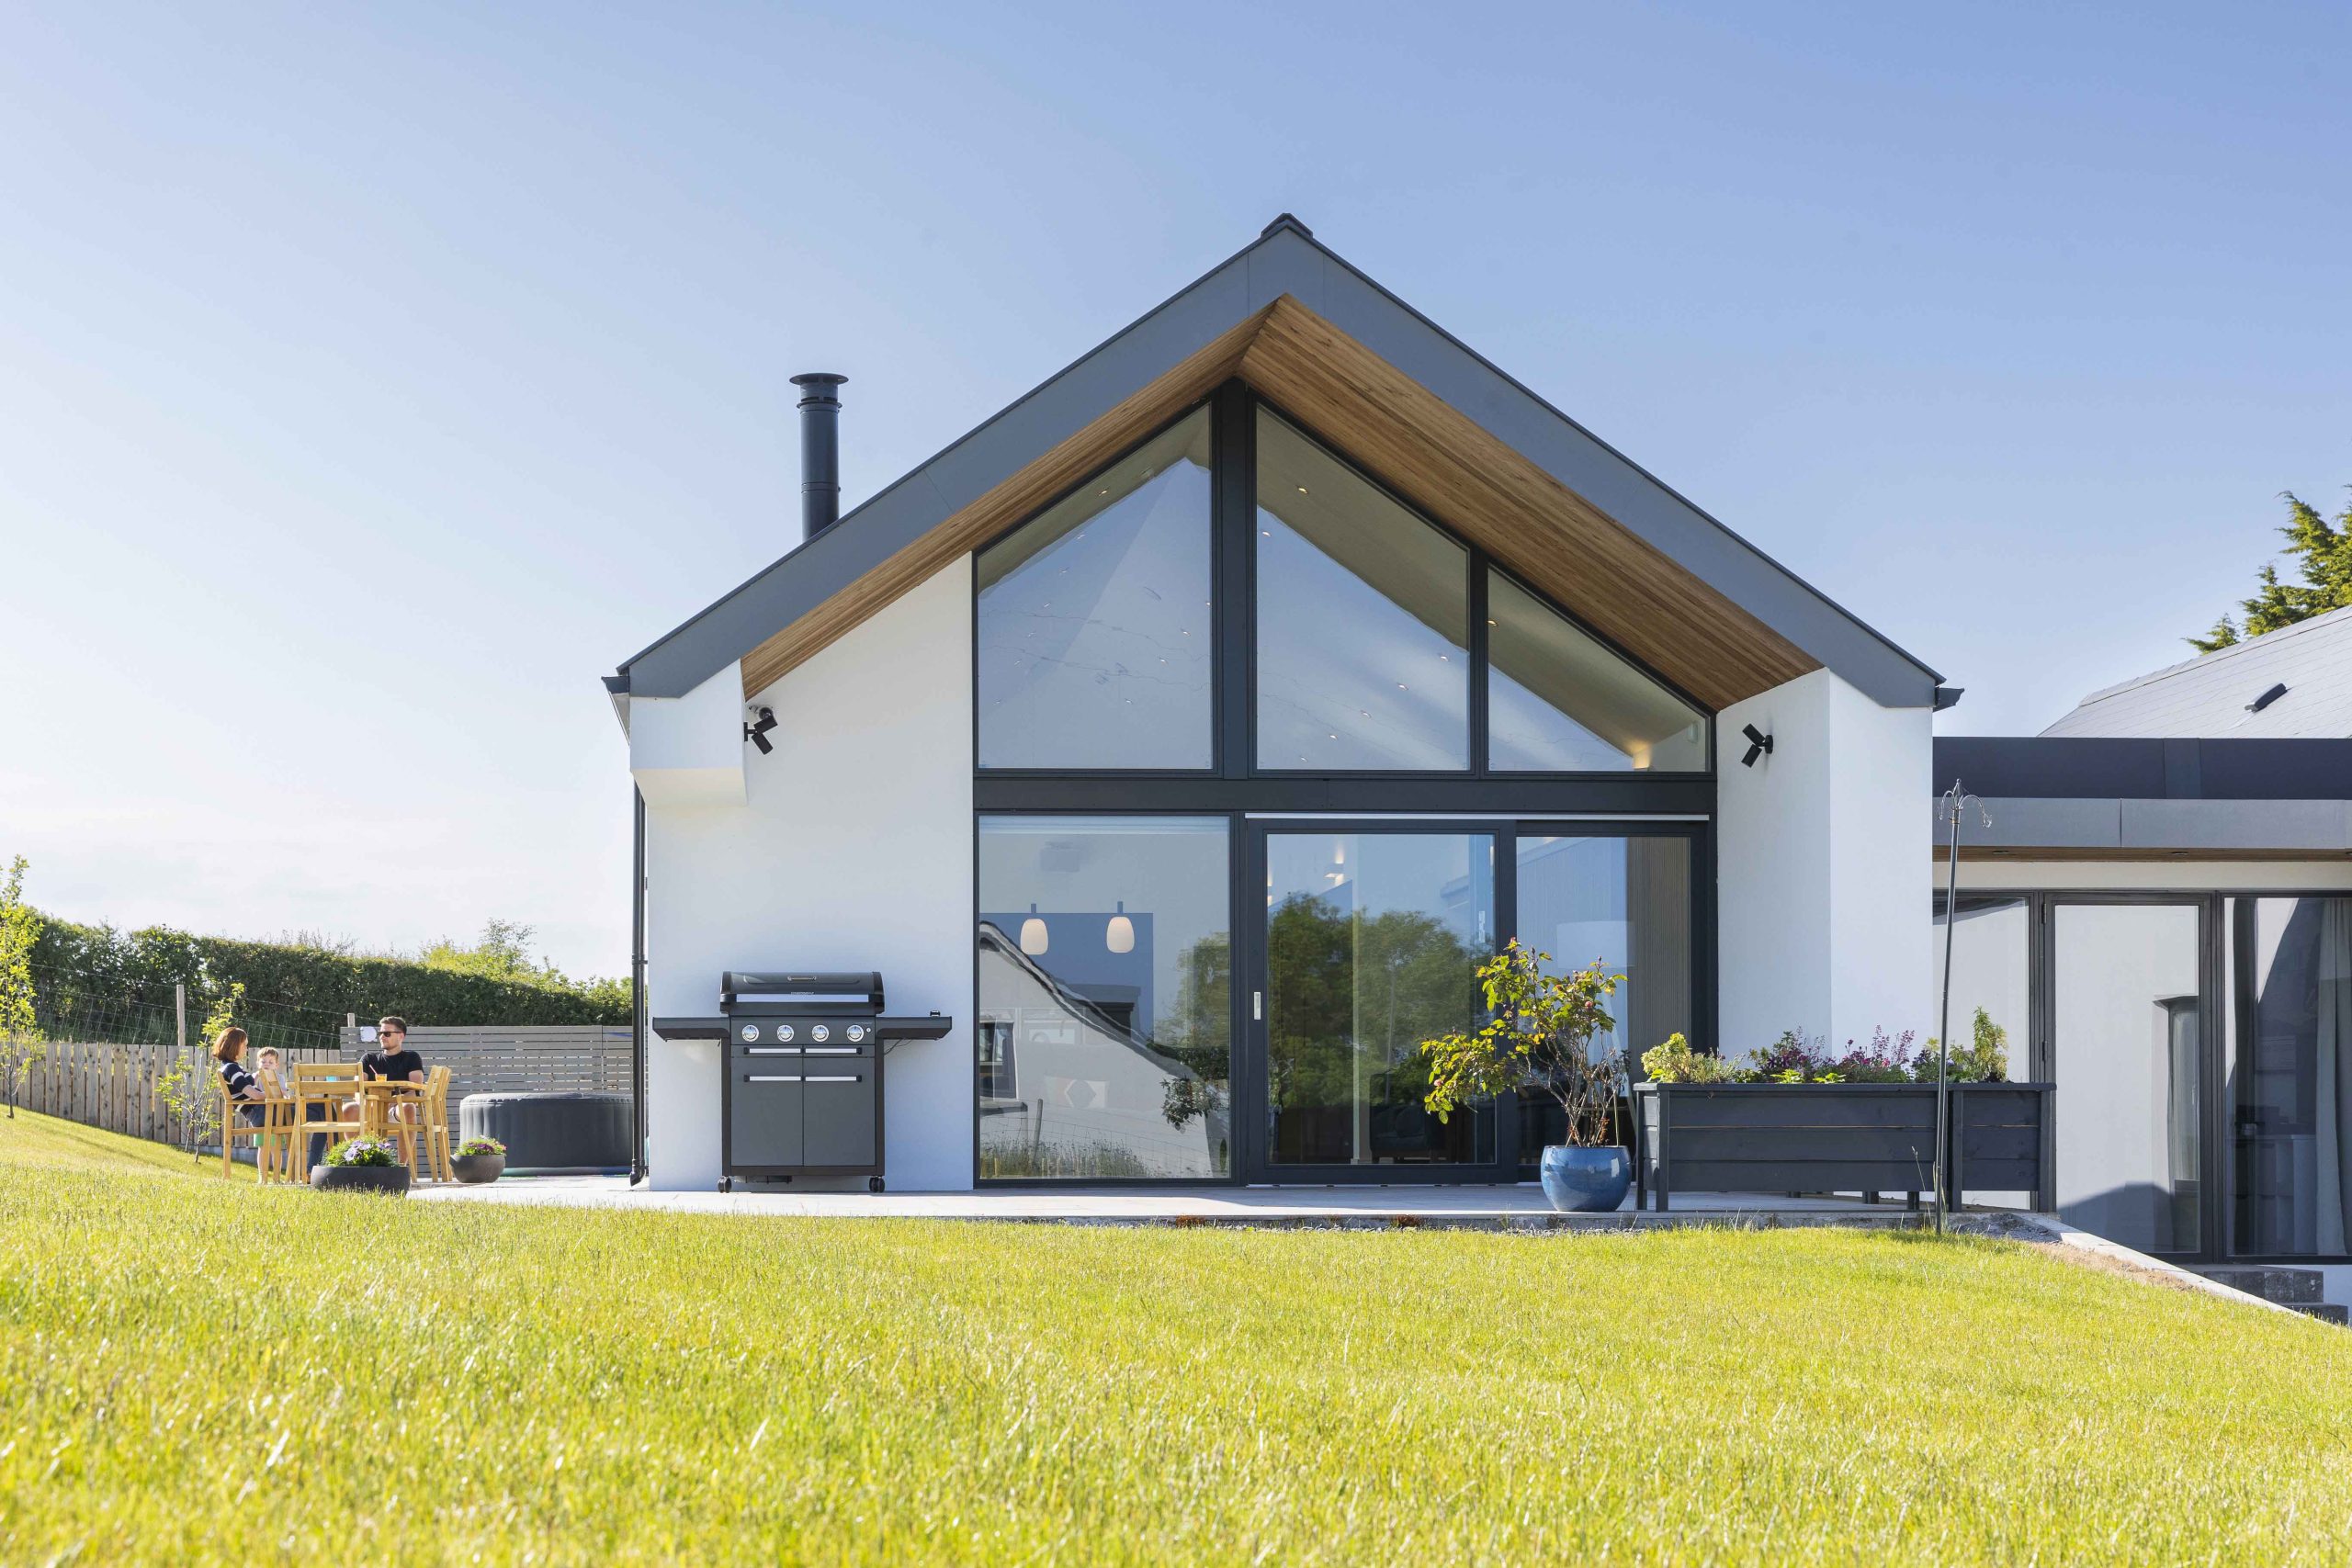
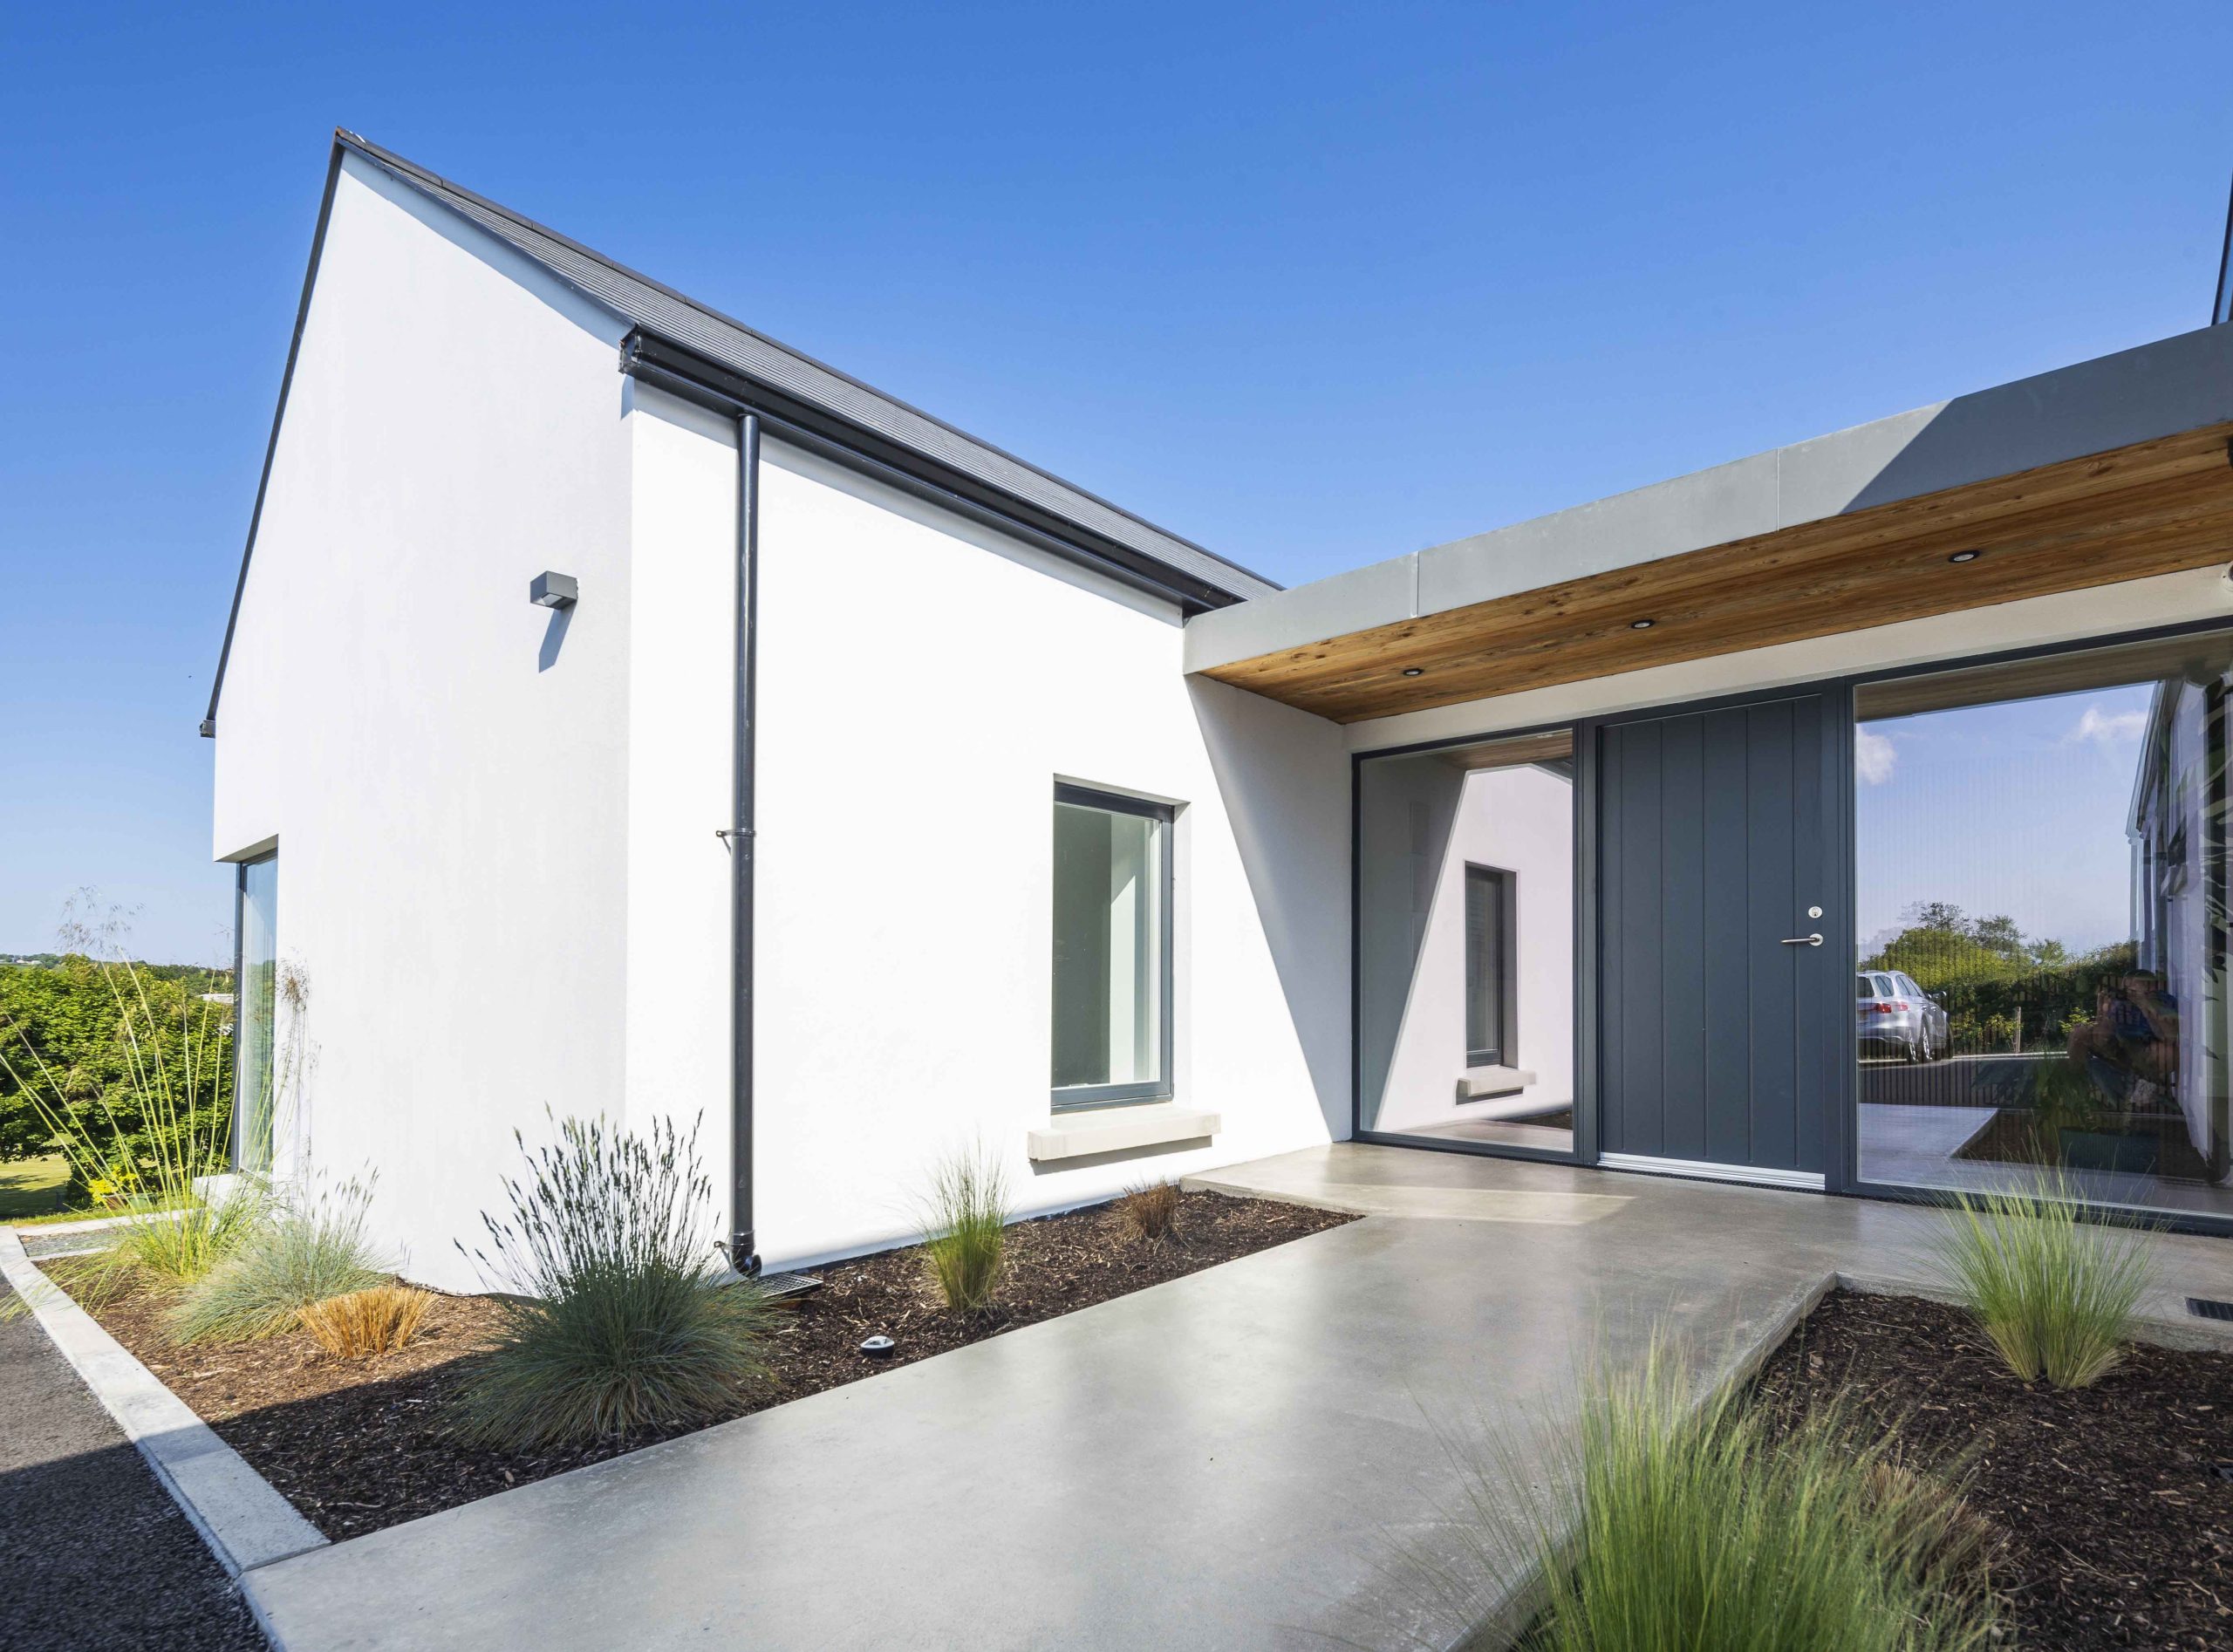
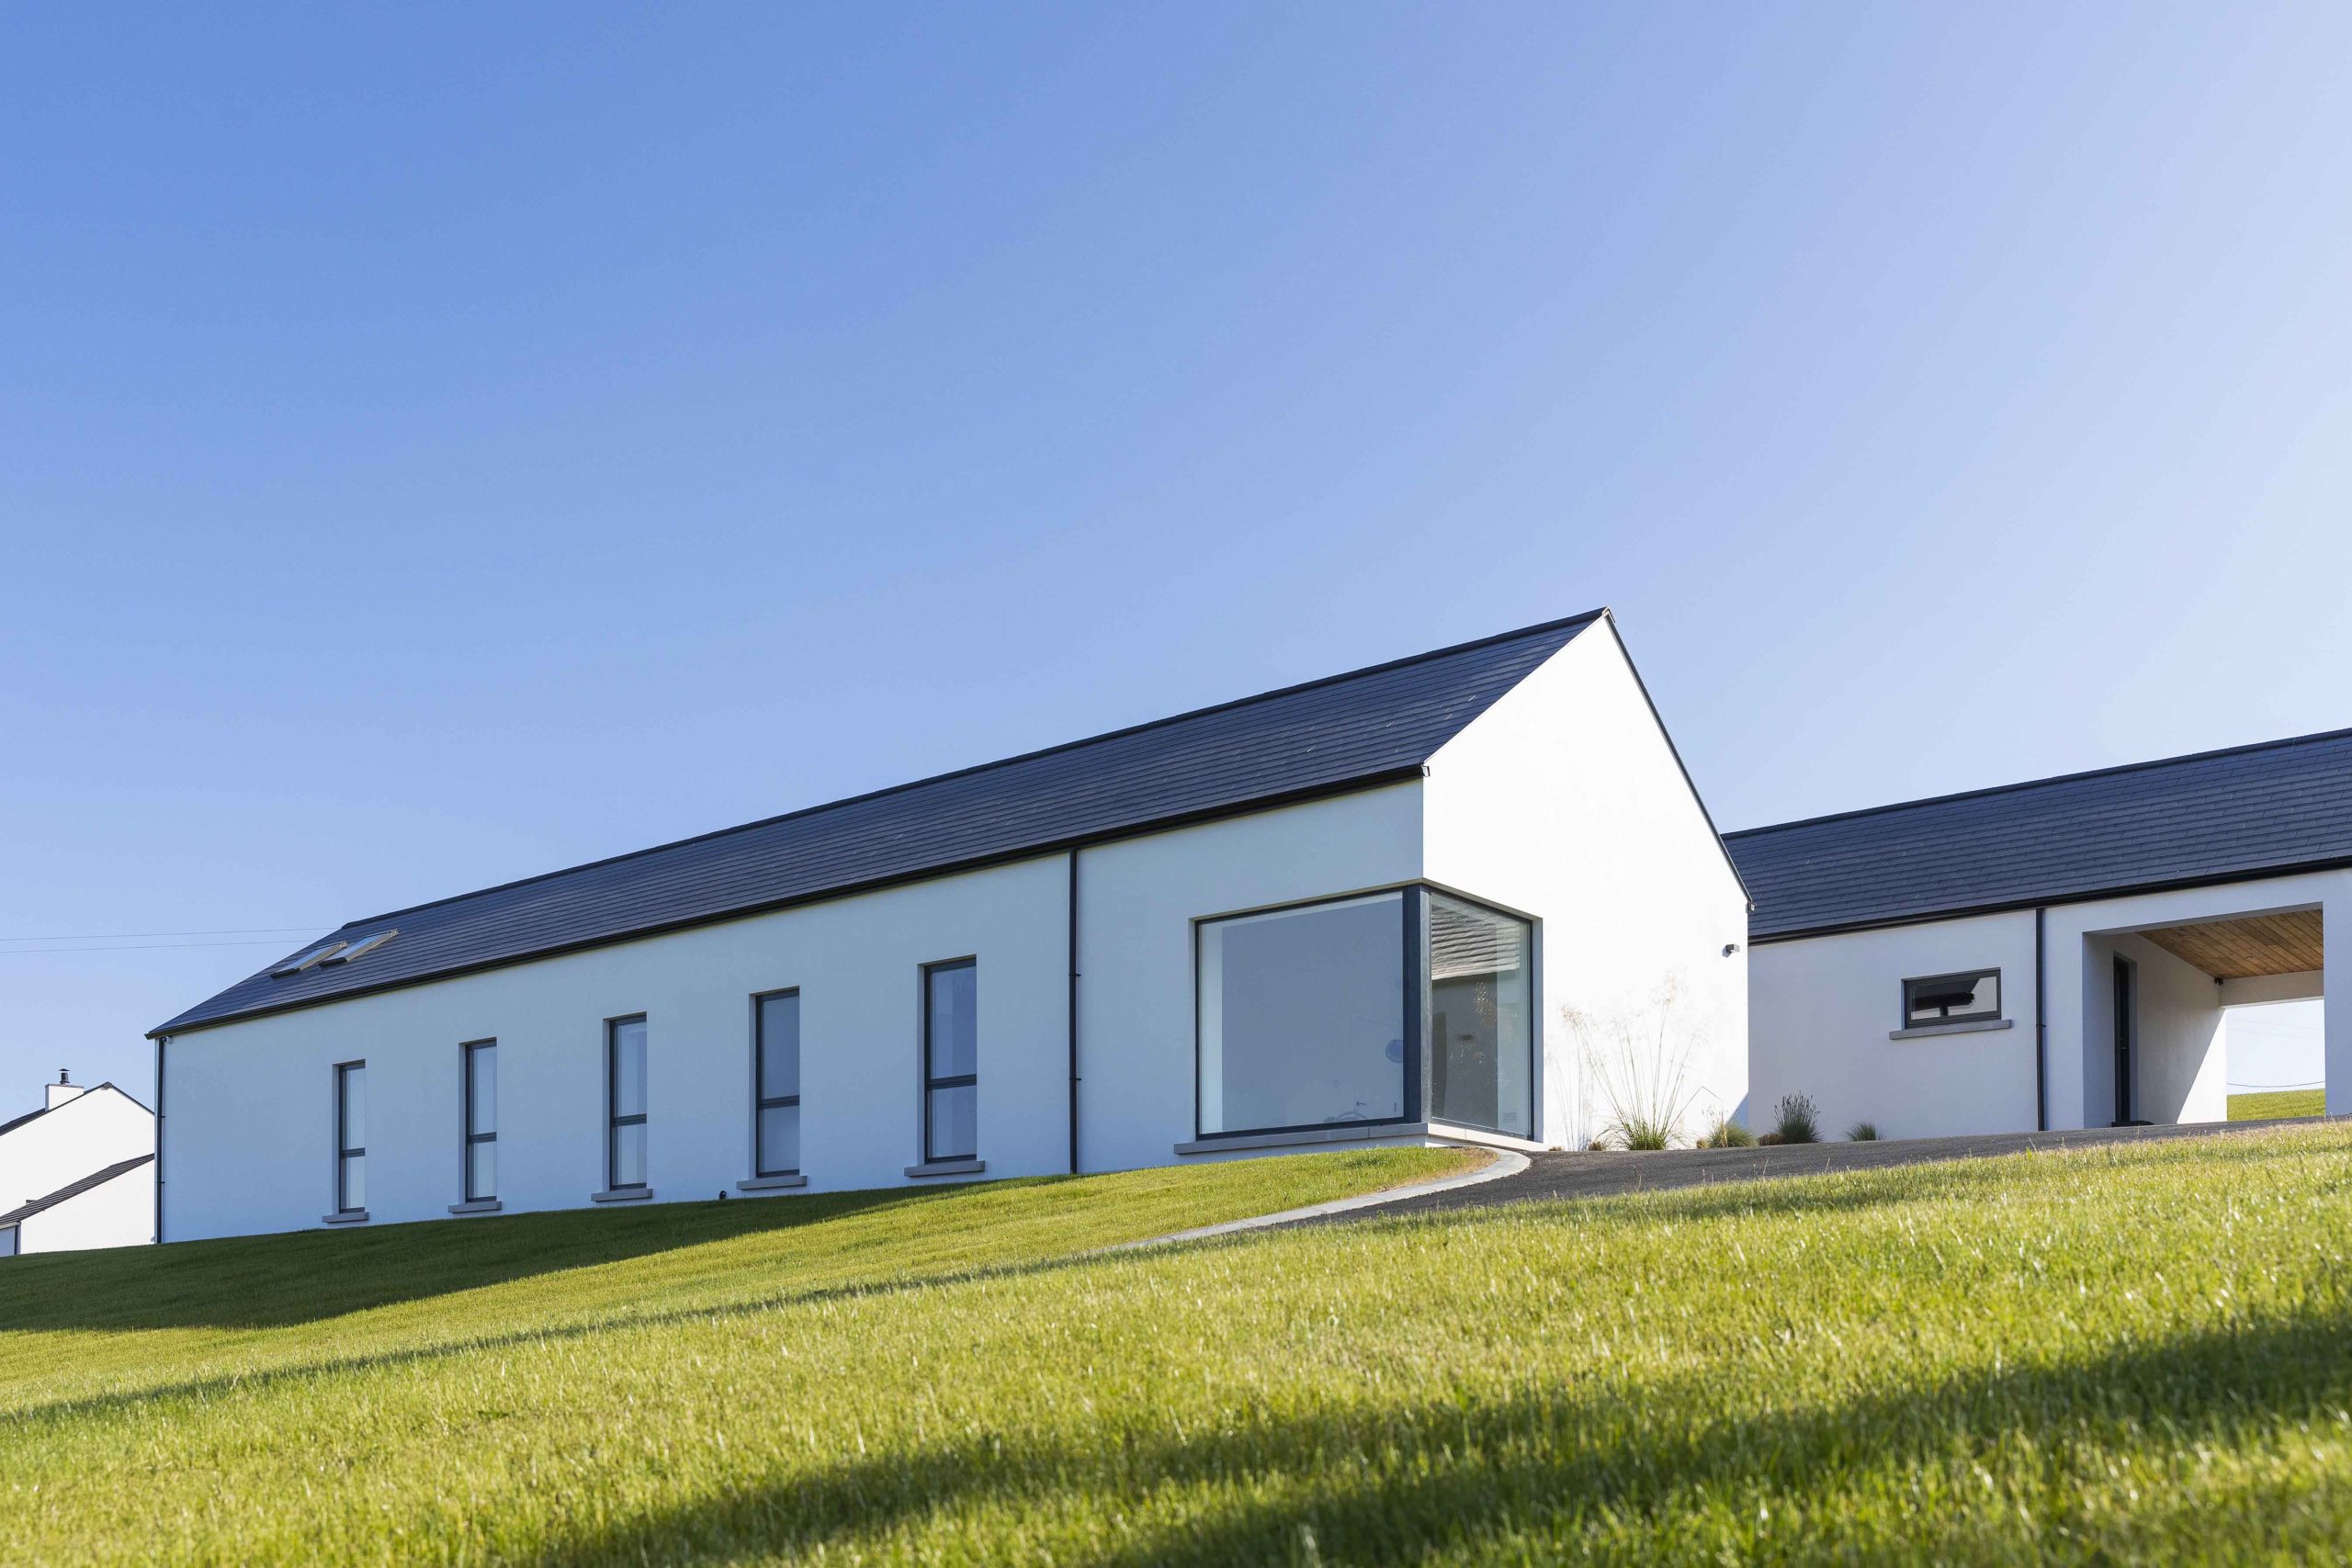
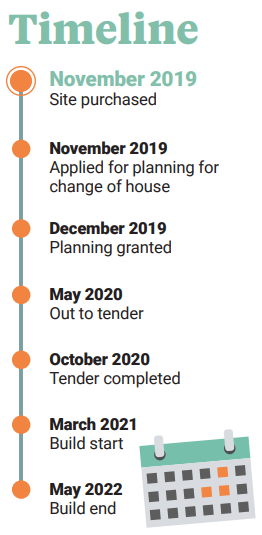
In 2019, they found a suitable site just five minutes from Katie’s family, which was ideal for both of their work commutes. The previously approved plans for the site were for a large two storey building, around 420 square metres. However, due to the sloping site, the building would have had to be built low down the hill to adhere to the maximum ridge height.
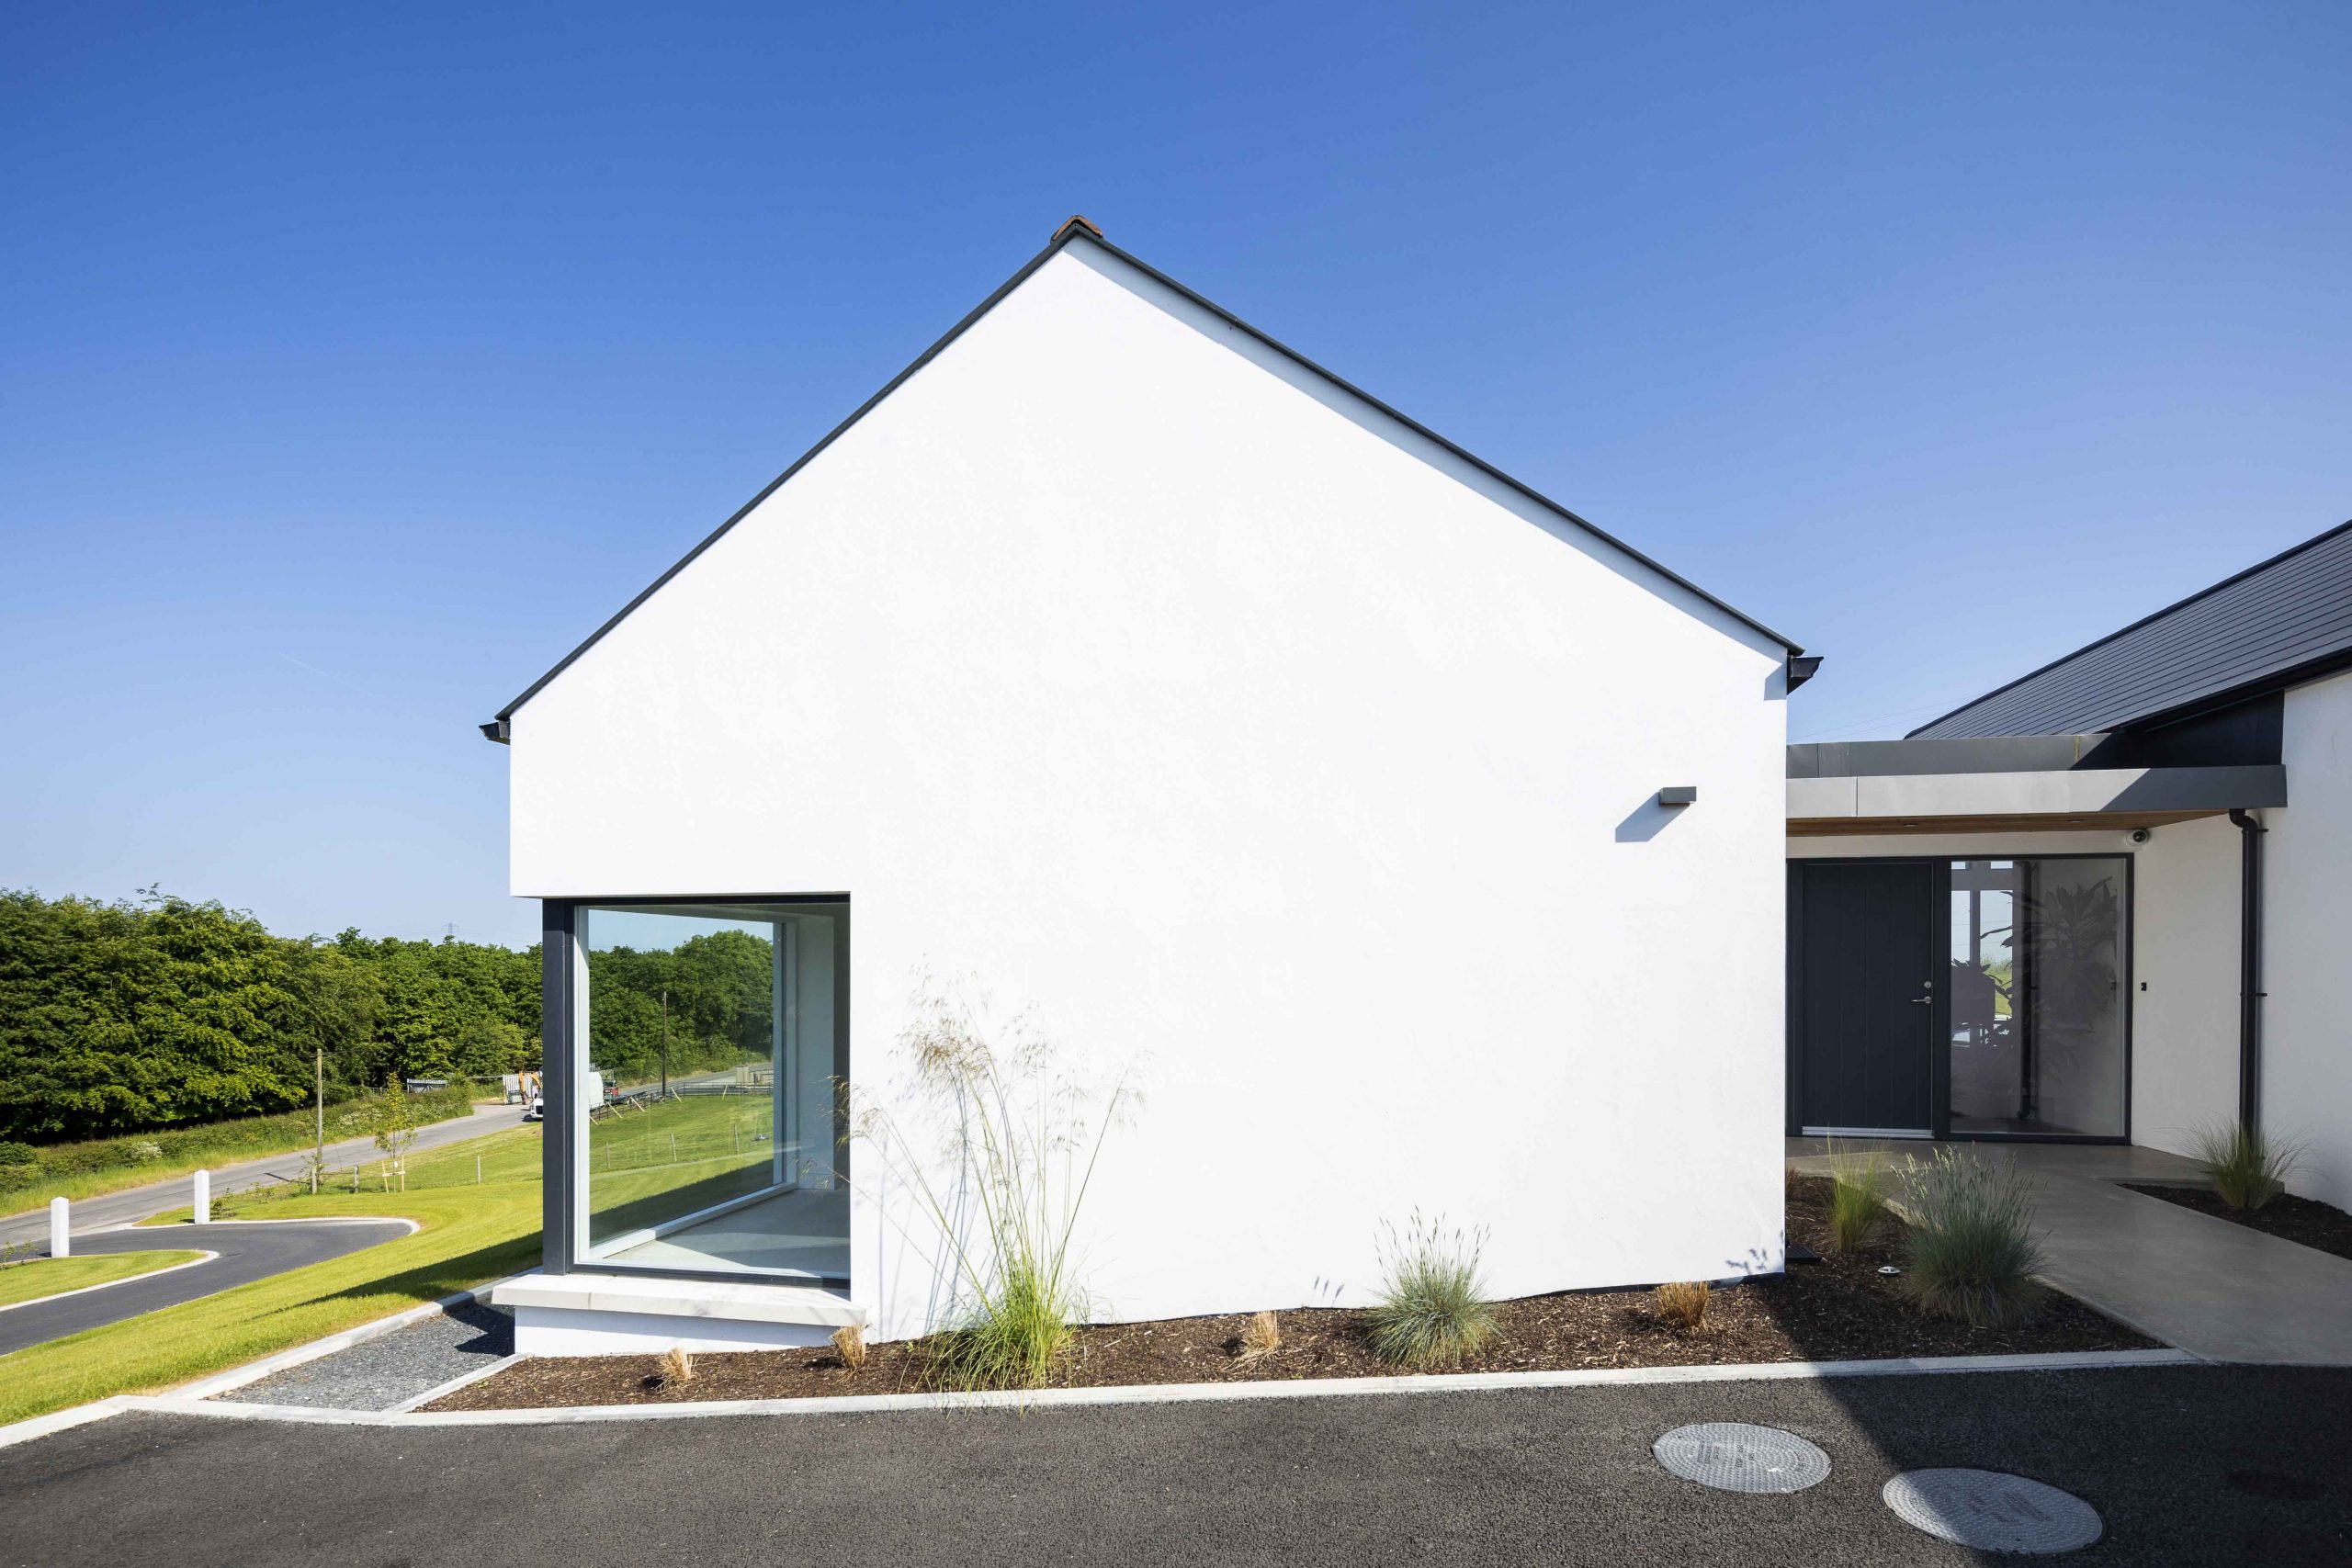
“We consulted with several architects and ultimately decided on a split level design that allowed us to build half the house size but further up the hill,” explains Stuart. “We wanted a home that was functional and not too ostentatious. And we didn’t want to overspend on our project.”
Space to grow
Stuart, a pregnant Katie and their young son moved in with Katie’s parents in October 2019 and remained there throughout the entire build.
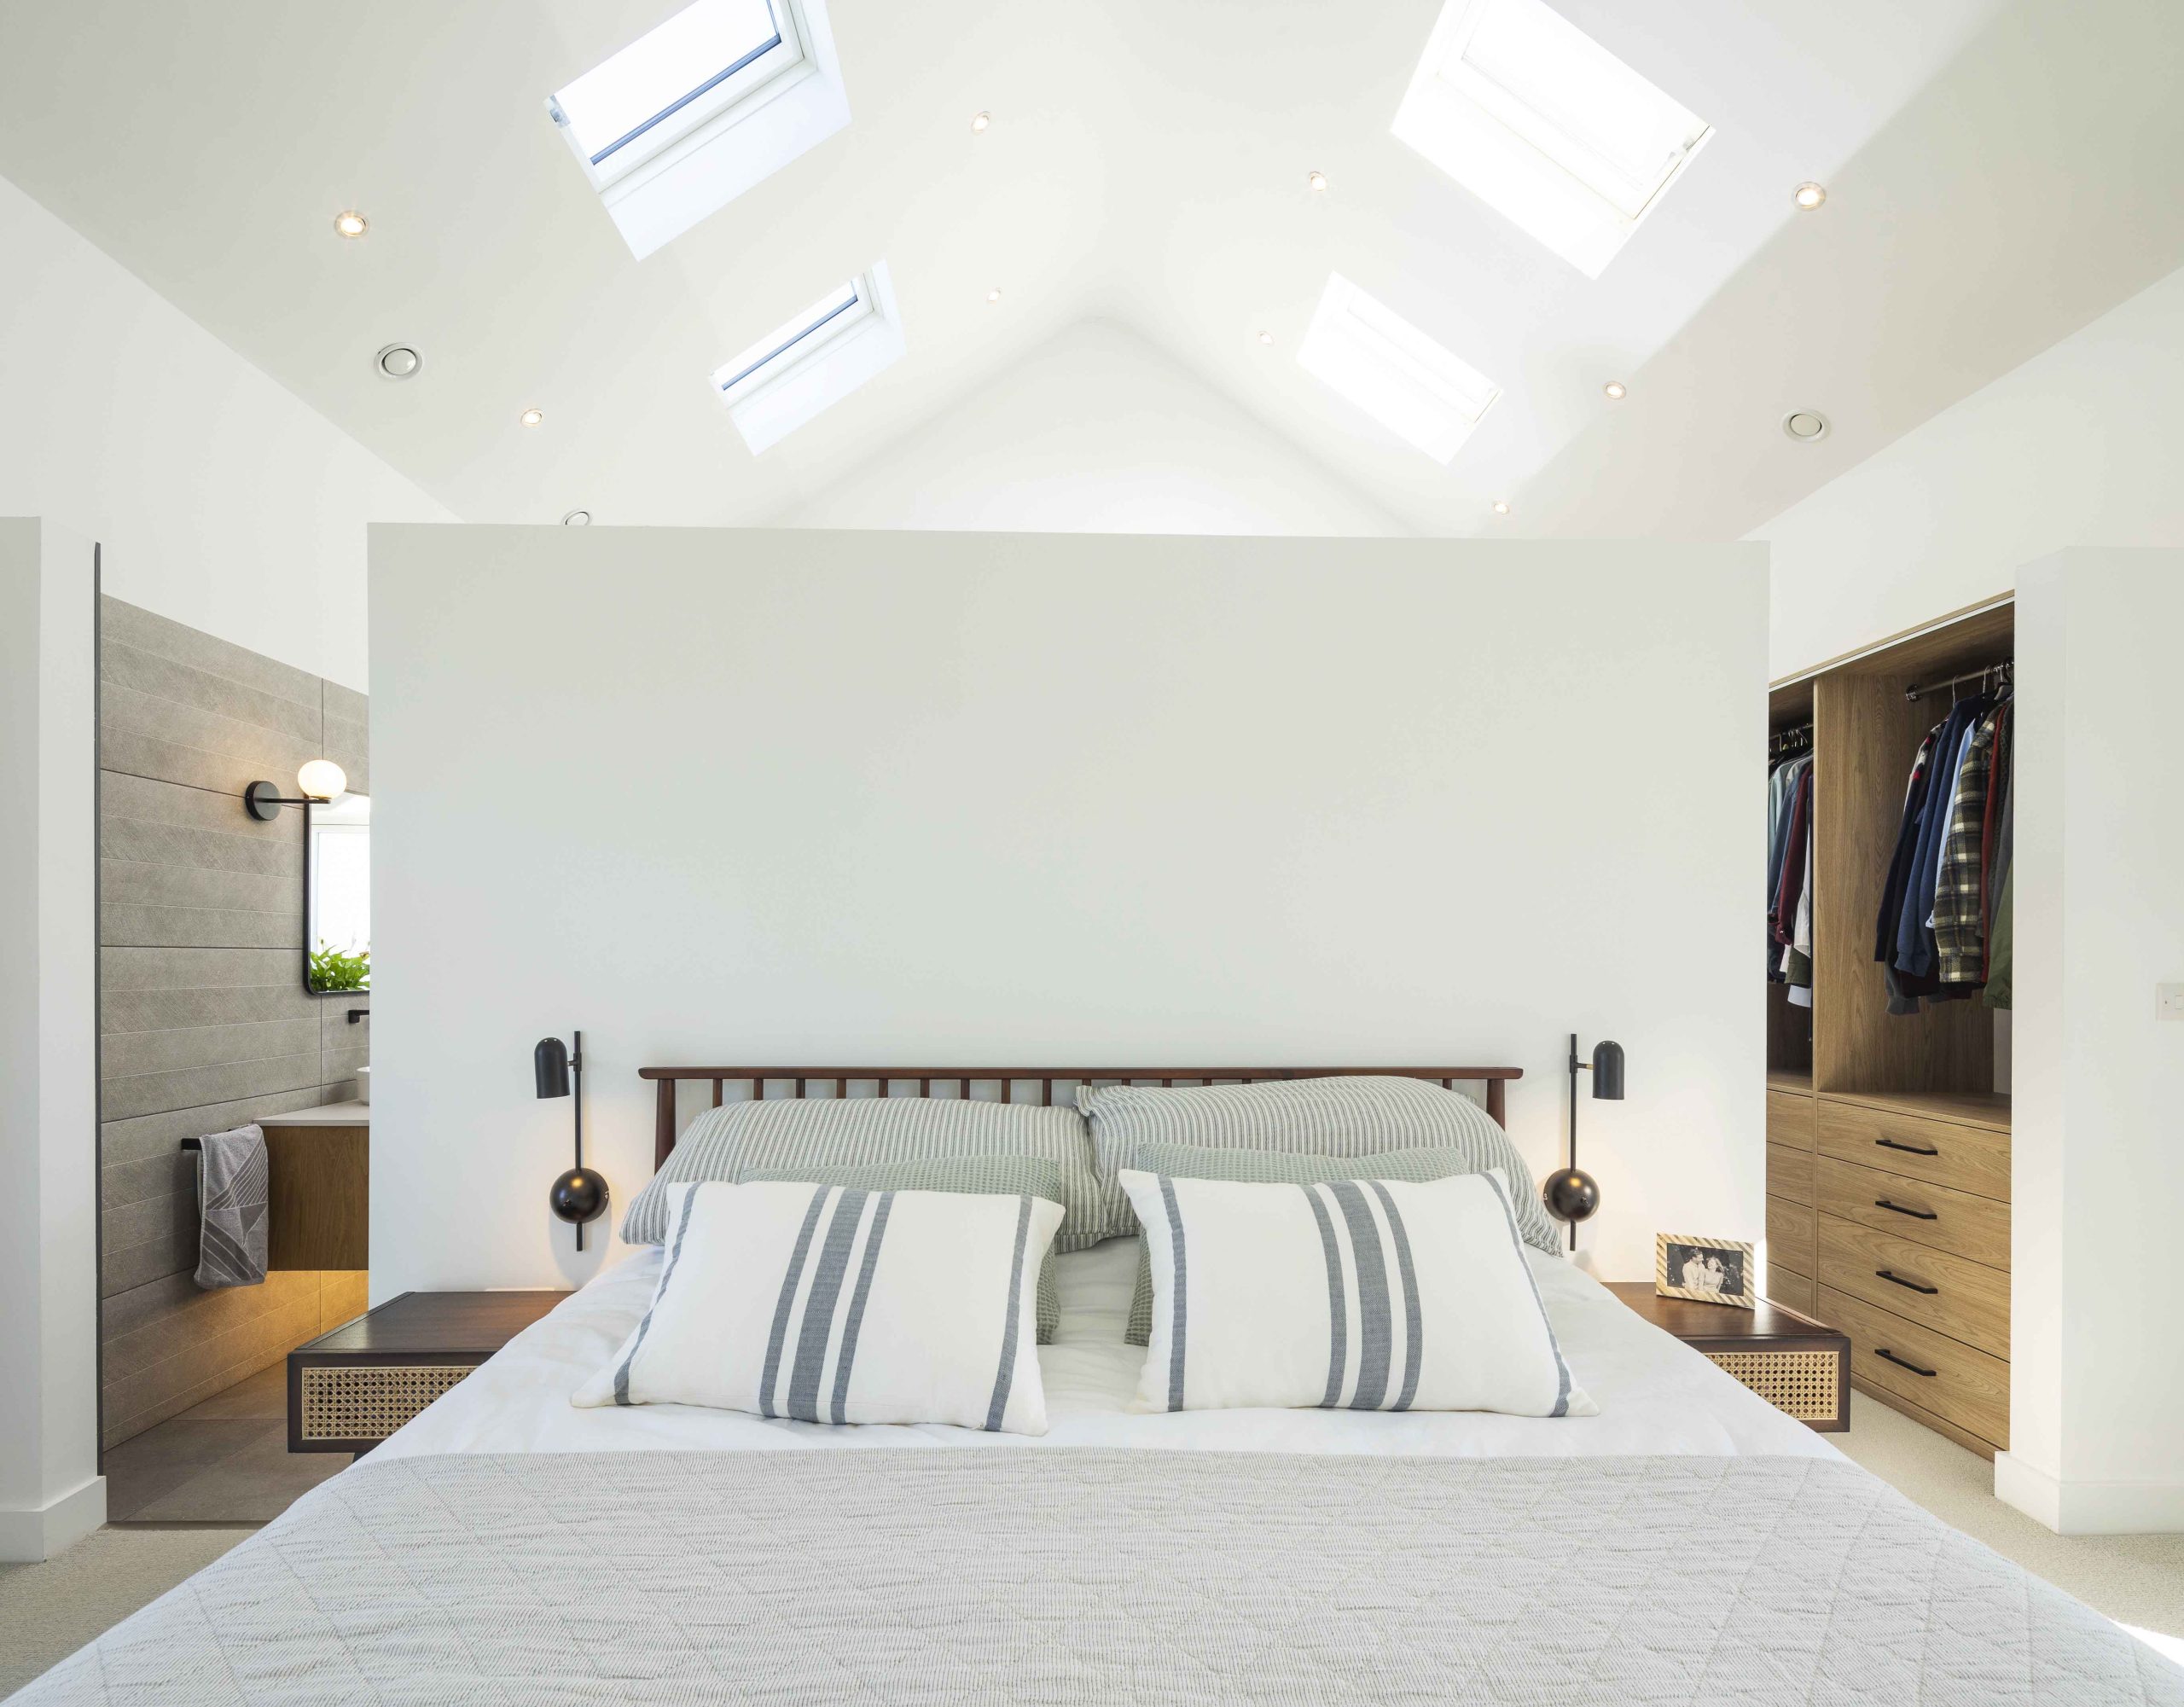
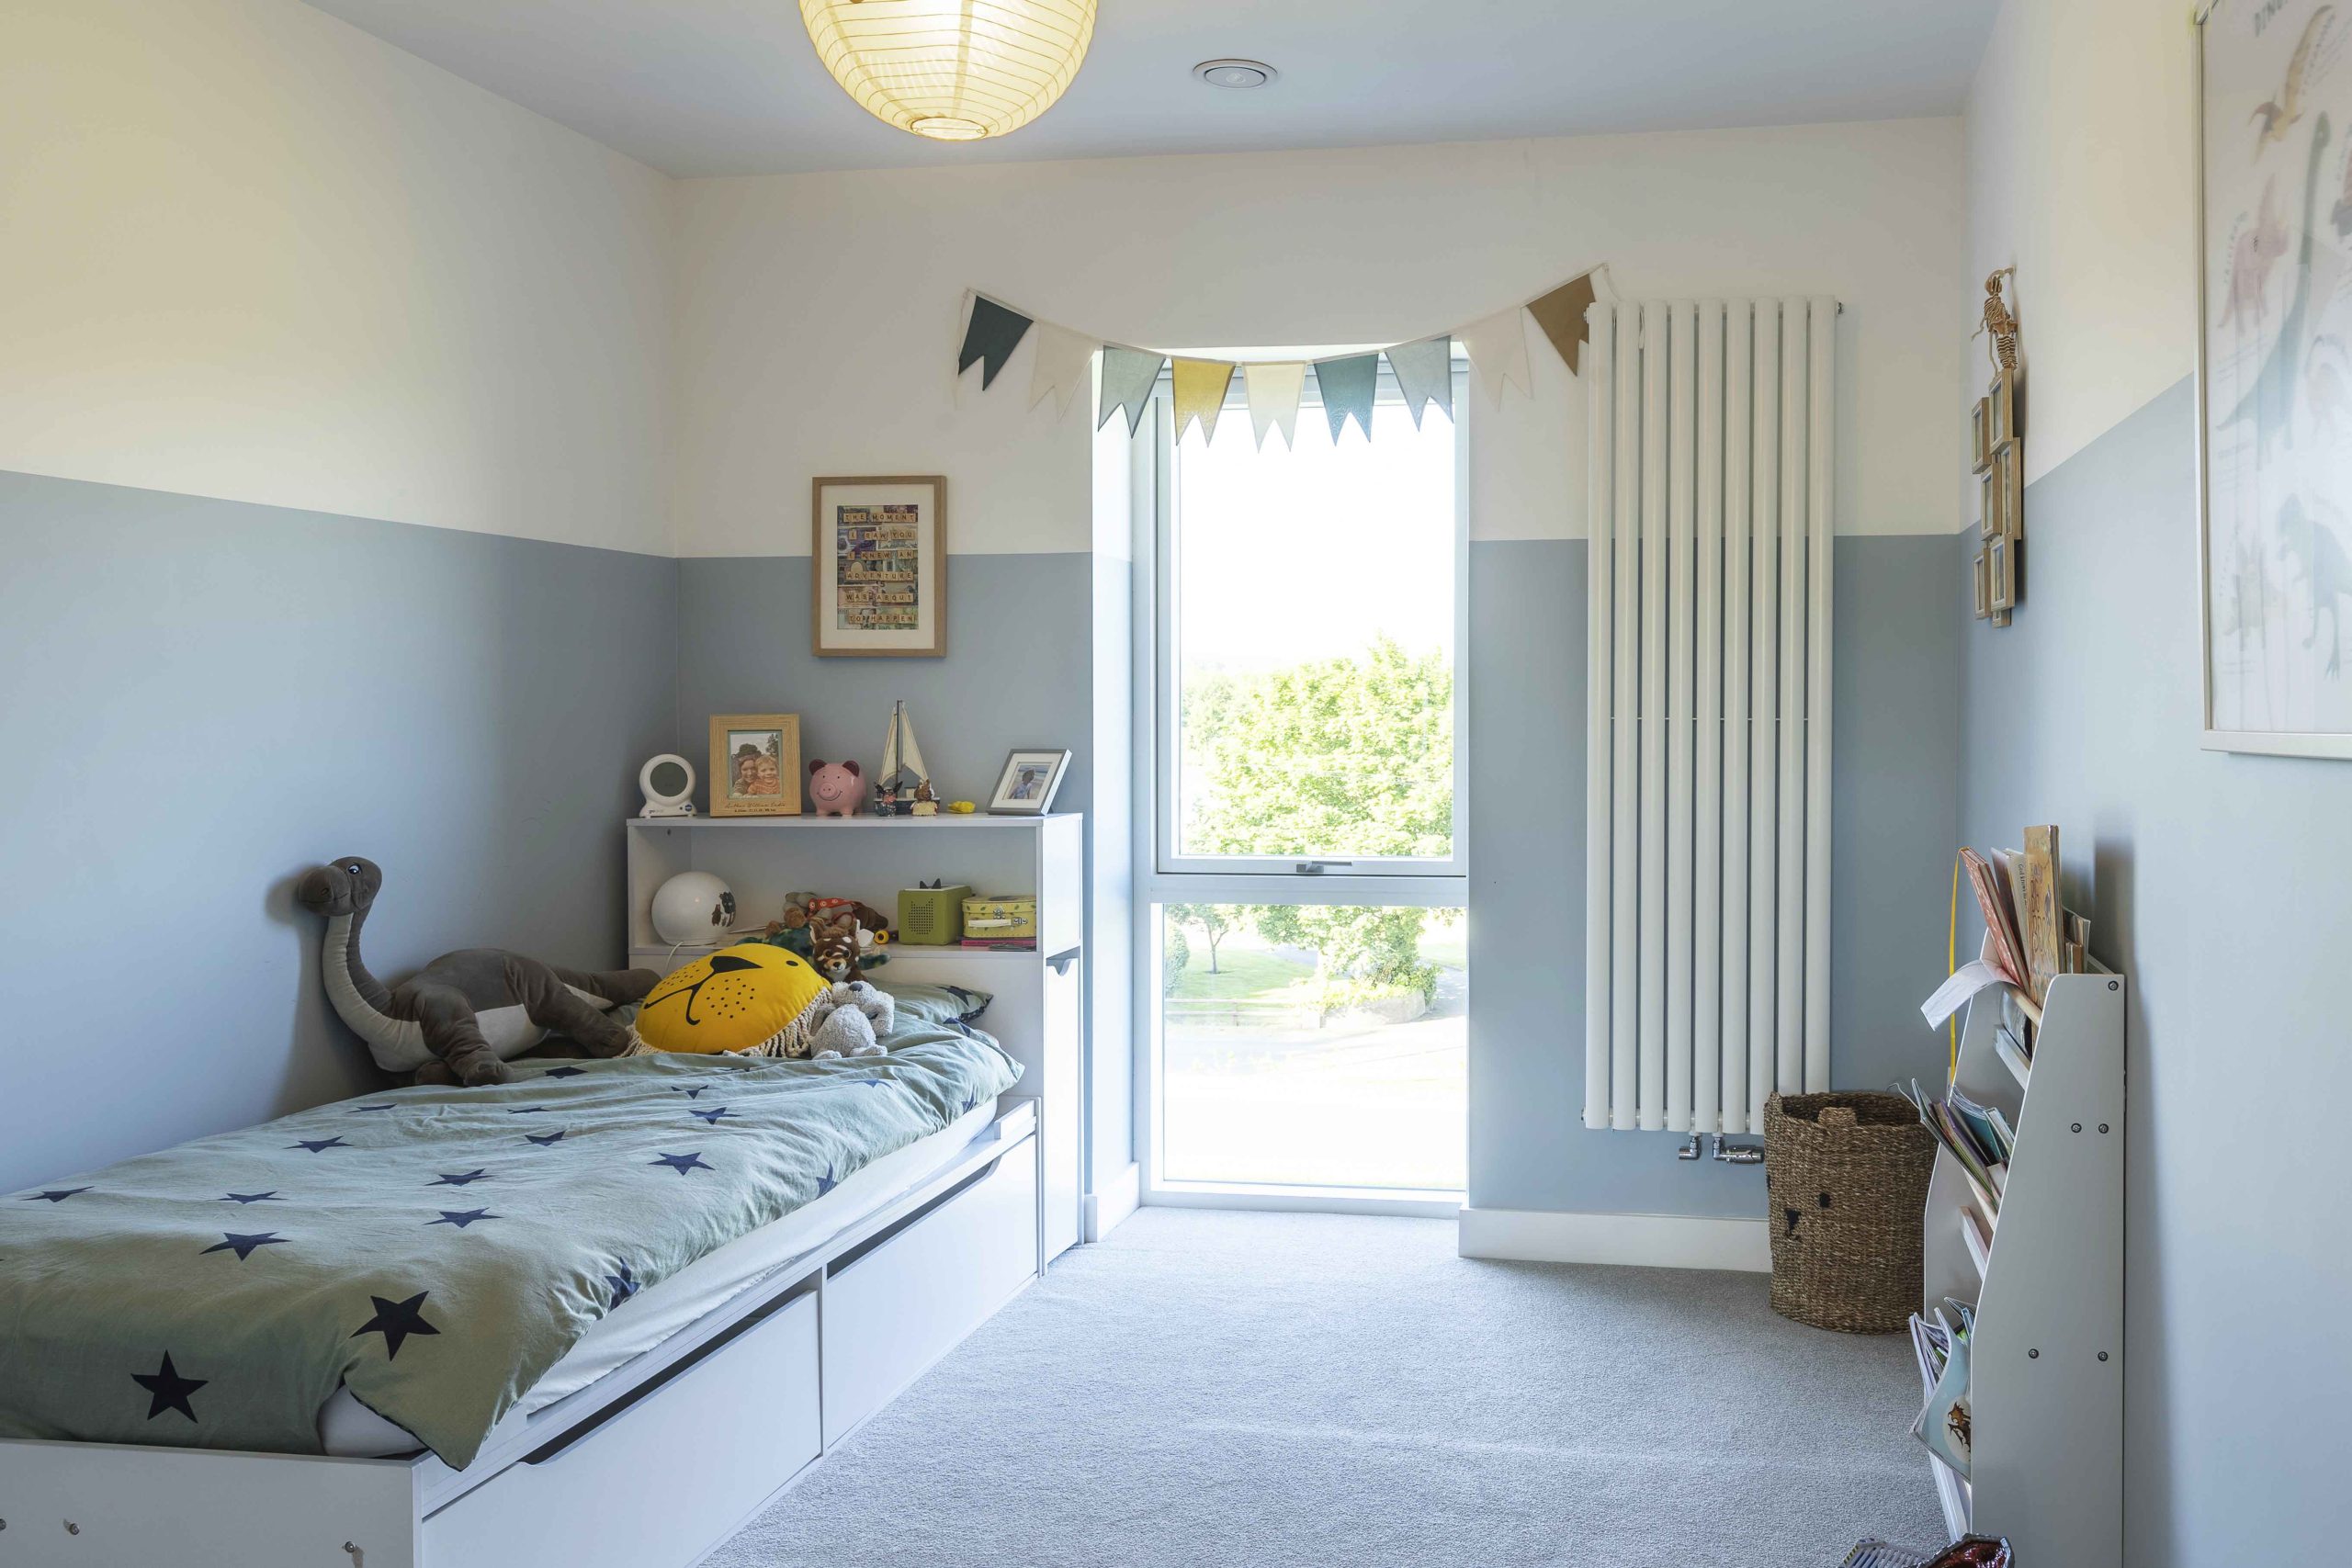
“When Katie and I were considering the design of our new home, we knew that space was a top priority. With one child at the time and two now, we wanted to ensure there was plenty of room for them to move around, and even ride scooters inside the house. We also wanted more natural light and a view of the sky – features that our previous home lacked.”
“Of course, sticking to our budget was crucial, so we carefully selected an architectural practice that had experience designing family homes while keeping costs under control. We had seen some of our architects’ previous work and felt confident they would be able to create a design that met our needs. We were delighted when they were able to deliver a plan that maximised space and minimised waste, resulting in a functional and comfortable home that perfectly meets our family’s needs.”
“It took us a long time to initially plan and work through all the details of the house, including walking through the space and trying to visualise how we would use it. We even went so far as to measure rooms in other people’s houses, to get a sense of what a ‘normal’ room size would be.”
“We had to reapply for permission as our plans were for a smaller house. But our architect assured us that this would not be a major issue and the process was surprisingly quick. From submitting the plans to receiving approval, the whole process took only about six weeks, which was much faster than we expected.”
“We had a fixed price agreement with the contractor who project managed, but the architects were also overseeing the build. The builder had his crew of workers, but he also had certain subcontractors who had worked with him for 20 years. We appointed specific people for the windows, kitchen, bathroom and polished concrete.”
“Since I lived close to the site, I would visit most days and we would also be in constant communication with the architects. Whenever I was unsure about something, the architect would step in and resolve the issue for me, which was great as it meant I didn’t have to be confrontational.”
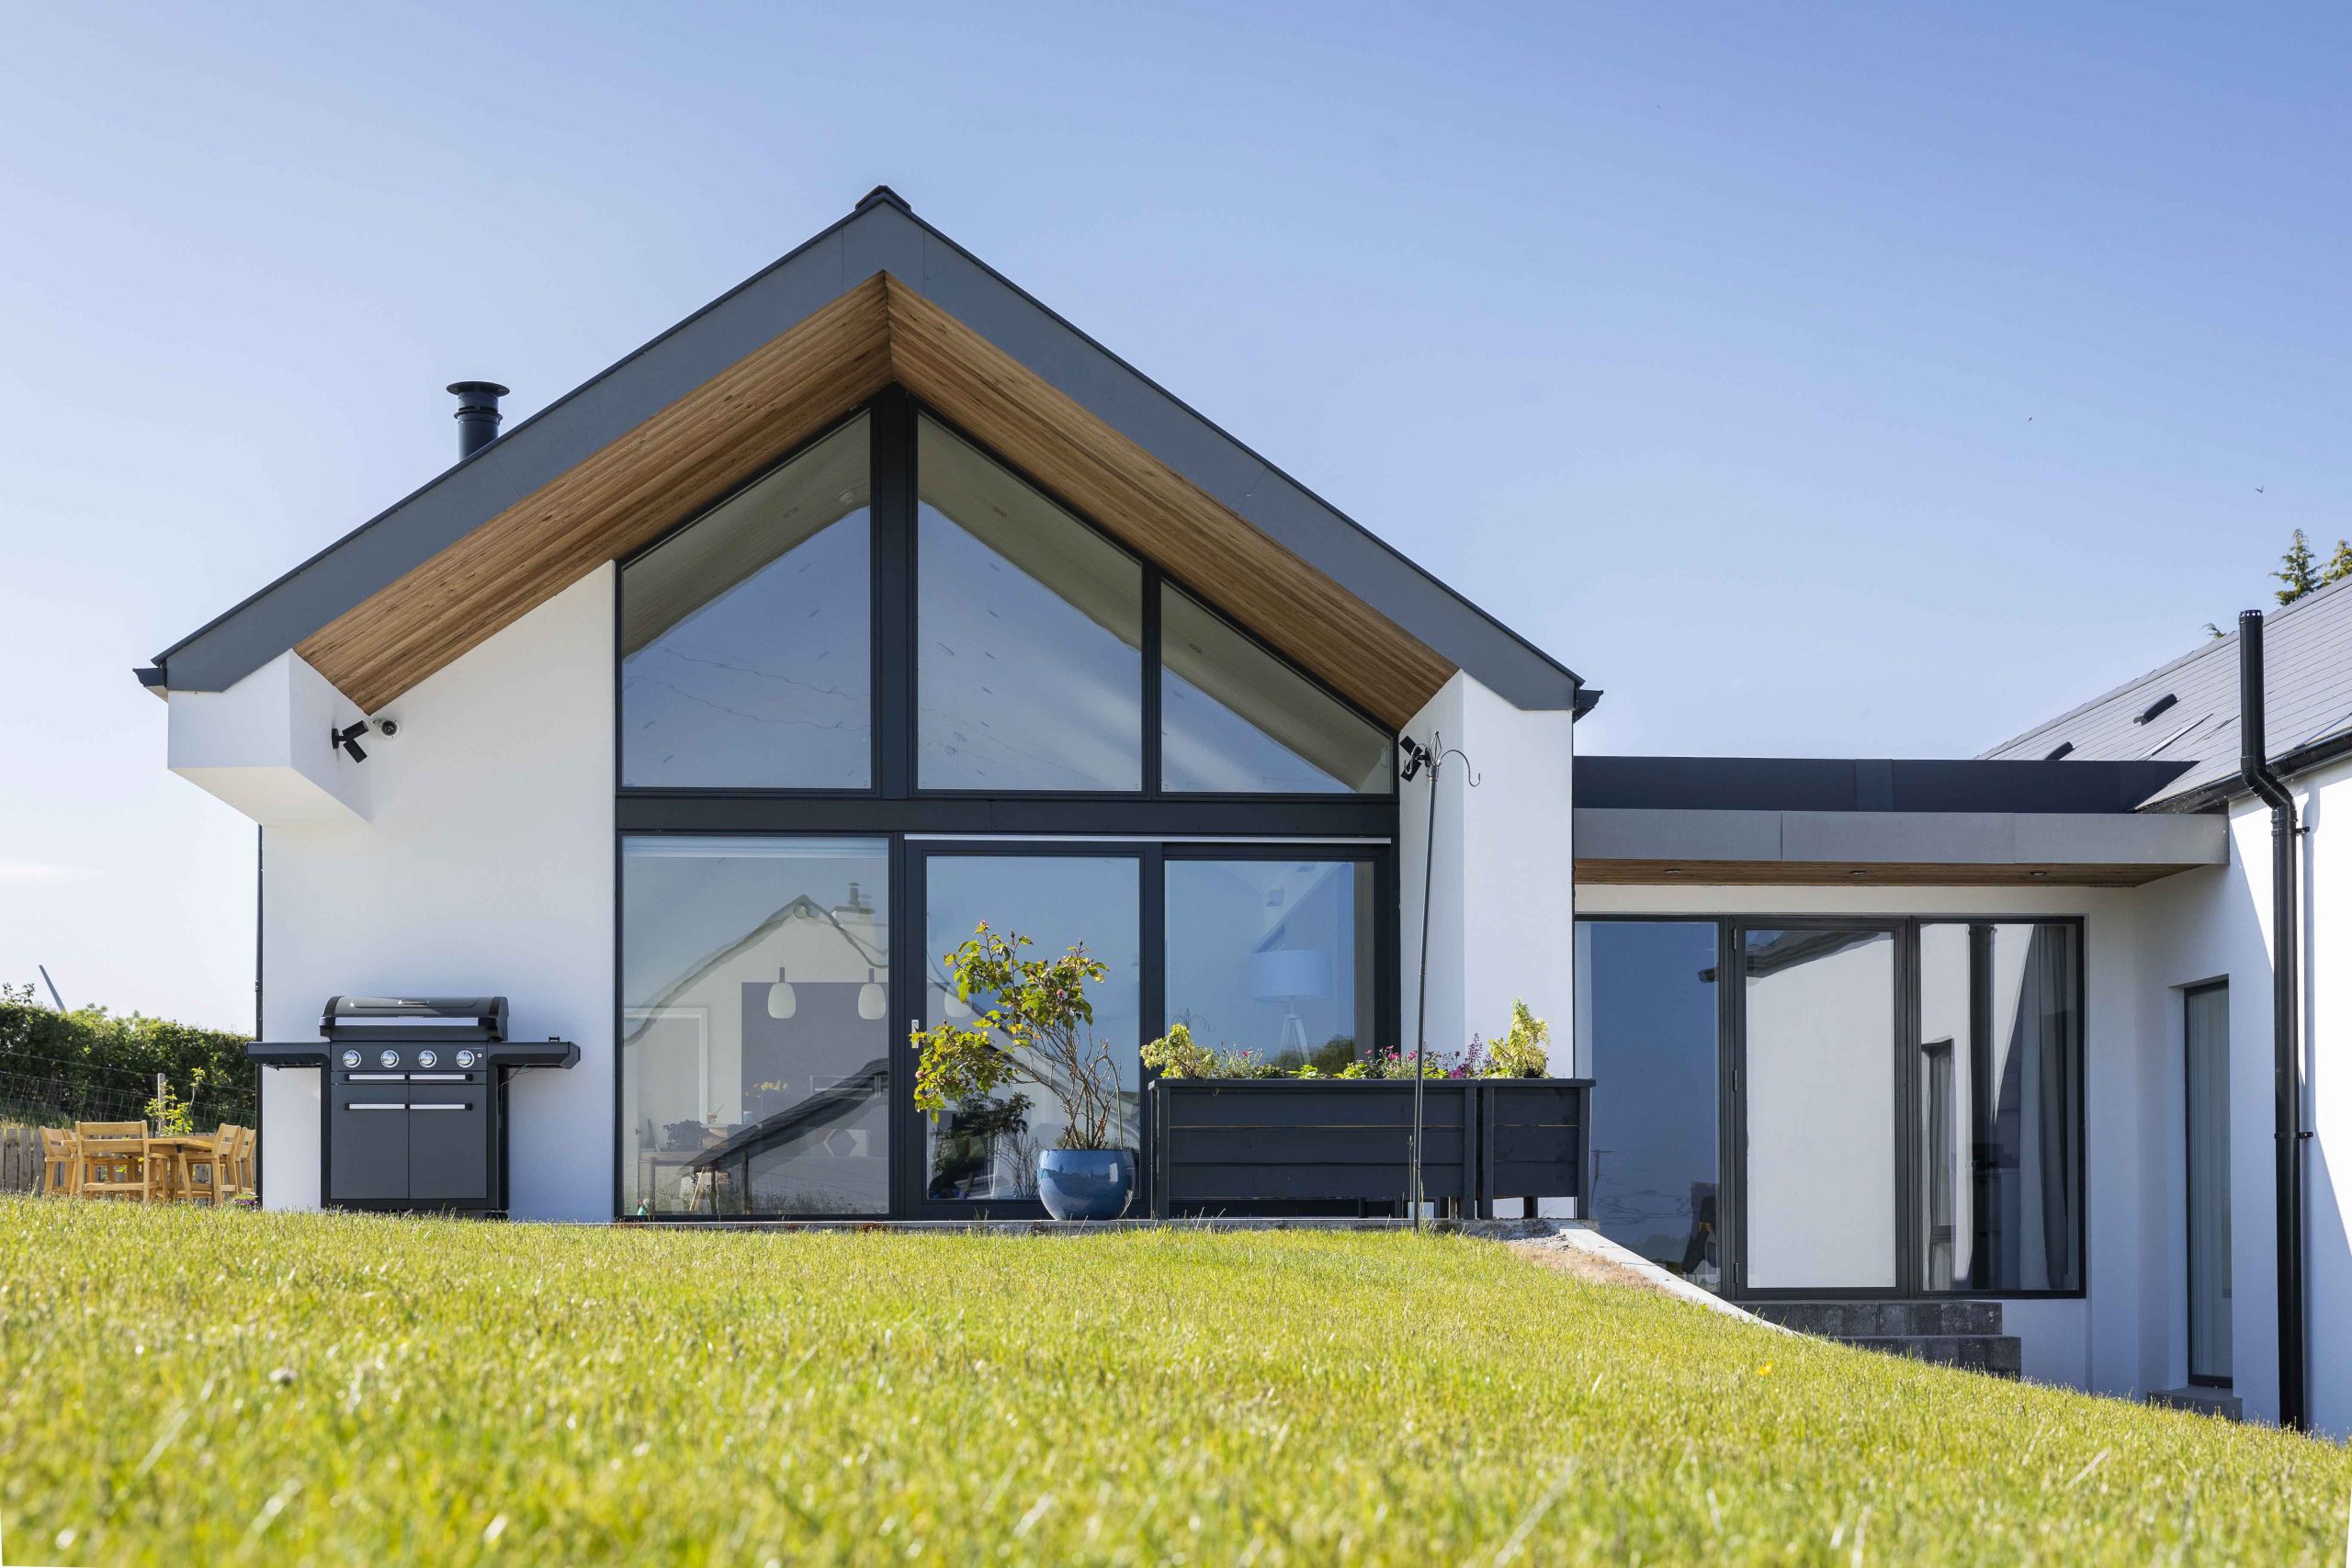
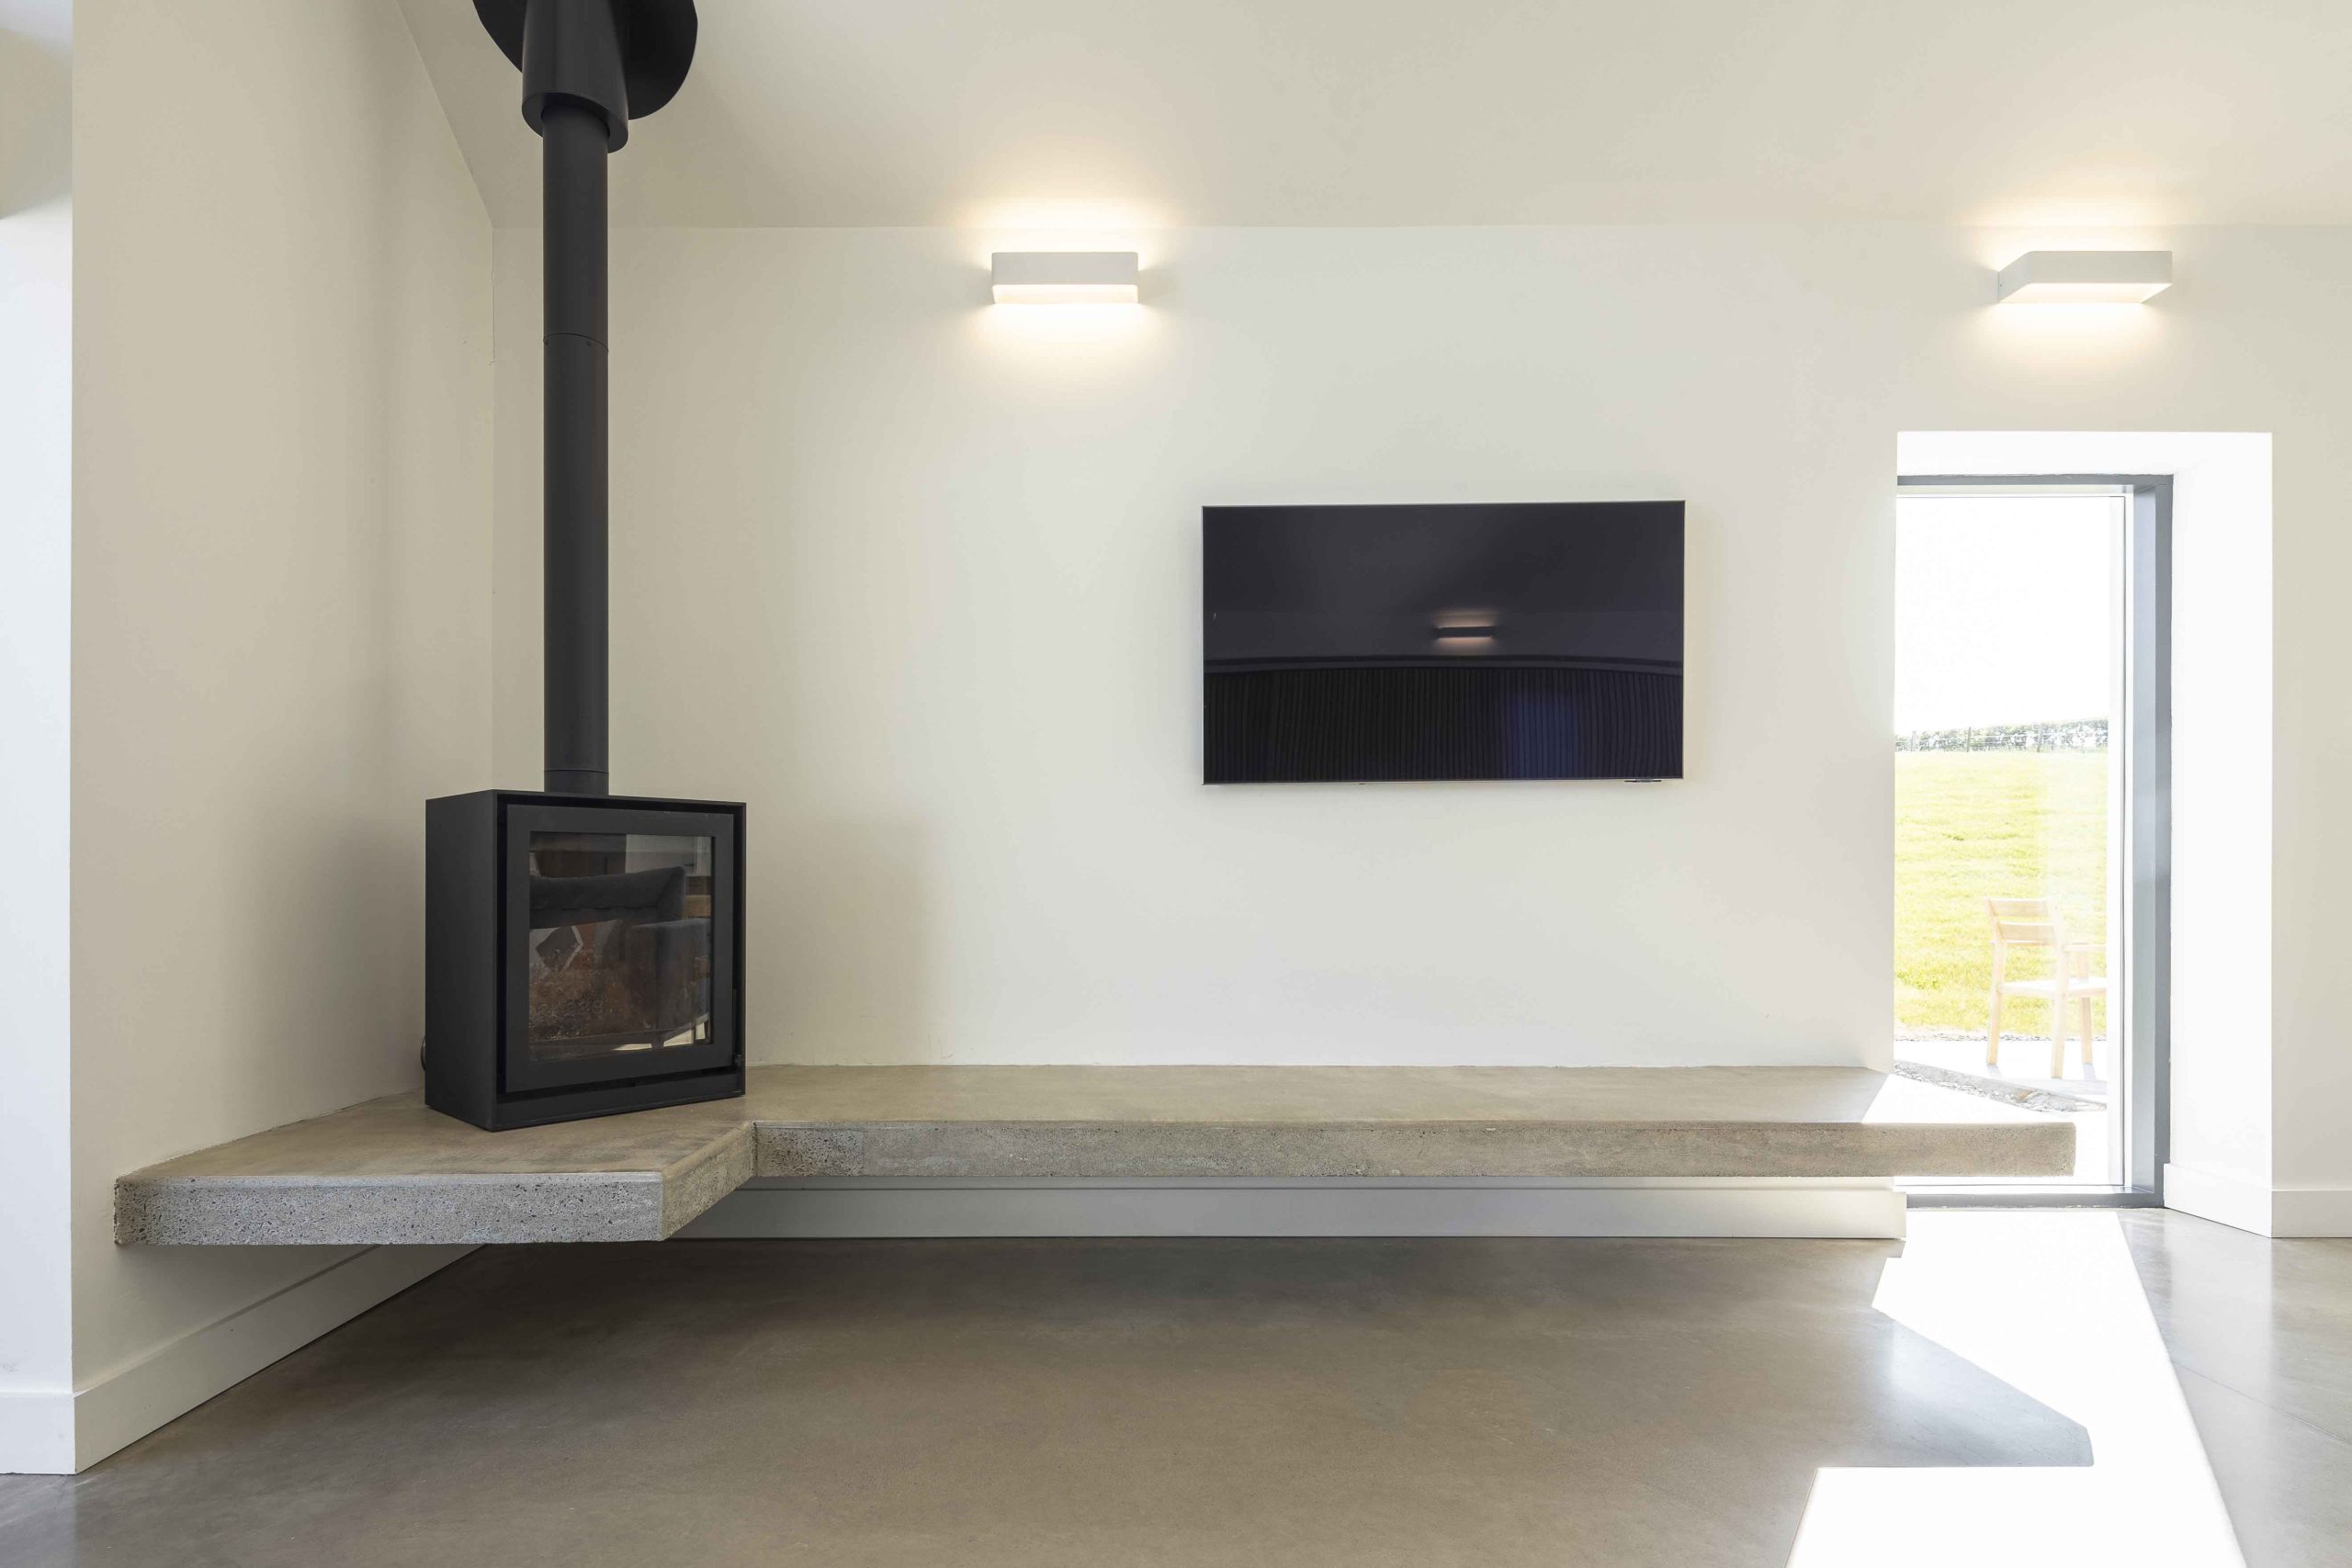
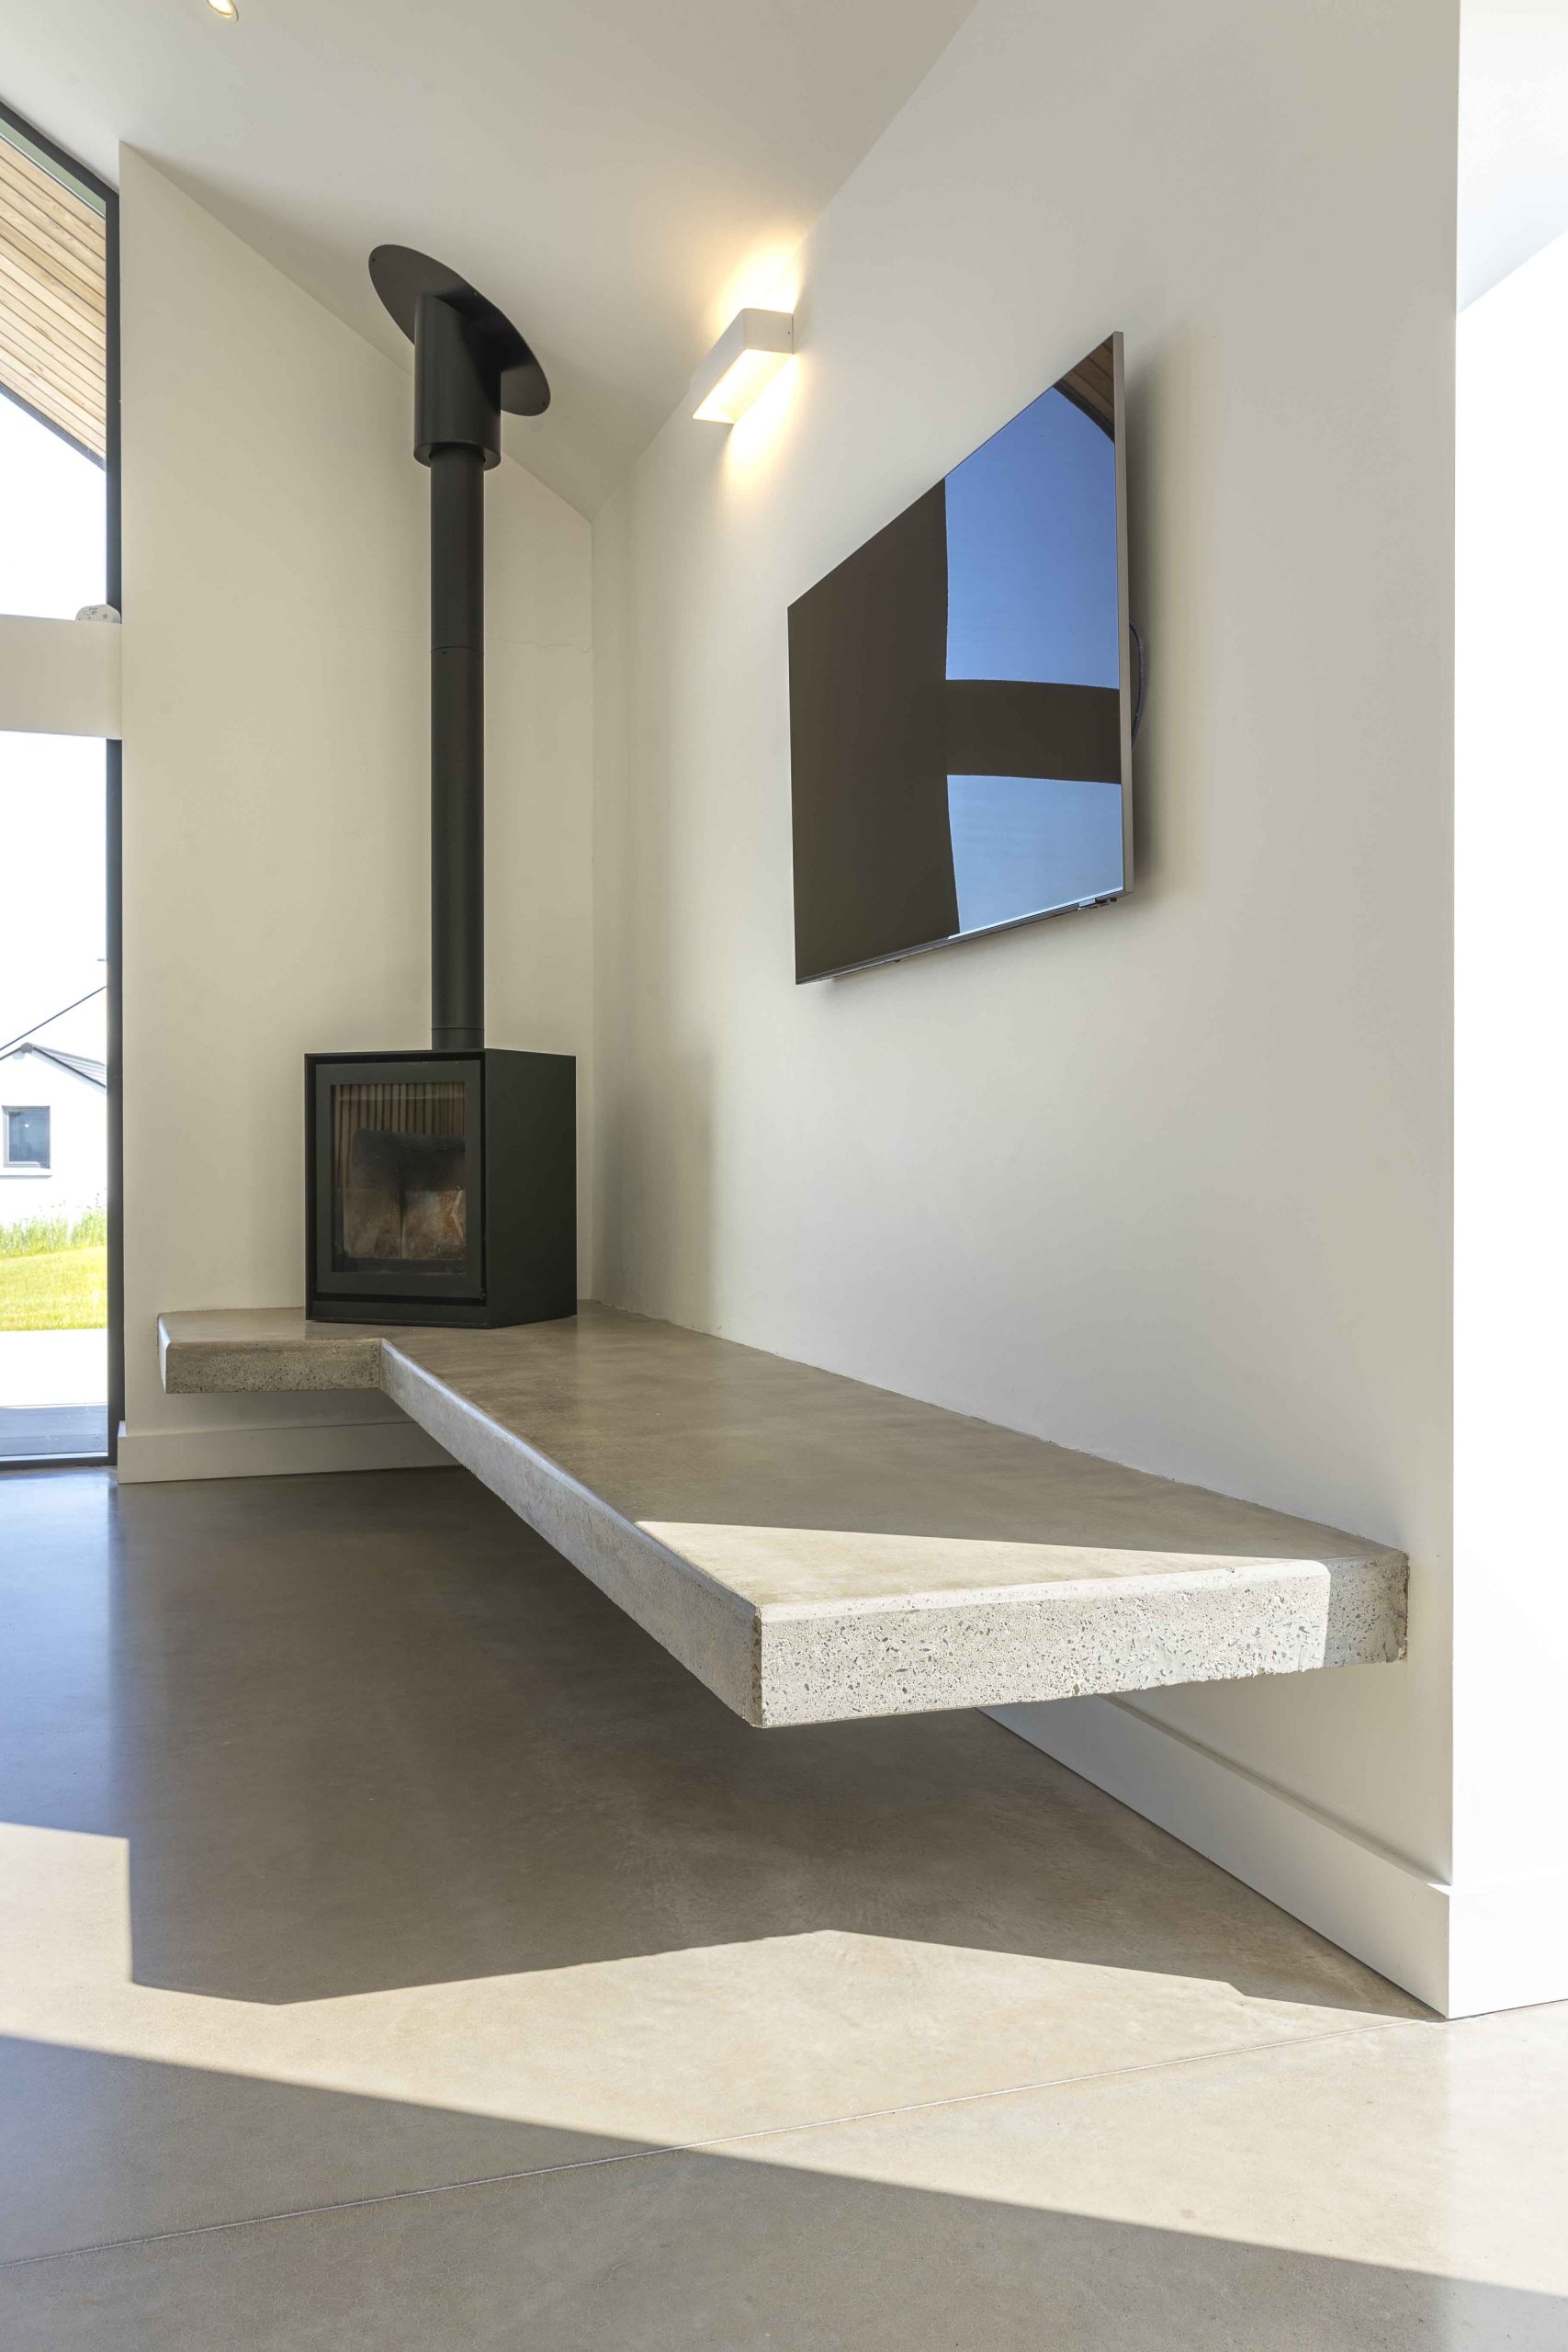
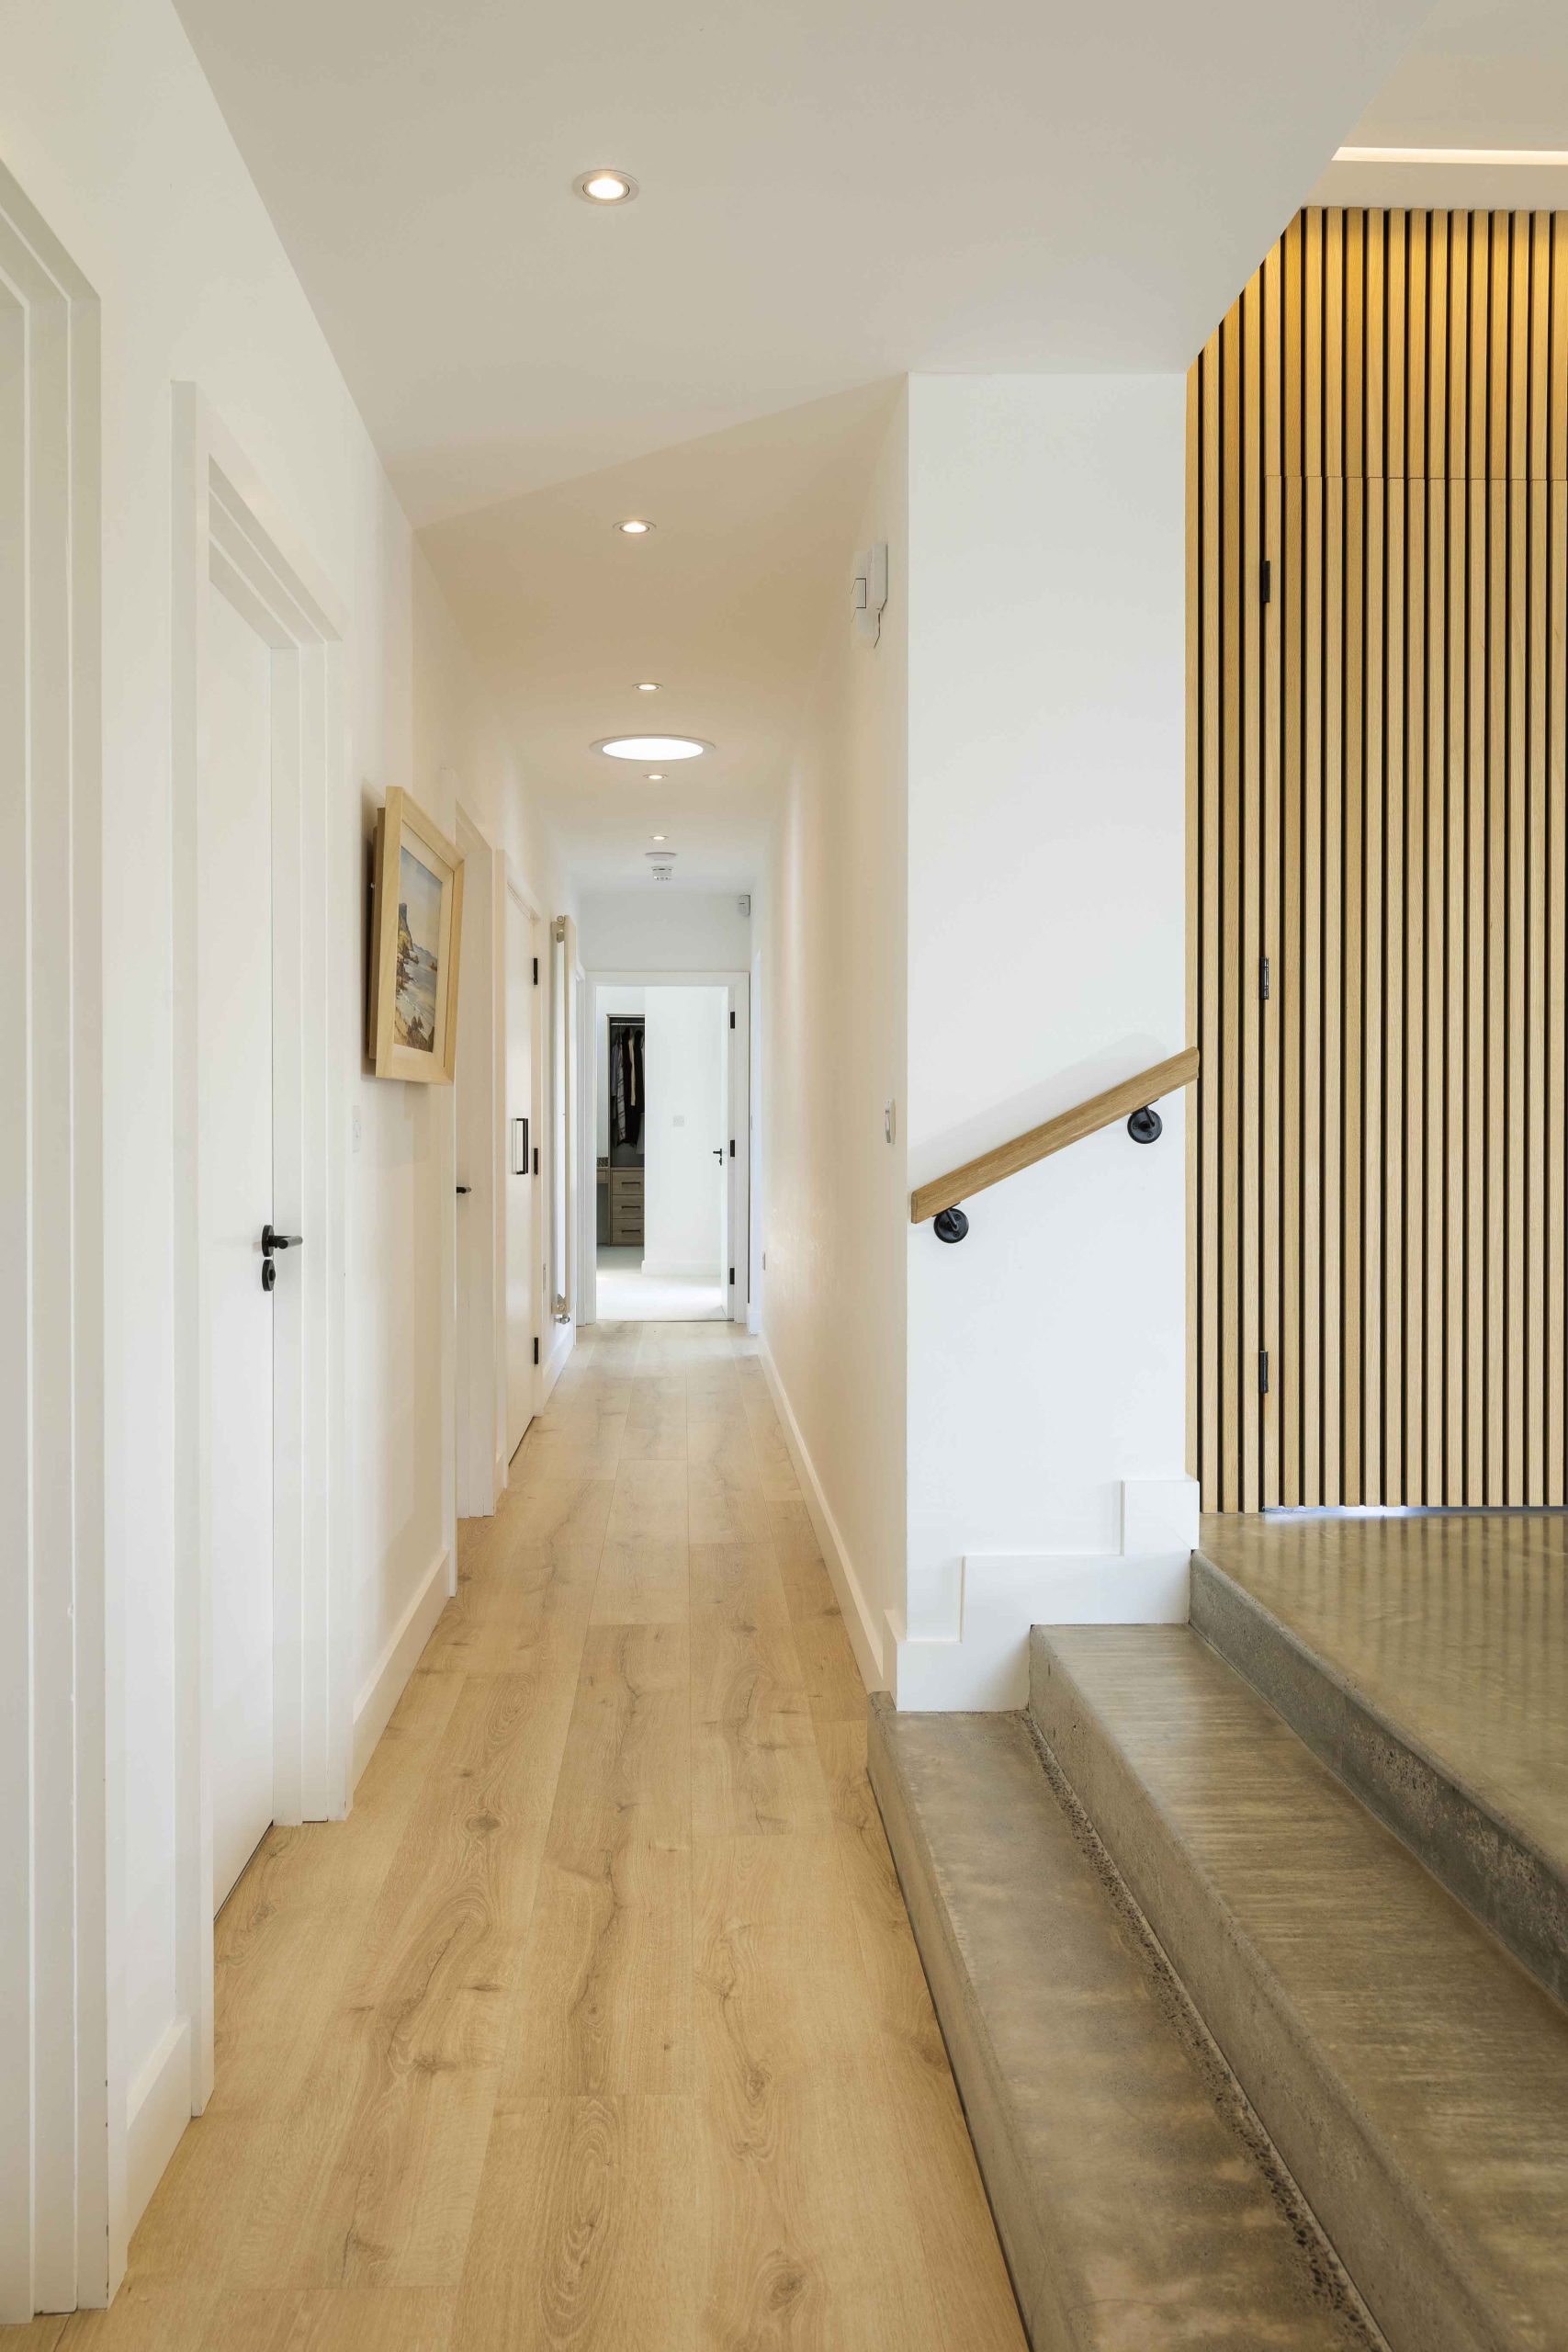
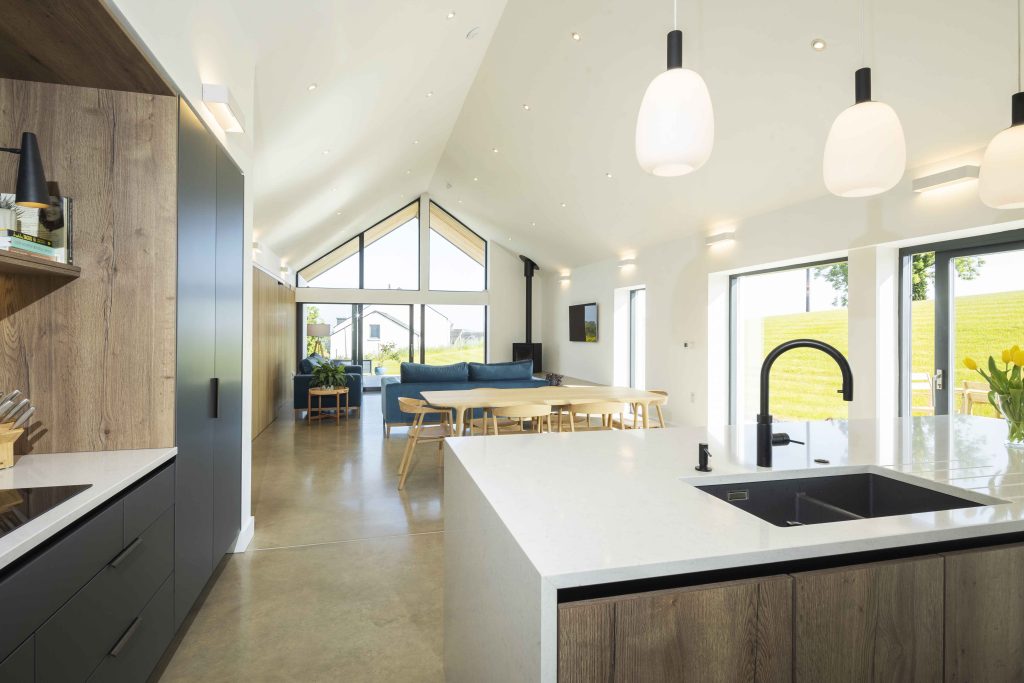
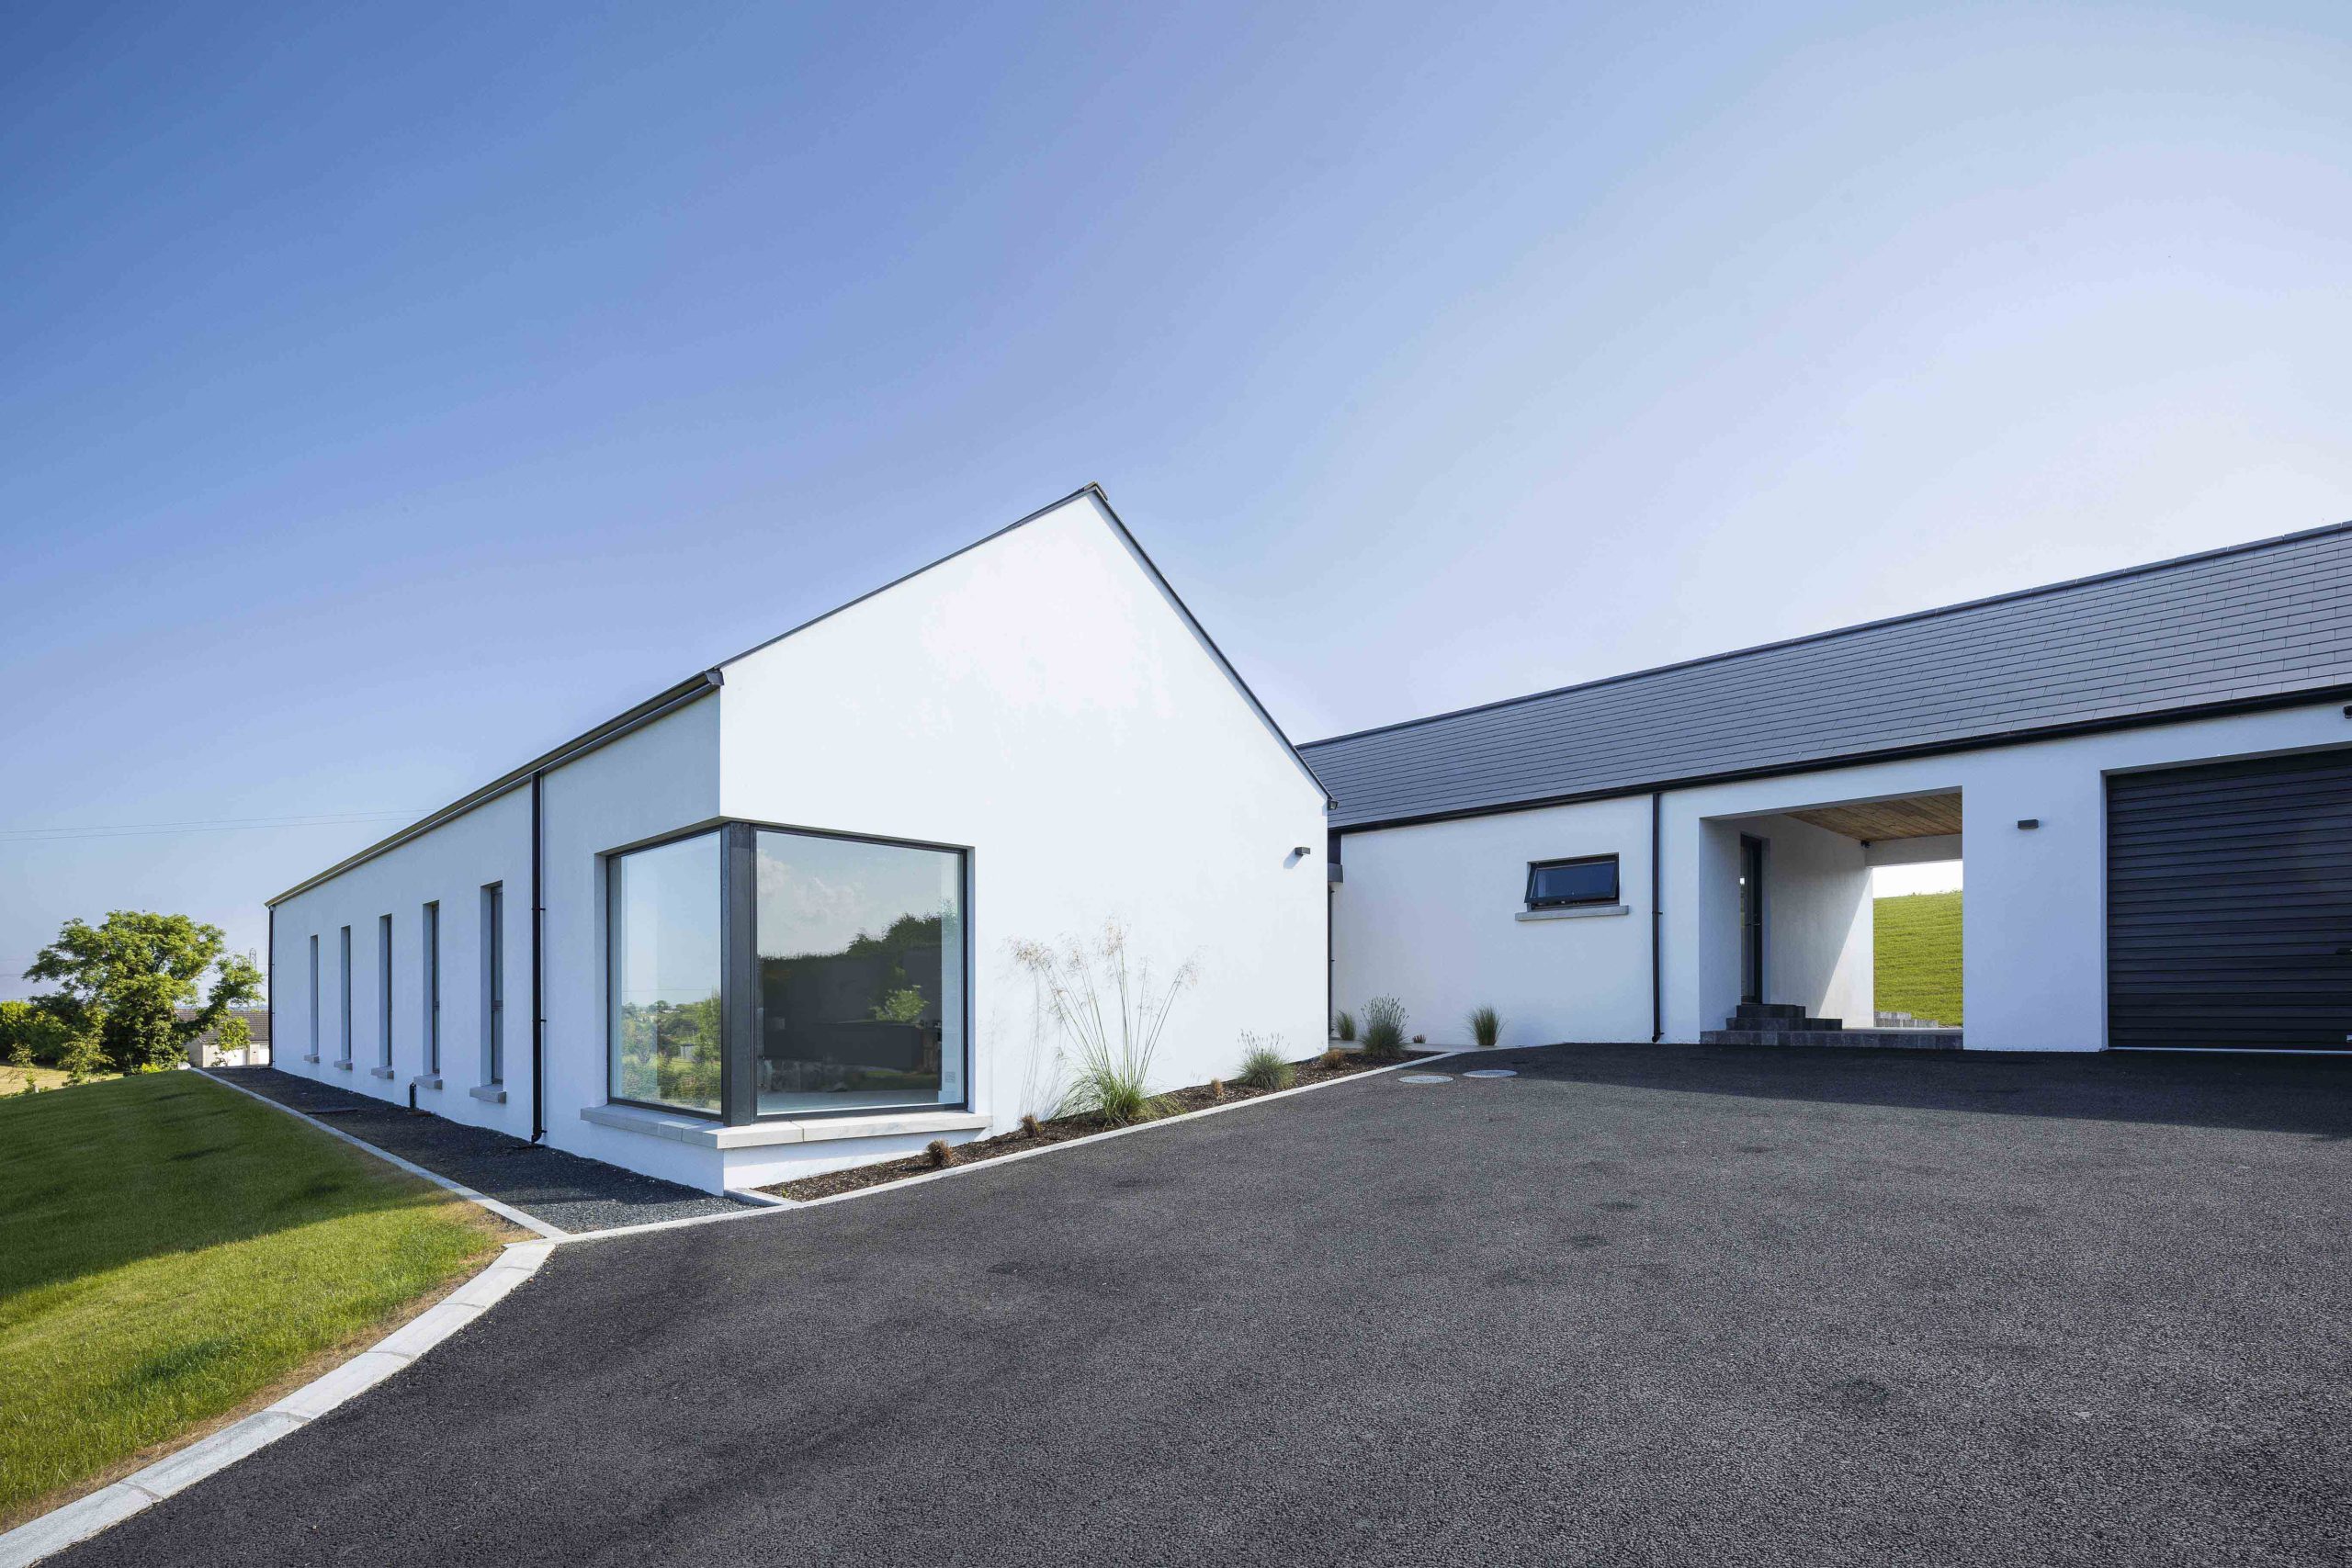
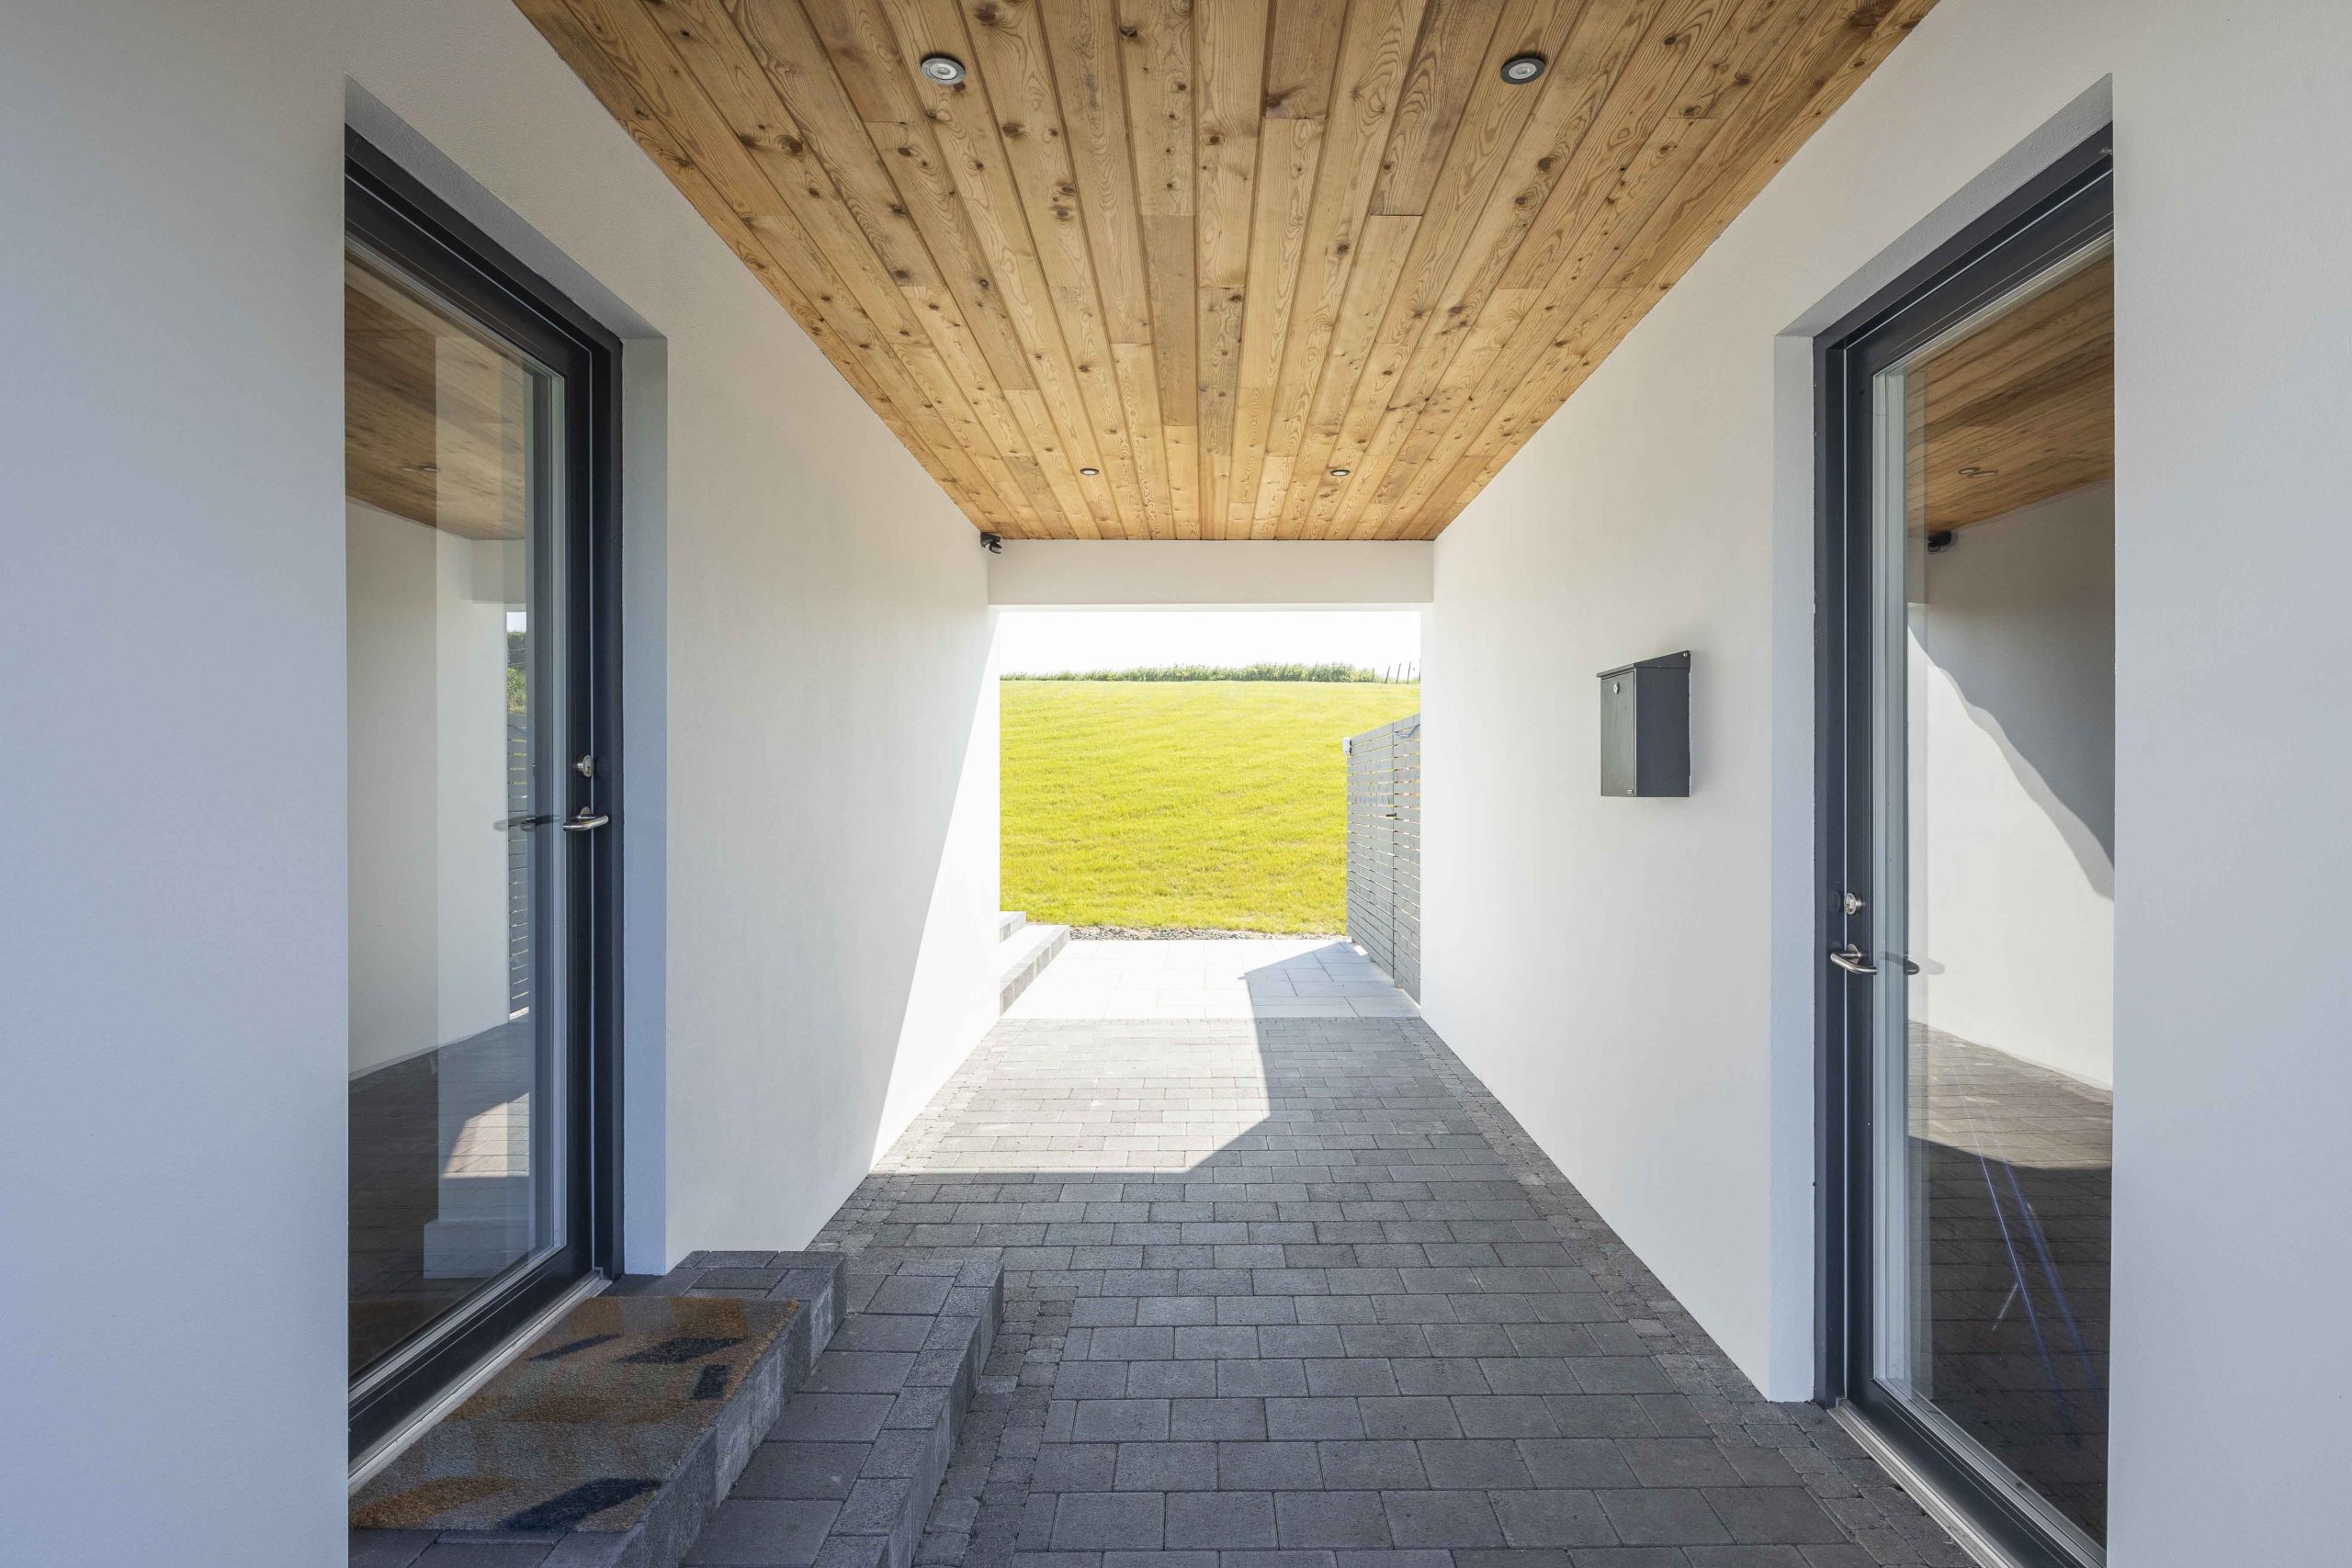
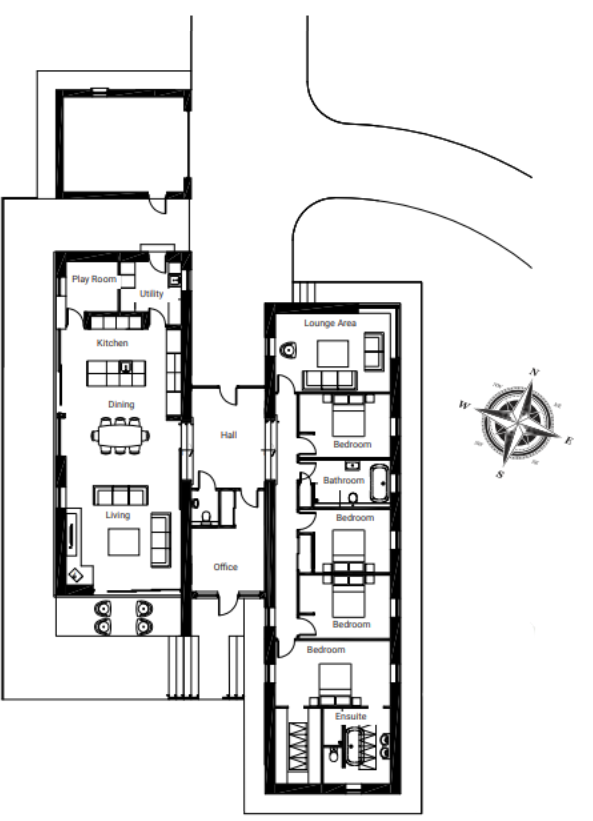
The house is built on three levels, with an H-style floor plan. The flooring for the open plan living room upper section and the middle section are all polished concrete. The rest of the house has standard screed, and the bedroom blocks have screed as well. Underfloor heating was installed in the middle and upper block and radiators are used in the rest of the house.
“We opted for oil fired heating, but kept in mind the possibility of retrofitting a heat pump in the future,” says Stuart. “To reduce our carbon footprint, we have solar panels with a 4kW system on the roof and heat recovery ventilation. Additionally, we have a wood burner for extra warmth during the colder months.”
Tricky business
Stuart and Katie encountered some challenges with the septic tank and electrical systems during the
construction of their home. Initially, ground tests indicated that the soil wouldn’t be suitable for a septic tank, which could have led to a costly alternative system.
“It was going to cost around £12,000,” says Stuart. “At one stage, we were unsure if we’d be able to get anything suitable for the discharge of water at all, which would have meant no discharge certificate and therefore no mortgage. Things were getting quite hairy, but, with the help of a neighbour, we were able to find an old field drain in the lane beside the house. We had to go through solicitors and Land Registry to get permission to dig. But eventually, we were able to install a very simple septic tank for £4,000 and the soakaway just goes into that field drain, which was a lifesaver.”
For the electrical installation, they assumed that connecting to an existing pole would be straightforward, but NIE told them they’d have to connect to a different pole at an extra cost of £8,000. “We spoke to a few different people at NIE,” says Stuart. “Katie eventually managed to chat to one of the workers and got the cost down to £4,000. You need to be persistent sometimes. If you just take the first word for it, you can find yourself paying over the odds.”
Katie adds: “I was pregnant, angry and emotional, which all helped!”
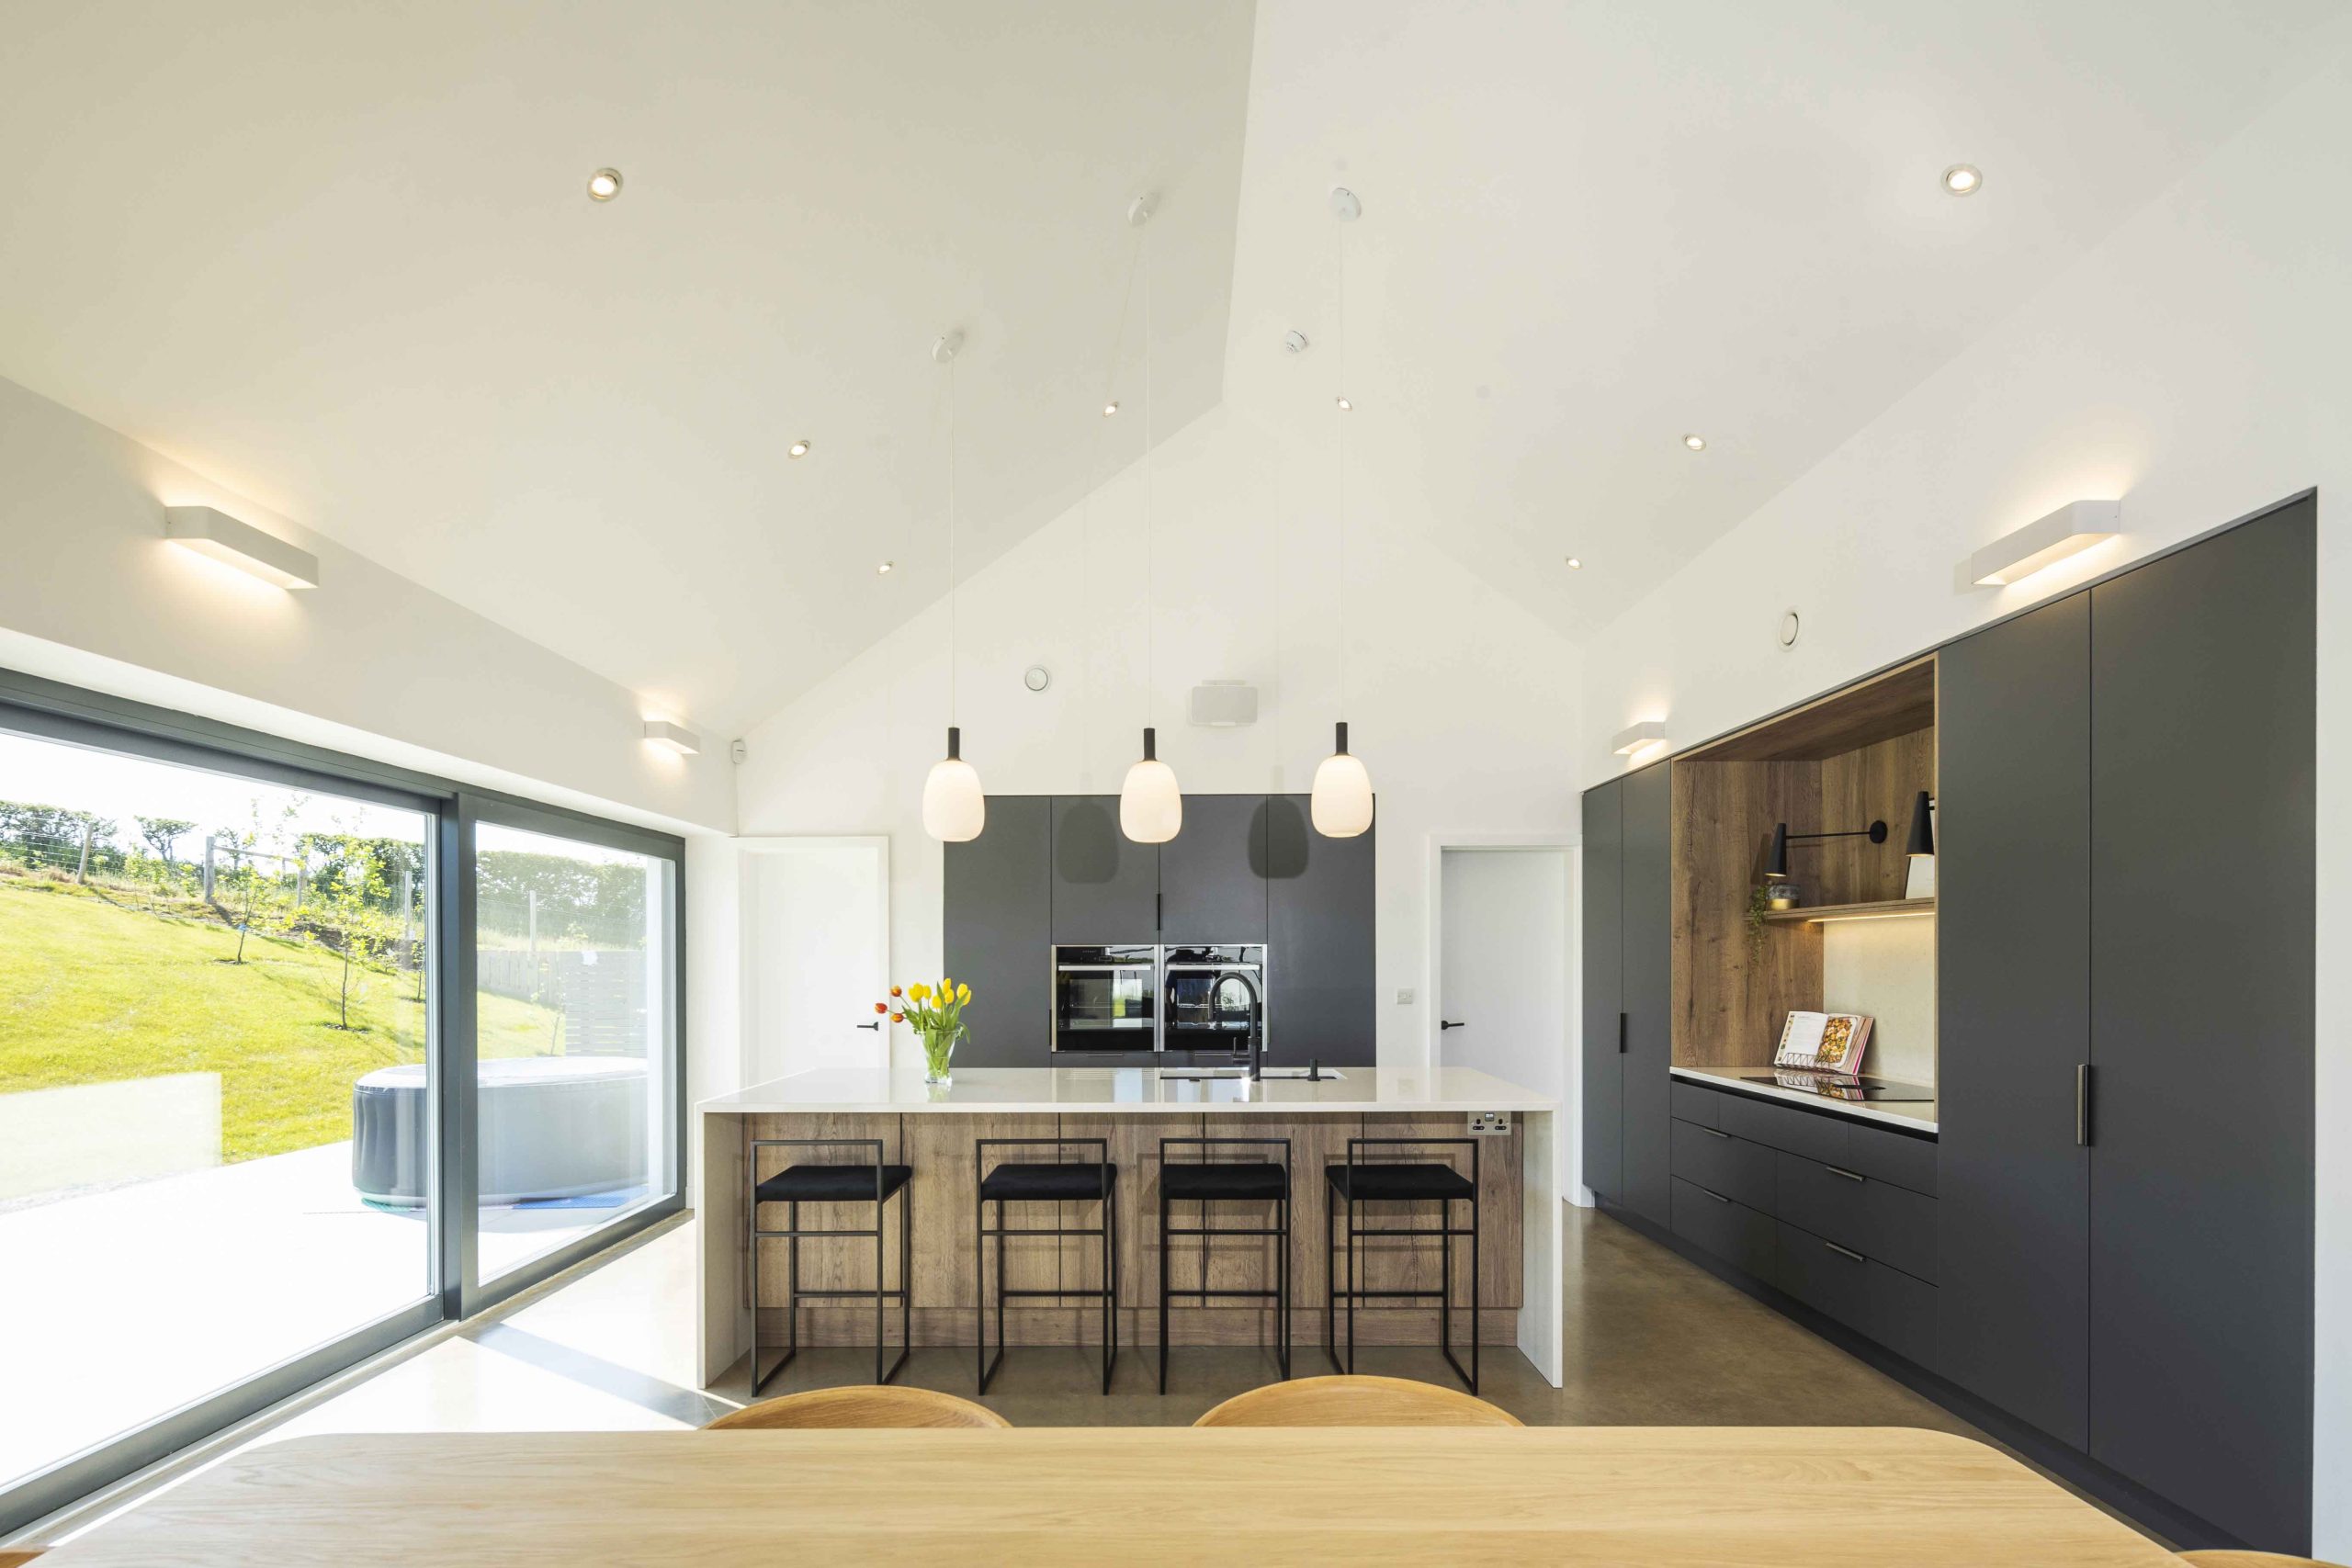
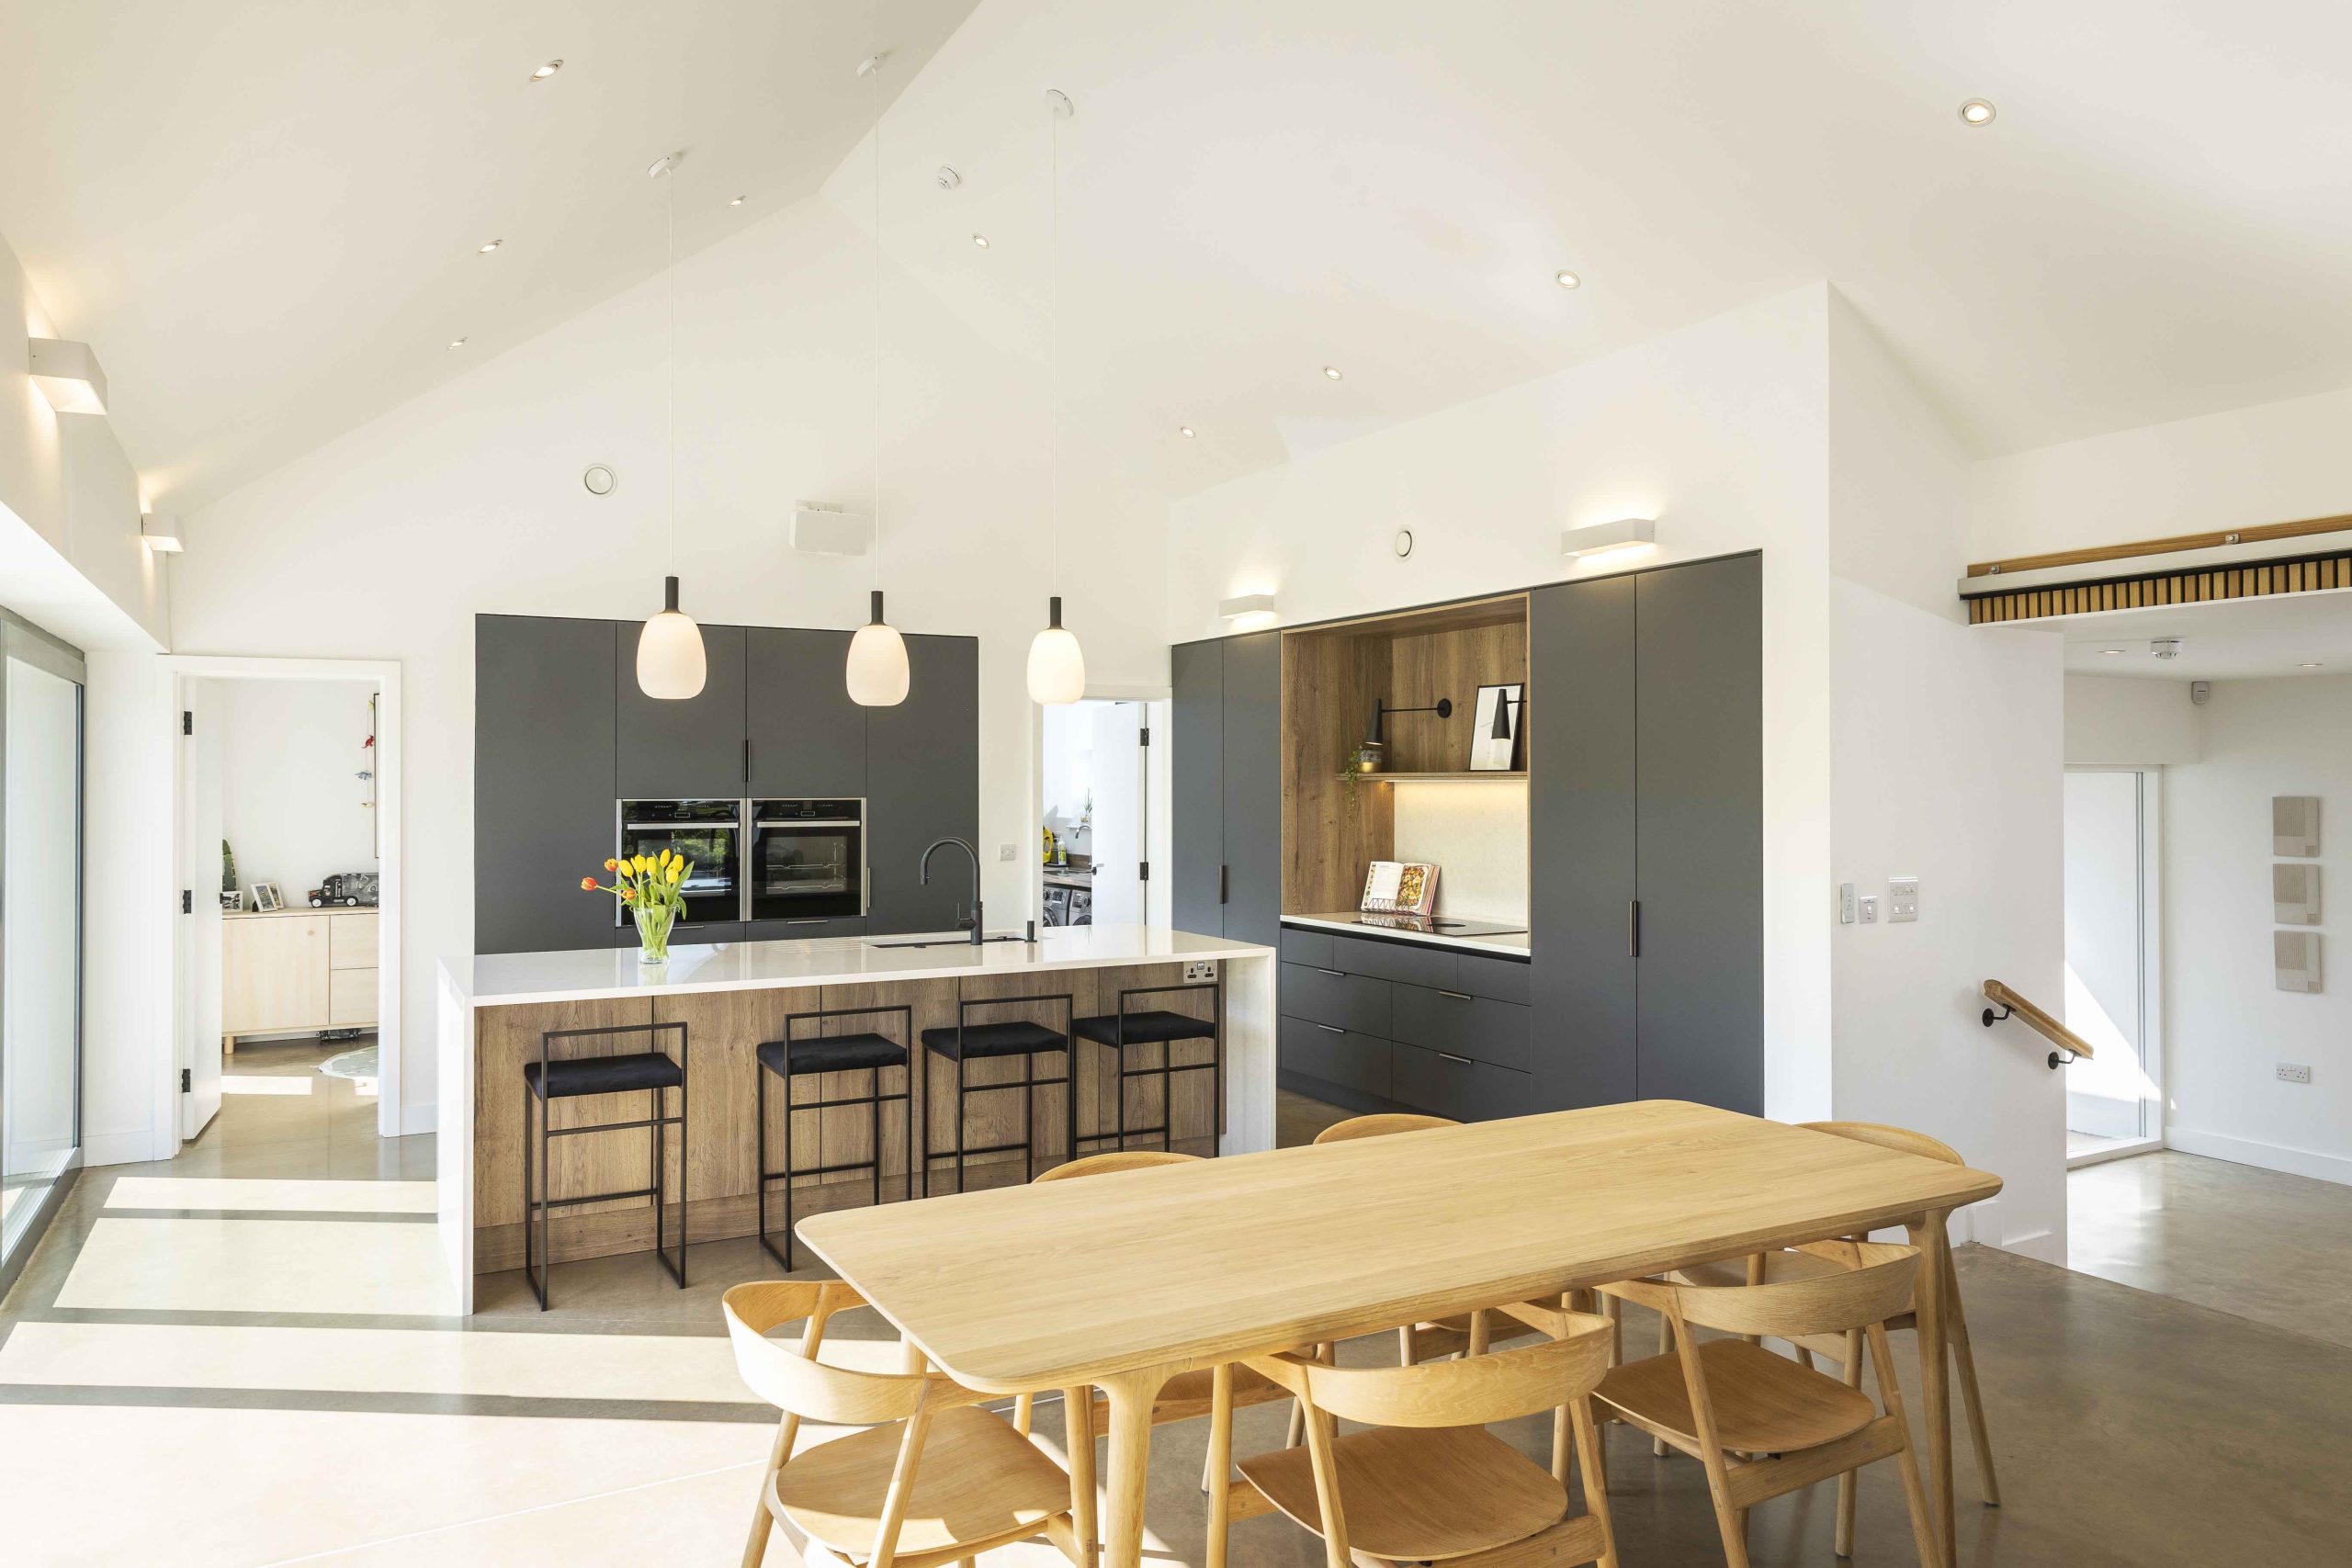


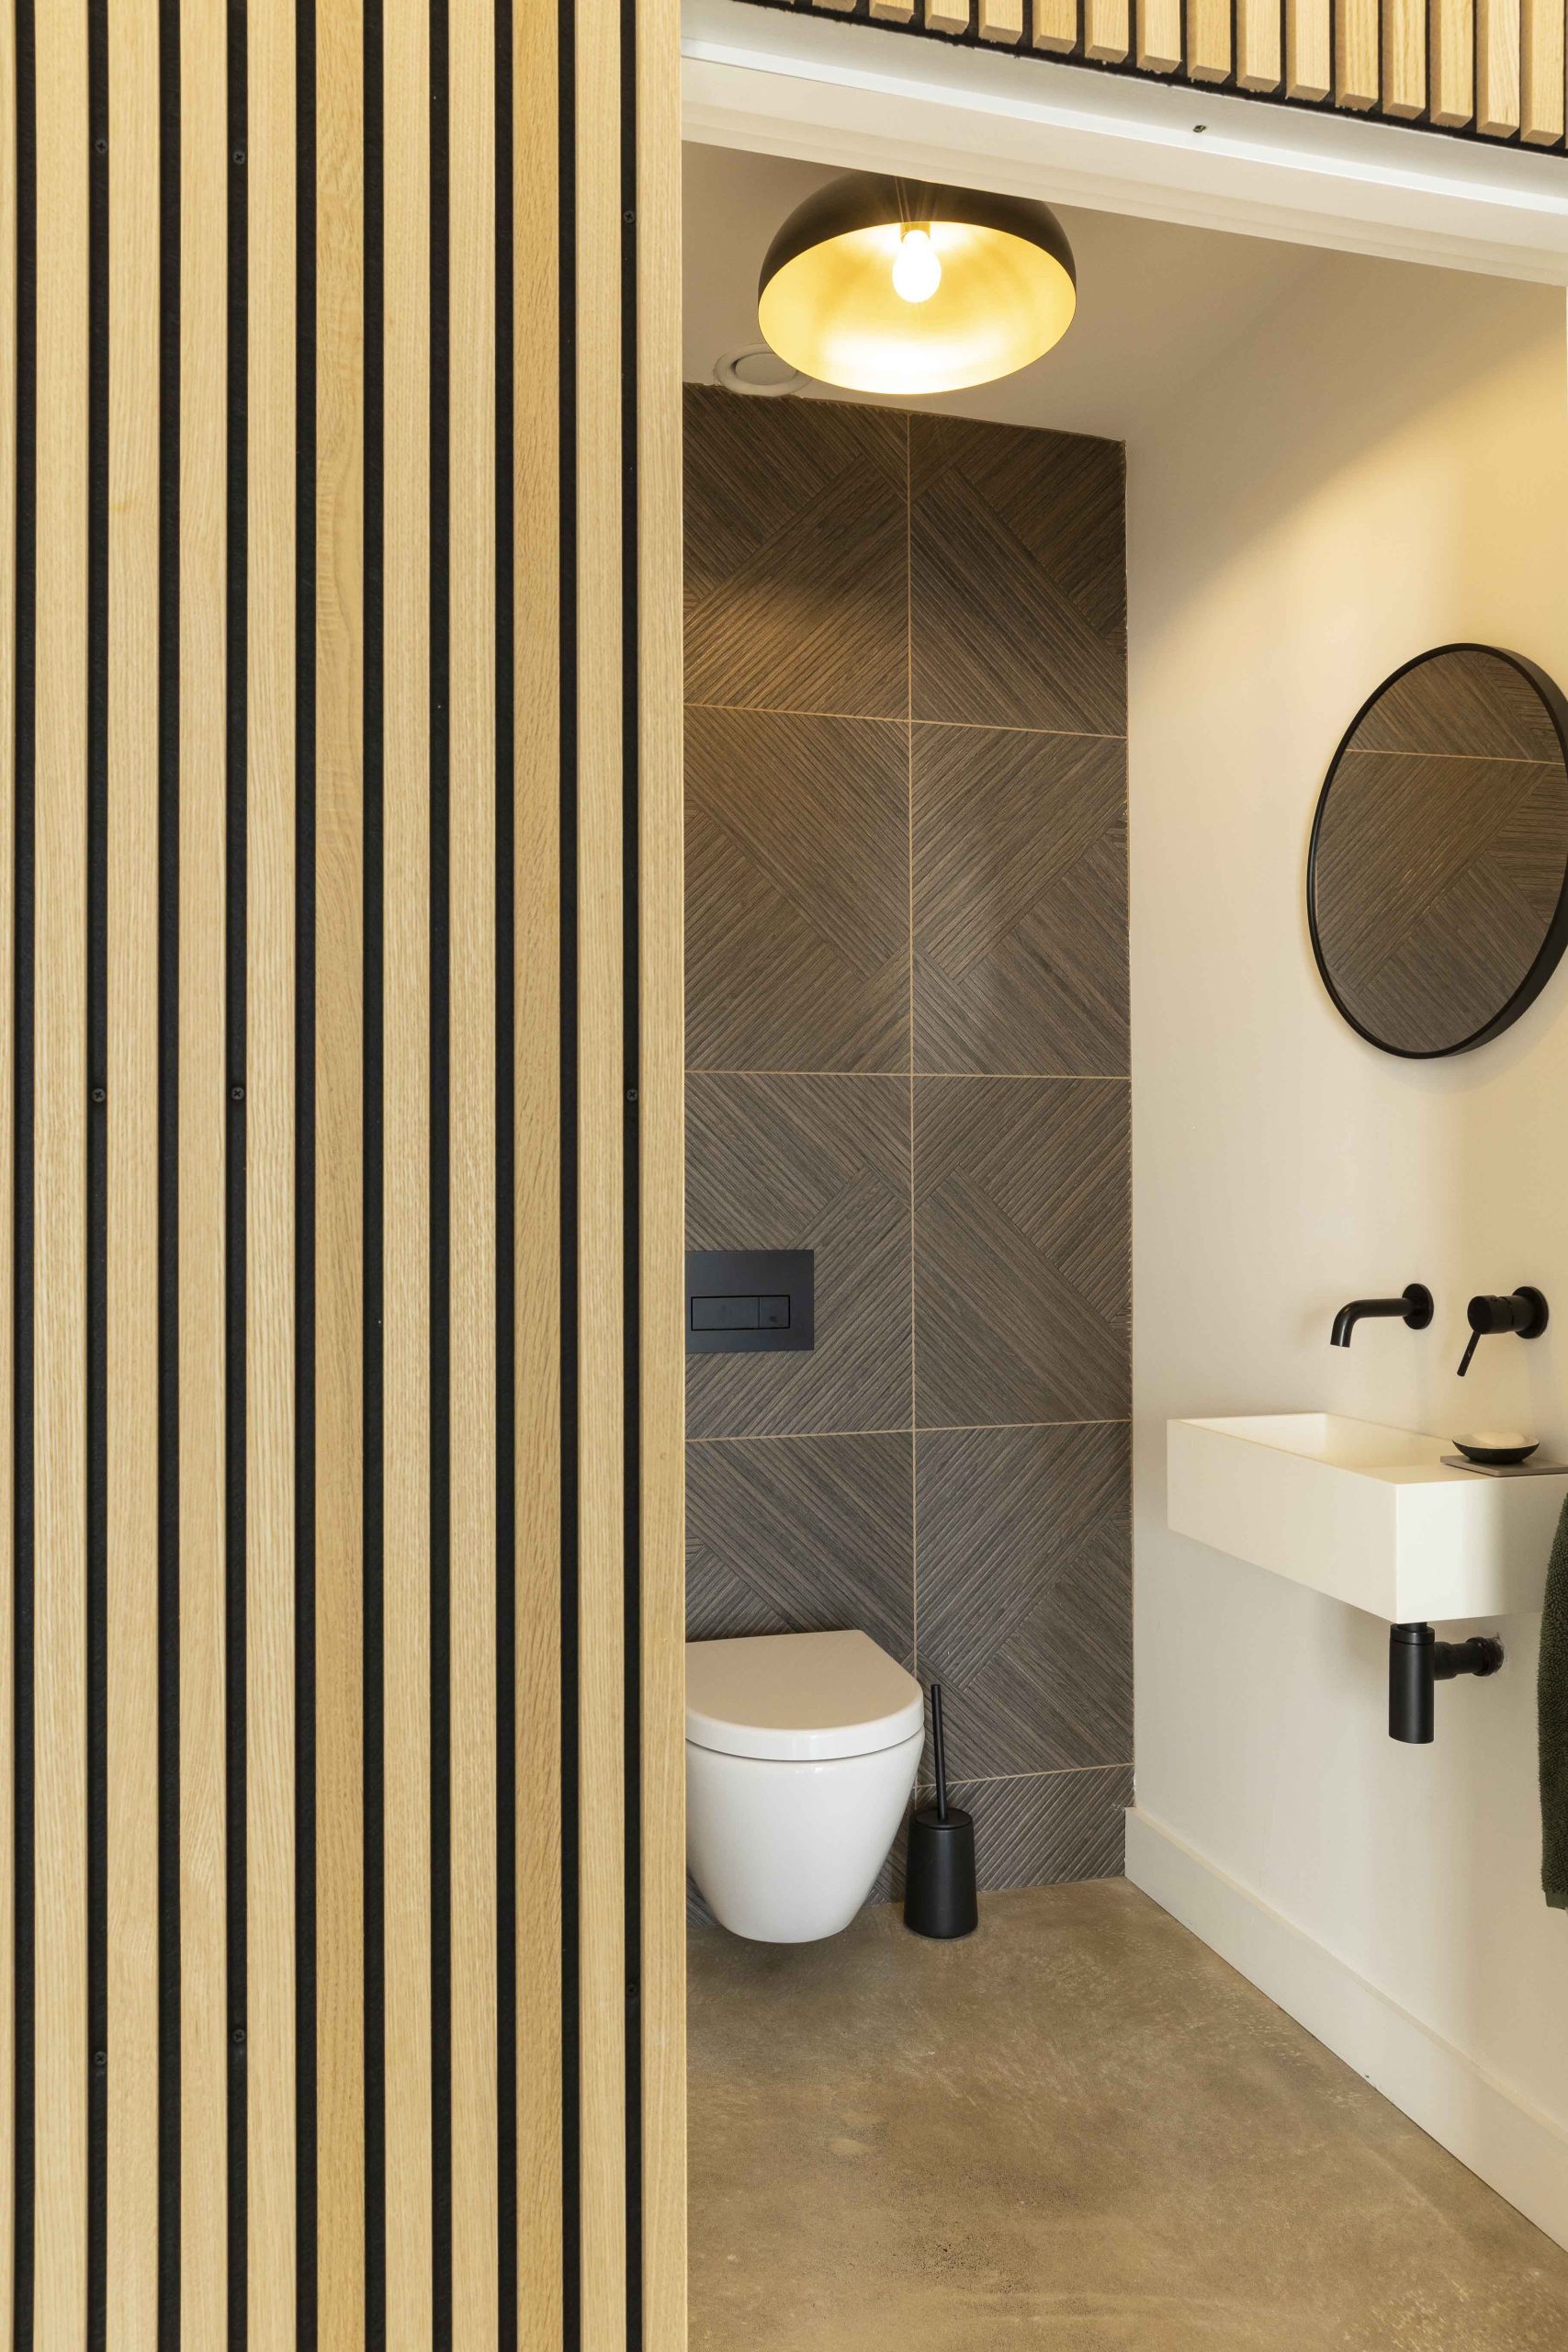
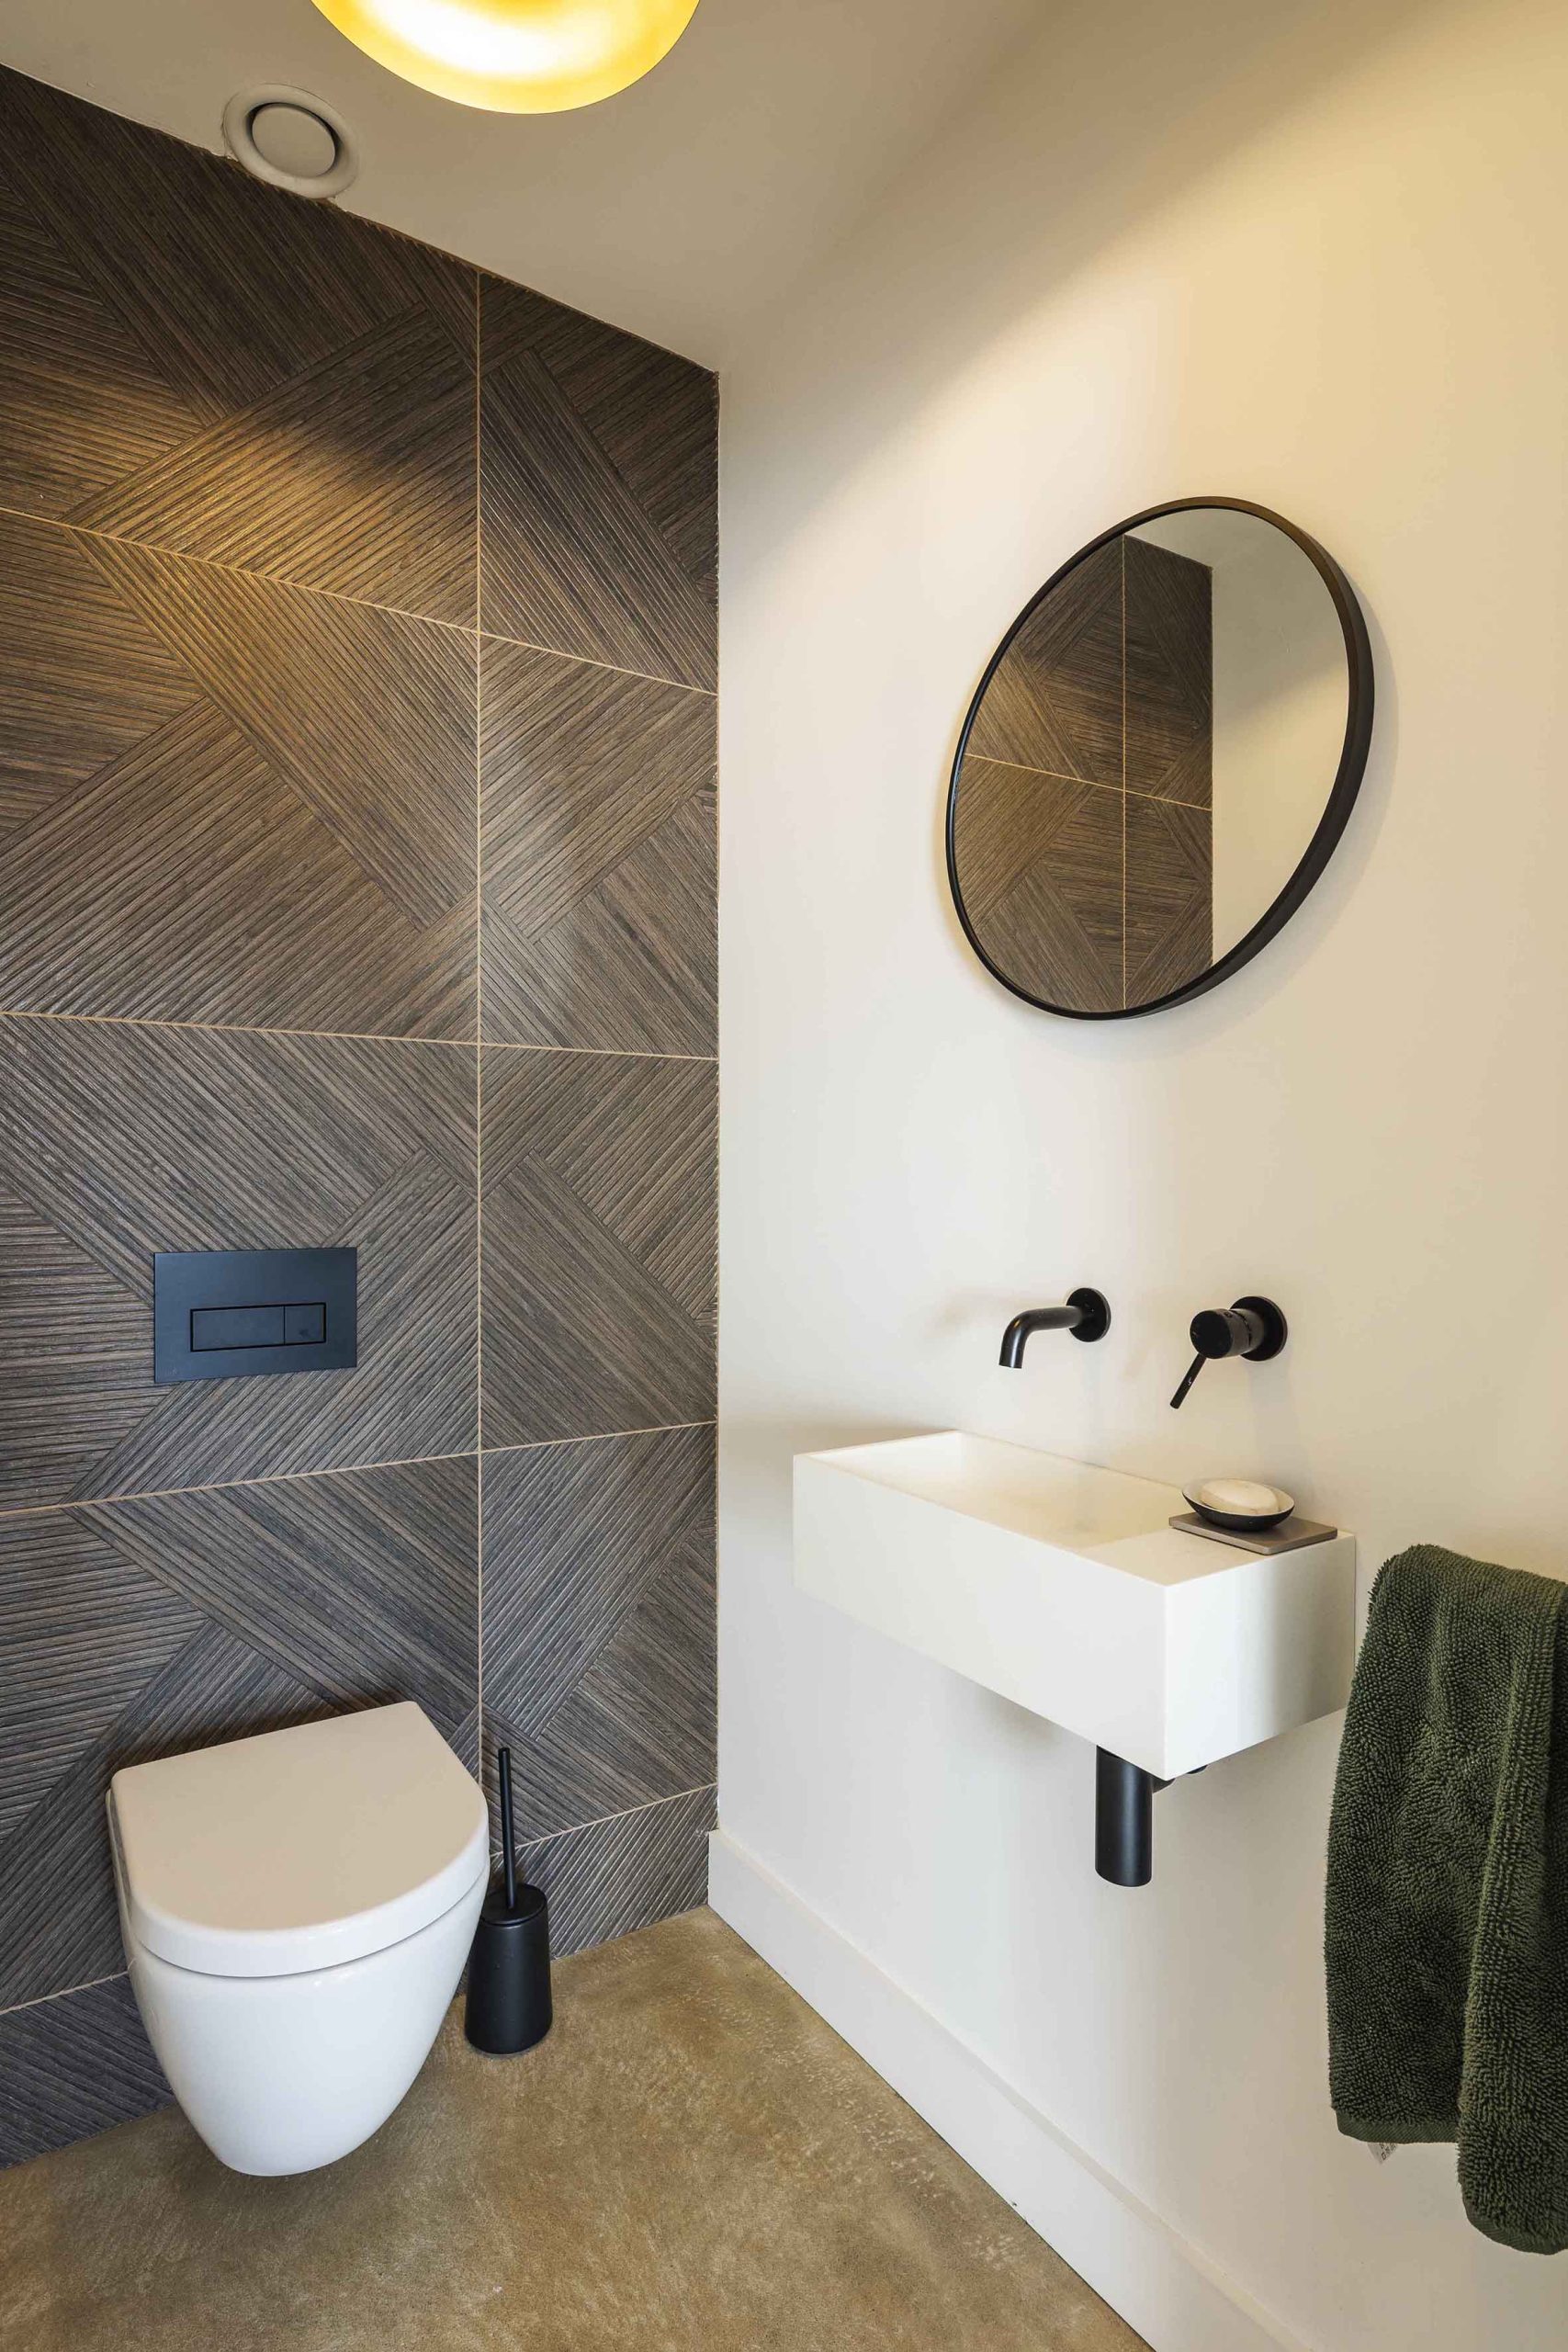
Interiors
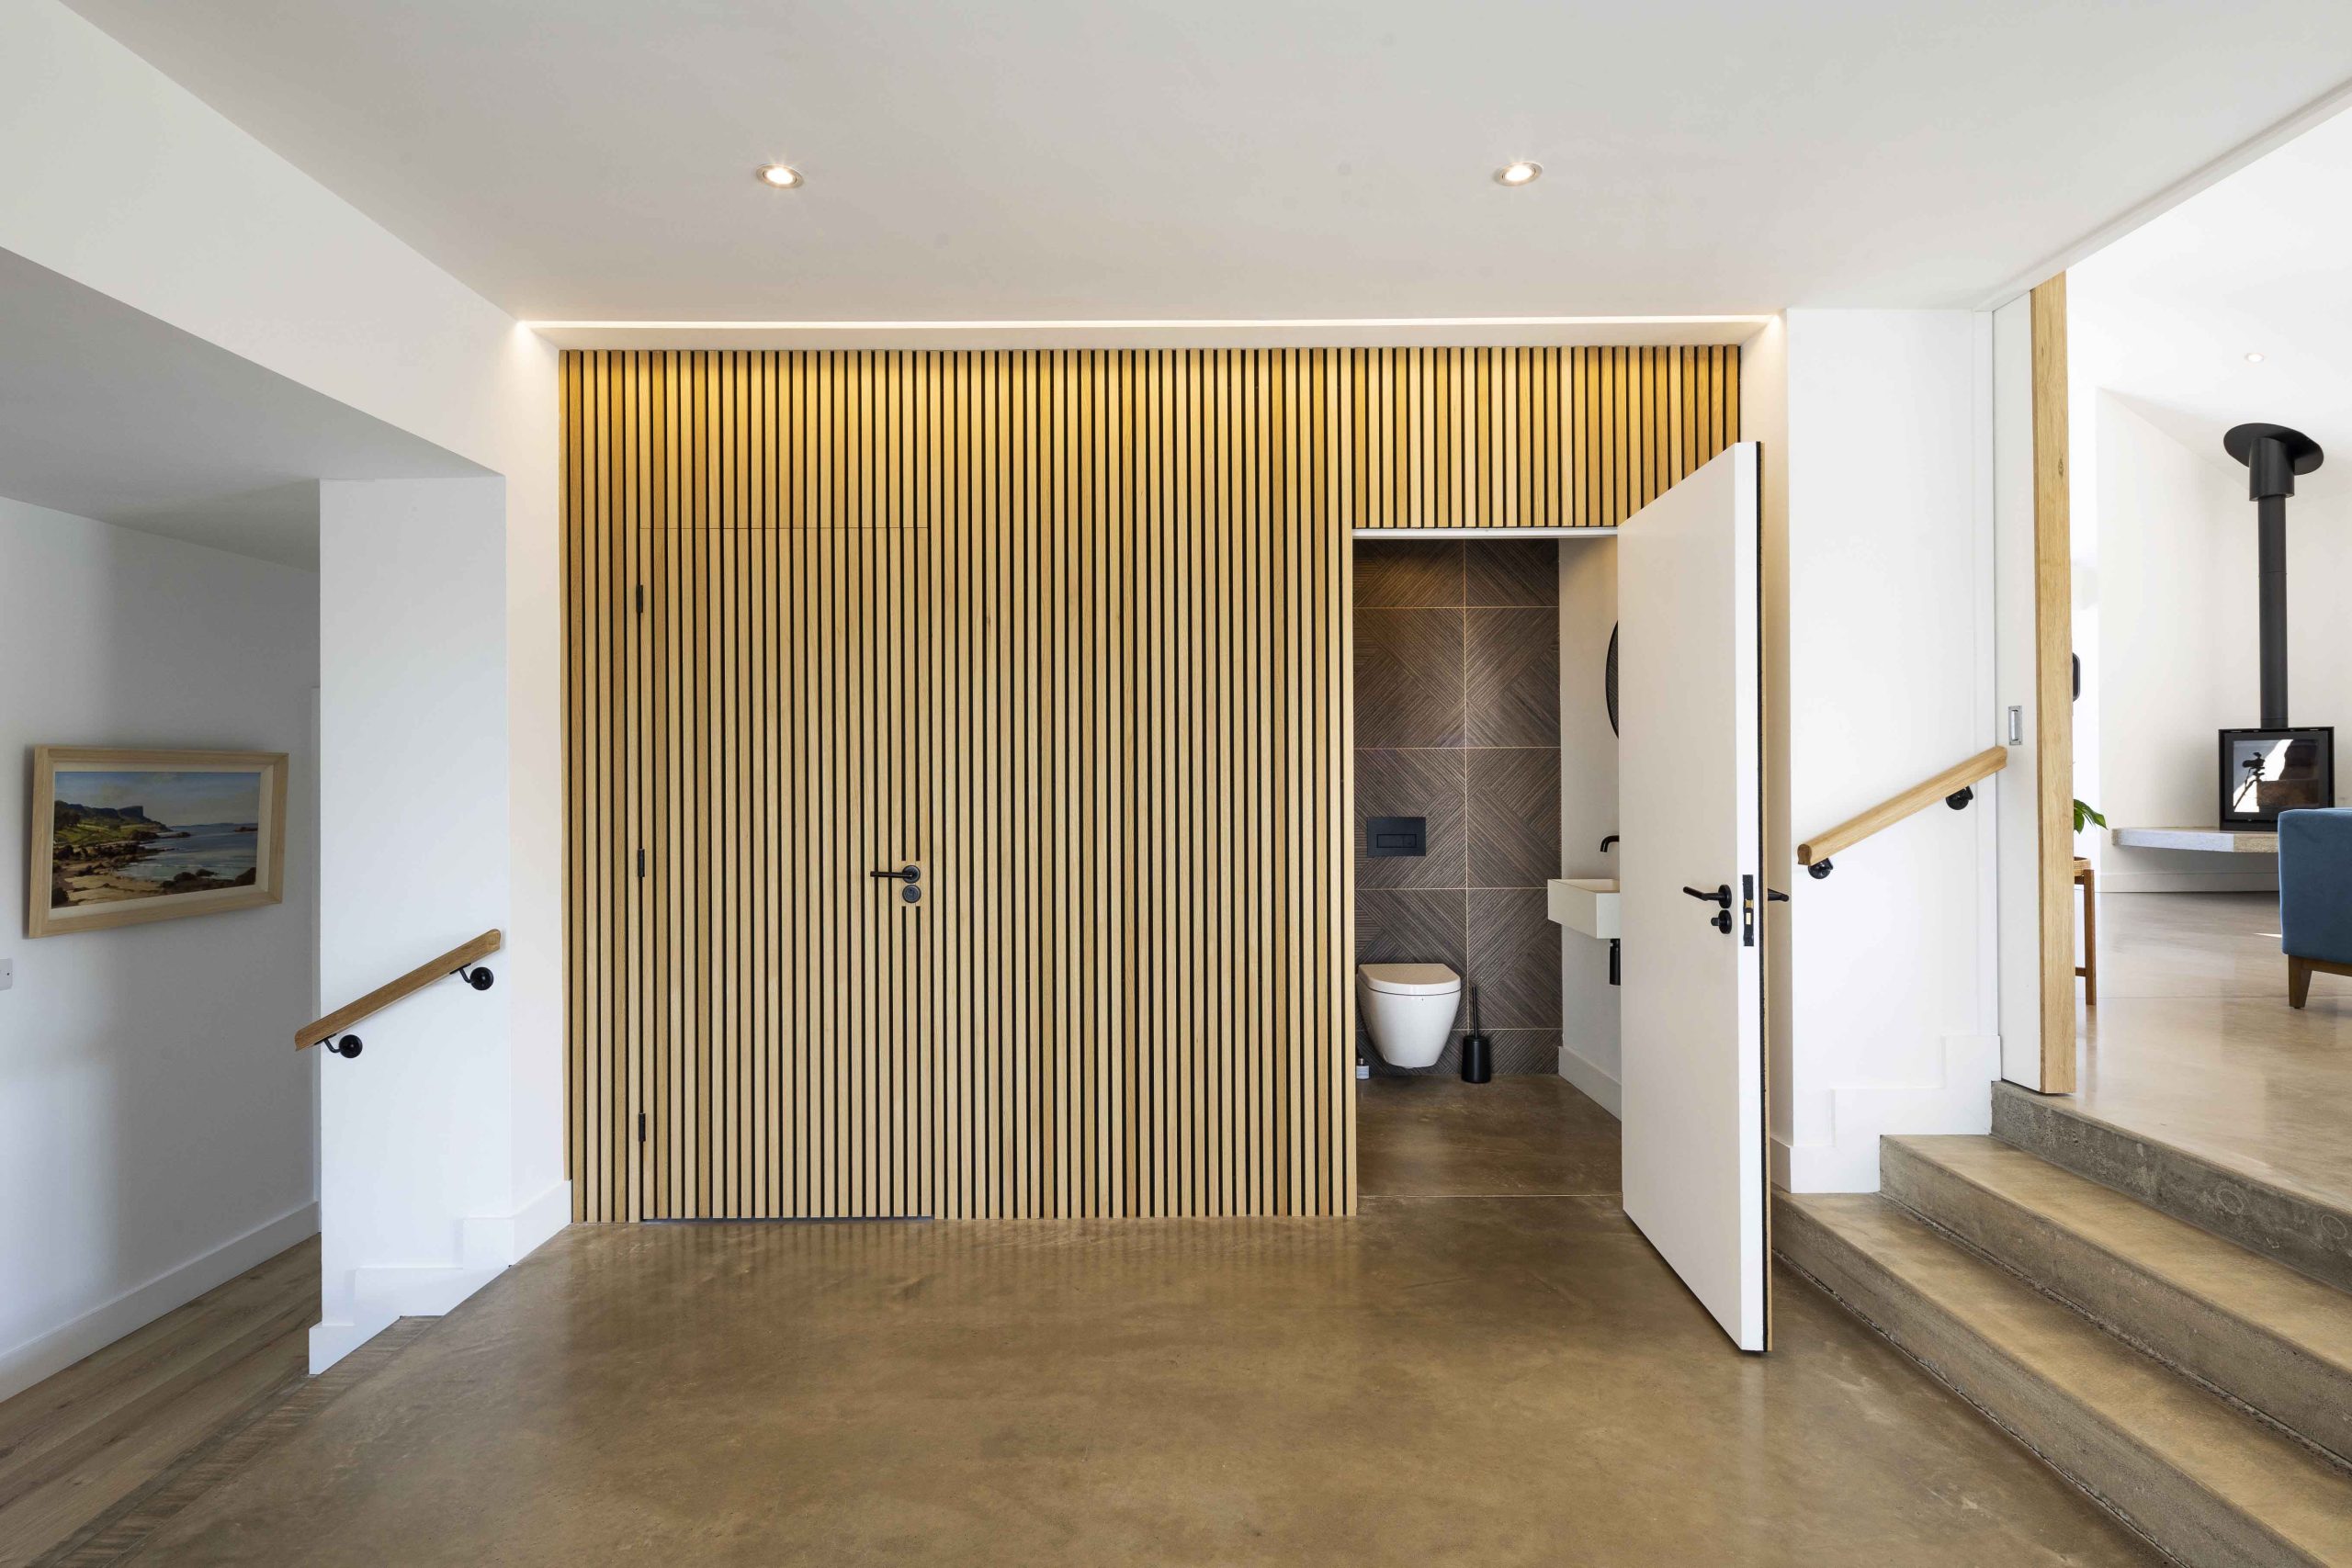
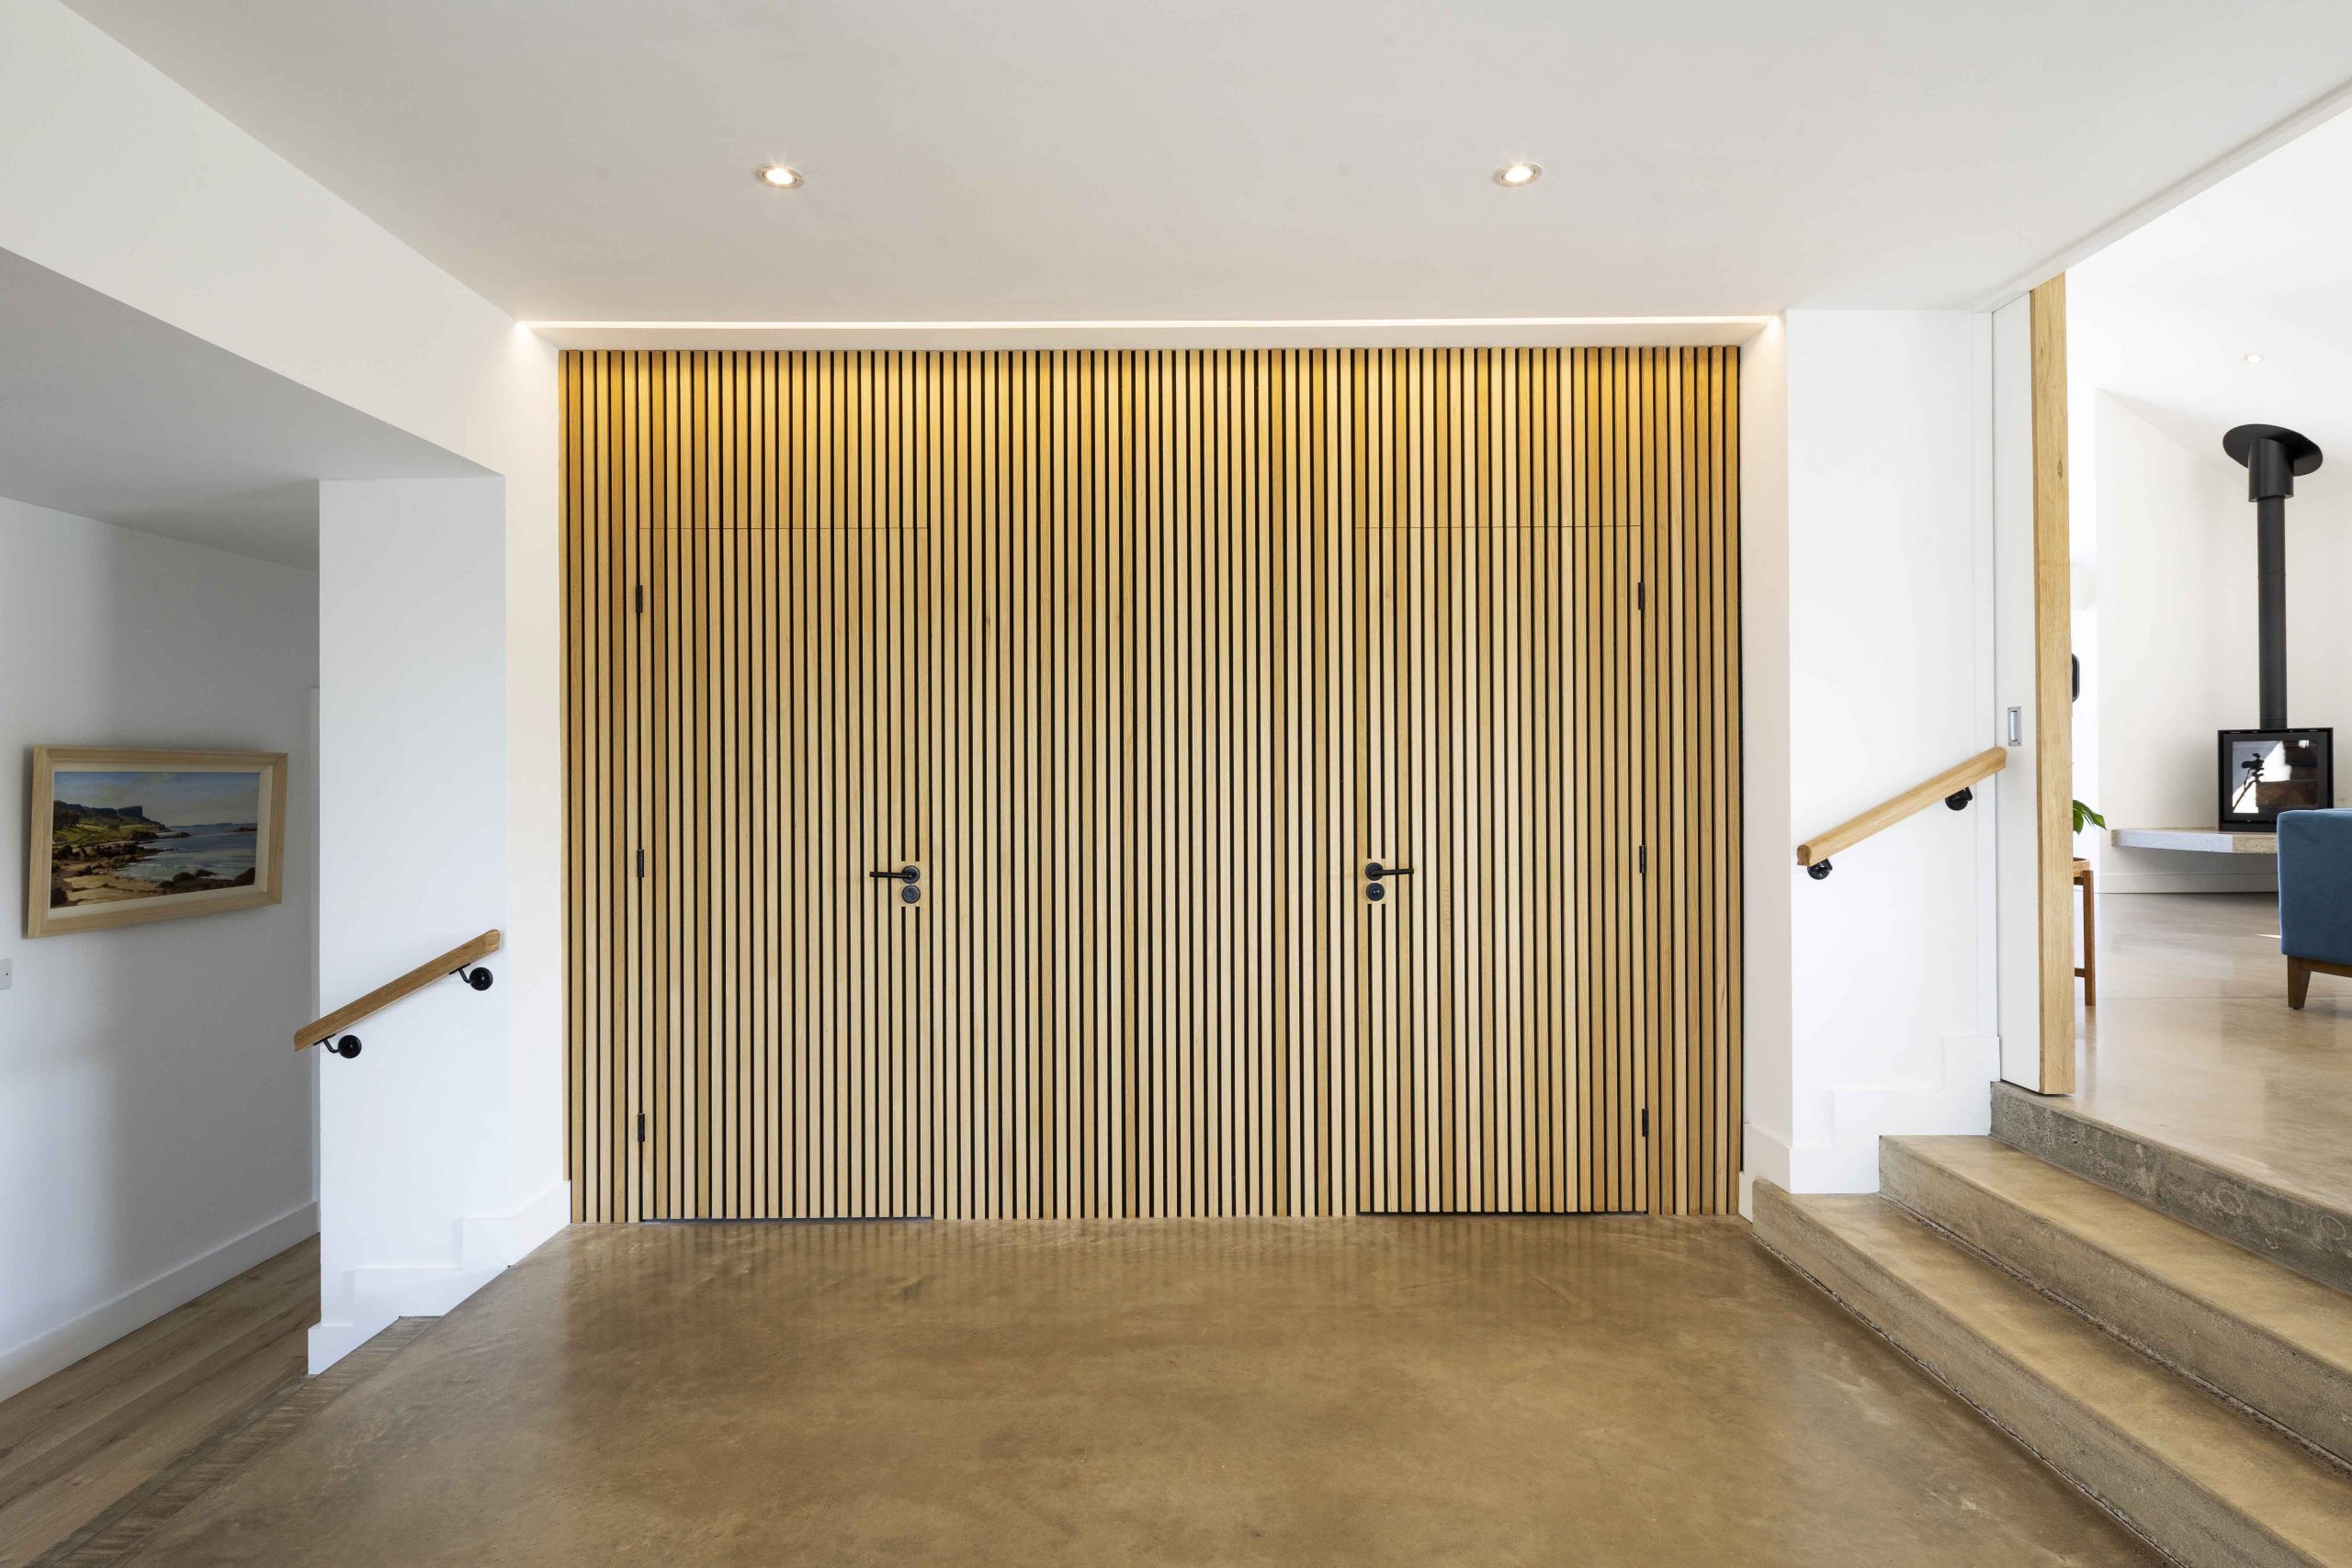
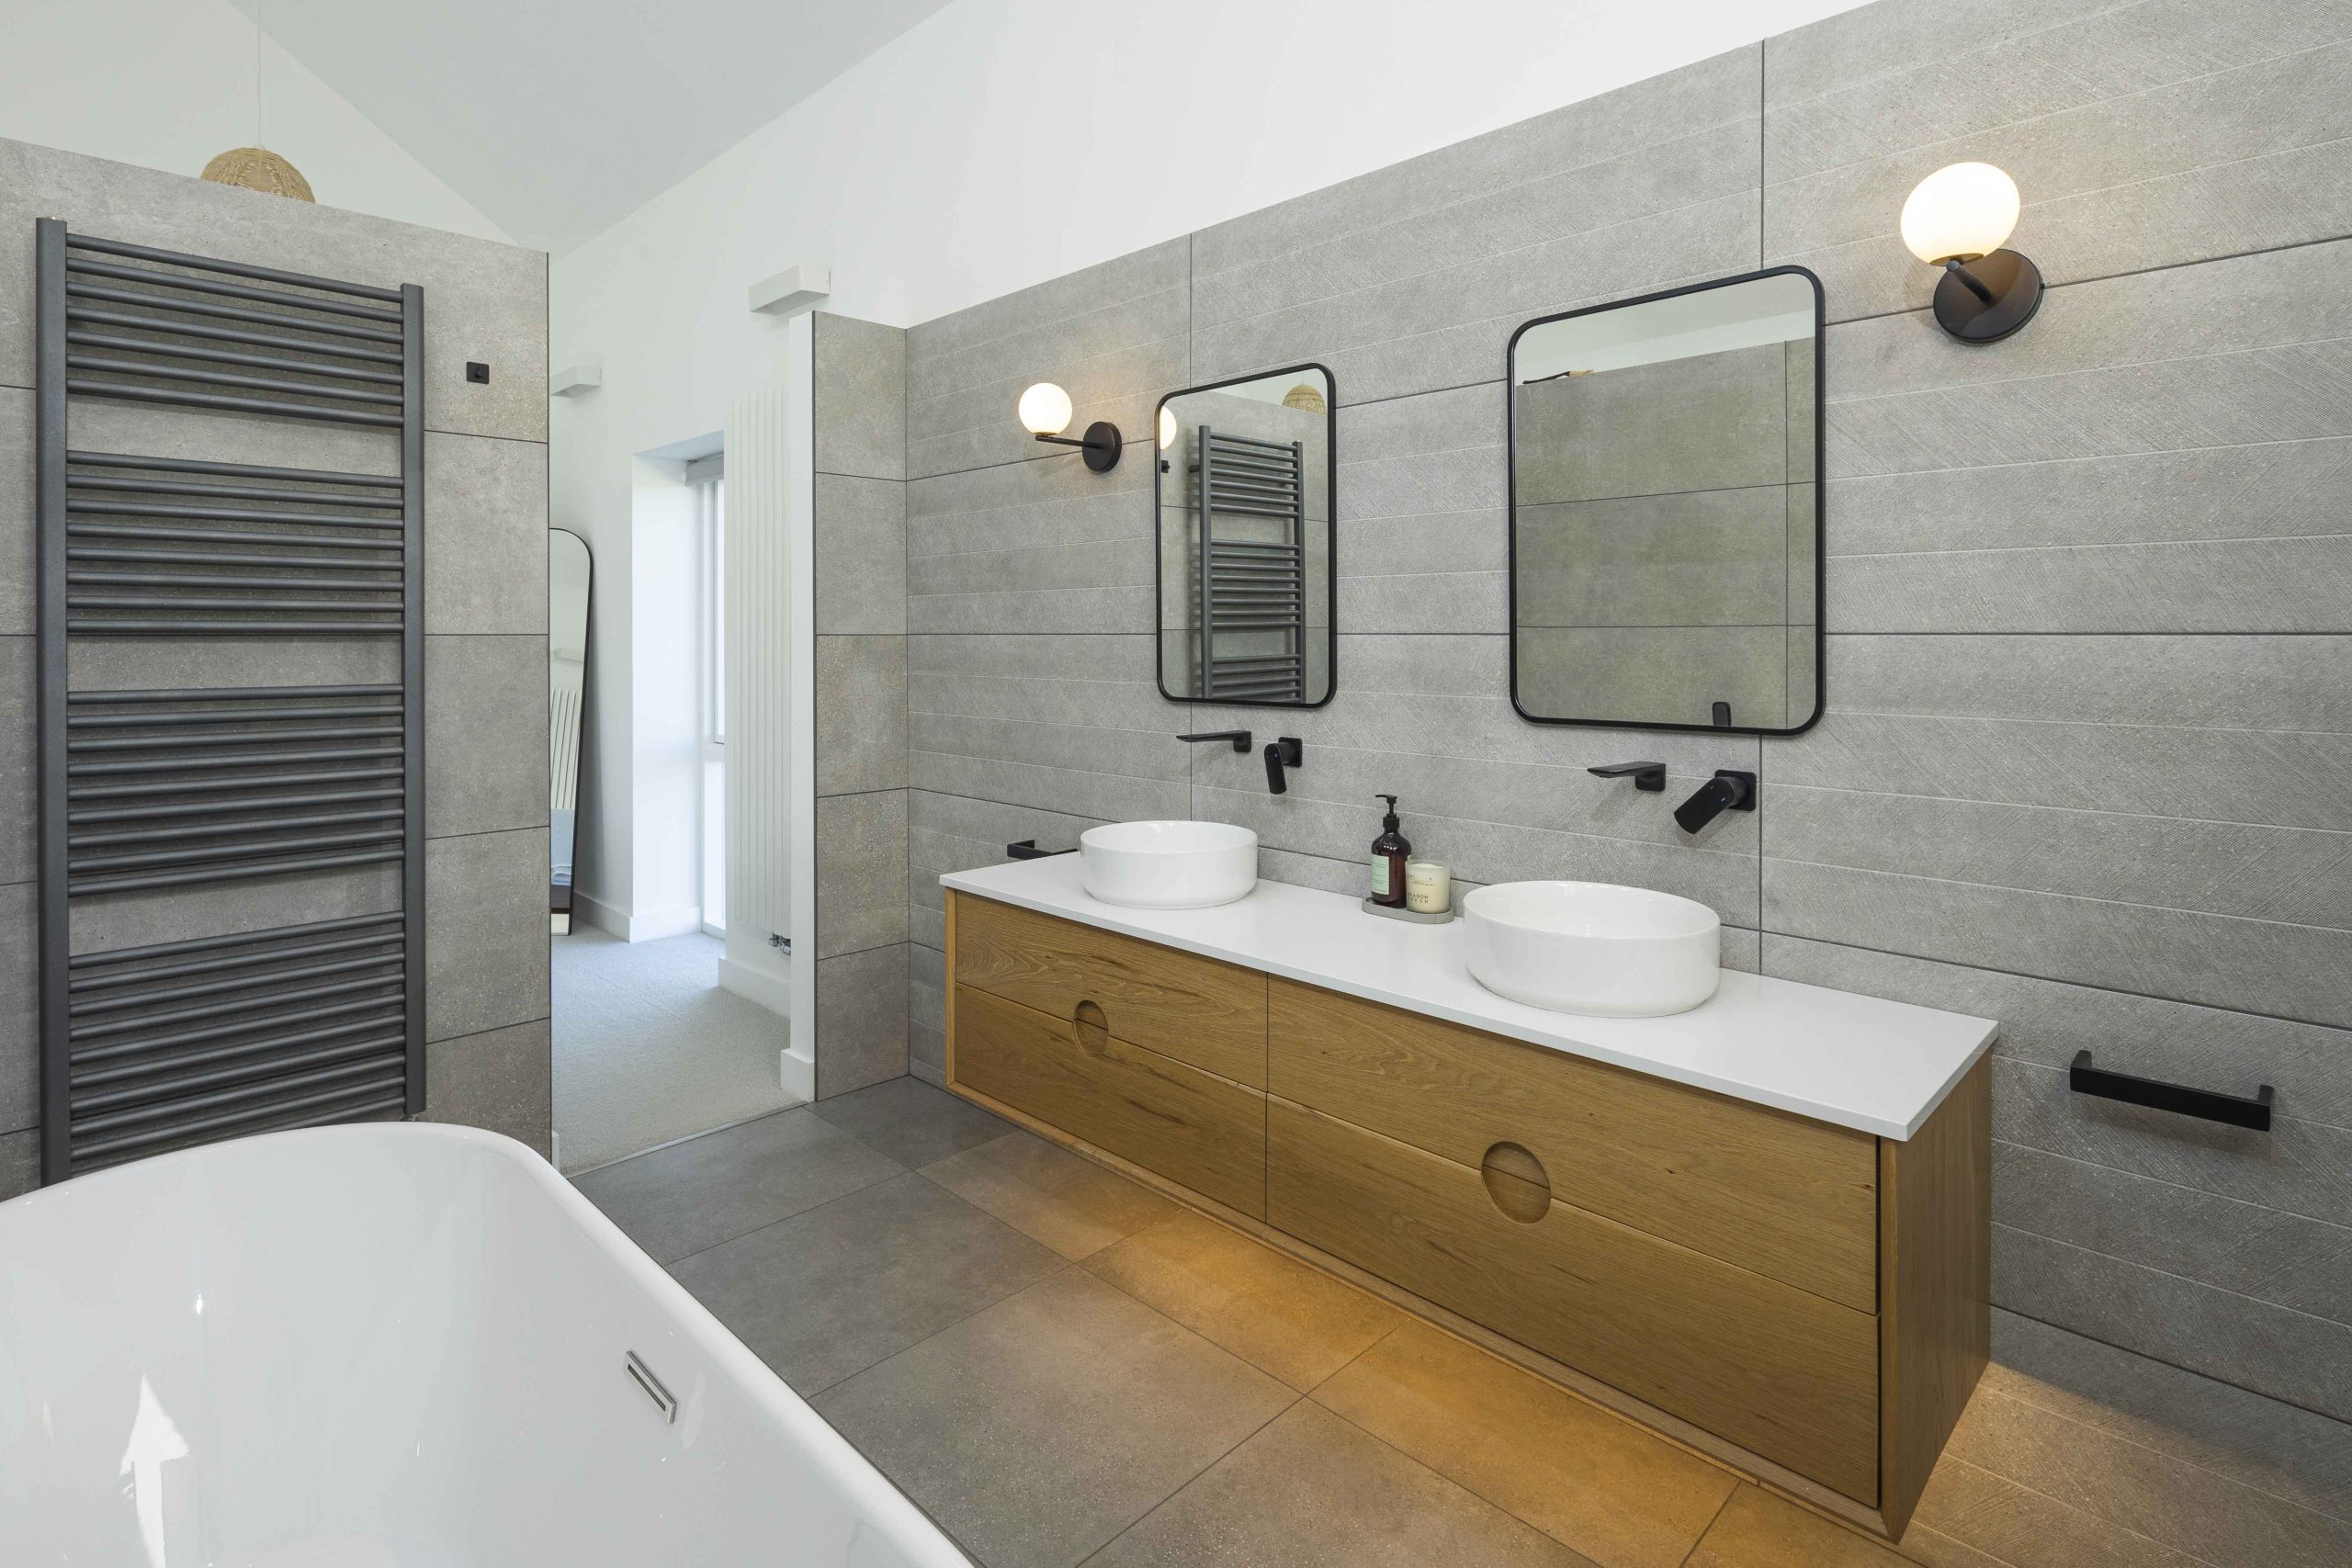
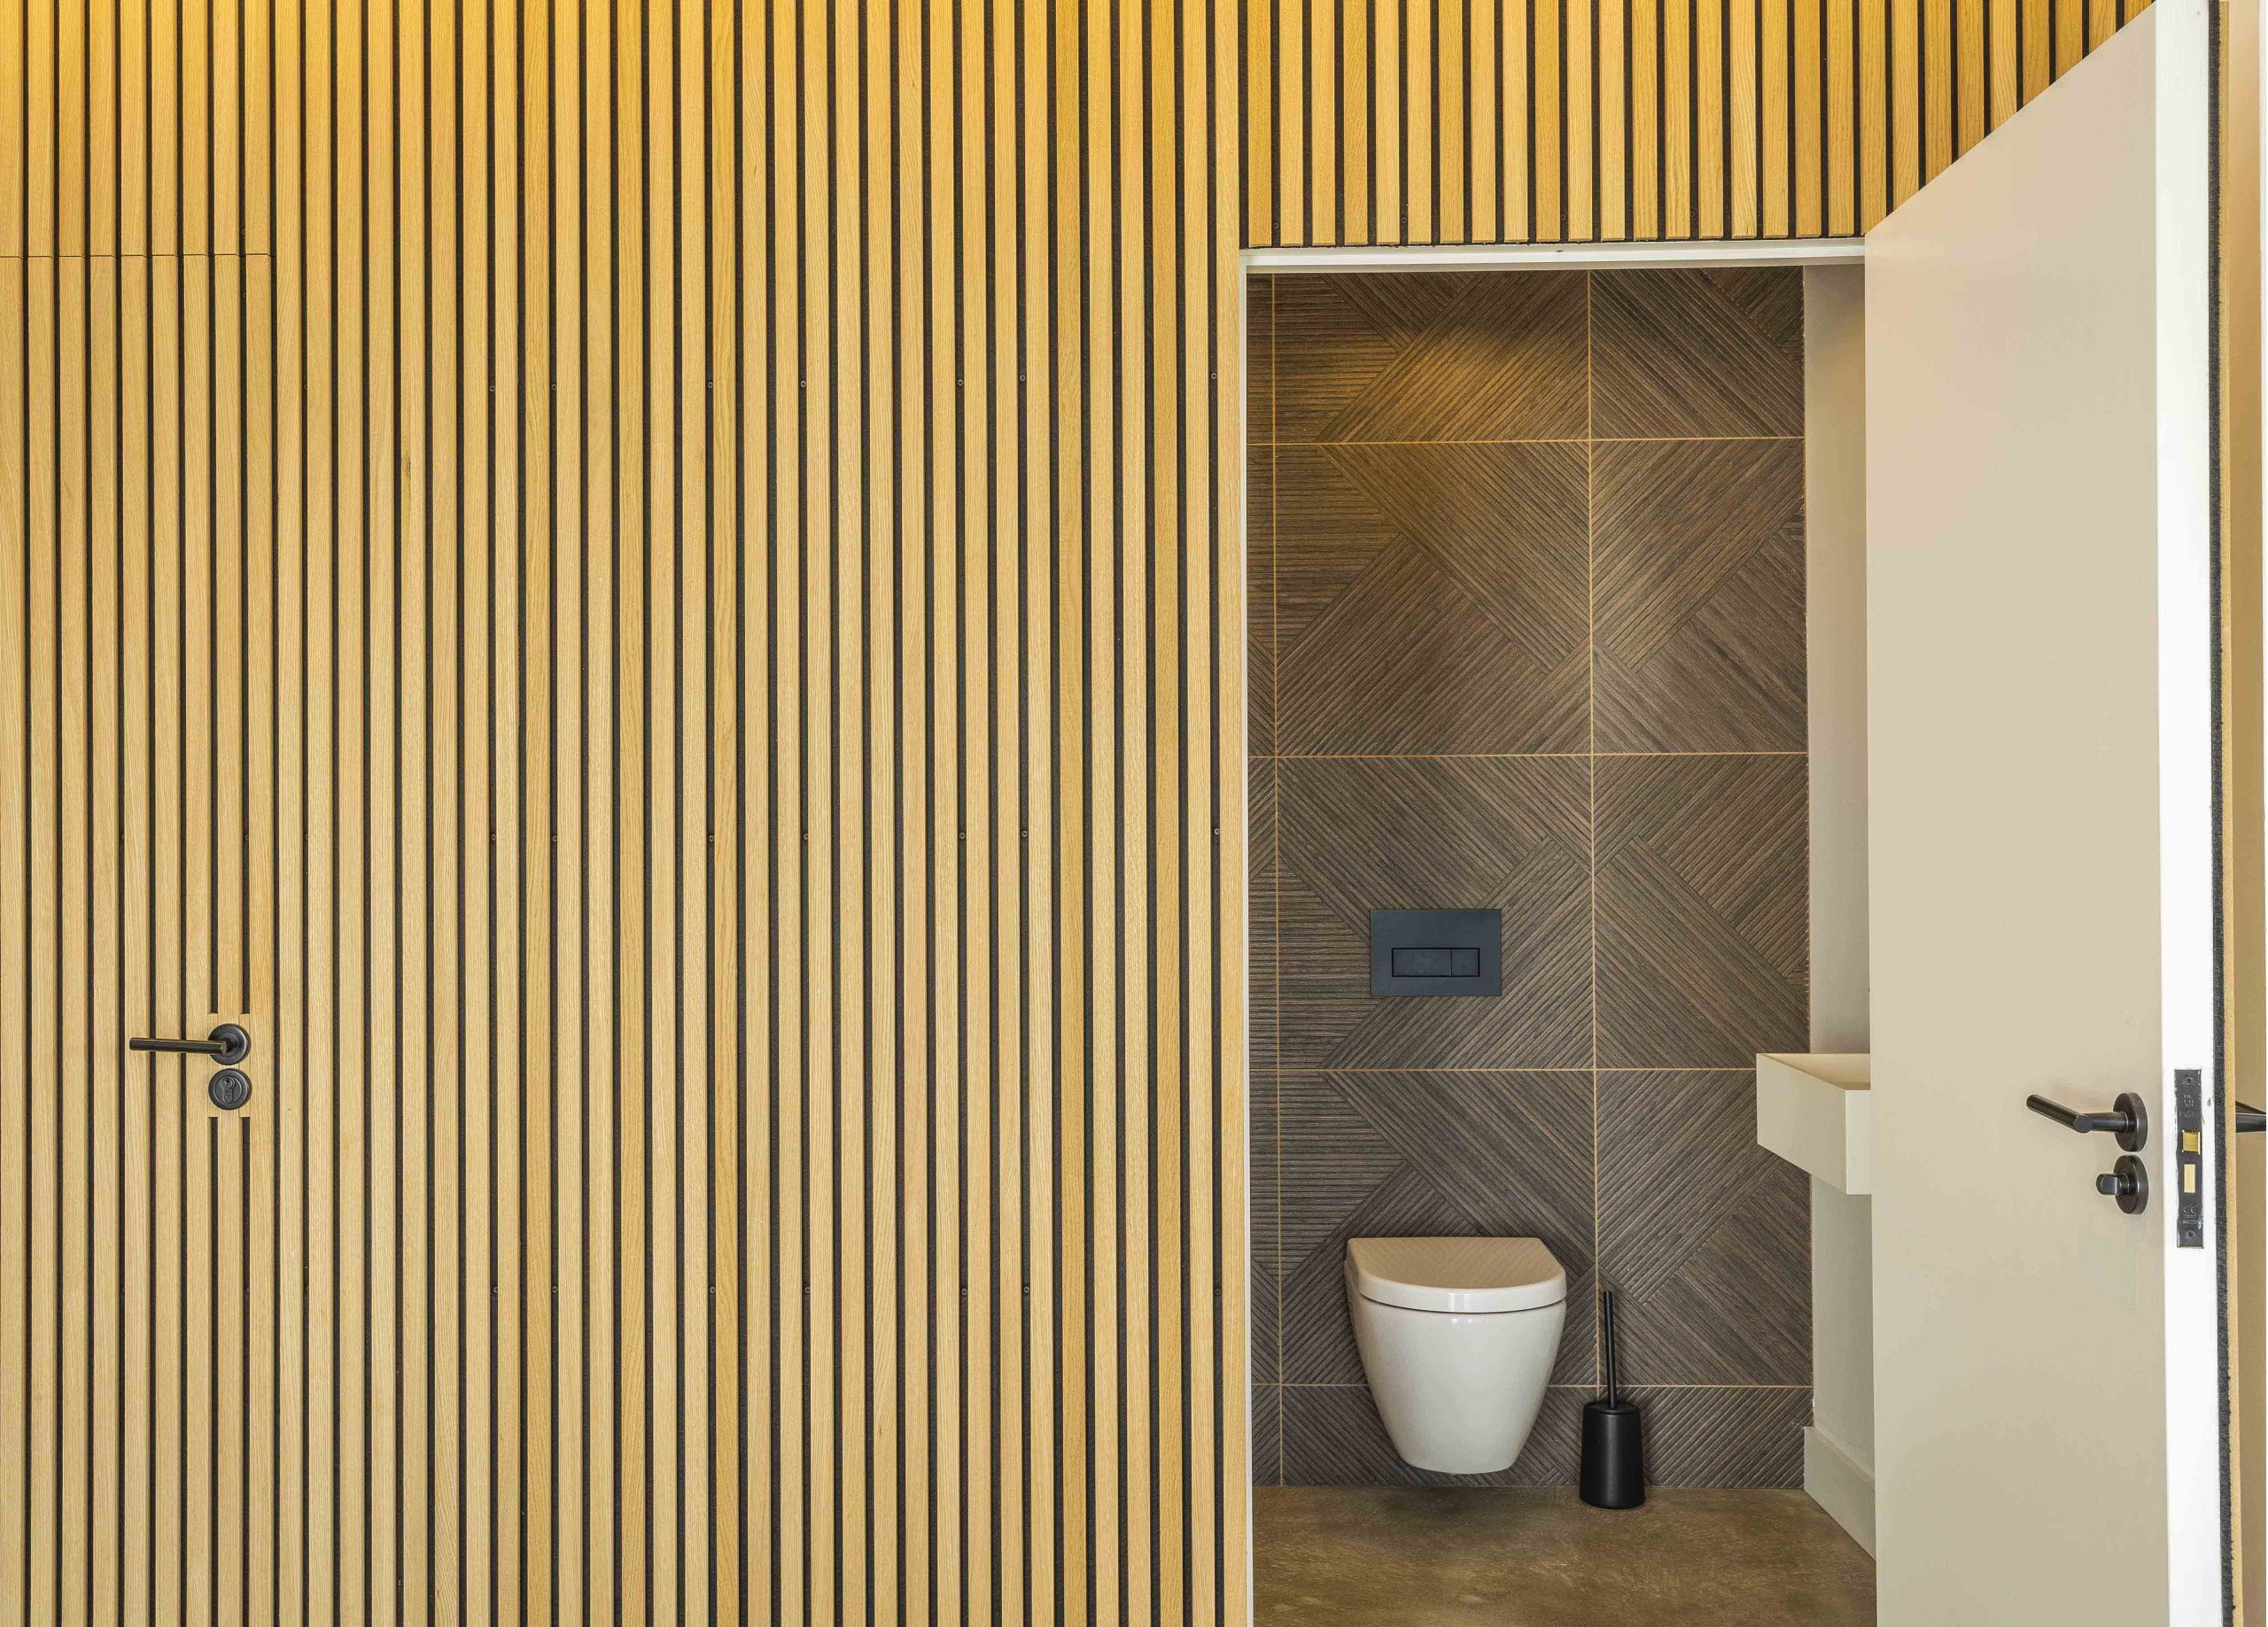
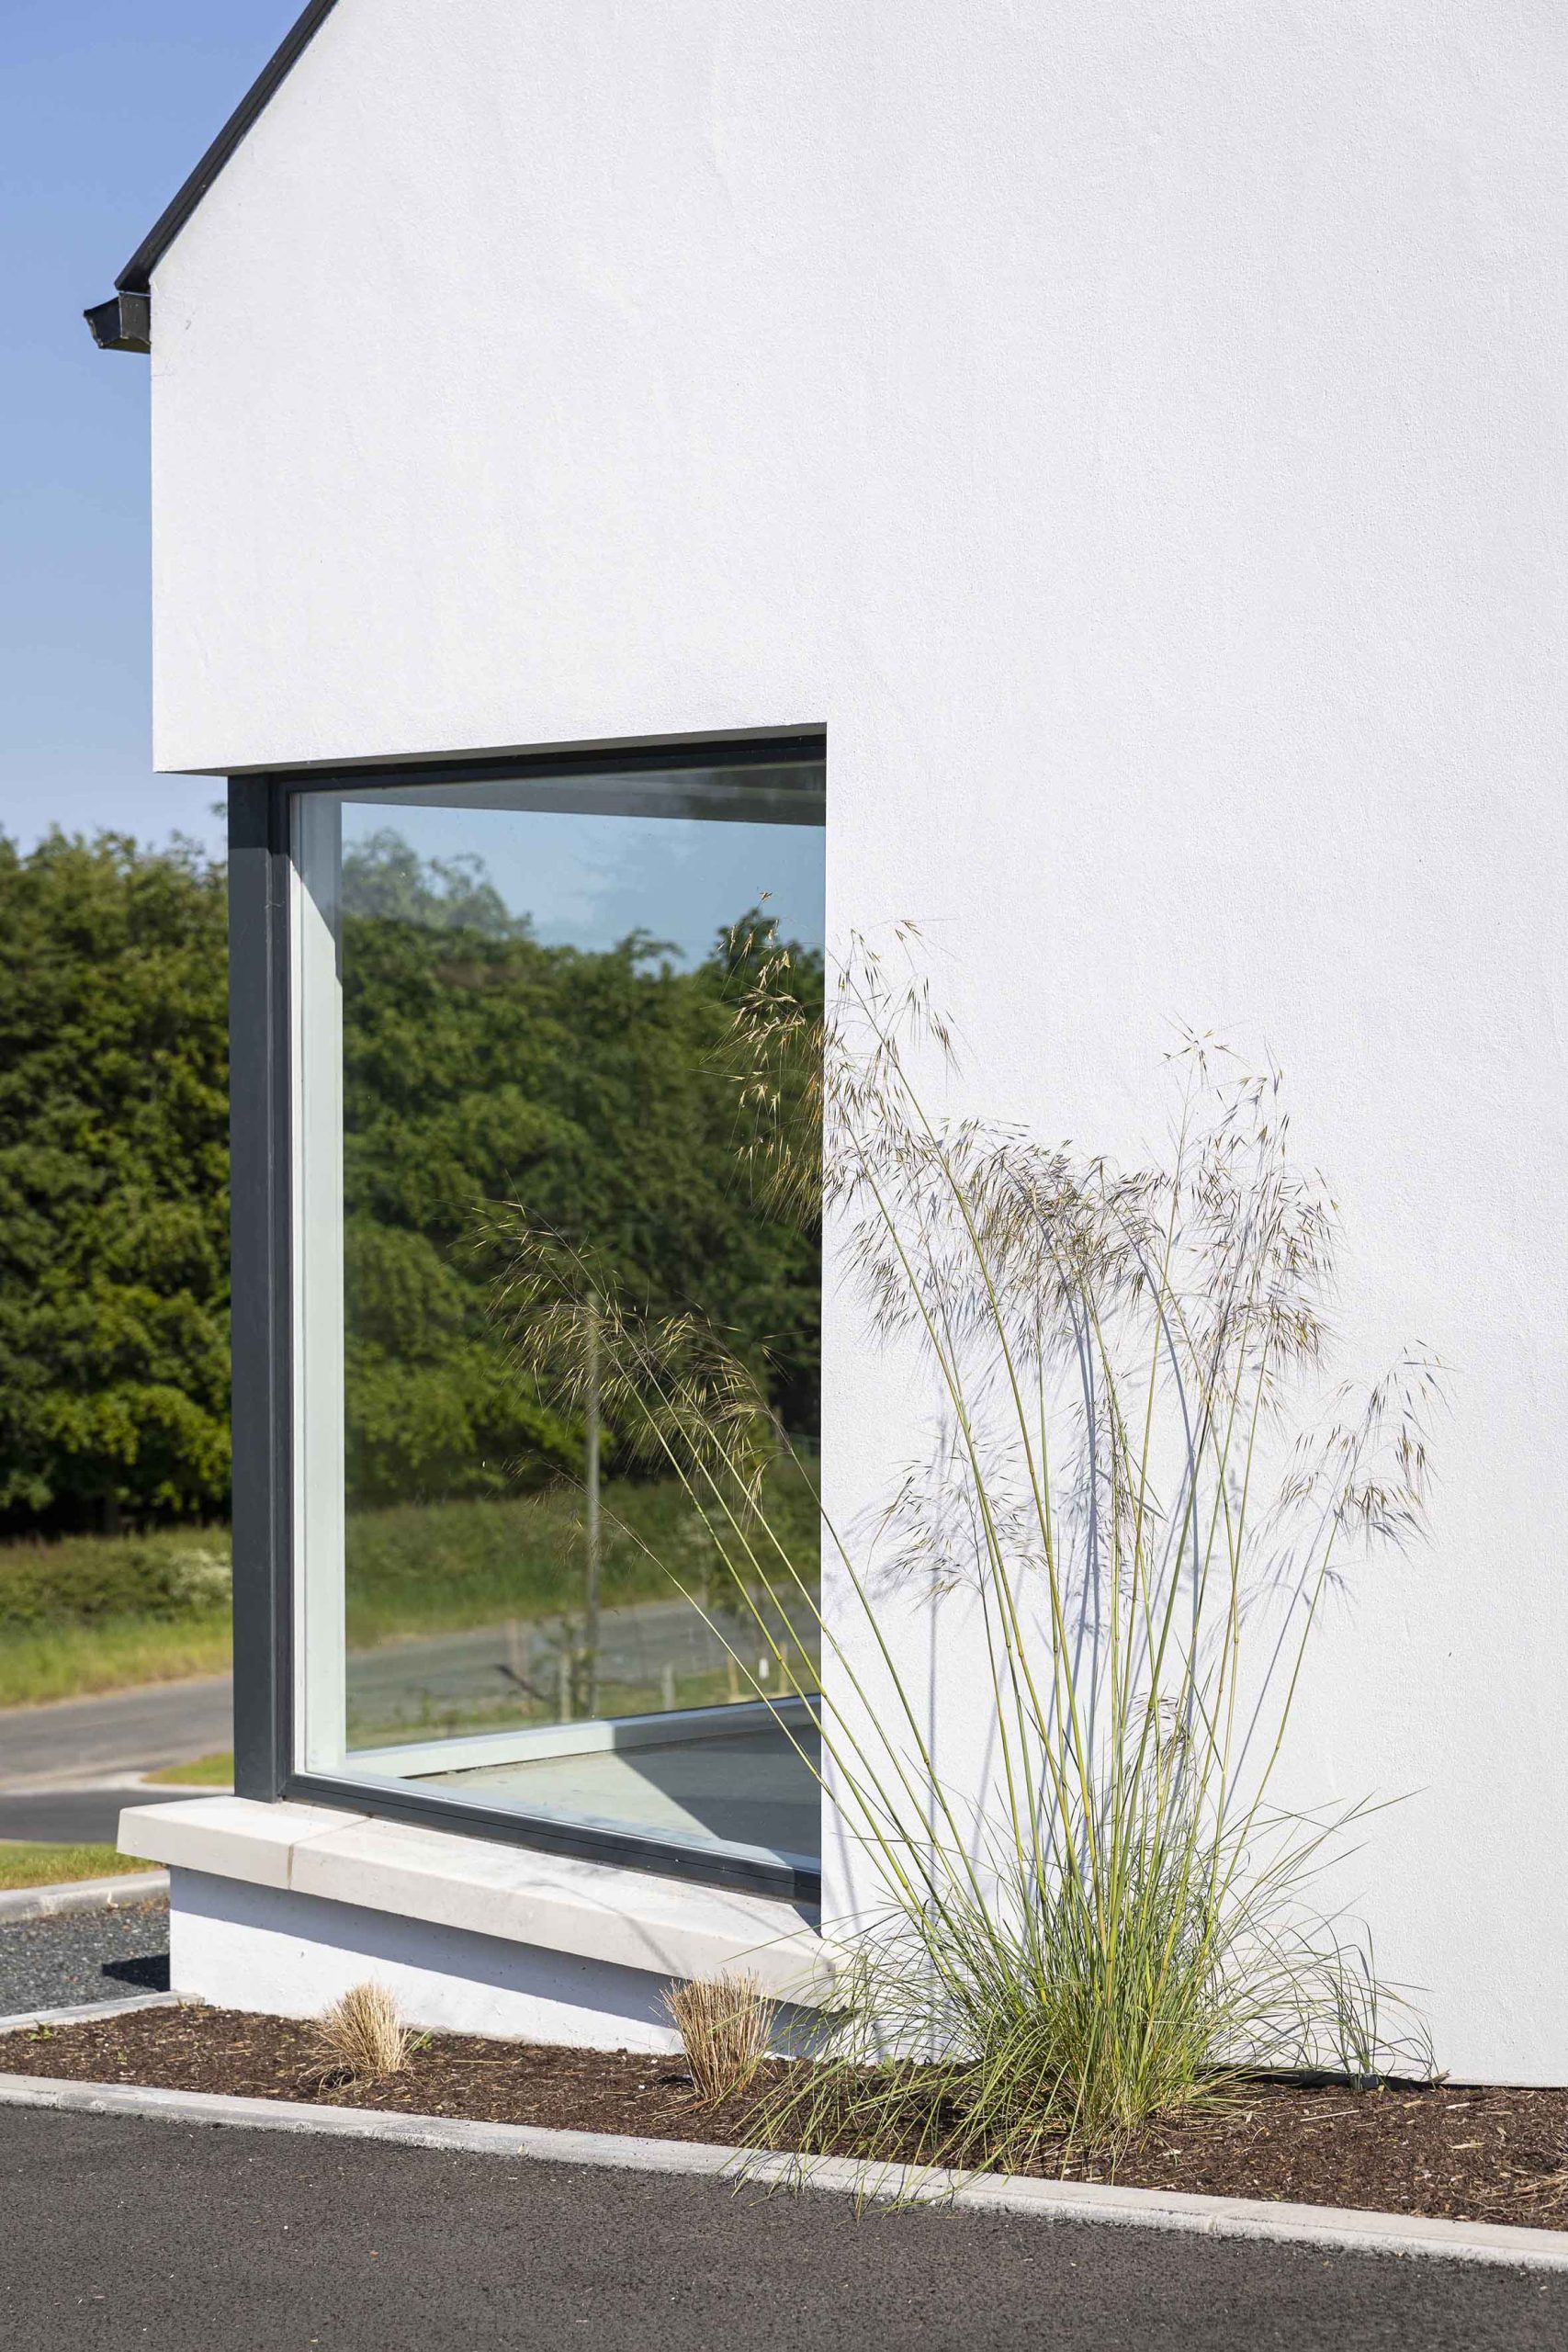
Describing the couple’s interior style direction as “warm meets minimalistic” Katie says: “From the start, we were adamant that we wanted polished concrete flooring which set the tone for the rest of the house. We also bought our kitchen and bathrooms quite early on, so we just hoped we would still like them when they were in the house. Not knowing what anything would look like in reality was the most difficult part.”
“We picked things that we liked, made an online mood board and looked at social media self-build accounts. We had a neutral aesthetic and just followed it through, room by room.”
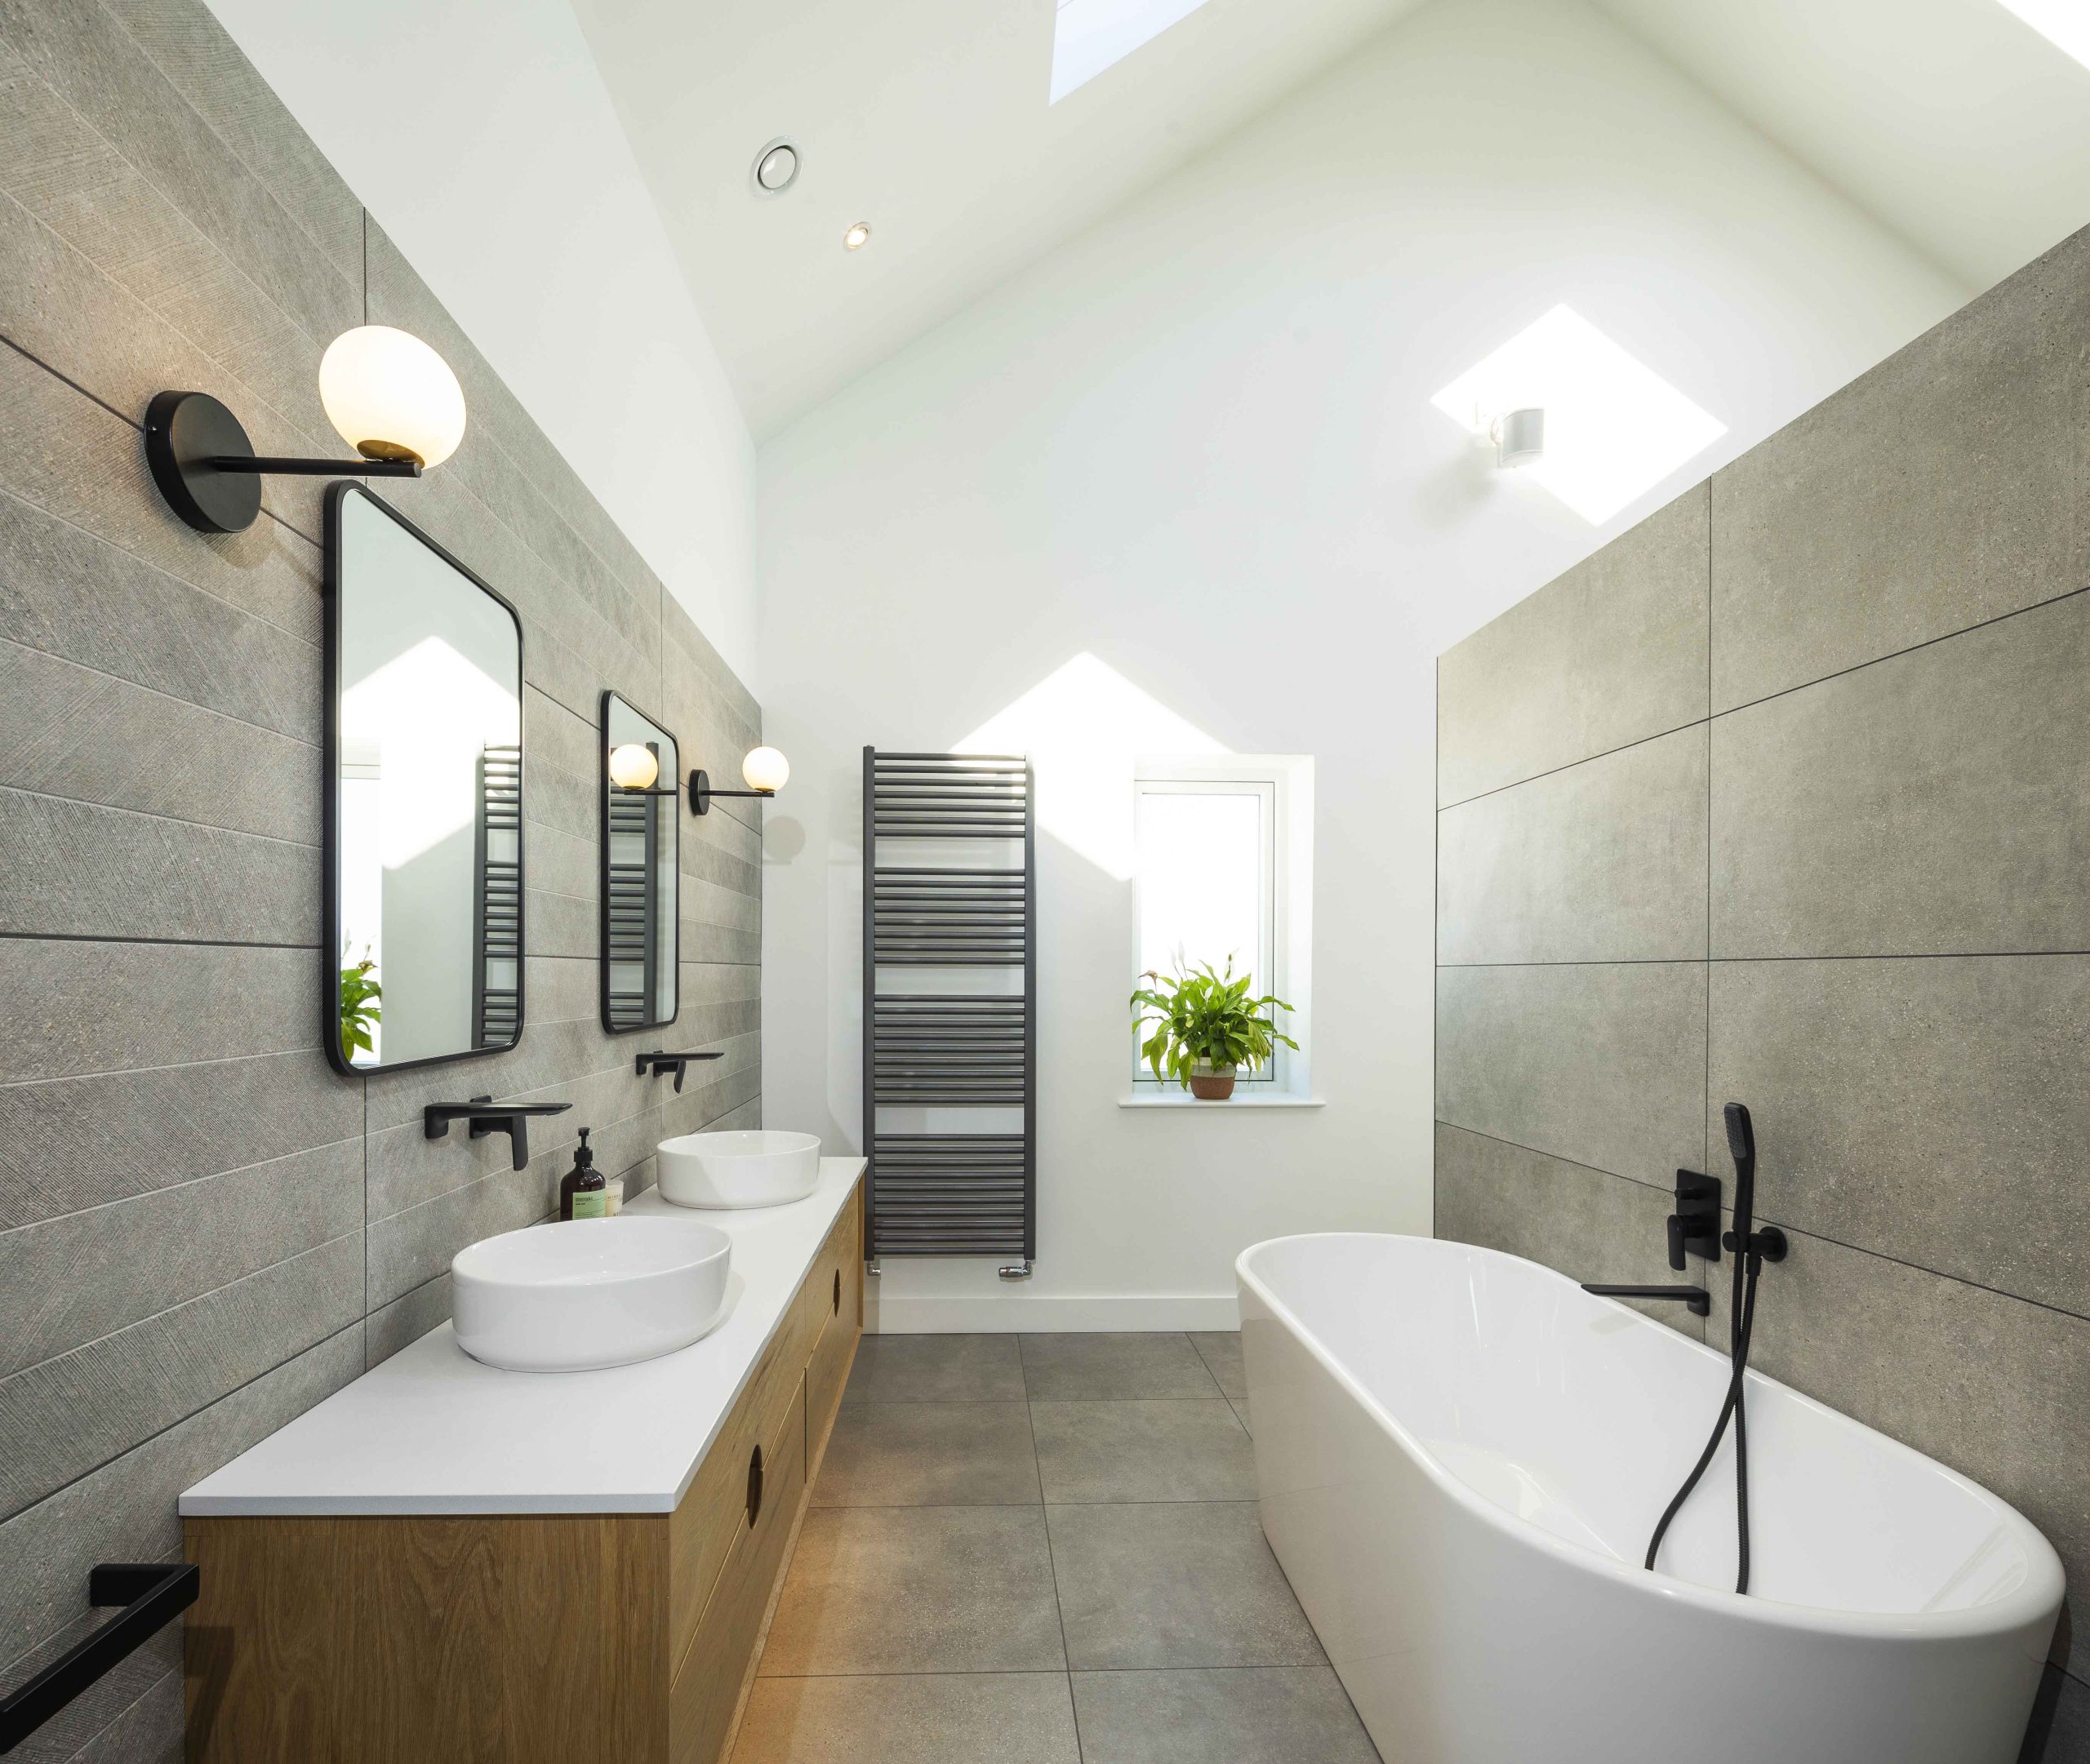
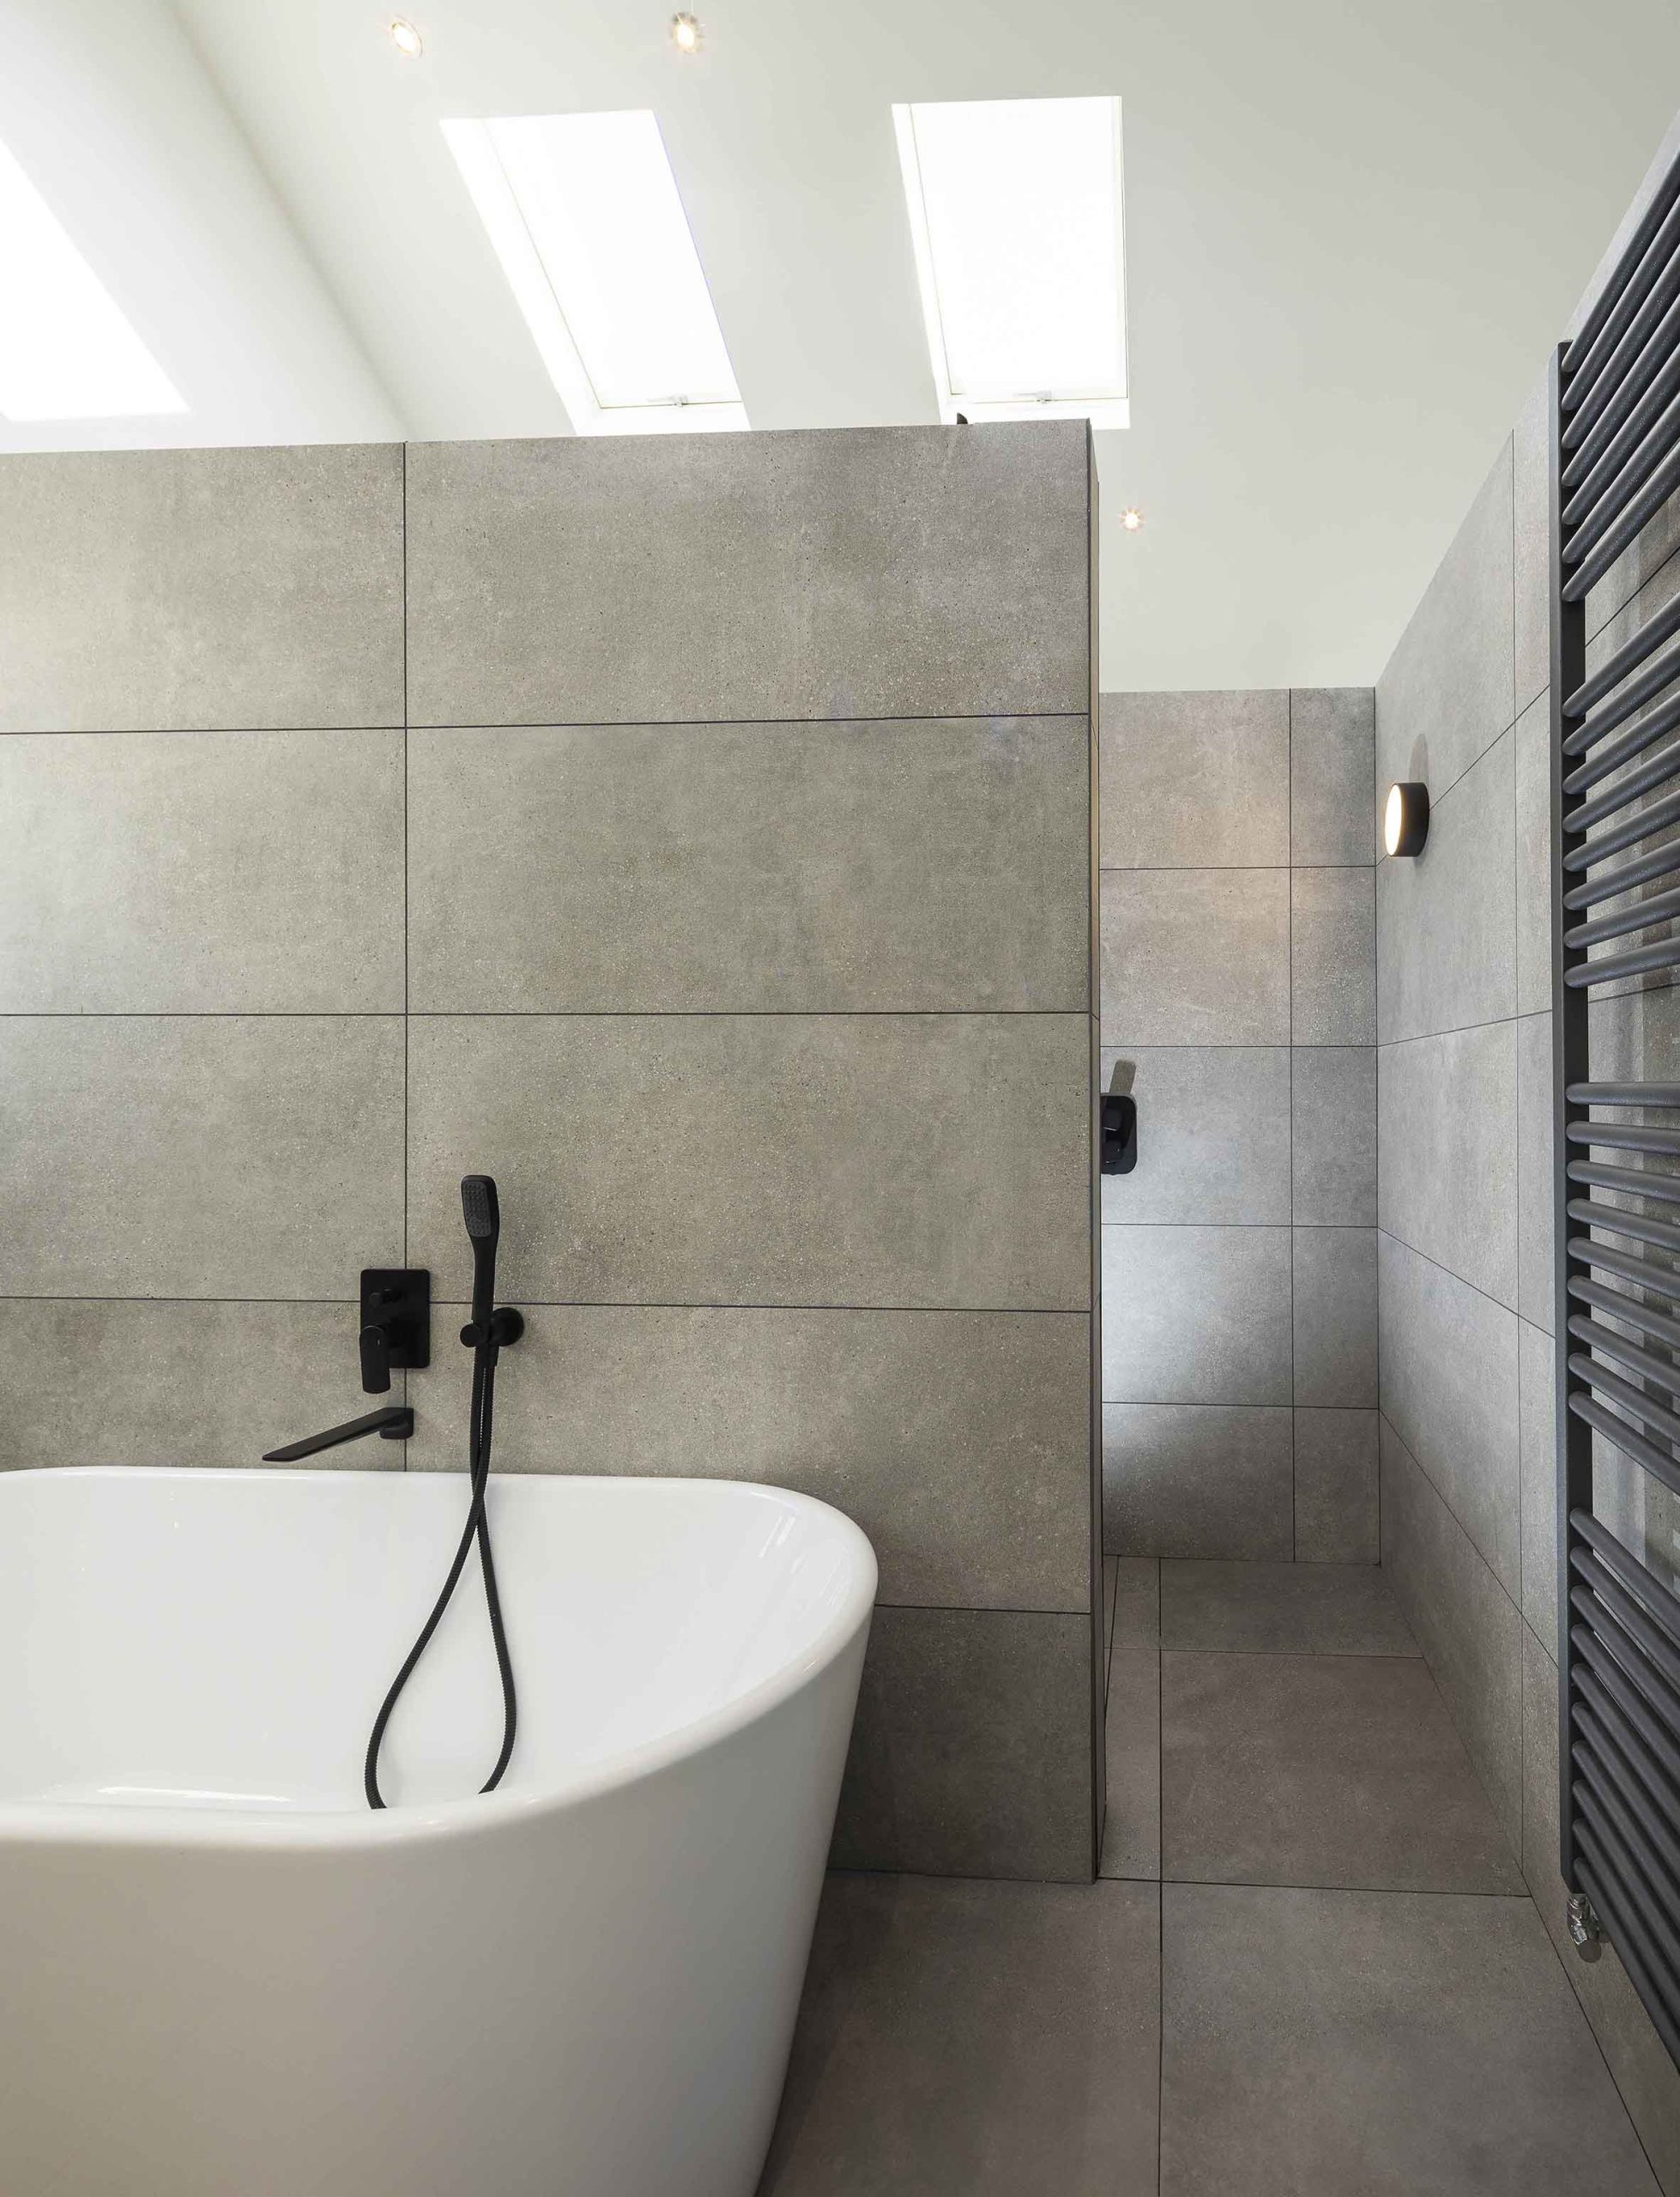
“We wanted things that were easy to clean and maintain, like large tiles in the bathrooms and a minimal shower screen – all of that reduced that amount of grout and glass to keep clean,” adds Stuart.
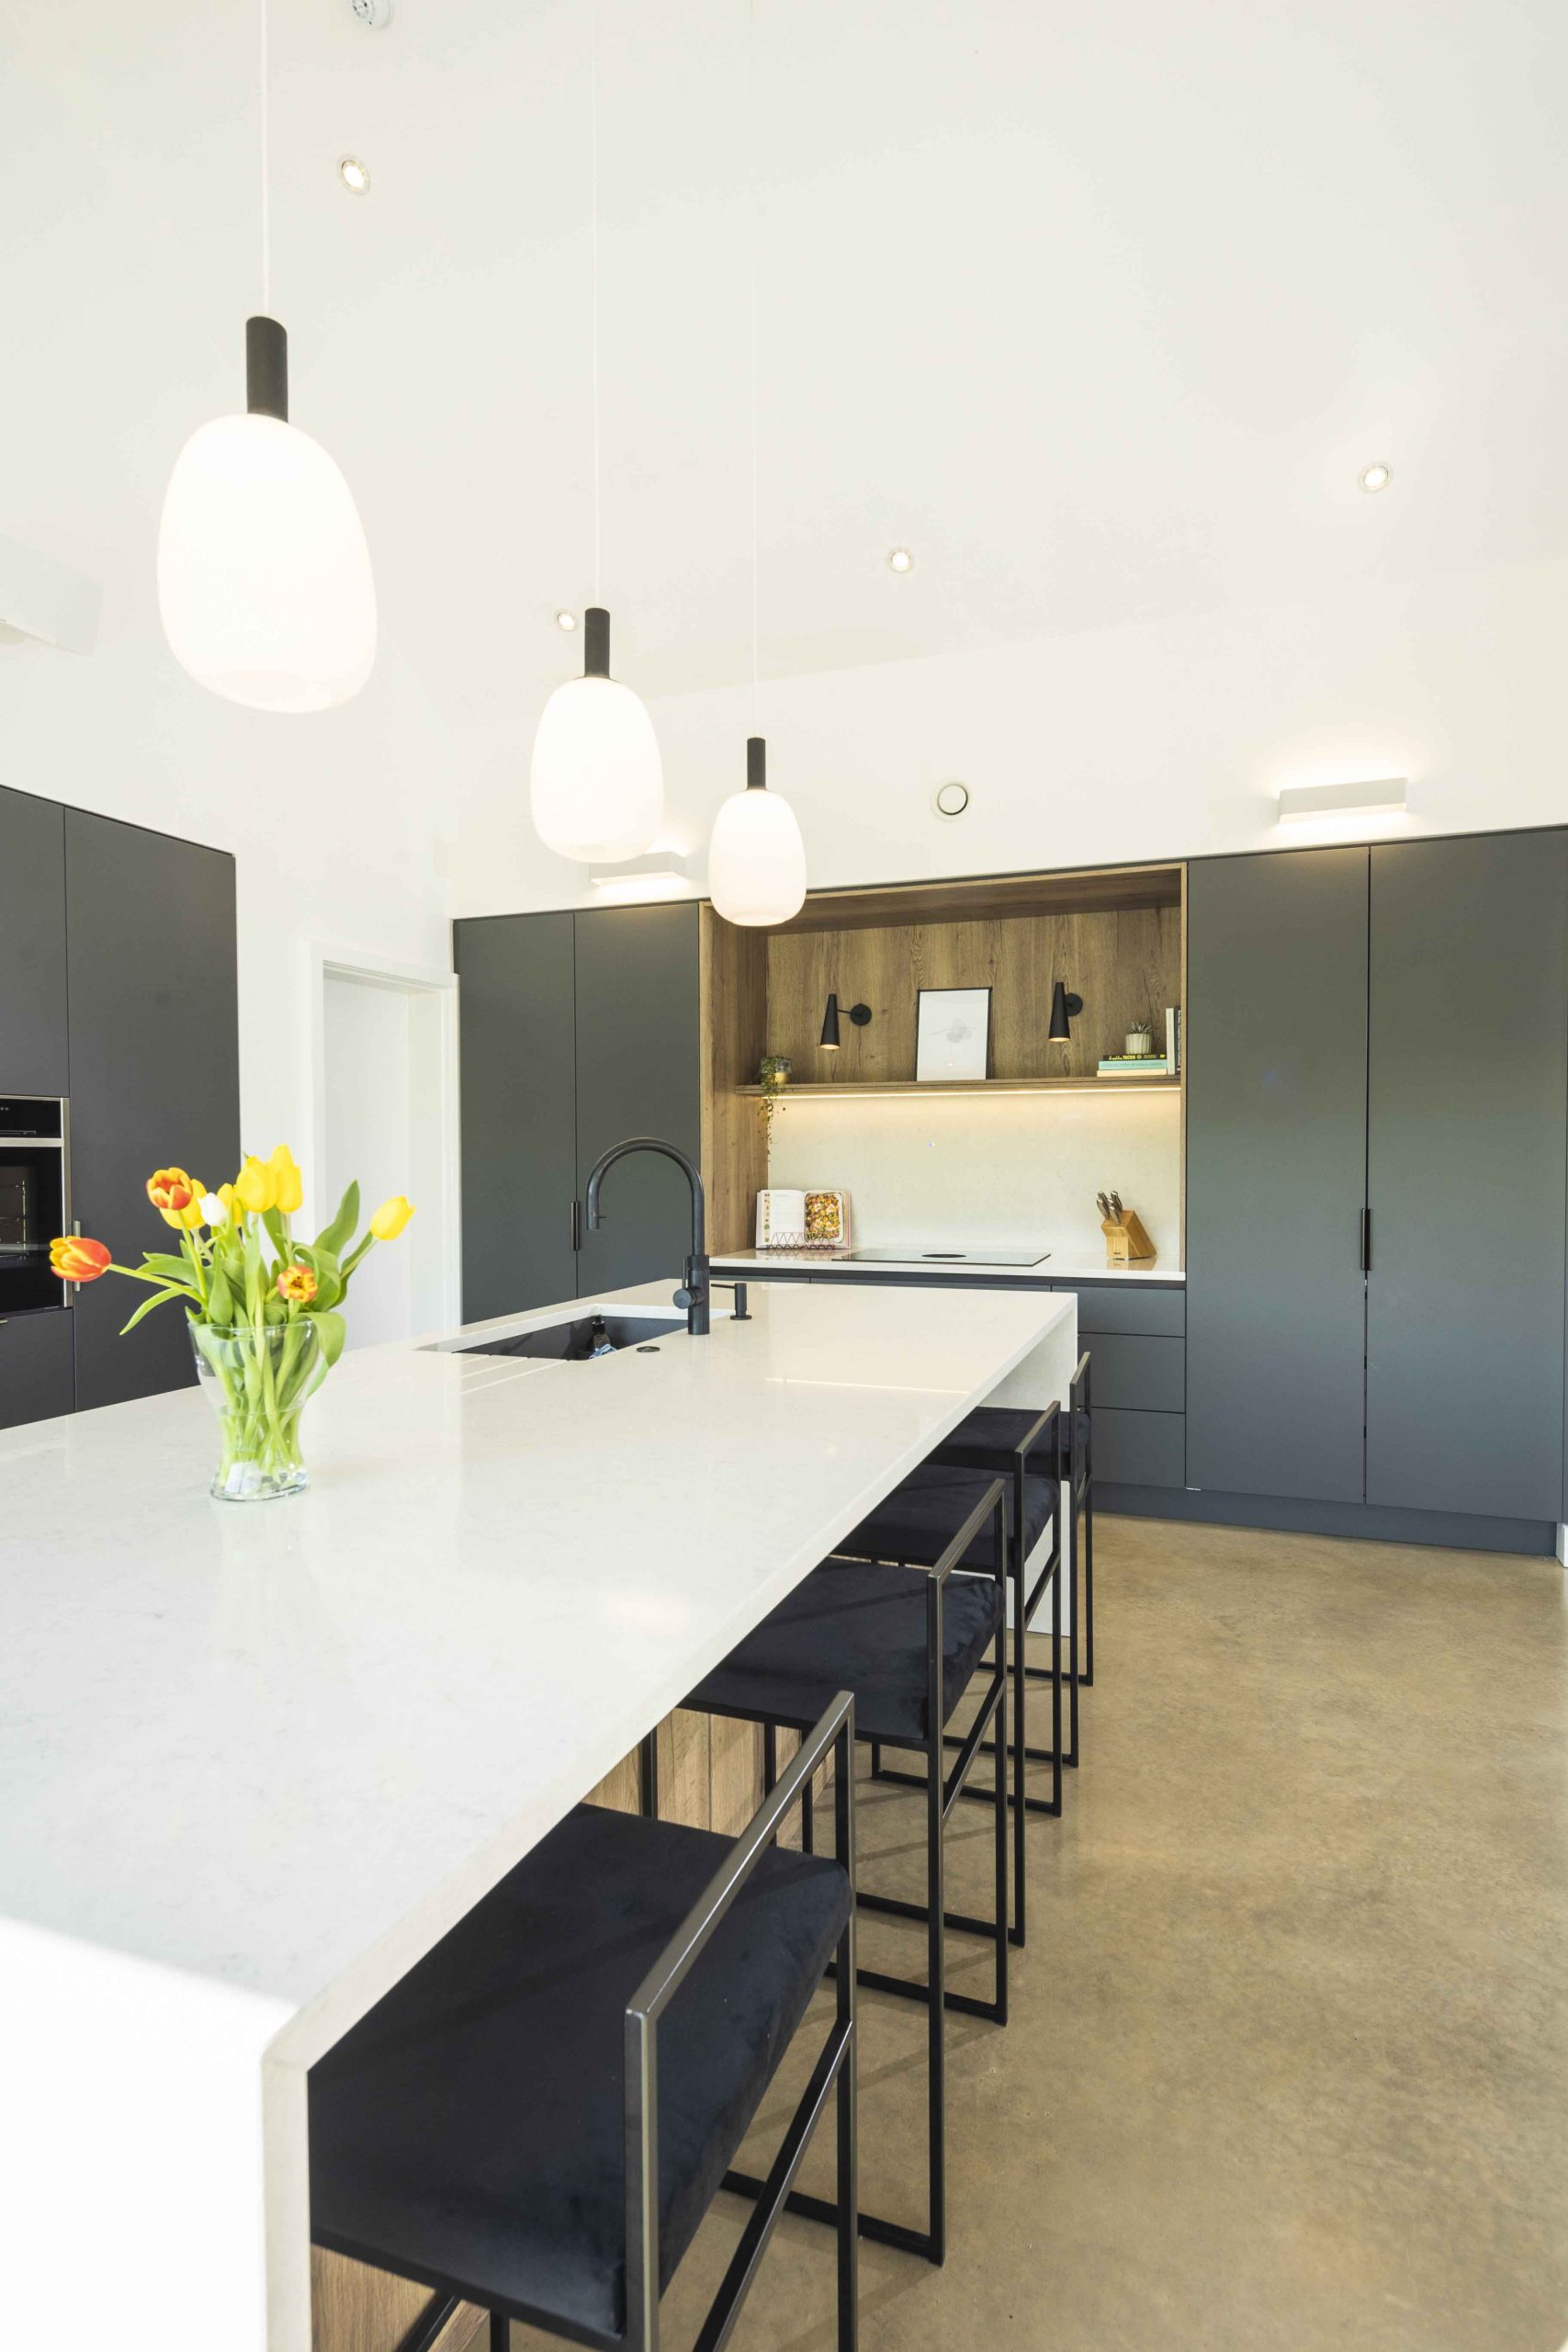
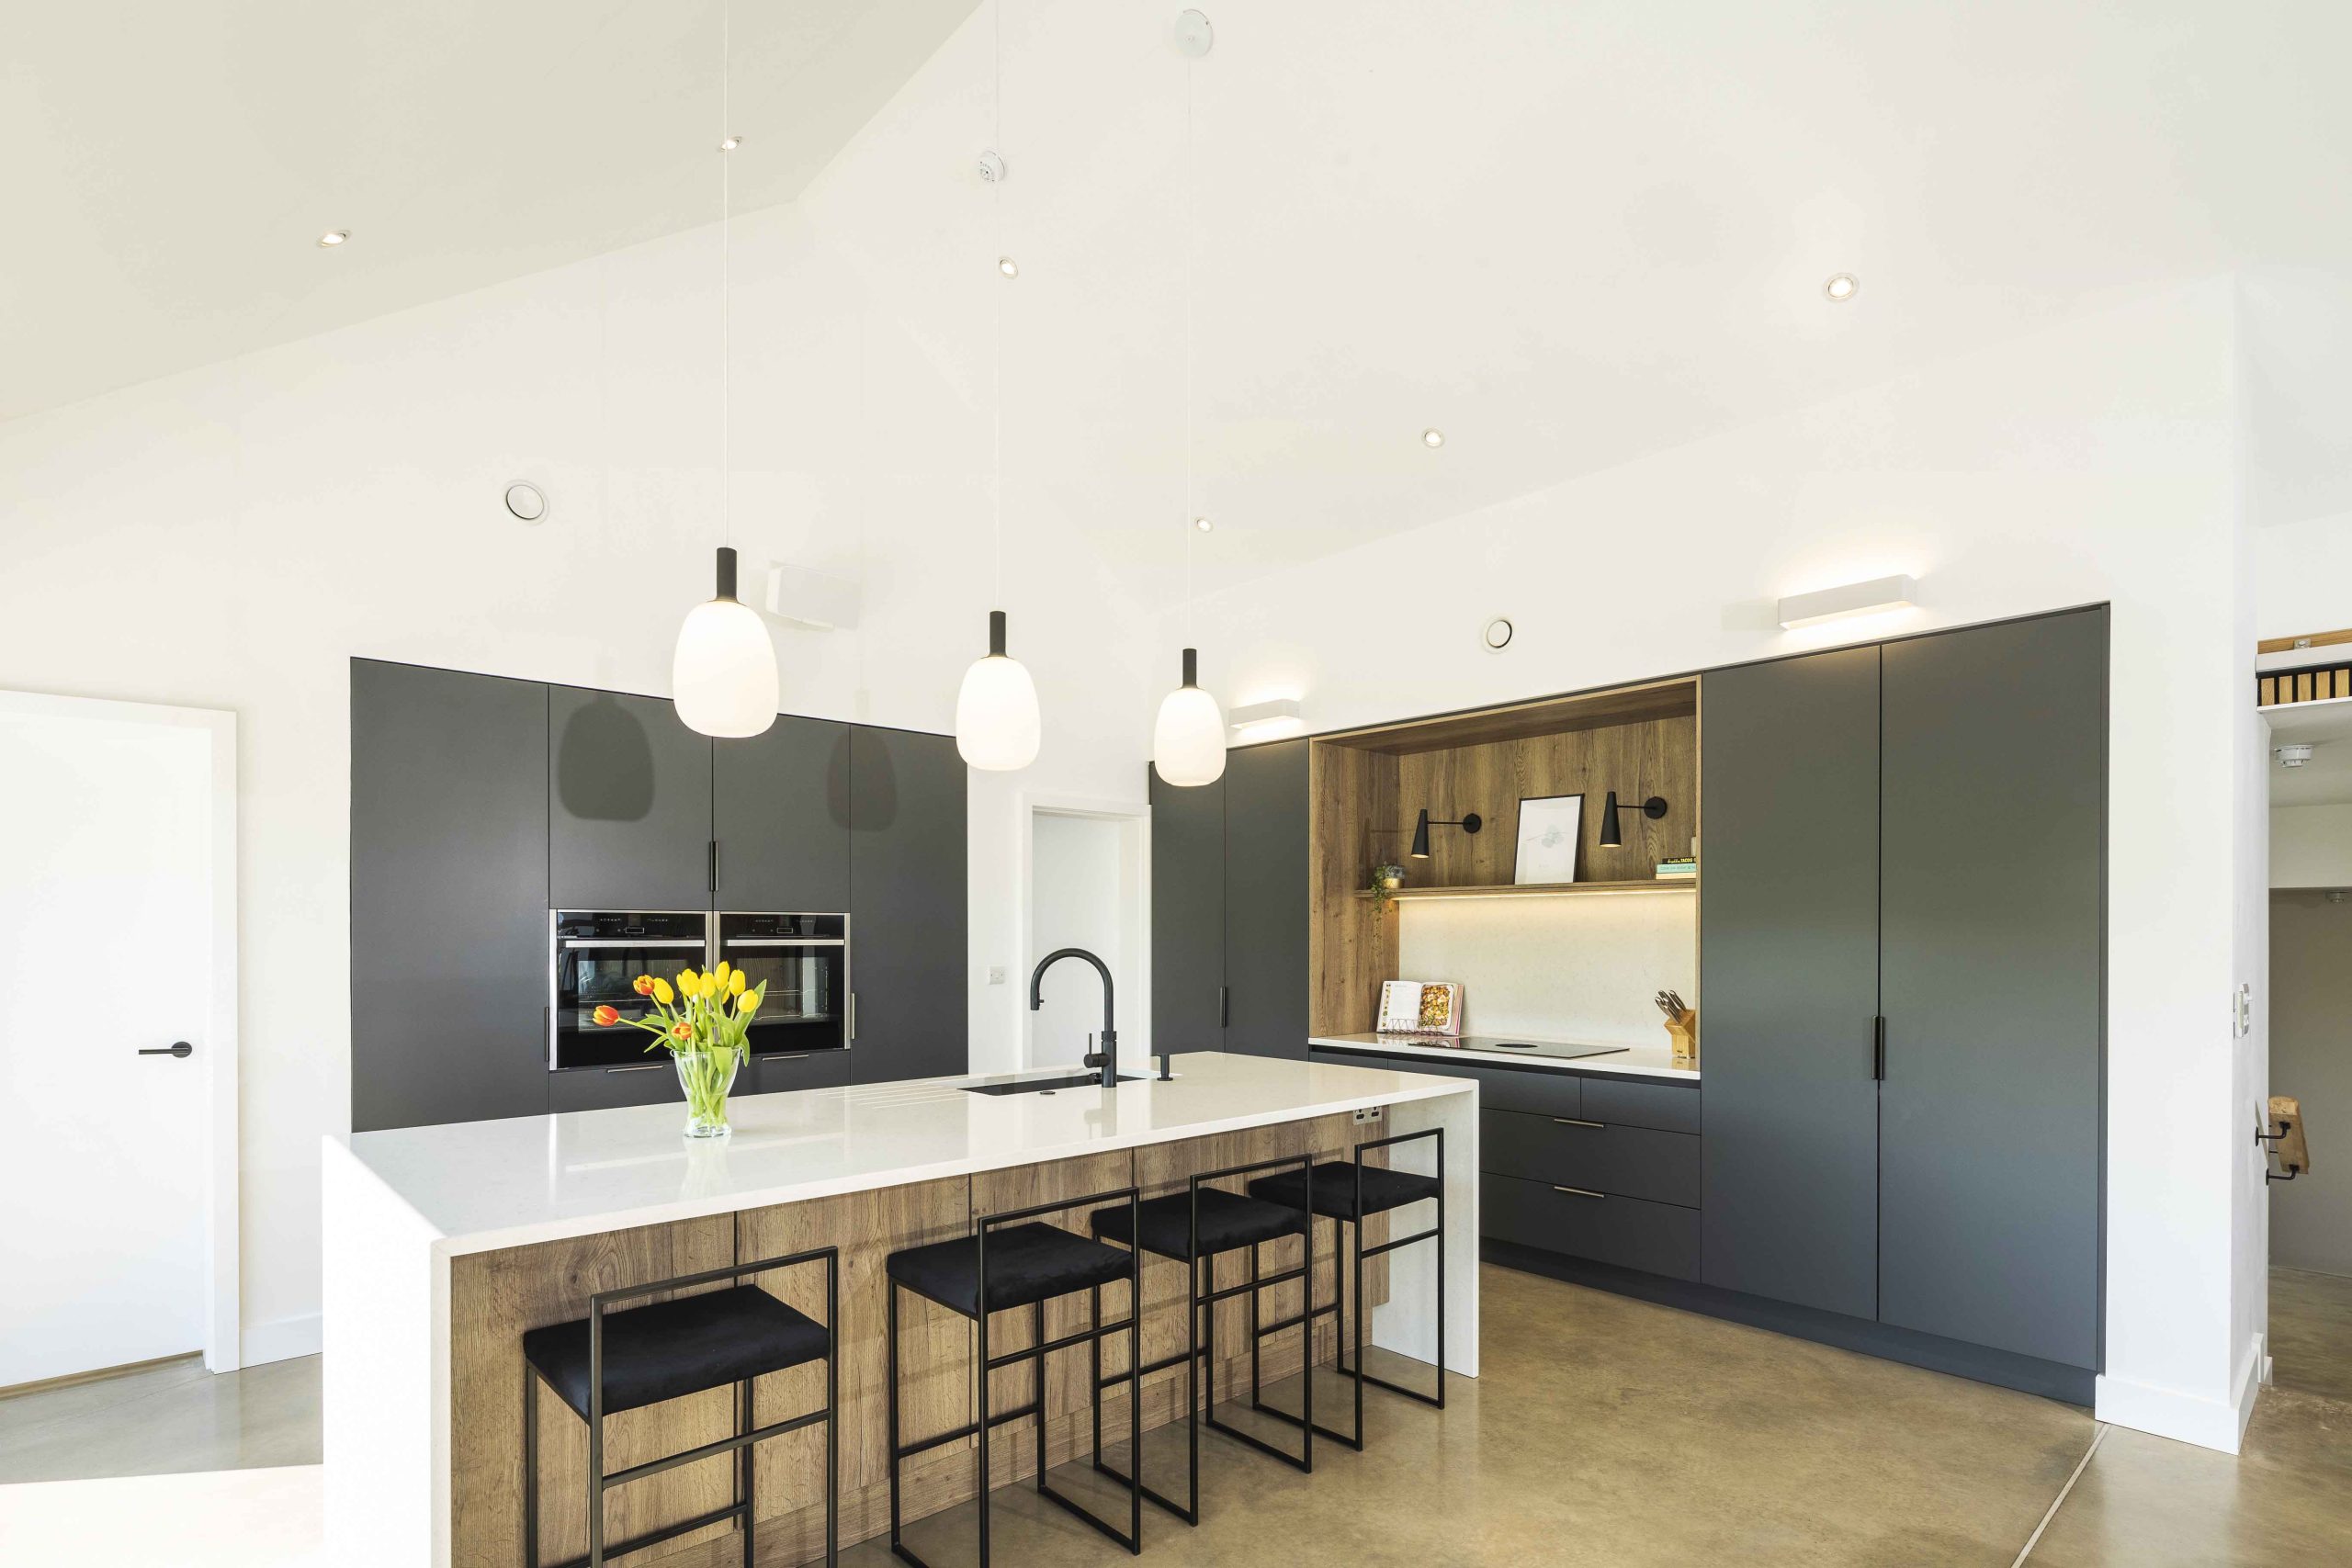
“Phillip from the kitchen company was really good. He advised us that in an open plan living area, the kitchen becomes more like furniture (as well as being functional). So we changed from our original shaker style choice to one that was more modern and minimalistic,” says Katie.
“I like to choose items that have an enduring, timeless style, plus I don’t like clutter on the worktops or in the way.”
Savvy decisions
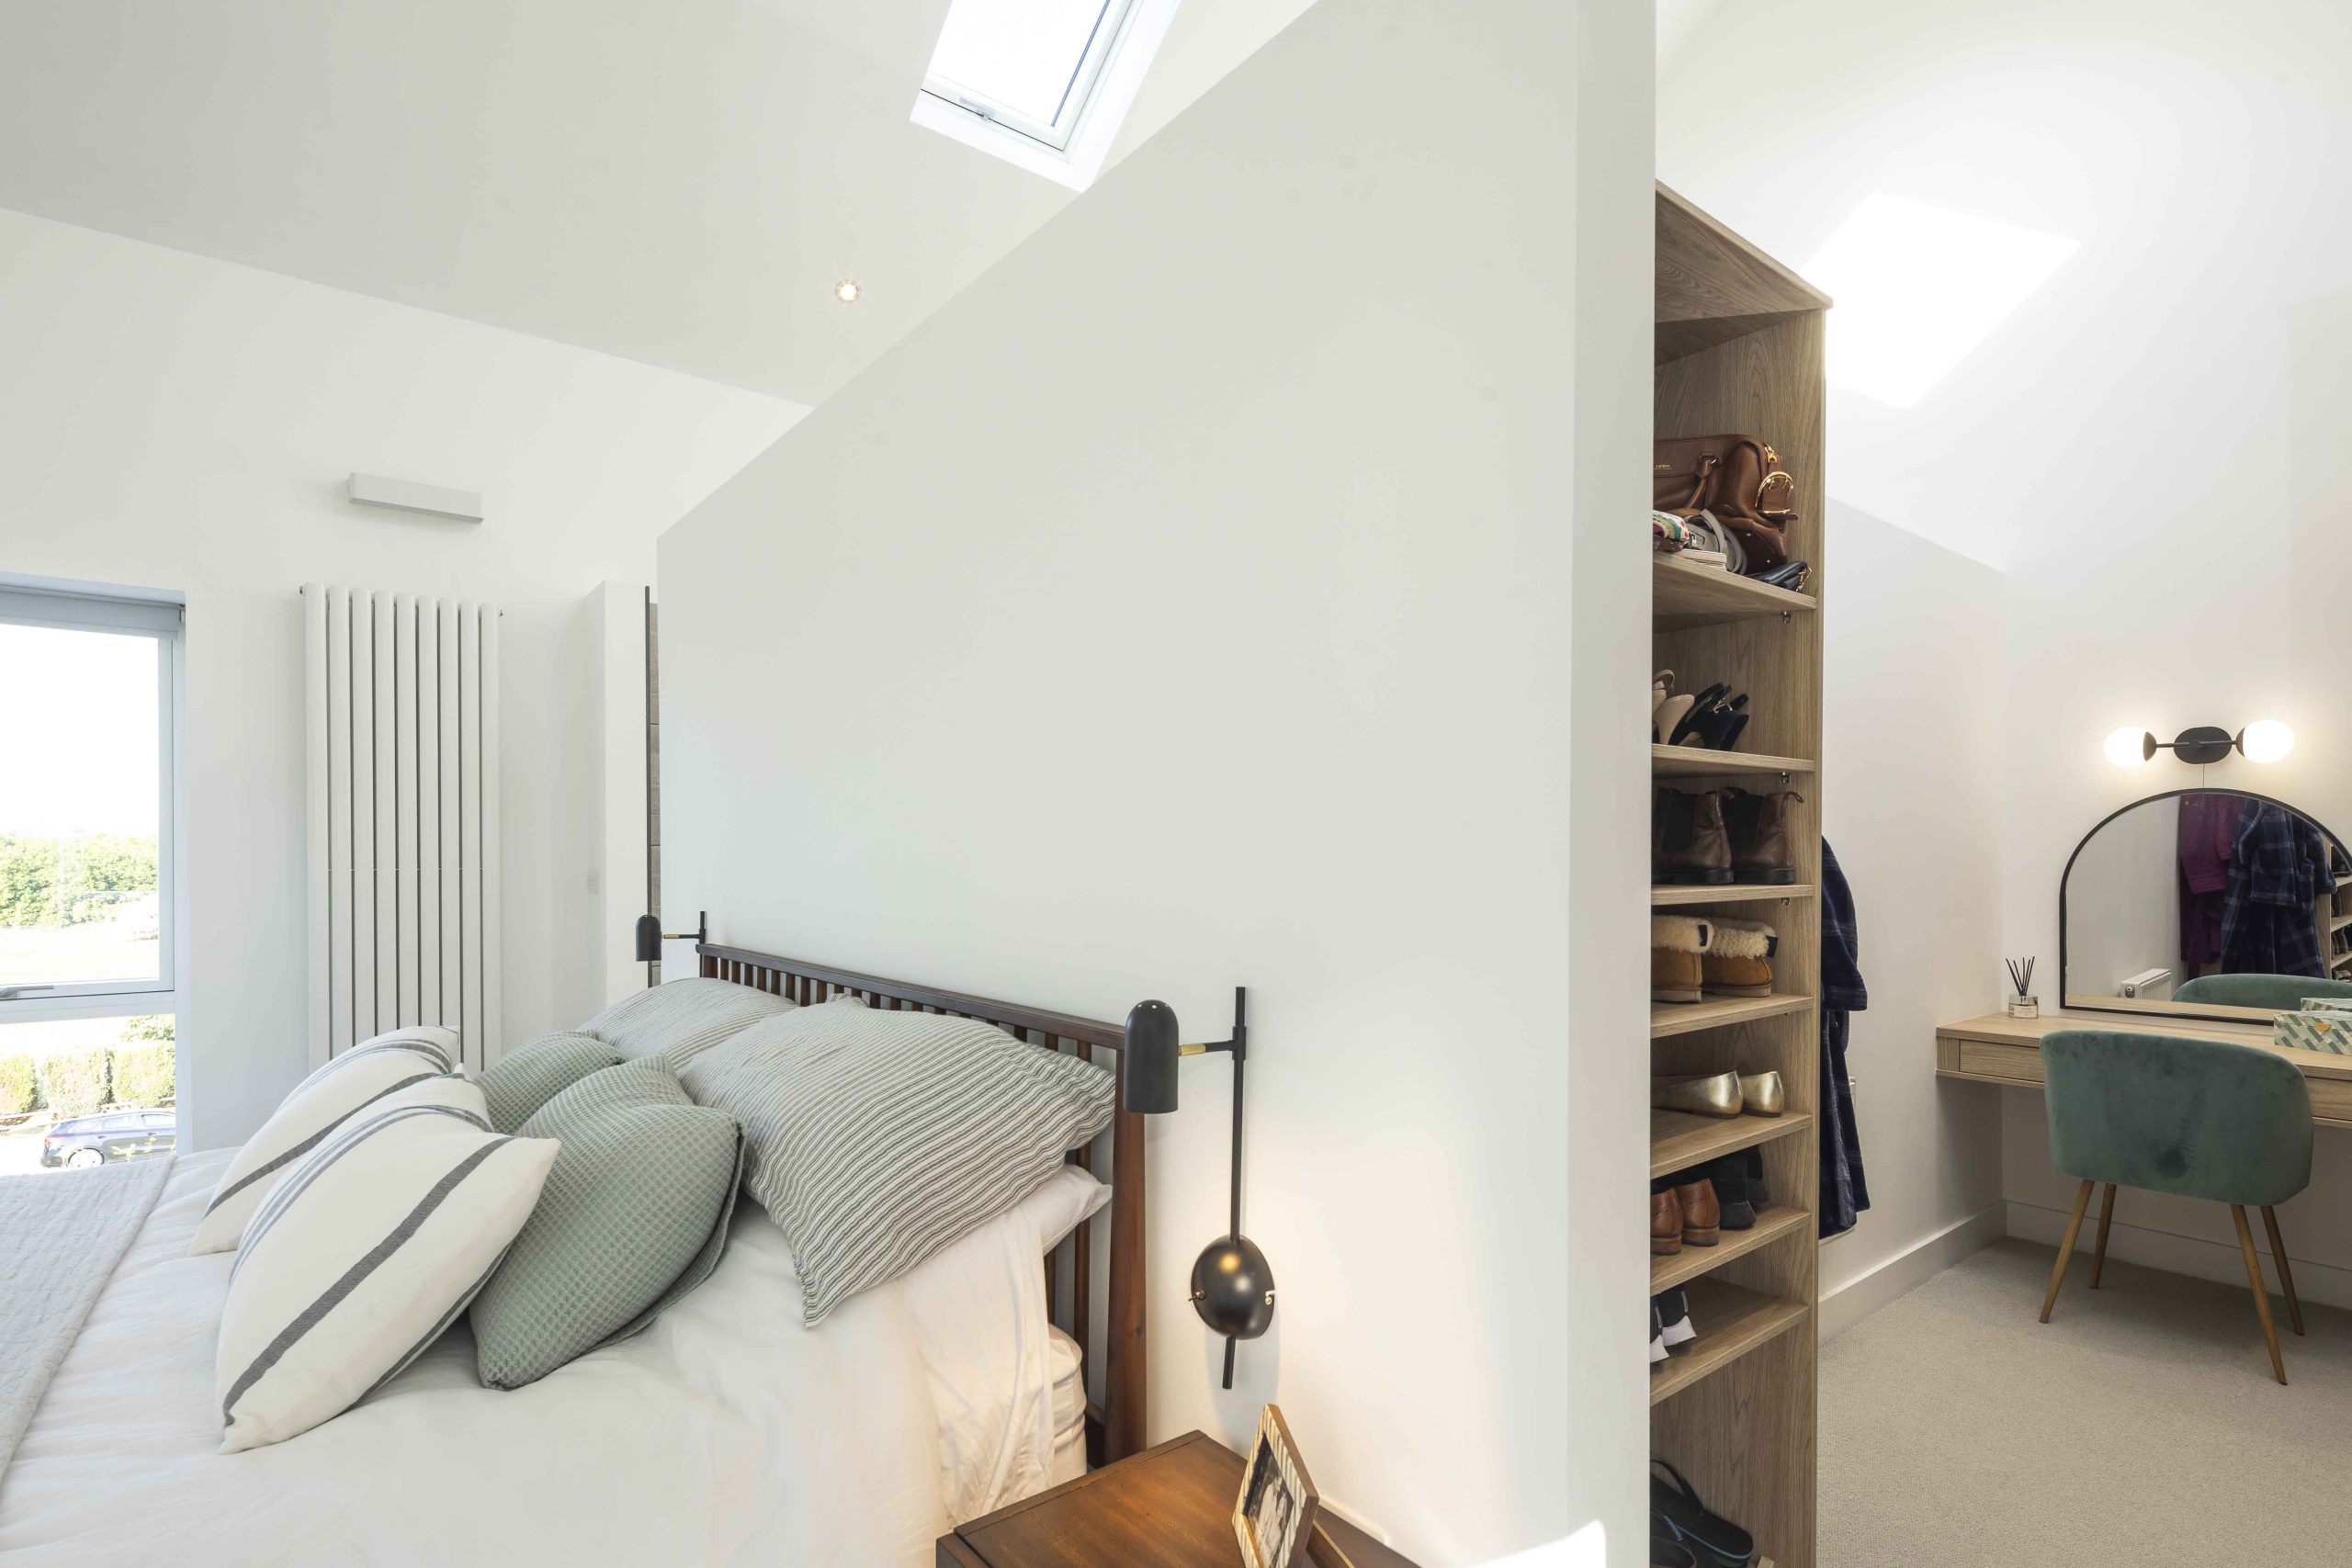
“We had to reduce our insulation package to save money in the end,” says Katie. “Originally, the house was specified with rigid board insulation, but we had to switch to cavity bead insulation. The thickness of the new insulation makes the U-values quite similar. Since much of the house faces south, we installed a lot of glazing to make use of the solar gain. Even in the winter, the house feels quite warm on sunny days. However, we purposely placed the bedrooms on the north side because we don’t like sleeping in hot rooms. This setup works well for us, keeping the bedrooms cool in the summer.”
“In the future, we would love to install an air source heat pump or a ground source heat pump, since we have enough land to fit it, but we had to draw a line in the budget somewhere.”
“We considered the payback period for our solar panels and estimated that they would be paid off within four years. They have been working for us. Last year, we didn’t use our oil for heating from May until the second week of October, relying solely on solar panels. This significantly reduced our electric bill and heating costs. Any extra energy that wasn’t used went to the immersion heater so hot water was free too. When fuel prices went up, we decided to buy an electric car, which at times we charge using the solar panels.”
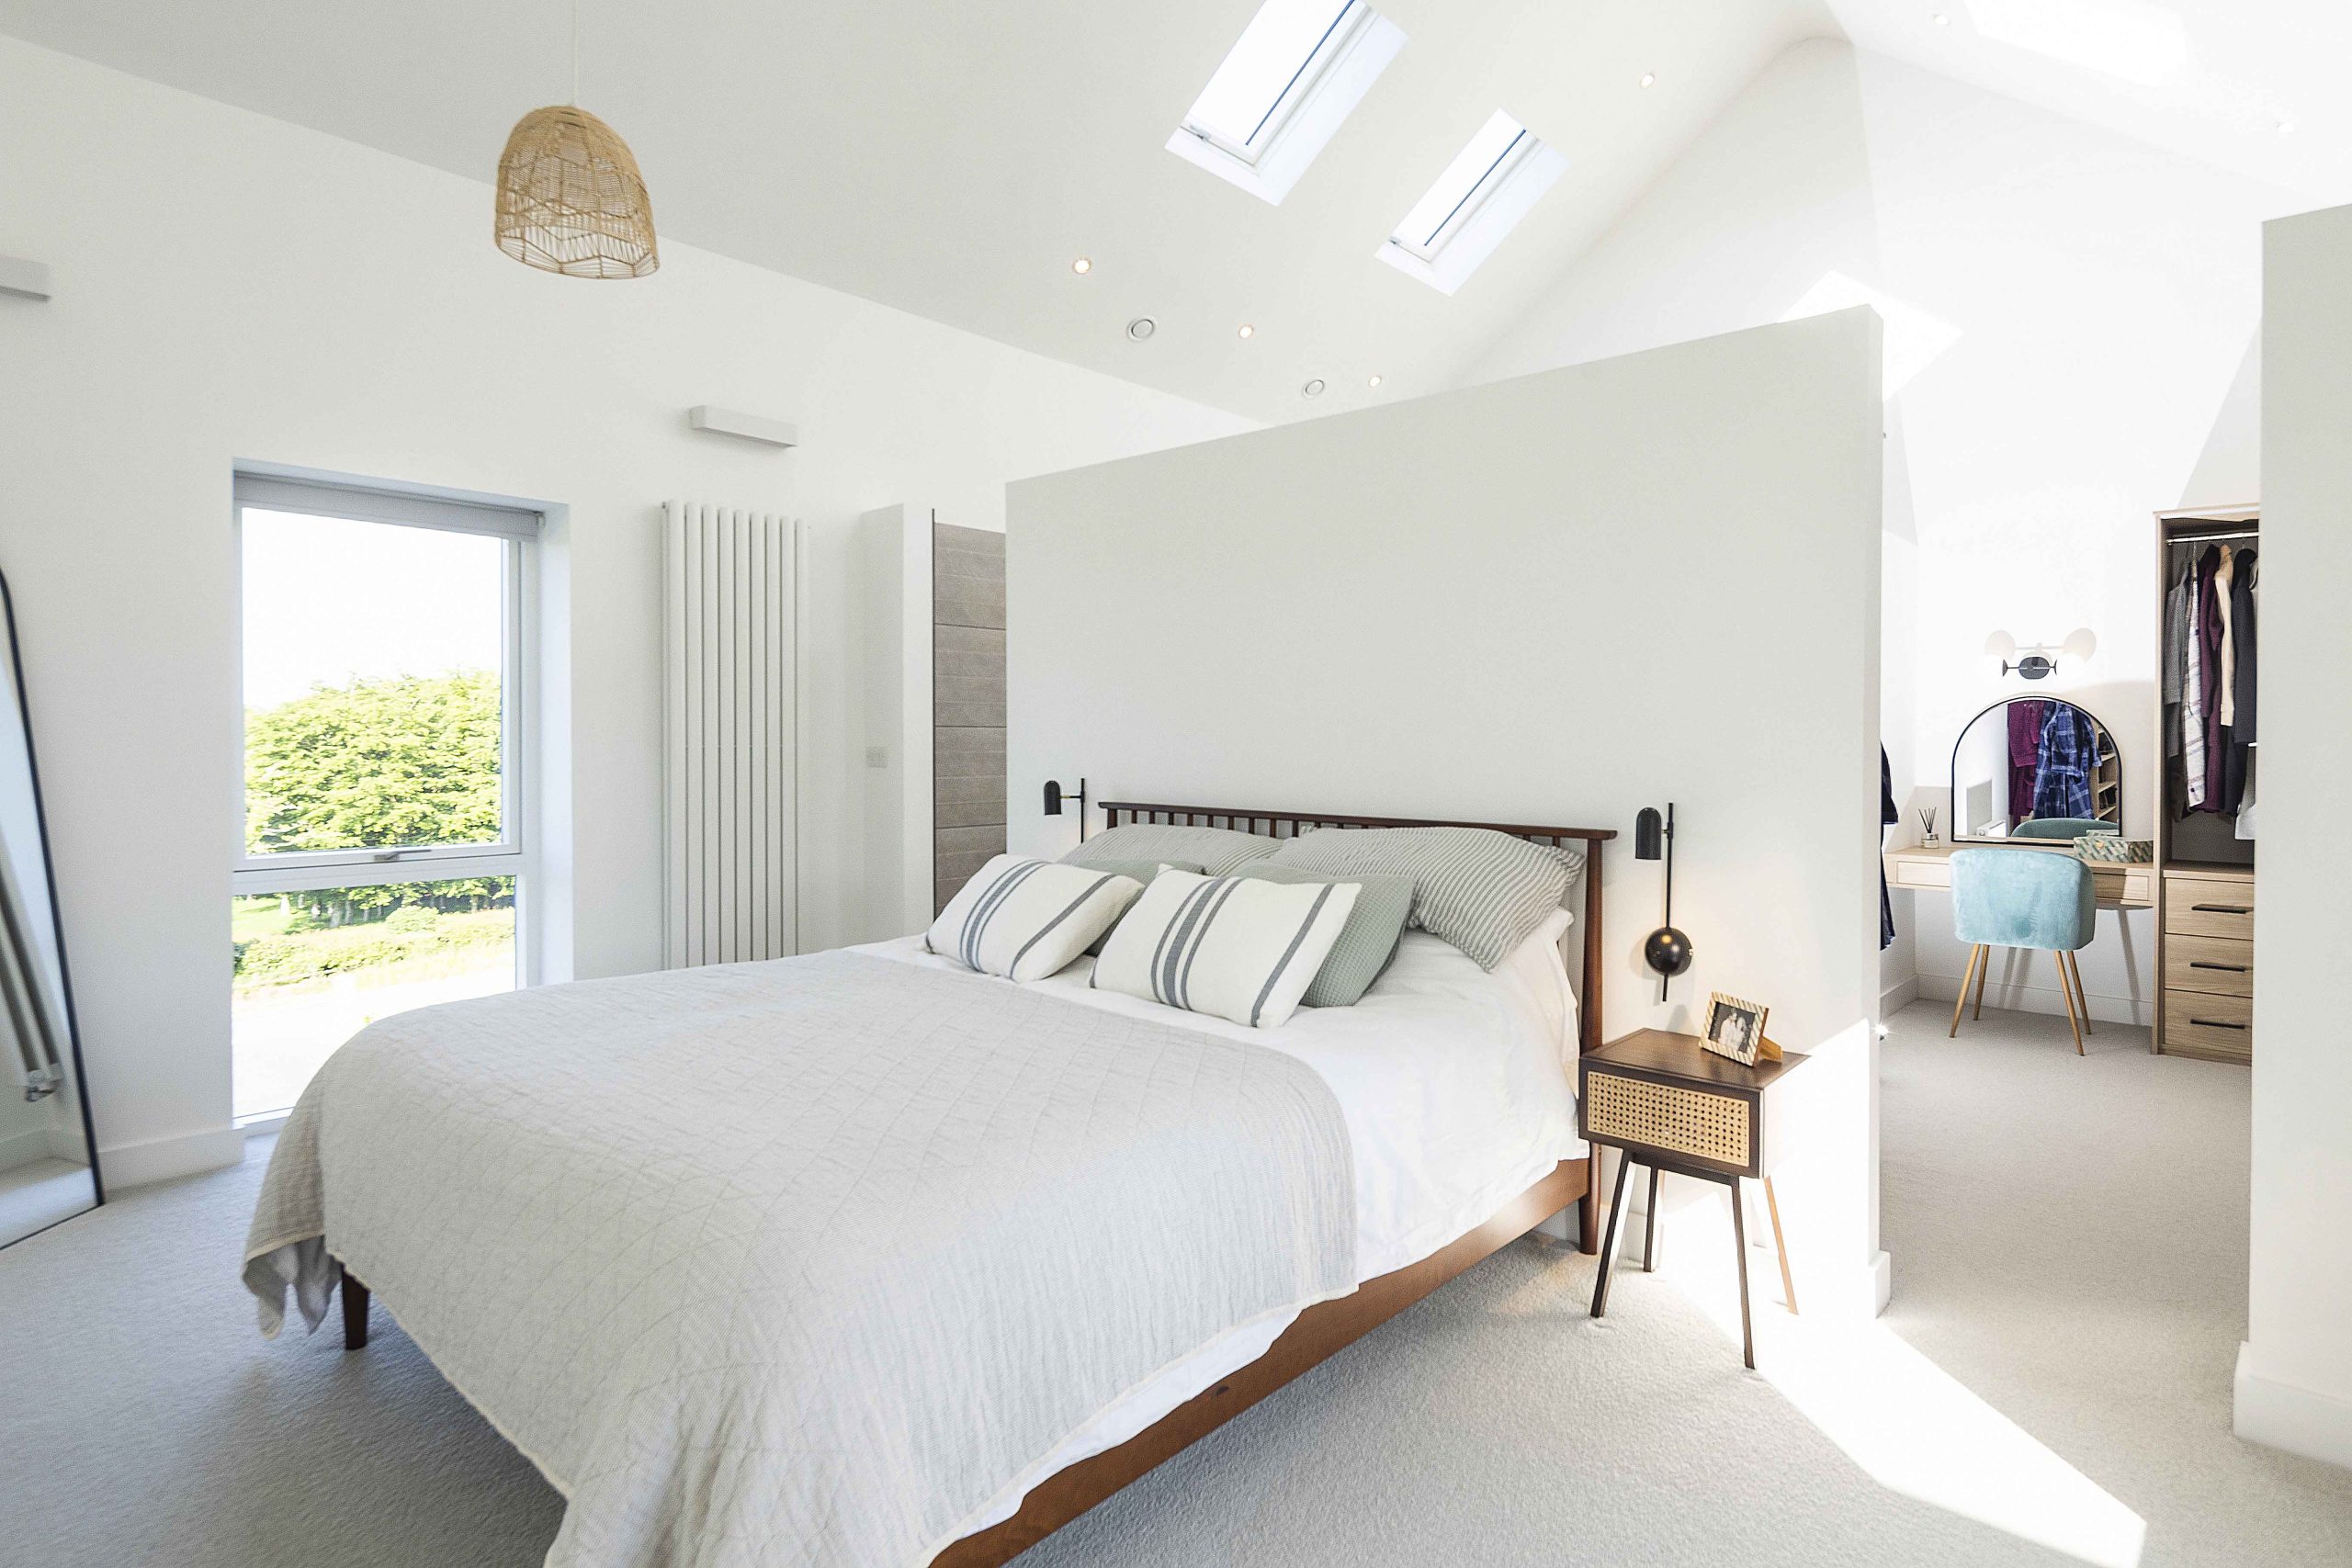
“At design stage, our solar panel providers recommended installing a heavy cable from the junction box to the garage for a future EV charging point. We thought it would be unnecessary since we weren’t planning on getting an electric car for a few years. However, we decided to have the cable put in at the last minute. Within a few months of moving in, we had an electric car and were grateful for the futureproofing since it saved us money on cable installation, which would have been a nightmare to install with the vaulted ceilings.”
“Initially, we’d also removed landscaping from the contract to save costs. However, we later added it back in and were able to get our patios and tarmac done by the builder. He also sowed all the grass for us, and since then, I have been planting trees and hedges. If I had been left with a bare acre site, I’m not sure I would have been capable of making that lawn.”
One of the biggest challenges to the build was the timeframe, especially when it came to the windows. “The window installation took 10 weeks longer than expected,” admits Stuart. “But as we had specifically appointed the window people, it was our responsibility to manage those delays.”
After a year of living in the house, how is it working for them? “It’s been great so far,” says Katie. “There are very few things that I’m not happy with. I love the open plan living, which works well for our family life. We still need to decorate our lounge and have that as a separate space, but overall, I think the house is not too big and is easy to keep clean. It works well for us as our family home.”
Q&A with Stuart & Katie
What was your biggest splurge?
The polished concrete cost £12k, it was probably about £3k more than if we had tiled, but we both love it and think it was worth doing. It creates a great flow throughout and blends nicely with the wood panelling. The windows were £27k, but we worked to get that down quite a bit as well. The kitchen, utility, and appliances came to £31k.
What single piece of advice would you give a budding self-builder?
Get a quantity surveyor to draw up a bill of quantities; we got ours done on the recommendation of the architect. This gave us more control over the spending, and we could easily add or deduct items based on the unit prices provided in the bill of quantities.
And we did add a few things to the contract that increased the cost, such as driveways and landscaping. To save some money, we initially planned to use concrete paving for our patio, but we decided last minute that we wanted sandstone instead. We knew the price per meter for the sandstone, so we had more control over the spending and could make informed decisions.
Overall, our main piece of advice would be to ensure you have the right professionals on board from the start. We hired an architect that we could easily communicate with and a quantity surveyor to help us control the budget. Although it cost us around £2-3,000 upfront, it saved us a lot more in the long run.
Good communication with the builder is key, and ours kept us involved throughout the entire process. The electricians, in particular, were great at keeping in touch with me and making sure everything was done correctly. The contractor in general was fantastic, and the site was always kept clean. Overall, the process was easy, although living in a space which wasn’t ours during the build was a bit challenging – probably more so for the parents!
Stuart & Katie’s Tips
Visit different showrooms for kitchens and bathrooms. We got a price to do all our bathrooms and then went to a place recommended by our architect who was able to do all the bathrooms and the tiles for the same price as the other places were quoting just for the sanitaryware. So there’s £3,000 worth of tiles that we wouldn’t have otherwise.
Haggle. There’s no shame in just going in and saying, “I have a better price elsewhere. Can you match that?” Having a good, honest conversation can get you a long way.
Try to enjoy the process. I admit that I stressed out a lot and lost sleep over it, but in hindsight, I should have trusted the professionals more and enjoyed the process a bit more.
Spec
Walls: 455mm cavity walls with 150mm cavity to include full fill pumped EPS bead insulation, to
achieve a U-value of 0.21W/sqmK or better.
Pitched roof: Concrete roofing tiles or slates suitable for 35deg pitch on 50x38mm treated battens
at centres to suit selected flat profile slates on breather membrane on 150x50mm C16 grade timber rafters at 400mm max. centres. 100mm PIR board between rafters with 50mm PIR board below rafters throughout the main dwelling. To achieve a U-value of 0.17W/sqmK or better.
Floor (bedroom block): Selected carpets / ceramic floor tiles on 100mm sand/cement screed.
1200 gauge vapour barrier on min 100mm PIR Insulation boards used in conjunction with preformed
perimeter strips on radon barrier on 150mm concrete slab. To achieve a U-value of 0.15W/sqmK or better.
Floor (open plan block): Polished concrete floor incorporating under floor heating pipes. A252 Steel
reinforcing mesh on 40 / 50mm concrete spacers (castles) laid above wet underfloor heating pipes, clipped into insulation. 1200 gauge vapour barrier on 100mm PIR insulation board used in conjunction with preformed perimeter strips on radon barrier on 50mm concrete slab. To achieve a U-value of 0.15W/sqmK or better.
Windows and doors: mix of double and triple glazed, aluclad timber, average U-value 1.2W/sqmK
Air permeability: 3.98 m3 (h.sqm)
Suppliers
Architect
Mark and Jack Cassidy at C3 Architects, Co Antrim, tel. 9266 2555, mobile 075 4365 4495
Contractor
Sam McNiece at S L McNiece Ltd, County Armagh, tel. 3752 3421
Quantity Surveyor
Clarke Faulkner at W T Orr and Partners, Co Tyrone, tel. 8676 9520
Structural Engineer
David Graham at Add Consulting, Co Armagh, tel. 3760 0200
Kitchen and utility
Phillip at Cardy Kitchens, CoAntrim, tel. 9267 8884
Bathrooms and tiles
James at Hillsborough Tile and Bathroom, Co Antrim, tel. 9268 3330
Ensuite vanity unit
Danny Ogge at Dogwood Designs, Co Mayo, ROI mobile 085 269 0032
Polished concrete floor
Concrete: 100mm minimum thickness Zircon Concrete by RTU, concrete colour: Roman Court, substrate: insulation
Grinding/Polishing process:
Thomas Ringland of Remarkable Polished Concrete, remarkablepolishedconcrete.co.uk, mobile 07510934306, surface finish:powerfloat, cream finish and no exposure of aggregate, then polished.
Built-in bedroom furniture
Fusion Robes, Co Down, tel. 9045 9337
Windows and doors
Rationel AURAPLUS range
Photography
Paul Lindsay, paullindsayphoto.co.uk
ROI calling NI prefix with 048, mobile prefix with 0044 and drop the first 0