To get your dream kitchen on a budget in Ireland, you’ll need to spend time to do your research and be on site to follow through.
In this article Vivienne Hanna shares how she designed and built her new kitchen, including:
- Key design element for a budget-friendly build
- Breakdown of costs
- Her experience kitchen shipping with top tips
- Choosing cost-effective materials without compromising on quality
- Choice of appliances, fittings
- Installation process
- Floor and wall finishes
- Supplier list
Even though it’s fun to plan the kitchen, there’s a lot of stress associated to the amount of money you will be spending on it. That was Vivienne Hannah’s realisation when she tackled her own design, as she recounts below.
Original budget: Kitchen/Appliances/ Worktop £10,000, Utility £2,500, Larder £1,000.
Final cost: Kitchen £10,000, Appliances £5,000, Granite Worktop £2,500, Utility £1,100, Larder £1,000
I moved into my forever home almost three years ago and looking back, I tackled the kitchen as I did any other part of the project. With plenty of research and attention to detail. Here’s a guide to how I approached it.


Designing my dream kitchen on a budget
The inspiration was my local rural environment, passion for furniture and charity shops. I love old things repurposed and quality furniture pieces; infact I came across an old chiffionier and painted it, long before there was any kitchen planned.
I knew any kitchen I would choose, would have to match it! I also picked up a Parker Knoll Chair and Stag two seater love seat, both of which needed a facelift. Over a few years I had ripped pictures from various magazines, flyers and books and put them all in a file. This started probably around the time we actually made the decision to build, long before we had acquired a site.
If I was at the dentist and flicking through a magazine and saw something, I would rip it out and deftly stuff it in my pocket. I was only collecting the images I really loved. After a few years of collecting, I bought a scrap book and one wet Sunday afternoon decided to start sticking the pictures by house area, into the book.
I did it with my daughter who was young at the time and made a game of it. It wasn’t ordered, we stuck all the pieces of ripped paper into the scrap book willy nilly, but remarkably an eclectic style emerged.
Once we had our house plans drawn up and were happy with the room layouts, I was dreaming about my kitchen. It was the biggest room in the house and I knew it needed to be a homely place where we would want to hang out.
I was searching through magazines – in fact I took out a few subscriptions to help me with ideas. I also spoke to friends and family and when visiting, I took great interest in other people’s kitchens and got ideas and advice from them. Having renovated two houses before, I knew I would have to compromise on a budget so I needed to be realistic. I also had my trusty book of cuttings which reaffirmed to me what I liked.
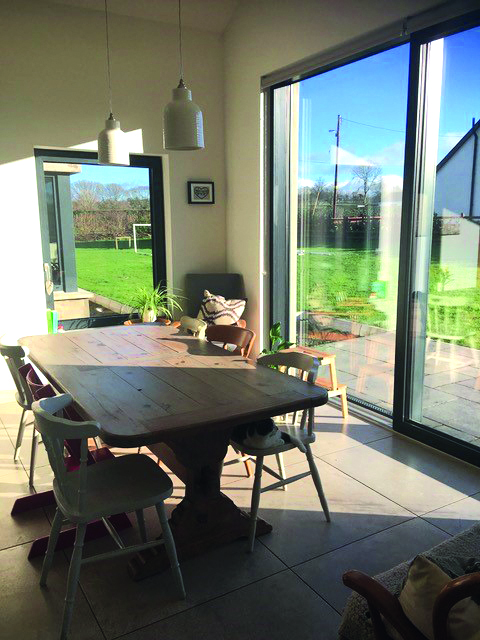
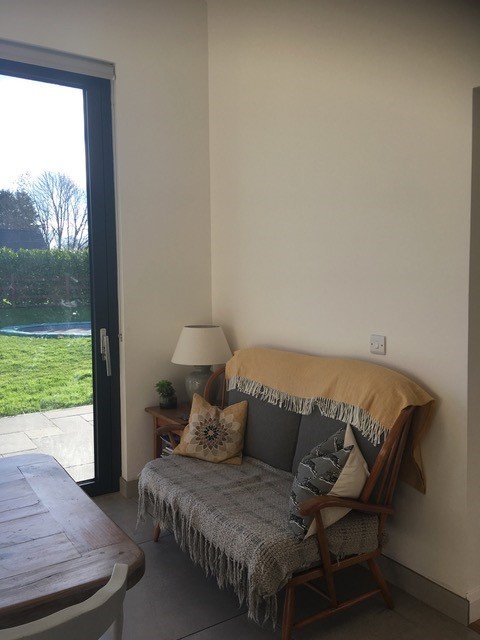
I would say the kitchen layout was pretty much decided when we had the room shape. There are four internal doors in the kitchen, large patio sliding doors and one entrance (with no door) into the TV room/snug. ‘Work out what it is that you like and marry that to the site/ building that you’ve got.’
Kitchen Shopping
We went to a visit a lot of showrooms, at least nine! They were in four different counties. We probably took some information from each one. I had a design in mind as I knew we had limitations and gave it to each kitchen company to give them an idea of our style.
The reason we went to so many places was that they were all so different and going from one to another, we never actually achieved or got what we wanted. Surprisingly the level of service varied considerably. We thought we would go get a plan/price and get it sorted, but it wasn’t so simple.
We thought it would be straightforward to get three costings. Instead two companies persisted in telling me they had sent me plans (they hadn’t).
Another said they were doing it, another priced immediately and were chasing me for a deposit, another said they would give me a plan once I paid them £1,000. Another told me up front my chosen style would be about £25k+ (I nearly fell off their bar stool in shock).
There are many different stories, I could go on. It was very time consuming and quite exhausting. In fact, nearly all of the companies had something I wanted, but really only one company got it right for me. After one hour of discussion and me showing my plan, I went back a week later. Their plan was ready and was perfect.
They were fab to deal with and offered incentives and suggested changes to make the kitchen affordable. They really were excellent, but still it was over our budget and we just couldn’t afford it. Since then, I have recommended them many times! I did get three quotes of a sort, although none were like for like. I decided to separate all the parts of the kitchen and buy them myself in the hope it would be more cost effective. In the end, I chose an experienced cabinet maker, who worked to my basic but evolving design, who got the kitchen sprayed and he fitted it beautifully. I bought the knobs and handles online.
Choice of materials
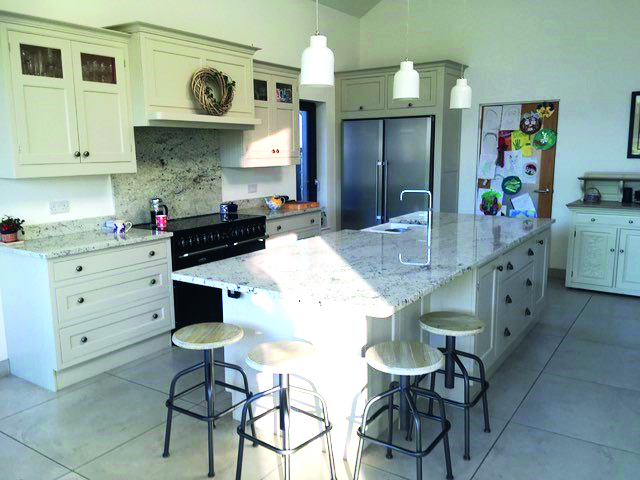
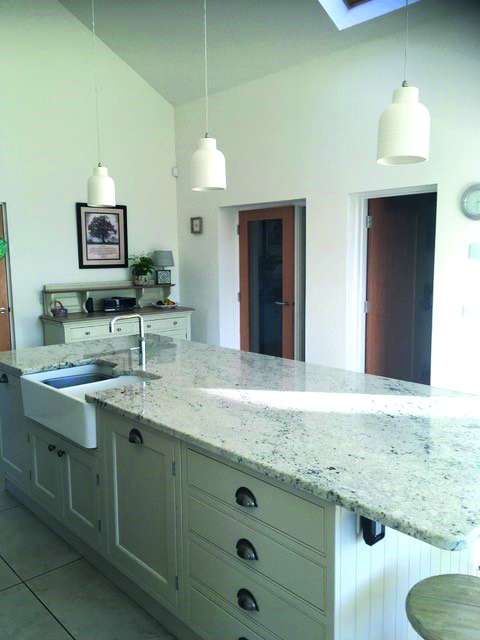
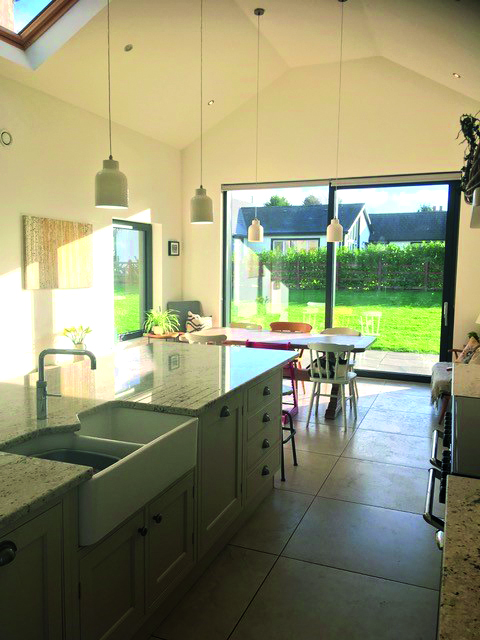
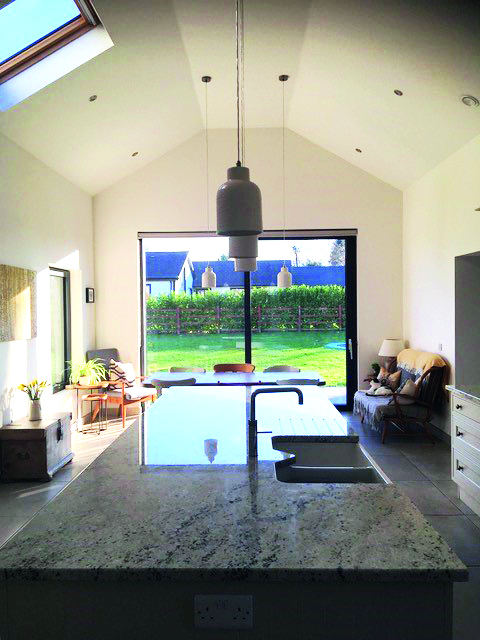
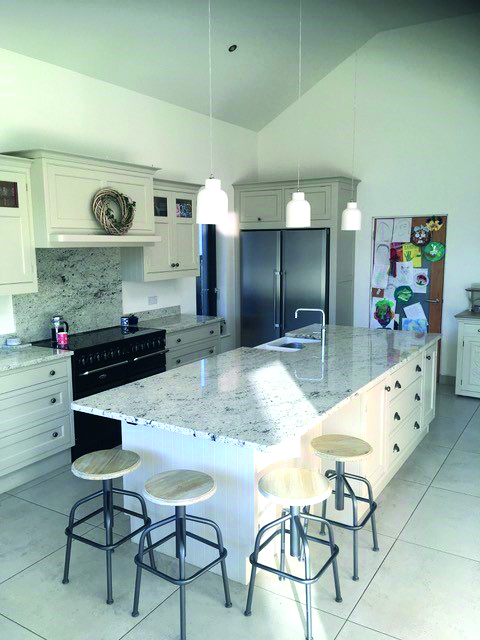
Our kitchen is classic yet contemporary. The carcases are made from finished plywood which is solid and durable. We got a light coloured spray finish on the doors and panels. The larder was a bit of an obsession I had, from having a scullery in my parents’ house at one time.
I also felt apart from great storage, that it would reduce my kitchen cabinetry costs. But that turned out not to be the case! Although plywood is more expensive than OSB or MDF, it is also very sturdy and aesthetically pleasing to look at and to touch. I felt it was worth paying a little bit more for. The style of the doors is referred to as shaker.
My choice of kitchen was inframe, or having the doors and drawers sit flush within the carcase, something I didn’t even know about until I saw it in all the pictures of kitchens I liked. This is a particular style, costs more than standard, but I didn’t want to compromise on it.
I felt my kitchen was to be the heart of the house so, was willing to get it right, within reasonable cost. I had originally opted for a hand painted kitchen finish, but once I got the names of the painters who specialised in doing this, it turned out to be incredibly expensive and also not so easy to work with. They were in great demand and wouldn’t commit to a timescale.
At the time, I was very disappointed, but, as I had previously had a sprayed kitchen, I knew it was very durable and would be good for family use. When choosing worktops, there was much debate between my husband and myself, simply as he really wanted wood in the kitchen particularly on our island (3m x 1.2m).
Whereas I personally had always wanted a marble style finish and persisted until he agreed. Well he never really agreed and we still debate it.
So I looked at laminate, engineered stone (stone mixed with resin), and natural stone (marble and granite). My preference was marble for sure but then I was gutted to learn that the marble I liked wasn’t a good choice for the worktop as it would mark easily. Lemon, beetroot and red wine would stain it and that wouldn’t have been good for us!
Choosing the more practical route, I decided on granite. A more costly option than laminate but similar in cost to the higher end engineered stone. I felt it was one of the things I didn’t want to compromise on. I later learned about the different grades and their costs.
I also wanted the granite in one piece, so I was more restricted to the type of granite I could choose. It took me about three months to get it right and within budget.
I went to the wholesaler and got a couple of samples and lived with them. I picked one, but a month later had changed my mind. I then went back and took a very long time perusing and finally made my choice. I took the sample home and looked at it every day for a few months to make sure I would be happy. It was going to be such a cost, I had to get it right.
Appliances, fittings and installation
I always wanted an enamel double sink – which wasn’t in vogue in any of the showrooms at the time. I felt it matched my kitchen design. I wouldn’t compromise on it, I actually bought a new one second hand for £90 (retailed at £360).
Essentially, I needed two sinks, as we have a busy family life and also I cook a lot and I needed the generous size for everyday living. I went to a host of shops for appliances but chose the place where they had the right price, the right attitude and were willing to work with our cabinetmaker, at our timescale, which was a great help.
Their aftersales service and care has been exceptional and we continue to use them for other household items.
As for installation we had two very experienced kitchen fitters; they worked at a whirlwind pace and made everything off site. They were happy to work with me on fitting the appliances and to install the knobs and handles I had purchased separately. They are a great team and very skilled; it took about a day to install.
Then the plumber came for the sink and instant hot water tap. Once this was done we got the granite people to come and make a template. Once it was all confirmed the granite came about a week later.
It was a five man lift to get it into the house and to install. A big cheer went up when it was in place!
Floor and wall finishes
Since we had a timber frame house we had chosen to dryline our walls (no skim coat on the plasterboard). Instead of waiting for a painter to do room by room, we got the whole house sprayed inside early on, prior to second fix.
It made a great difference and has allowed us to live in a much nicer environment. The kitchen as with other rooms, still hasn’t been ‘officially’ decorated other than the original spray finish.
The floor tiles were 80cm x 80cm, grey concrete effect. Dull low shine finish with some mottles, it helps with a busy family life and I am not stressed out trying to keep them pristine.
The kitchen has a great flow and is easy to navigate and clean. Floor tiles are easy to mop or steam and I also used tiles as my skirting, so very durable and my paintwork isn’t affected. The granite worktop is a dream to keep, so all very easy. As the granite is a light colour it is definitely easier to manage/polish than a dark colour.
Design Tips
Use the kitchen triangle stove/fridge/sink as your guide to start thinking about the design.
Think about how you actually live; prep area fro school lunches, types of meals your prepare, where to put dishes in relation to dishwasher, etc.
What does it need to be for you: Just a kitchen or a kitchen diner? Will it include the living room?
If you cook a lot, chop, prepare, think of your view. Make it nice so you’re not staring at a wall.
Set aside a contingency: for a high end finish and something to last for years and dress the room we needed to invest £5,000 more than we had budgeted for. We had to recoup this from other parts of the build.
Suppliers
Granite worktop and splashback: Lamont Stone, lamontstone.com
Appliances: Sourced through Basil Knipe, Ballymoney. Side by side Liebherr fridge and freezer, Electrolux dishwasher and Stanley double oven with grill, slow cooker and induction hob. Co Antrim, basilknipe.com
Tiles: MDC Tiles in Magherafelt, mdctiles.com