In this article we cover:
- What is a snag list?
- Who writes the snag list?
- How do snag lists work?
- Do you need a snag list?
- Where to start with your snag list
- M&E snag list
- Heating and cooling snaglist
- Checklist for floors
- Checklist for walls and ceilings
- Checklist for internal joinery
- Checklist for stairs
- Checklist for drainage
- Checklist for other external work
- Checklist for windows and doors
- Checklist for roofs
- Checklist for external walls
- Chimney and roof spaces watchpoints
- Dealing with structural defects
Weirdly, a snag can mean a sausage (in Australia) or so I am told, but not so in our part of the world, where a ‘snag’ in the building industry is a word that is used to include a problem such as a defect, missing or incorrect work or materials, or missing or incorrect information. ‘Snagging’ doesn’t just happen at the end of a building project, as it should be routinely carried out at intervals before each stage of work is covered up. A snag list therefore is simply a list of anything which is required in order to eventually issue the completion certificate.
Who writes the snag list?
Anyone who has a vested interest in the property can write a snag list, so it could be the appointed certifier, the client or a representative of building control or the building warranty provider.
Writing a snag list requires a good working knowledge of the standards covering the work. It is essential for instance, to know when an out of square or otherwise irregular surface is a defect or whether it falls within the tolerances permitted by the standards.
These standards, depending on which area your project is in, are published by the British Standards Institution (BSI) and the National Standards Authority of Ireland (NSAI). The writer will also need to have a thorough knowledge of the construction drawings, planning and other approvals, the building contract documents, and the building regulations related to their construction project.
First-time self-builders would not reasonably be expected to possess this in-depth knowledge, as it can take years of on-site experience to accumulate, but even so, you should still point out anything you’re not happy with and by all means make a list.
You can also choose to engage an independent individual or firm to carry out the snagging work on your behalf. If attempting a DIY approach to snagging, be aware that online searches related to technical matters can throw up some very risky (in some cases, potentially dangerous) AI-generated information, so always double check the sources.
The snag lists and the notes made by the certifier after a key stage inspection should not overlap or repeat each other.

How they work
As the snagging inspection progresses, each item to be checked can be ticked off on the contract drawings, specifications, bills of quantities and itemised schedules. After a snag list has been prepared, it should be given to the project coordinator, who will check to see who is responsible for the missing or remedial work or for providing further information.
If necessary, requests for information (RFIs) will be issued to the responsible parties. The principal contractor (PC) if there is one, should be given the full list.
Appropriate and sensible time limits, within the scope of the building contract, should be allocated to any work to be carried out, goods or materials provided or information to be collated
Chimney checks
Houses with chimneys will need to check the dimensions and positions are as per the drawings. You can do a visual check for flashings (missing or damaged), incorrect dimensions or grade, or staining roof. Pots and copings must be securely fixed. Cowls or bird guards must be fitted along with supports and associated fittings of any free-standing flues.
Do you need them?
Yes, they are essential if you want your new home to match your expectations. Not all new build homes will have undergone a comprehensive snagging process, but after this, hopefully yours will have done.
Most snag lists at the end of a project will focus on superficial aspects of the build and will typically be related to purely decorative items such as cracked tiles, painting or plastering. Some will relate to the function of an item, such as the operation of mechanical and electrical (M&E) fittings.
Where to start
There is no industry-wide methodology or a standard approach to the checking process, but most professionals will have their own checklist to allow them to follow a logical procedure.
All self-build projects are different in some way, so it is not possible to produce a checklist that covers everything, otherwise it would end up as a book, not a list; but the list that follows should be a useful starting point for checking most domestic self-builds.
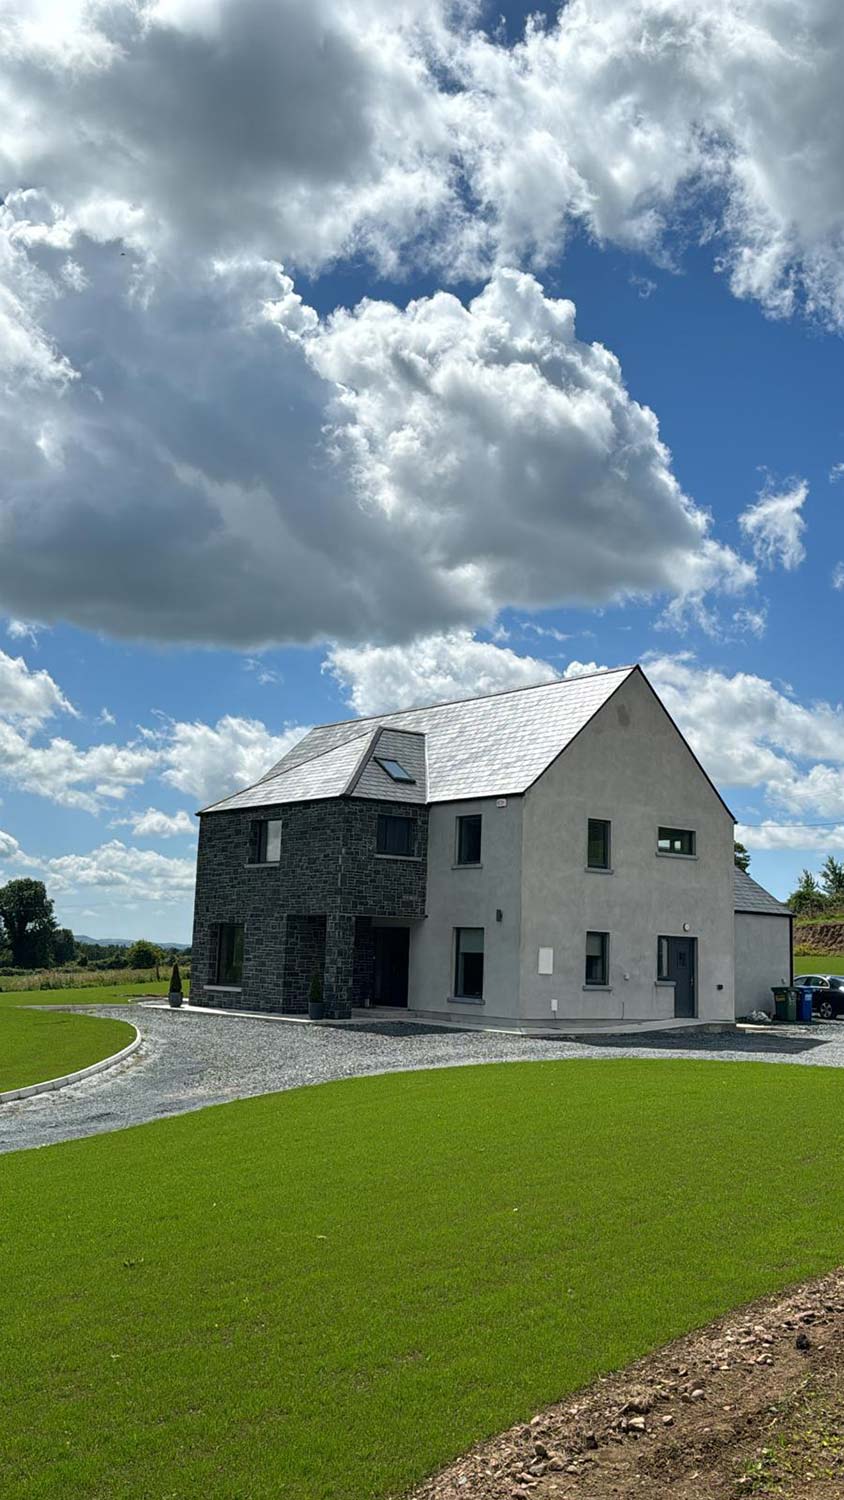
Starting off with the external checks, make sure the appearance of the external materials, including the type of material, colours, textures, placement and dimensions are correct. When doing this, avoid unnecessary climbing (use binoculars). Stand back and look at alignment of walls, windows and doors, roofs and chimneys. Everything should match the drawings. If not, find out why.
I would recommend a thermal imaging survey of the exterior of the dwelling to check for thermal bridging; get an expert to carry it out.
Windows and doors
Here’s what kind of snags you might come across for your windows and doors.
The first thing to check, before the installer leaves is that the windows and doors all open, close and lock as expected. Retain the keys. Also obtain your user guidance manual on maintenance and future adjustments, etc. With time, if you notice condensation inside double or triple glazed units, or notice gaps around the weather seals when the windows are closed, you’ll need to contact the manufacturer to get them replaced.
It is good practice to retain all protective wrapping until the work on site has finished, to ensure frames and glass are free from scuffs, scratches and paint or render spatter marks. It’ll be difficult to get this remedied if precautions haven’t been taken on site to protect them. A blame game may ensue with no satisfactory outcome.
You’ll have specified a specific type of glazing, which could include glass which is obscure, low-emissivity (‘low-e’), fire-resistant, impact resistant, low-iron, laminated, mirrored, tinted, self-cleaning, etc. Check all glazing against the specifications. Safety or fire rated or other special glass is identified by the required markings. Weather sealants and airtightness measures should be in place as specified.
Likewise check trickle vents, if they were required, are all present and correct.
Make sure emergency escape windows are provided where required and function properly. Thermal bridging trouble spots should be checked for compliance also.
M&E snag list
You’ll often find sockets and switches may not be of the quality specified, uniform in appearance or fitted at the correct heights. Electrical components should work as intended. Don’t forget all socket outlets including USB outlets, TV sockets and the external utility sockets if there are any.
Check if broadband and telecoms systems work as expected. Any youngsters will have checked this out first! Run broadband speed tests periodically. Also check circuit breakers are labelled for reset purposes when required. The consumer unit or fuse box needs to be fitted correctly and the fuses clearly labelled to identify their function.
Appliances where supplied, should be working, free from damage, fitted with the correct fuses and provided with user manuals and written guarantees. Other M&E things to check for include:
• Extract fans including the cooker hood extract should run for the correct length of time, at the correct flow rate and at the rated sound levels.
• Fire safety equipment and alarms tested. Check the correct positions and functioning of detectors for smoke, gas (including carbon monoxide), heat and flames.
• Lights, including external lights, lights on ceiling and walls, in and under cabinets, in cupboards and in the attic. Check everything.
• Sanitaryware works as expected, with no chips, cracks or blemishes.
• Check drainage flows.
• Stop cocks and valves should
be labelled and tested.
• Switches if multiple (i.e. two[1]or three-way, etc.) fitted logically or if not, labelled
Timber must be certified as kiln dried and vacuum or pressure treated.
Heating and cooling snags
Allow a few days to test these properly. They should have been commissioned, certified and in proper working order. Check for cold spots on radiators or UFH. A thermal imaging survey is useful here.
Make sure radiators are fixed securely to walls, with no movement or rattles, and that they are free from imperfections. Insulation and clearances around boilers and hot water storage vessels should be checked including lagging and insulation in unheated spaces such as around pipes and tanks on the roofspace.
Pipes should be properly secured where surface mounted and all joints clean and tight. Programmers, air-conditioning units and any other potentially complex heating and electrical fixtures should have user manuals and if necessary, the users instructed on their proper use and maintenance. Further elements to check:
• Thermostats. Check that they work, including those on the radiators or underfloor heating system, domestic hot water system, etc.
• Time-out of any automatic light fittings and the function of dimmer switches.
• Trims and collars fitted around pipes where they penetrate walls or floors.
• Unexpected overflows, gurgling sounds, drips, leaks or loss of pressure?
• Vacuum system tested if installed.
• Vent ducts. Check for leaks, splits, tears or holes; particularly flexible ducts if fitted.
• Ventilation ducts positioned and insulated to avoid condensation problems.
Roof spaces and other voids
The first thing to check is that there is access and lighting provided for maintenance of equipment, water tanks, etc.
You will also need to ensure the bearing points are all correct for steelwork and structural timber, and that the bracing to roof trusses are done correctly along nodes and diagonally along web and rafter members. If large areas of decking are provided, double check whether the roof structure has been designed to carry the anticipated loads.
Fire protection to structural members need to be placed where specified in the drawings and fire safety measures including fire stops must be in place as detailed.
Insulation should be checked last, to remedy any misplacement by tradespeople. It should fit snugly and remain uncompressed. Trapdoors or hatches must be insulated, sealed and fitted with secure catches.
Lateral restraint ties to gable walls from roof trusses must be in place and sarking membranes should be undamaged and correctly fixed. Structural timbers must be stamped, certified and treated as per specifications.
Supports for tanks, equipment and floor decking need to be in place; also tie down straps must be where indicated on the drawings.
Last but not least, ventilation of the structural timbers should be unimpeded.
How about structural defects?
Snags relating to structural defects are less common but the structural engineer is quite often called in to investigate any items which may be in doubt.
Any snags relating to the safety of occupants, workers or other visitors must be remedied as soon as possible. There are some points to note.
As a rule of thumb, any retaining structure, such as retaining walls, sheet piles, piers or gabions, in excess of 600mm above ground level should be designed by a structural engineer.
Not many people might know this, but depending on the site exposure zone, a free-standing wall constructed of 100 mm thick concrete blockwork and a height in excess of 325 mm might not be regarded as safe.
Even a 200 mm thick blockwork wall could be unsafe at heights above 775 mm and piers in any wall can contribute surprisingly little to stability.
All free-standing walls should be designed by a structural engineer. Collapses of undesigned free-standing walls have been the cause of fatal and serious injuries to children and adults.
Also, approved guarding should be provided alongside changes in levels (paths, ramps, steps or retaining walls) where the difference in vertical height between upper and lower ground levels exceed 600 mm.
This also applies where the ground slopes away from a path, ramp or steps at an angle of more than 300 from the horizontal. Guarding may also include handrails where they are required for accessibility.

Roof snags
Has the cladding been installed to account for prevailing winds and exposure conditions? When cladding is on roofs, check the adequacy of the fixing methods and vents if required. Fascias, barge boards and soffits need to have been installed as per the drawings. Check ventilation fixtures. Also check flashing and trim around roof light windows.
When it comes to hips and ridges, check if they are bedded in mortar or fixed using screws. As for the slates or tiles, check if there are any missing pieces, cracks and misalignment. In doubt check the specifications.
Valley gutter defects such as cracks or split joints, debris, etc. must be attended to. Vents along valleys, roof intersections, hips, ridges, and so forth also need to be secure. The verge trim must be properly installed and secure.
All solar systems, be it for hot water or photovoltaic, must have been tested and certified. Make sure you have the paperwork.
External wall snags
Balconies including their materials, supports, guarding and drainage must be checked. If you see cracks wider than the thickness of a pound or euro coin, get it checked and measure their depth.
Damp-proof course (DPC) must be continuous at heads, sills and jambs of external openings. DPCs in walls must be above ground level including at sloping paths, steps and ramps. Check flashings, soakers and DPC cavity trays at roof/wall abutments. Electric meters and/or gas meters must be in their correct positions; obtain keys for cabinet doors. Finishes around pipes, ducts and other wall penetrations must be tidy. Check for approved flexible sealants and neatness of render.
Gaps are unacceptable where the frames of windows and doors about the walls. Make sure all external lighting is complete, with avoidance of light pollution. For masonry and pre-cast concrete products check for chips or cracks. Look at the bottom edges of sills especially if they have been set up using a forklift or telehandler. You’ll need masonry movement joints where they abut timber frame elements.
Metal or other sheet wall cladding must have been installed to account for prevailing winds and exposure conditions. Check all fixings, edge vents and infestation barriers.
Mortar and render may be hard to check but if there are issues it could be that the correct mix has not been used, e.g. lime content may have been specified.
Bulging, discoloured, hollow or boast render have to be remedied or if it shows a geometric surface pattern. Steelwork if exposed or in cavities of walls must be at least galvanised and in coastal areas may need to have been manufactured from stainless steel. Check the specifications.
Stone and brickwork may present staining due to efflorescence or other causes. Check the specification and quality of materials and the type of mortar joints used. For stone or brick cladding, check the adequacy of fixing methods and dimensions. On timber frame construction check all wall vents, also those installed for suspended timber ground floors. Are all walls true, square and straight? All dimensions should be within permitted tolerances.

Checklists
Checklist for floors:
1. Acoustic performance and draught seals where required.
2 .Circulation, horizontal and vertical, within the dwelling.
3. Edges of floor finishes should not protrude above one another where they meet.
4. Fixings and their correct positions for all wood panel flooring products.
5. Floorboards. Listen for creaks and look for gaps, ridges or unevenness in floorboards or other timber or composite products.
6. Insulation where floors meet the internal faces of the external walls.
7 .Movement joints positioned and sized as per the specifications, for all types of floor finish.
8 Screeds properly prepared with no cracks or surface irregularities. Before finishes are laid, check levels and moisture content.
9. Terrazzo, tiles or other hard floor finishes. Check for cracks, especially around salient wall corners and over any potentially weak points in the screed.
10. Thermal bridging.
11. Trip hazards, slip resistance and uneven or misaligned surfaces.
Checklist for walls and ceilings:
1. Cracks in surfaces often occur where different building materials abut one another.
2. Paint should be even and free from brush or roller marks.
3. Painted and similar finishes should be protected from damage until handover.
4. Plaster popped out at nail or screw heads should be properly repaired.
5. Plaster should be smooth and evenly applied, with edge beads where required.
6. Plasterboard should be smooth and even and fixed in accordance with the specifications.
7. Plasterboard, where it is not intended to be skimmed, should be properly prepared.
8. Surface cracks in masonry walls checked as for external walls.
9. Surfaces all finished as expected and cleaning-up completed?
10. Unpainted surfaces adjacent to painted surfaces should be free from paint marks.
11. Walls and ceilings should be true, square and straight and dimensions
within permitted tolerances.
Checklist for internal joinery:
1. Air gaps under internal doors should be provided where required.
2. Cabinet doors and movable shelves or baskets move smoothly and are neatly fitted.
3. Door furniture should be free from paint.
4. Door stops provide as specified.
5. Doors and frames. All screws fitted in hinges and hinges lubricated.
6. Doors should not squeak or stick when opening or closing and should not rattle when closed.
7. Fire doors fitted to the correct specification.
8. Handles should function smoothly and return to their positions when released.
9. Kitchen, utility room and bedroom fitted furniture is free from defects.
10. Loose and overly resinous knots and other defects should be cut out and made good.
11. Moisture content of any internal timber yet to be painted. Check it before painting commences.
12. Nail or screw holes and splits should be properly filled and primed before finishing.
13. Paint and similar finishes should not be applied until the correct temperature and humidity levels have stabilised and the area is free from air-borne dust and other contaminants.
14. Prefabricated timber components should receive a first coat of treatment before fixing.
15. Preservatives, where used. Ensure that following finishes are compatible.
16. Primer should be applied to hidden timber surfaces such as the backs of skirtings, architraves, internal sills, etc. before they are fixed.
17. Stains or varnishes comply with fire regulations and have been certified, for example, for surface spread of flame on ceilings, etc.
18. Surface imperfections should be rubbed down before painting or staining.
19. Widths of other gaps around doors should be within tolerances and uniform.
Checklist for stairs:
1. Balusters, handrails and newels securely fitted and tight.
2. Damage or other imperfections to all stair components? Check thoroughly.
3. Differences in levels between stairs and adjacent floors or landings not permitted.
4. Dimensions of stairs, guarding and handrails must comply with the regulations.
5. Gaps between stairs and adjacent walls, floors or landings should be rectified.
6. Stairs and ancillary fittings properly fixed, with no creaks or rattles.
7. Treads and risers should have uniform dimensions. Treads should be level.
Checklist for drainage:
1. Condensate pipes from condensing boilers should discharge to a suitable gully.
2. Inspection chambers and manholes must be fully inspected and tested, including their lids.
3. Package wastewater treatment plant or septic tanks must be checked, tested and certified.
4. Pressure testing of drainage must be carried out where required by the regulations.
5. Rainwater and wastewater gullies, pipes and joints must be checked for gaps, leaks or damage.
6. Rainwater goods must be of correct materials, profiles and dimensions. All brackets and joints must be secure and water flow through gutters must be towards downpipes.
7. Roadside drainage must be in place and working as it should.
8. Soil vent pipes should terminate at the correct position and be fitted with cover cages.
9. Sustainable drainage systems (SUDs) must be as designed.
10. Wastewater pipework which is fixed to walls must be checked for compliance
Other external works checklist:
1. Check driveways, paths, ramps and steps. Kerbs, drainage gullies, gradients, dimensions including levels and materials.
2. Environmental measures must be completed in accordance with the approvals.
3. Check for obvious defects on fences, gates and pillars, etc.
4. Heating installations and fuel storage: bases, bunds, fire safety zones and distances from underground services must be in place.
5. Lawns and beds must be completed in accordance with the contract.
6. Parking, access routes and accessibility must be adequate.
7. Patio, terrace and decking: check stability, including supporting bases, materials and levels.
8. Planters should be capable of supporting the plant species and volume of soil.
9. Sight lines, sight splays and access to and from the public road must be as specified on the drawings.
10. Tree planting and tree protection schemes must be in accordance with planning approval.