From design vision to final finish, first-time self-builders Colin and Nicole McKee rolled up their sleeves and got stuck in.
In this article we cover:
- How to achieve a contemporary design within a rural setting
- Planning permission process for replacement dwelling
- How they project managed the build themselves
- How they tackled issues on site for ducting and cabling
- Choice of heating and ventilation systems
- Photovoltaic (PV) system choice and installation
- Details of vaulted ceiling
- Kitchen design and installation
- Interior design details: industrial look
- Tips to stay on schedule and on budget
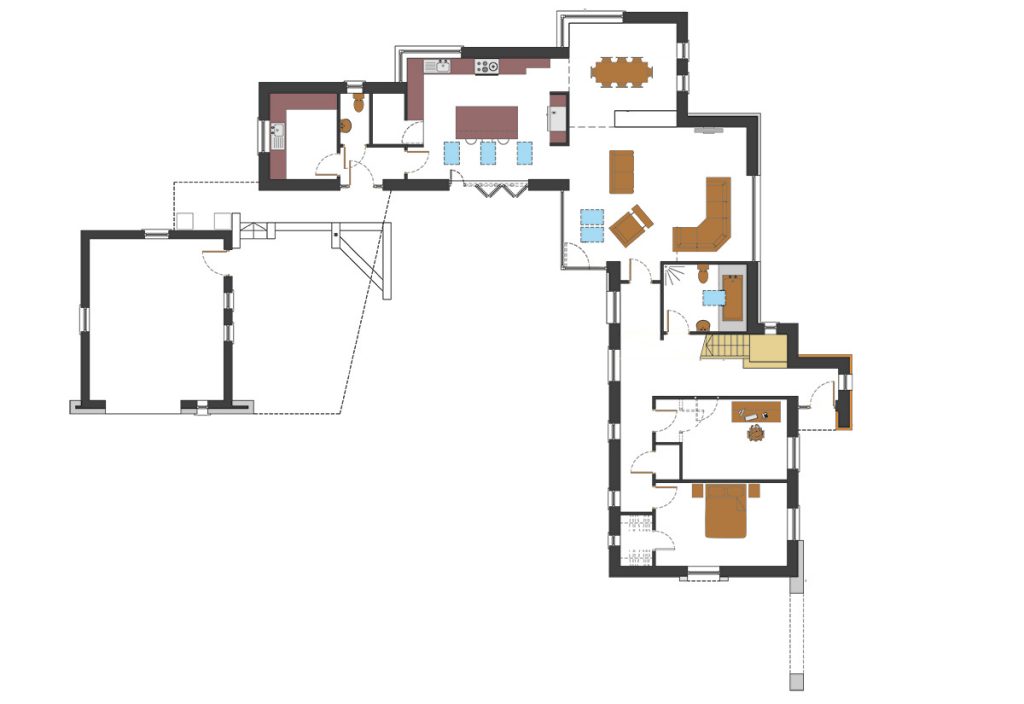
- Full floor plans, specification and supplier list
“We were fortunate to have a site on Colin’s family farmland and after watching way too many episodes of Grand Designs, we convinced ourselves that we could take on a self-build project,” says Nicole.
Walls: 400mm timber frame wall construction composed of 100mm block, 50mm cavity, 150mm mineral wool within the timer frame stud, 50mm PIR board and finally 50mm service cavity with mineral wool insulation. U-value 0.13 W/sqmK.
Roof: truss roof construction, vented, with 450mm mineral wool and 50mm PIR board on the underside. U-value 0.14 W/sqmK.
Floor: standard subfloor then underfloor heating on 150mm PIR board covered with 100mm 50N concrete. U-value 0.12 W/sqmK.
Glazing: uPVC triple glazed with U-value of 1.2 W/sqmK.
Air permeability: 0.83 m3/hr/sqm @50Pa
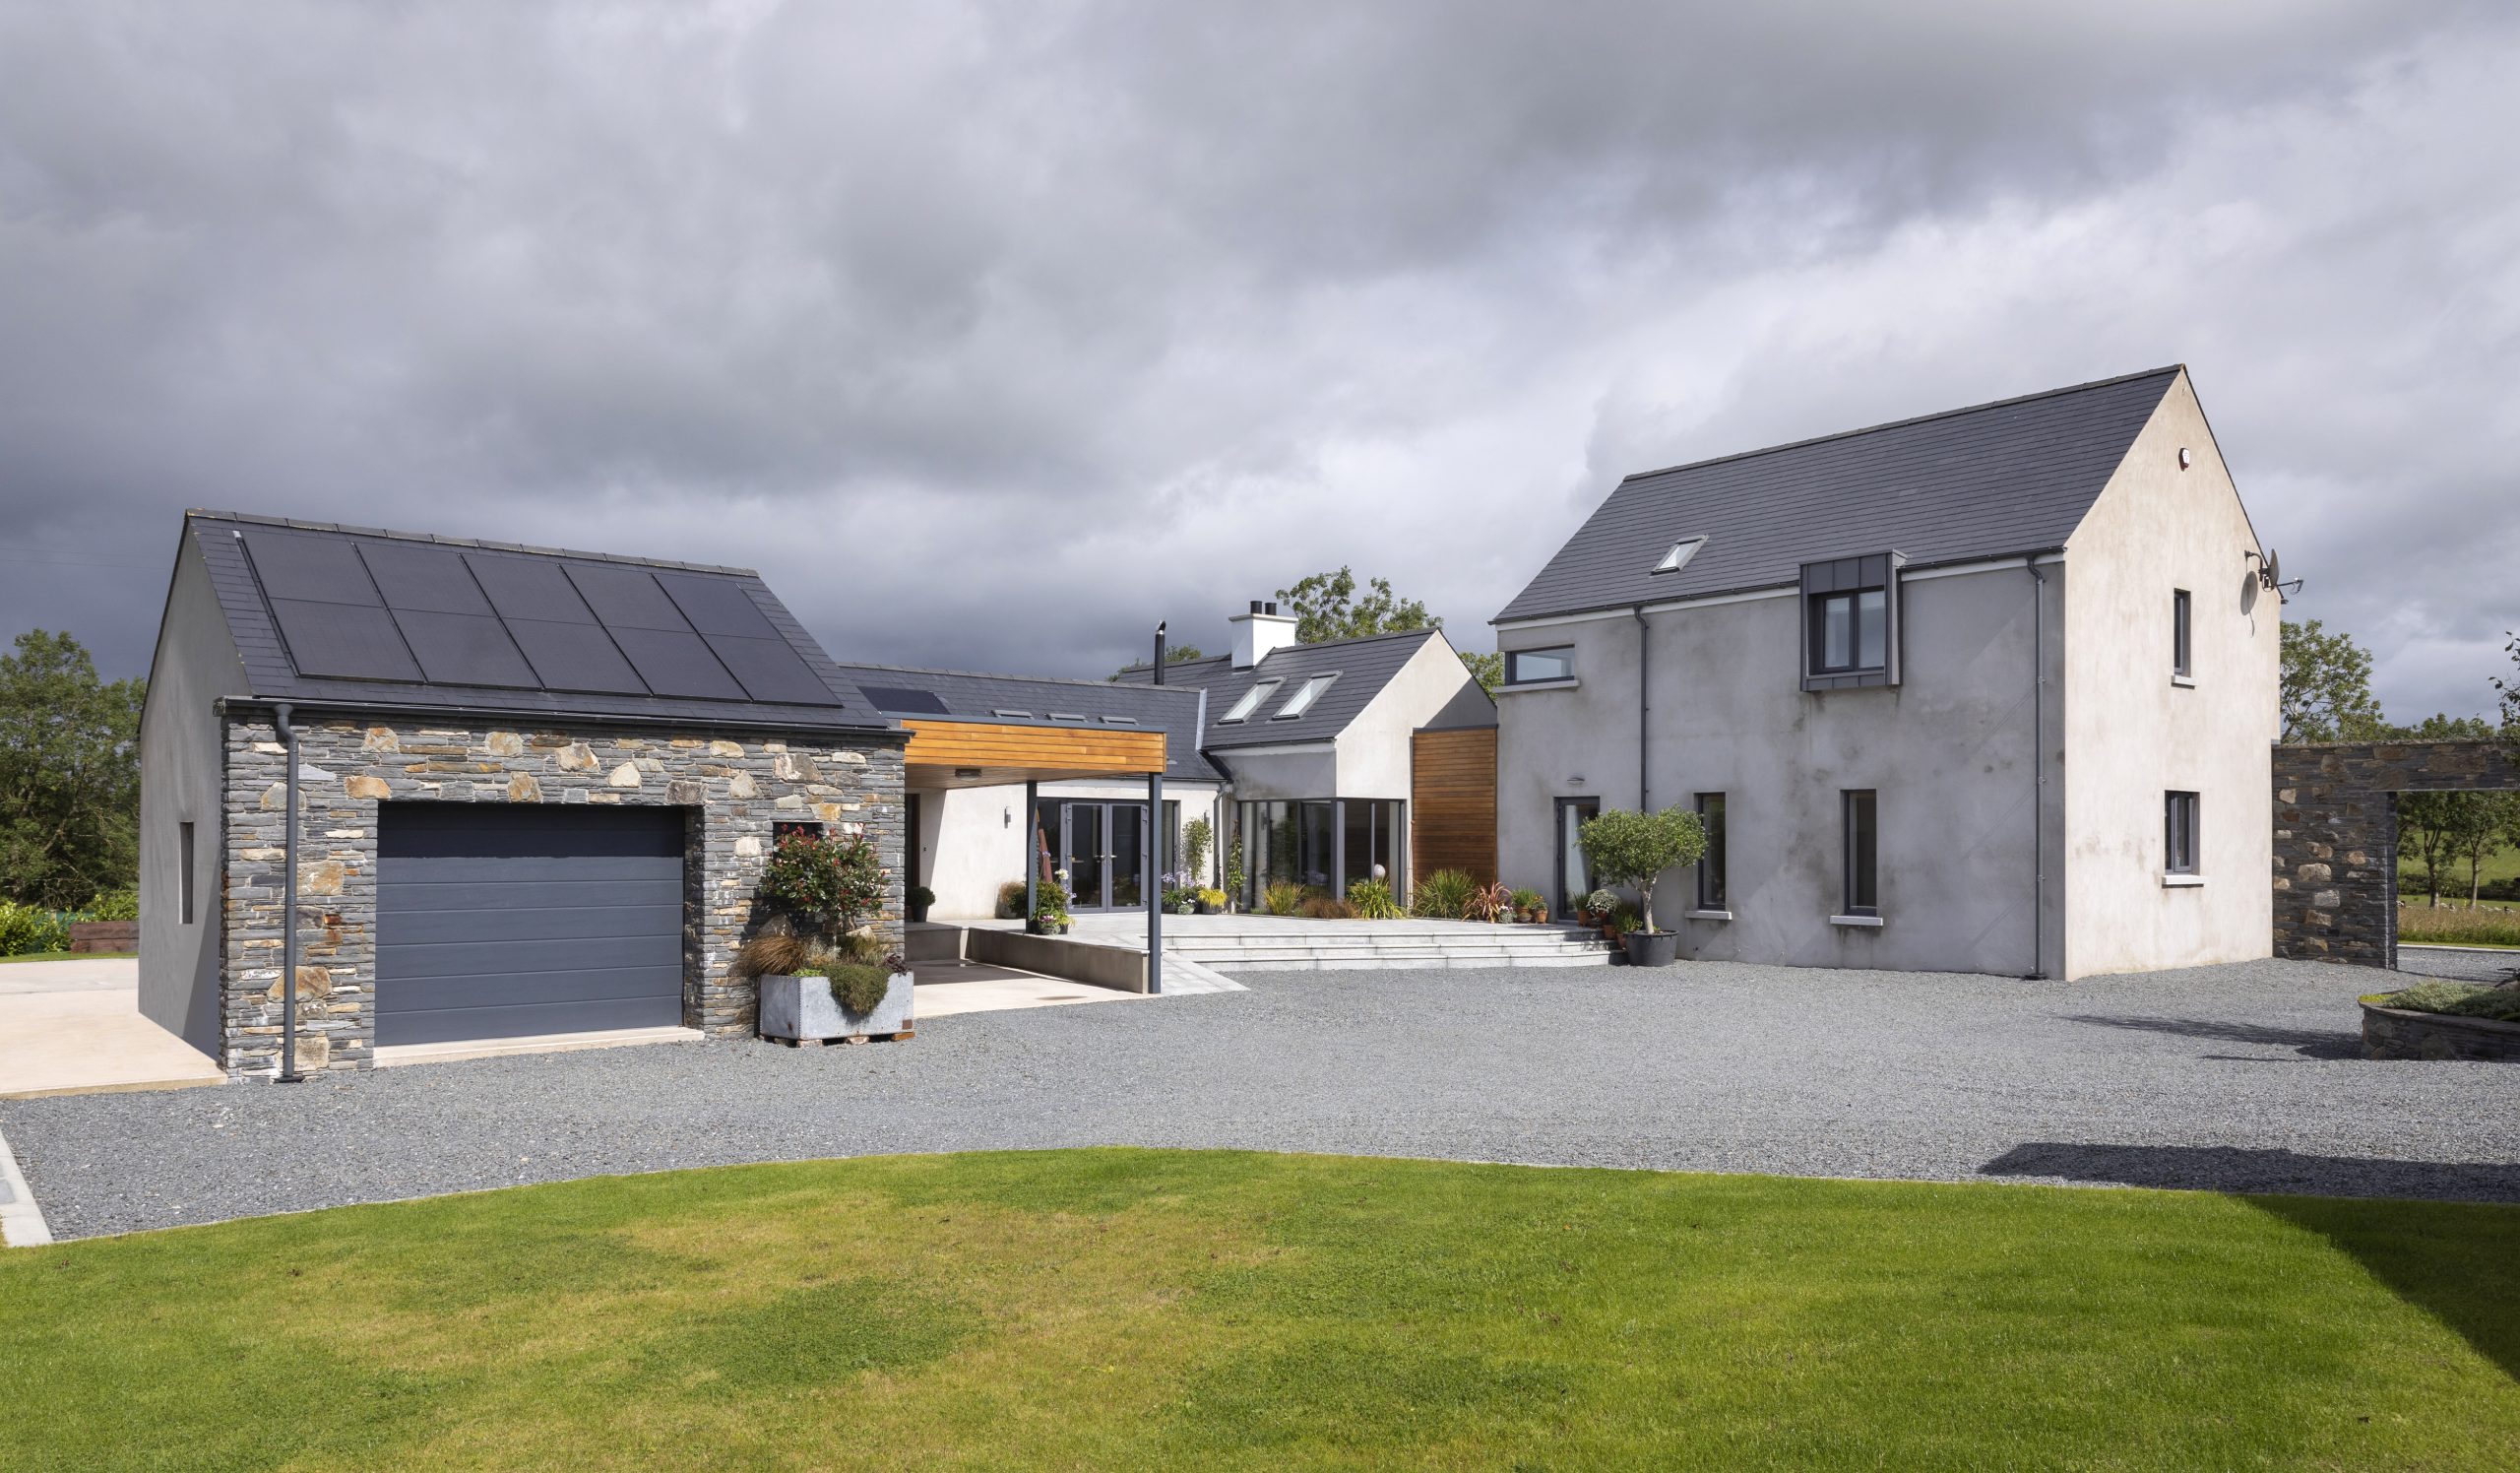
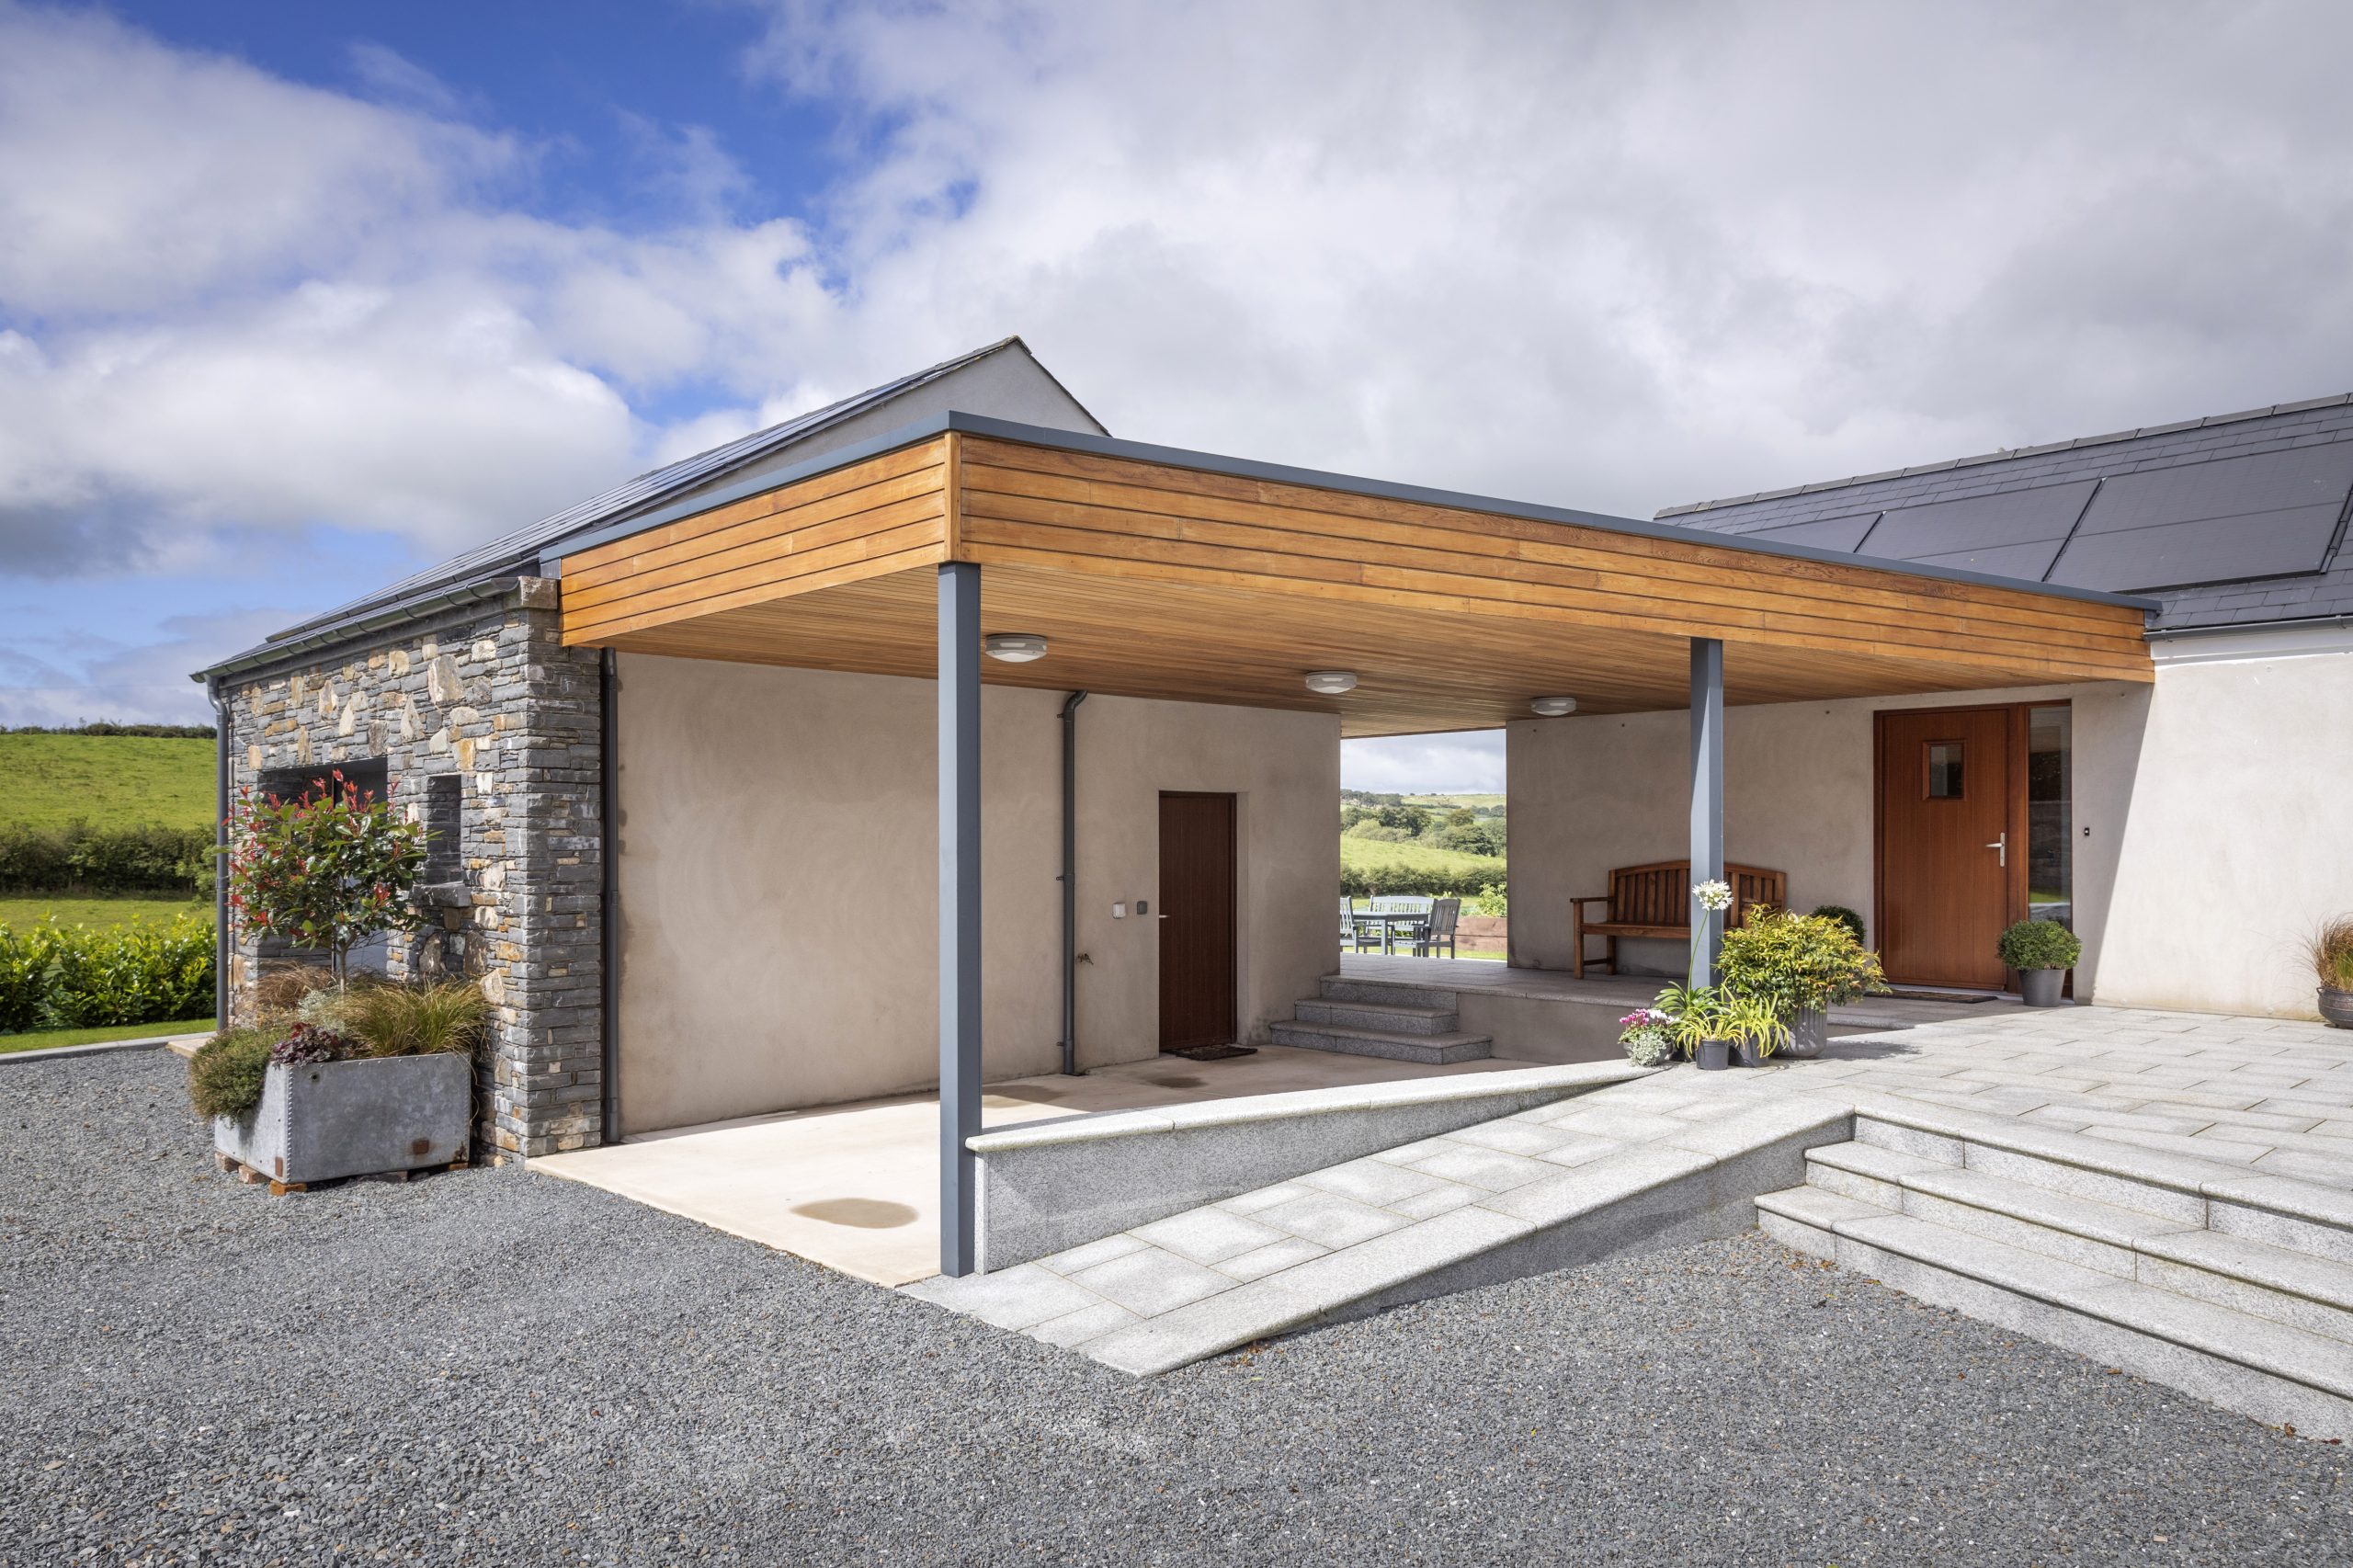
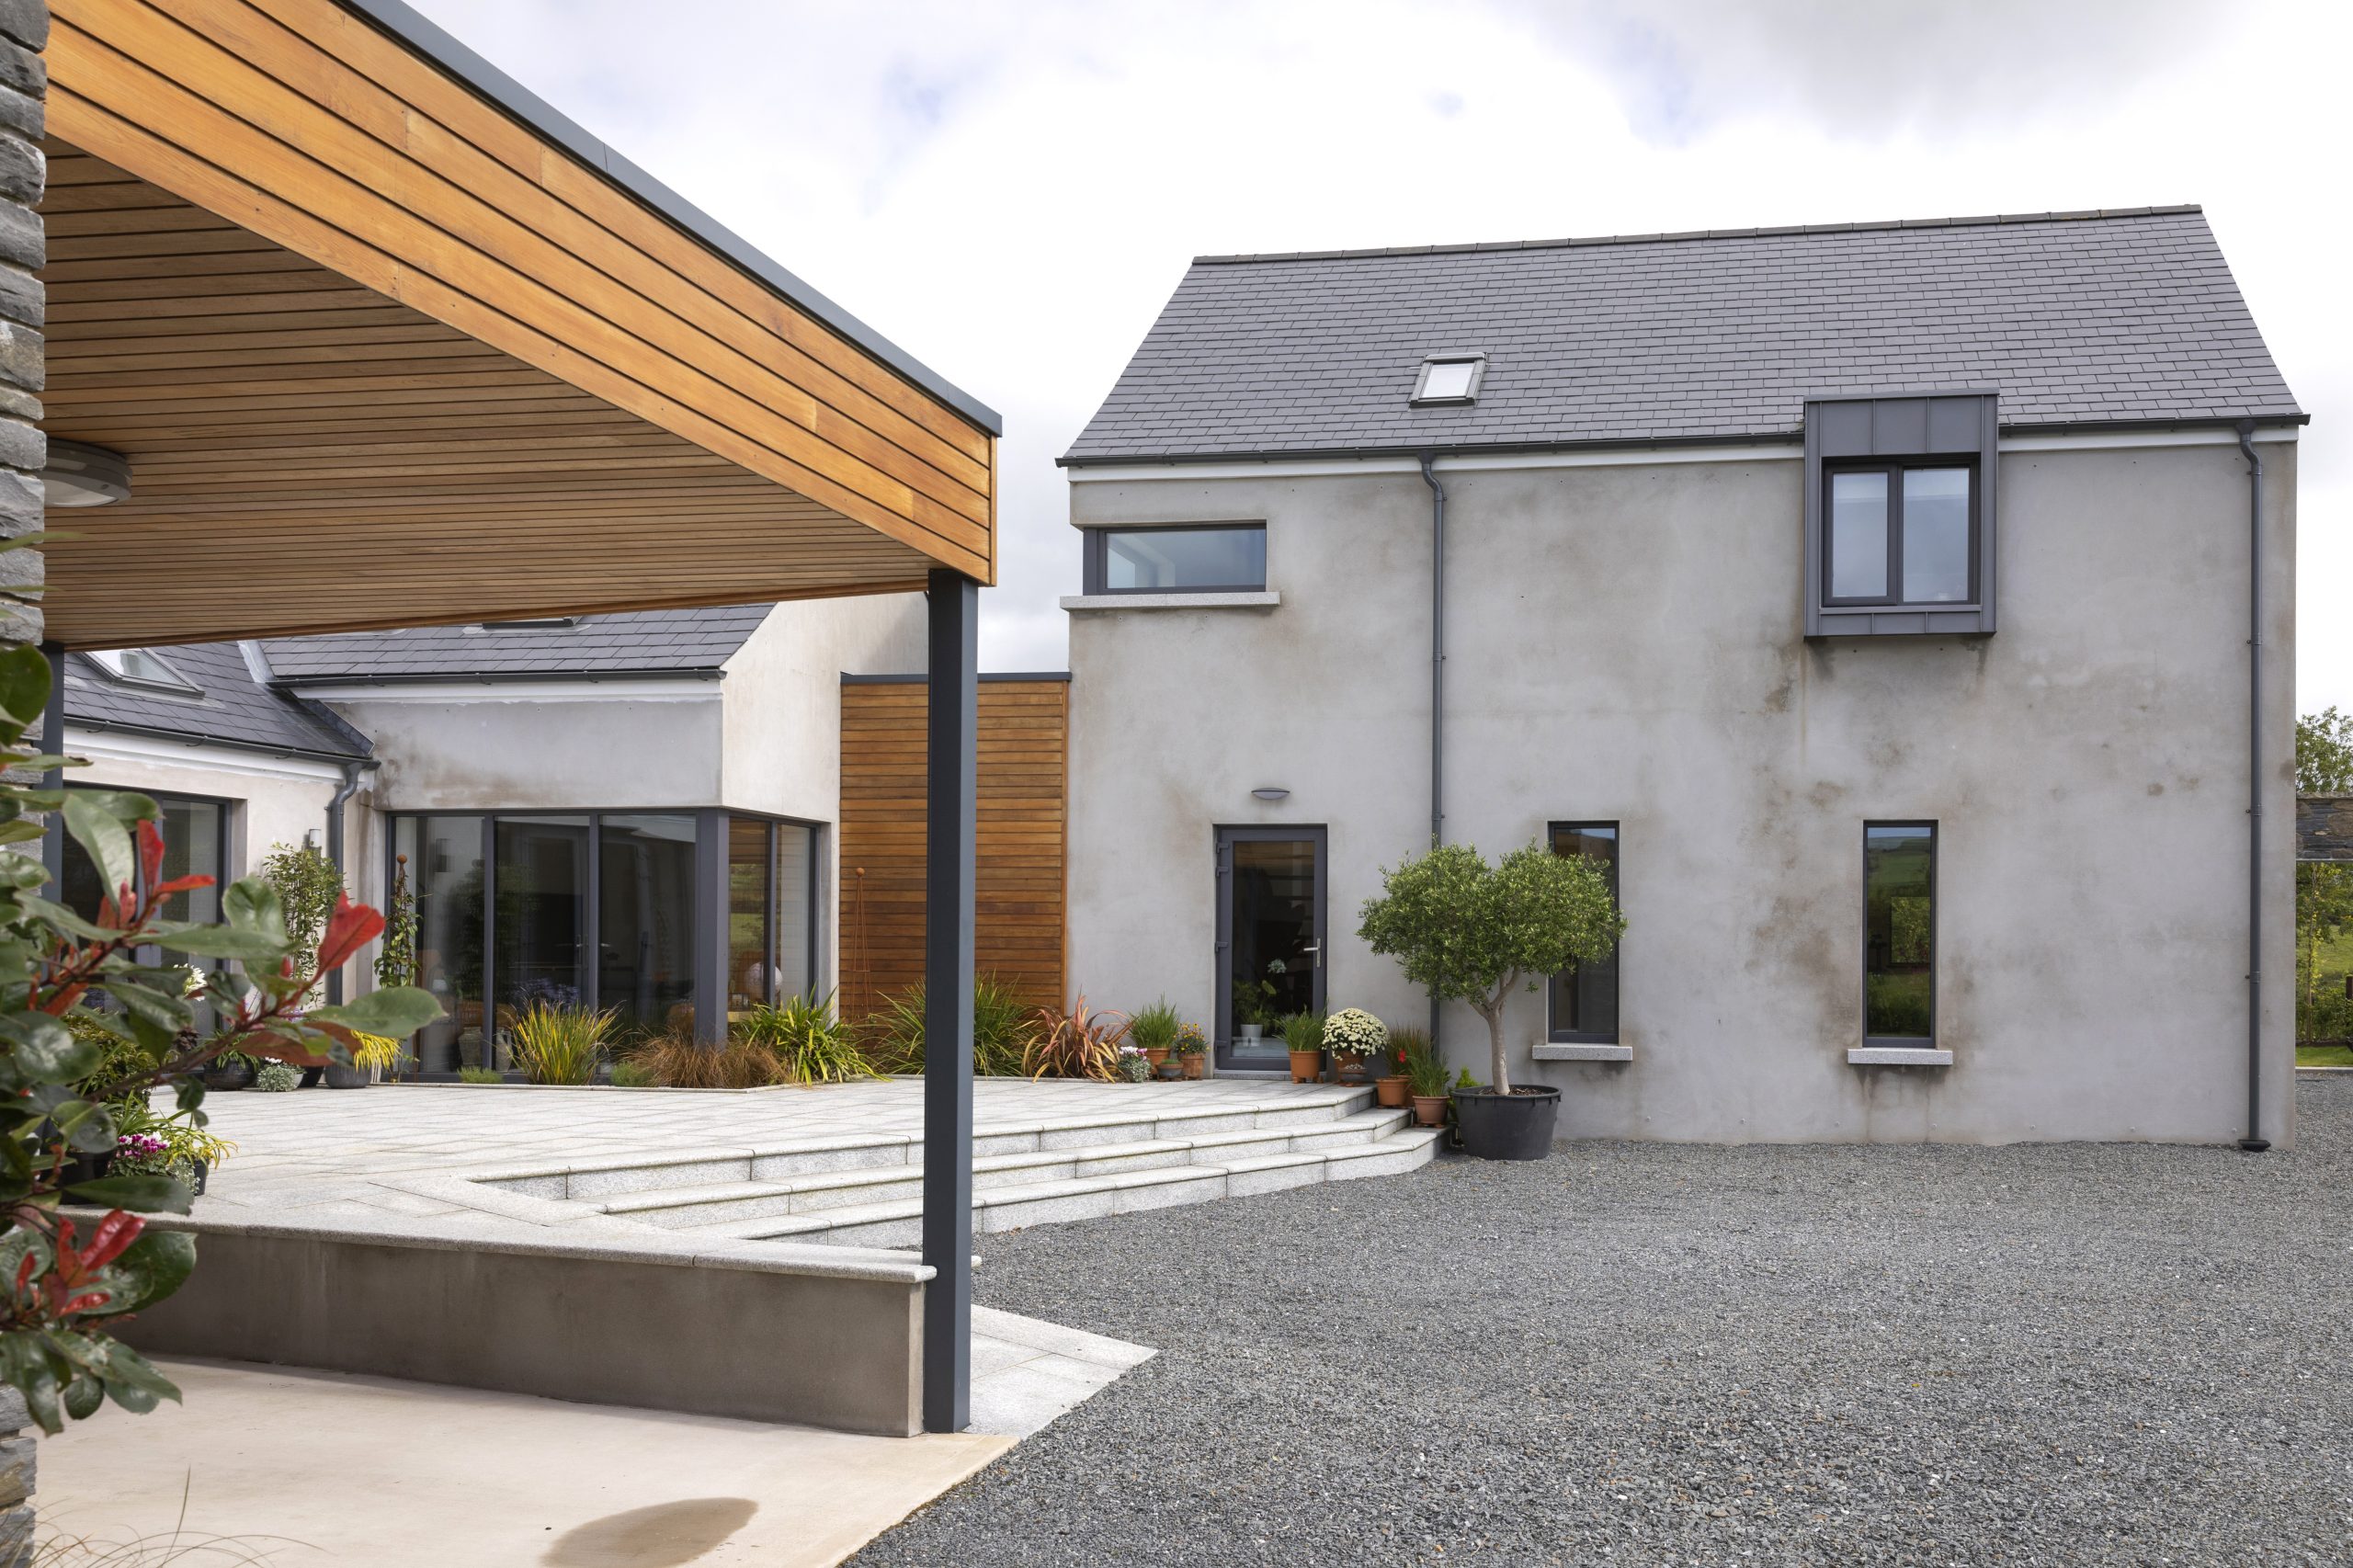
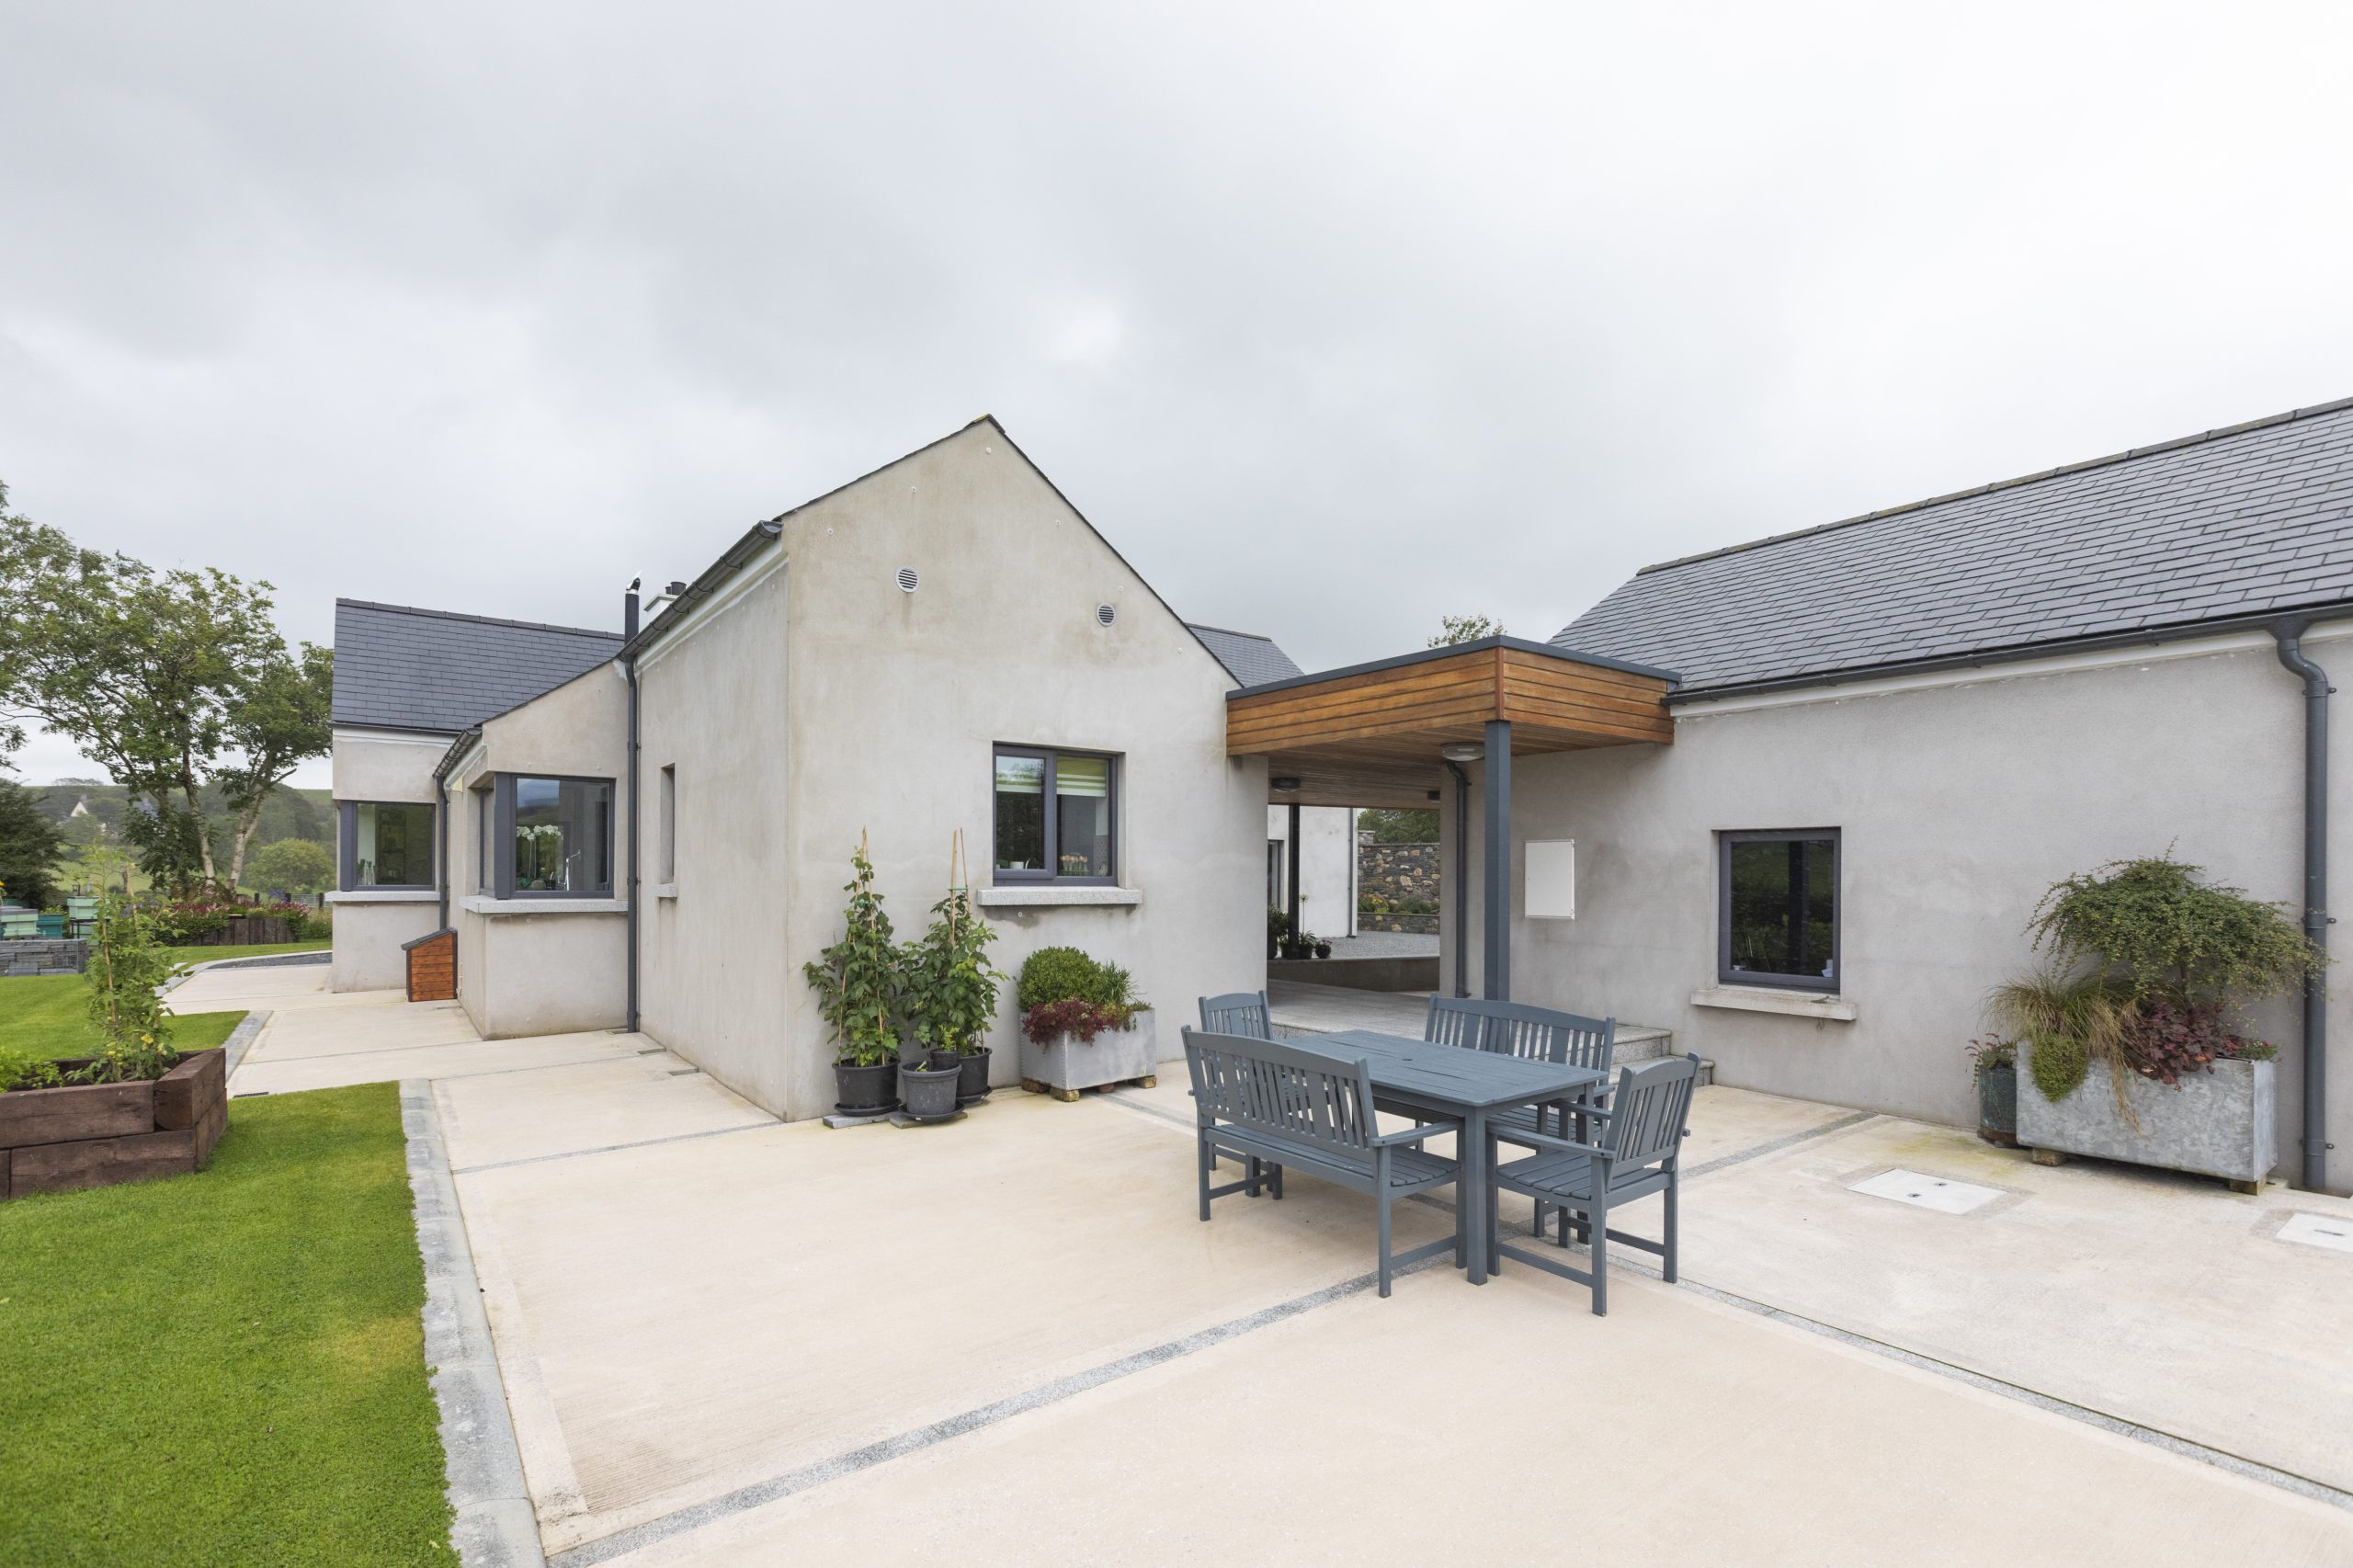
“We like visiting National Trust houses and gardens at the weekends, which helped influence what we wanted our new home to look like. It wasn’t the grand facade of the main house that appealed to us; it was the more humble aesthetics of the stable courtyards and outbuildings. We loved the character of the old stone, slate and wood used in their construction, but also liked the idea of merging it with glass and steel for a more modern twist.”

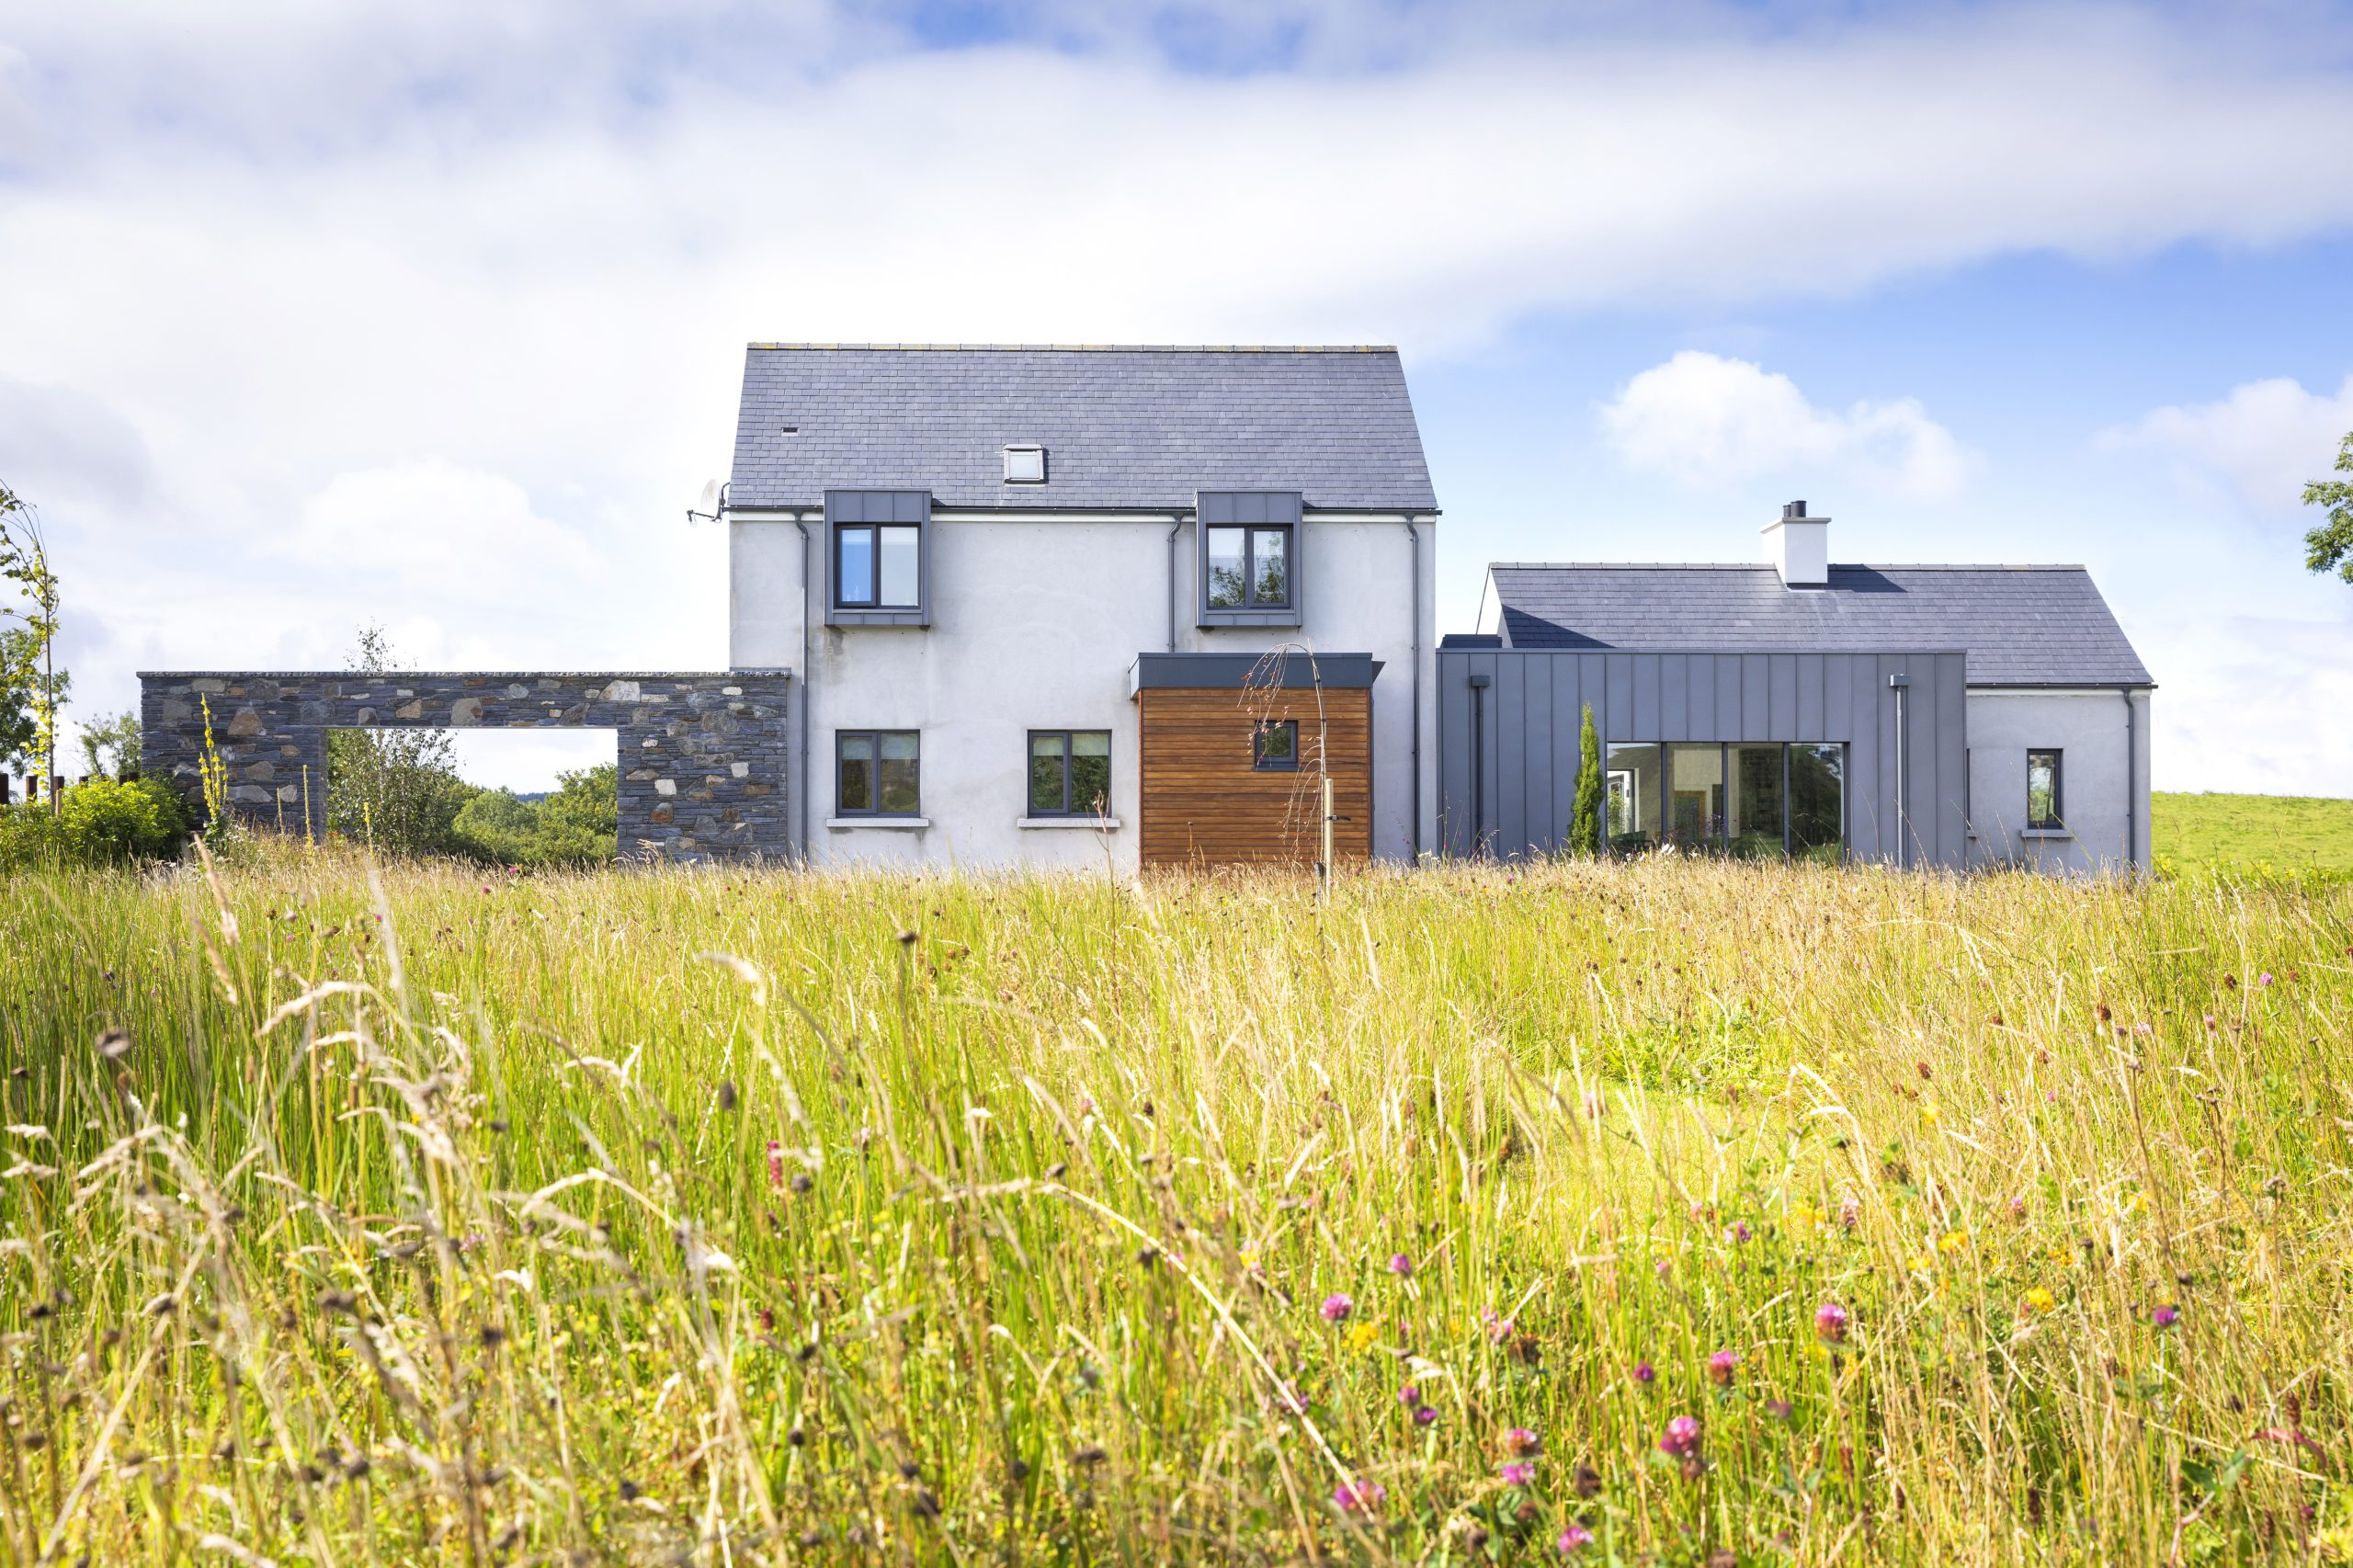
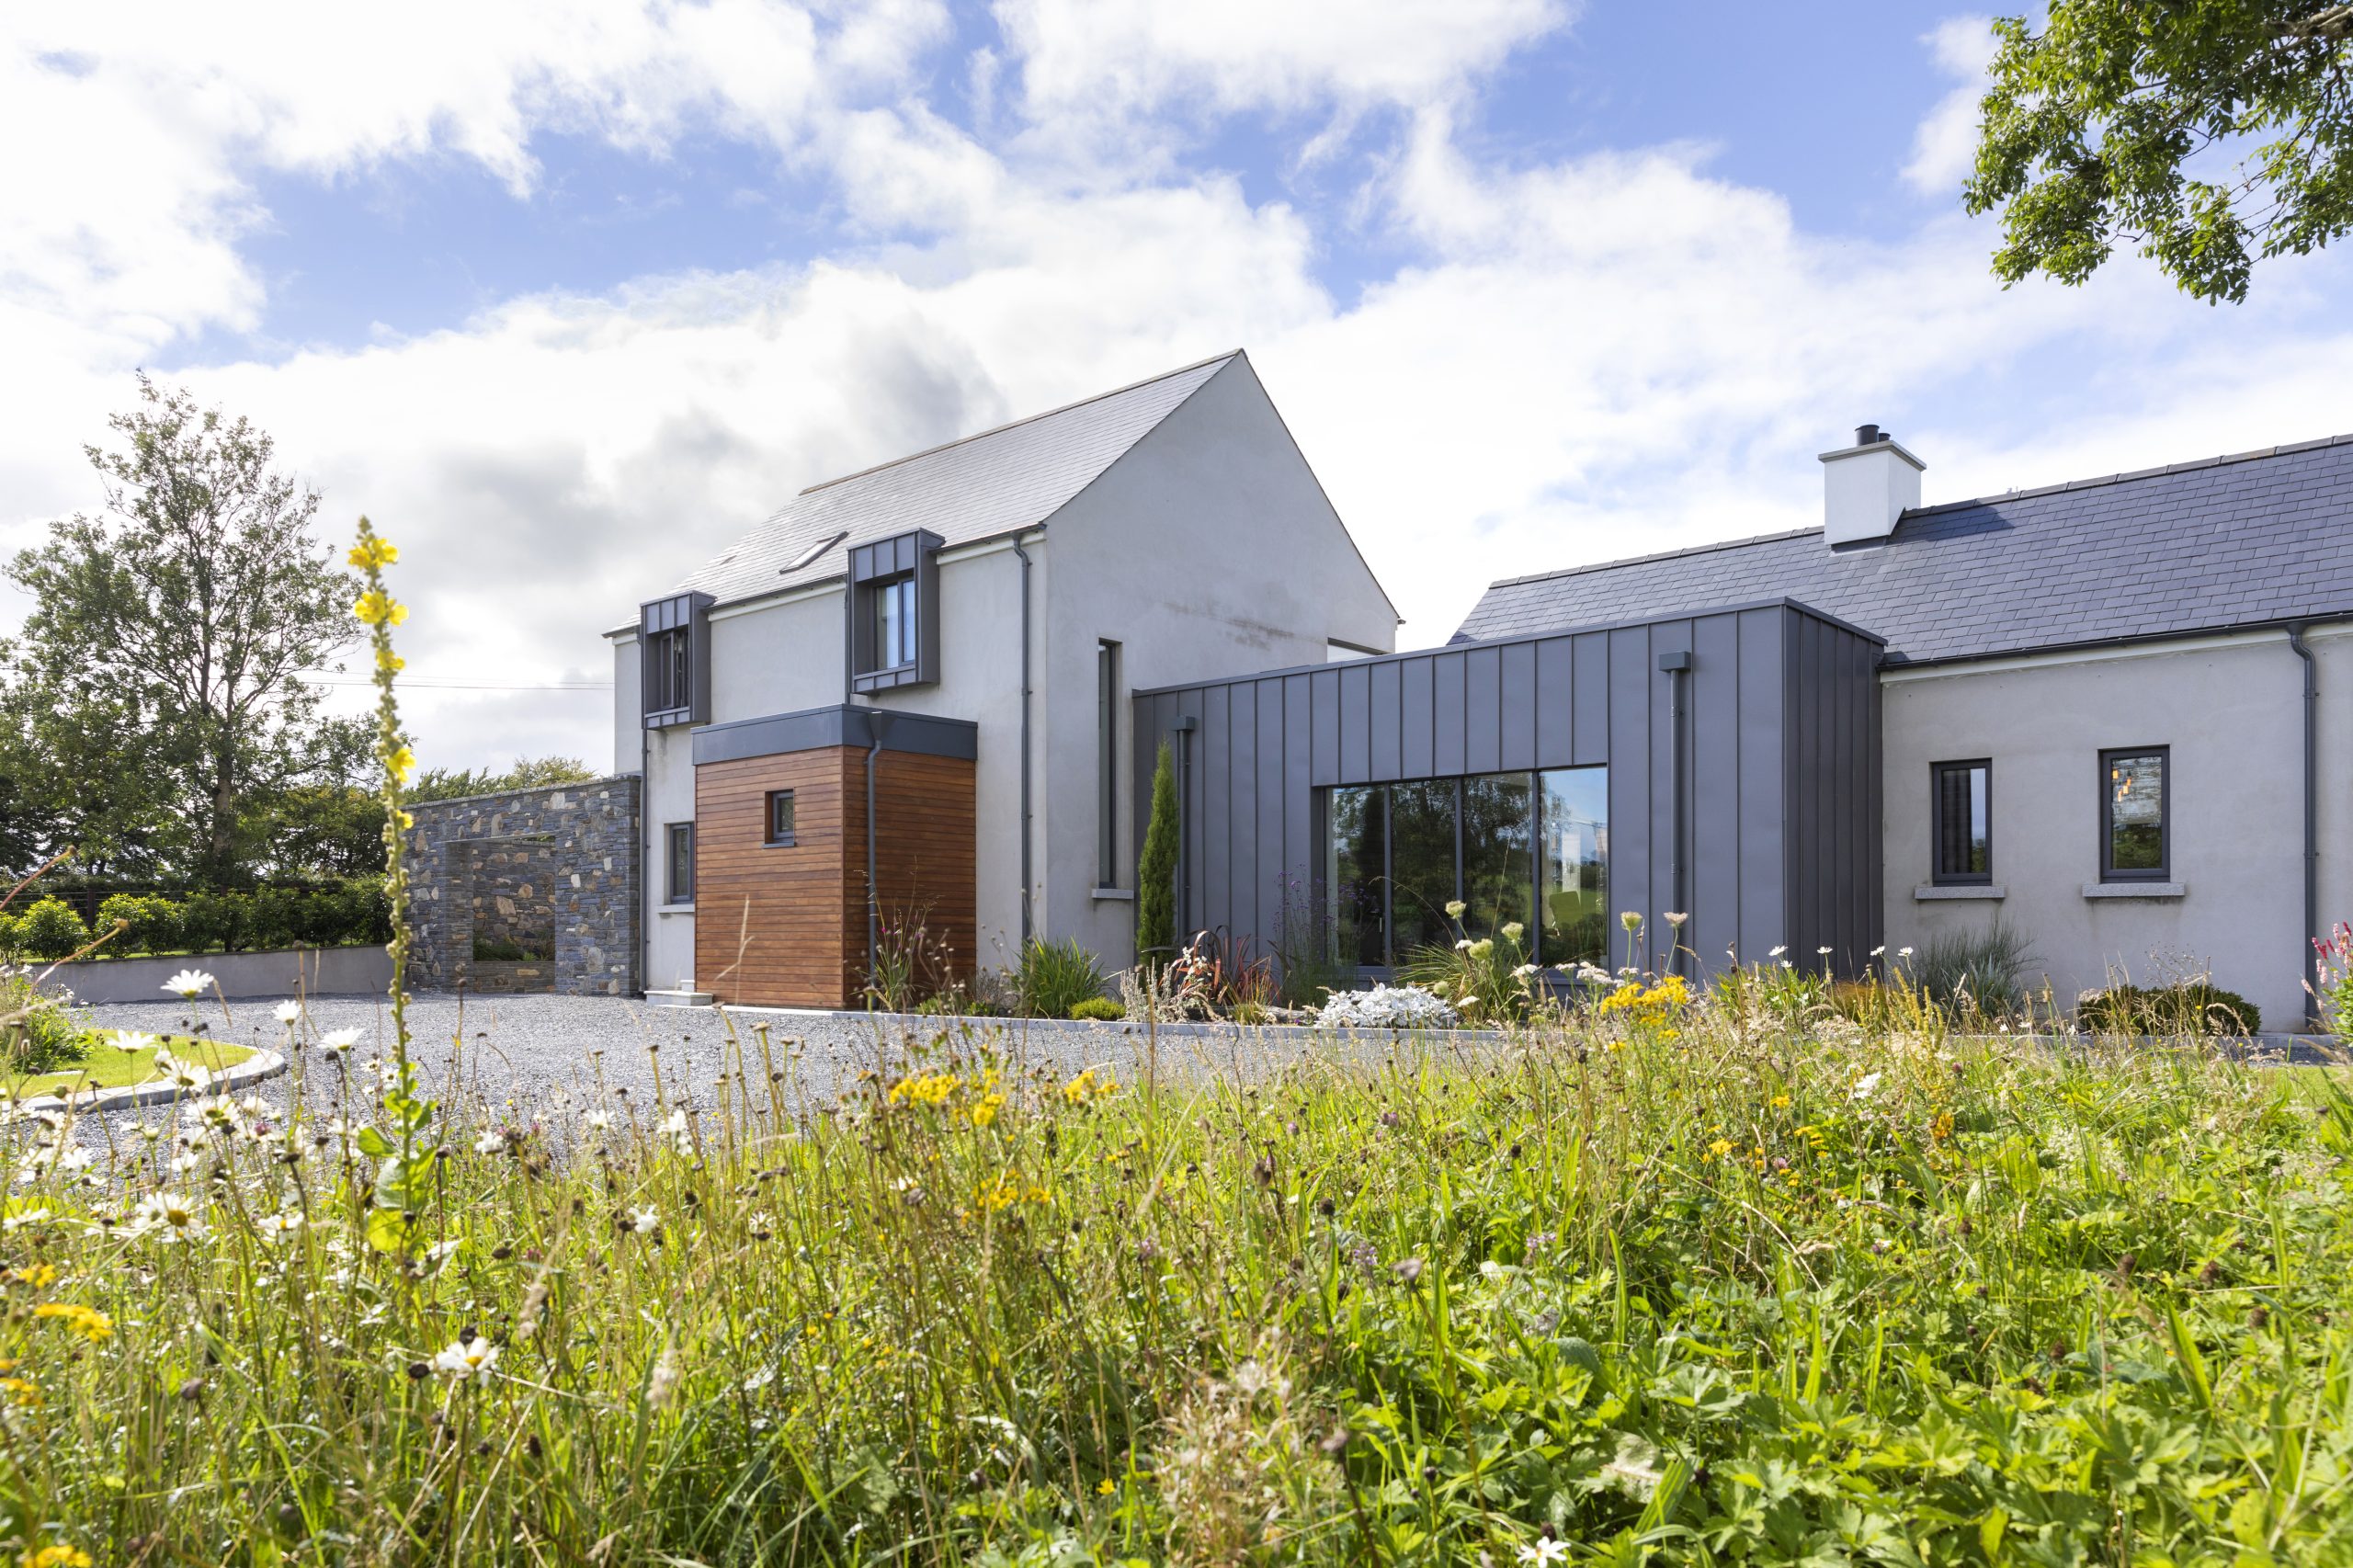
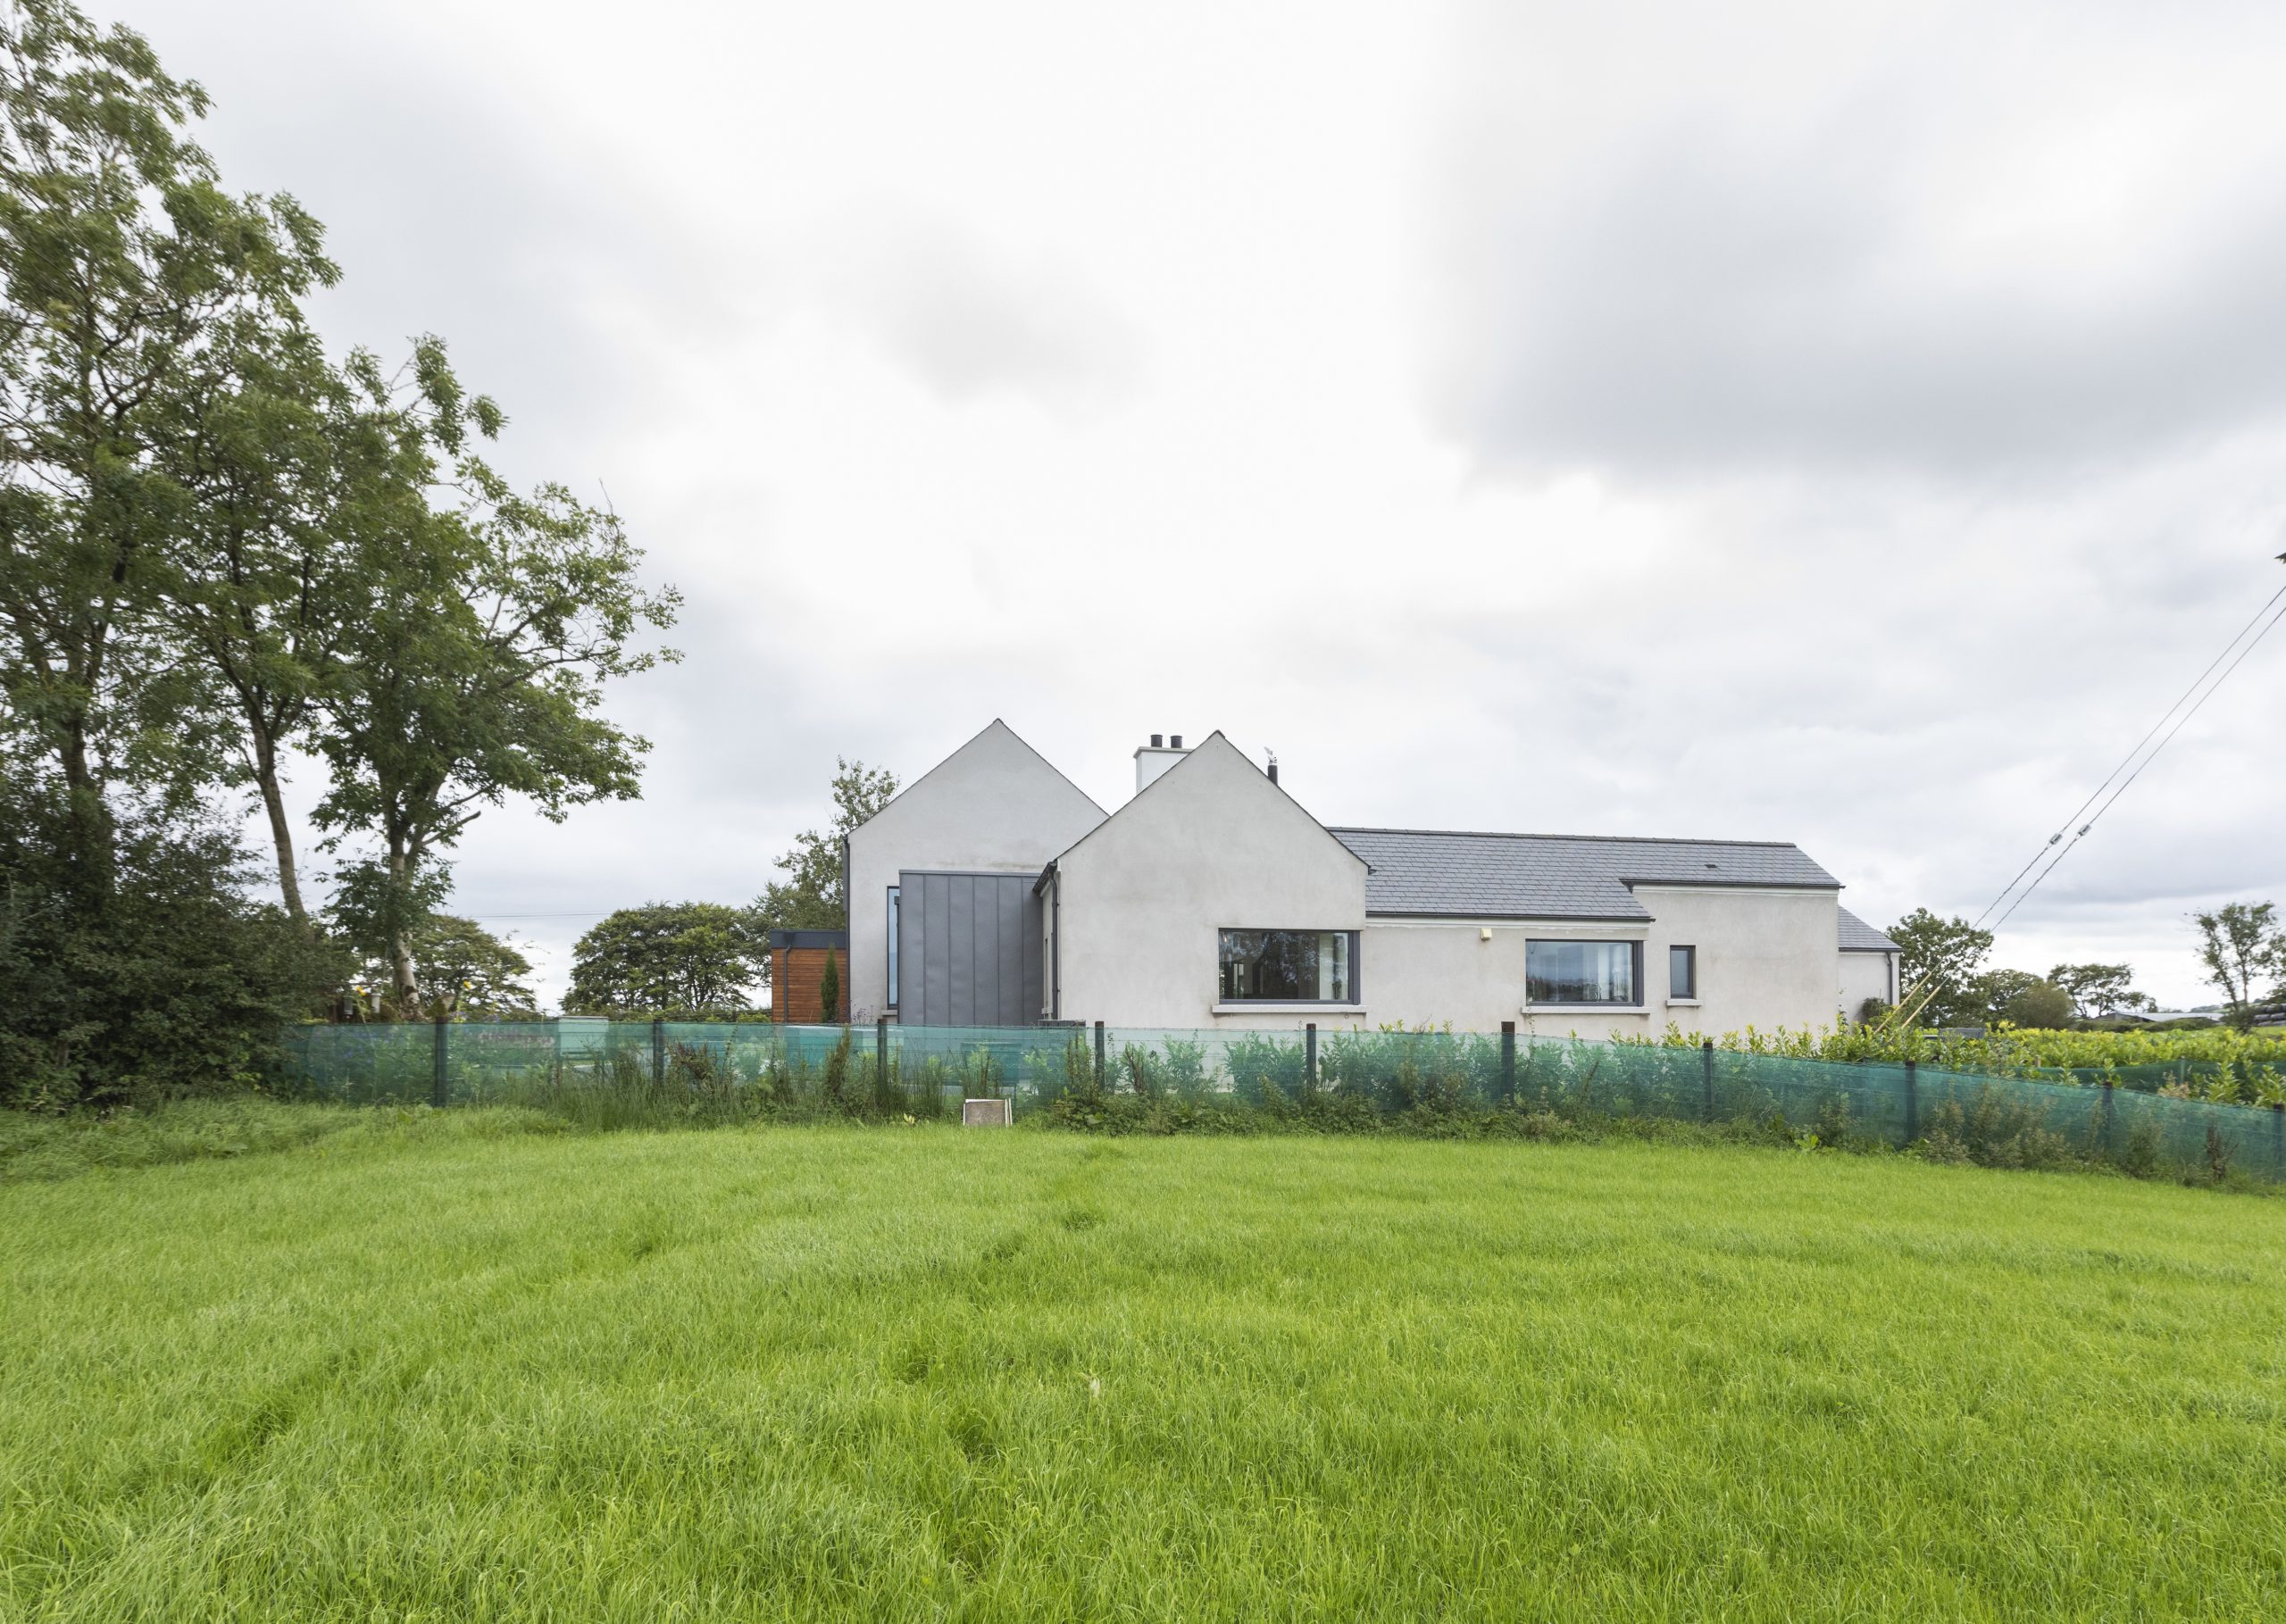
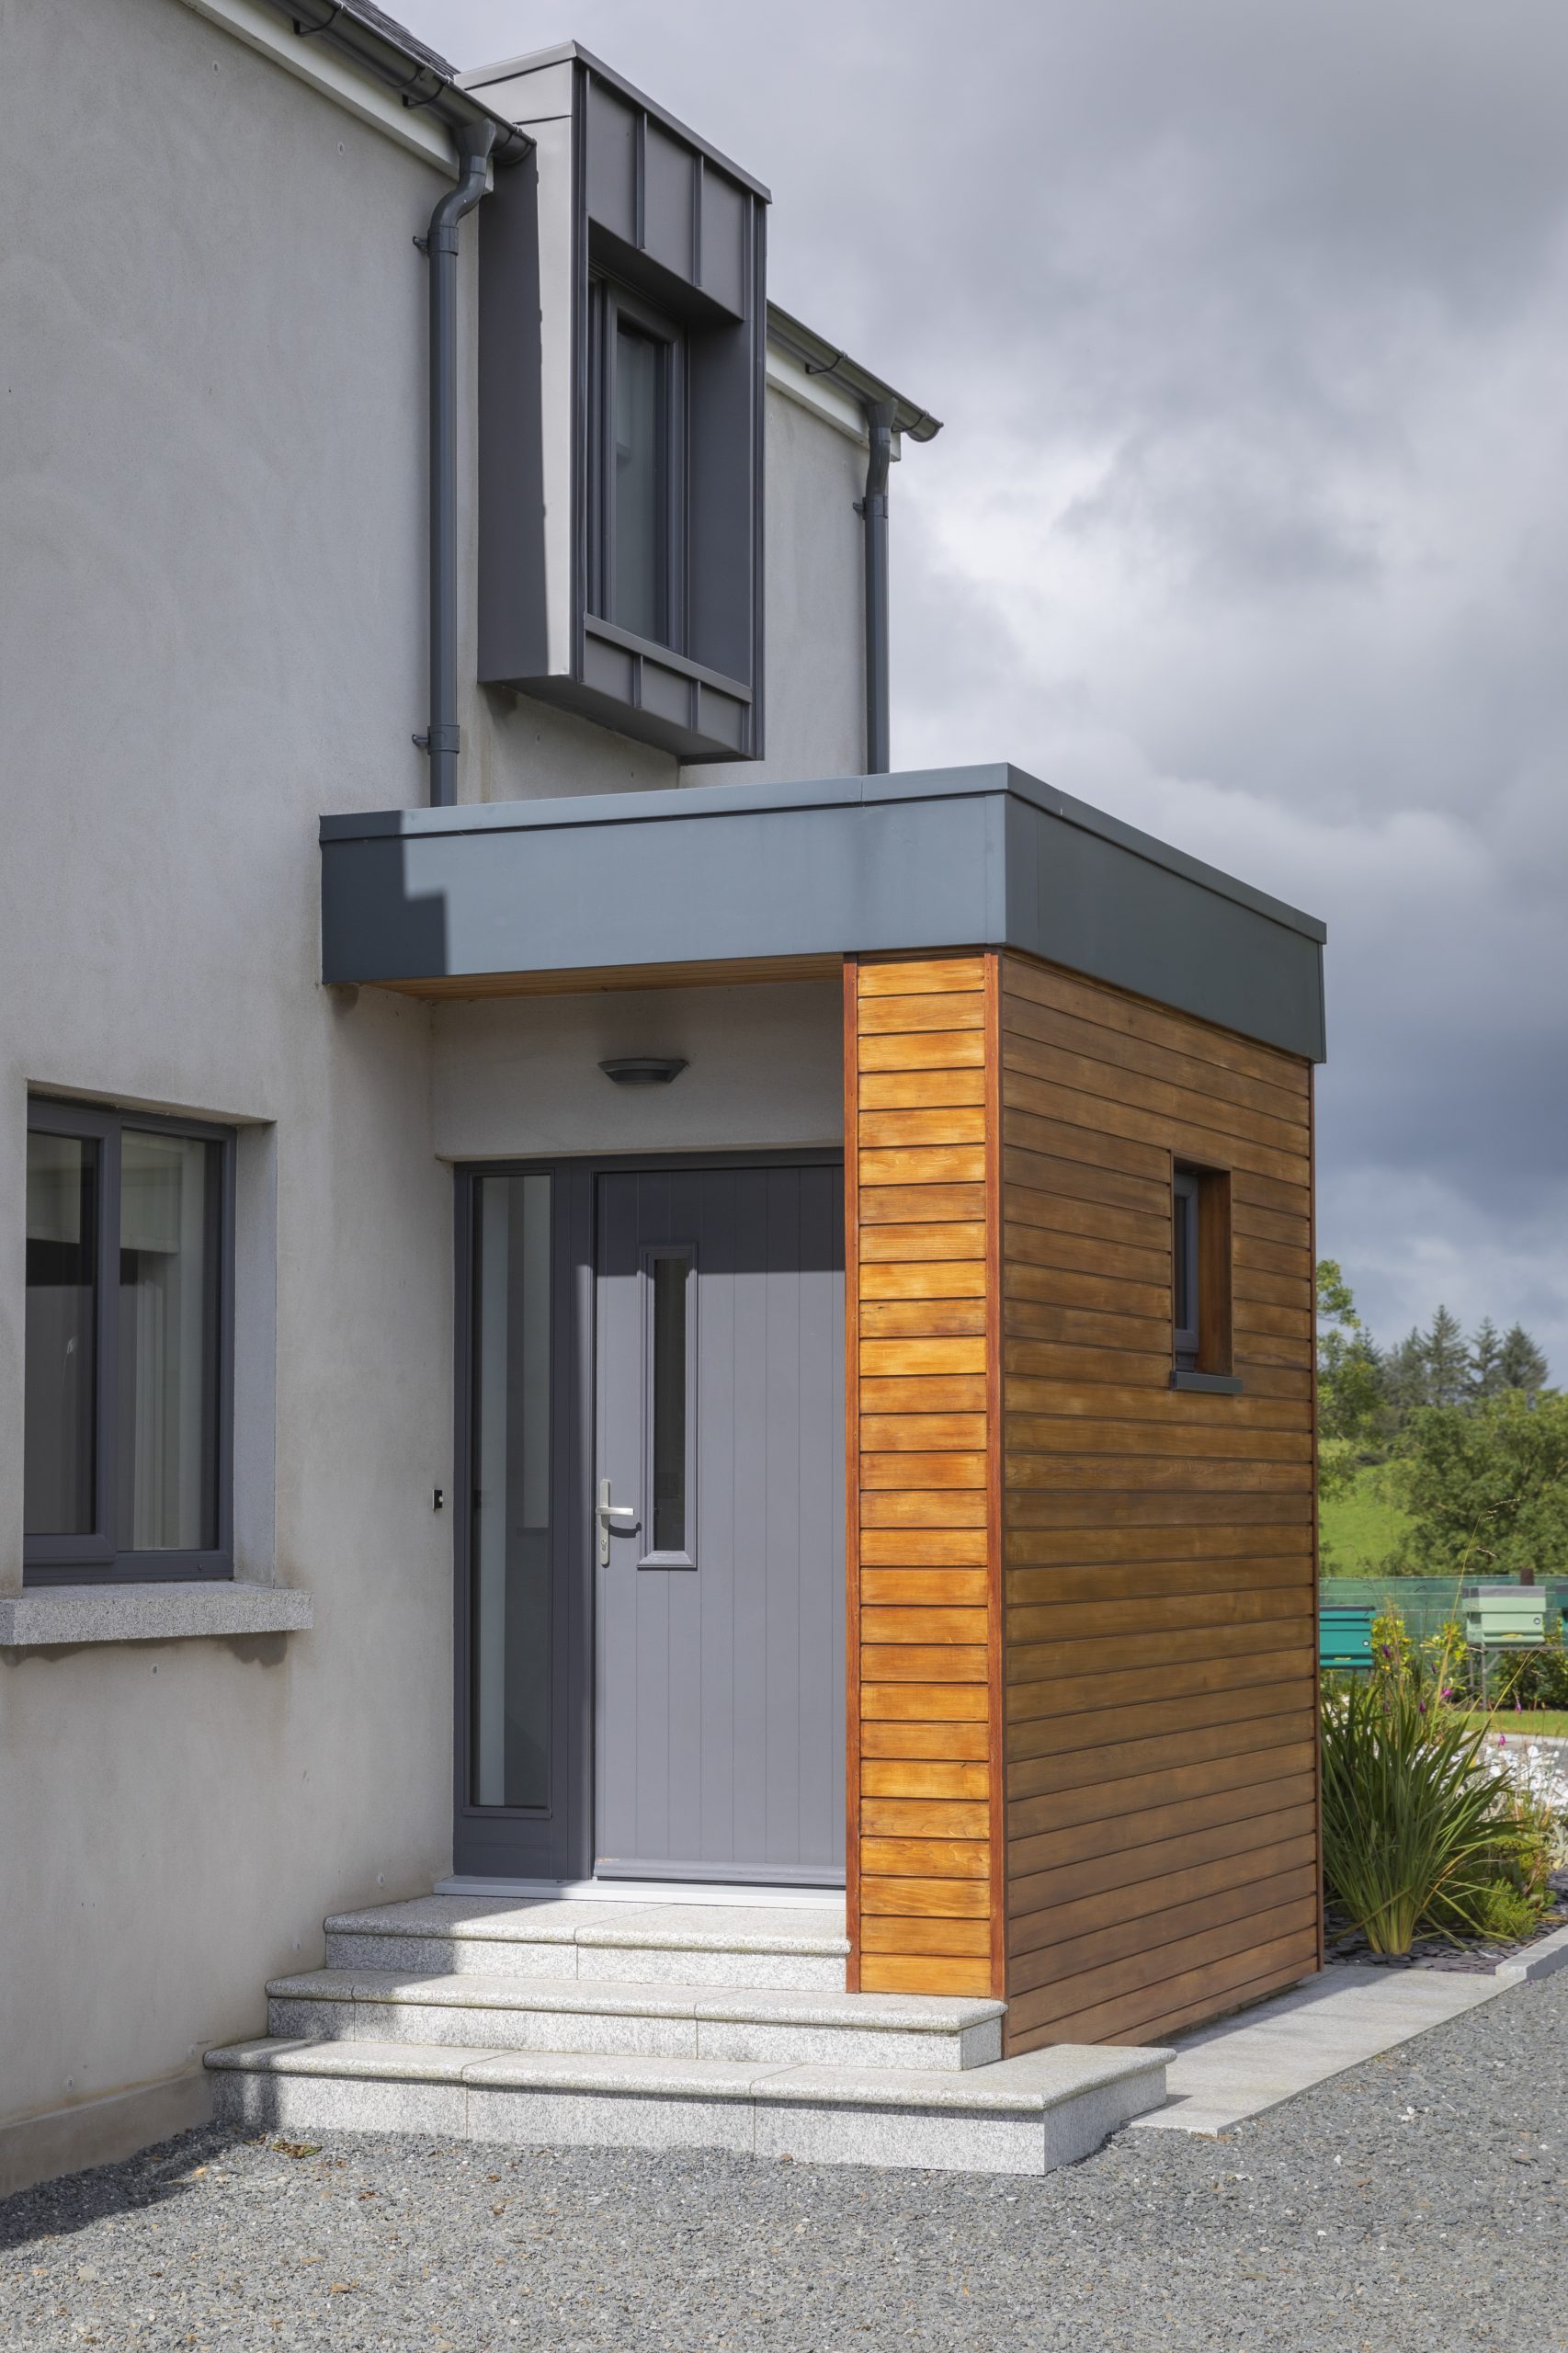
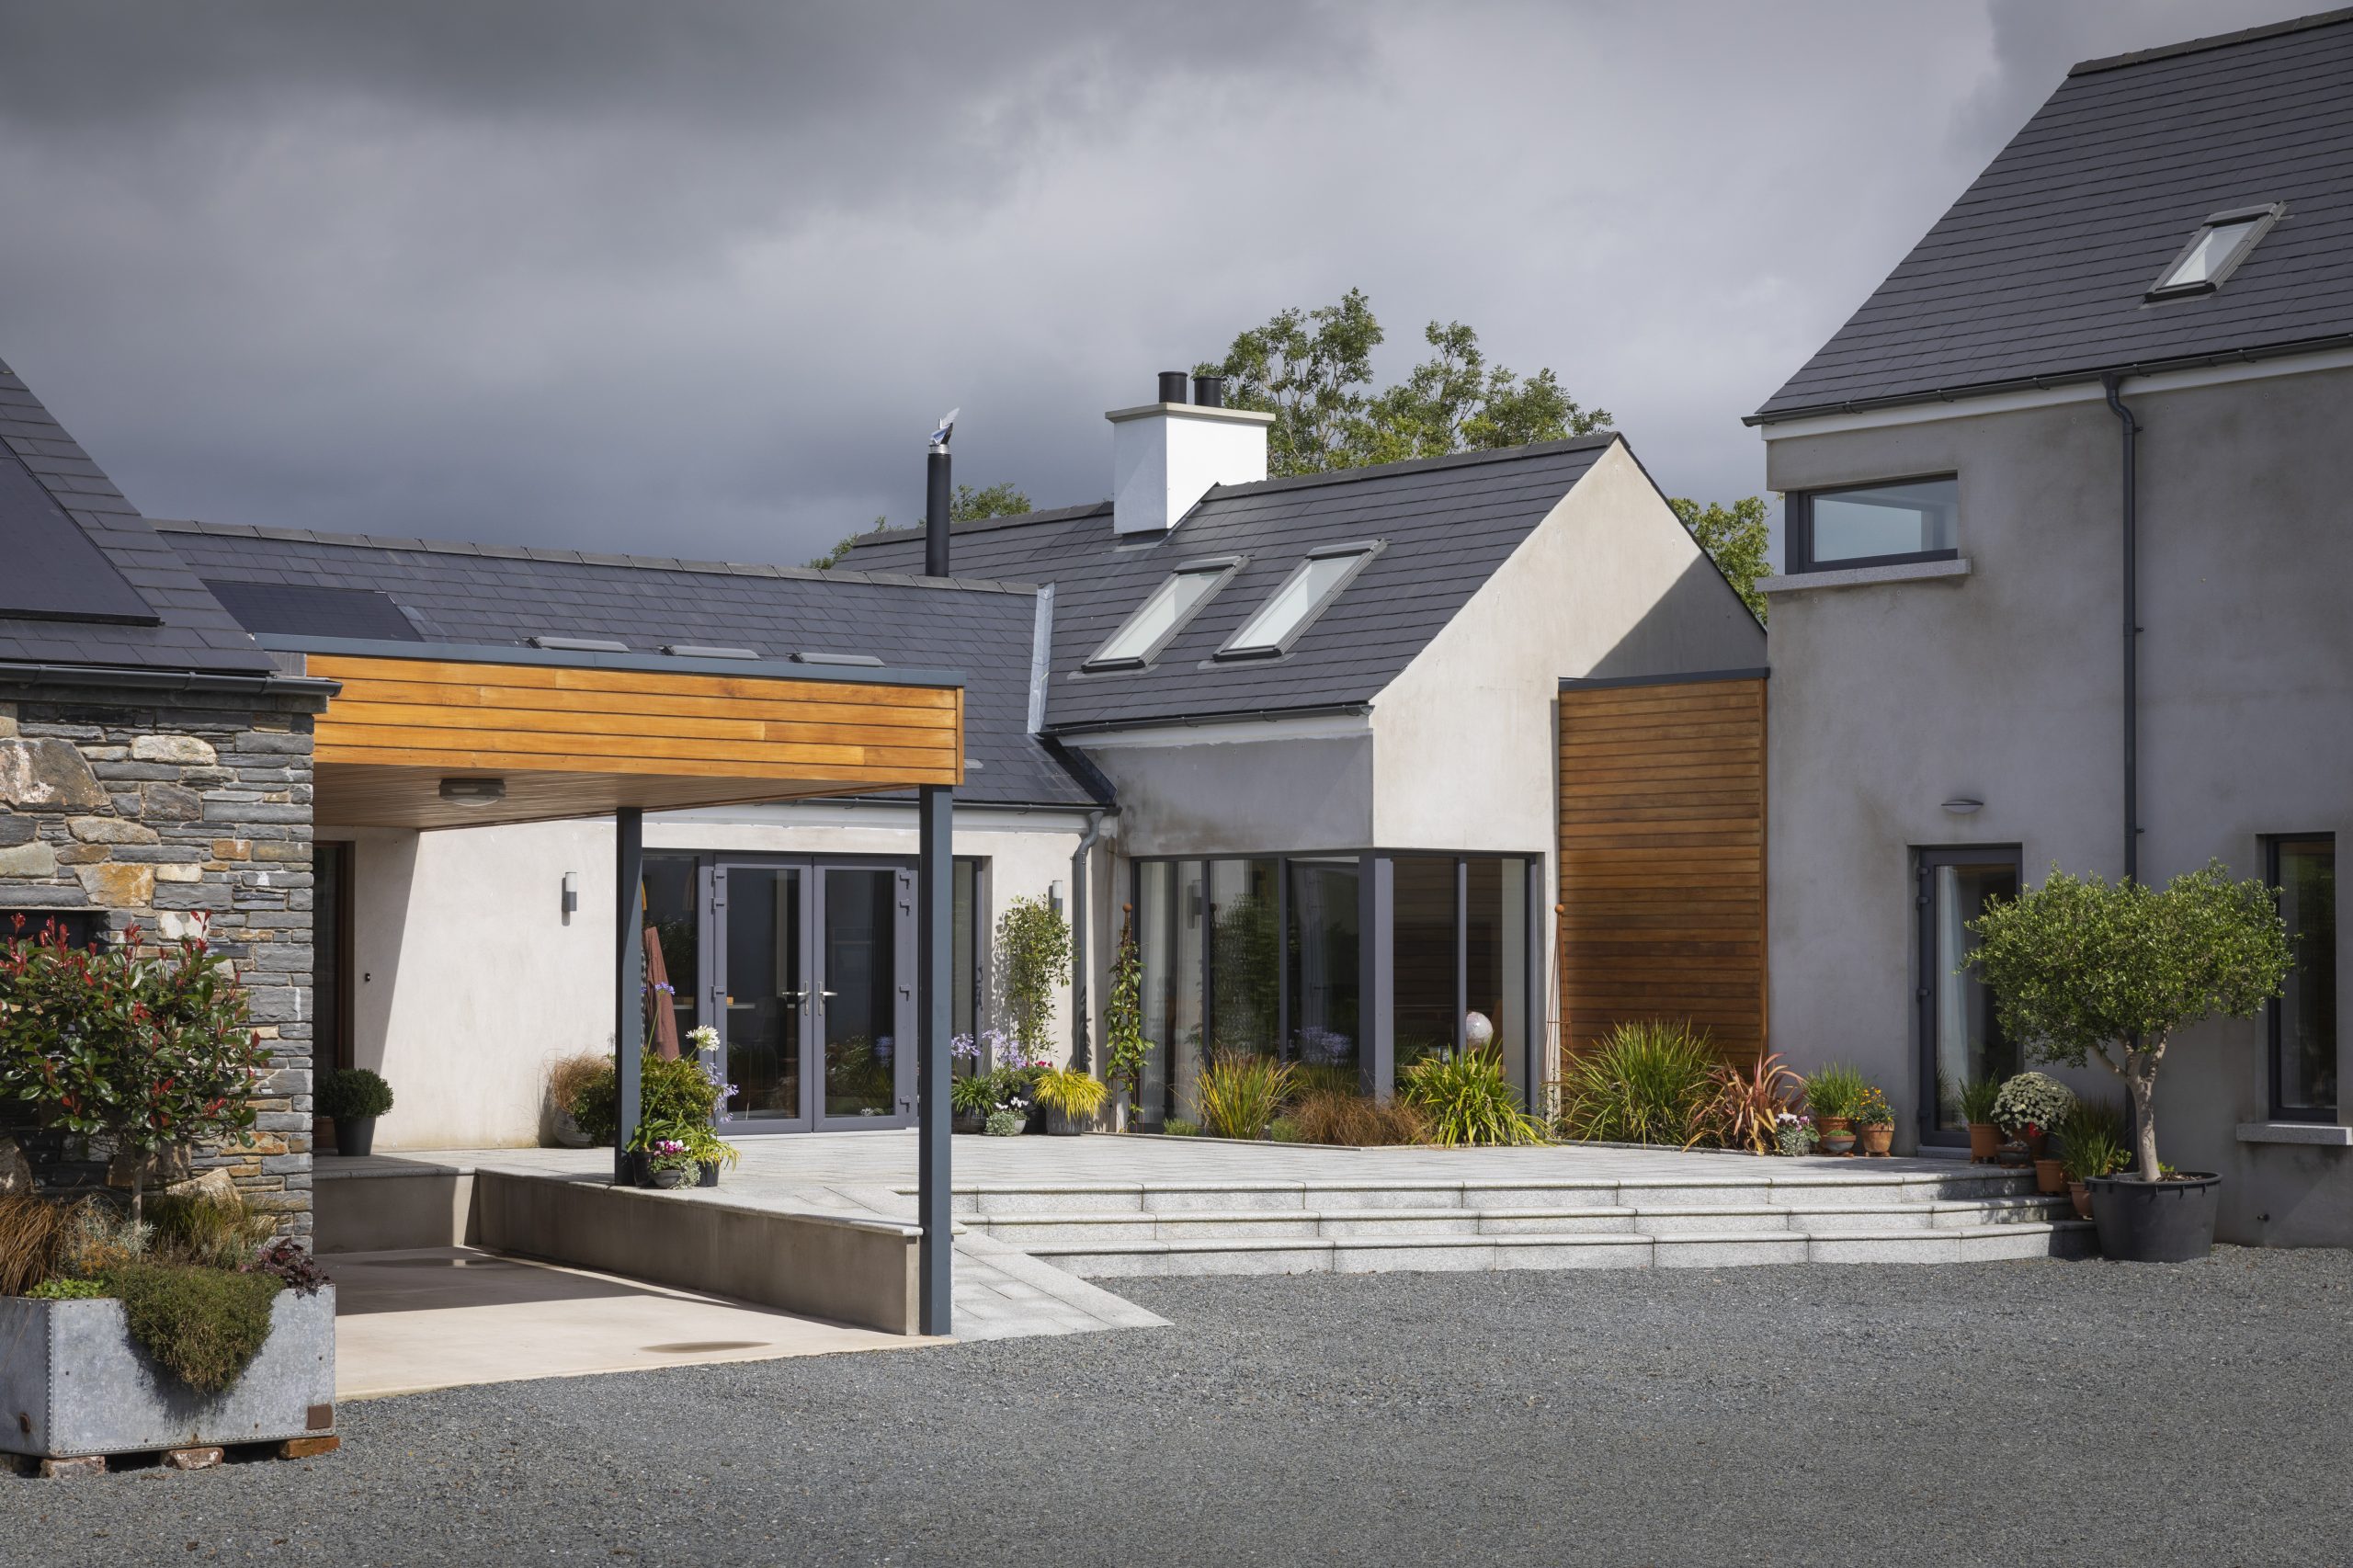
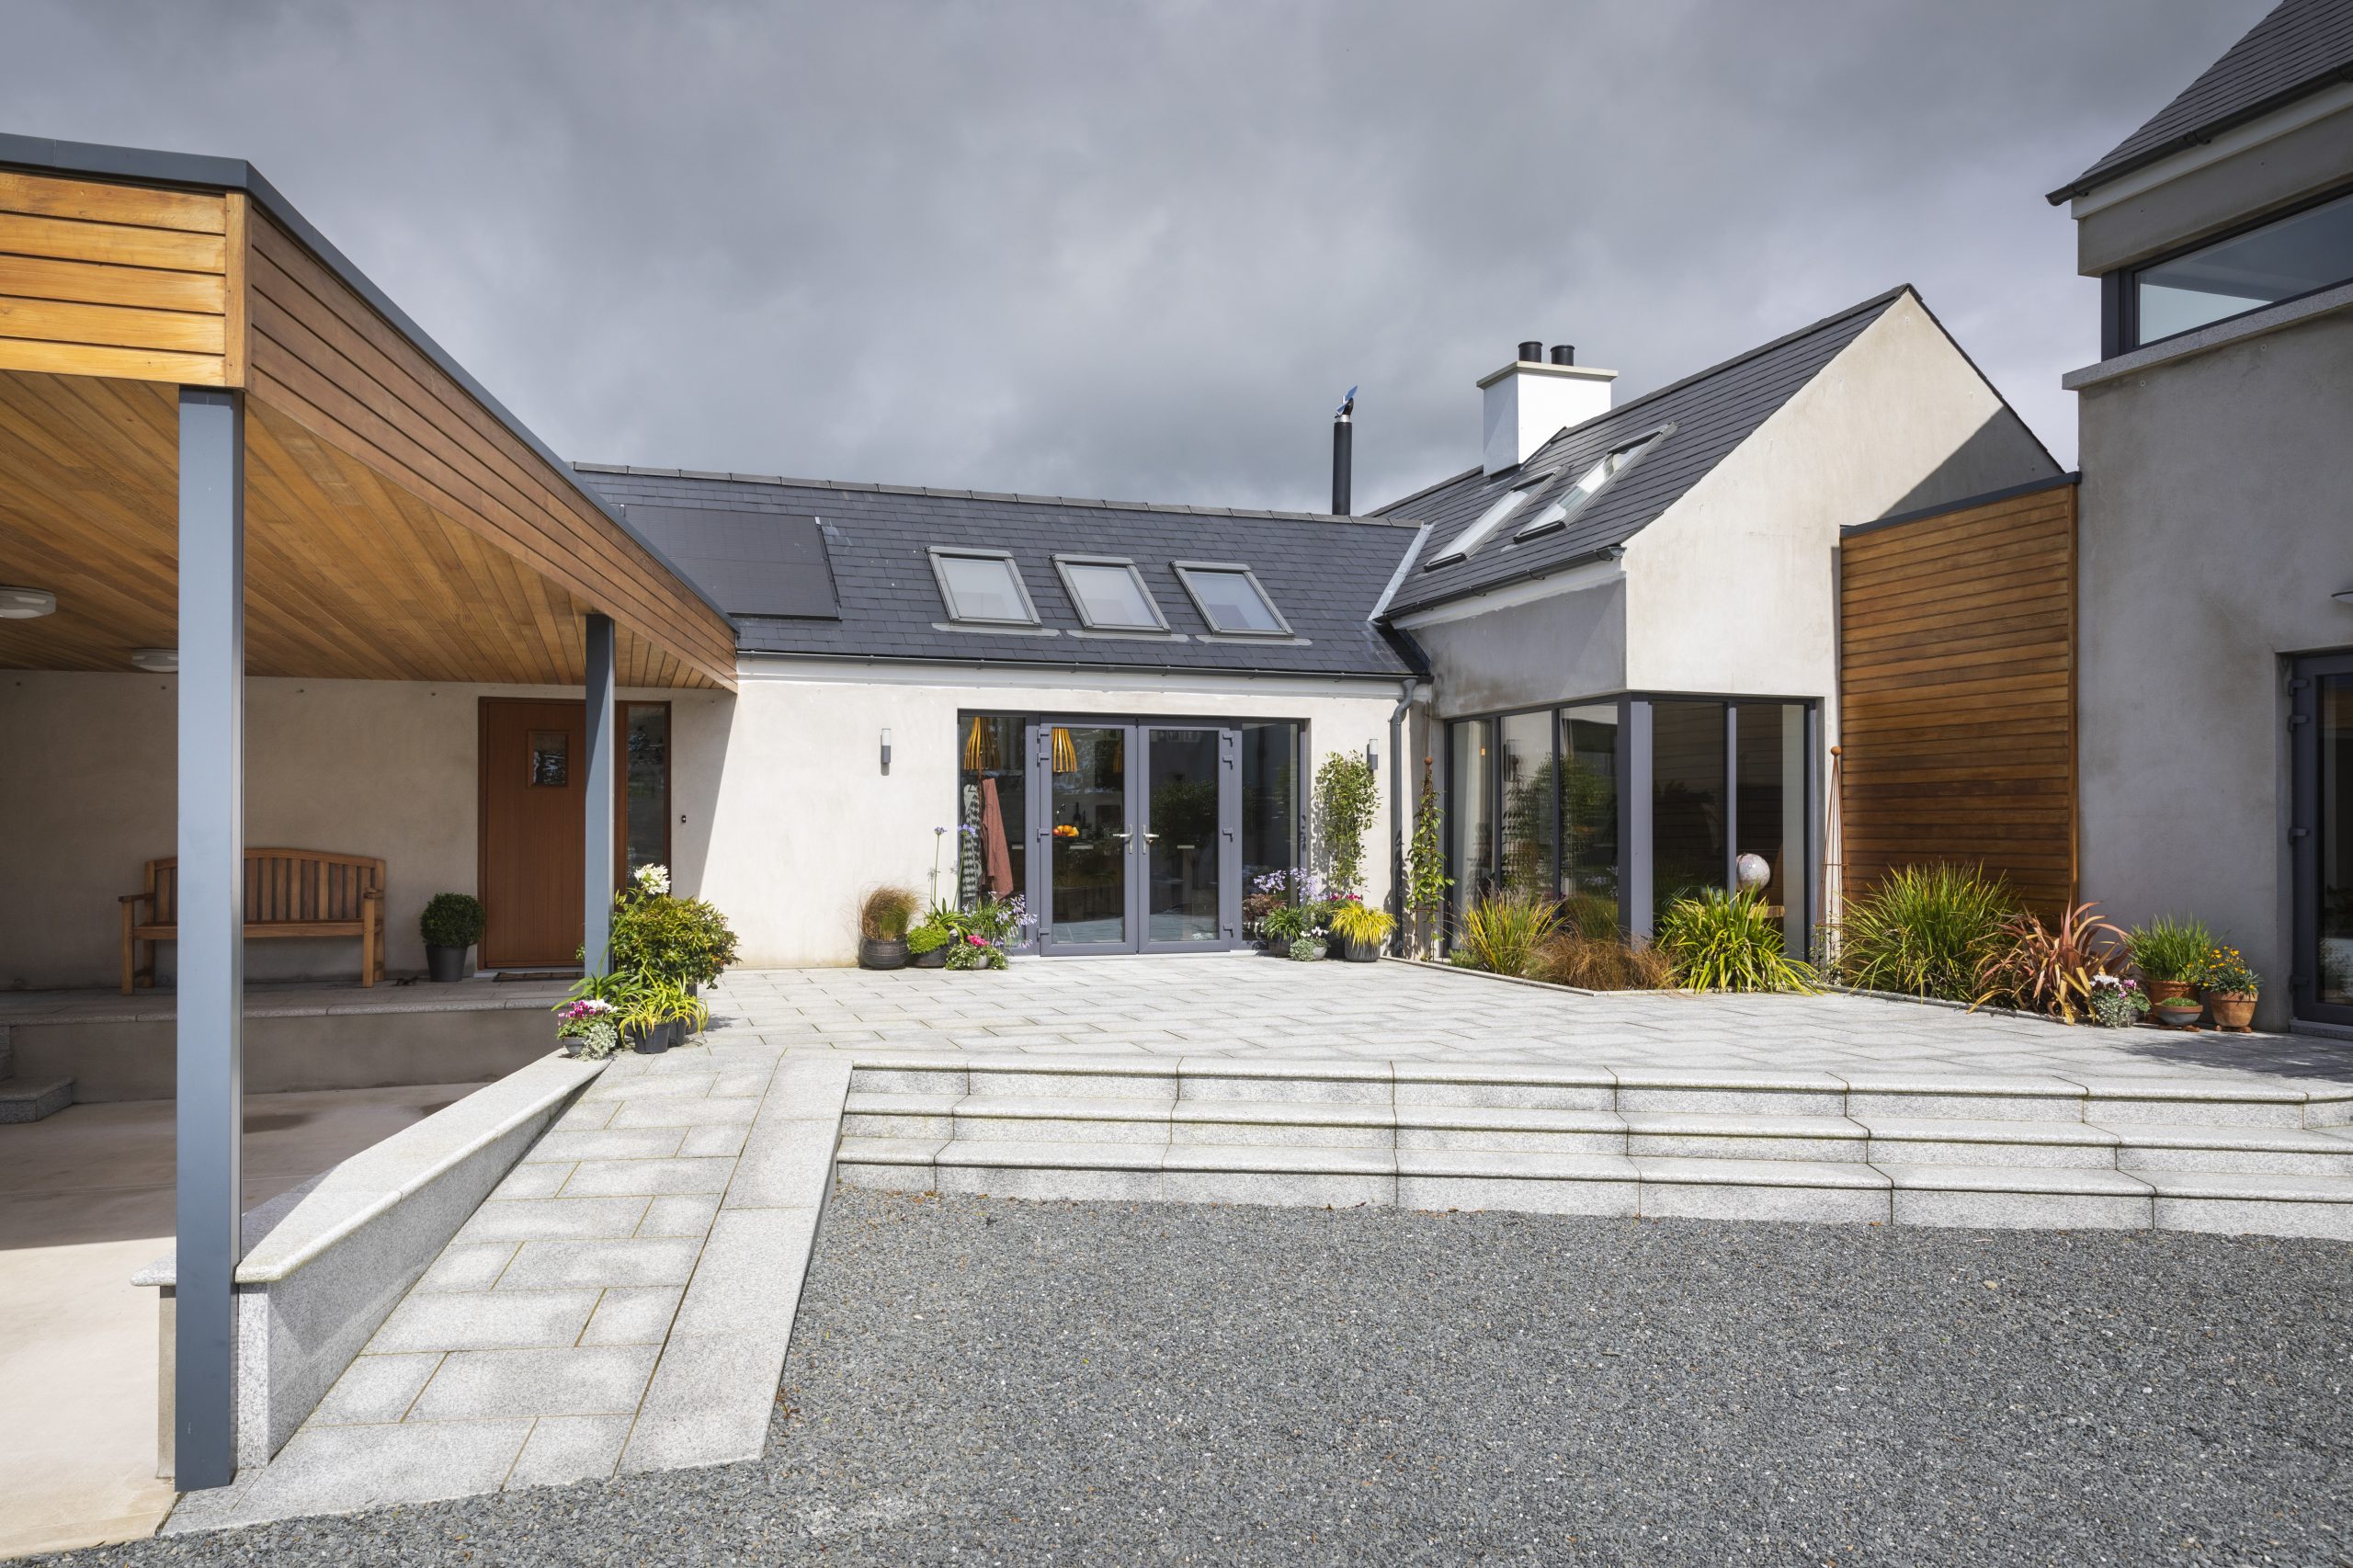
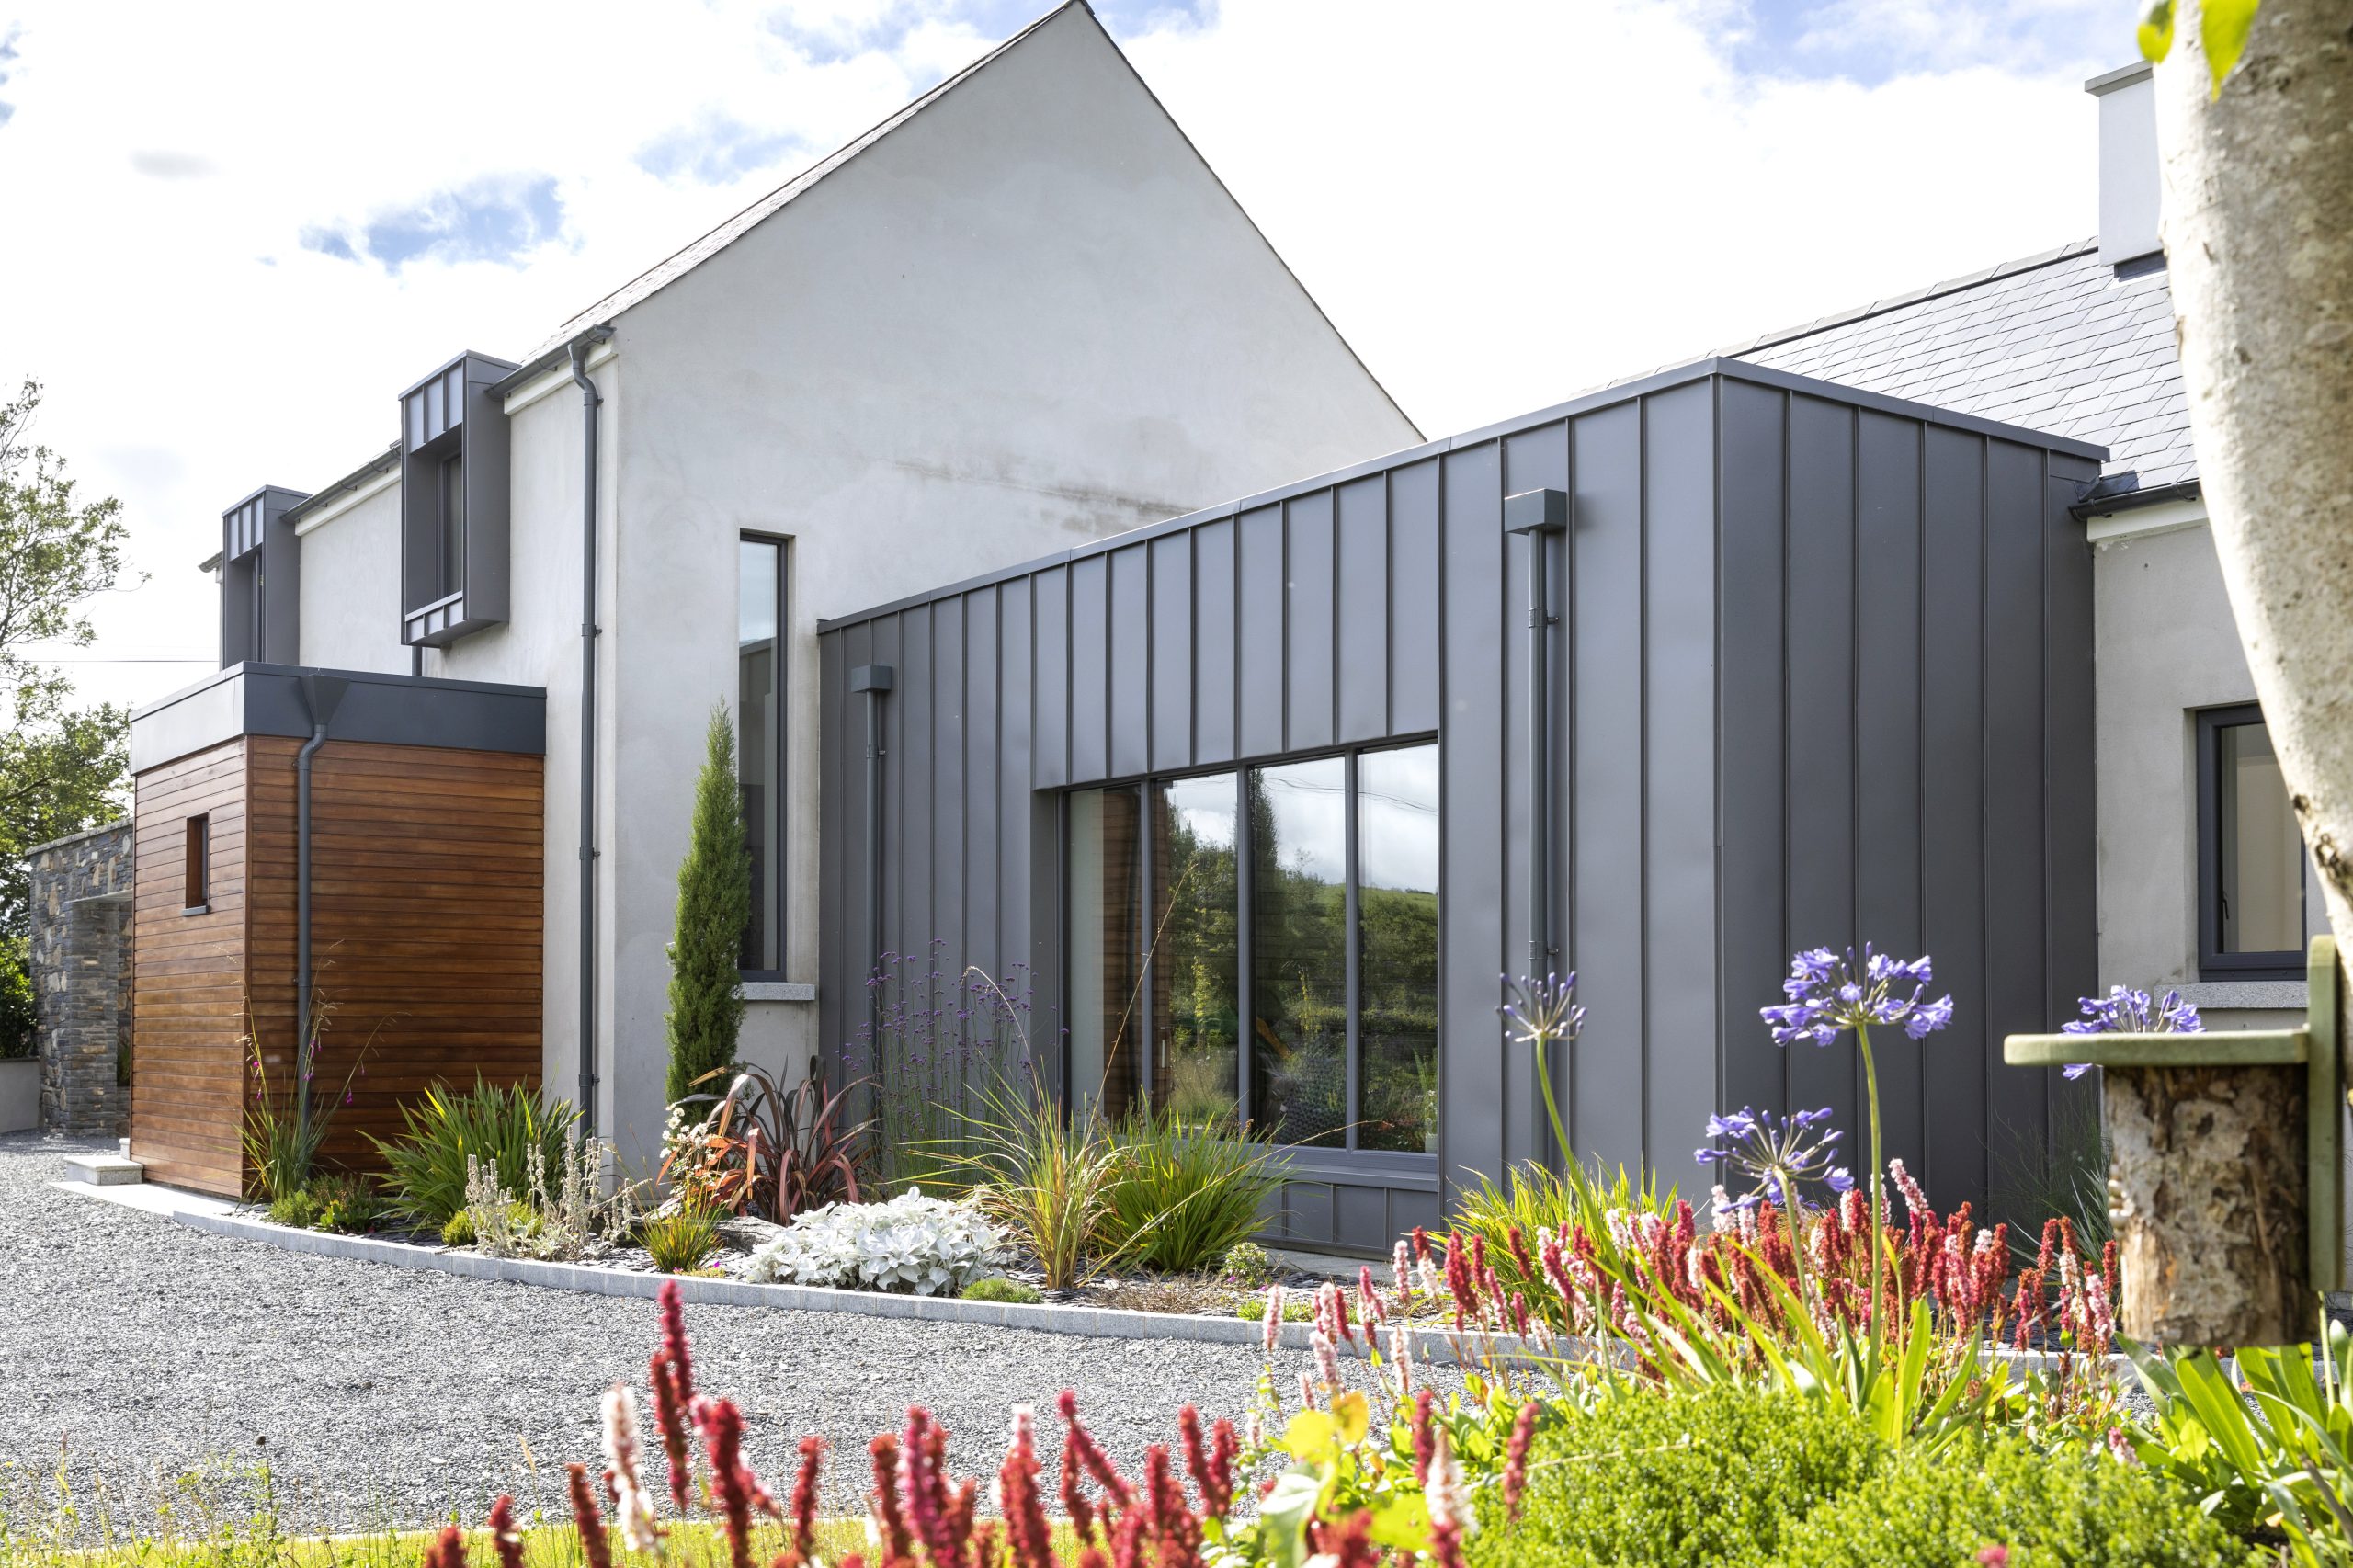
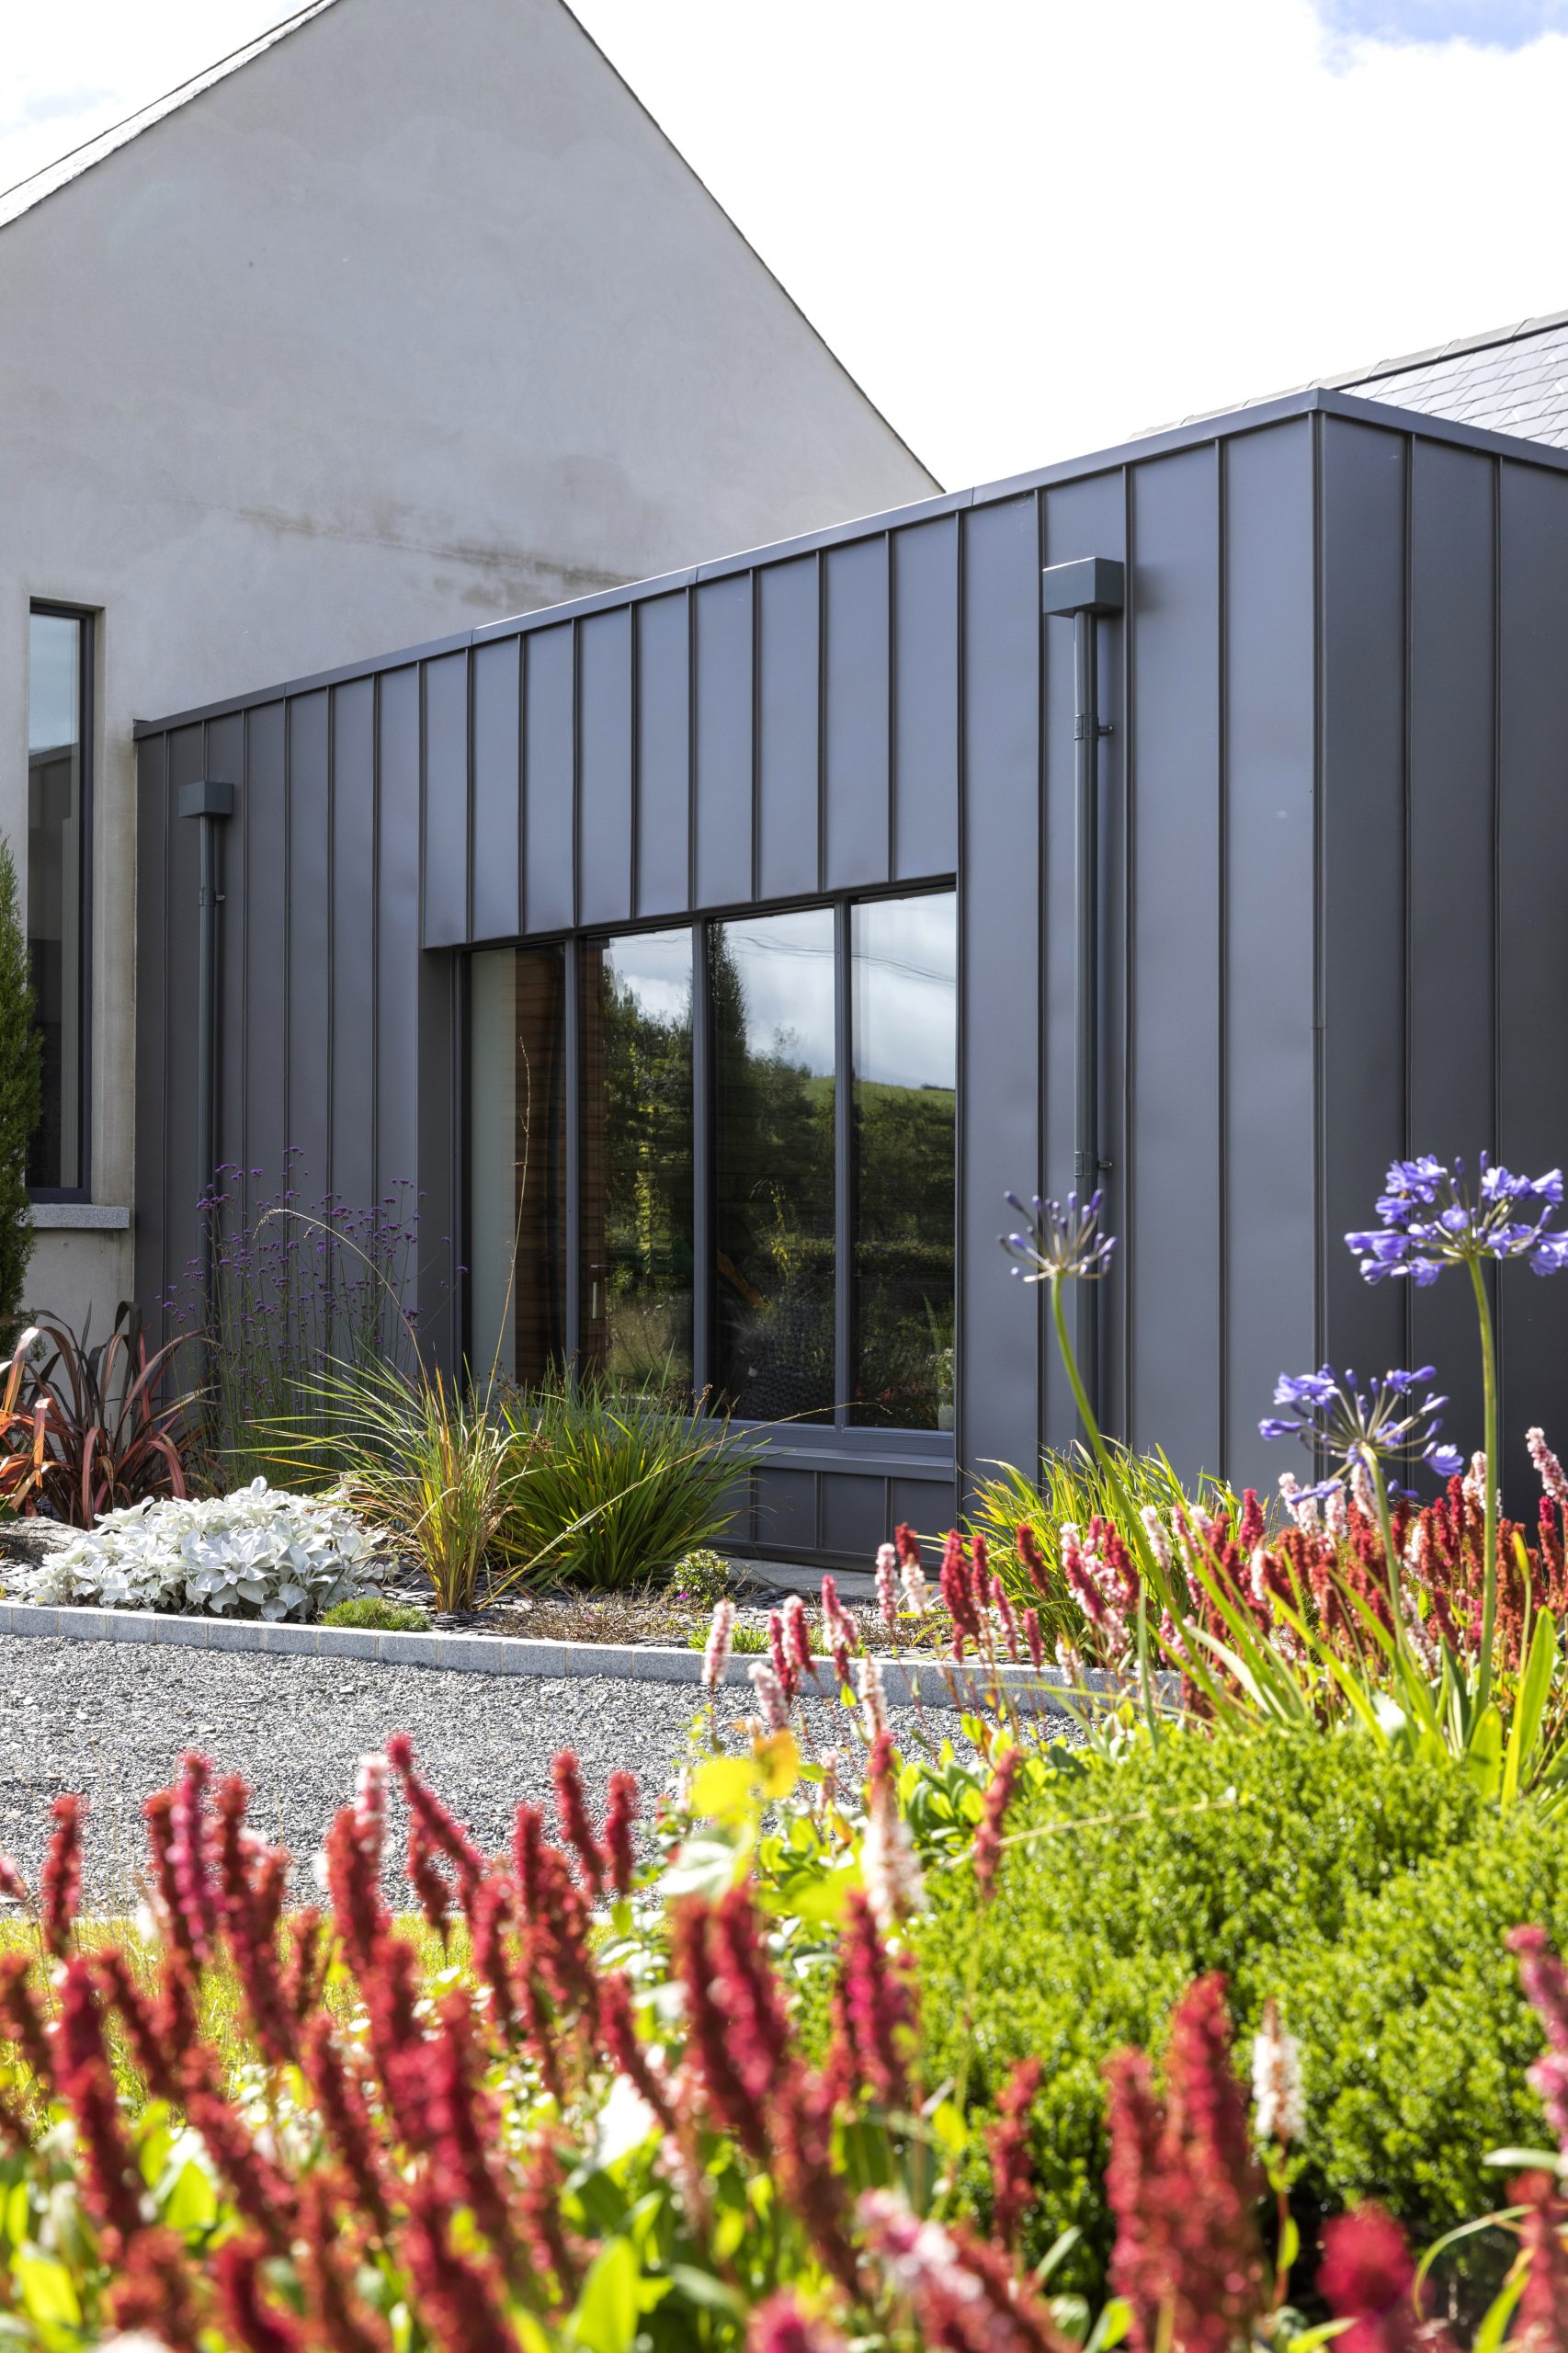
“So our vision was to create a courtyard style, open plan house that incorporated complementary materials like white render, cedar and zinc cladding, and natural stone. The idea was to achieve the illusion of a cluster of connected buildings.”
Planning process
“We spent a lot of our spare time driving around the country taking pictures of houses we liked. I’m sure people wondered what we were doing but we have since noticed people doing the same to ours, which to be honest makes us smile.”
“Our new build journey started at SelfBuild Live Belfast where we first met Ronan our architect. In early 2013 we started the design process, sharing with him the many pictures and notes that explained our vision.”
“As we had a very clear idea of the style we wanted to achieve, we had a lot of questions, comments and changes throughout the design process. This was a once in a lifetime project so we wanted to try and get it as perfect as possible.”
“Since the new build was a replacement dwelling, which broadly followed the original outline of the existing two-storey stone building with adjoining farm buildings laid out in a U-shape, our plan was approved quickly without any objections to our design. As soon as the building control drawings were passed, we started the groundworks.”
“We project managed the build ourselves and, where non-specialist skills were required, we did the work ourselves. This included preparing and pouring the subfloor, assisting with erection of the timber frame, installing wool and PIR insulation in the walls, ceilings and floors, installing the mechanical ventilation ducting and generally keeping the site in shape. Don’t underestimate the amount of time needed to keep a tidy site!”
“Nicole is an accountant, so was comfortable with taking on the role of managing the budget, researching suppliers, obtaining quotes and securing deals,” adds Colin.
“At least one of us was on site for every aspect of the build and we both spent most evenings and each Saturday doing the non-specialist tasks to try and keep the budget on track and costs down.”
“We worked hard during this period juggling full-time jobs alongside the build. We sometimes found it hard to keep motivated and the energy levels up,” adds Nicole.
“This was generally helped by the food parcels and treats that were delivered to the site by Colin’s mum every Saturday – she made sure that we never worked on an empty stomach!”
“We project managed the build ourselves and, where non-specialist skills were required, we did the work ourselves.”
Build method
“We wanted a quick construction and the opportunity to reduce costs by doing some of the work ourselves. This is why we opted for timber frame, which we sourced locally,” says Colin.
“We also wanted a low energy building that was as close to Passivhaus standard as we could realistically achieve within our tight budget. This meant an airtight building that reduced the leakage of air through the external envelope. We achieved this using membrane and tape on all external walls and at all junctions to the floors, walls and roofs.”

“At the time we were building, regulations required an air permeability of no more than 10m3/hr/sqm at 50 Pascals (which is still the case in NI). A blower door test was completed and we achieved a reading of 0.83m3/hr/sqm at 50 Pascals – we were obviously delighted with the result!”
“We had to install a service cavity through which all the wiring, cabling and so forth, could run because cutting the membrane would have compromised the airtightness. We also had to ensure that the woodburning stove had an external air supply.”
“These things added a layer of complexity to the build and, due to our inexperience, something we didn’t fully consider. We’d advise other self-builders in the same situation, to give this more thought at the planning stage.”
“Our aim of achieving an airtight build meant that we had to install a mechanical ventilation with heat recovery system (MVHR) to continuously supply fresh air and remove stale/moist air from the house. We were able to install all the MVHR ducting ourselves with the supplier testing our work and fitting the unit afterwards. The ducting was relatively easy to install, it just required time and diligence with taping joints etc and saved money.”
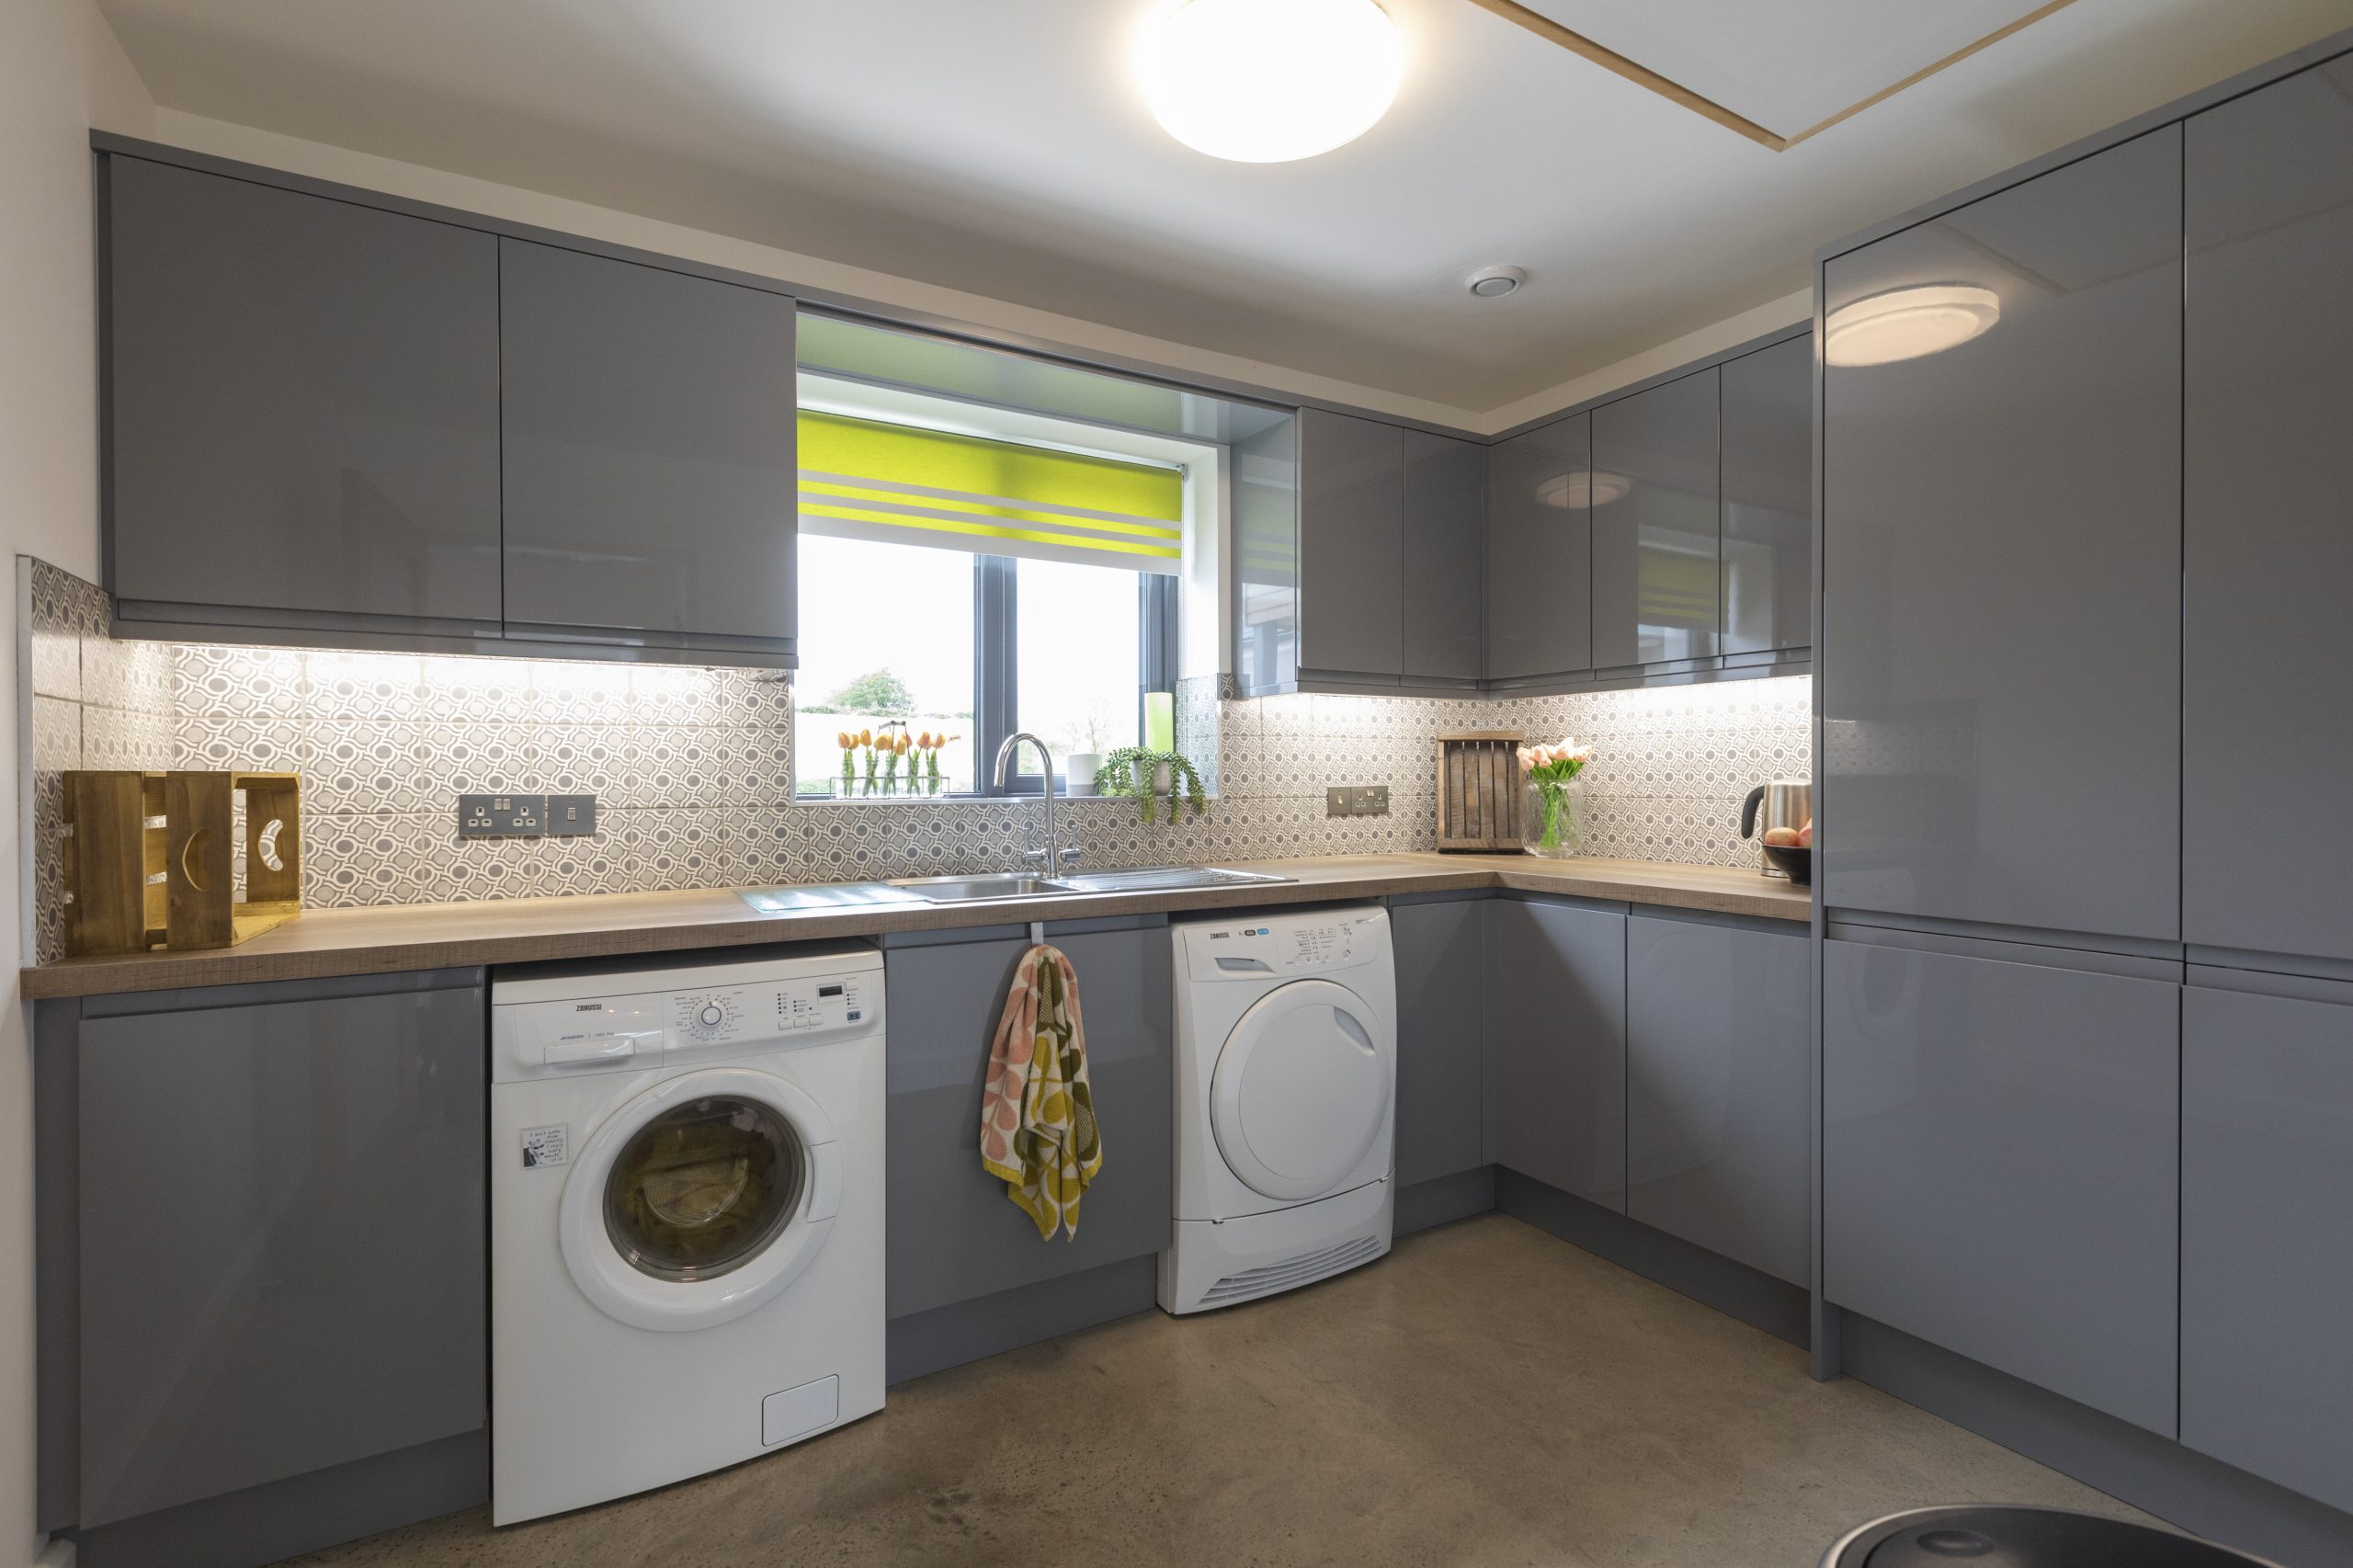
“We knew from the start that we wanted an energy efficient house which provided modern open space living. Therefore, this influenced our decision to go for an underfloor heating system. We originally researched and priced installing an air source heat pump (ASHP), but these were relatively new systems at that time and were quite expensive.”
“So instead, we installed an energy efficient oil burner, which we believed would work well with the expected efficiency and low energy use of our house. This has proved to be the right decision as we use on average 1,100 litres of heating oil a year for our 2,400 sqft house. When the plumber installed the underfloor heating system, he laid the pipes at spacings that would be suitable for an ASHP in case we decide to switch in the future.”
“We also installed a 4kW photovoltaic (solar electric) panel system which is designed to generate electricity. Approximately 50 per cent of this electricity is used in the running of the house and heating of water, the rest is exported back to the grid.”
“On top of this, we receive an annual ROCs payment (now defunct for new applicants) which pays us an amount for all the electricity the panels generate. So we effectively get paid twice; once by our electricity provider for the exported electricity and once from the ROCs payment for the generated electricity. These payments generally cover our electricity bills each year.”
Going with the flow
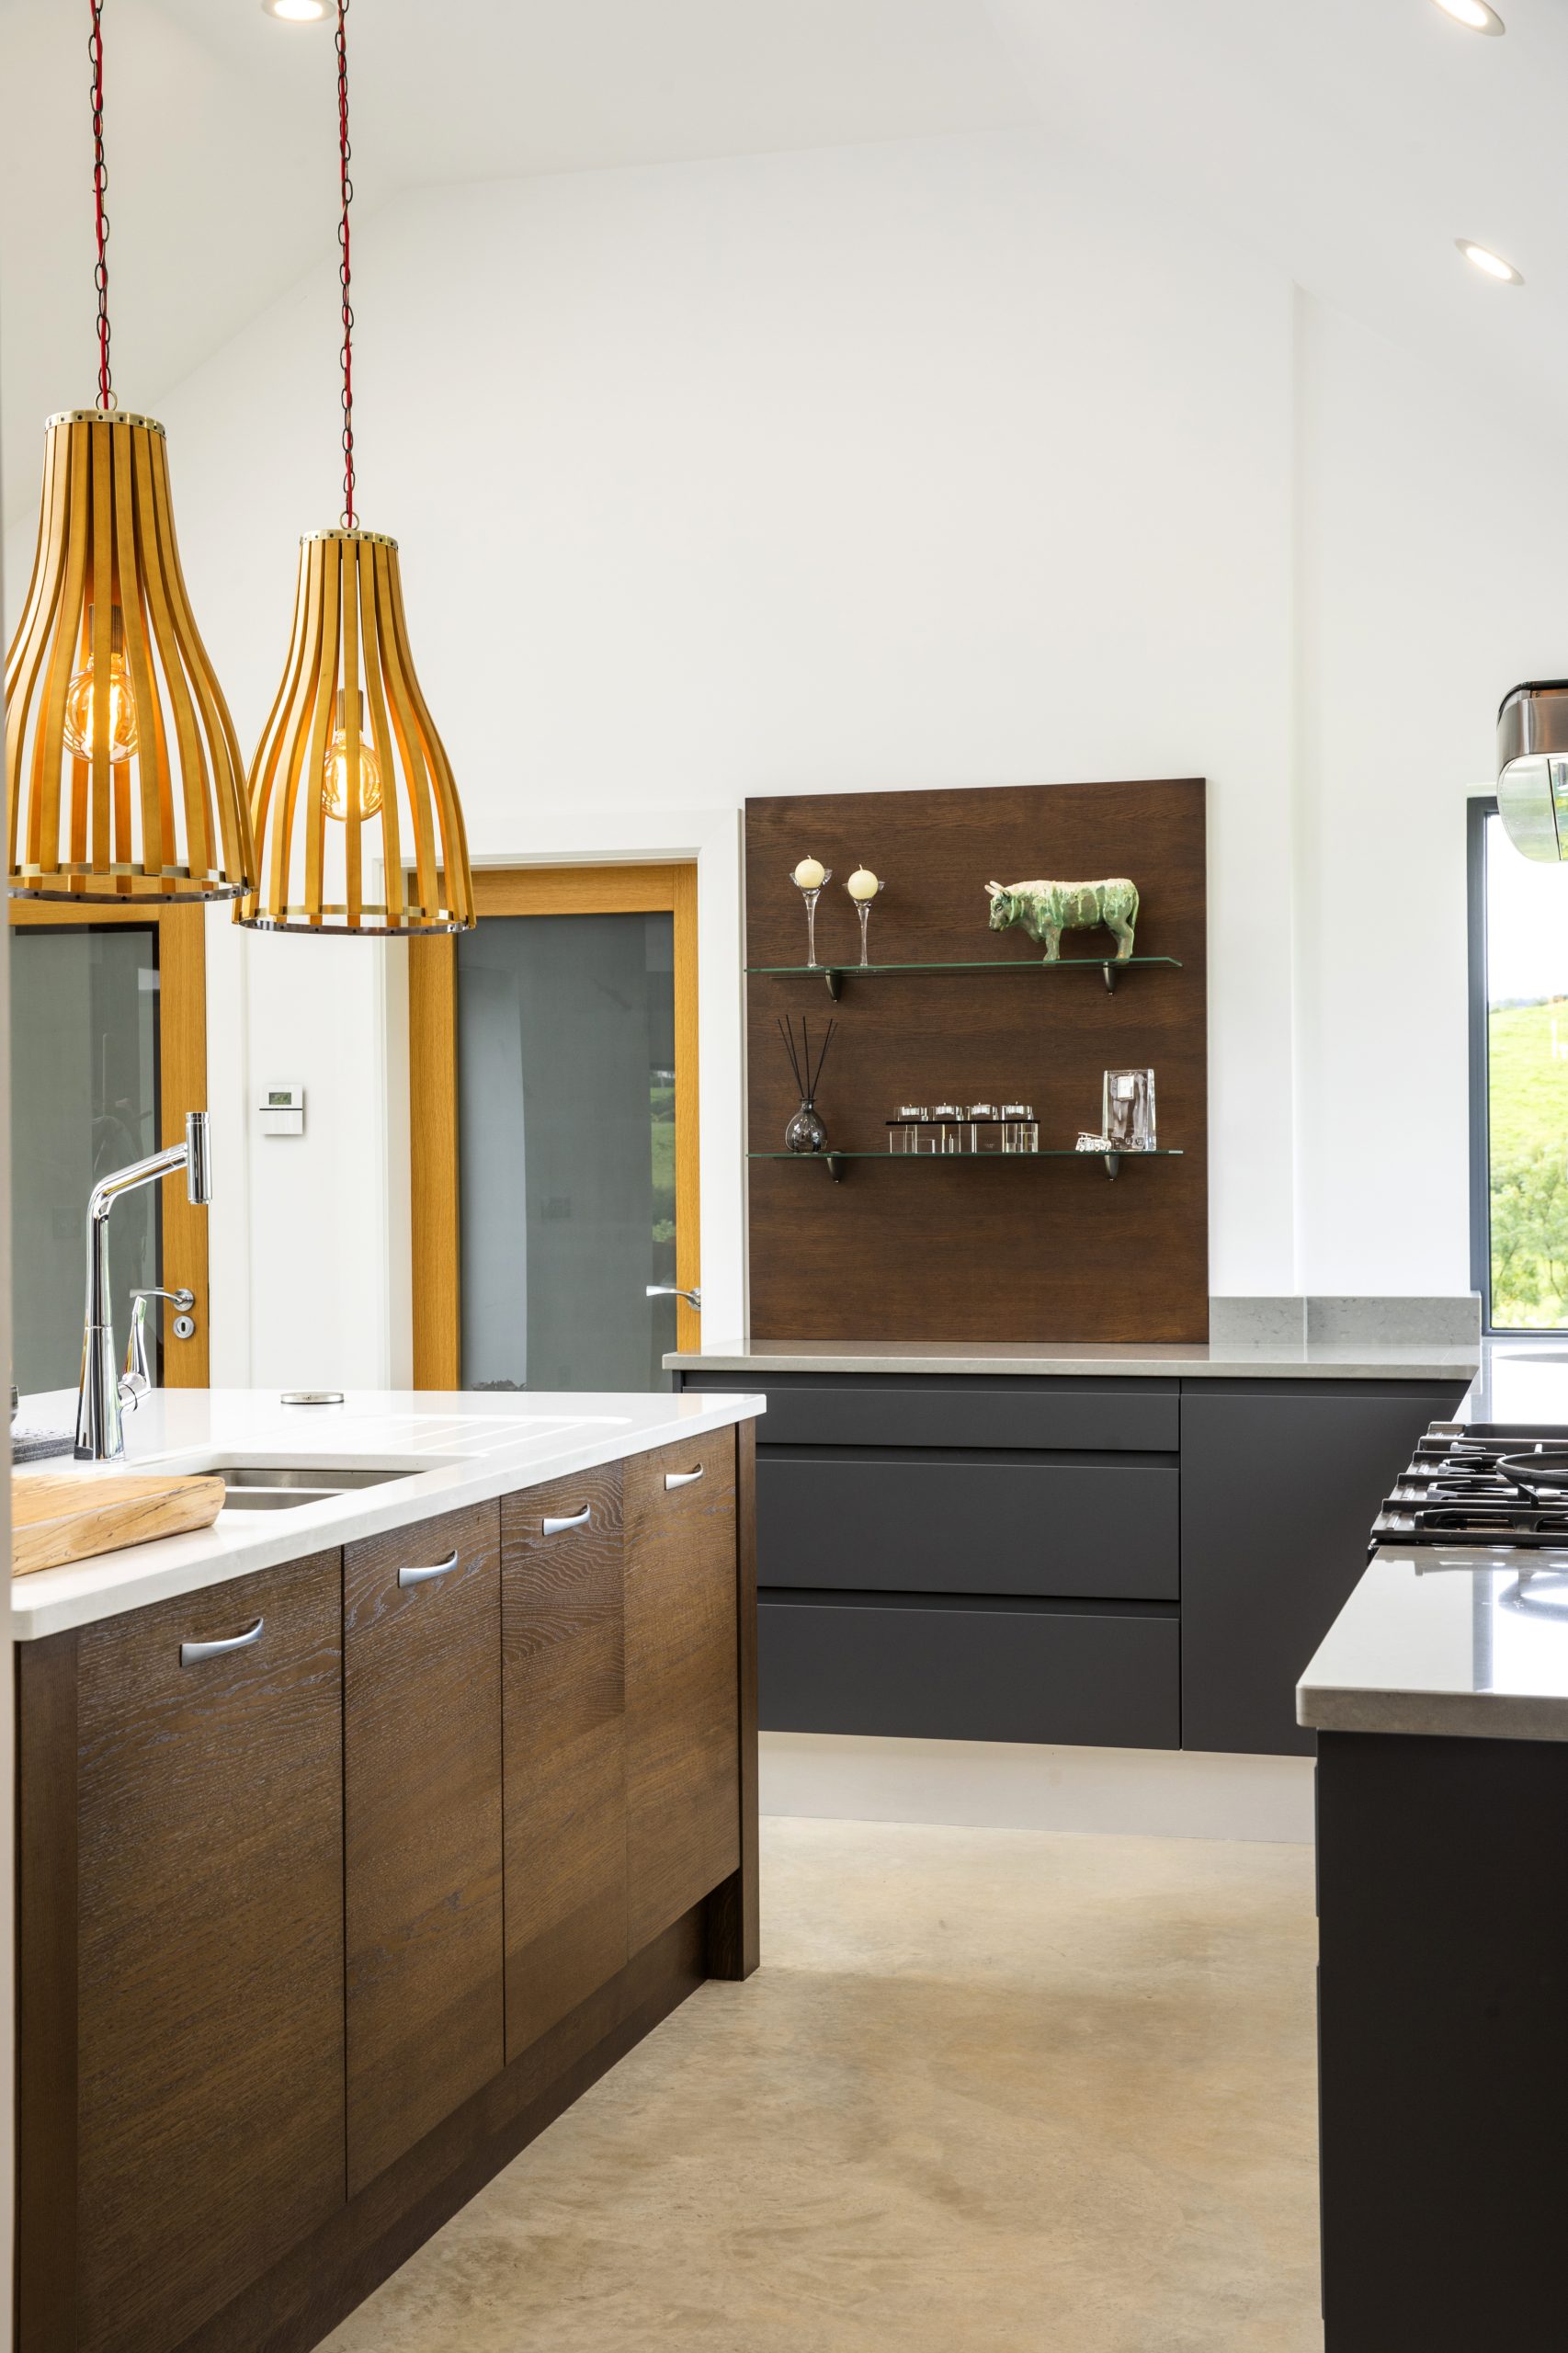
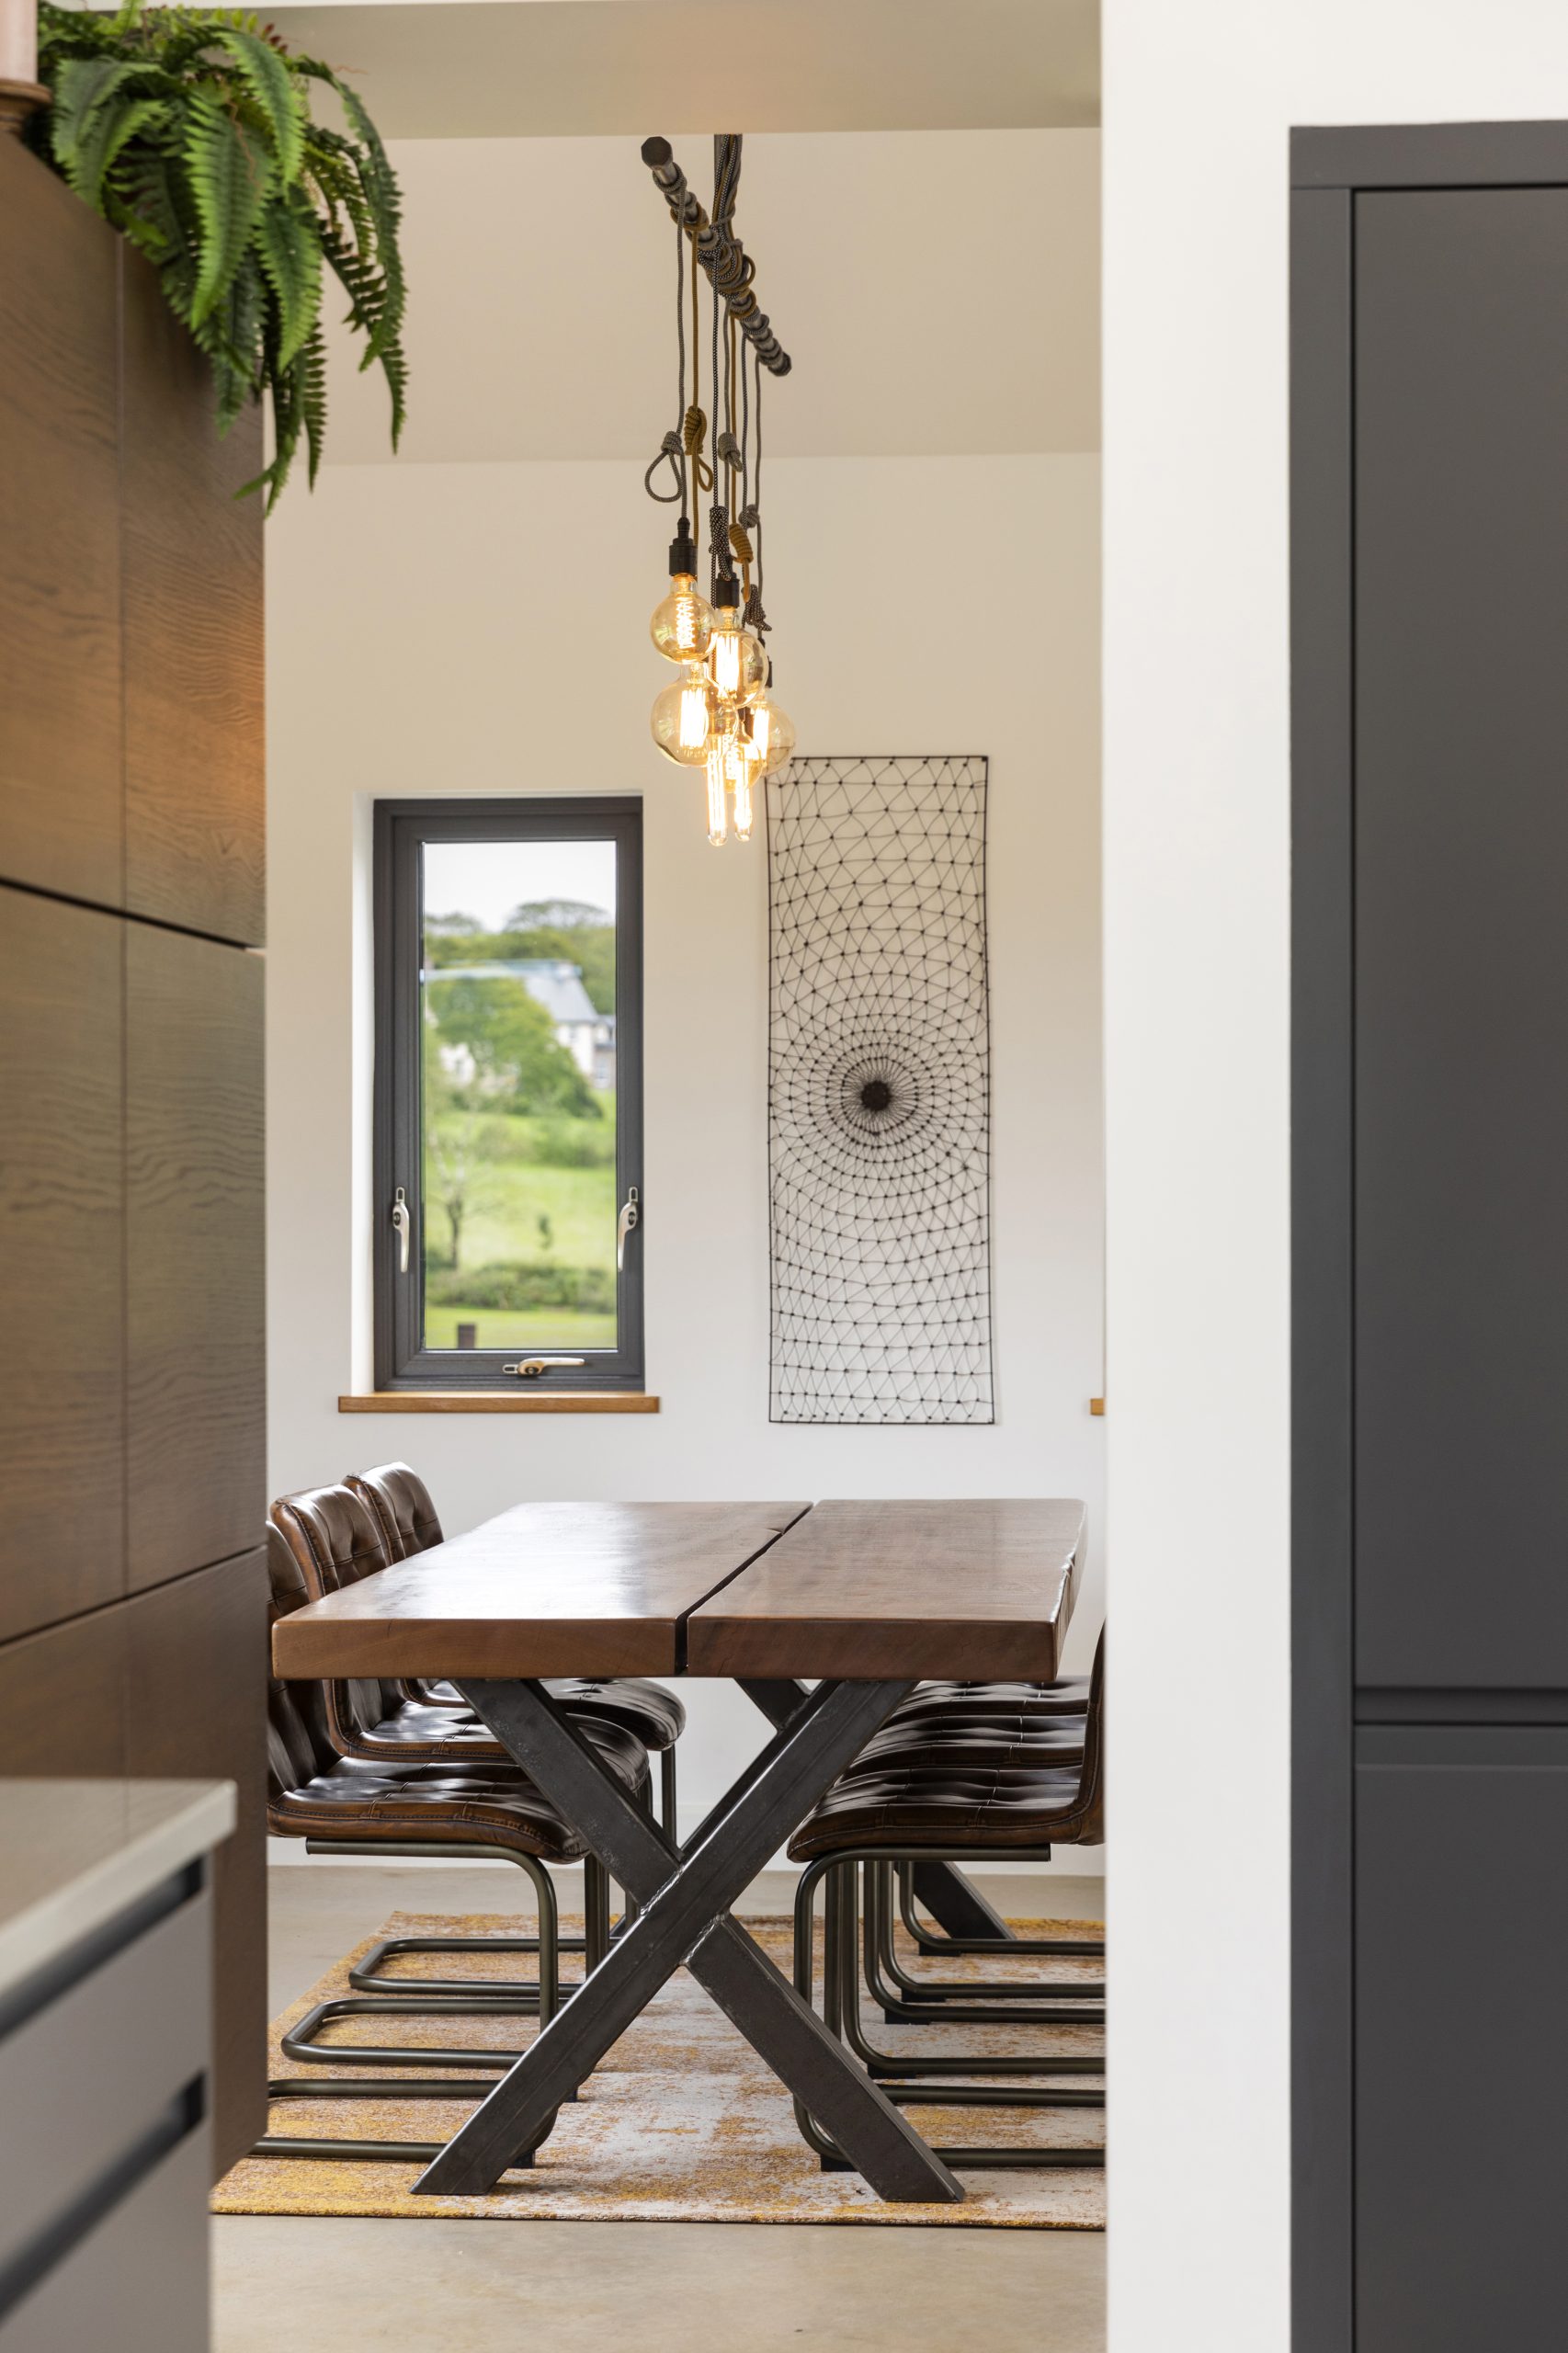
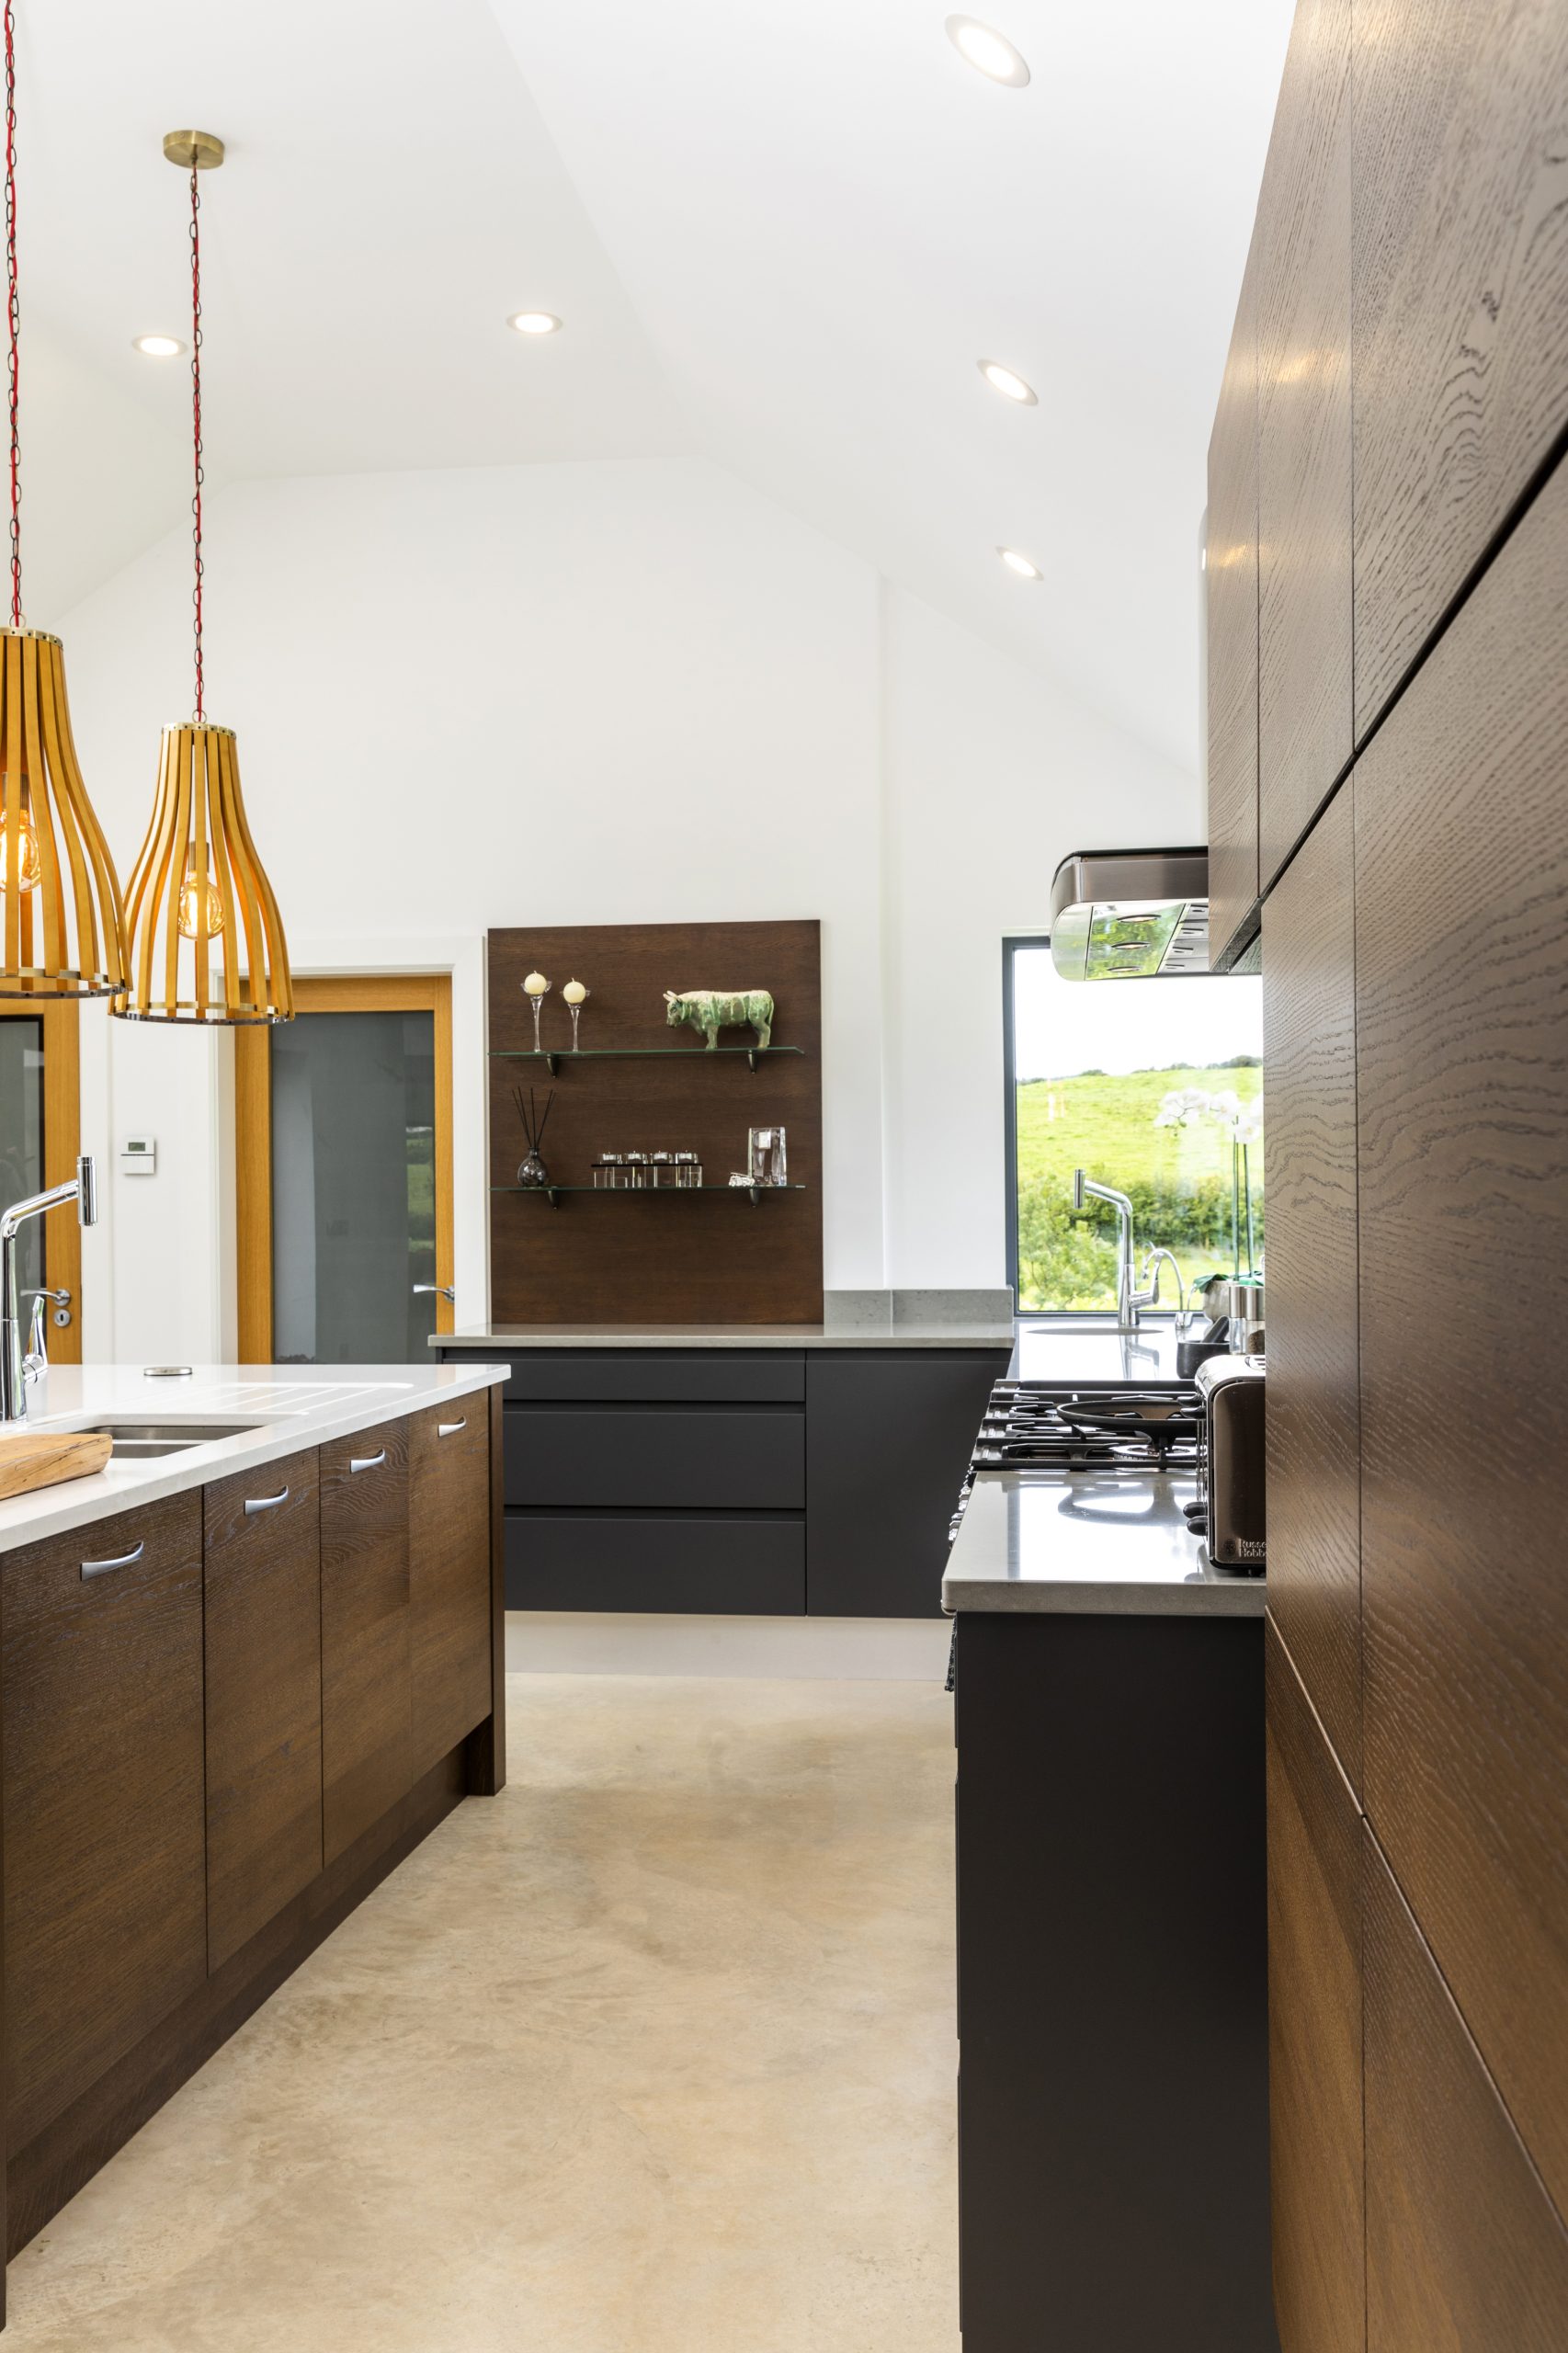
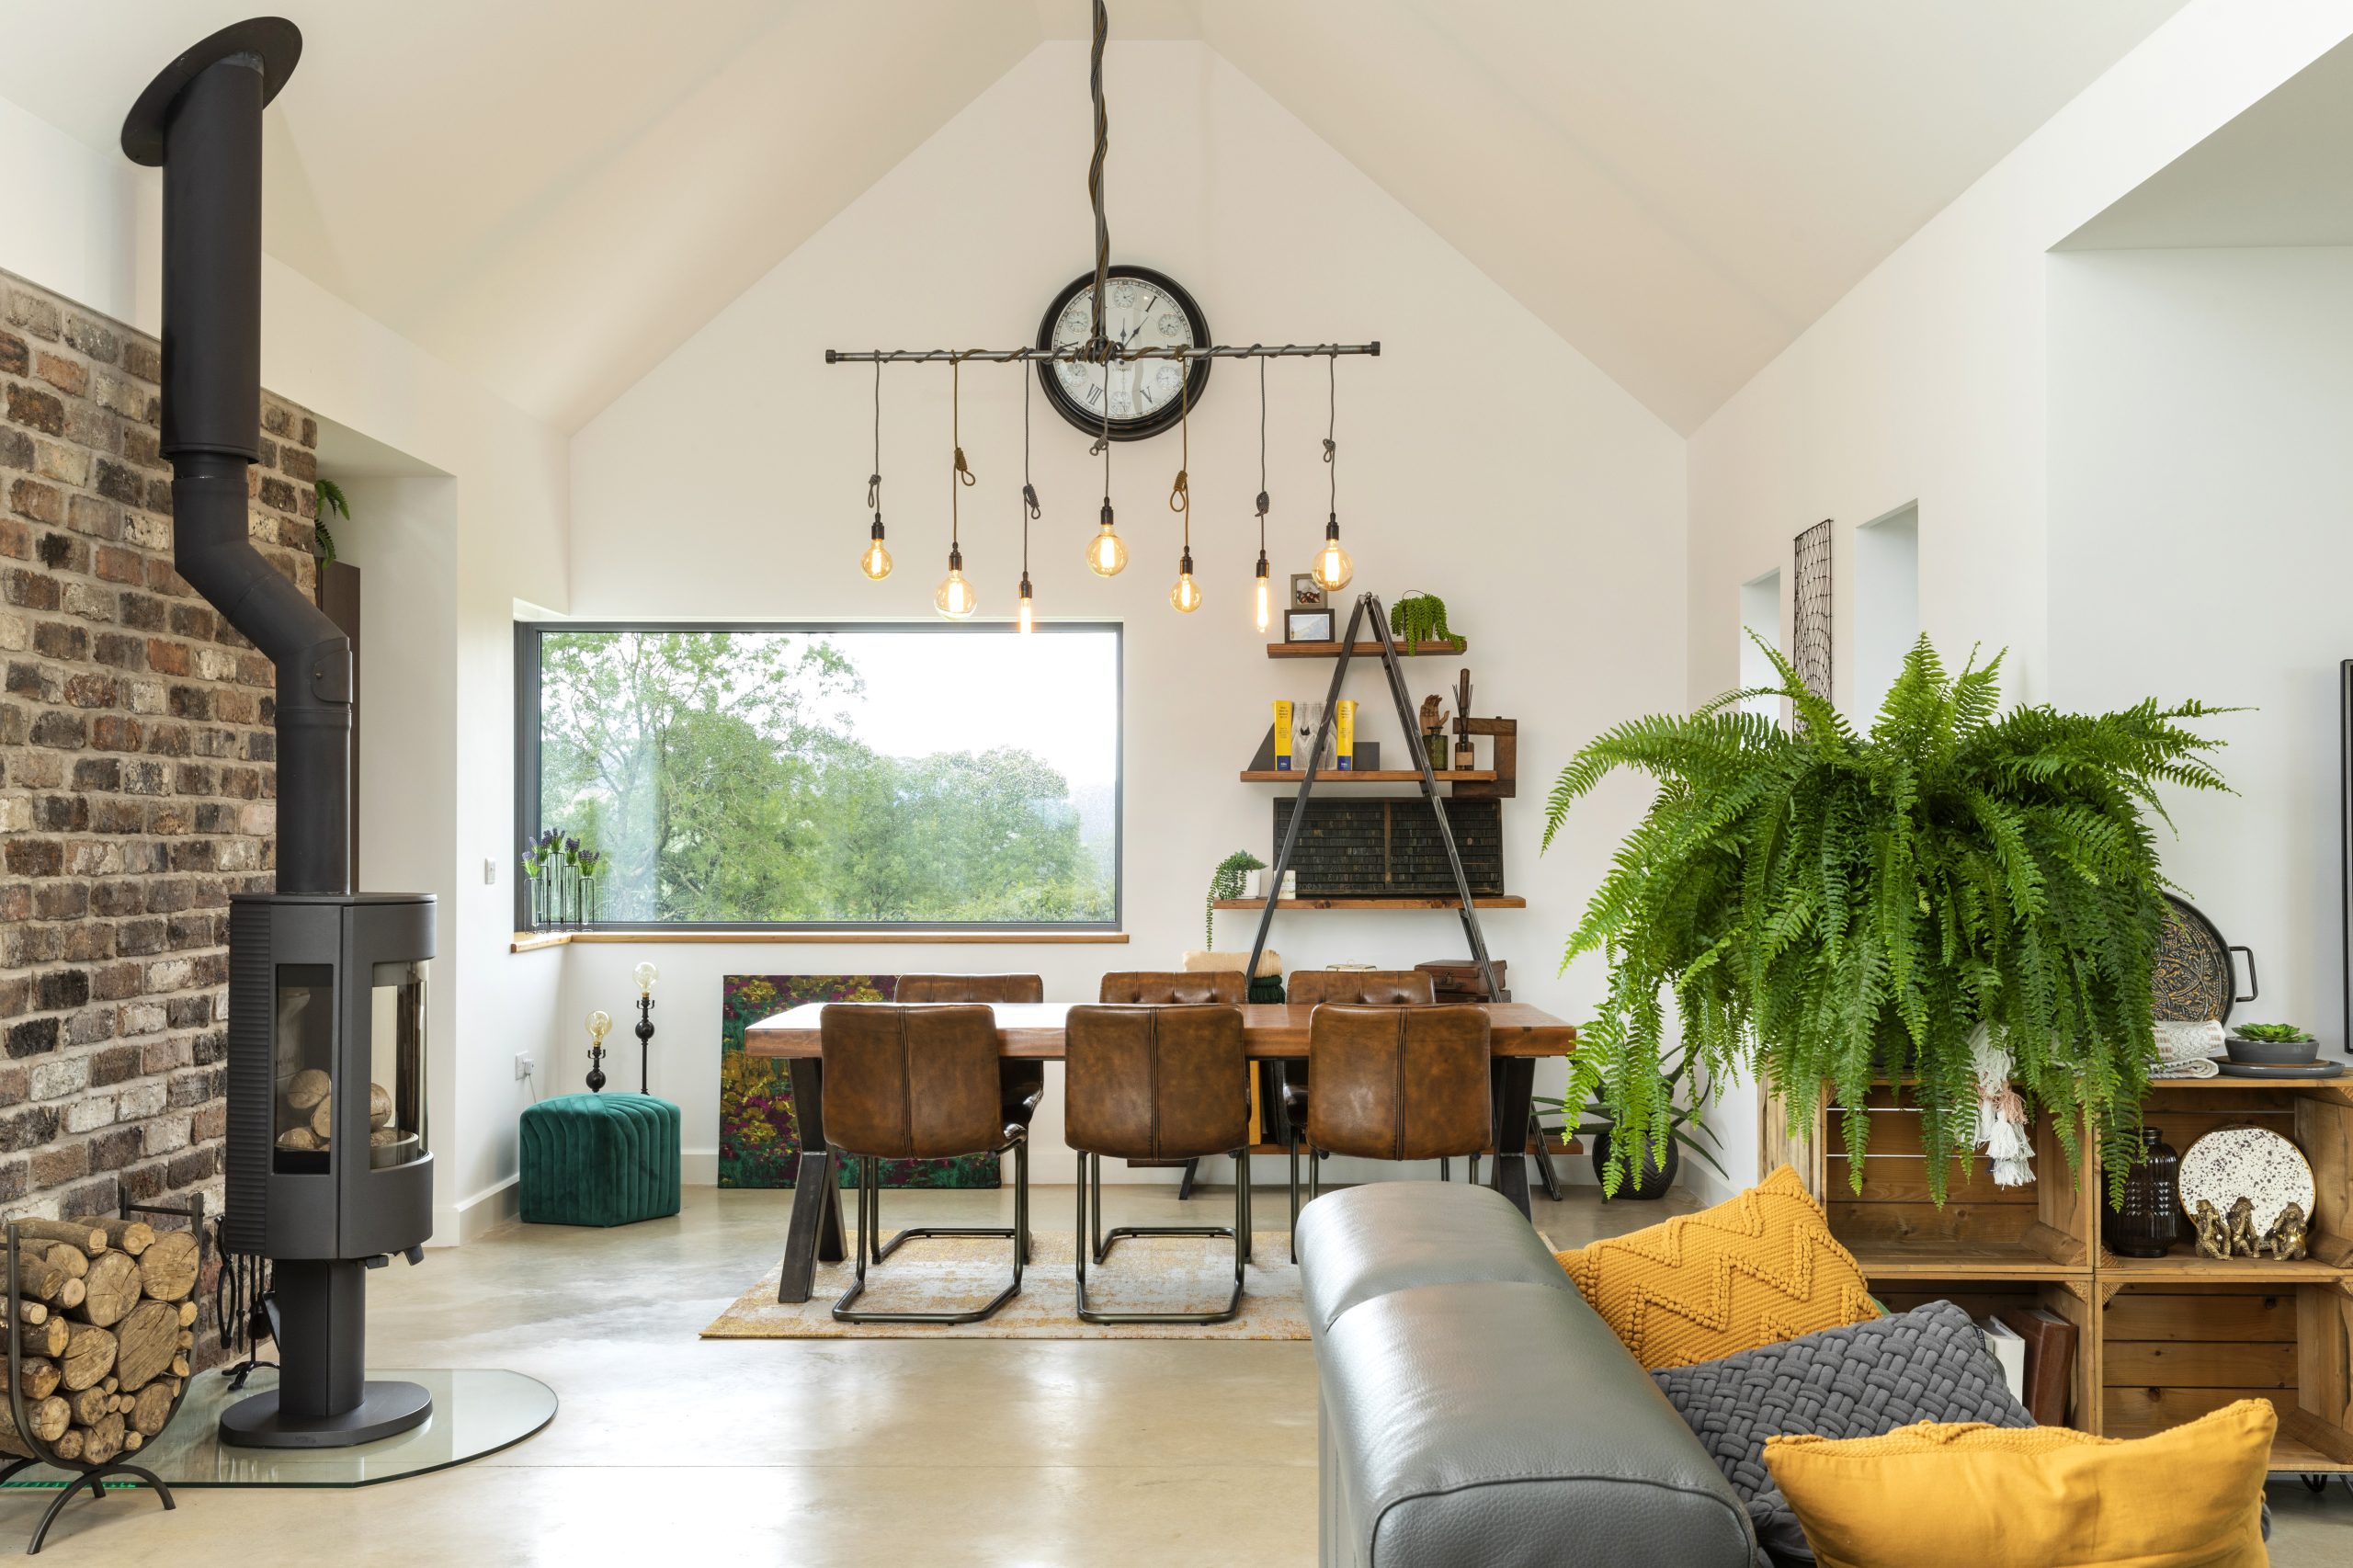
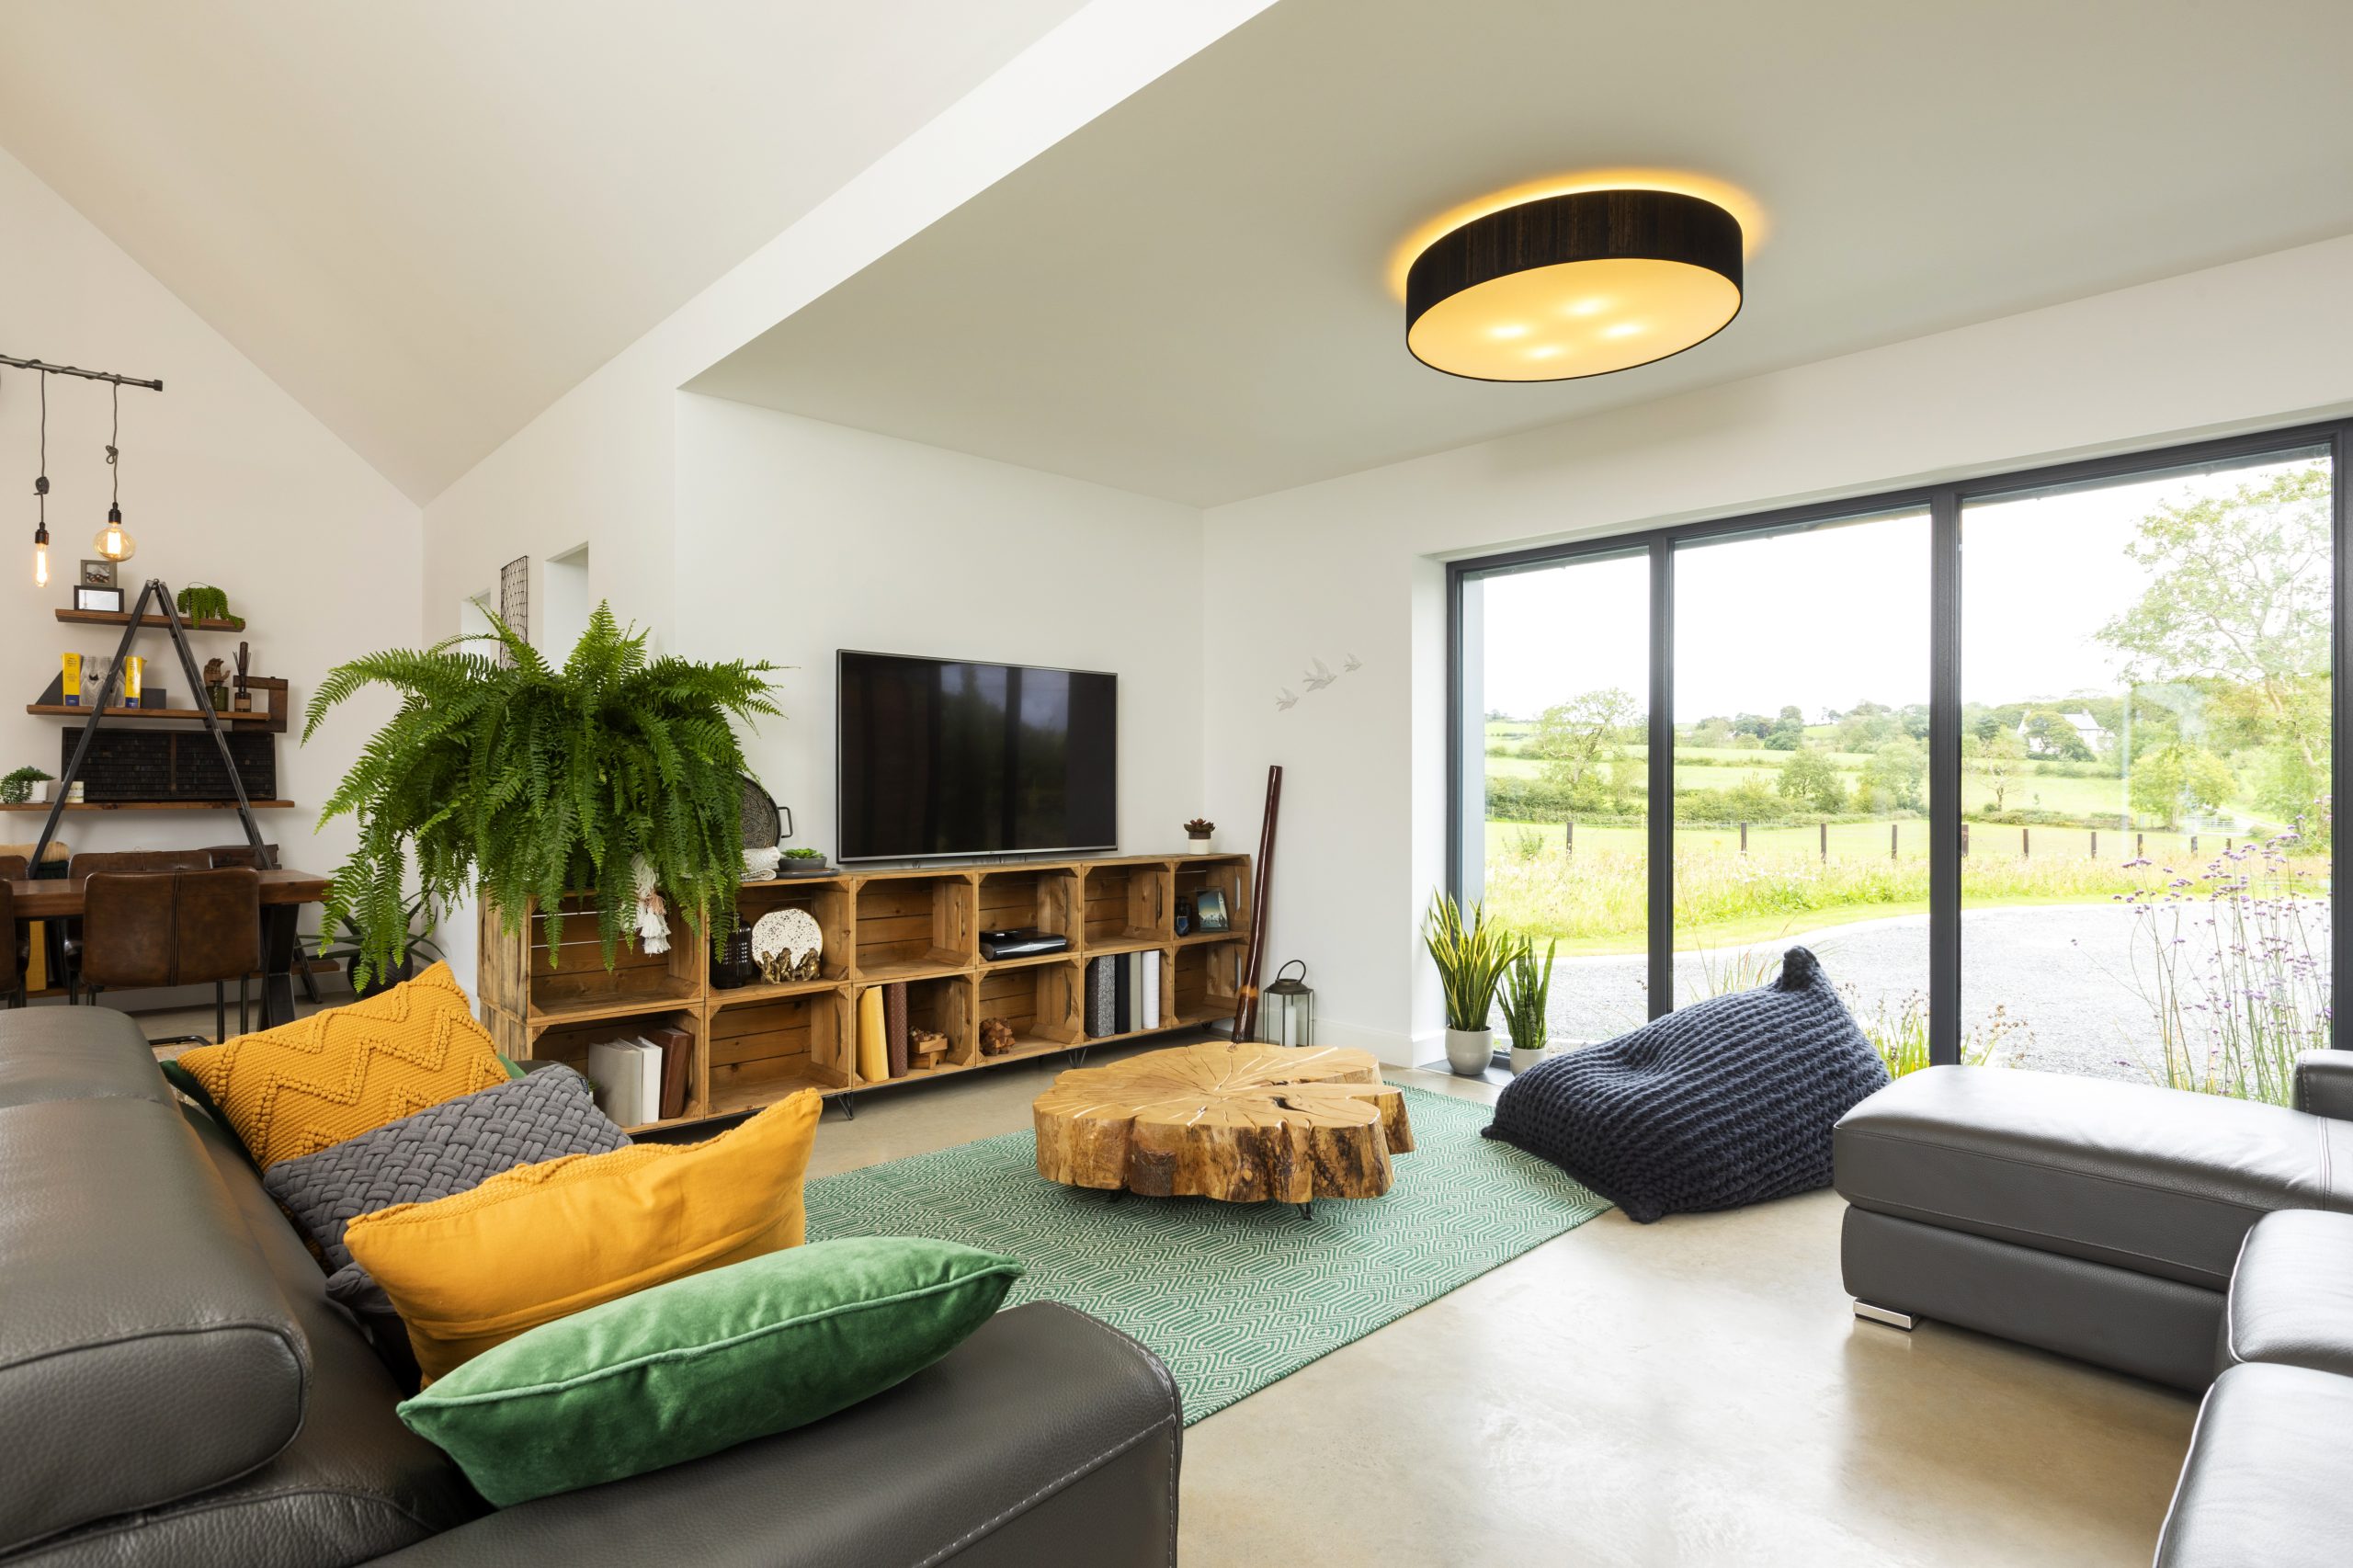
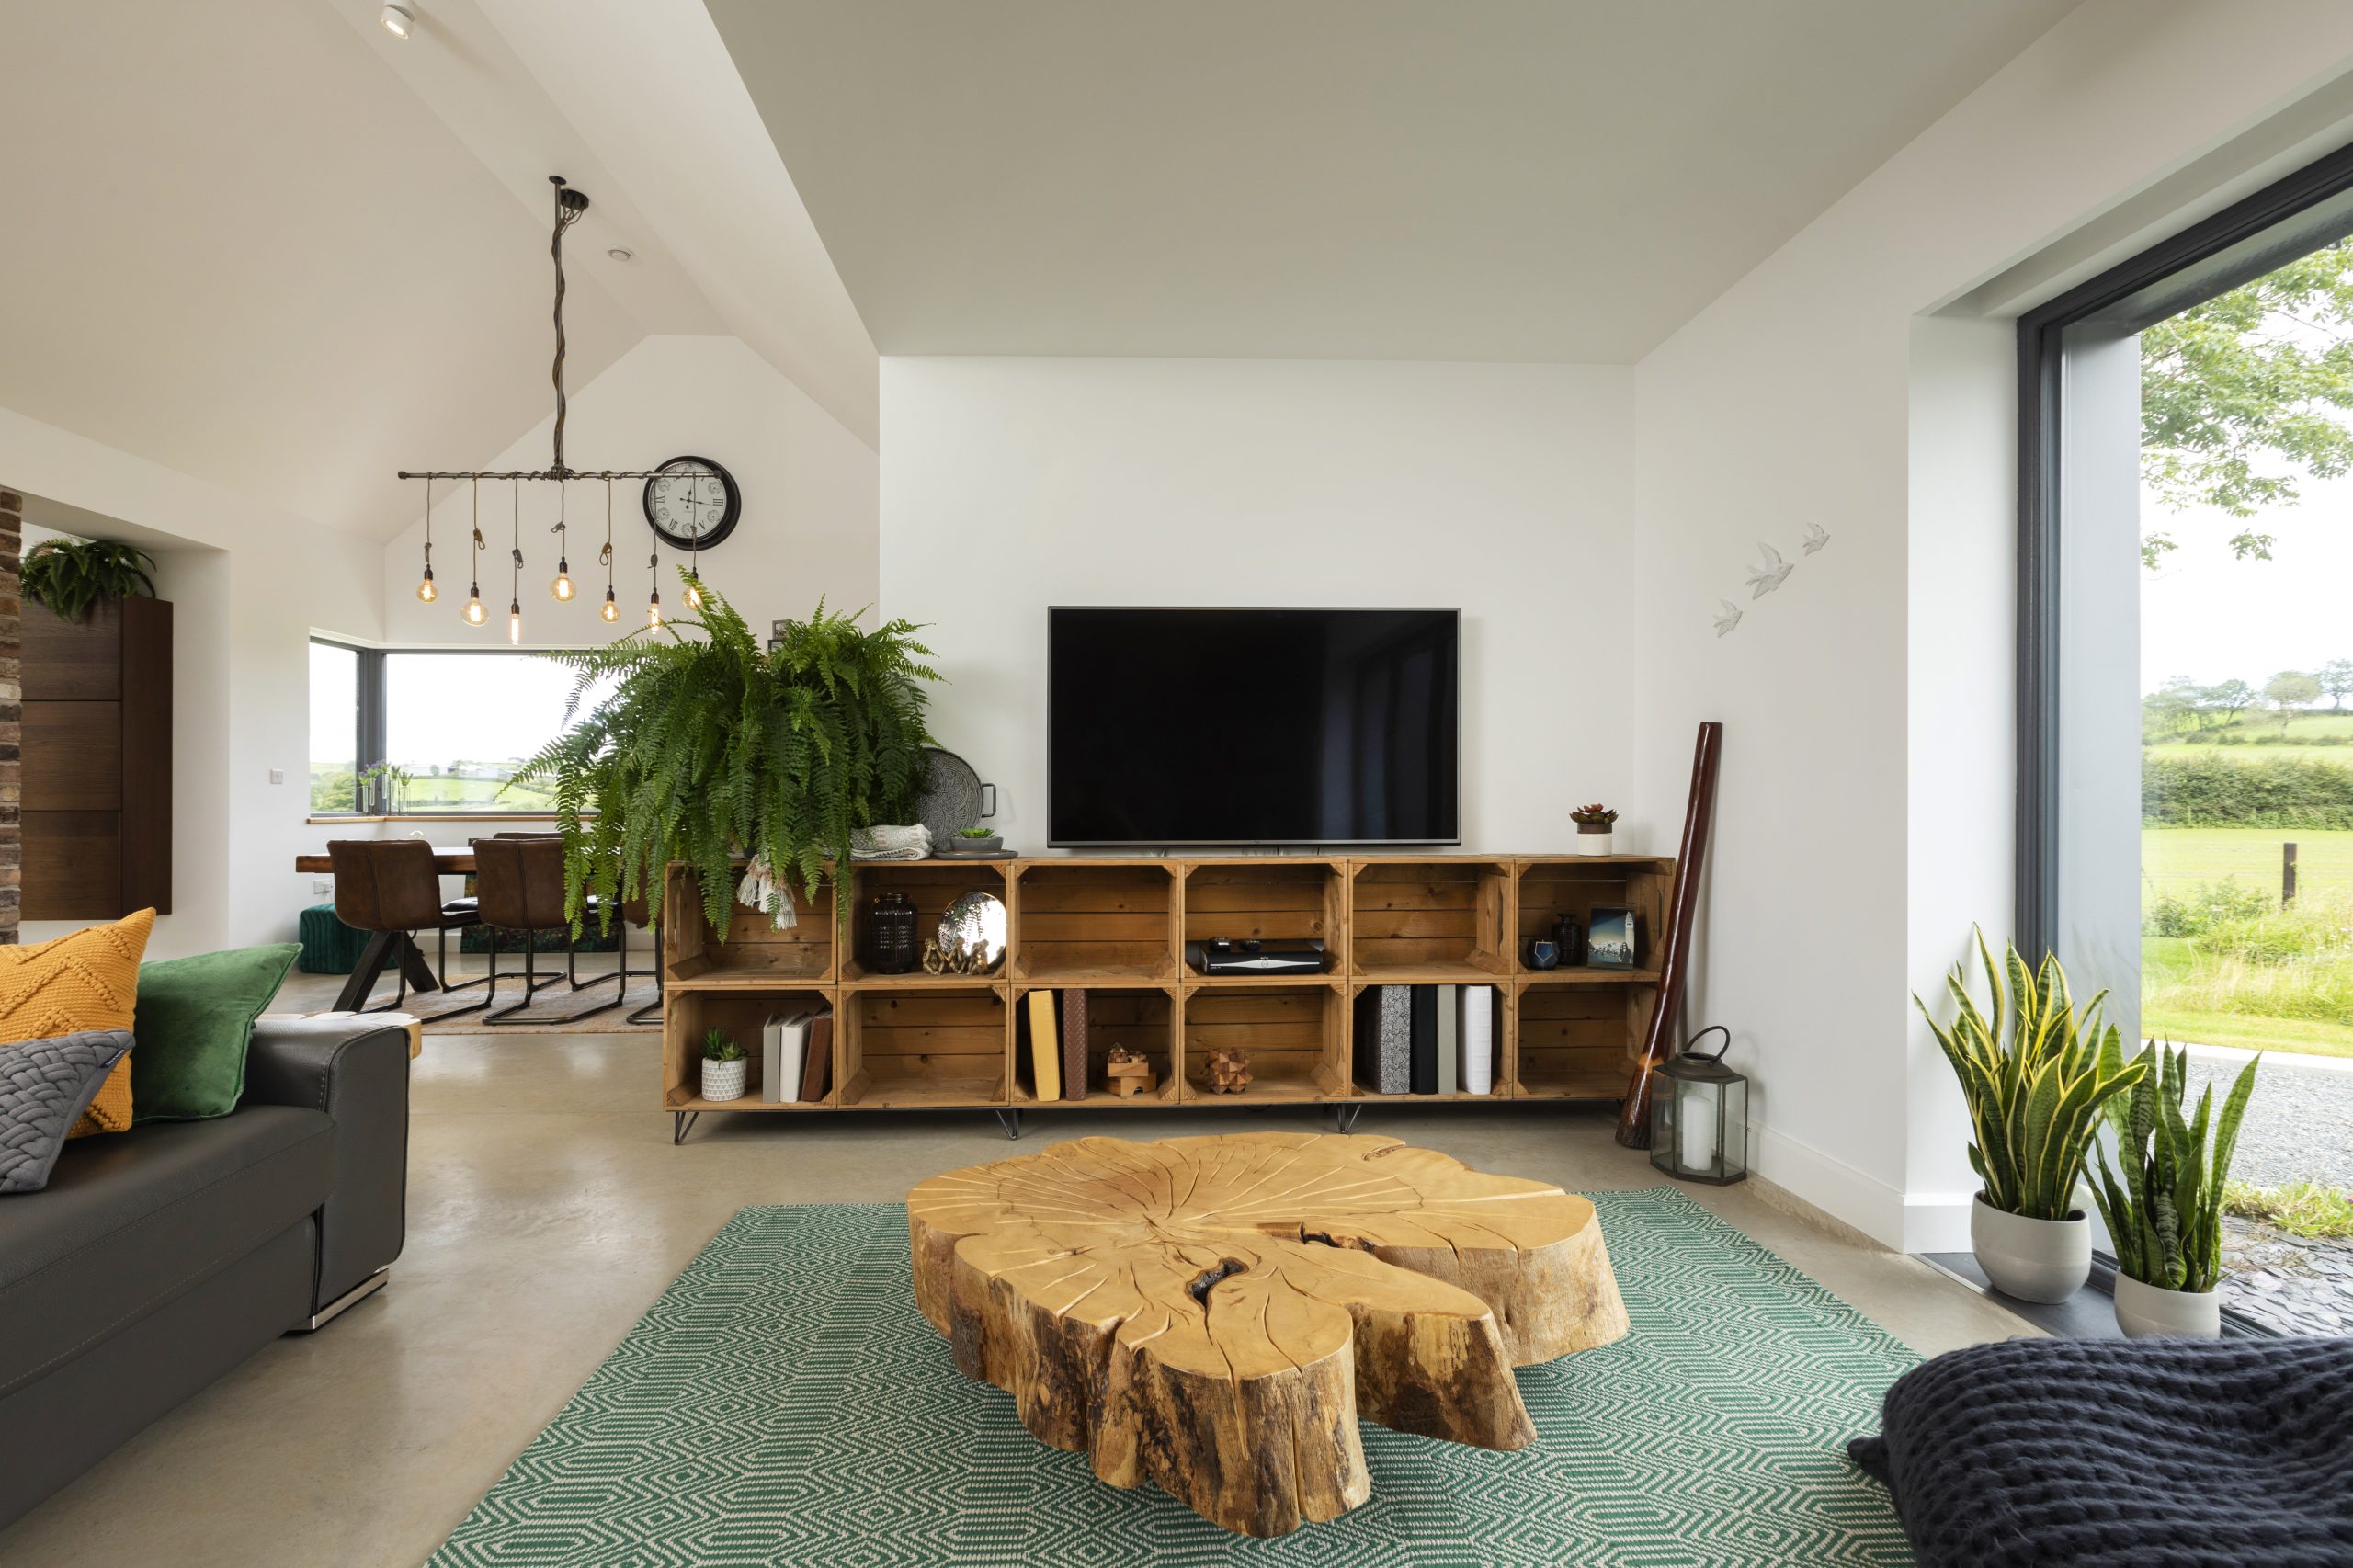
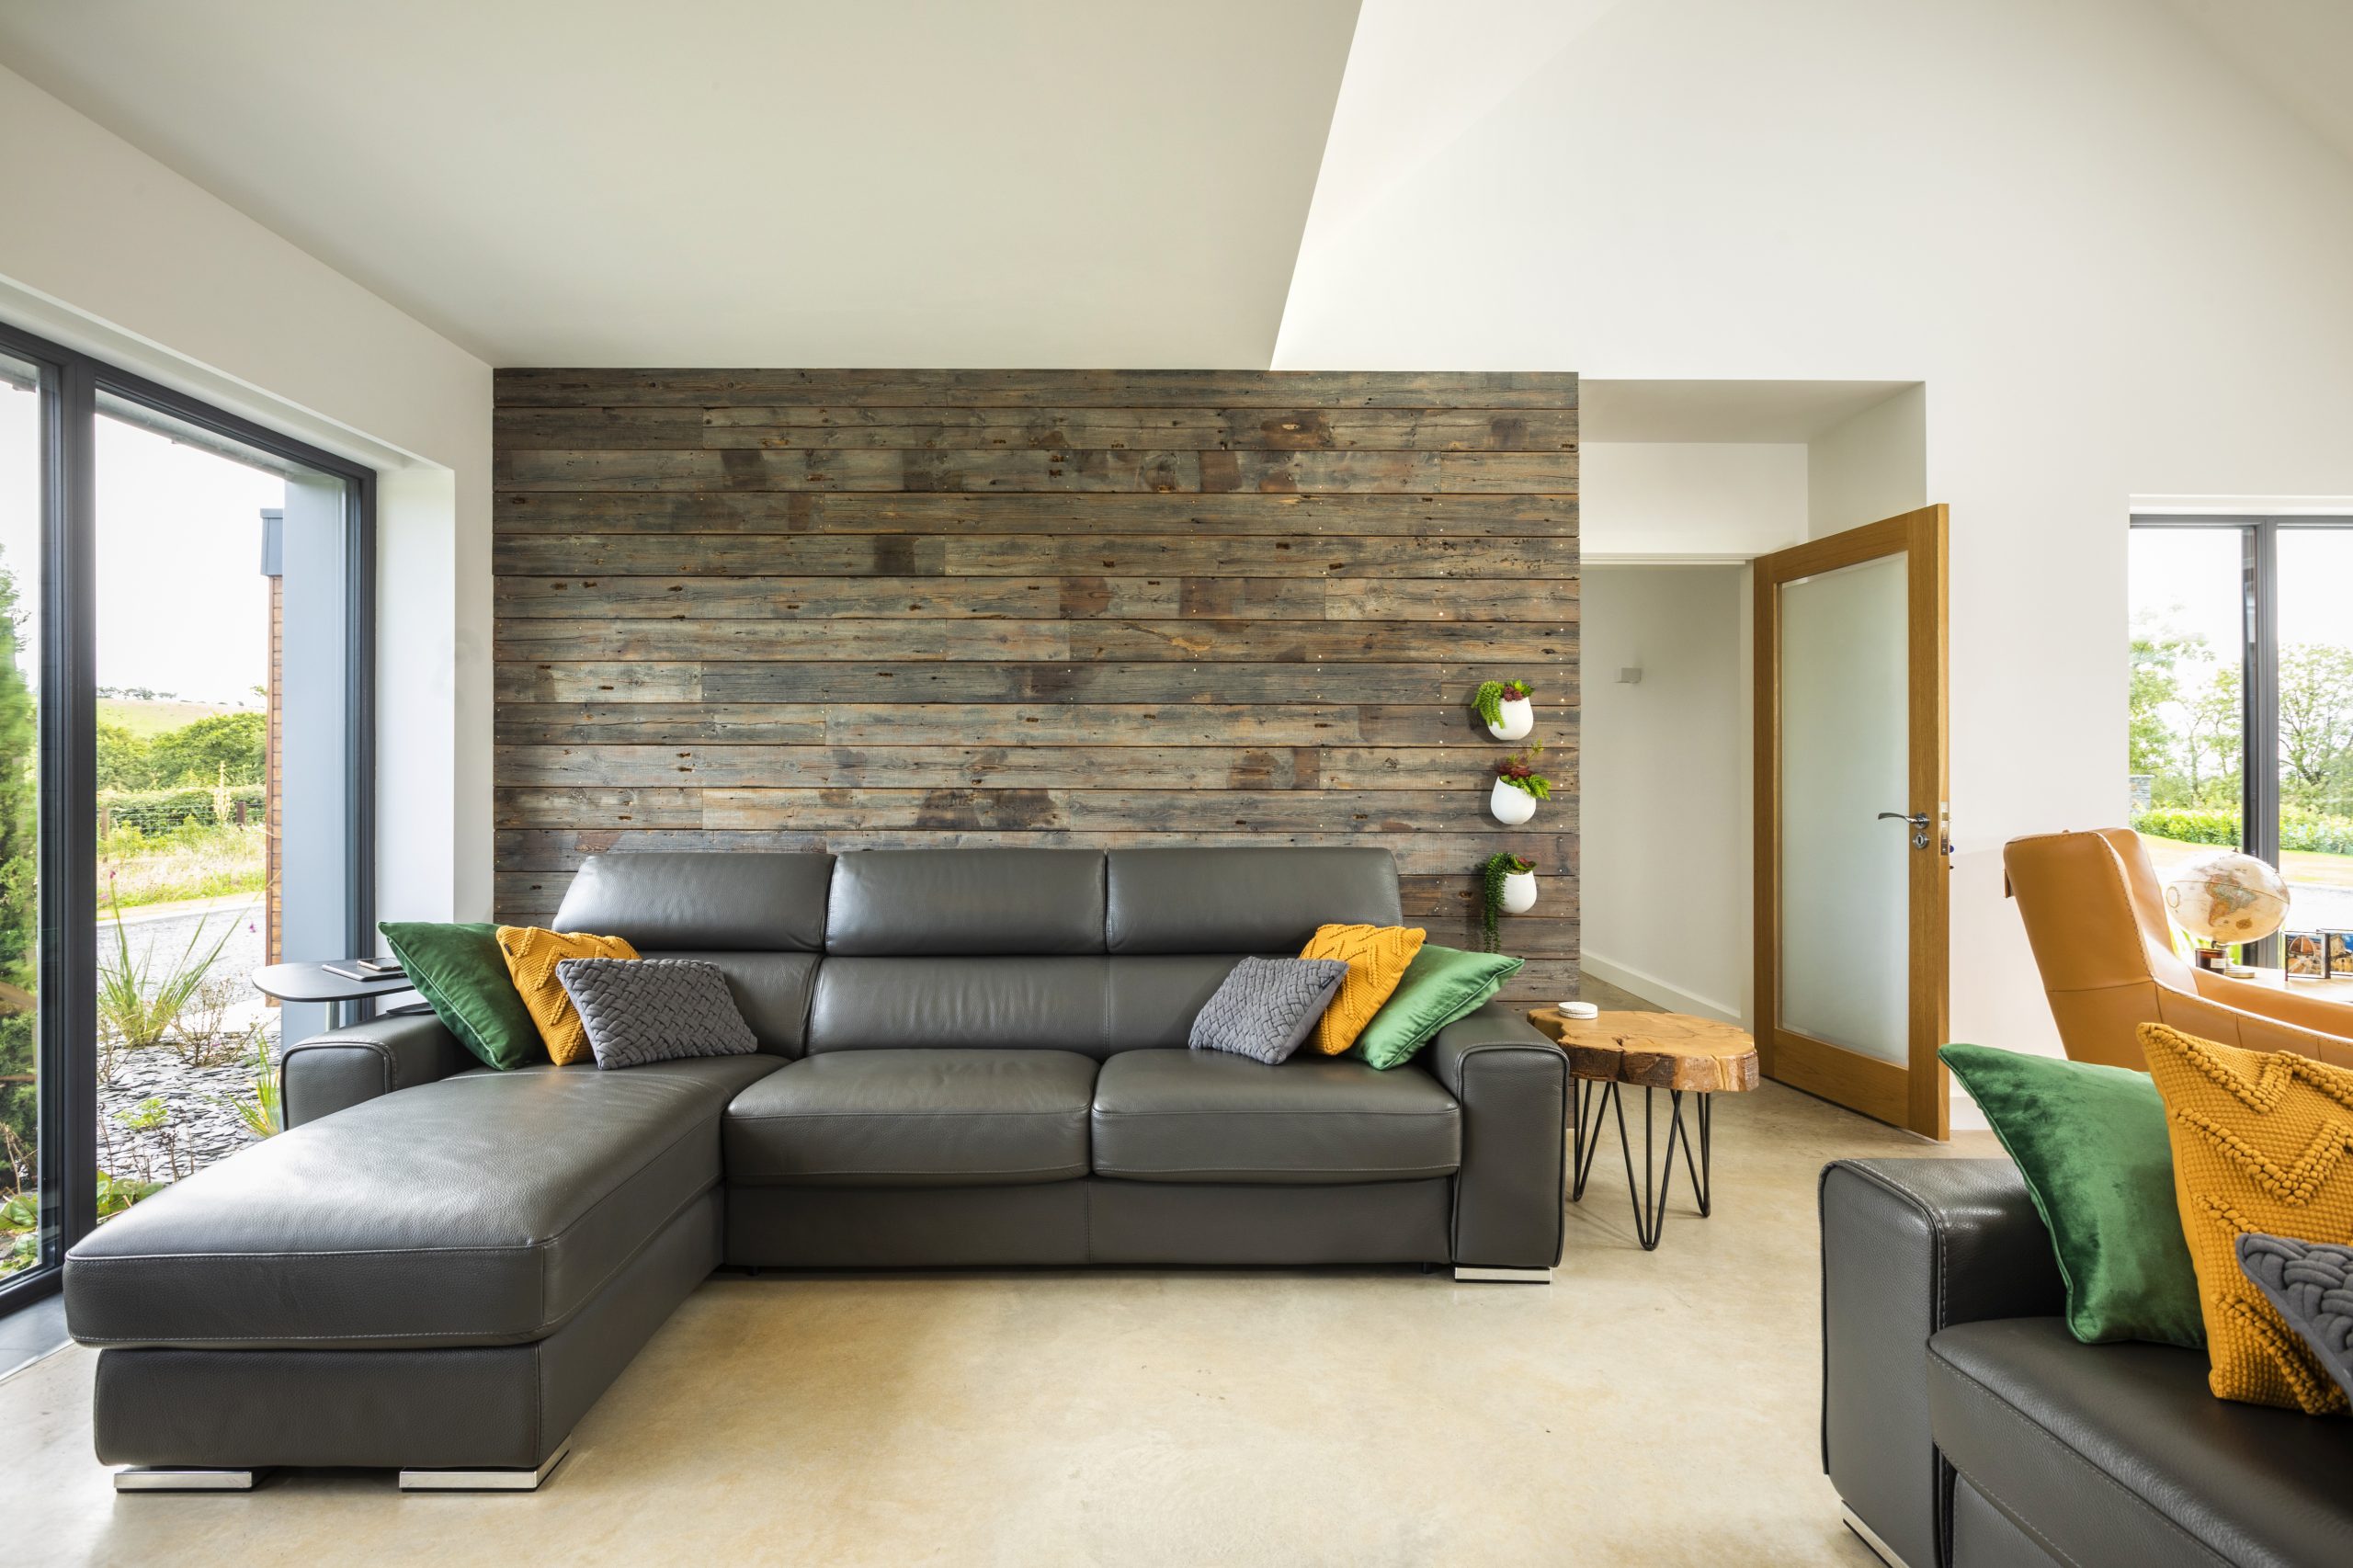
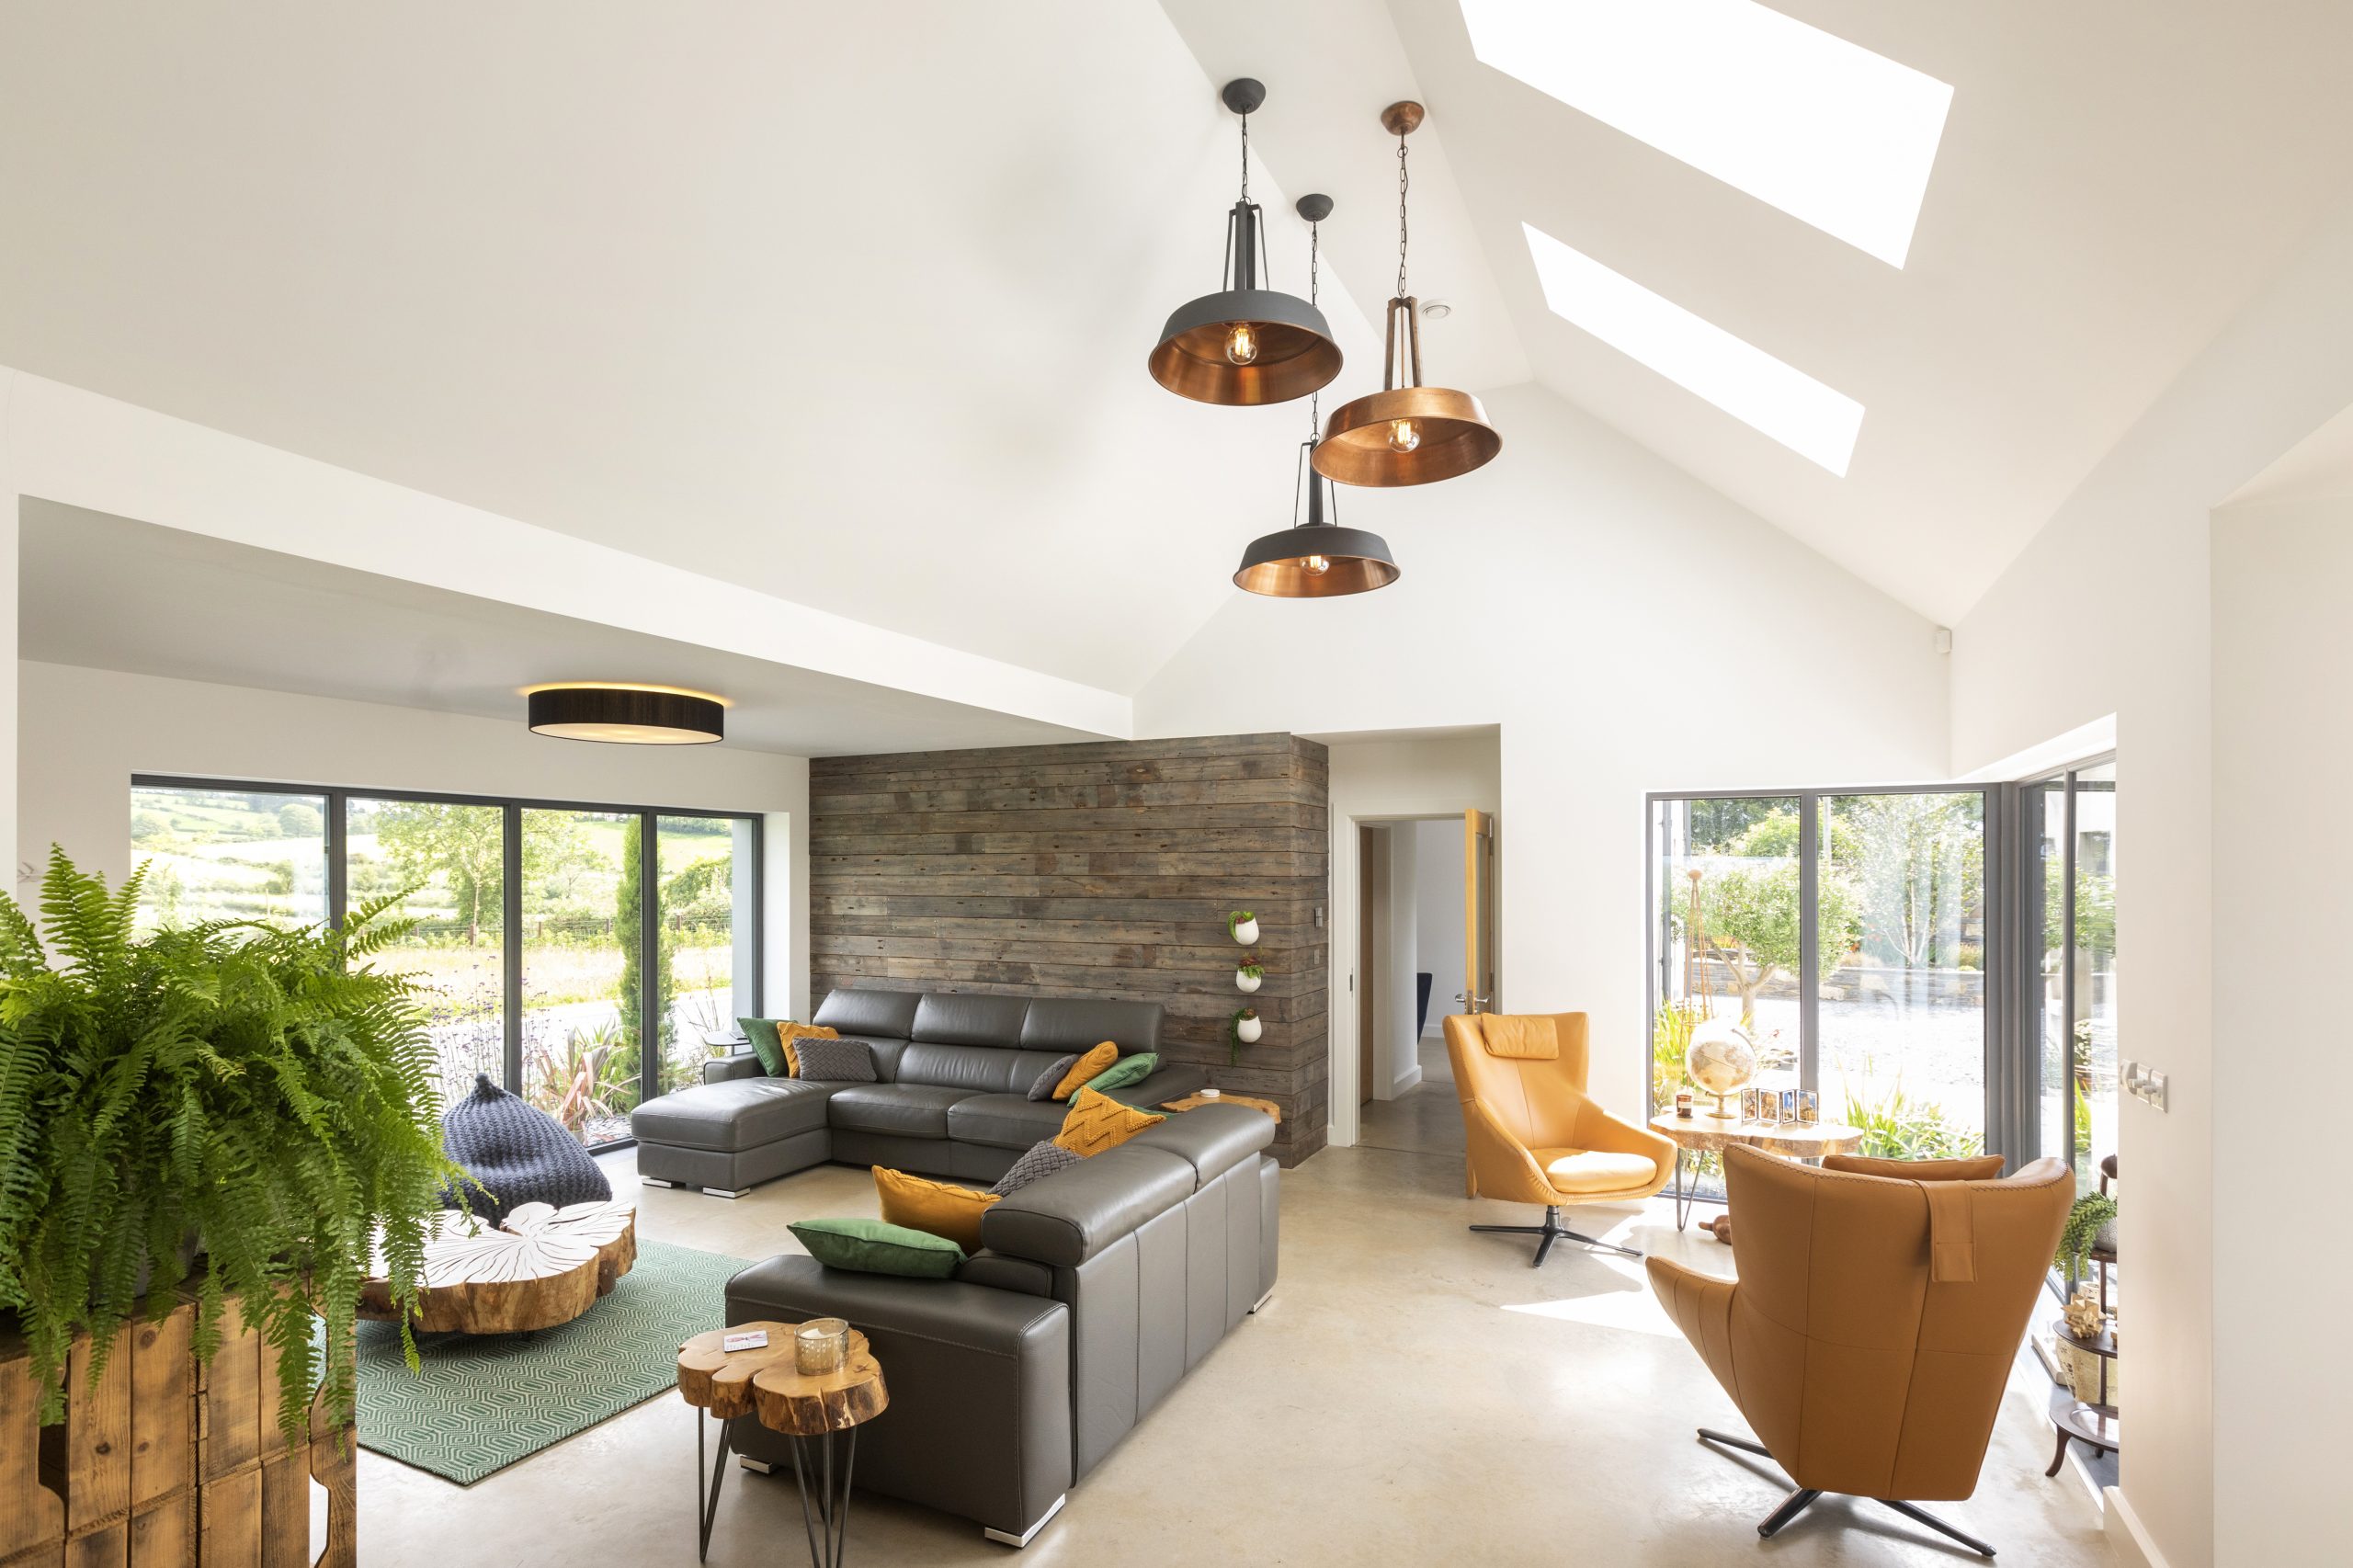
“We wanted to create a connected, open plan living, dining and kitchen space that flowed and was functional, but still had a slight distinction between them. Ronan was able to achieve this by offsetting the rooms in a T-shape and dividing them with a bank of cabinets and the stove wall. There is enough separation between the rooms to provide a certain amount of privacy, while still feeling connected.”

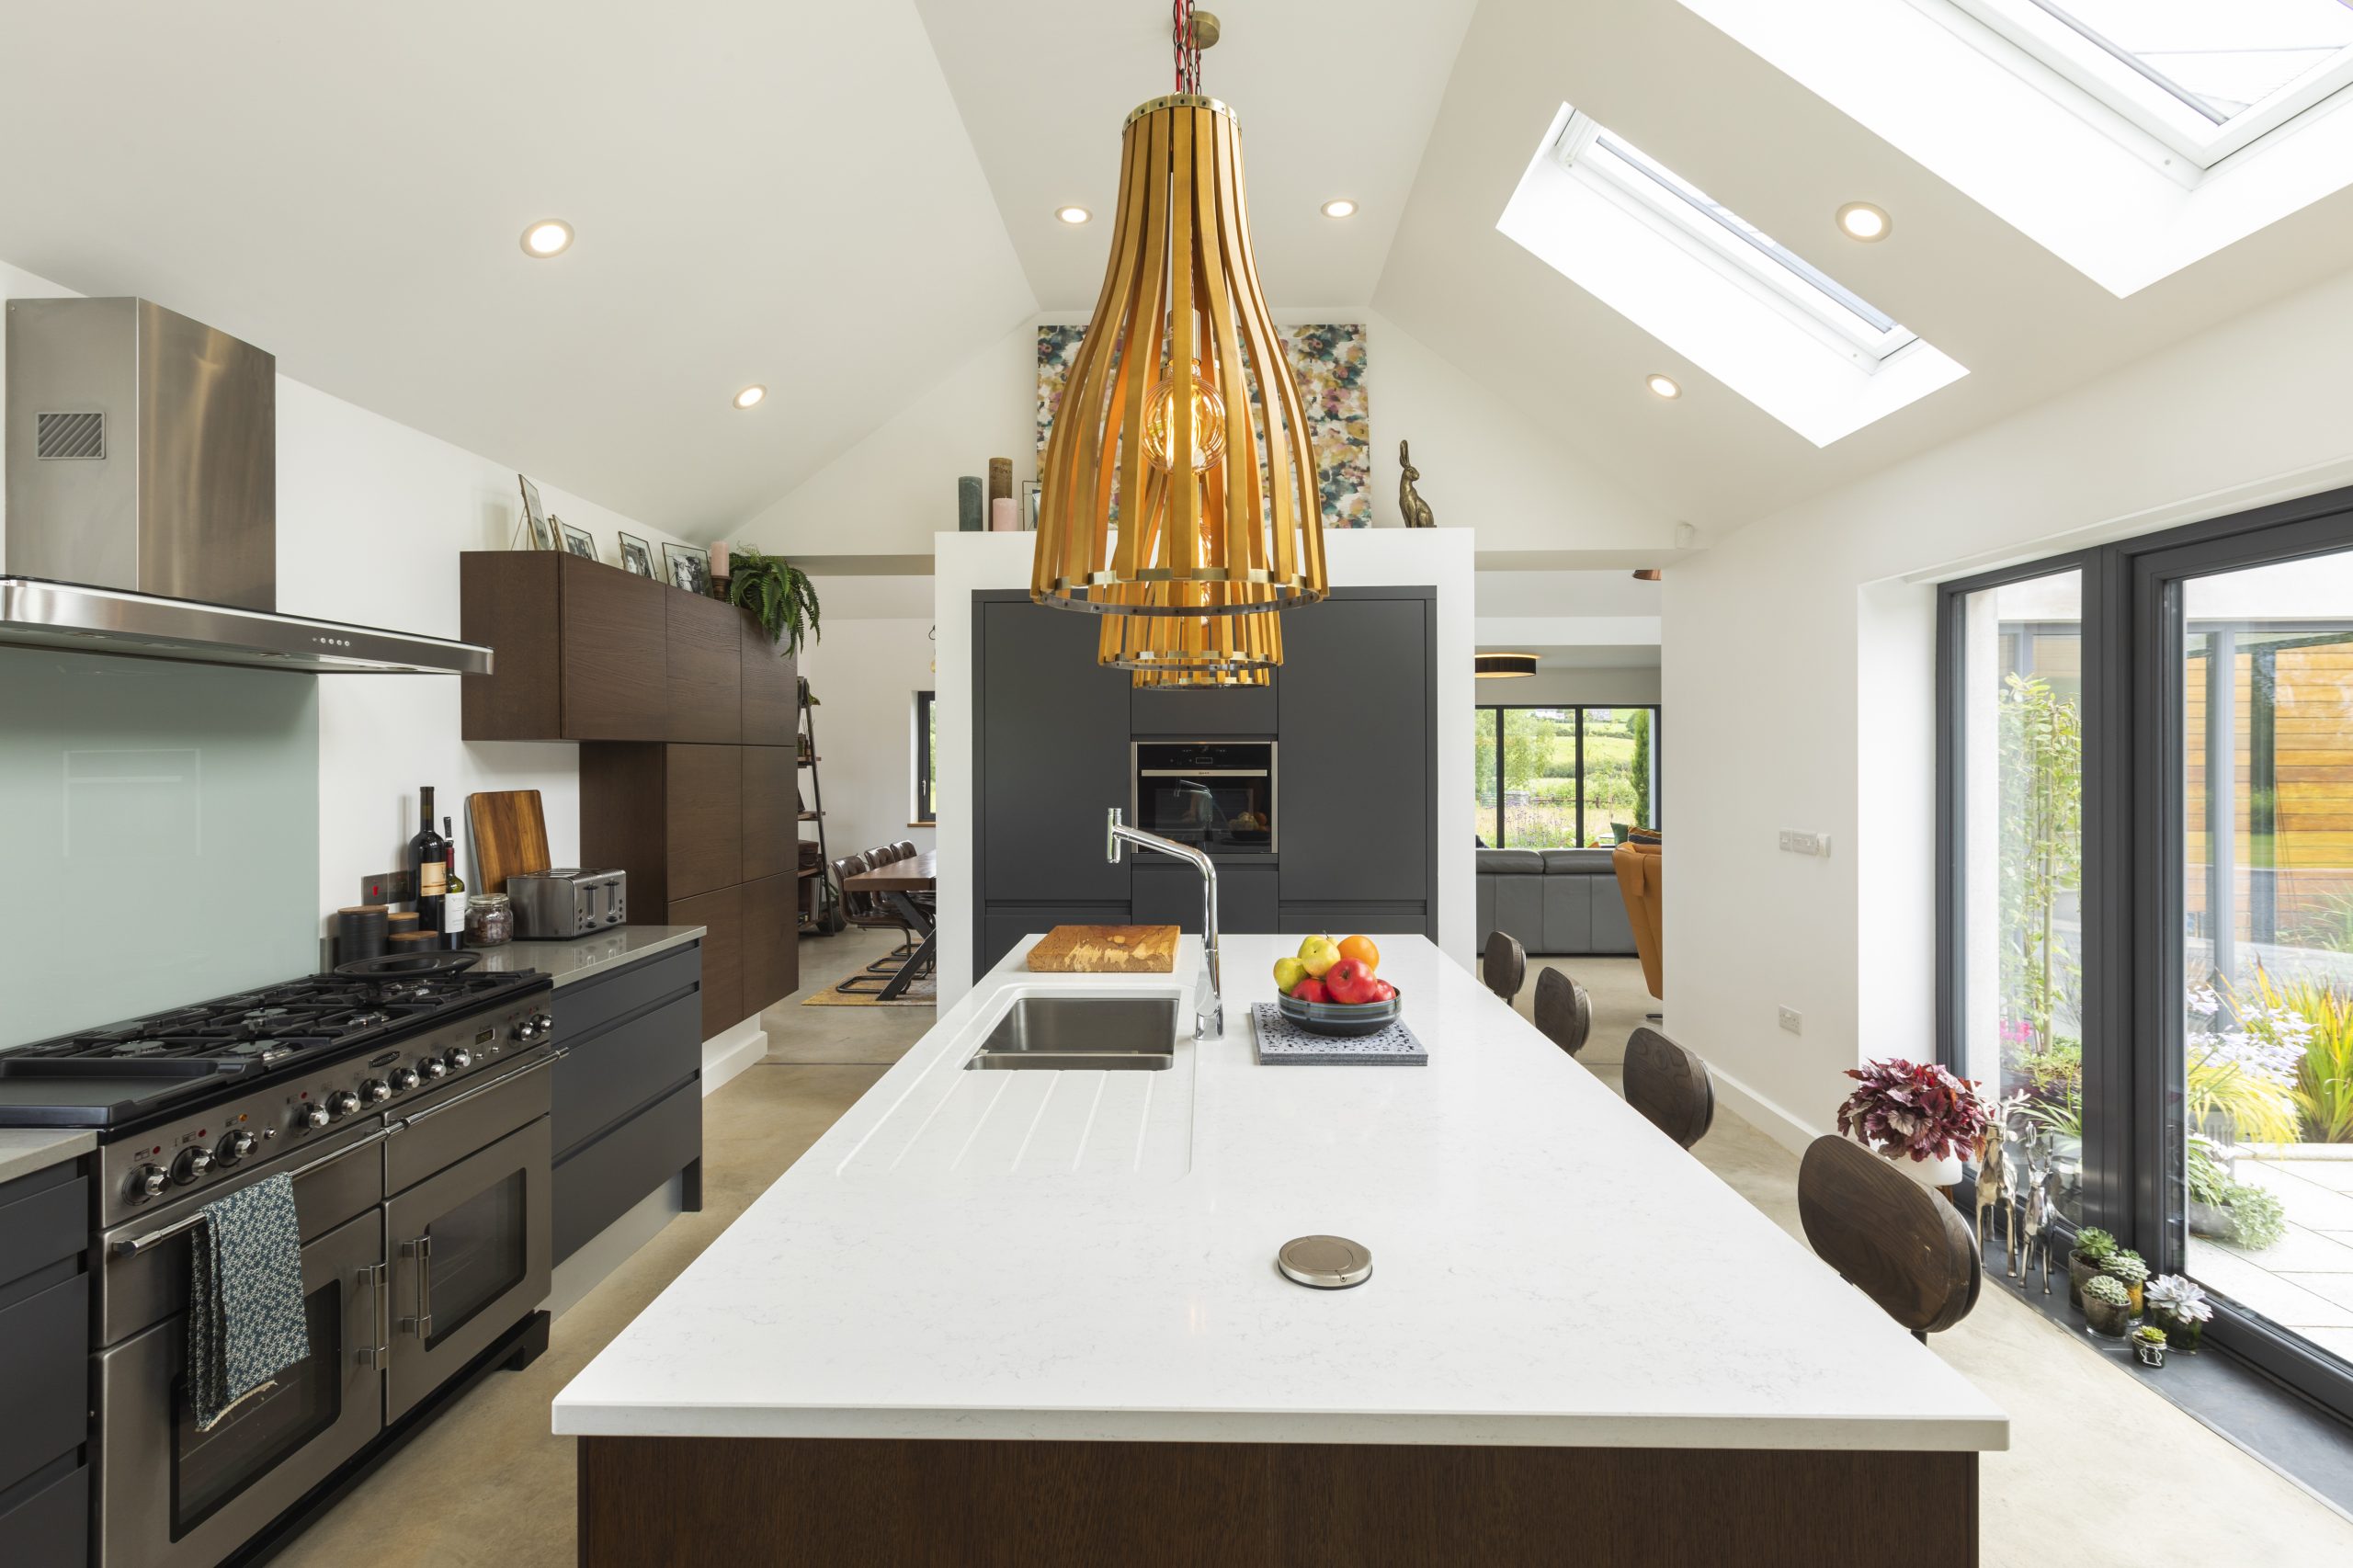

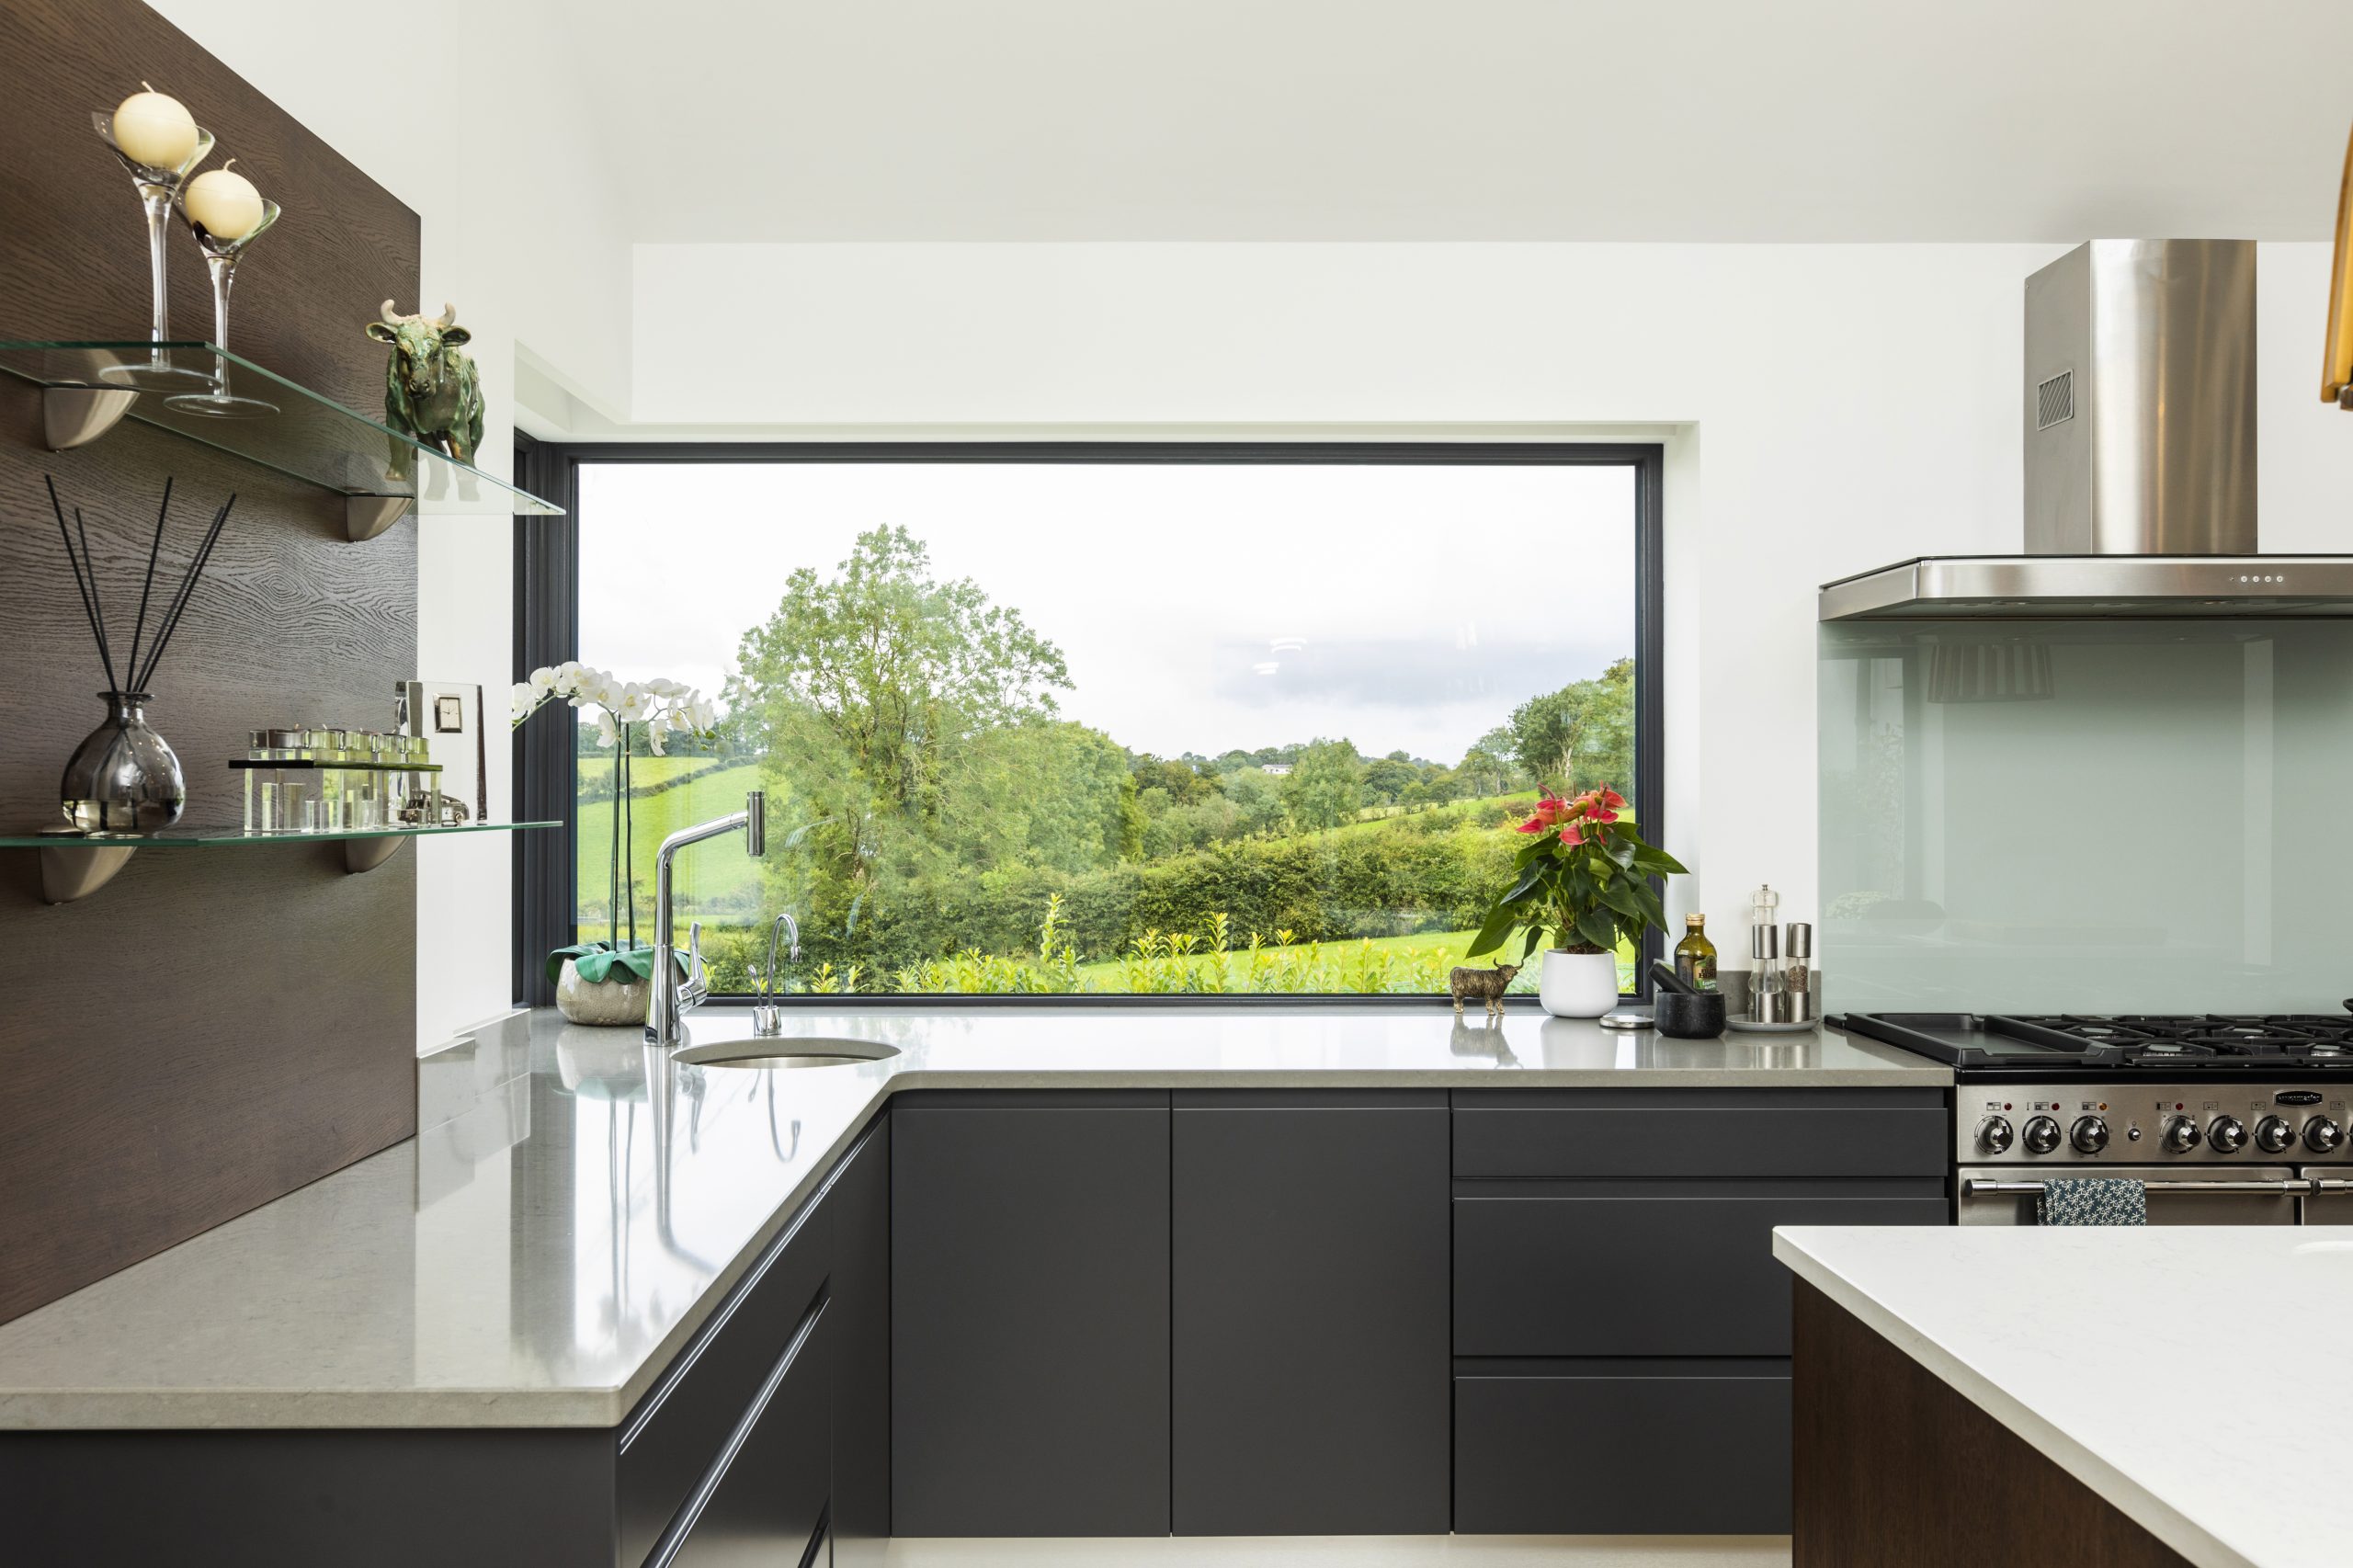
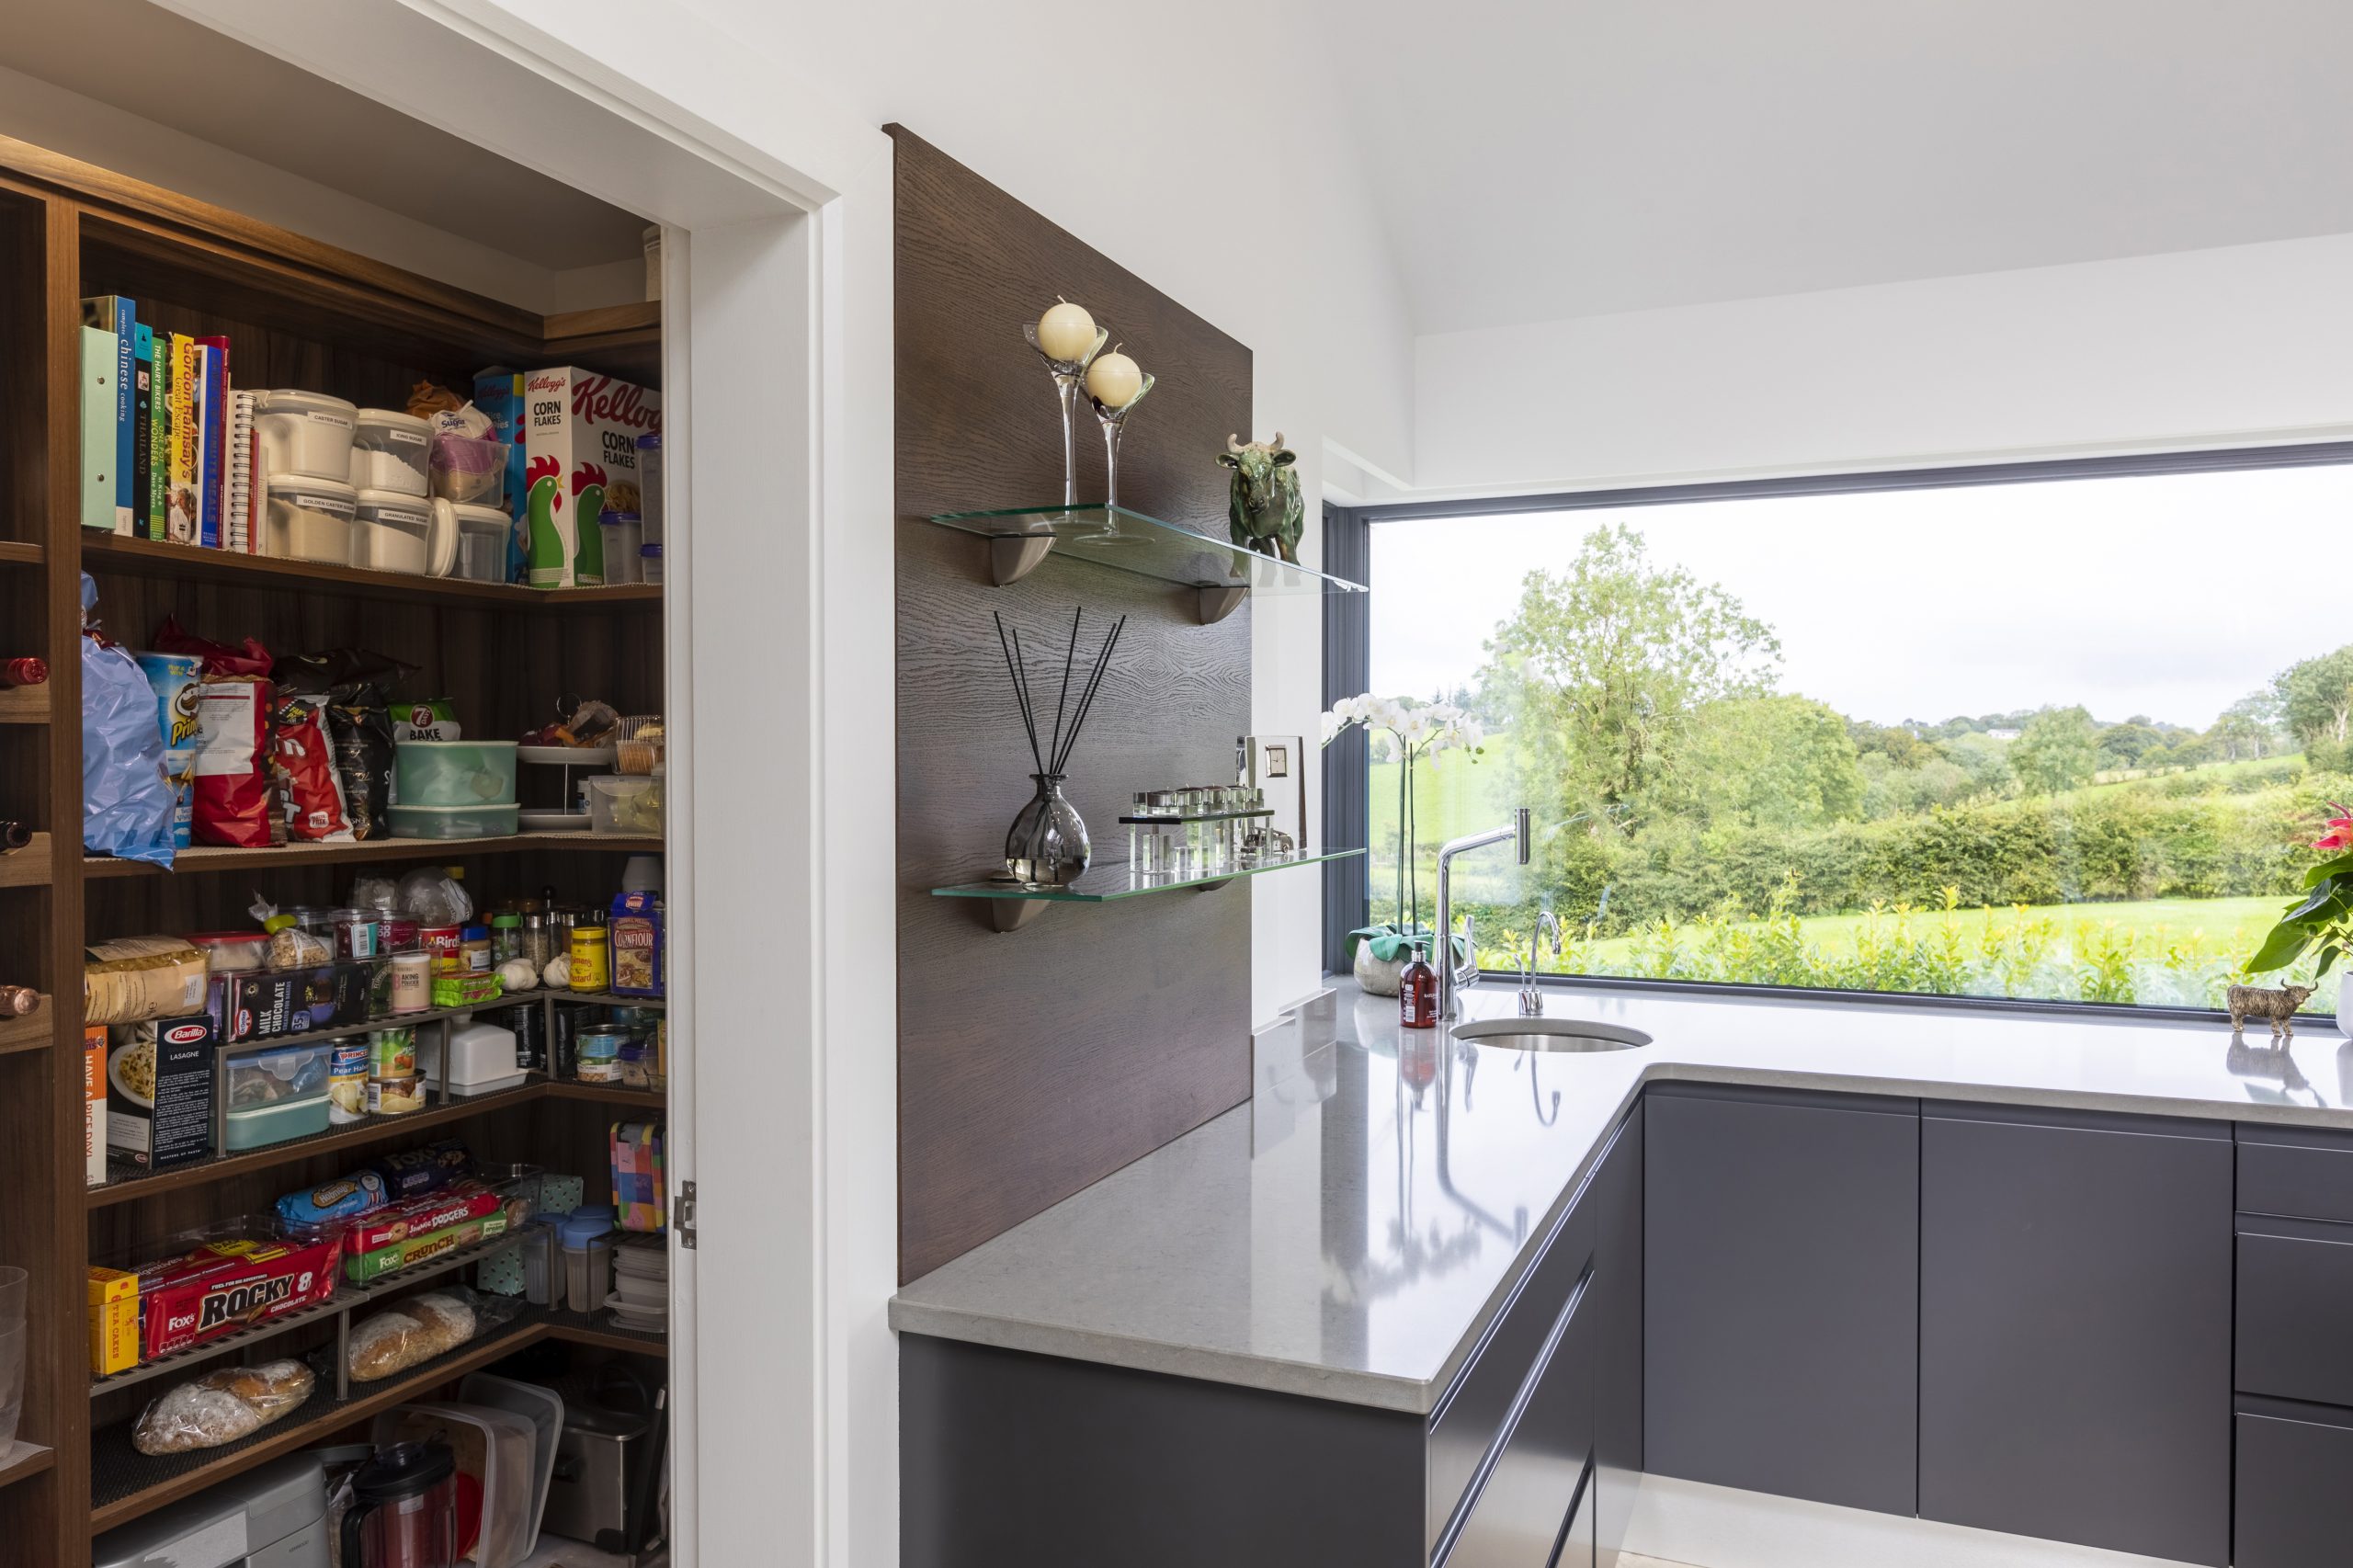
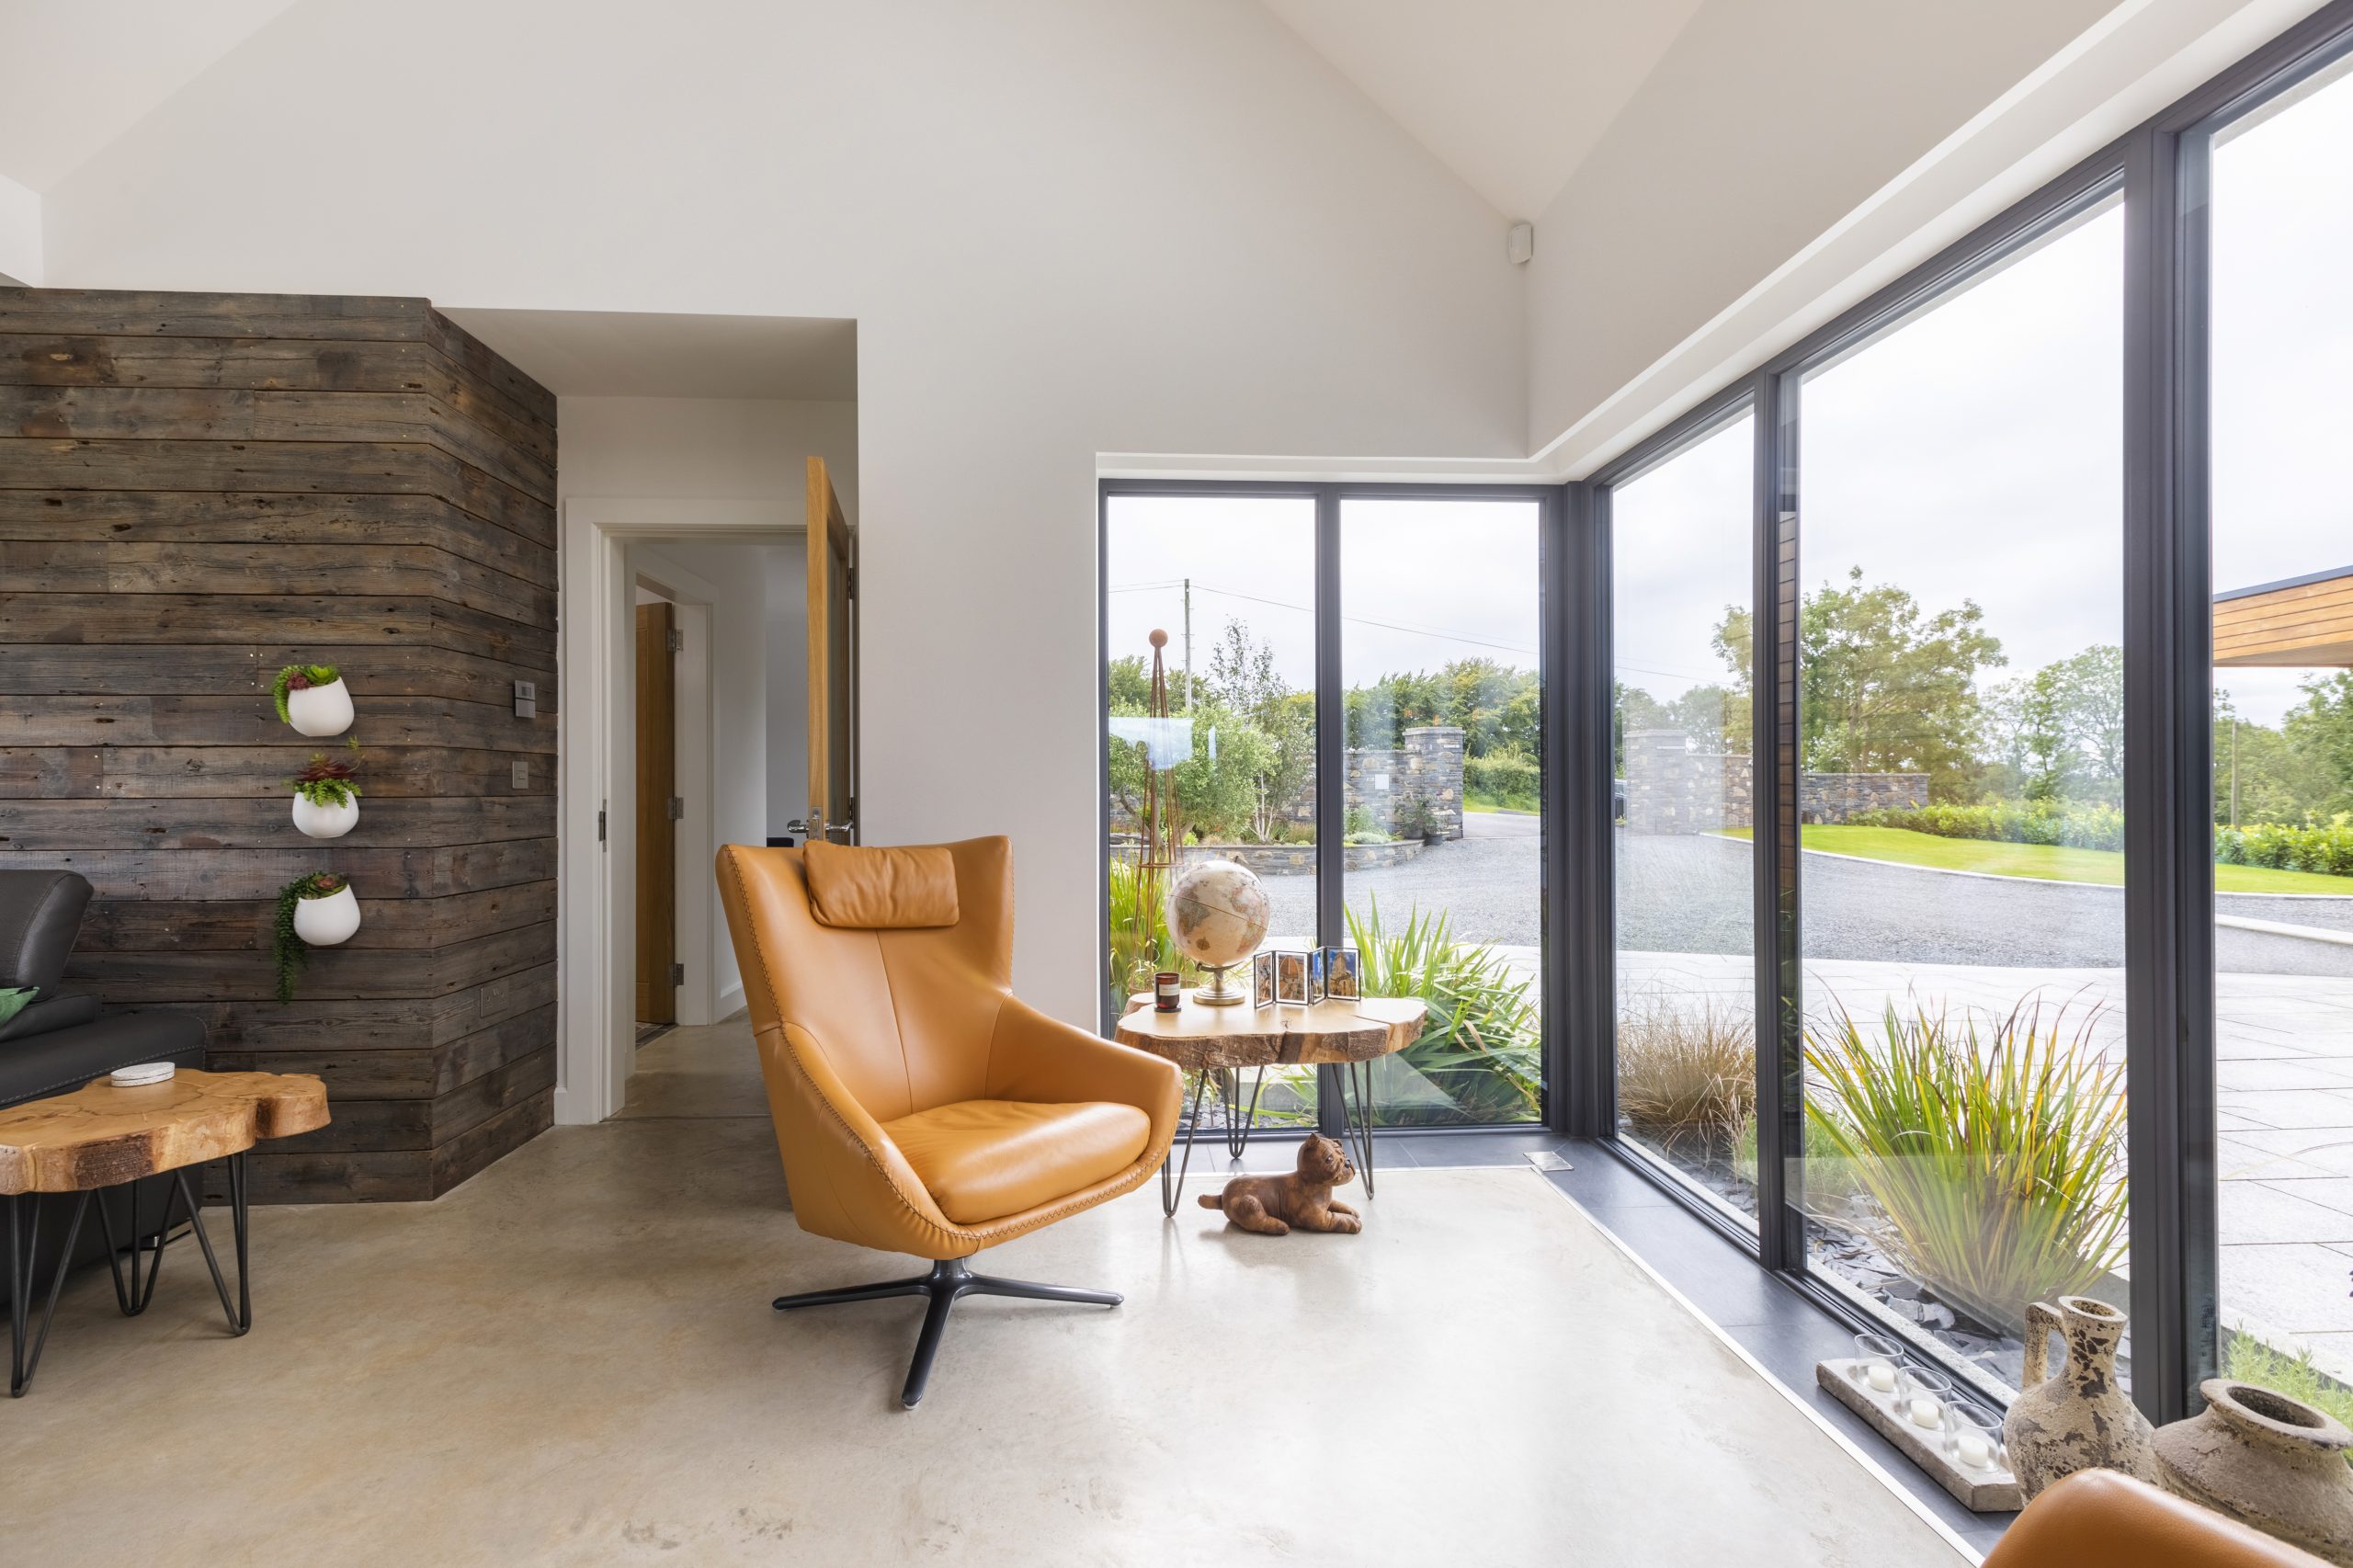
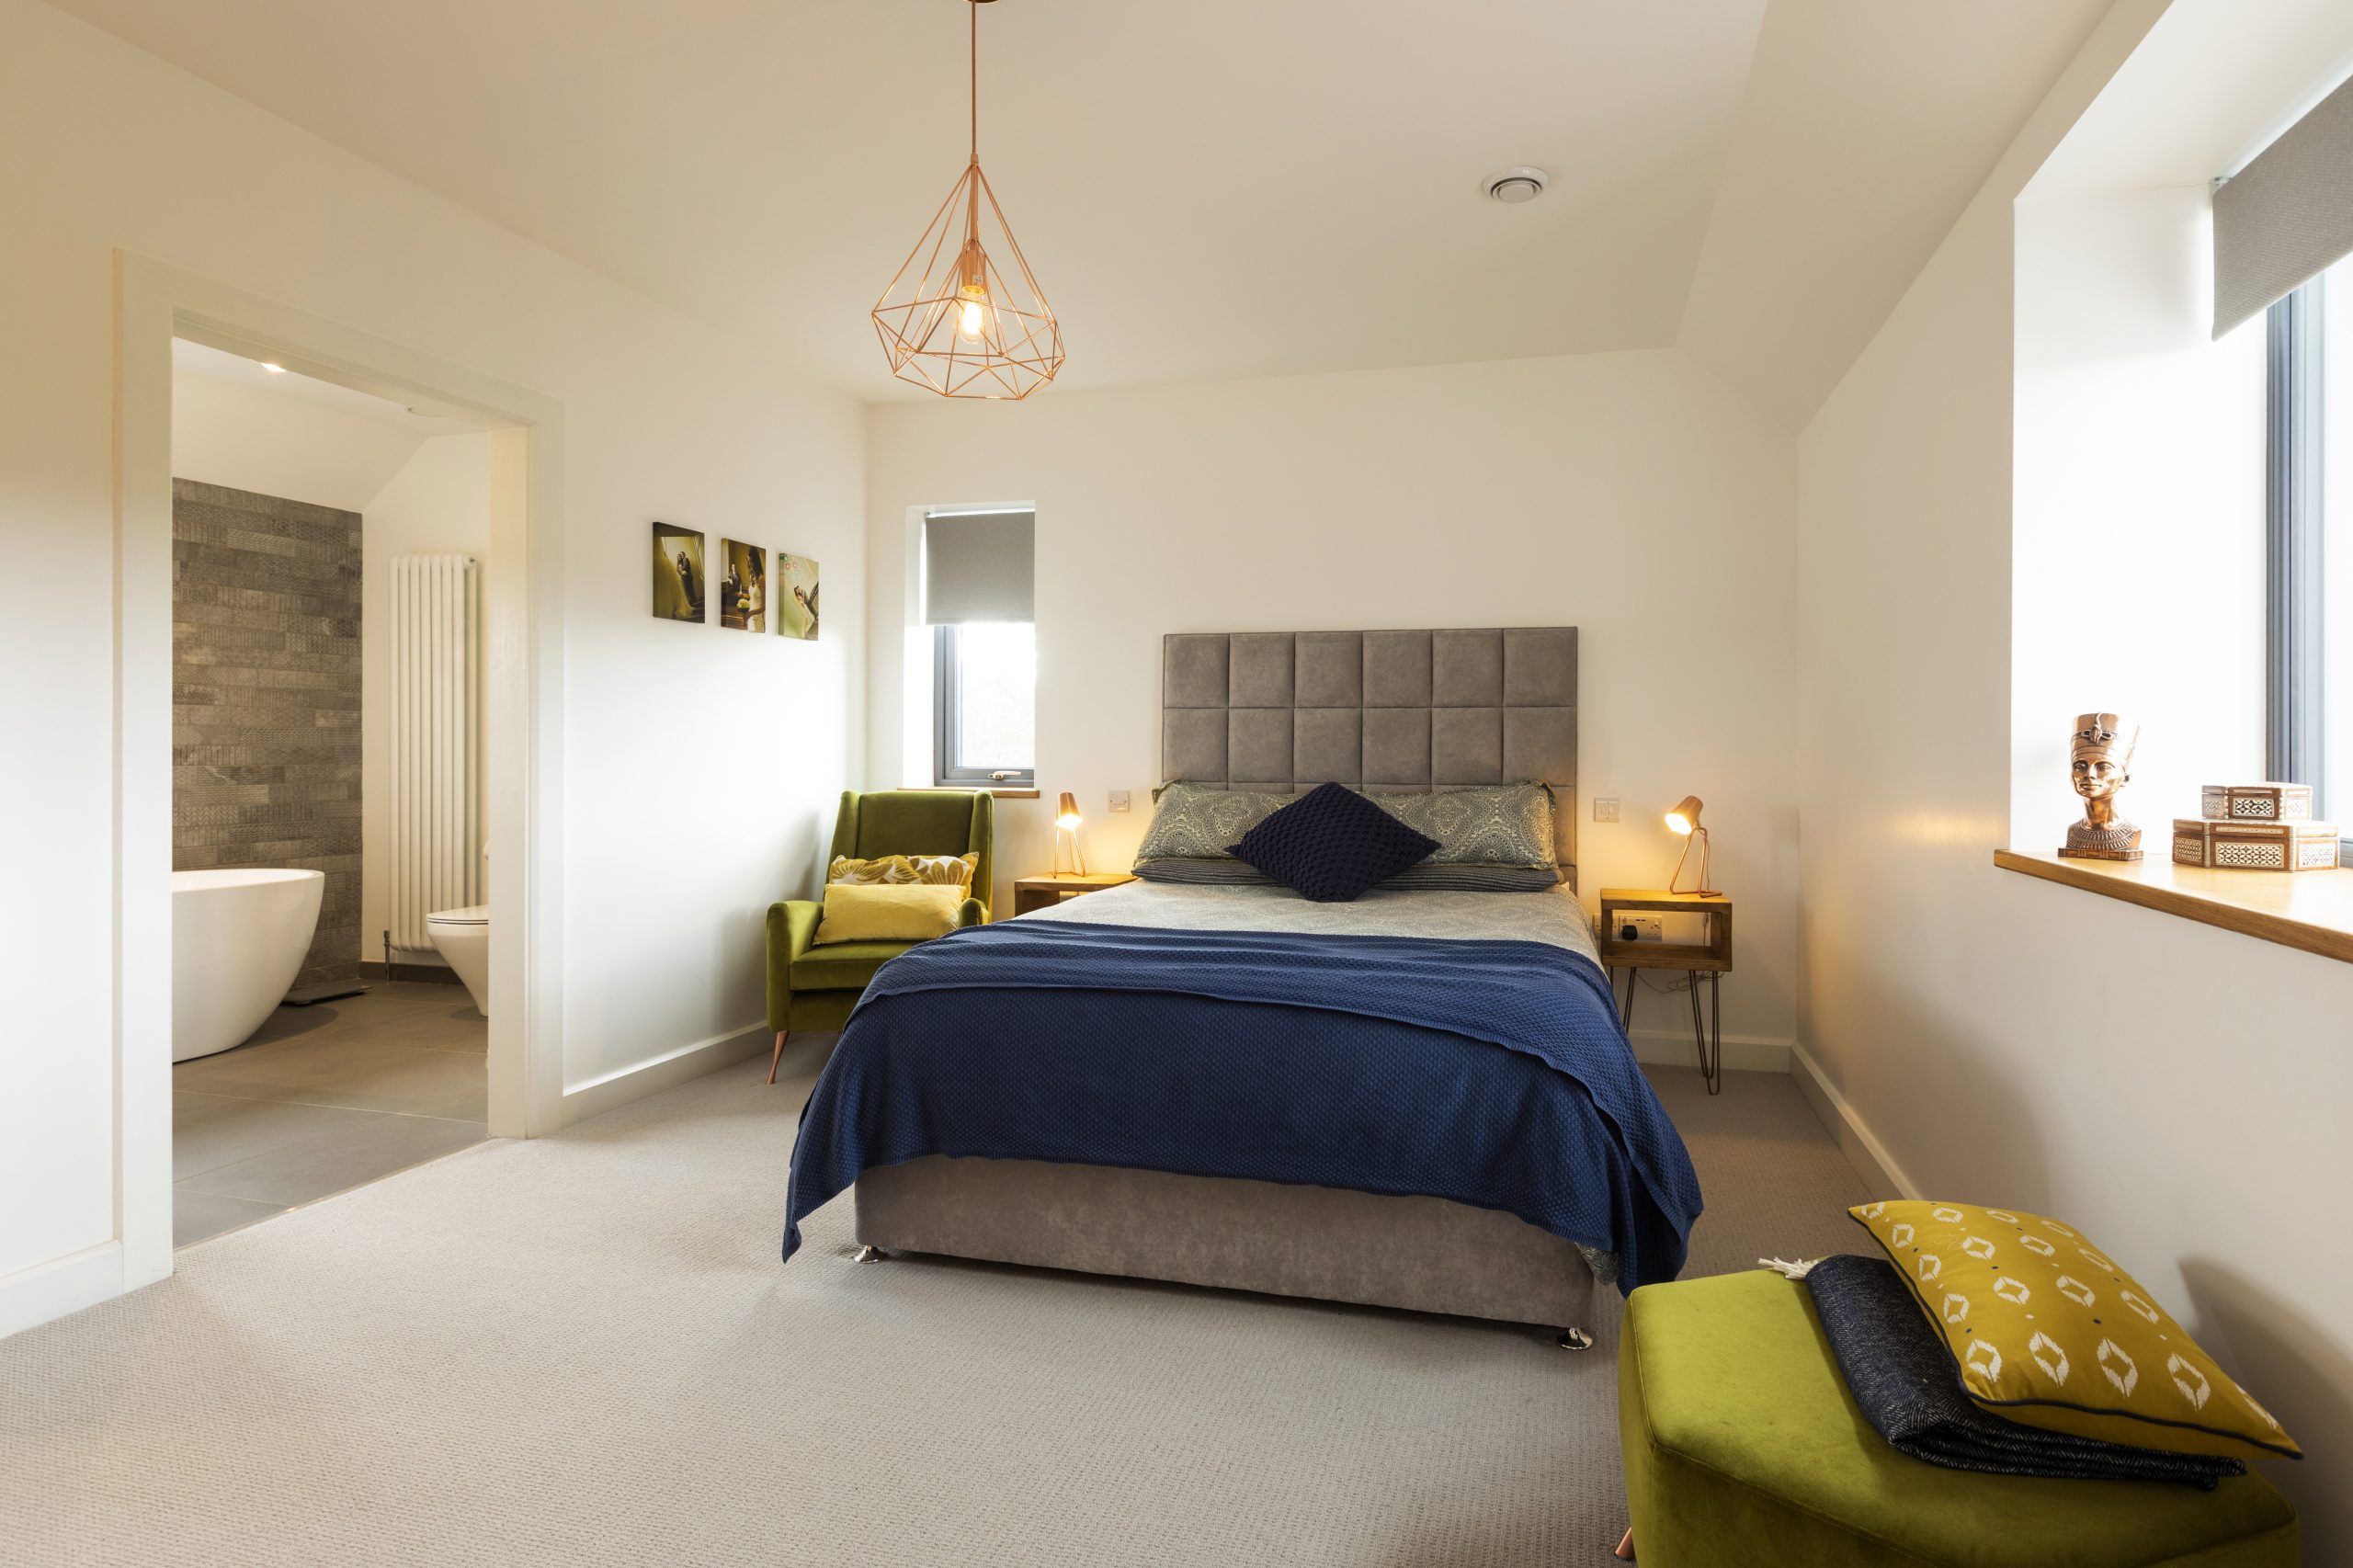
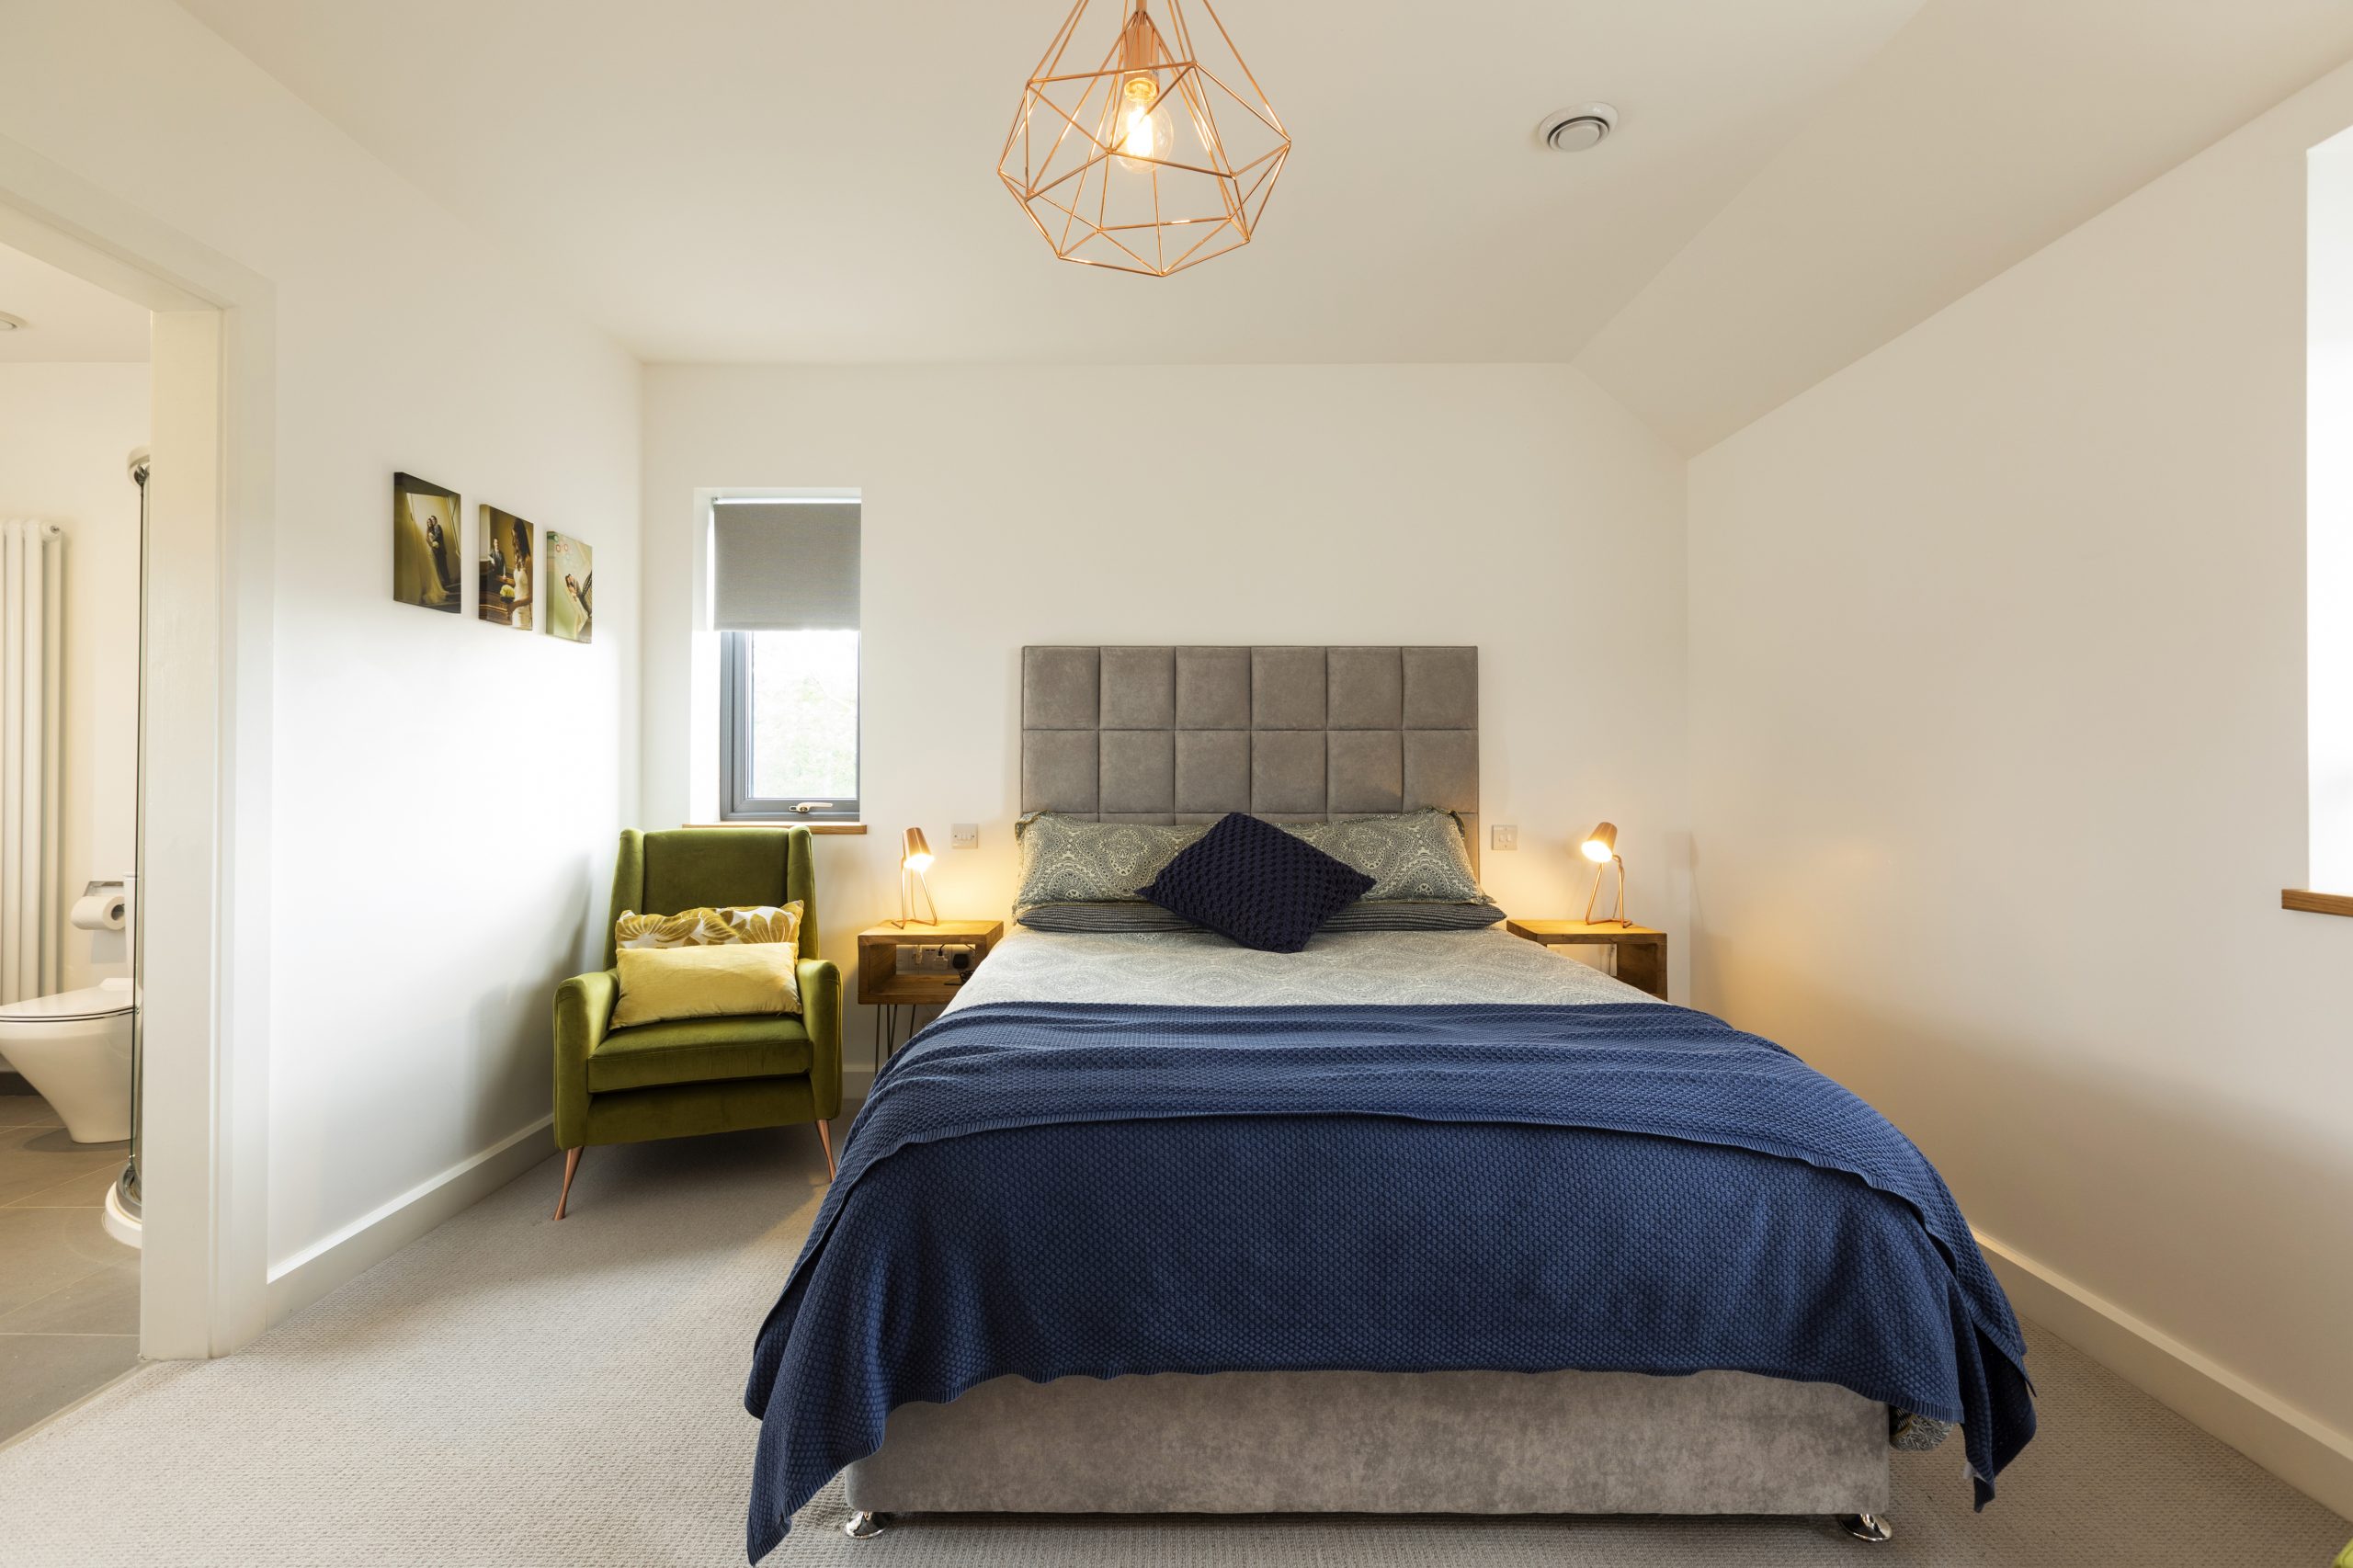
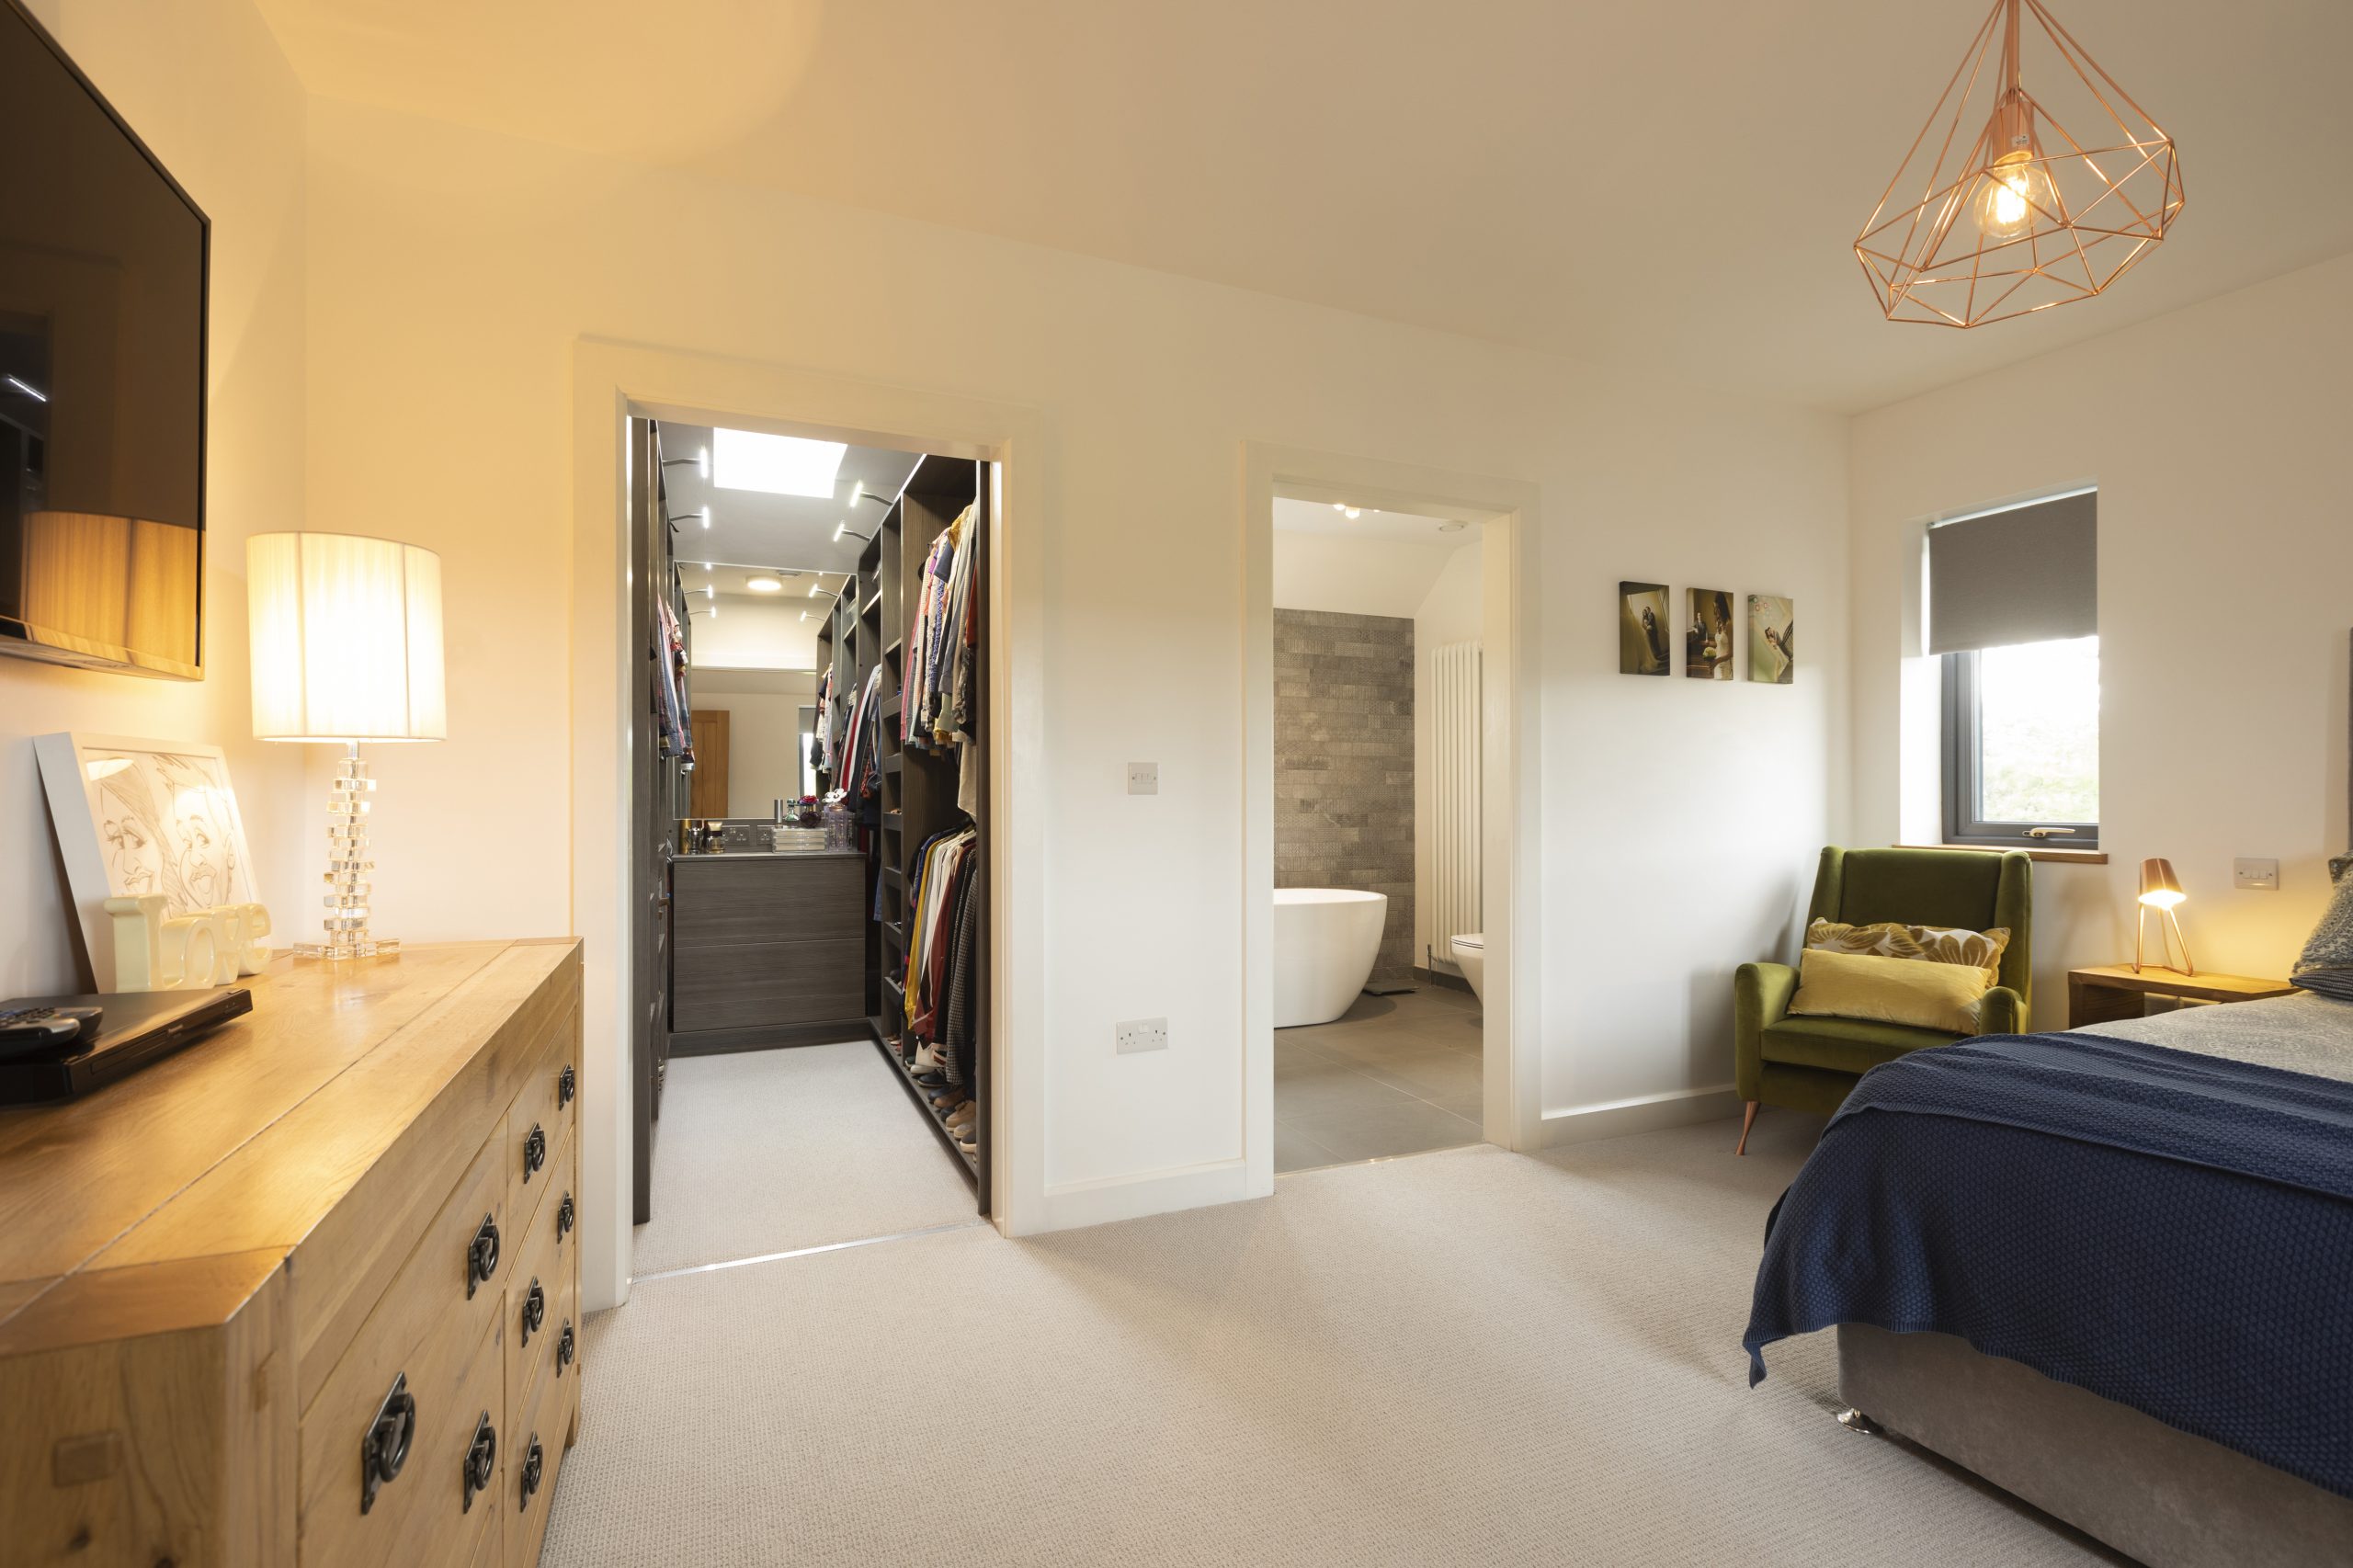
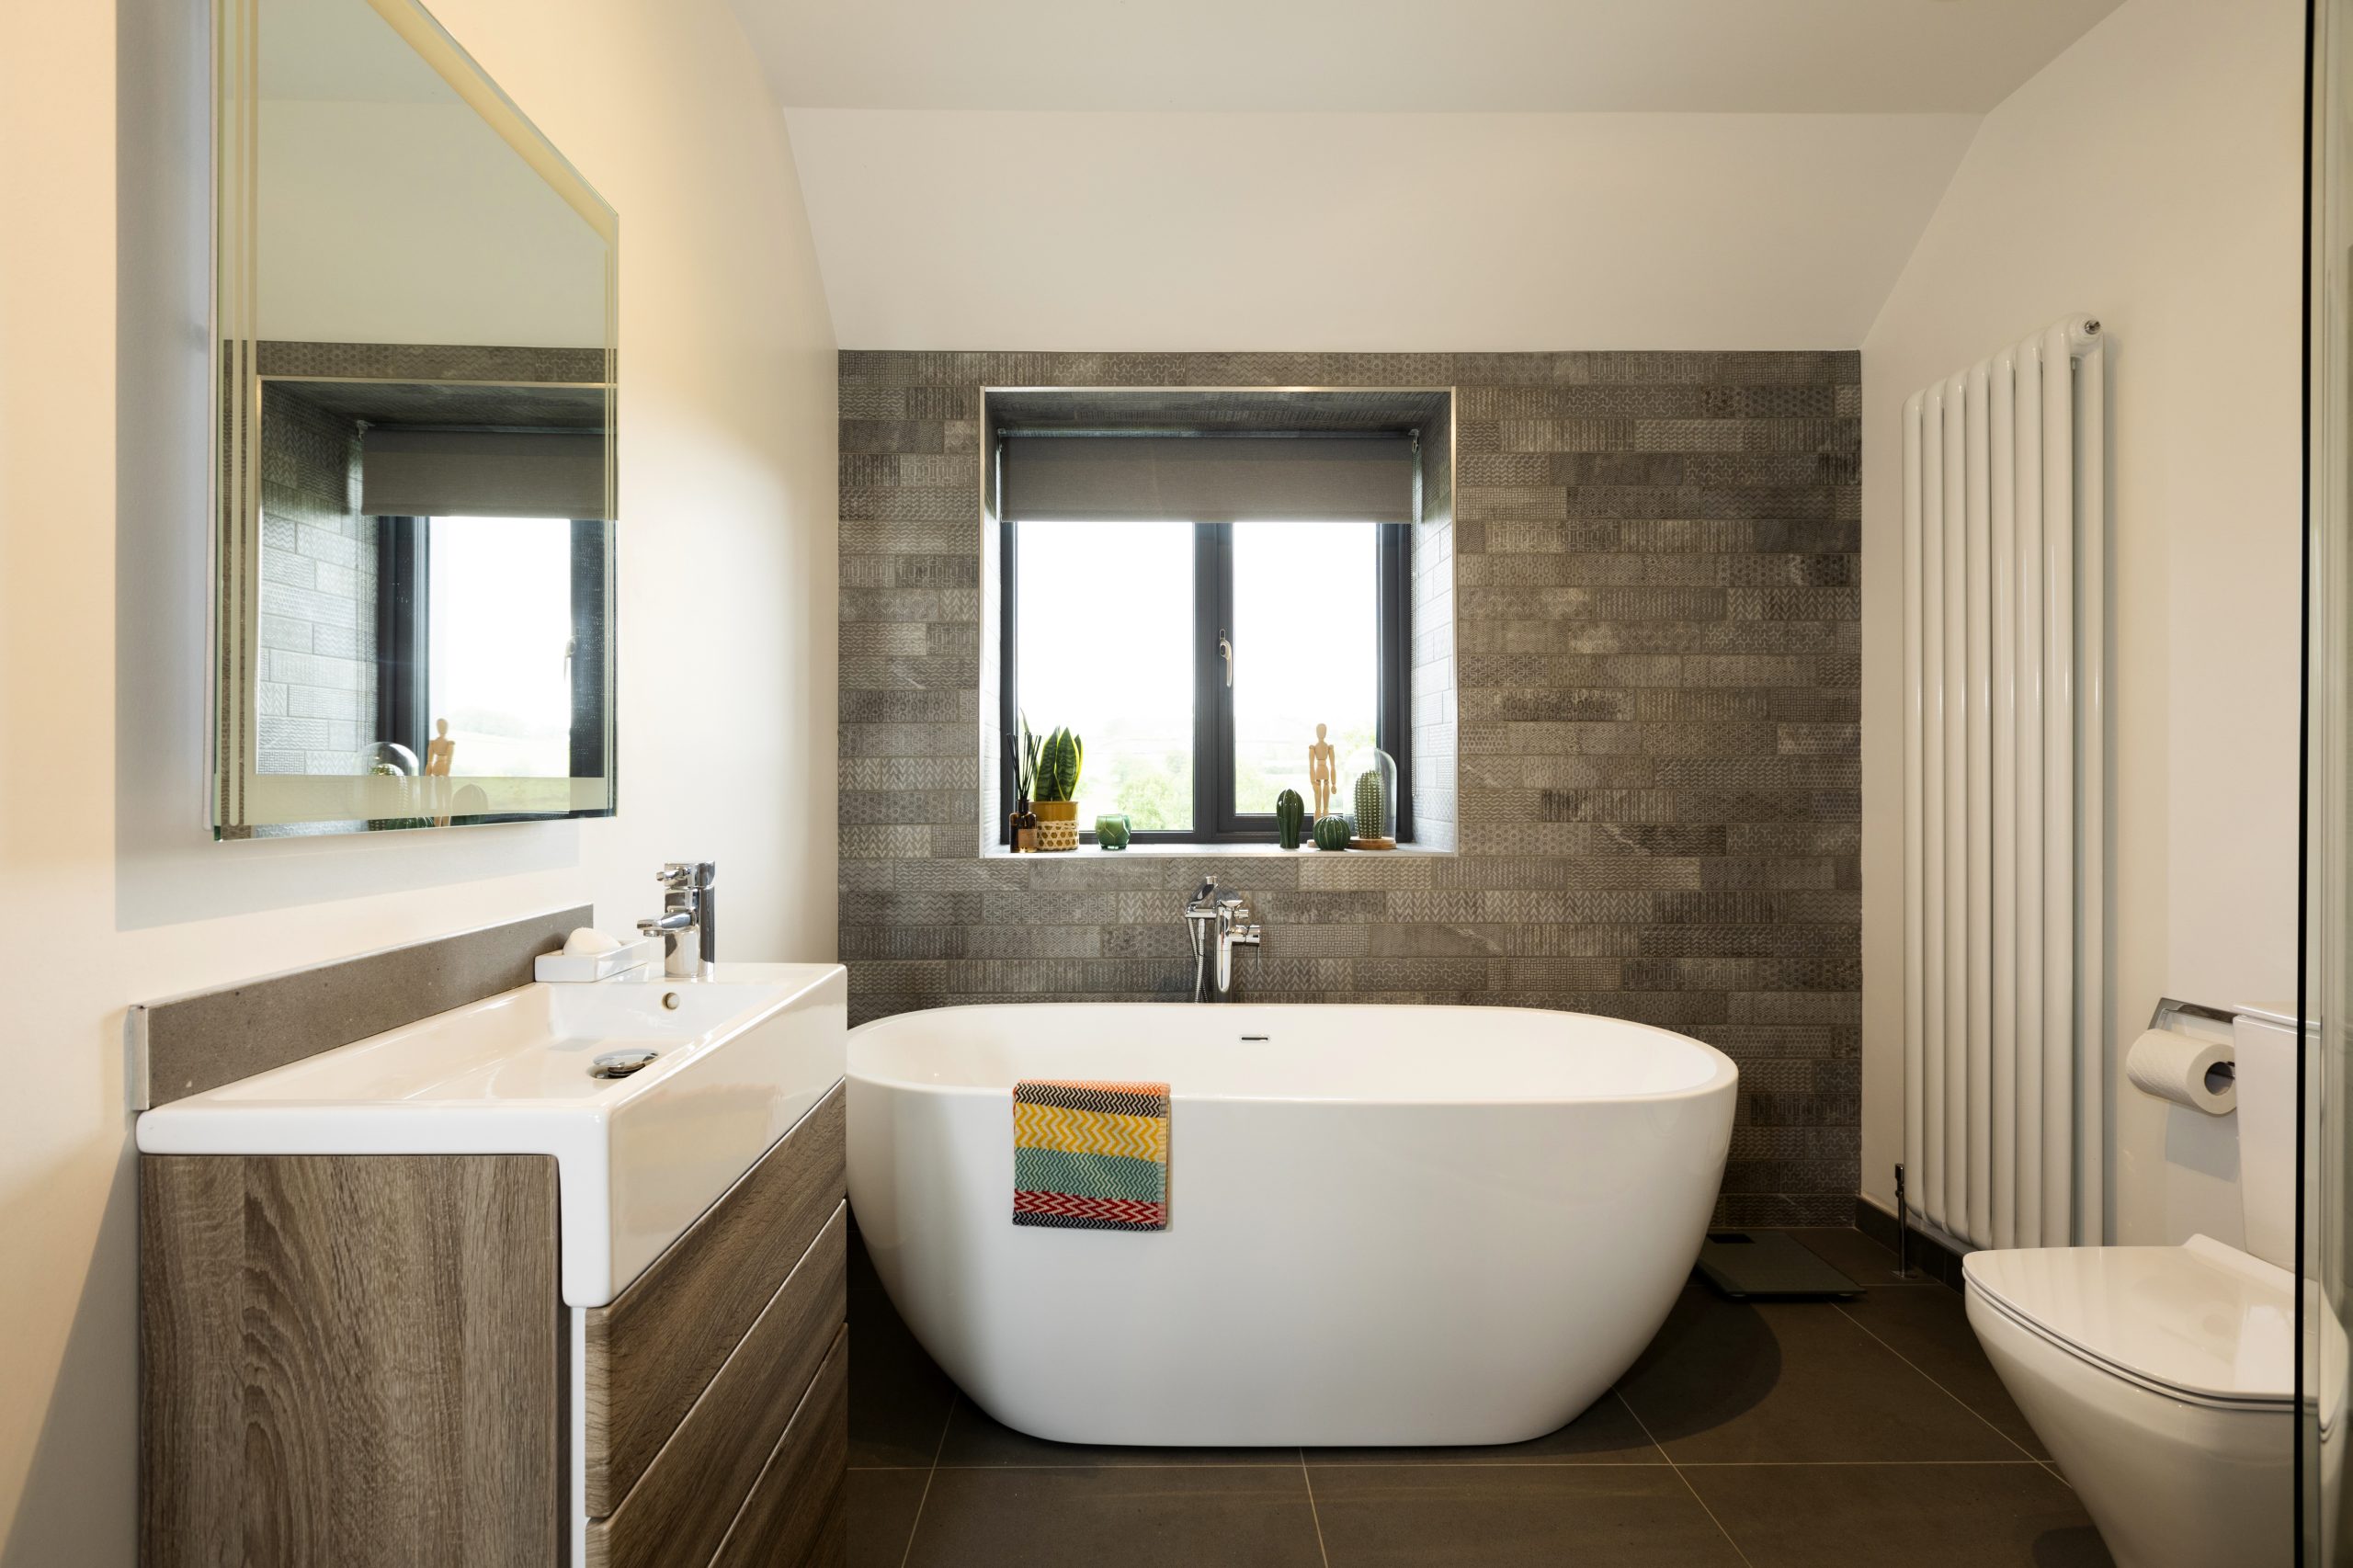
“The kitchen has a vaulted ceiling, a rooflight and large windows so it’s a bright room with lots of natural light and pleasant views of the surrounding countryside.”
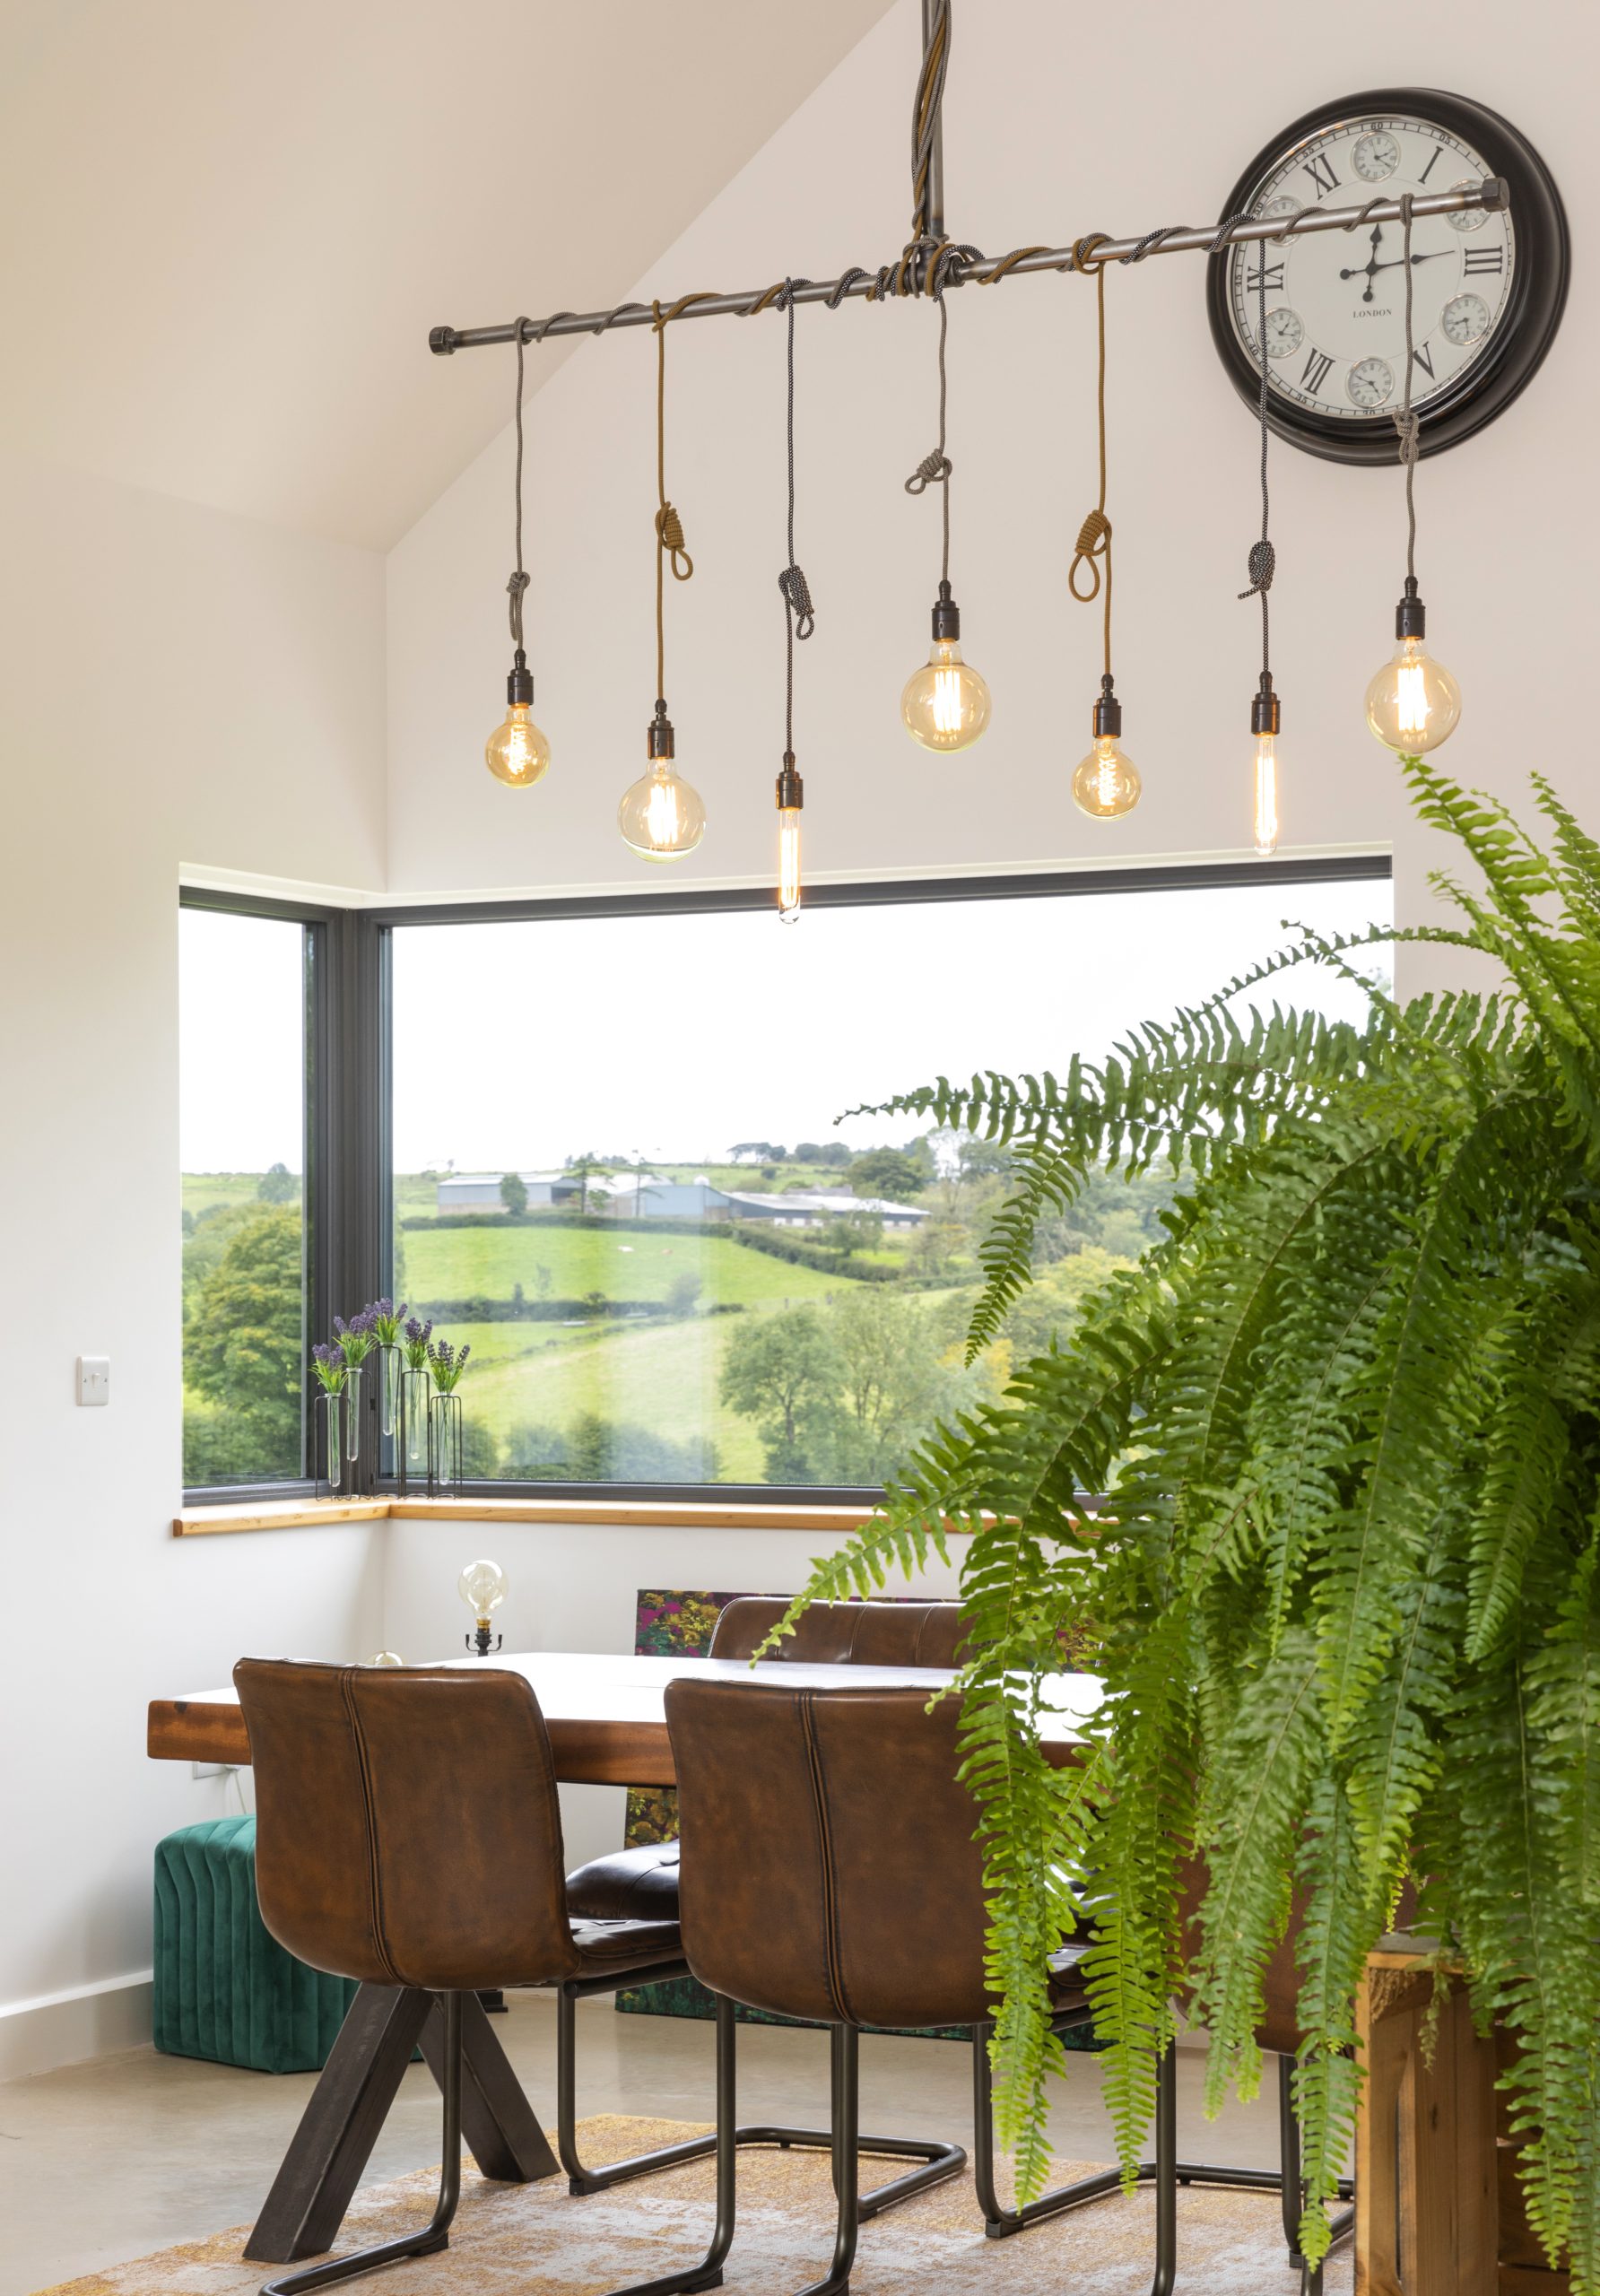
“The use of vaulted ceilings in the living/dining room further help create a sense of space and allow for the room to be flooded with lots of natural light. However, this created issues when it came to choosing lights that looked in proportion to the space.”
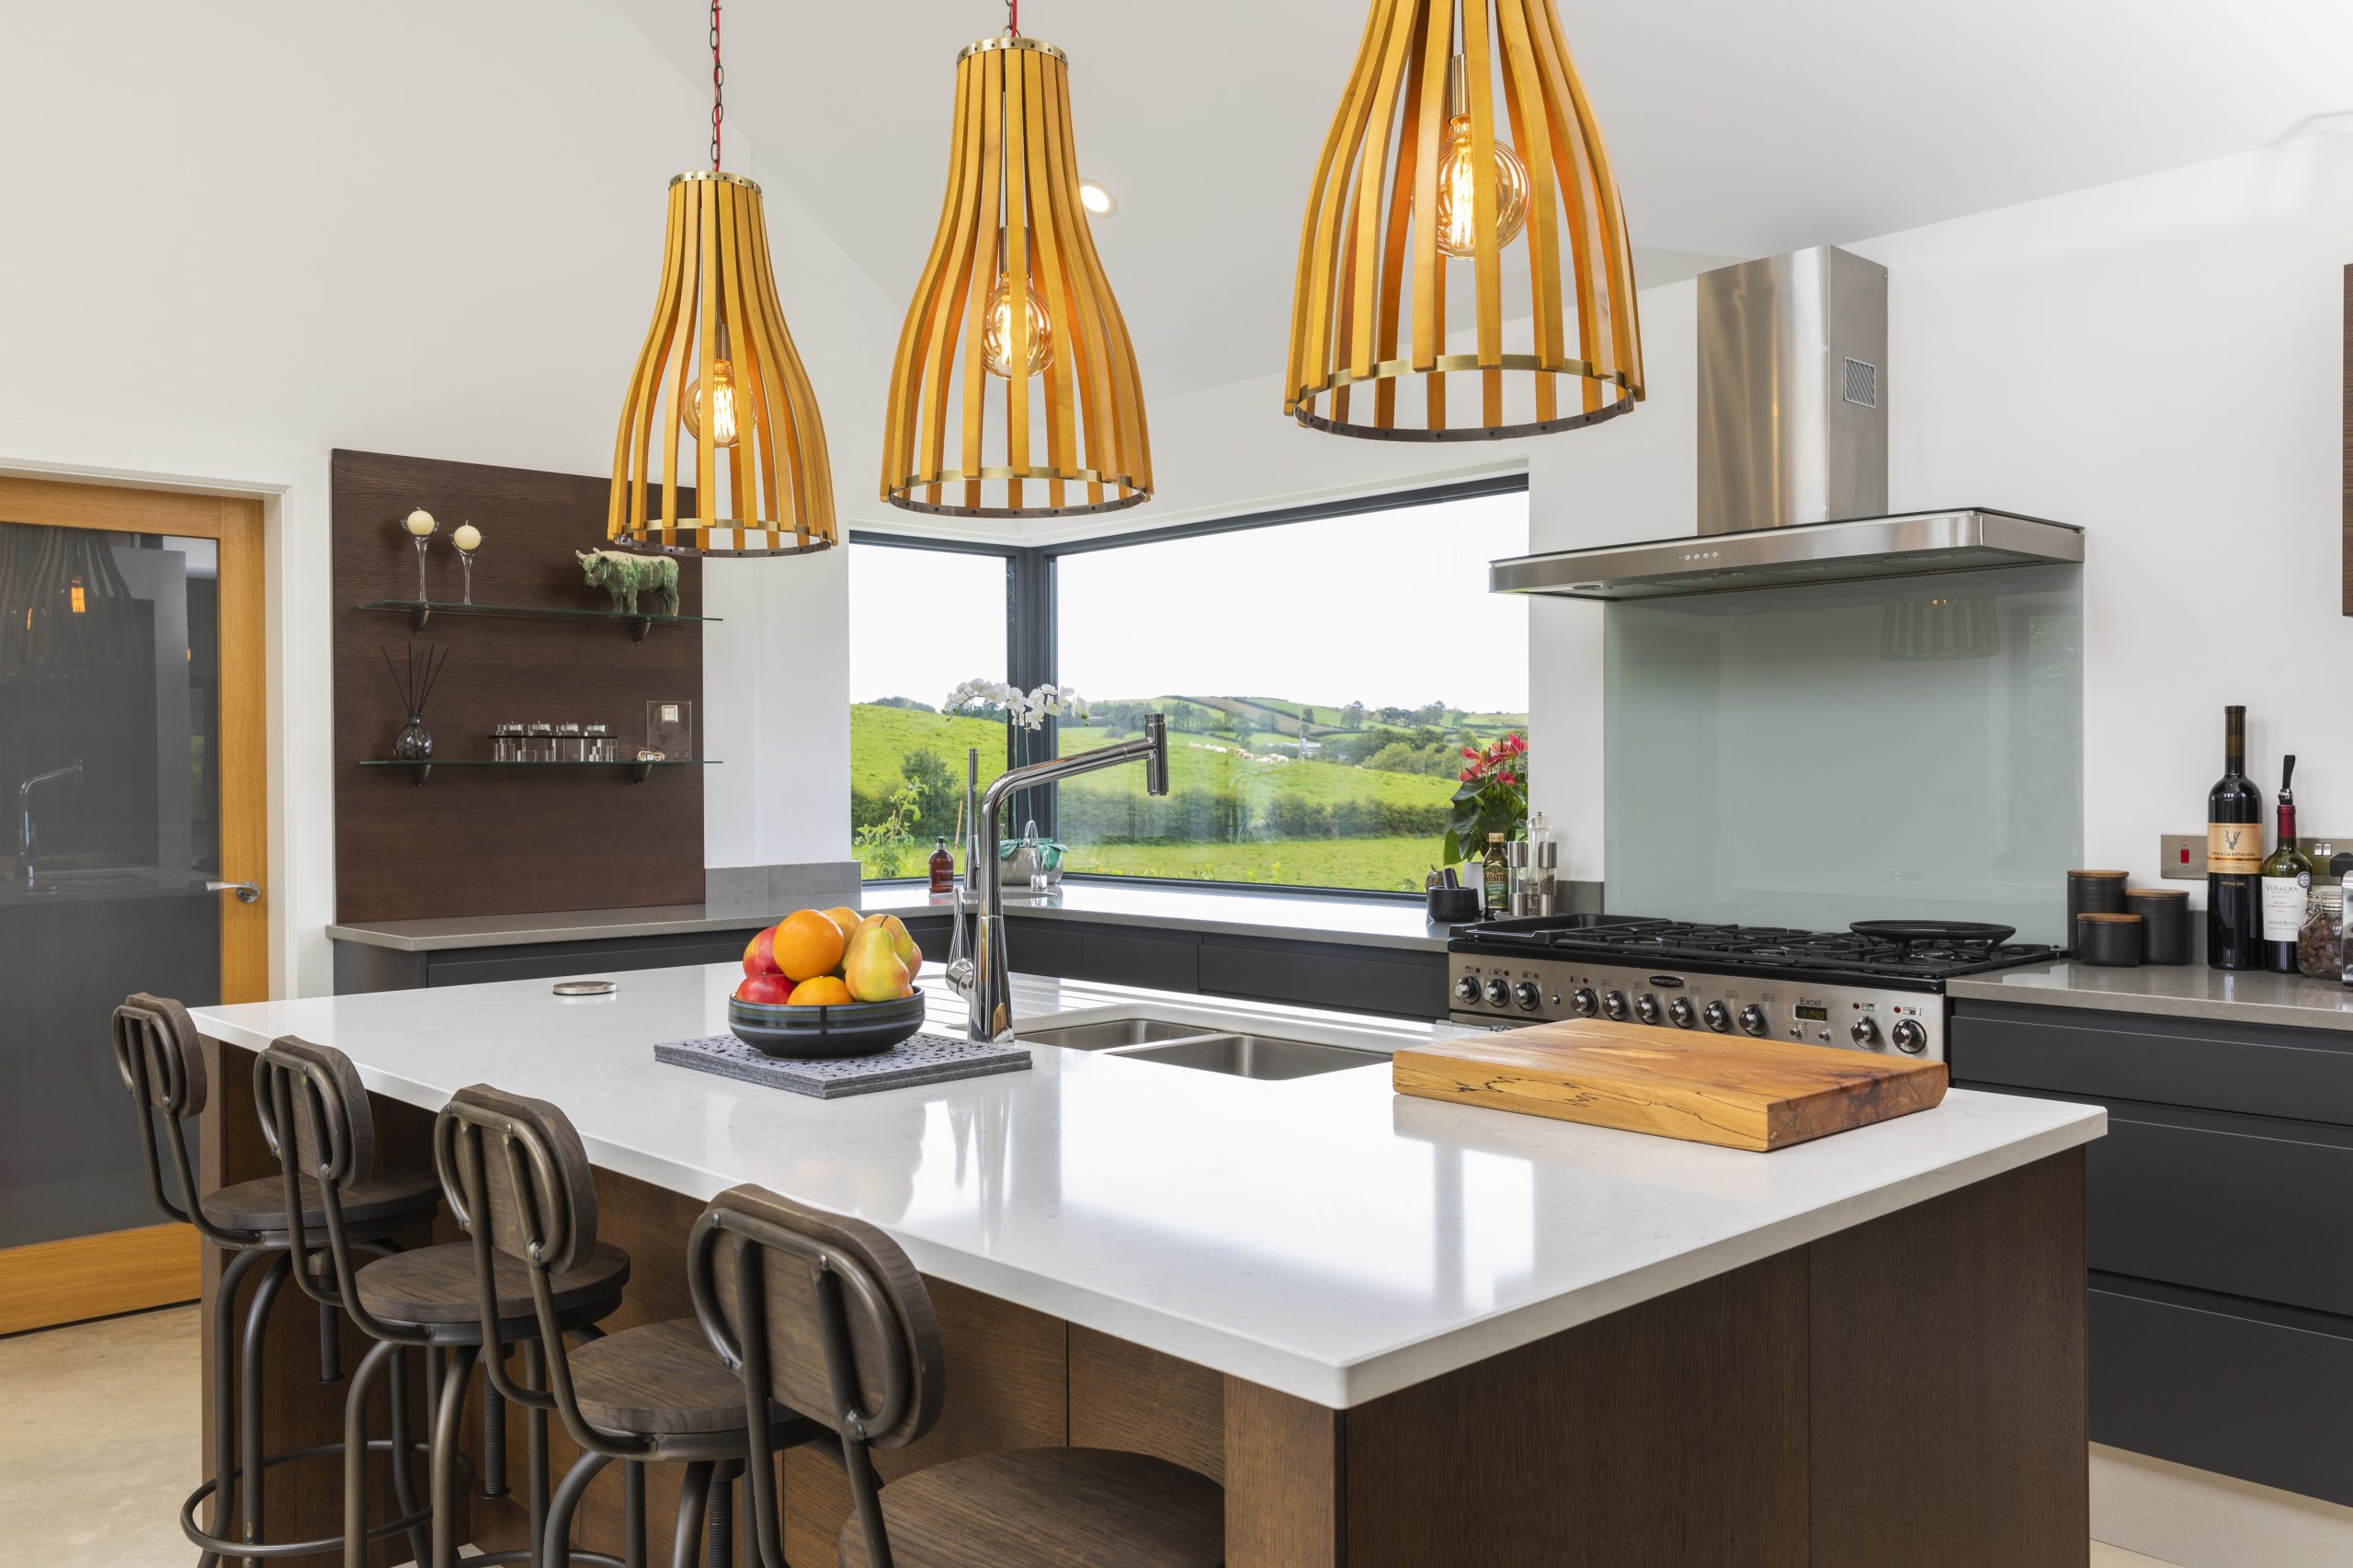
“We worked around this by clustering lights together as one light on its own looked out of place. A local tradesperson welded old water piping together to use as a frame for the light above the dining table and we then hung numerous vintage bulbs from the frame. This has created a practical light that is in proportion to the space, and is also a focal point”
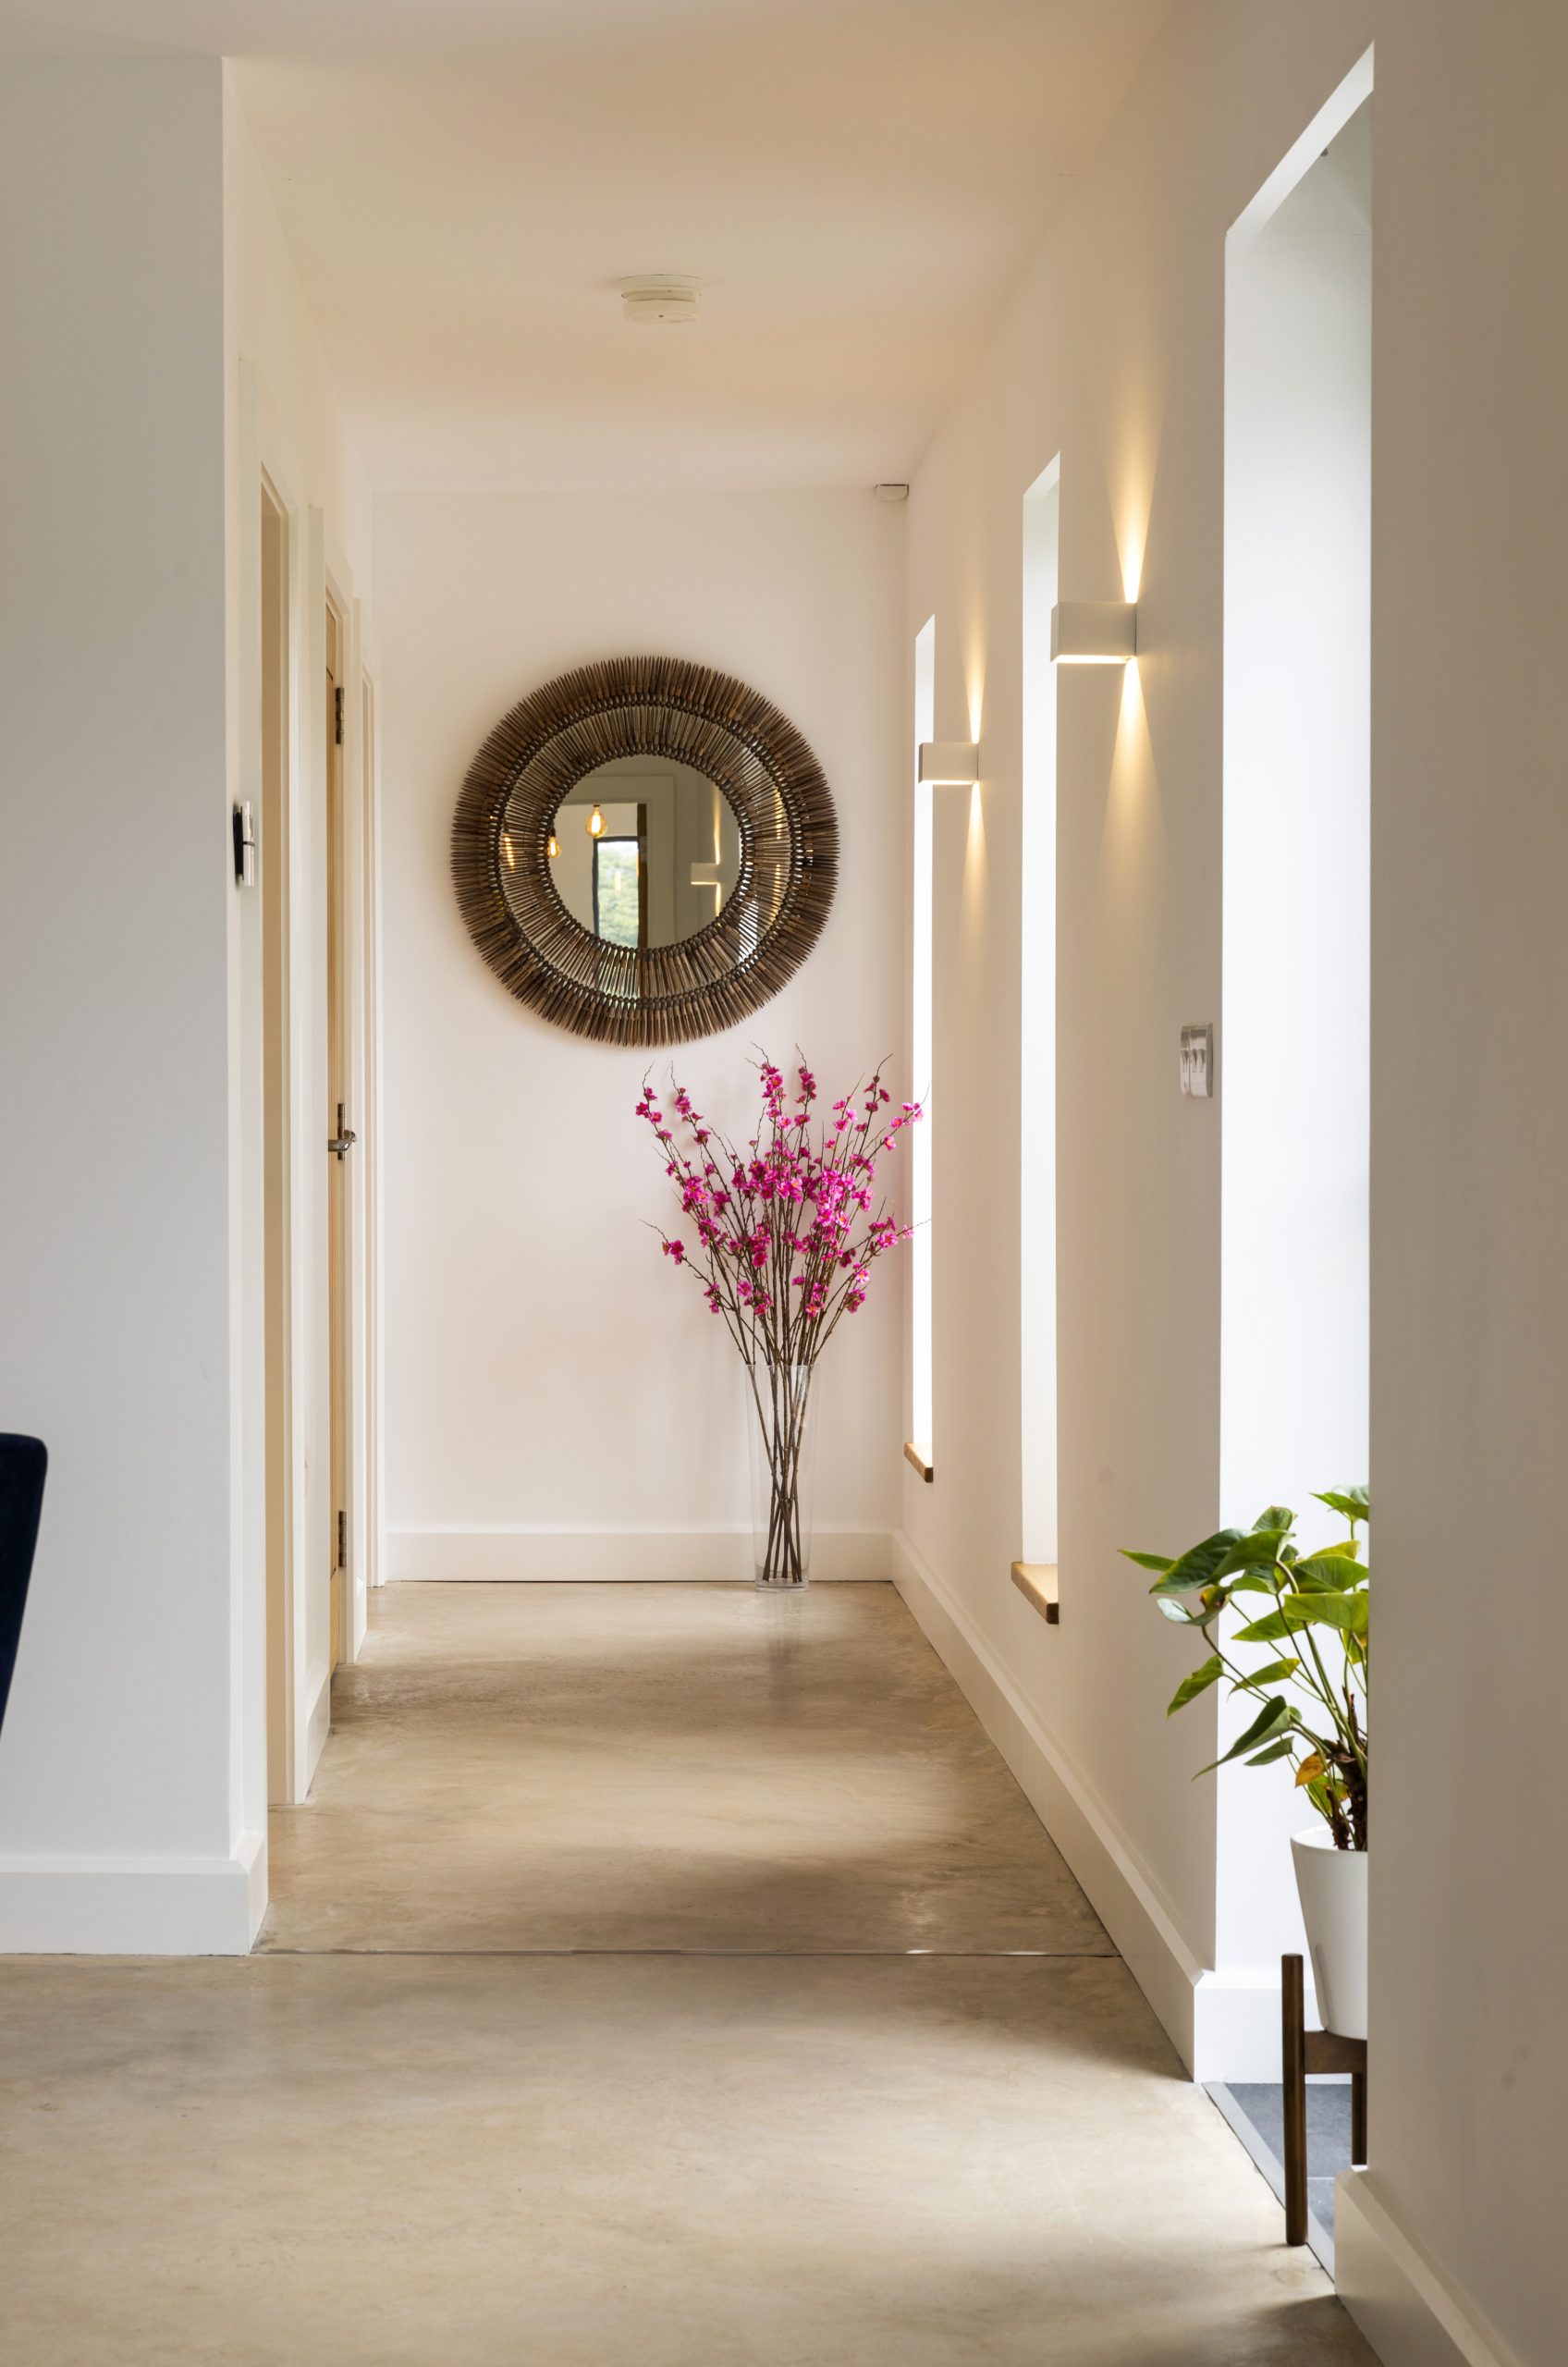
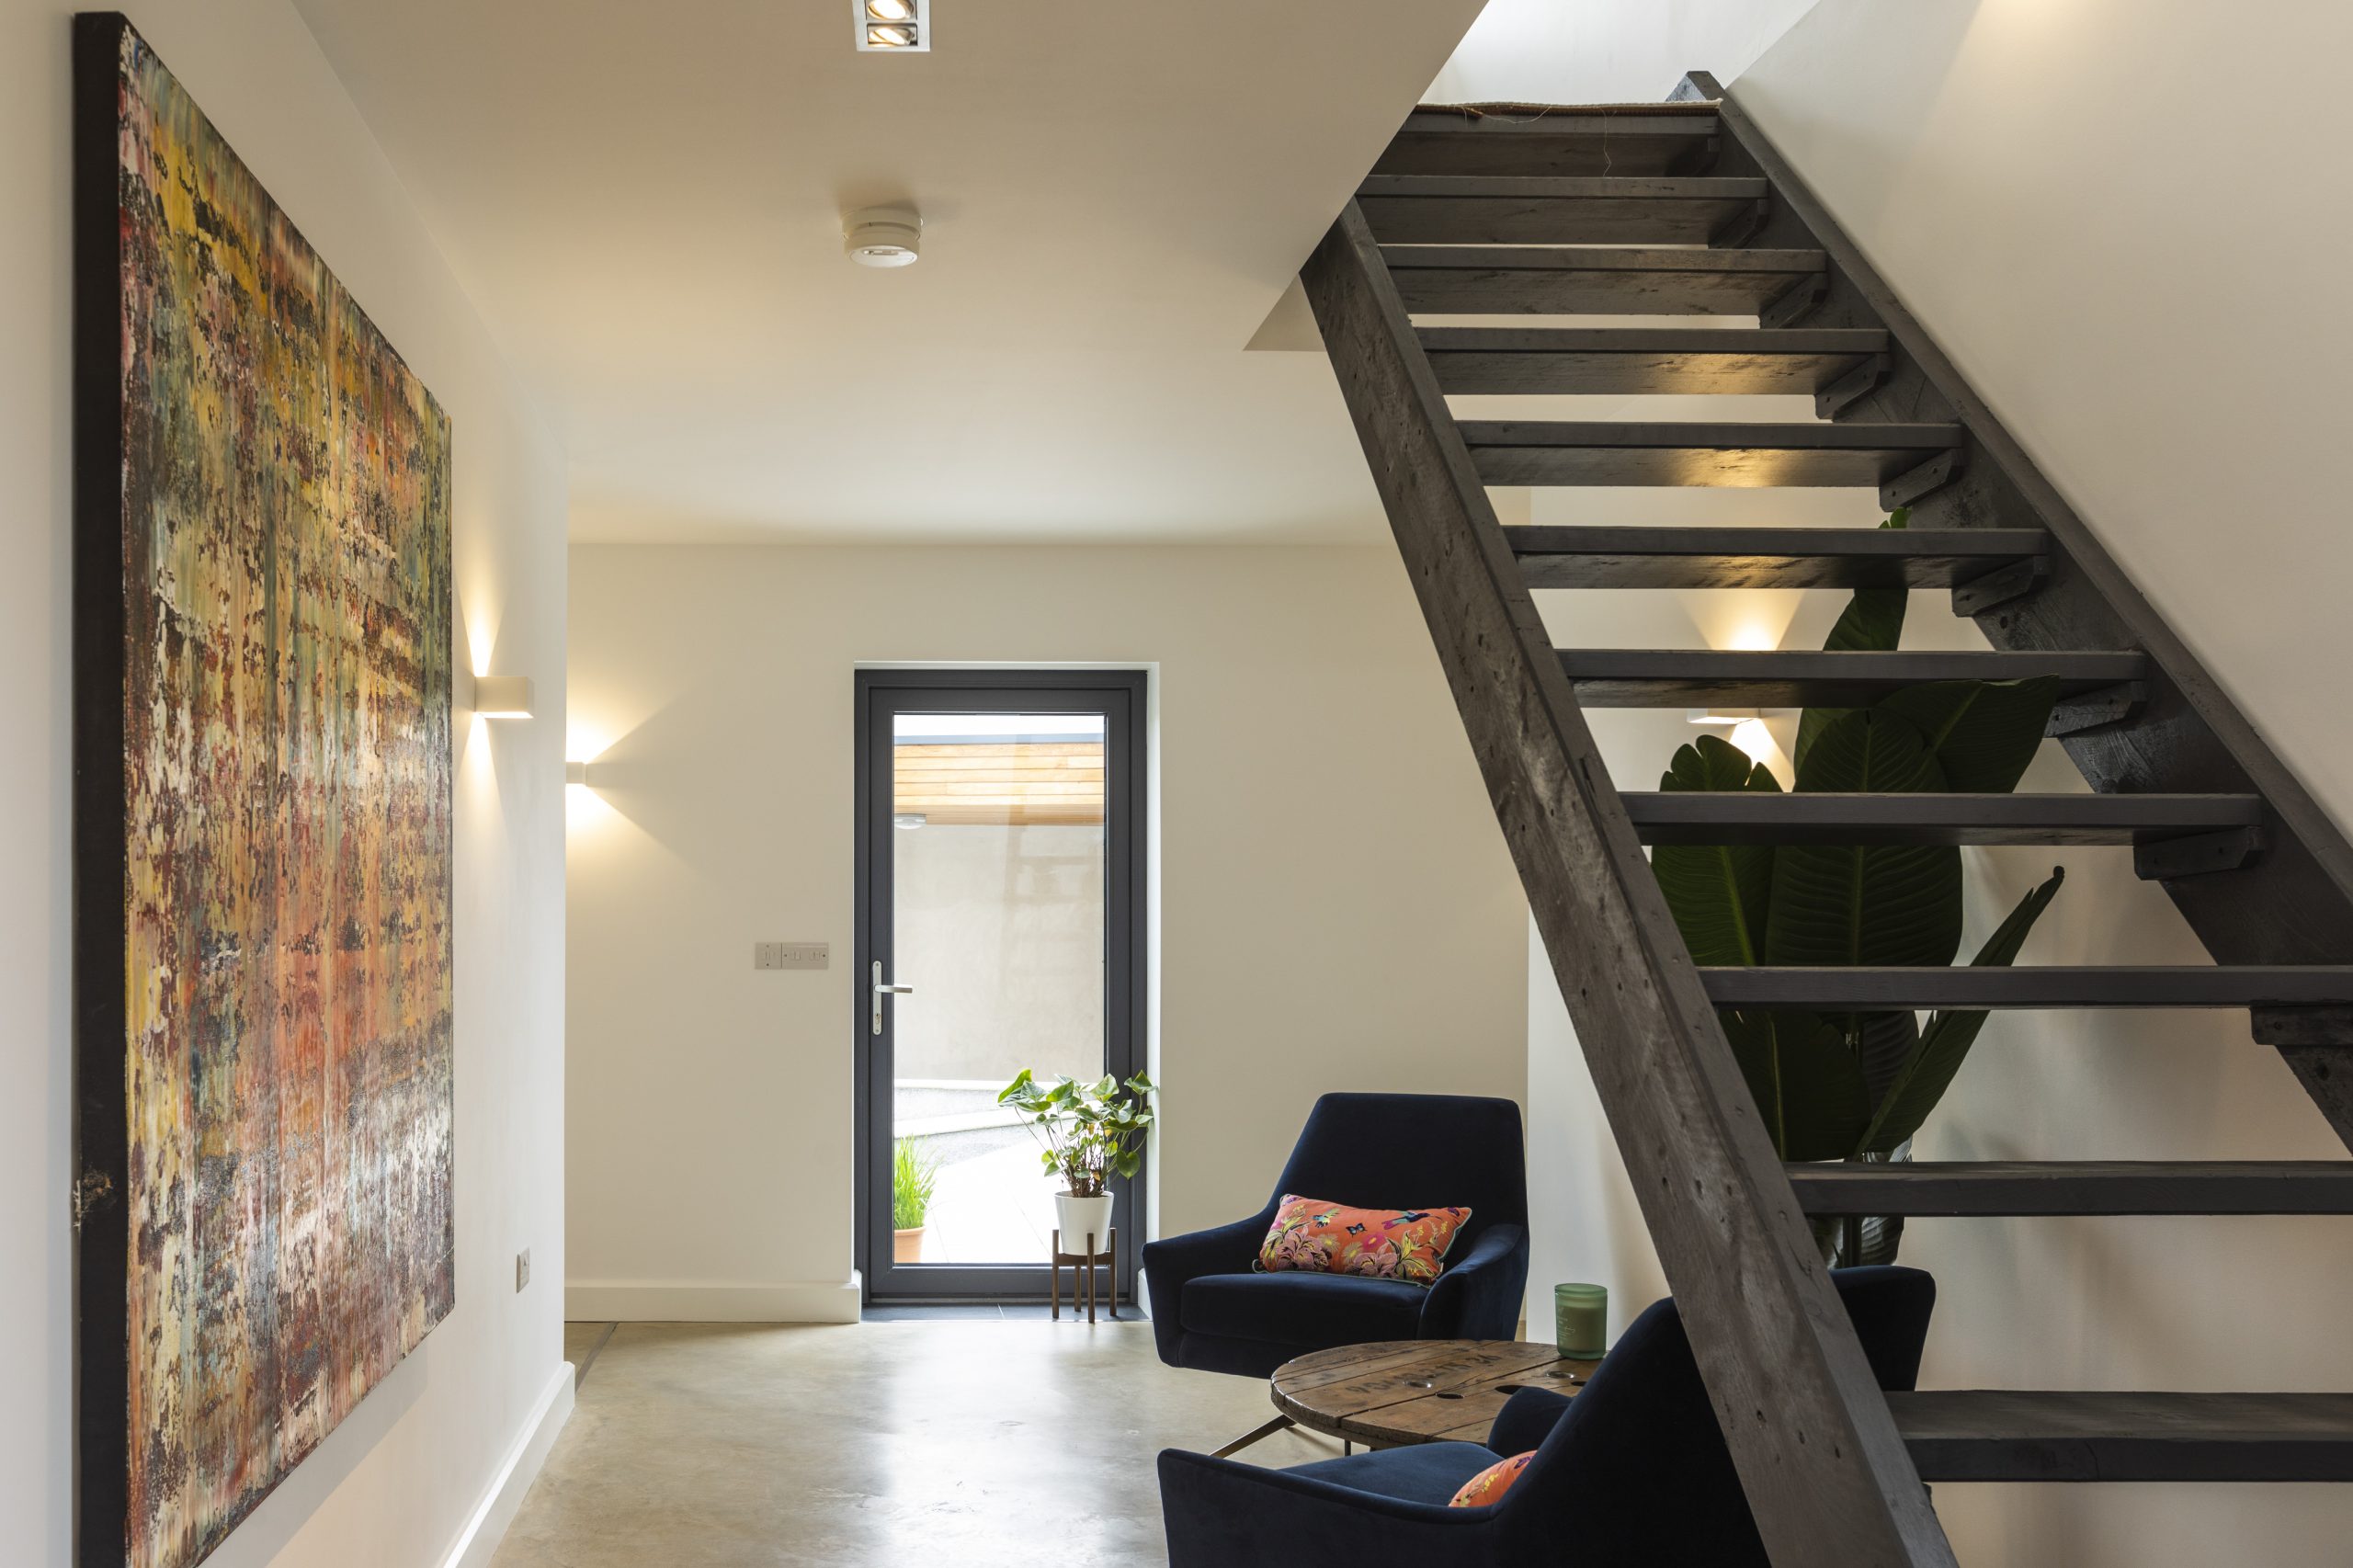
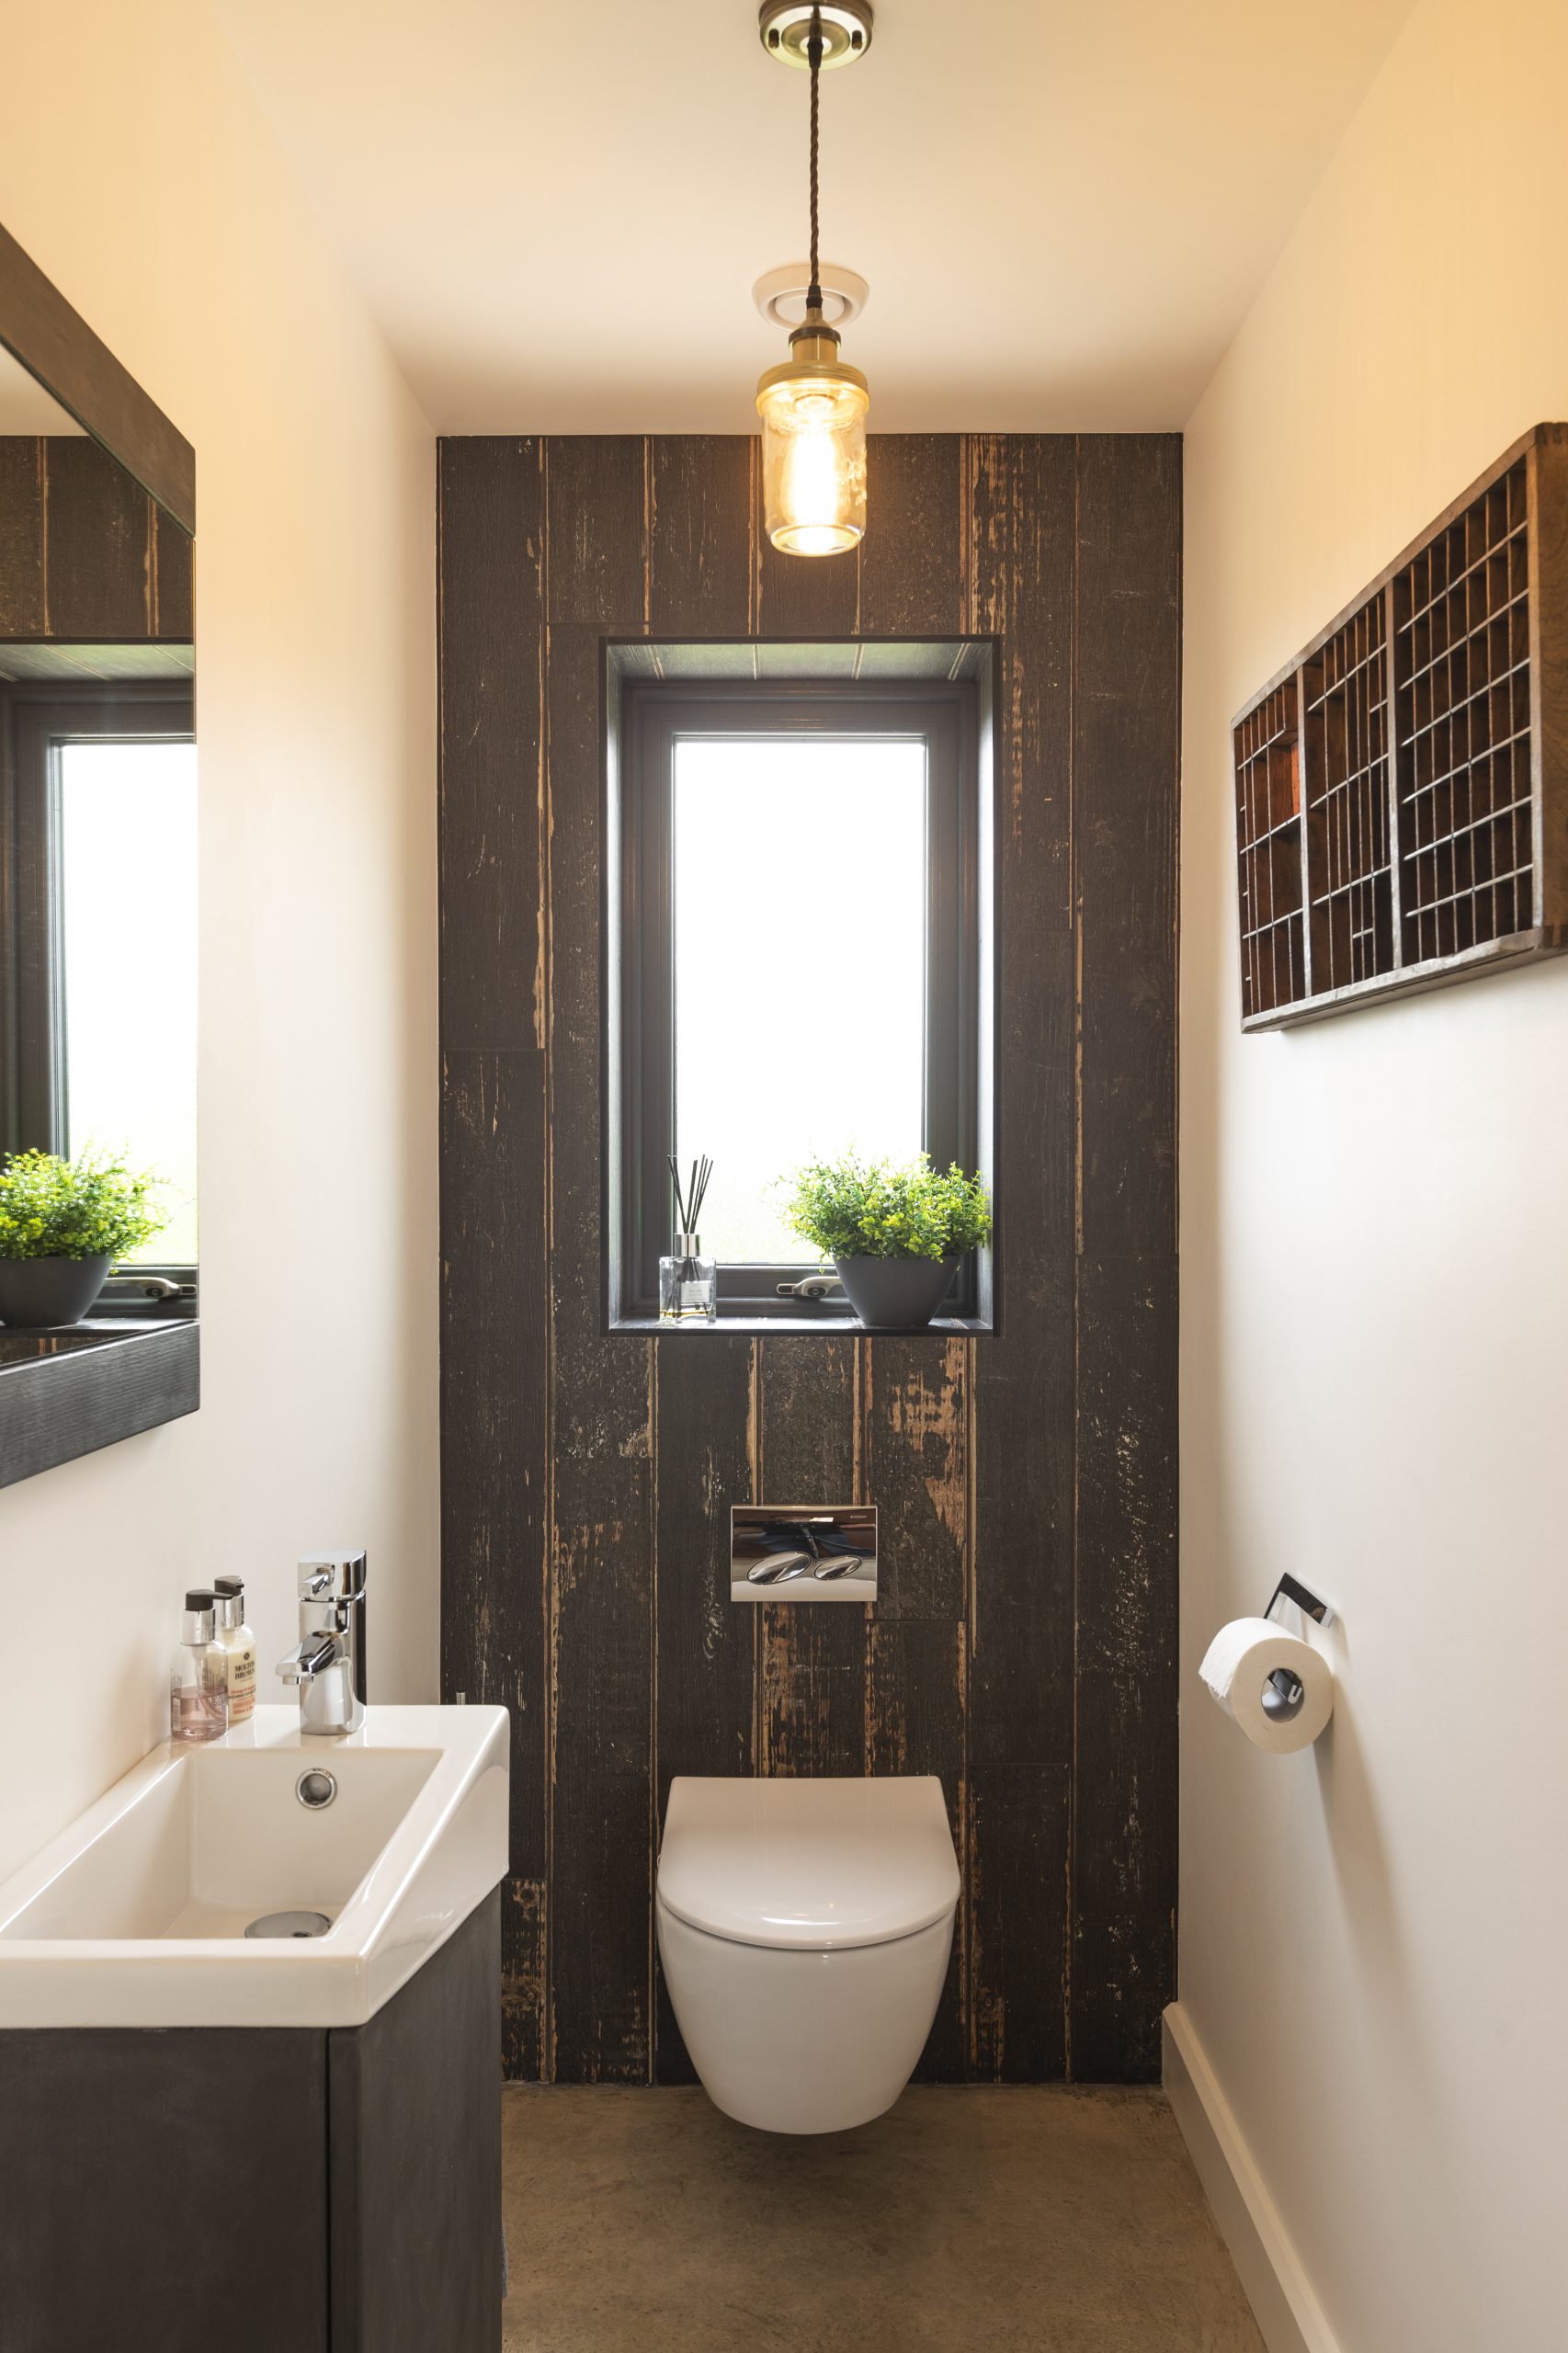
“We wanted to use the same floor material throughout the downstairs of the house and our preference was for an industrial finish. We took the chance and went for a power floated concrete floor. We had considered polishing the concrete but felt that the glossier finish was not in keeping with our style. We applied a proprietary sealer to the floor to prevent it from staining and to give it a slight sheen.”

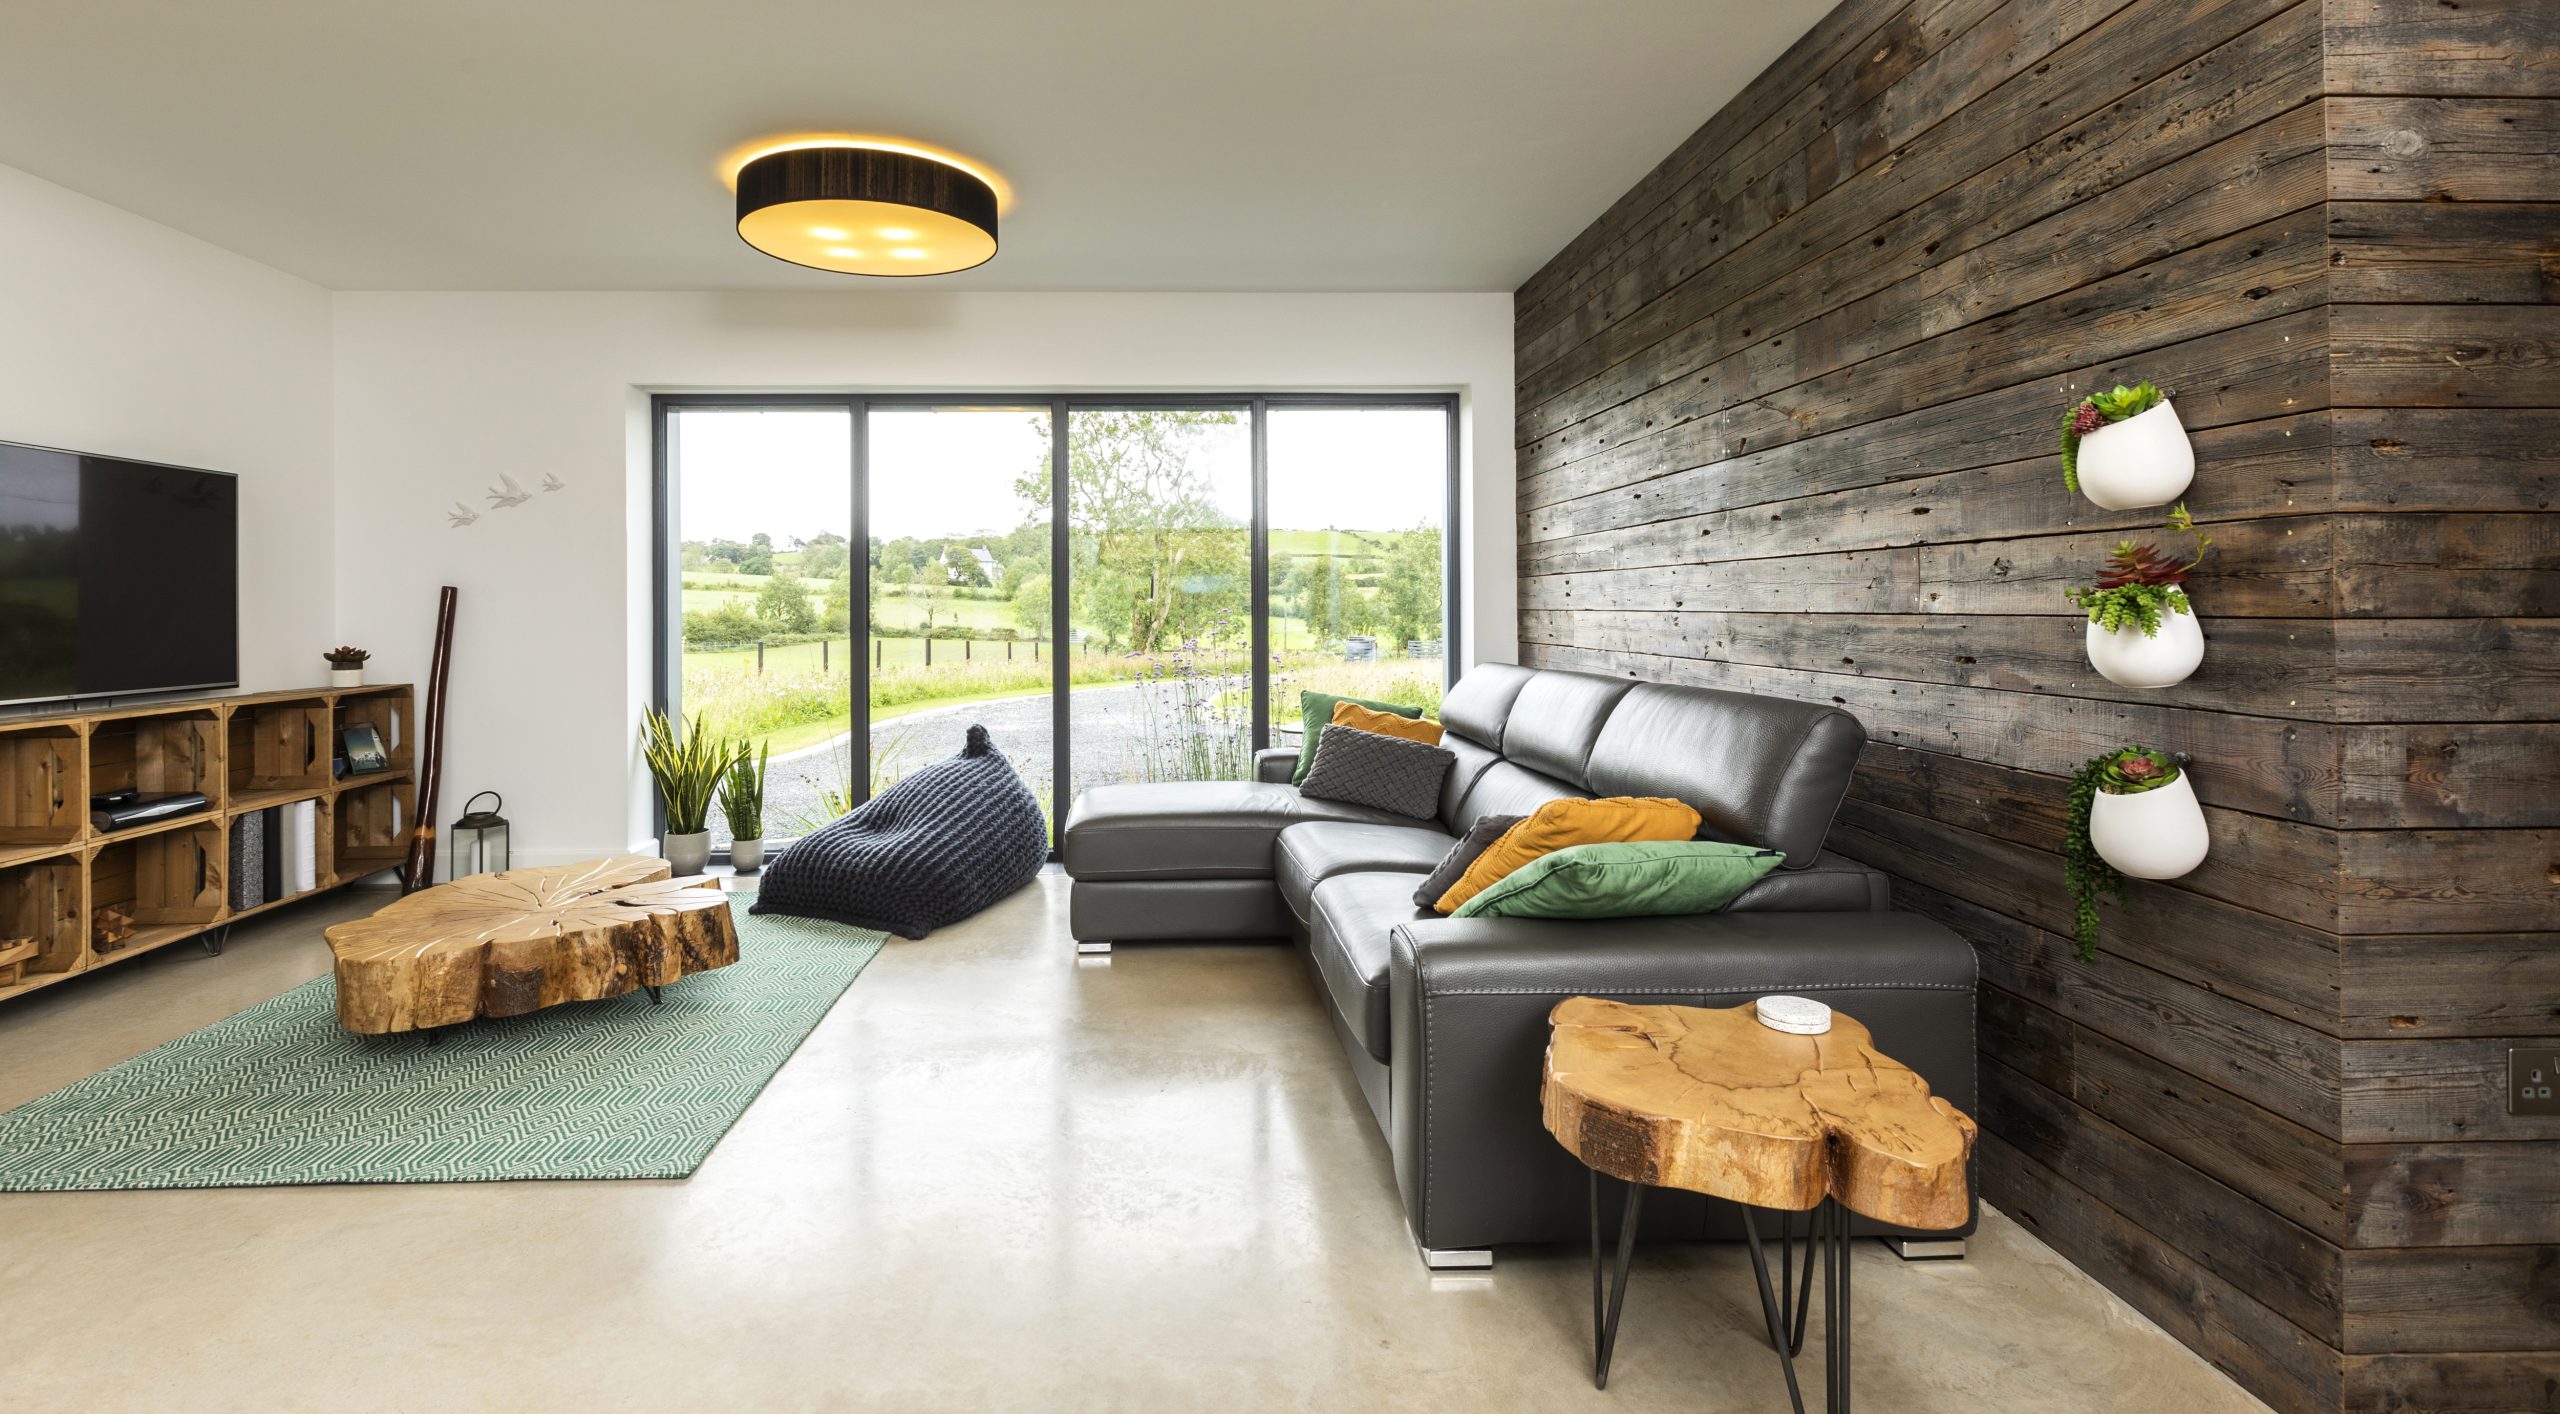
“Keeping in line with the more industrial look, the interior colours of the house are neutral with warmth added via grey tones, wood, reclaimed brick and floorboard feature walls. We have been slowly adding pops of colour through plants, furniture, textiles and pictures. However, even after three years, this is still a work in progress.”
Family affair
“Nicole’s father provided us with a telehandler and a mini-digger which came in extremely handy during the build process,” says Colin.
“Also we are fortunate to have plasterers in the family,” adds Nicole. “Colin’s brother and father (alongside family friends Billy and Davy) did all the service cavity battening, plasterboarding and plastering amongst many other things.”
“Our local joiner and family friend, Billy, laid the slate roof, fitted the wood cladding, created the reclaimed floorboard wall in the living room and completed the interior trimming out (including the very painful process of the hidden pockets for the blinds).”
“Billy has very high standards and ensures that everything is done well – the quality of finish would not have been the same without his eye to detail.”

“We are very privileged to have had the help of these family members and close friends who have assisted and advised us along this amazing self-builders journey. For any self-builder, it is vital to surround yourself with people that you trust and have your best interests at heart.”
Q&A with Nicole
What would you change?
We don’t think we would change anything to the house itself. With hindsight however, we would have liked a bigger garage. It’s unbelievable the amount of storage you need!
Would you do it again?
Without a doubt, yes. But we have put so much time, thought and energy into creating our dream home, we don’t think we will ever need to do it again.
What is your favourite part of the house?
The various windows around the open plan area which provide framed views of the surrounding countryside and our enclosed patio area. Our favourite space outside is the stone wall with raised flower bed. Our stonemason, Peter, and his team did an amazing job reusing the fieldstone that was reclaimed from the original farm dwelling.
What surprised you?
We vastly underestimated the amount of time that was required to research different aspects of the house, obtain quotes, meet with tradespeople and suppliers.
What single piece of advice would you give someone who’s thinking of undertaking a self-build?
Start your research as early as possible in the process – there are so many things to get your head around! Our home is full of natural light, with lots of great views out on to Colin’s family farm. It’s exactly what we wanted. Now that the garden is almost done, we can really enjoy what we have created. The house is meeting all our requirements and more. We are super proud of what we, as two inexperienced self-builders, have achieved.
First time self-builder tips
Don’t be afraid to question how things are done or to ask for changes.
It’s better to do this during the design or even build process rather than regret it later. And don’t take “no” for an answer. Sometimes people’s automatic response is “no it can’t be done.” Push for explanations and ways to resolve problems to ensure that you achieve what you want in a budget-friendly manner. Don’t be afraid to ask questions and quiz responses.
Take your time.
We initially thought the whole process would take approximately a year. However, as we completed several non-specialist tasks ourselves, the timeframe ran into nearly two years. This frustrated us at the time but with hindsight, we realise this allowed us to make minor changes (which were important to us) while the build progressed. We would not have been able to do this if the build had moved at a faster pace.
Suppliers
Architect
FMK Architecture, fmkni.com
Timber frame manufacturer
Hawthorne Forest Products, hawthorneforestproducts.com
Builder’s merchant
RJ Hardware, rjhardwaresupplies.co.uk
Airtightness
Isocell, airstop.ie
MVHR
Homecare Systems, homecaresystems.biz
Kitchen, utility, pantry, walk-in wardrobe
Designer Kitchens, designerkitchens.ie
Paving / Cills
Creggan Granite, creggangranite.com
Concrete floor sealant
DryTreat Intensifia
Photography
Paul Lindsay, paullindsayphoto.co.uk