Matthew and Hannah Sterrett of @ourweecountryhome share their story of building what they call the tin house: how it started and the obstacles they came up against.

In this article they talk about:
- Why they chose to self-build on family land instead of buying, as was their original plan.
- The inspiration for the pre-finished steel roof, aka the tin roof, and how they went about sourcing plus installation tips.
- Building stages from start to finish from site clearing to getting services on site.
- Tips on how to tackle each stage along with budget-saving advice.
- Top budgeting tips on how to finish the house to a high standard
- Full specification and suppliers list
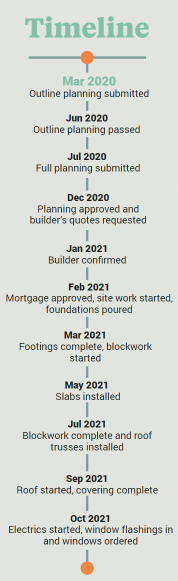
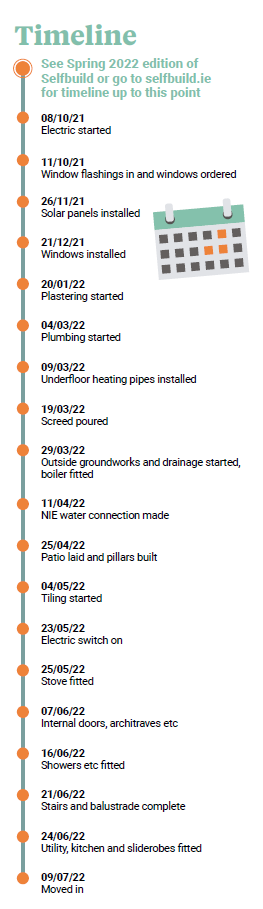
- Fully detailed timeline
Contents
Part 1 – Avoiding the rent trap – Skip to Part 1
Part 2 – The tin roof – Skip to Part 2
Part 3 – Site clearing, foundations, blocks going up – Skip to Part 3
Part 4 – Water and electricity – Skip to Part 4
Part 5 – Photovoltaics (PV) and internet – Skip to Part 5
Part 6 – Finishing the tin house – Skip to Part 6
Part 1 – Avoiding the rent trap
As published in the Spring 2022 edition of Selfbuild magazine.

Matthew and Hannah got onto the property ladder by putting their rent money towards buying their first house. When it became too small for them, they decided to invest in a self-build on family land.
After graduating from university, Hannah and I made the decision that it was time to get on the property ladder. We were determined not to fall into the rent trap so, for a short period of time, we moved in with my parents in the centre of Belfast to save up for a deposit.
Seven years ago, we had enough to get a mortgage to buy our first home. After a few years in the house, we decided it was time to expand and started considering other areas on the outskirts of the city we could move to.
We looked at a range of options, but really struggled to find something that ticked all the boxes.
We considered a few new build developments within Belfast but couldn’t warm to any of them as they seemed somewhat repetitive. It just felt like we were trying to get a square peg into a round hole.
Hannah’s sisters had completed self-builds in the past, so after a while of not finding anything suitable to buy, we began to see the appeal of building a bespoke home.
Throughout our time together, and despite the move to Belfast, Hannah continued to help out with the family farm. Naturally, her family was keen for us to move down closer and had always been willing to facilitate us building by way of a site.
However with the move to Belfast and the life we built there, we had never really seen this as an option in the short term. Then the pandemic hit.
In March 2020 there wasn’t just uncertainty about moving. We both started working from home and after being confined to the house, we started to see the disadvantages of our city location. So something that started as a ‘what if’ turned into more of a ‘why not’.
We went on ahead and the first step was to find an architect, which we did through word of mouth. We met him on the family farm to look at potential sites. One had a great view but was very close to overhead power lines which would have restricted our build height, another already had access built but was at the end of a 500m long lane (that’s a long walk to bring the bins out!).
We finally found our perfect site after a few weeks of searching. It was somewhere we had never thought about, as it was only 250m away from the farm. It was perfect.
Frankenstein house
We did not know what to expect from the design process. When we first met with our architect, we thought we would end up with an Edwardian style house, but at the same time we were really keen to find a design that would fit into the farm and surroundings.
Our architect was amazing – on first meeting him, he told us not to worry about the outside of the house, only let him know what we did and did not want inside.
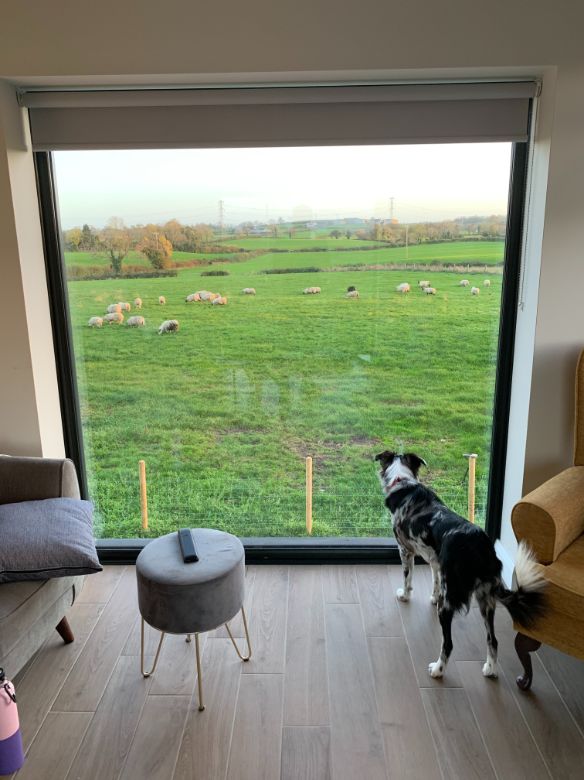
So we set about writing out what very much felt like a shopping list of our wants. It consisted of tangible wants like bedroom numbers (three), then transitioned into things like ‘somewhere with nice light to have a coffee’ and ‘dog friendly’.
So honestly, we had no idea what kind of a Frankenstein house would come out of our demands! One thing we knew for sure was that we wanted something a bit different.
From our time in Belfast, we also knew we did not need a huge house and did not want a lot of wasted/empty space. We knew we needed an office and a room downstairs which could be converted into a bedroom – this was planning for the long term, in case either of us broke our leg and couldn’t get upstairs or old age prevented us from being as mobile as we are now.
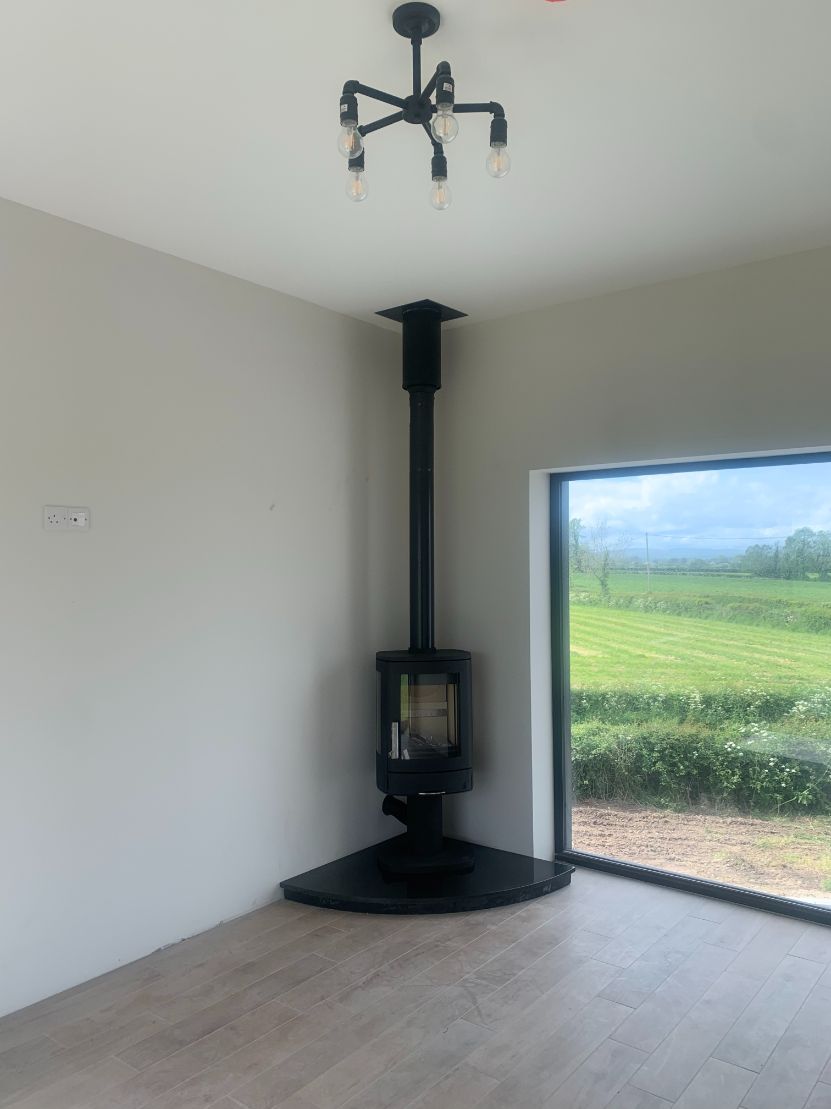
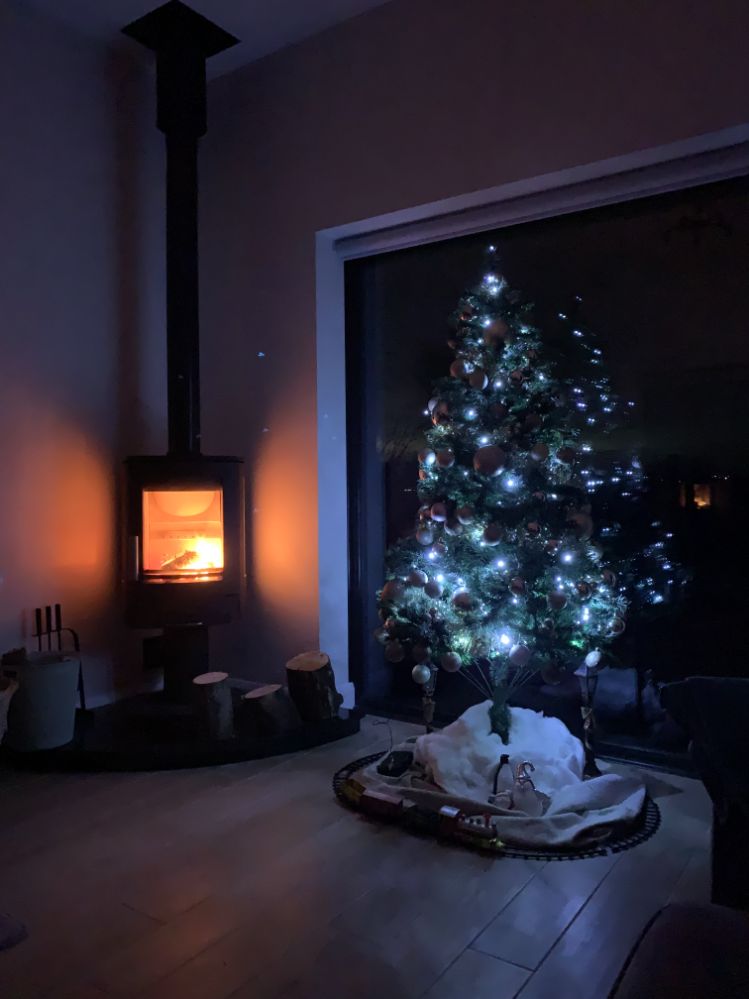
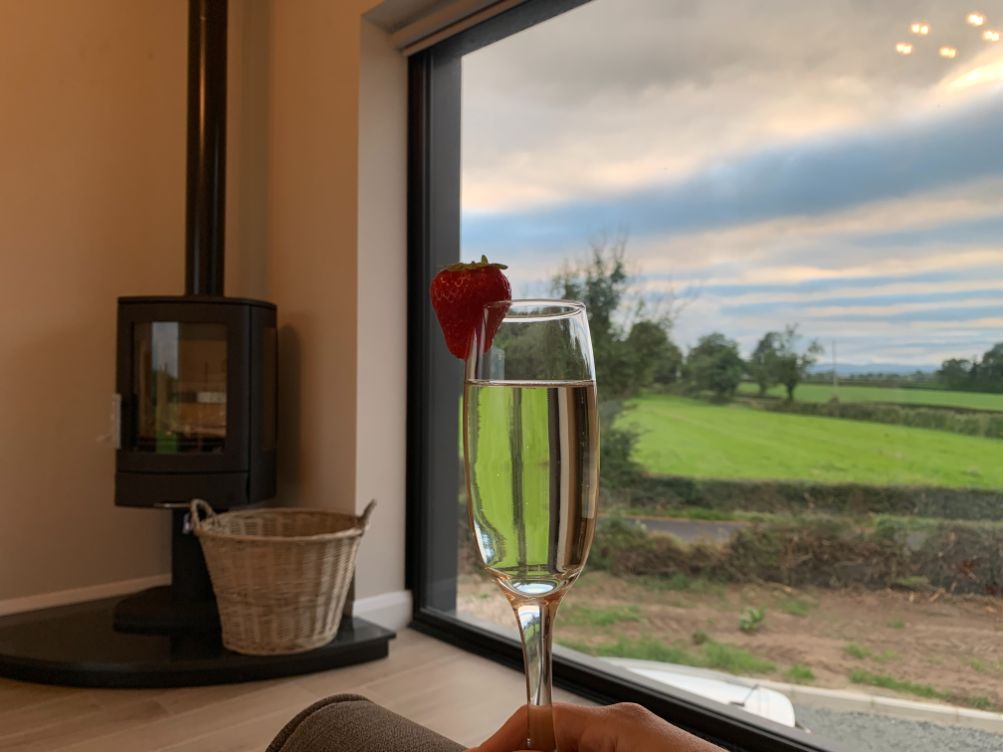
One major thing I wanted was a log burner in the living room as this is something we were unable to have living in Belfast.
Then the design took guidance from our budget. This can be something very difficult to establish in the early stages as there are so many variables in terms of options, quality, finish, etc.
Our architect suggested working off a rule of thumb for approx. £100 per square foot “plus plus plus” which basically means the budget becomes a bottomless well. That being said, we wanted to keep the house modest and as close to 1,800sqft as feasible.
We had two meetings with our architect before he showed us his design. He brought us onto the site with his printed out plans, as well as some spray paint to mark out where the rooms would be and how big.
Initially, it was quite a shock being presented with the floor plans. Our first reaction was that building a long house one room deep wasn’t quite normal, but we fell in love with the concept behind it – each room was able to make use of natural light.
Everything we had mentioned to our architect was present in the design, even simple things we had mentioned in a passing comment such as making sure we had somewhere to store wellies when coming into the house.
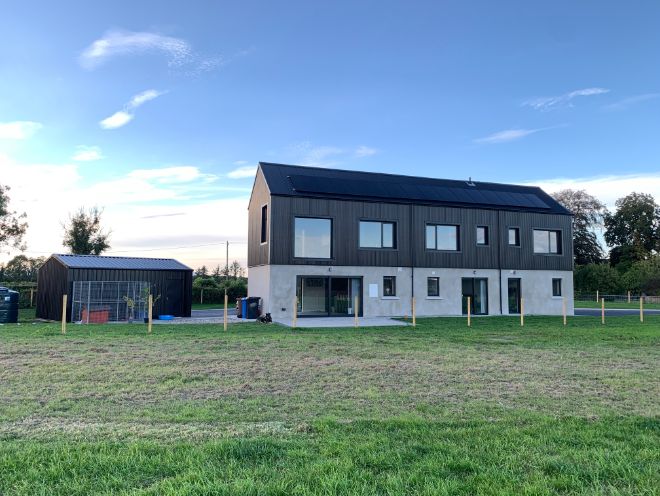
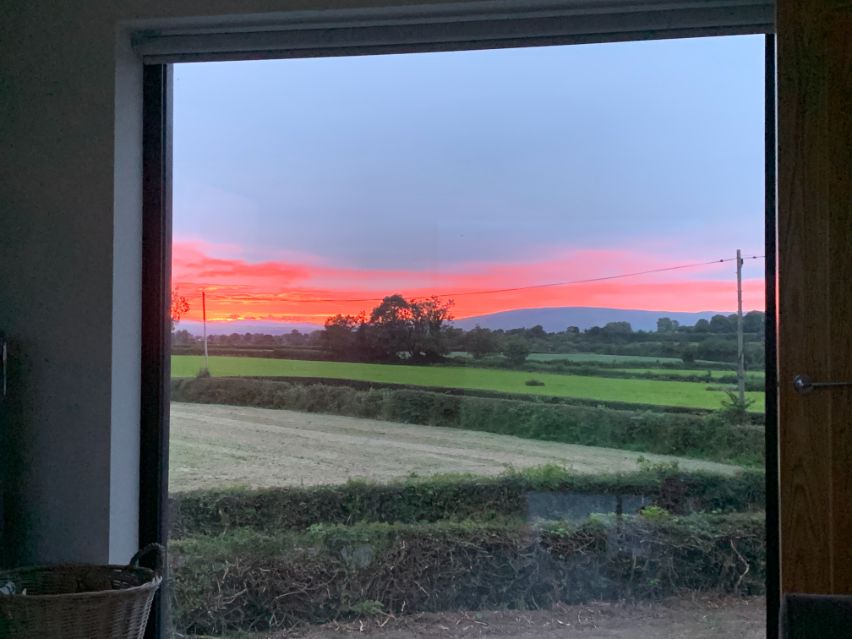
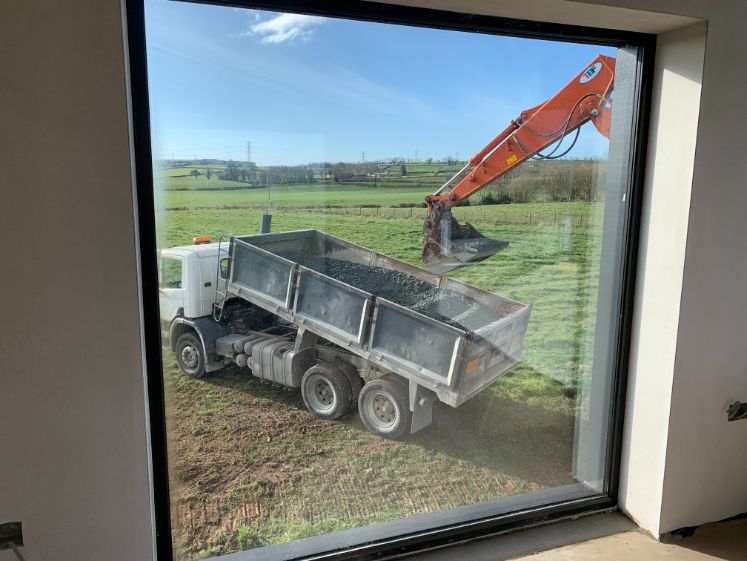
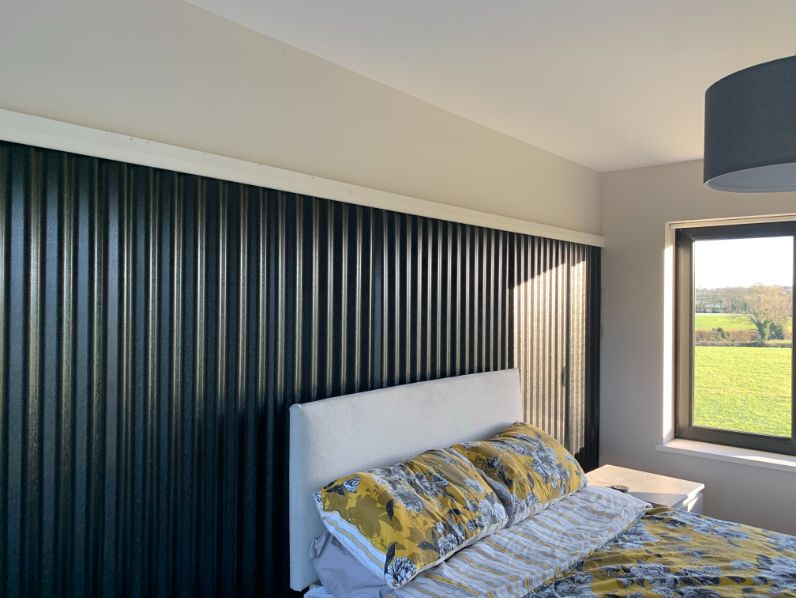
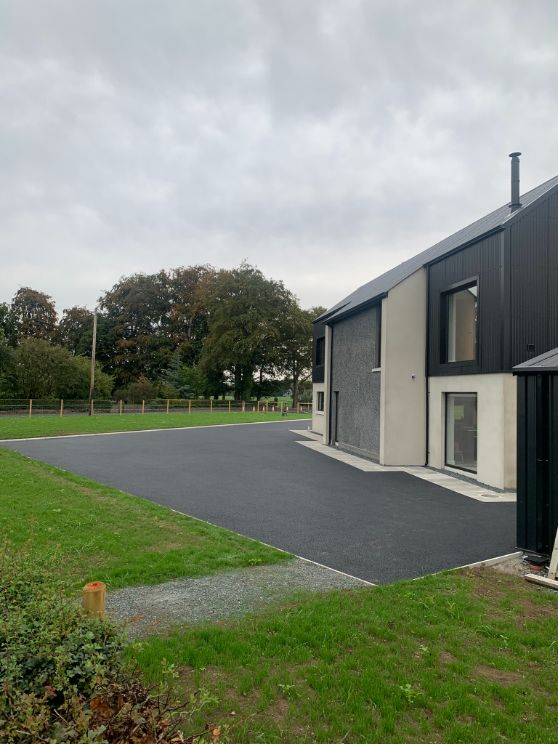
We had never seen a house designed like ours, especially with the corrugated cladding on the roof and first floor. The idea of having two 2m x 2m windows in the living room was amazing as it gave us unparalleled views of Slieve Gallion as well as great views across the valley from the farm from the other side.
One thing we had mentioned to our architect was how much we enjoyed eating and drinking outside so his solution was to have a 4m sliding glass door in the kitchen which would open the room up and make it feel like the outside was an extension of our living space.
Planning permission
At the time, we weren’t confident we would get planning permission. We did not want to pay for the full planning fee as we were almost certain the planners would say no. Our architect helped us complete both the outline and full planning applications, which I would recommend to anyone.
Our outline planning permission came back within a few weeks, and to our great surprise we had been given no restrictions. After putting in our application for full planning permission, the planners took around five months to pass our plans.
As we were doing a non standard construction, two planners needed to be in the same room to discuss the plans. Unfortunately this could not happen during lockdown due to social distancing rules.
Our architect was on to the planners each week asking them for updates. After what felt like an age, we got the good news that we had passed. We were ecstatic.
Finding a builder
The next step was to find someone who would build the house for us. Finding the right builder/contractor is a very difficult thing. We were all too aware that we would be spending a lot of time with the individuals building our house and we needed to find someone we could completely trust to do the job right.
We had searched online for some builders in our area and had reached out to family and friends who had built in the previous few years. We decided the best thing to do was to try and do as much research as possible before reaching out to contractors – so a lot of time was spent googling past projects from each.
We finally settled on a list of four builders we were going to reach out to and get quotes from. Two highly reputable ones we had found online and two were referred to us by word of mouth.
We had a rough idea of what we wanted to spend so upon meeting the potential builders, we had to inform them of what we were happy to cut from the build. We ended up deciding we did not need a lot of the stone cladding for the downstairs, or some of the groundworks we had envisioned.
As with most build projects, you start with grand ideas and slowly realise that it becomes important to find compromises you can live with. When reaching out to the potential builders, we gave a deadline for them all to come back to us to try and keep an even playing field as well as asking a list of questions such as availability to start, payment structure and estimated time of completion.
Of the four we reached out to, three came back, one was way out of our price range so we were narrowed down to two.
Both quotes were on par in terms of quality and materials, however we ended up going with a contractor who built a family member’s house the year before.
Being able to physically see and hear first hand how they were was a massive advantage. We were very pleased with his build quality as well as his approach to any requested changes and finances, plus the estimate that the house would be built in 11 months was really appealing too.
Funding the build
When it comes to building, one of the most important things to work out is how you plan to pay for it. We started the mortgage process around the time we spoke to builders as we wanted to see how lenders would feel about the site location, design, and our ability to use the site as the mortgage deposit.
We were very lucky that Hannah is a mortgage broker so she knew which lenders would be best to speak to, especially as our build is considered to be non standard construction due to the corrugated metal roof.
With the roof being a relatively new concept, we made sure to do our homework before approaching lenders by gathering research on the tin’s lifespan, warranty and comparing this to the estimated lifespan of standard roof tiles.
What we would refer as a tin roof is actually pre-finished steel (see Part 2 below). Our supplier was very helpful, explaining what detailed information they needed, and we were able to show the warranty on the pre-finished steel exceeded that of the potential mortgage term – therefore reducing the risk to the lender.
In NI we are fairly limited with mortgage lenders, so having Hannah know the ins and outs really made the process so easy.
I would really recommend for anyone starting the process to speak to a mortgage broker, as mortgage lenders are so different as to what they do and don’t allow, which means it can be tough to know where to start with it all.
It also means one less stress for the build to know the mortgage side is taken care of.
Part 2 – The tin house: A tribute to farm buildings
As published in the Spring 2022 edition of Selfbuild magazine.
Matthew and Hannah explain how they had their heart set on a “non standard” corrugated finish for their roof, and how they went about installing it.
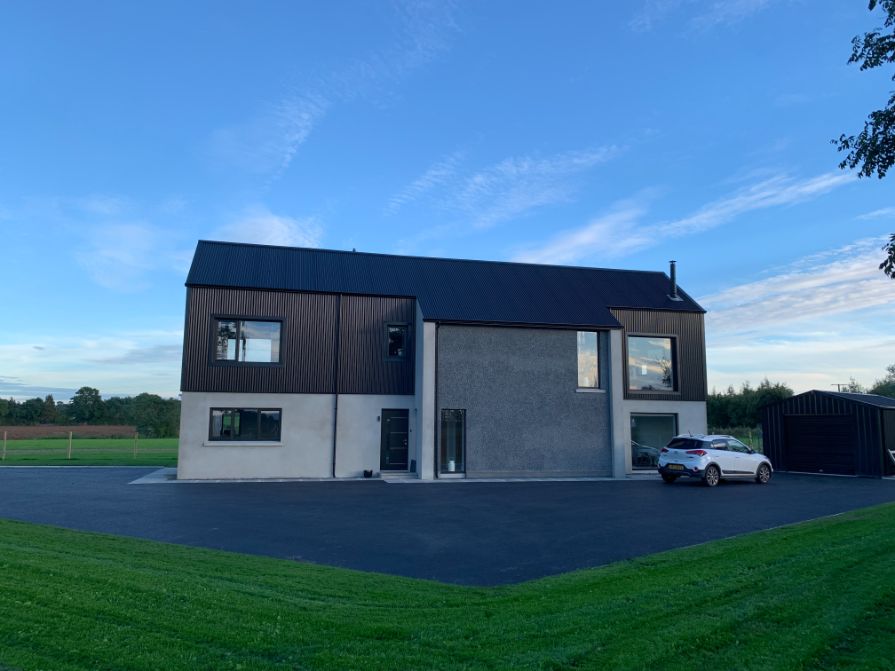
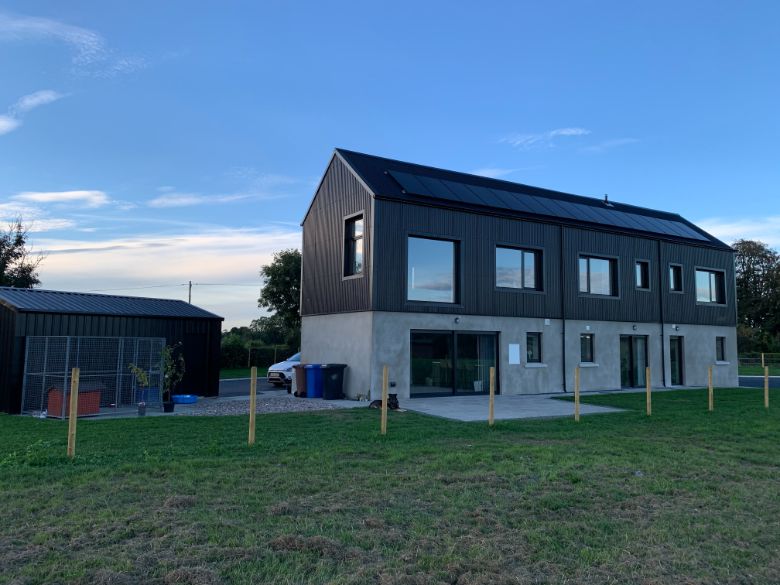
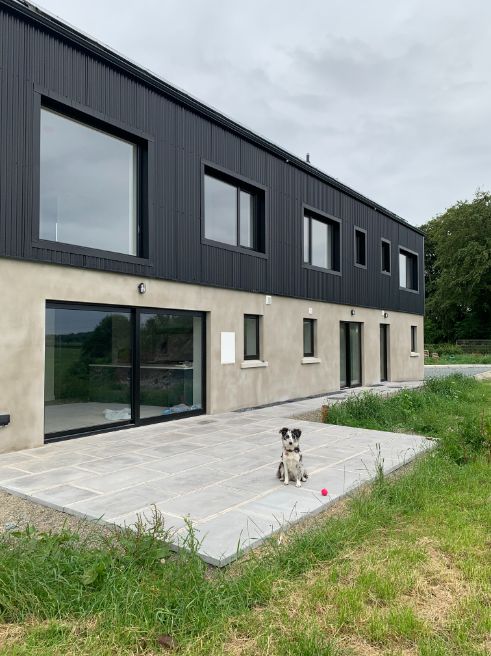
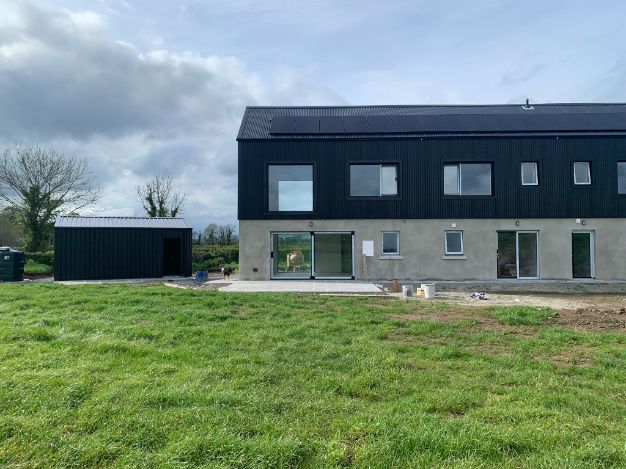
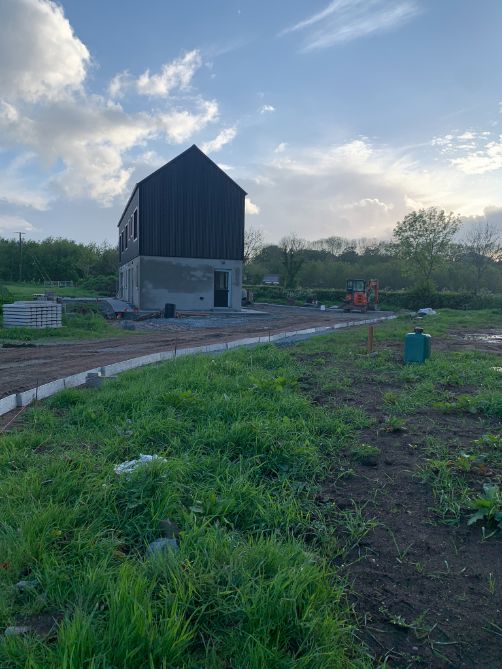
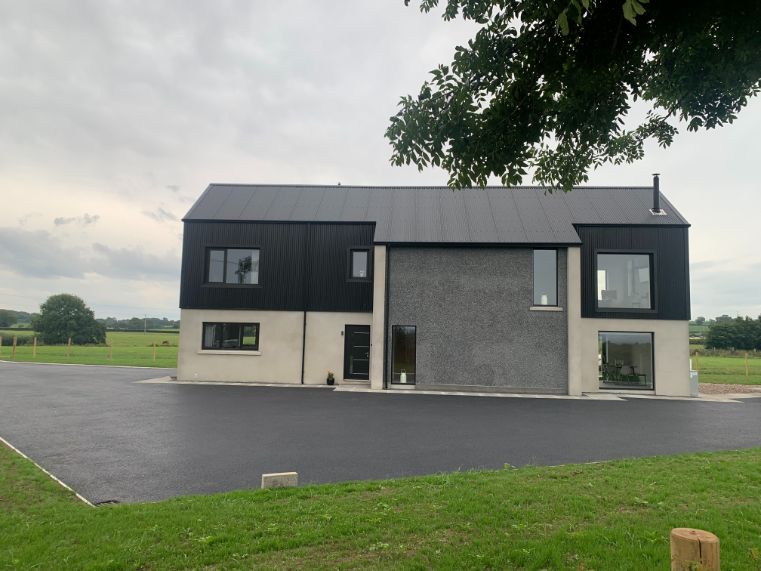
Our idea from the start was that the house would look like another farm building, resembling others on the farm holding which mostly have a block base with corrugated cladding and corrugated pitched roofs.
We looked at various options, tiles and slates which were designed to give a rustic look, however for us, they didn’t quite compare to the real thing. We also explored the idea of using other materials like zinc, but they came at a greater expense and it just seemed like we were overcomplicating something which had a simple solution.
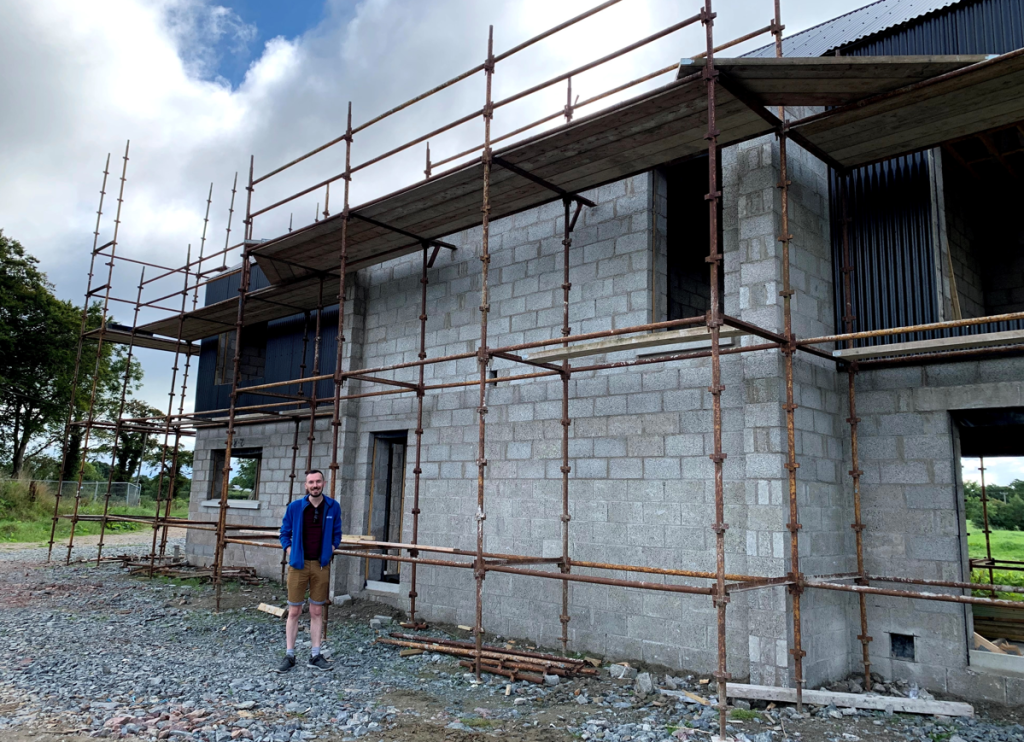
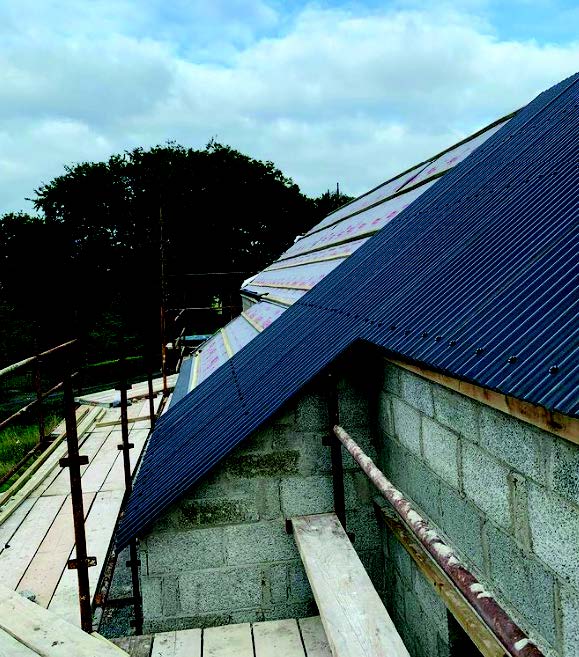
After all, if all the farm buildings have managed to weather in our climate for decades, then why couldn’t we use the same material? We found out farmers in the area used a pre-finished steel product for their sheds, so we opted to go with this as we felt it was the best way to get the agricultural tin look.
One large misconception people (including us) have is about acoustics. Many imagine the noise from inside an old, uninsulated barn, or from pinging rain on top of the holiday caravan. But the truth is, when the roof is installed, it is added on top of a strong vapour permeable membrane which vastly reduces the noise of rain, hailstones and other windblown debris. This, along with the 400mm wool insulation in the loft, should keep out any sound.
When we first contacted the architect, this was something that we knew we wanted to incorporate into the build design. Luckily for us, our architect had experience with a similar project and he understood exactly what we wanted to achieve.
We decided the best place to start would be contacting a local supplier of corrugated roof coverings for agricultural buildings. The more research we did, the more we were sold on the concept. It was cost effective, durable (25 year warranty) and we were blown away by how quick it was to put up.
Colour choice
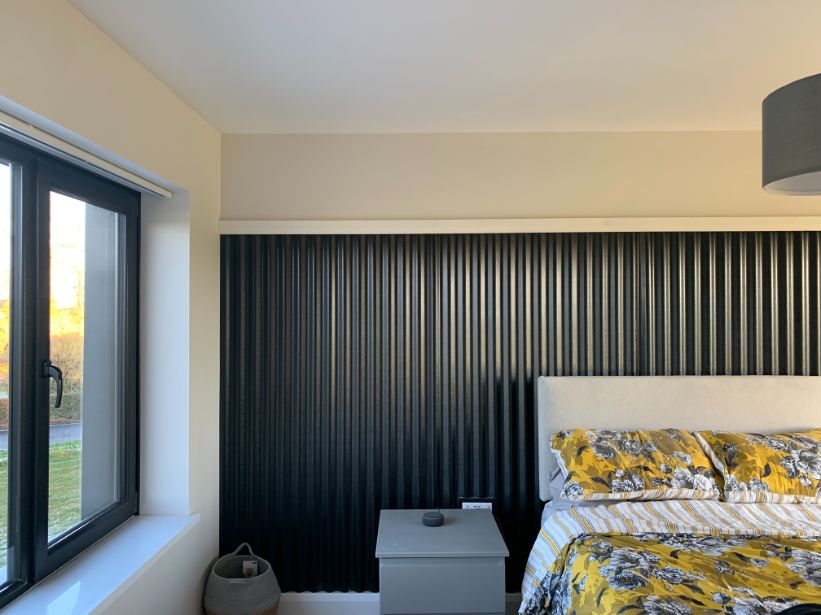
Once we had chosen our supplier, the next decision to make was the colour we wanted. Anthracite is currently the colour of choice for agricultural buildings, but historically red would have been a common option for old style barns and we toyed with that idea.
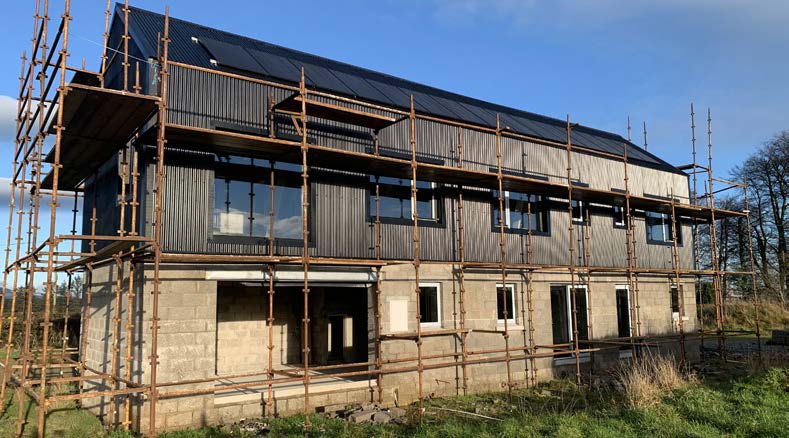
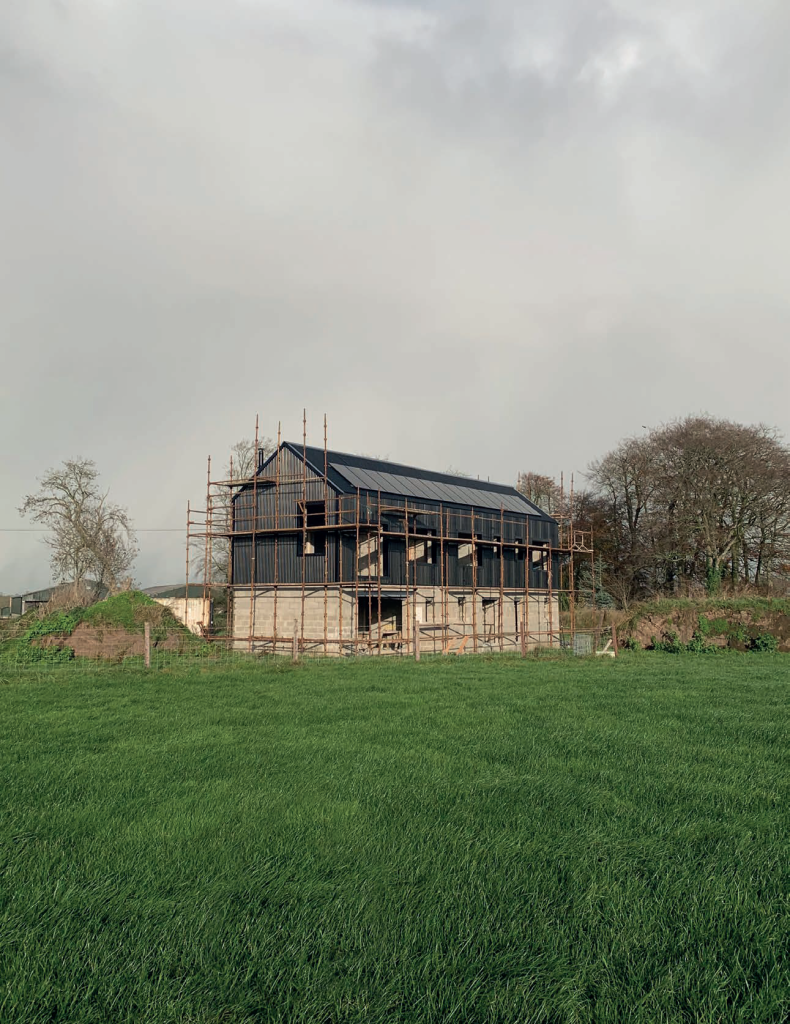
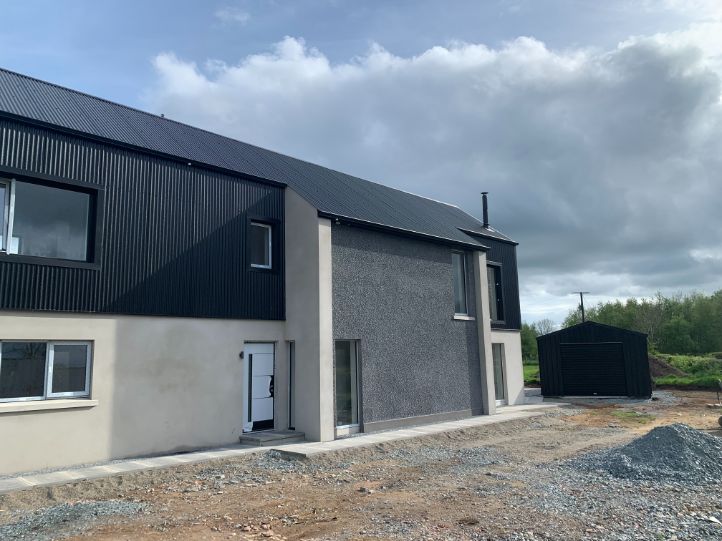
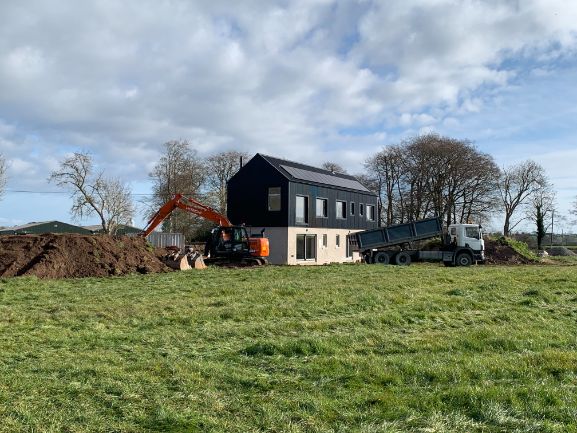
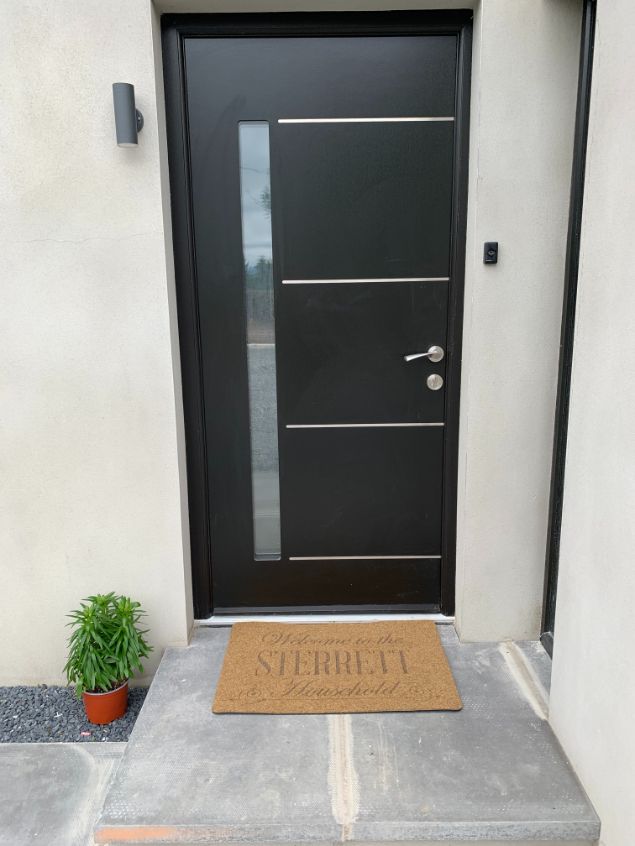
Then we considered the option of going darker again to try and make more of a statement while still feeling like we were blending in. That’s when we came across the black sample, and we were set.
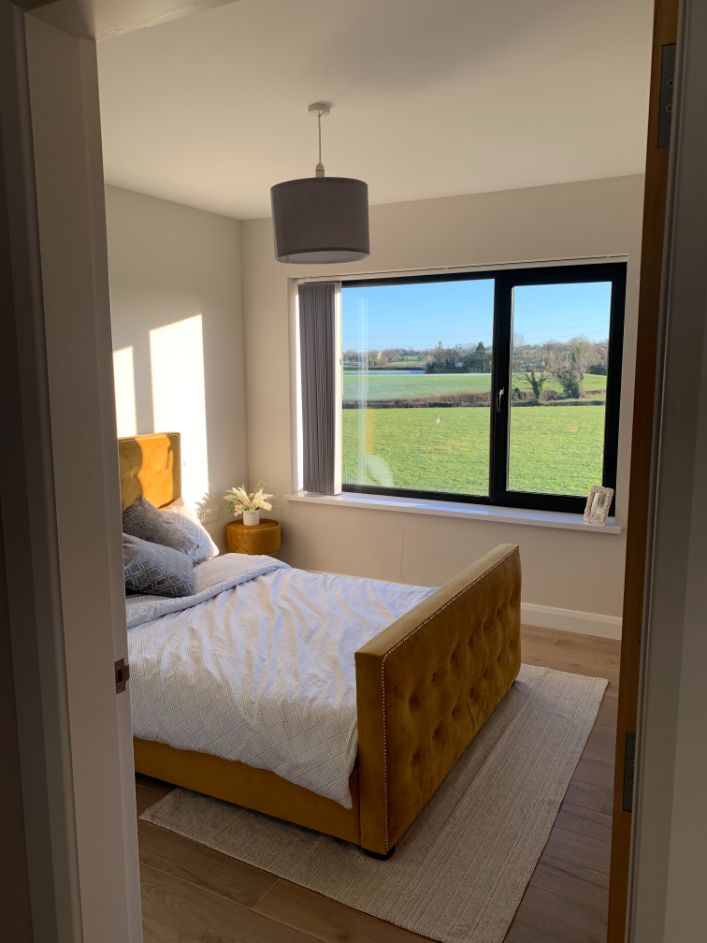
We already had decided on black frames for the windows, as we wanted to achieve a picture frame effect, so we knew the black of the metal alongside would really set off the house and create the dramatic look we were hoping to achieve.
Another draw for the black cladding was to get the outline of the building to blend into the treeline surrounding the site.
As the house is surrounded by thick foliage, when viewing the house from the top of the road, it makes it almost invisible to anyone driving past. That gives us peace of mind in regards to security as well as our want to blend into the surrounding environment.
Installation
When we were reaching out to potential builders, we made sure we asked for previous build information where they had used corrugated metal in any aspect. Our chosen builder had, both on an agricultural and commercial basis, which filled us with confidence.
We had two roofers on the job and within two days the roof had been fully covered, with a small space left for the fitting of the flue for the wood burning stove. However, when adding the cladding around the outside of the house is when work started to slow.
As we have so many openings and windows on the first floor, each section of metal needed to be cut to fit correctly. Once the cladding had been added onto the first floor, we added the window and building flashing which helped to frame the outline of the windows and building edging.
Throughout the build we had been discussing ways to incorporate renewables into the house and we landed on the idea of getting photovoltaics (PV or solar panels that generate electricity) added to the roof. When meeting with the potential solar supplier, we stipulated that the striking look of our roof was our favourite part of the house and we did not want solar panels to take away the wow factor.
Our chosen solar supplier advised they had a sleek, black solar panel which they thought would blend in perfectly. We decided to go for 15 panels which should give us a 5.5kW system. This would be more than we would use so we opted to have an additional system which will convert any excess power towards our immersion.
ADDITIONAL INFORMATION
SPEC
Walls: block built with 150mm cavity wall for blown EPS bead insulation, U-value 0.21W/sqmK
Roof: 400mm mineral wool insulation in cold roof build up, U-value 0.11W/sqmK
Floor: 125mm phenolic board insulation on standard build up, U-value 0.14W/sqmK
Windows and doors: double glazed, average U-value 1.37W/sqmK
SUPPLIERS
Architect: T4 Architects, t4architects.co.uk
Mortgage Lender: theprogressive.com
Roof Trusses: Quinn Building Supplies, quinnbuildingsupplies.com
Corrugated roof: Colorcoat LG pre-finished steel from Befab, befab.com
Bathrooms: Bathe NI, batheni.com
Windows and doors: Swish, swishwindows.net
Kitchen / Utility / Bedroom Interiors: Croft Interiors, croftinteriors.com
Appliances: DAC Appliances Cookstown
Solar panels: Solar Fix NI, solarfix.co.uk
Part 3 – Site clearing, foundations and blocks going up
February may see the start of longer days, but we had the joys of Northern Ireland weather against us. With the builder on standby, we sat back and waited for the threat of heavy rain to pass until we could get a clear stretch to break ground.
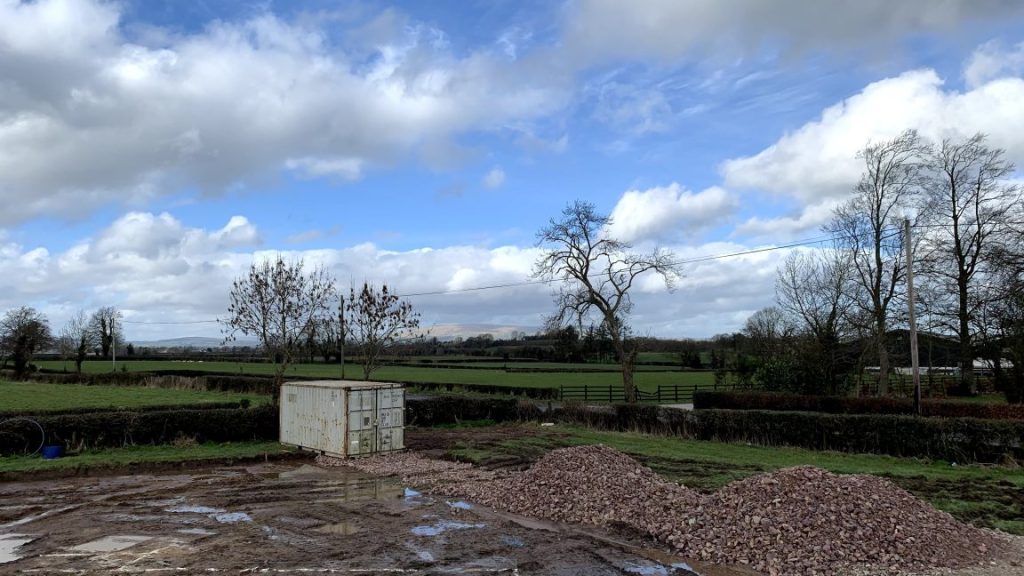
Site clearing
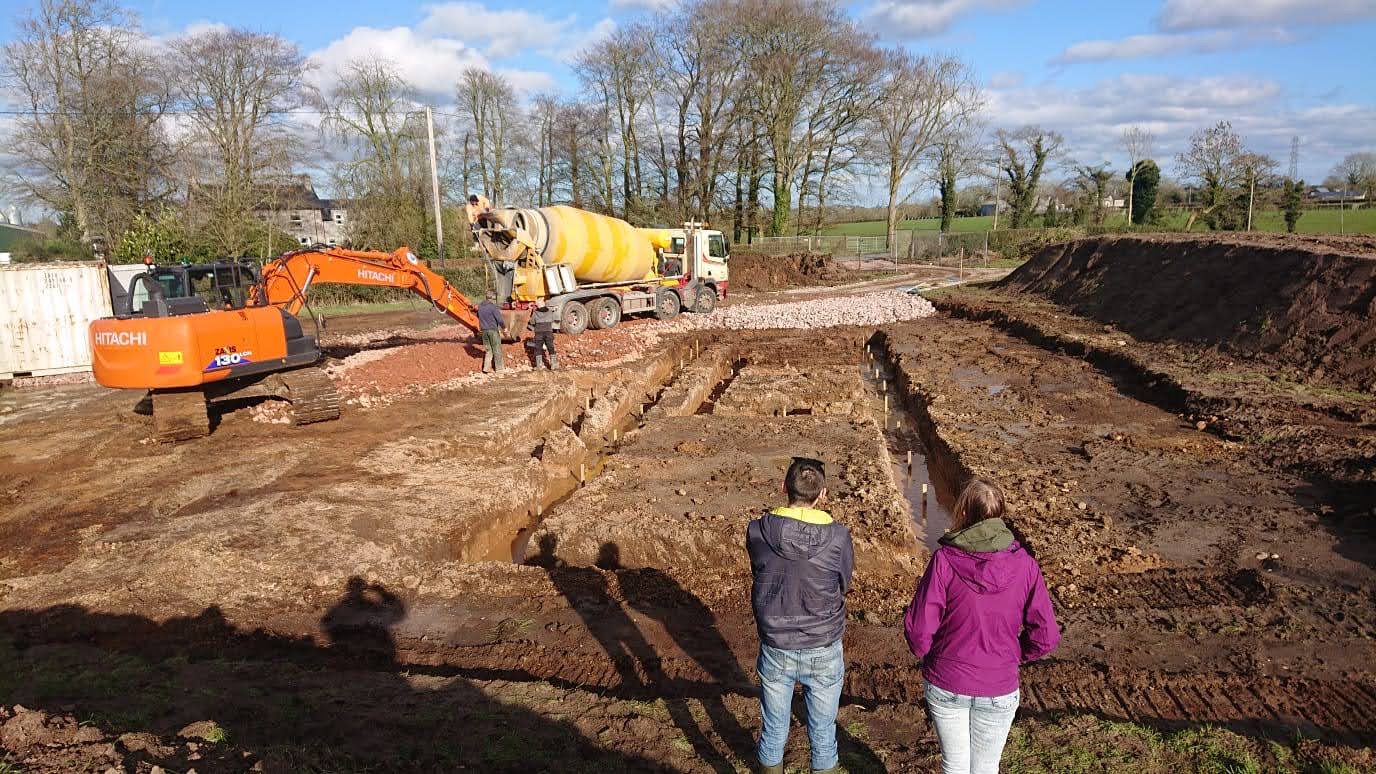
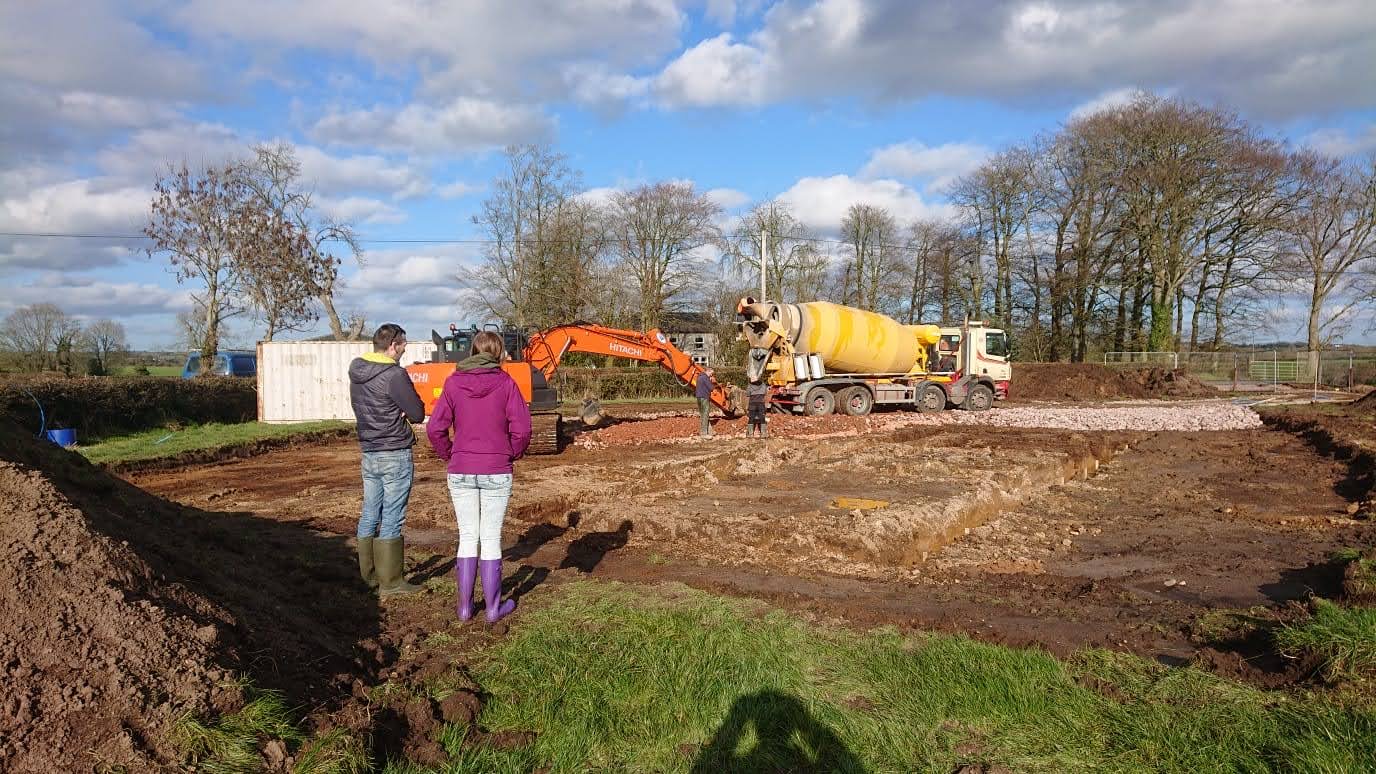
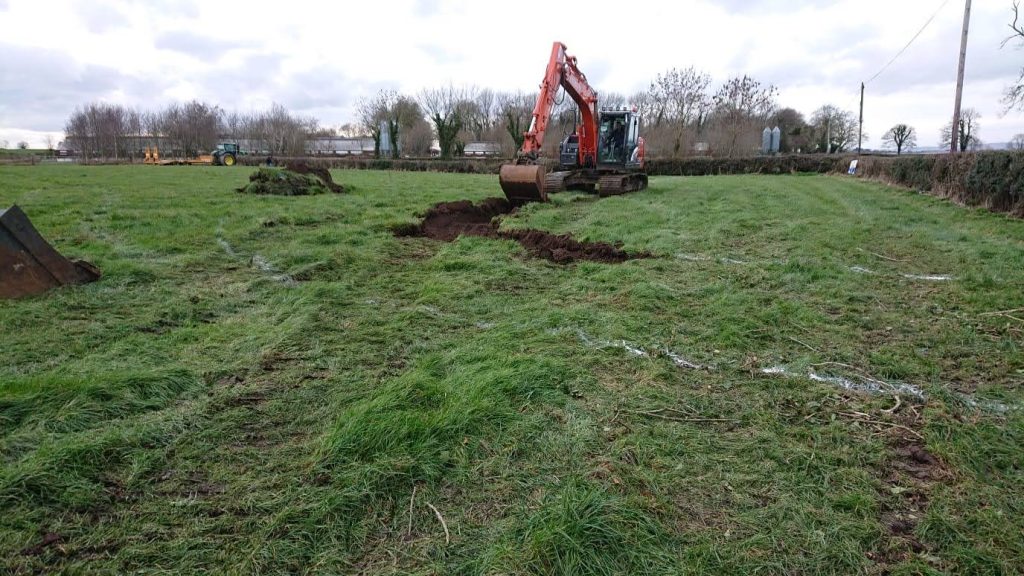
It was a cold Thursday morning when we heard the best sound – the rumble of the digger getting unloaded off the back of the loader to start clearing the site.
Thankfully our site was relatively flat, without any large rocks or trees to remove. When the diggers showed up, we were ready for anything.
Everyone warned us that we wouldn’t know what lies underneath the depths of the soil, with the potential for sand or poor drainage, until the digging would start.
We knew that a stroke of bad luck could potentially set us back on our budget in the form of a much bigger bill for secure foundations – something which we all know is so important to get right!
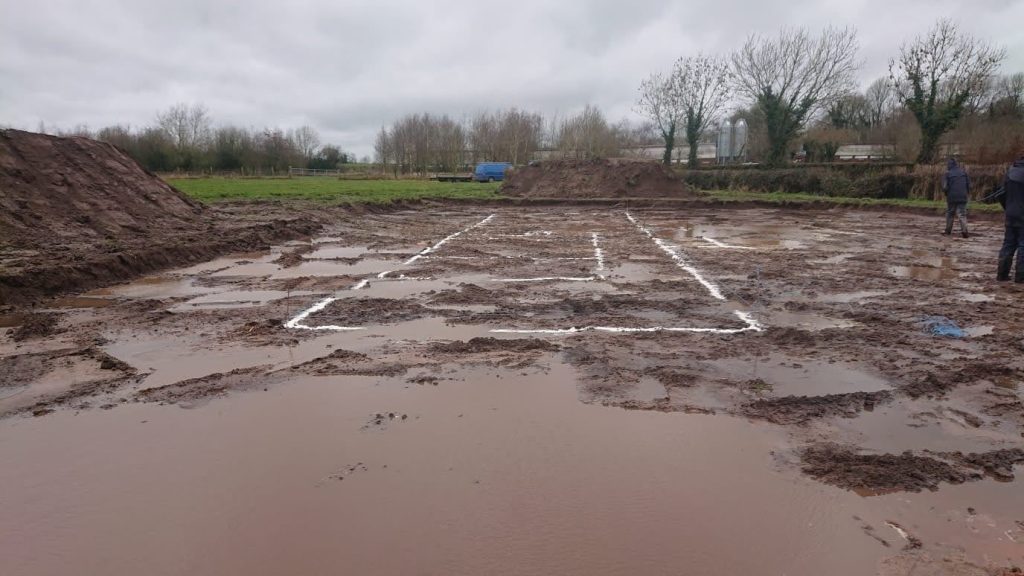
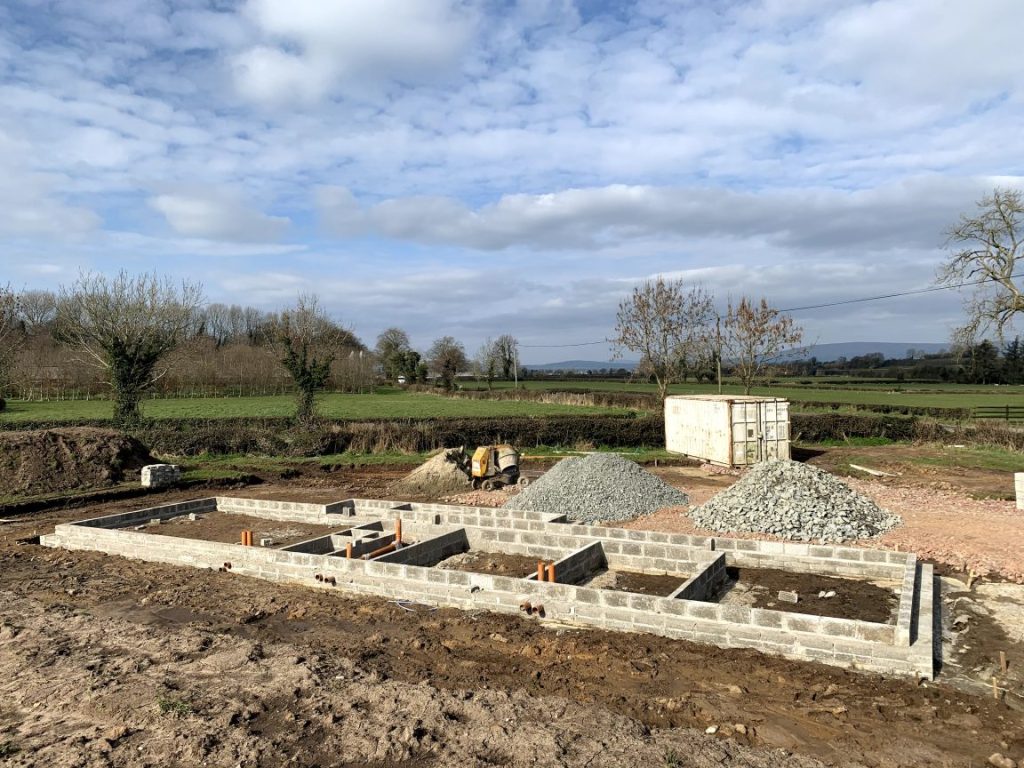
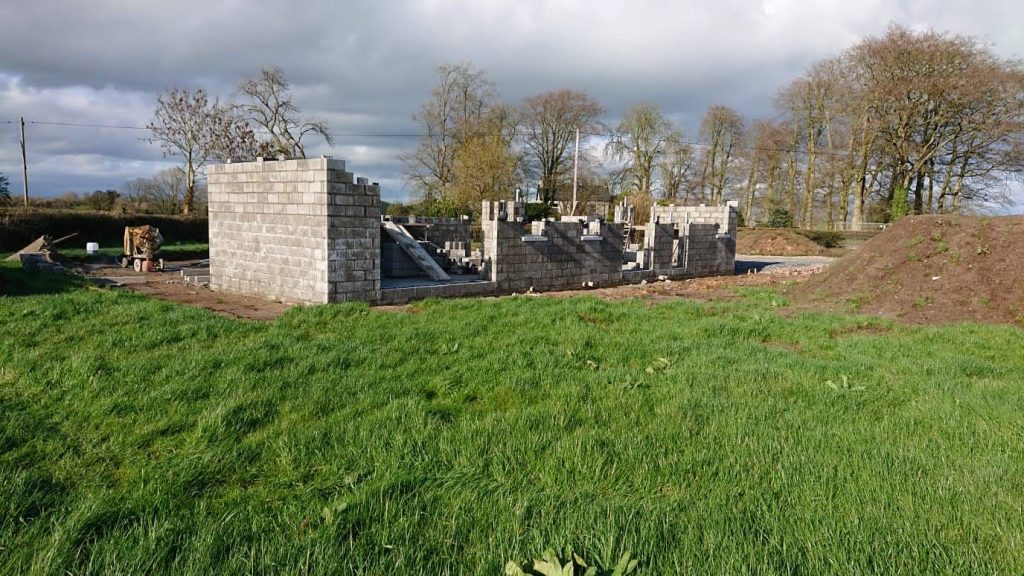
The site was stripped and soil mounded, giving us our first glimpse of our site layout with our chalked out house shape ready to be dug in preparation for foundations.
Seeing the narrow rectangle in front of us, we started to fear that our 1,800sqft floorplan was too small! It felt so insignificant positioned in the middle of the vast field.
We were both surprised at how quickly the site was cleared. Then, what seemed like endless lorry loads of stones and hardfill were dumped on the now cleared ground.
We also had to remove some of the boundary hedgerow. In line with our planning, this had to be replanted so we used the digger to help replant any moved hedges. This will save us buying and planting new hedges down the line.
Foundations
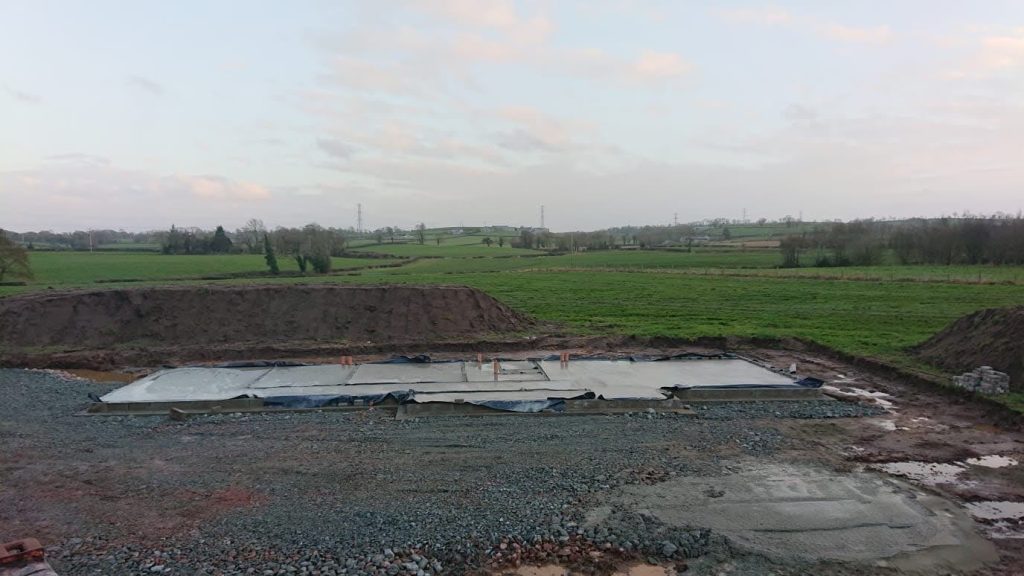
Within a matter of two days, we somehow went from a lush green field to a mucky site complete with foundation trenches ready to be filled and inspected by building control.
Ironically, we also realised that after all the planning, preparation and work leading up to here, we effectively had dug a hole only to fill it back in!
Thankfully on inspection the foundations all looked great and on 22nd February 2021, luck seemed to be on our side with the appearance of blue skies and more importantly, the cement lorries.
We had one corner of our foundations which were described as “sandy” and needed an extra bit of work but thankfully that was quickly resolved.
After a few hours, the foundations trenches were filled, settled, and left to dry ready for the builders to start the blockwork of the footings. We could finally breathe a sigh of relief.
Getting out of the ground
For our build, we opted for a cavity wall construction (block built), concrete floors and block internal walls. We initially toyed with the idea of timber construction due to the perception of cost saving and speed, however due to the rising cost of timber and the threat of shortage of materials we decided to stick to the traditional block method.
Living in a timber frame house currently was also a big factor in deciding against this method, as we seem to be a heavy footed family.
On completion of the foundations / footings, we started to see the buildings shape come out of the ground. With each room starting to form, we got the first chance to walk around our house and get a feel for the space.
We spent our time on site counting the steps from the office to the kitchen and mapping out where we would sit and eat – anything to visualise our future in the house.
Part 4 – Water and electricity connections
To get a house built, you need at the very least water and electricity. Here’s how we went about getting connected.
Electricity
Getting an electricity connection to the site is one of the most important things to do early on in the build. In NI, this is done via the NIE New Connection website.
NIE has two ways of working:
1. NIE carries out all works and deals with everything.
2. NIE carries out the Non Contestable Works and a third party ICP (independent connection provider) can carry out the Contestable Works.
On the NIE website, you upload your site location and site layout plans (we obtained these from our architect) as well as your contact details.
NIE then sent us our quotation pack which contained our quoted price as well as their planned routes of running overhead and any underground electric cabling. This quotation was free, but we were not expecting the cost of the electricity connection to be so high.
One of Hannah’s self-build mortgage clients had recommended an ICP called Electricity Worx. We contacted them to get a quote for the contestable works. The company came back with a quote significantly cheaper than NIE provided for the Contestable Works.
To hire the ICP, we had to send to NIE an acceptance of terms and conditions for the second option and an ICP nomination form, plus we had to make our first payment.
The ICP helped us with any other documentation we needed to complete as well as dealing with any wayleave agreements required for legal purposes.
NIE and the ICP were able to do most of organising themselves which meant the only thing we needed to do was dig the trench for the underground cabling to be dropped into.
During this wait time, we signed up with an electricity supplier as we had been given our MRPN when we signed up to get the works completed.
This was pretty straightforward however we had to call our chosen electricity supplier rather than be able to do it online as the address of the house had never been registered.
Once we had our poles and electricity connection, we asked our electrician to complete our connection card and return to NIE so they could come and fit our meter box as well as a temporary connection to allow anyone to use power when required during the build.
Water
Getting a water connection from NI Water was thankfully straightforward by following these steps:
- – Complete application – emailed in
- – Send site plan along with application
- – NI water carry out assessment with any conditions
- – NIE water invoice with any necessary infrastructure changes
- – Charges paid
- – Call from NIE Water about getting you connection date
- – On installation day you must have your water pipe at the roadside
Part 5 – Photovoltaics (PV) and internet
Installing solar PV panels was a priority, as well as having decent broadband to be able to work from home.
Solar
With rising electricity and oil prices and the fact we both work from home, getting solar panels to generate electricity seemed like a no brainer.
We had reached out to a few renewable companies and had gotten a few quotes but the one we chose was recommended by a family member who had the panels installed on his business and home.
He had nothing but good things to say about the company and he put us in contact with the director. When we contacted him, we mentioned that Hannah’s father might be tempted to put some solar panels into the farm as he was also starting to feel the squeeze of the energy increases.
He met Hannah’s dad on the farm and then met us on site the same day. We are blessed that our house is about five degrees of due south so we are positioned perfectly for solar as well as not having any large trees which would block the light from the panels.
We opted for putting 15 REC 365W panels in black on the roof as we hoped the black would not take away from the look of the house. We also decided against a battery due to the sheer upfront price but wanted to put in a diverter which would divert any excess solar energy into a second immersion heater which would in turn heat our hot water tank.
With the sell back rate being so low, it made sense to use our hot water tank as some sort of thermal battery. We added more panels than we might need as this would give us a better chance of getting the full 3.5kW we were allowed to generate.
We had a few other bits of wiring that needed completed but the solar company provided a breakdown of what needed done and these were passed over to our electrician when he was completing the first fix.
A few examples are running a Cat 5 cable from the inverter in the loft down to the meter as well as having a separate breaker box in the loft for the inverter.
Thankfully the solar company was able to take care of any documentation and help us out where needed. No planning permission was needed, which was a bonus as we hadn’t included the panels in our original application.
We also left our house so that we could install an air source heat pump down the line (in case they drop in price).
Internet
Getting the internet connection to the site was pretty straightforward. We did an inquiry on the Openreach website who sent out a surveyor to assess it.
We received an invoice from Openreach once this had been completed as well as a delivery of the cabling and ducting so the cabling could be buried underground.
The other end of the cabling is left at the edge of the property where someone from either Openreach or our chosen ISP can connect.
The next stage was to meet the electrician on site to discuss what we needed, so in an attempt to be prepared, we set off round the site with ‘post it’ notes and marker to try and put together a plan for where we wanted to position plugs etc.
Starting off at the front door, we done a full house walk through chatting about our plans for each space to try and piece together the best locations for everything. We found it was easier to start with the fixed necessary options for example the fridge, freezer etc as we knew where we needed them for certain. We then started to look at worktop spaces to plan where we may need access to plugs for small appliances.
We then looked at living areas and planned out ideal sofa locations so we could look at plugs for TV’s, lamps and where we would plug in phone chargers – all the essentials!
One thing we wanted to be sure to incorporate was Cat5 cables throughout the house. This means that in areas where Wi-Fi may struggle (which we suspected may be a problem with our block walls), the Cat5 outlet means that we can plug directly in and hardwire the internet. We knew we would want these anywhere where we had planned a tv as well as in the office to help with working in the house plus Matt snuck in a spare one for his Xbox
With it being close to Christmas, it was helpful to envisage things like locations of Christmas trees and outside lights when planning the plug locations then on the contrast we wanted to make sure there were plenty of outside power outlets for the likes of power washing and lawnmowers etc.
Feeling accomplished, we left the sea of yellow stickers and caveman like wall diagrams until we were set to meet with the electrician on site the following day. Thinking we had covered all bases, we met with the electrician in what we expected to be a quick summary run through. Three hours later we realised that despite our advanced preparation of planning plugs, we had barely even skimmed the surface!
One of the first things the electrician asked was, ‘What way does this door open so we can plan where to put the light switch?’ – something we never really had thought off and we were so focused on plugs. The good thing is that by having a good electrician, they can guide you as to what you need where, especially when it comes to making sure all the necessary are in place for building control.
There are a few things that are important to consider when planning electrics;
– Location of heavier power outlets eg appliances
– Outside power needs – shed, electric gates, intercom
– Septic tank
– Location of isolator switches
– Bathroom electrics – showers, mirror
One piece of advice for anyone who has a PC sum assigned for electricians costs would be to get confirmation of what that includes for example, standard lights or spot lights, plugs per rooms etc as all the additional add on’s can really increase the costs. For us we found it was important to future proof as much as possible, having lived in a house where extension cords were essential, we wanted to make sure we covered as many possibilities as possible – after all, it is easier to do when you have a blank canvas to work on!

Part 6 – Finishing the tin house
Building the tin house overview
Plot size: 2/3 of an acre
House size: 169 sqm
Bedrooms: 4
Construction: blockwork (cavity wall)
Heating and hot water: oil condensing boiler with PV backup, plus 5kW wood burning stove
Ventilation: passive input ventilation
Expected SAP: 83 (89 with PV)
Matthew and Hannah Sterrett are building a modern house that’s designed to blend into its agricultural landscape. Here, they share their experience finishing off the house…
As published in the Spring 2023 edition of Selfbuild magazine.
Every choice we made for the finishes felt like a big decision. We wanted to do the house justice but at the same time didn’t have an unlimited budget.
Overall, what helped the most was that the suppliers we chose understood what we were building. A ‘black tin house that is like a barn but modern’ did the trick to explain what we were after. Here’s how we got on, and what we learned from the experience.
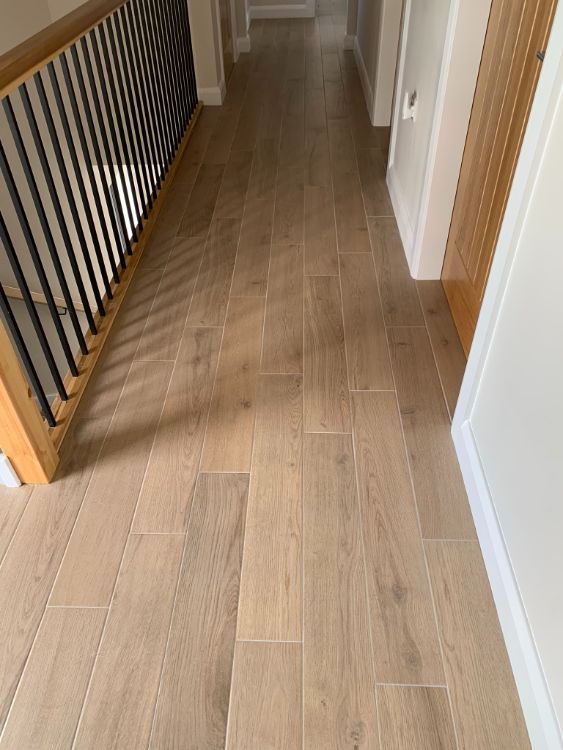
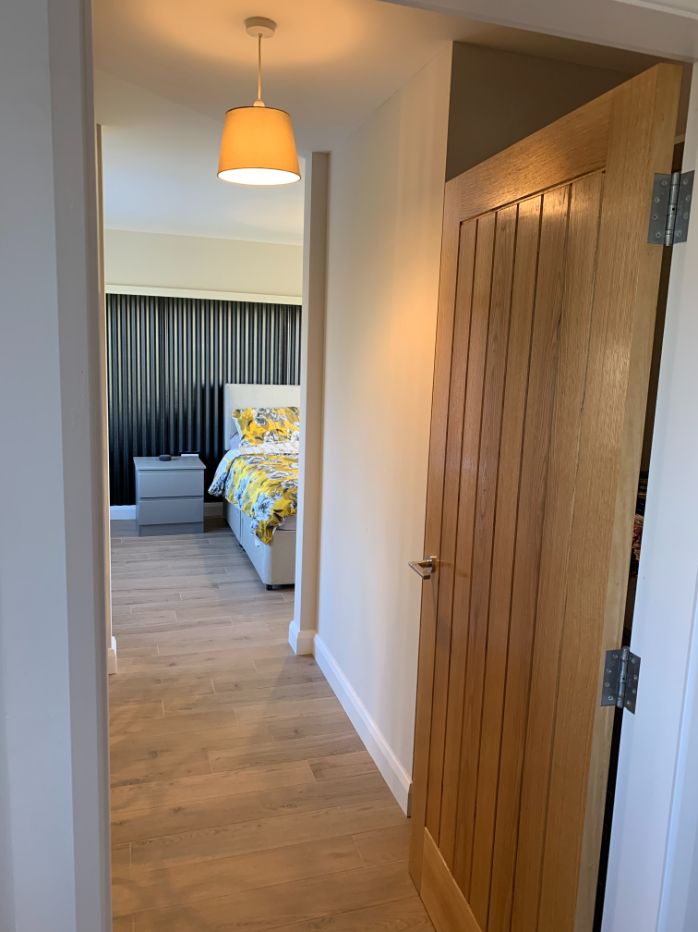
Whatever your budget is for tiles, budget the same amount for a tiler. Because we opted for underfloor heating, we felt it was important to maximise the heat output. Special types of carpet or laminate can be used with underfloor but we felt a hard surface would still do the job better. It was a big decision because tiles do feel more permanent than carpet. Initially we looked into the option of a polished screed to give that bit of a rustic industrial feel. However cost wise, tiles were the better option. And they allowed us to personalise the flooring slightly more.
Main tip here is to shop around. Most suppliers have a similar offering, but larger overheads might make the difference in the end cost. The cost of the tiler needs to be factored in addition to that. And a good tiler is worth his weight in gold. We were lucky to get an incredibly skilled local tradesman with great experience in unique tile layouts. He used the same tiles throughout but by arranging them differently, each area is different.

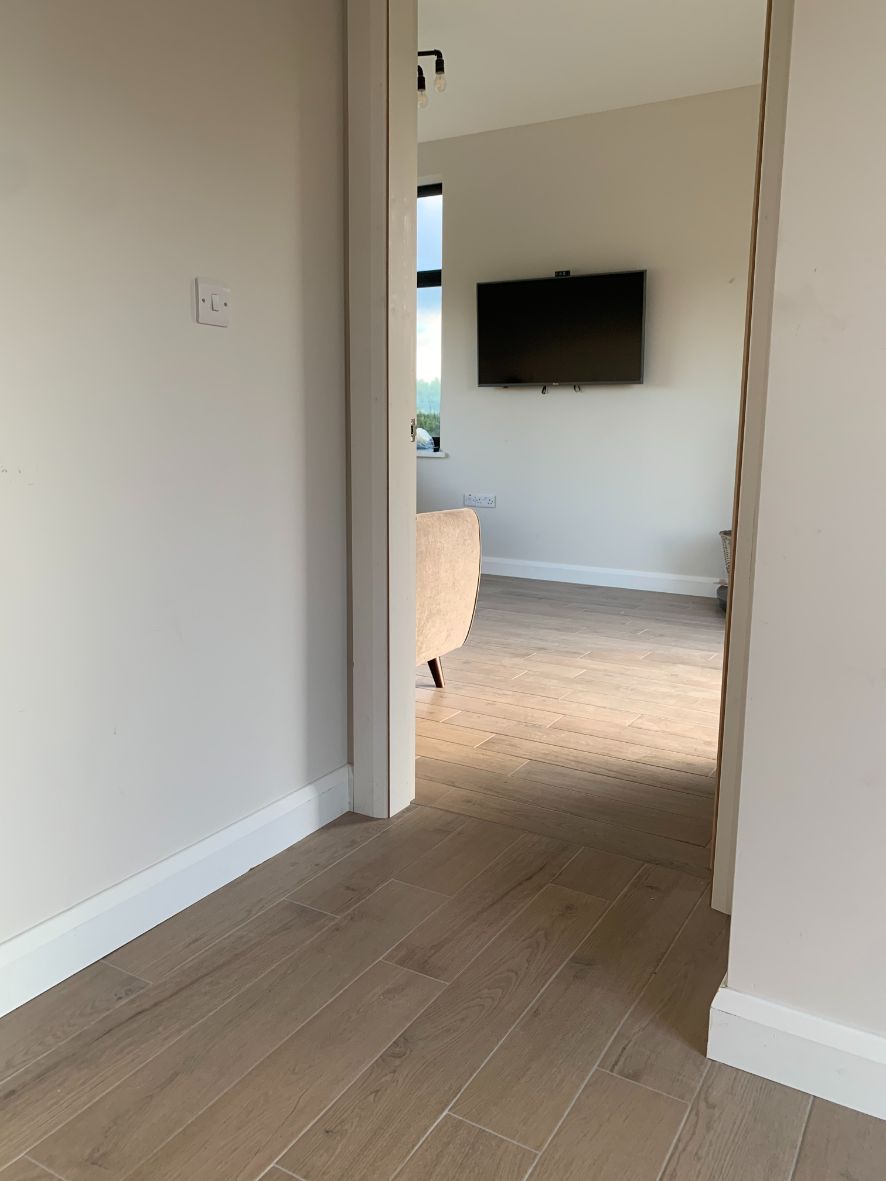
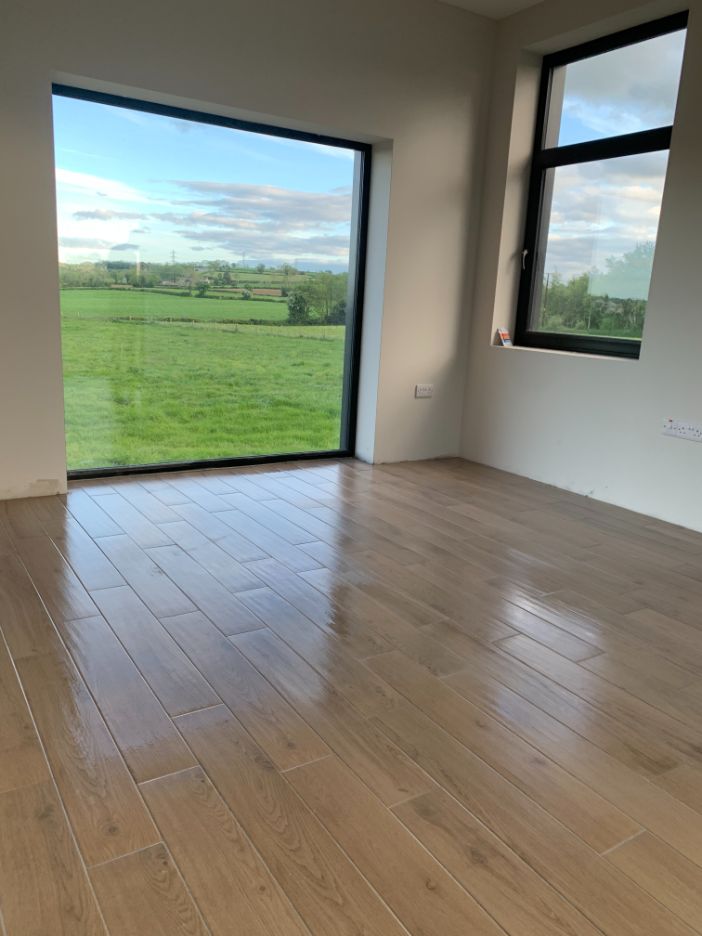
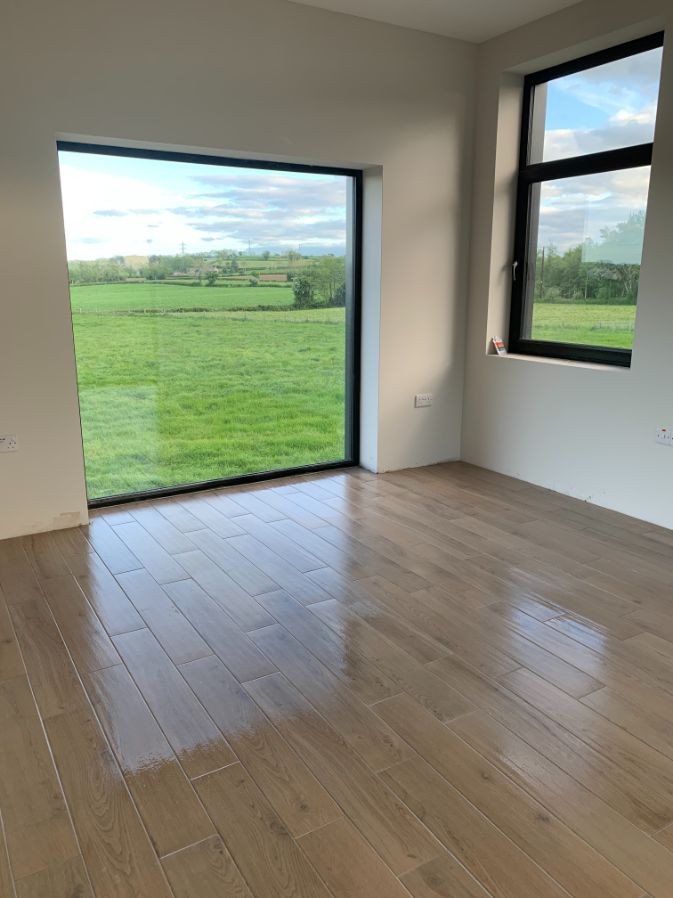
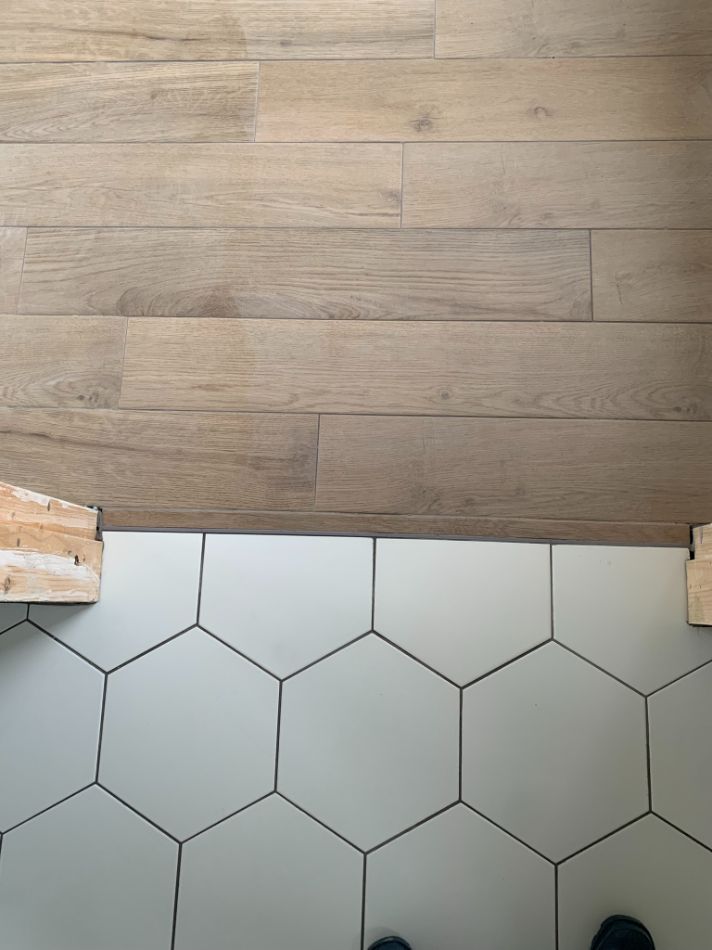
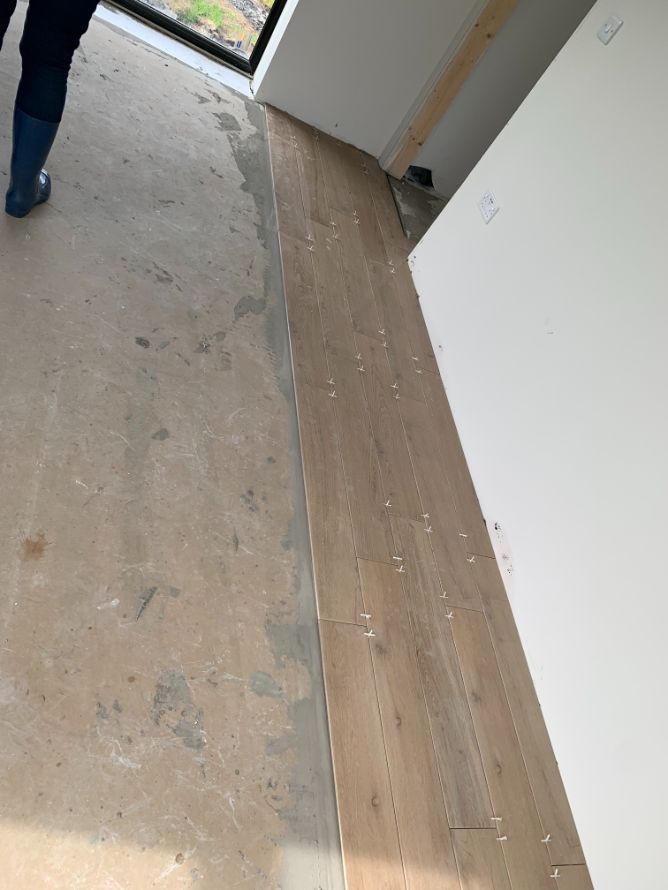
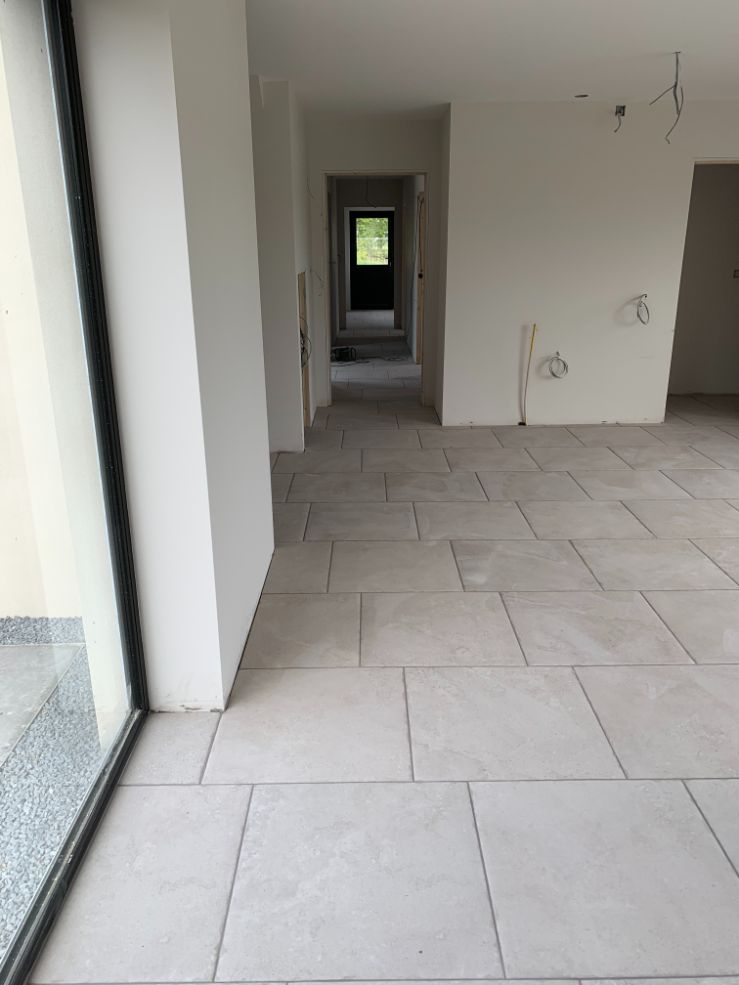
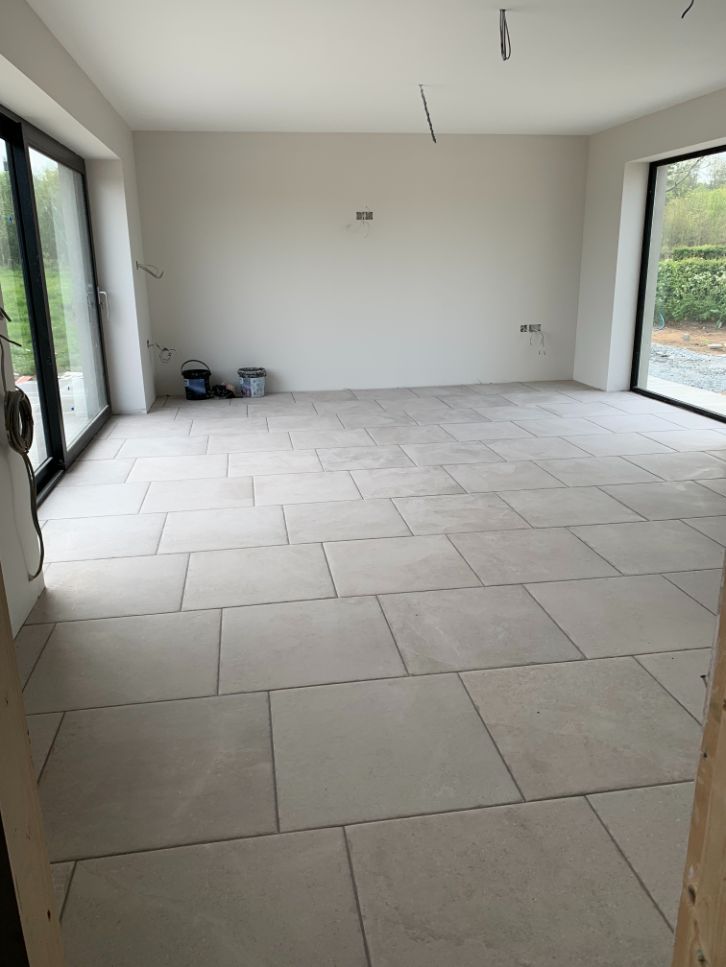

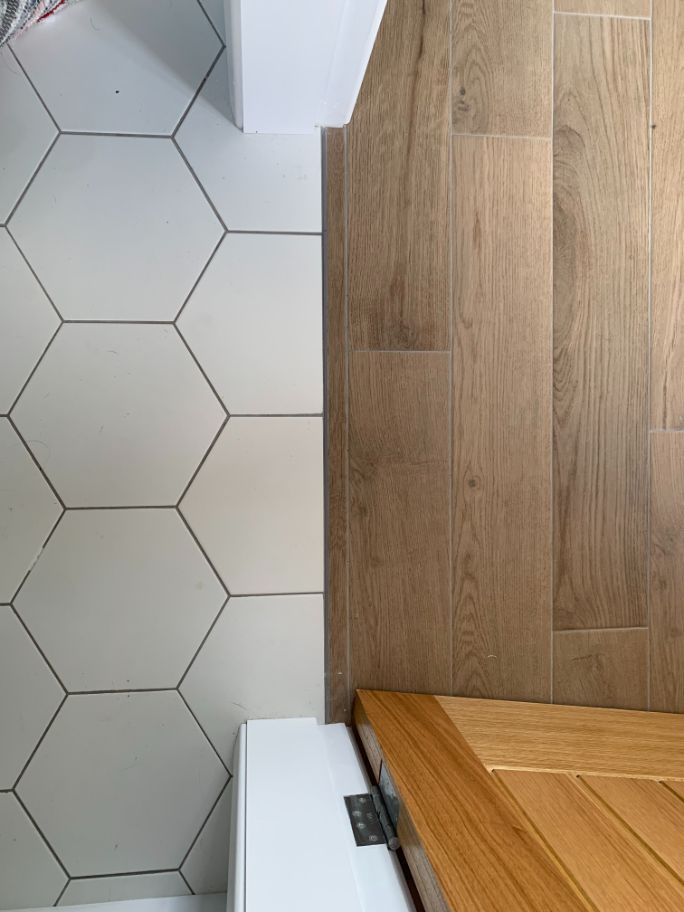
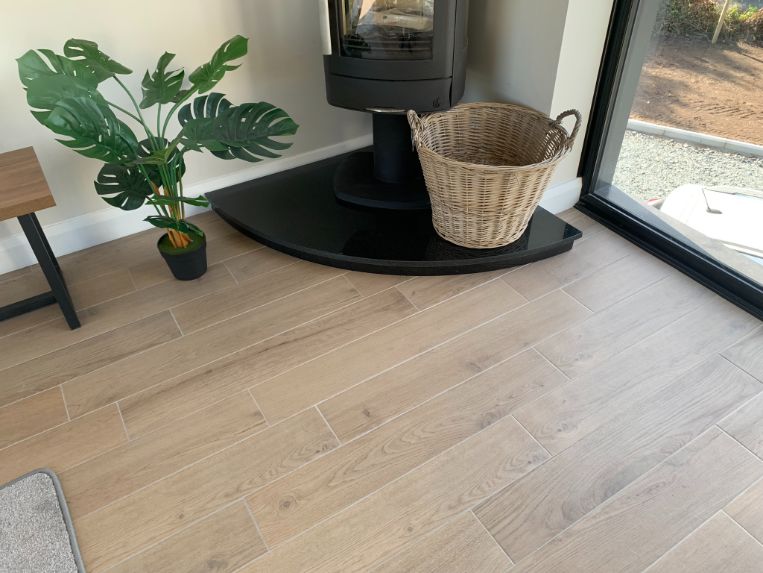
Limit the number of floor finishes. In the bathrooms and all of downstairs we opted for a cement effect tile. By chose the larger 60cm x 60cm tile throughout the downstairs, we didn’t have to worry about breaks for the rooms and change of tile design. This also really helped to minimise wastage. For the upstairs, we wanted the bedrooms to have a warmer feel so opted for a tile made to look like wooden flooring.
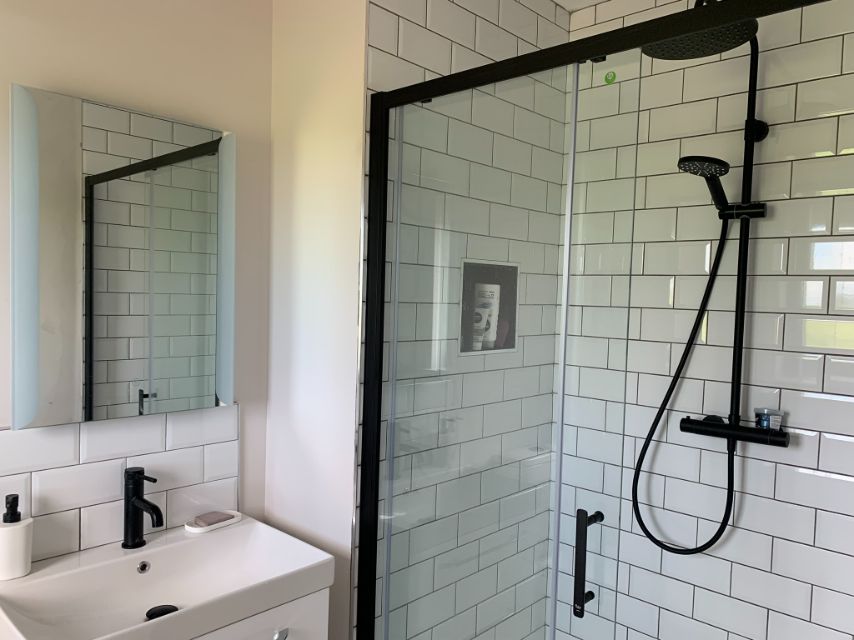
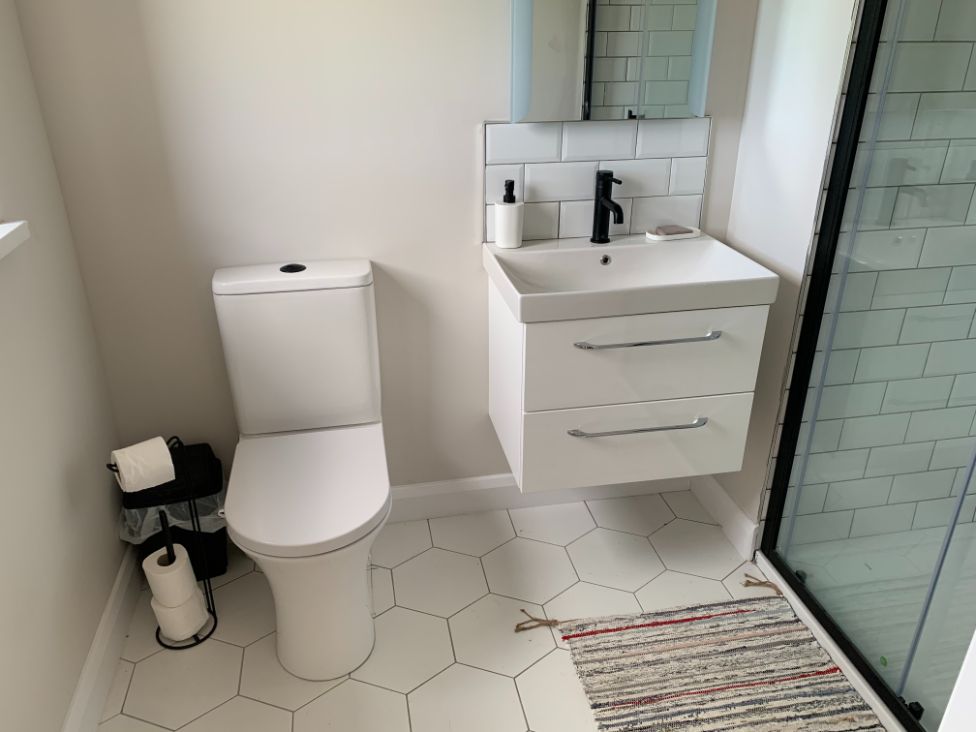
Despite keeping most of the house to the two tiles, we decided that our ensuite would give us a bit of an opportunity to mix things up. We decided to go for a white hexagon and metro tile to accentuate the black fittings.

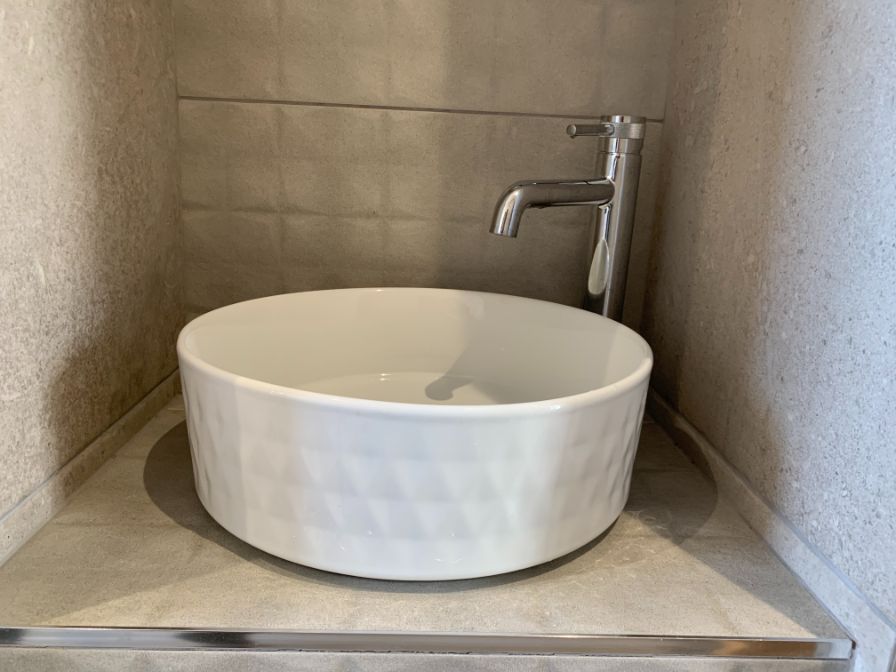
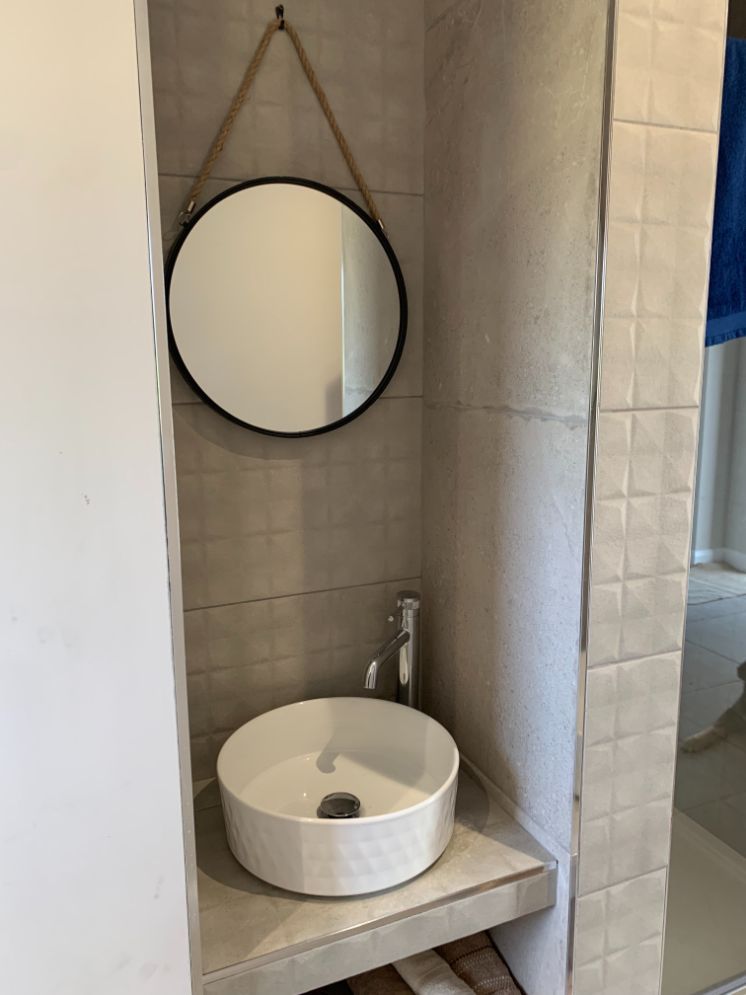
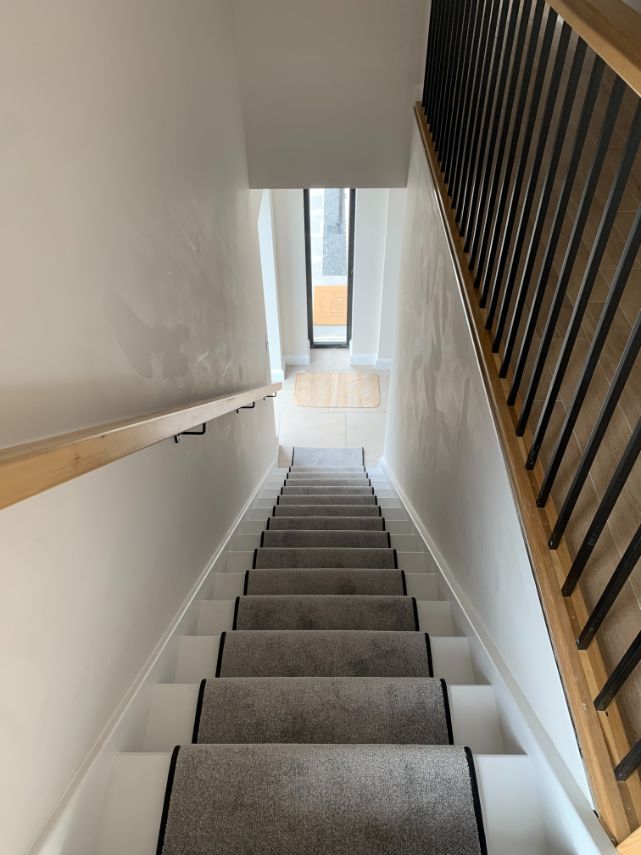
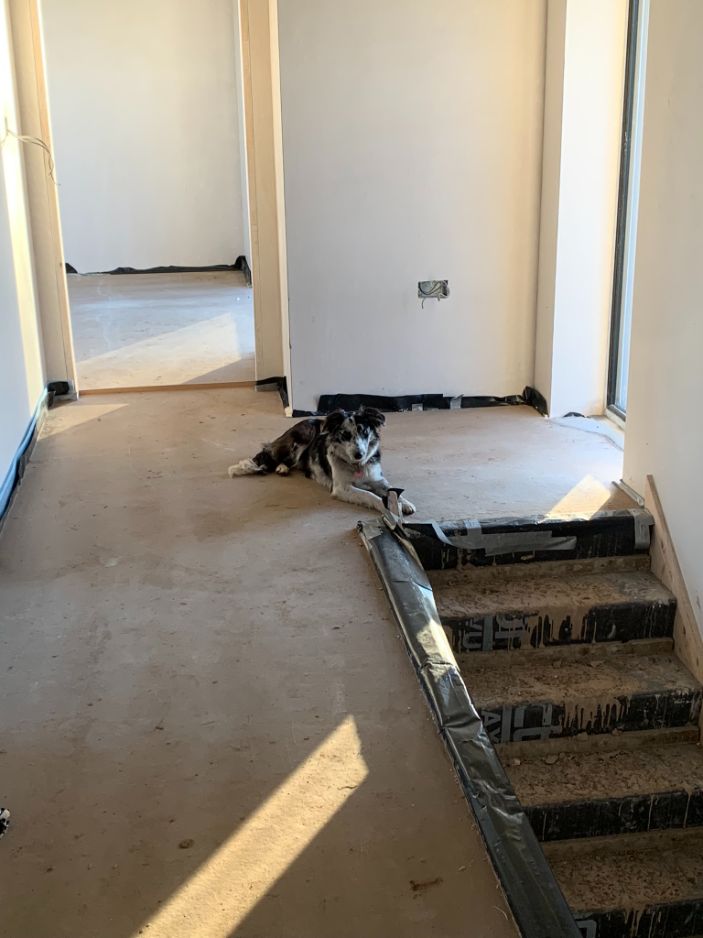
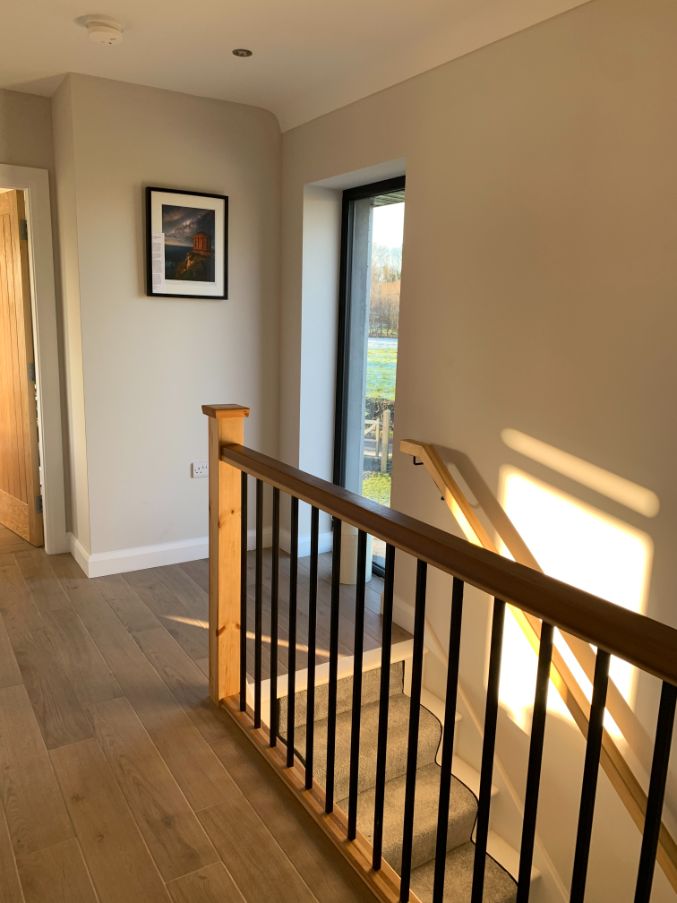
Consider MDF stair treads. Our plans originally included oak stair treads, however on looking at the budget we decided to opt for Medium Density Fibreboard as a cheaper alternative. To dull noise and to protect the stairs, we needed something. As our entire house is tiled, we didn’t want it to be fully carpeted as we thought it might look out of place. So instead we opted for a simple stair runner in grey then requested a black trim, which perfectly complements the window frame and grey floor tiles.


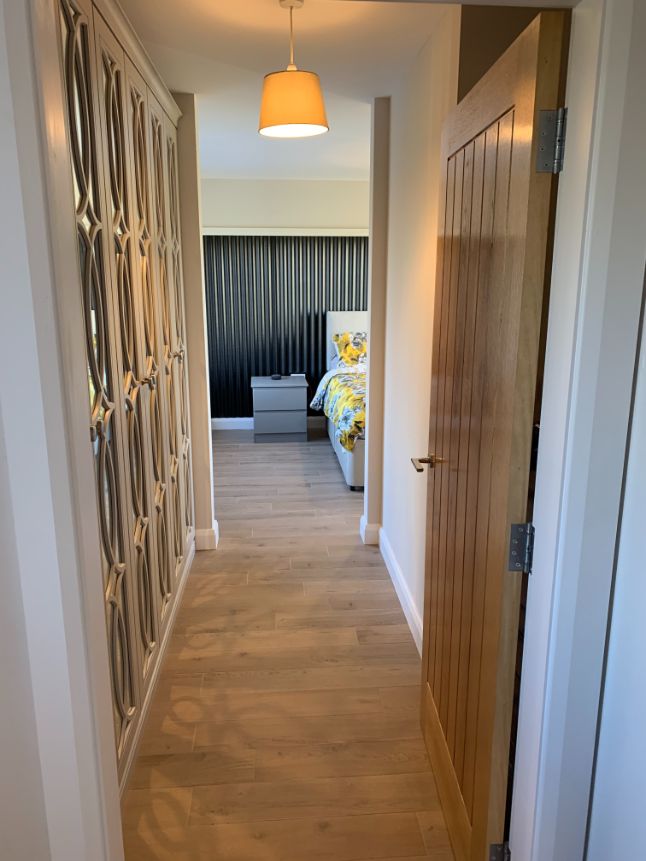
Don’t be afraid to make changes, and consider hiring a main contractor. We have a straight up and down flight of stairs to maximise space. In the original house plans, the top of the stairs was closed in. It’s the one thing we just didn’t quite like the look of as we felt this made the stairs and upstairs hallway look really narrow. After the green light from the structural engineer and Building Control, we found out that we could actually get away with a normal balustrade at the top of the stairs. We chatted back and forth with the builder about ways of satisfying building control but to allow as much light through the space as possible.
The original train of thought was to run a glass balustrade along the hall which would allow the light to fully shine down the hallway, however the thought of even more glass to clean was off putting. After endless nights on online mood boards, we came up with the idea of having some element of steel balustrade to complement the black. But we also wanted the design to mirror the simplicity of the lines in the tin without too much fuss.
Our amazing builder set to work and the next day he brought us a handmade sample. The finished version couldn’t be any more perfect as the simple vertical box line design allows the light to fully penetrate the hallway and turned our narrow enclosed stairway into a bright and open focal point.
All in all, using a contractor may appear more expensive, but can make the build easier as the contractor will deal with all the day to day on site and provides accountability for the build. Main tip then is to still keep an eye on things on a daily basis. So you can deal with snags as you go through the build. These are easier sorted when the individuals are on site.
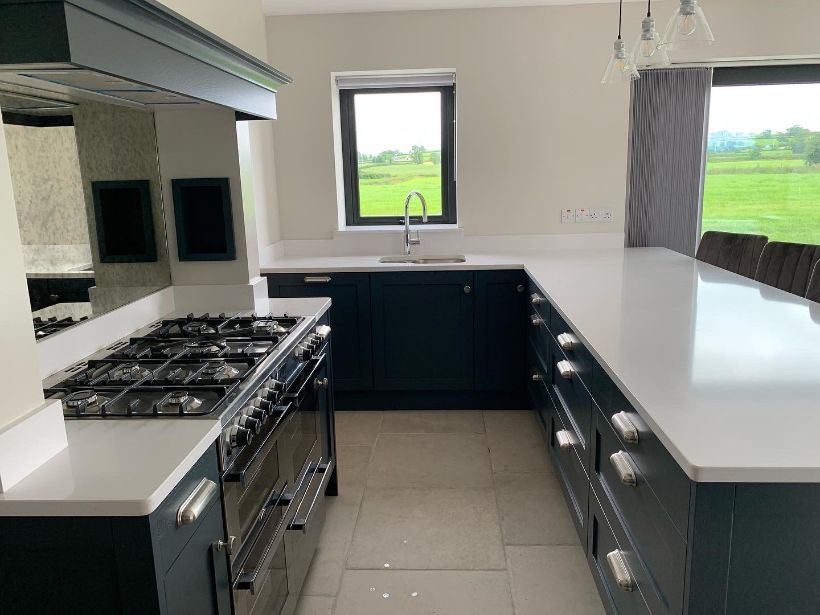

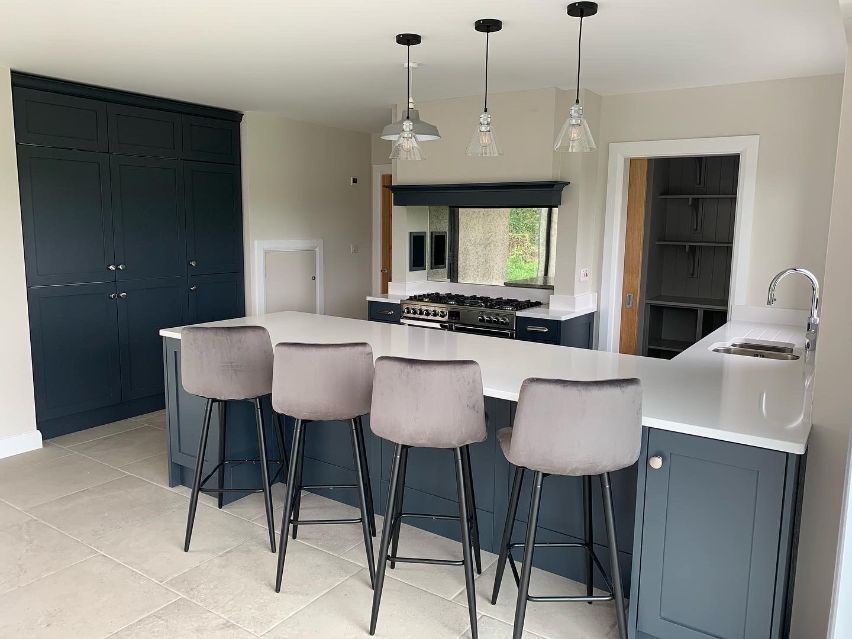
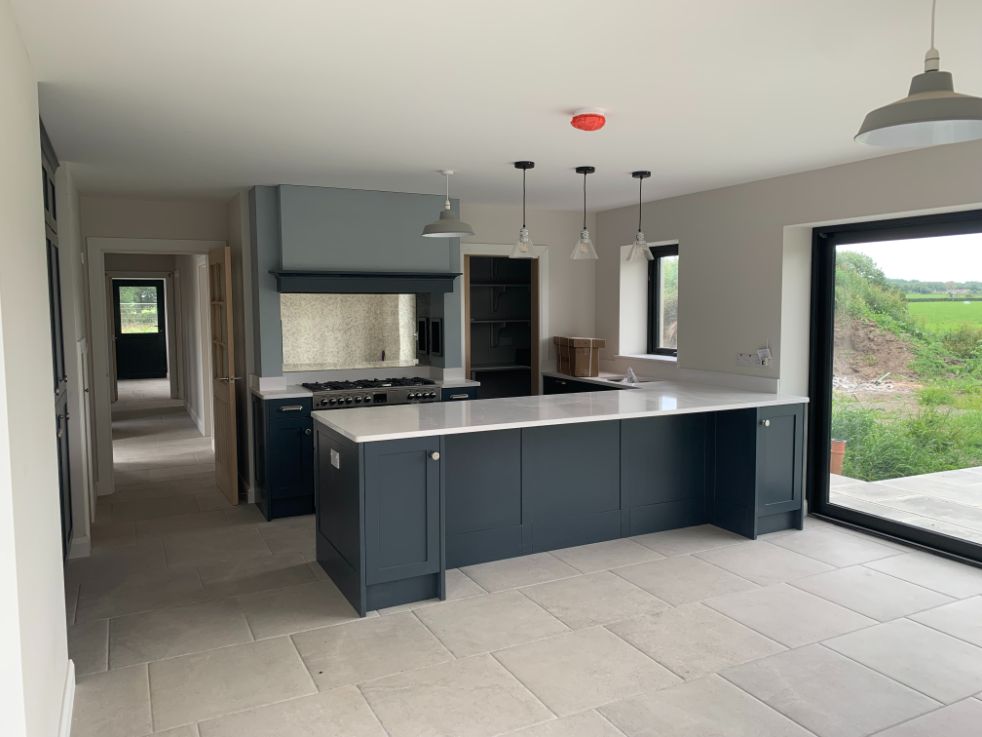
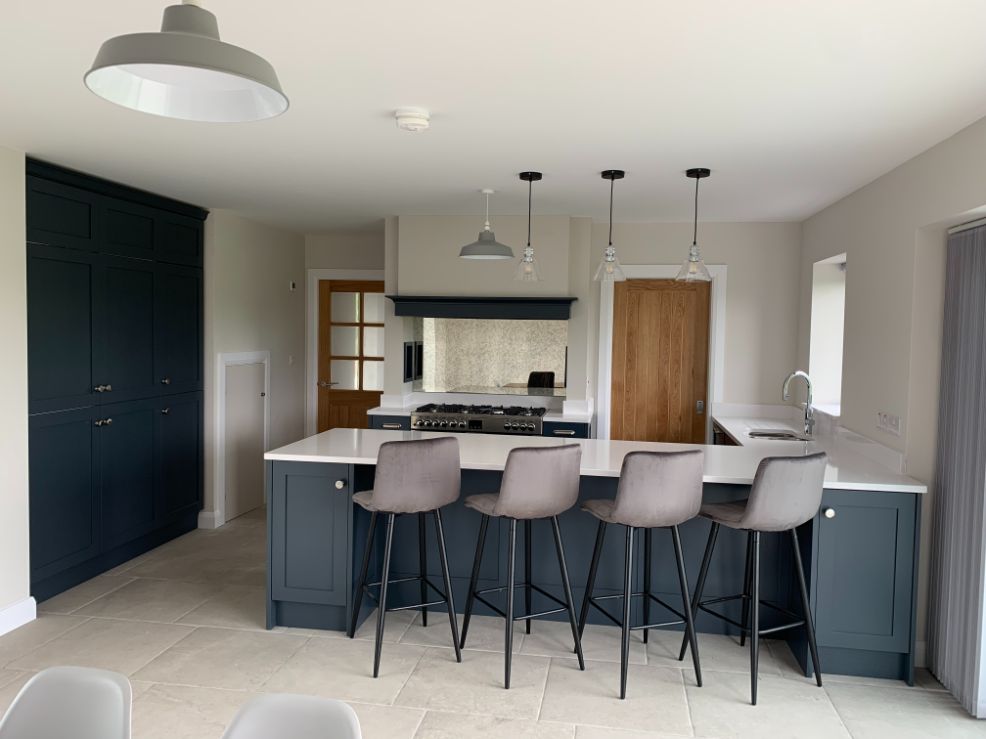
Choose the one company to do the interiors. From the very start, we approached the house design as a means to fulfil our wants and needs for areas like the kitchen as well as storage in the bedrooms and beyond. We always knew our kitchen would have an open plan feel and loved the idea of the space being filled with light from the 2m x 2m window and 4m sliding door. We both really enjoy cooking, so wanted the kitchen to really reflect that, but also provide function over all else.
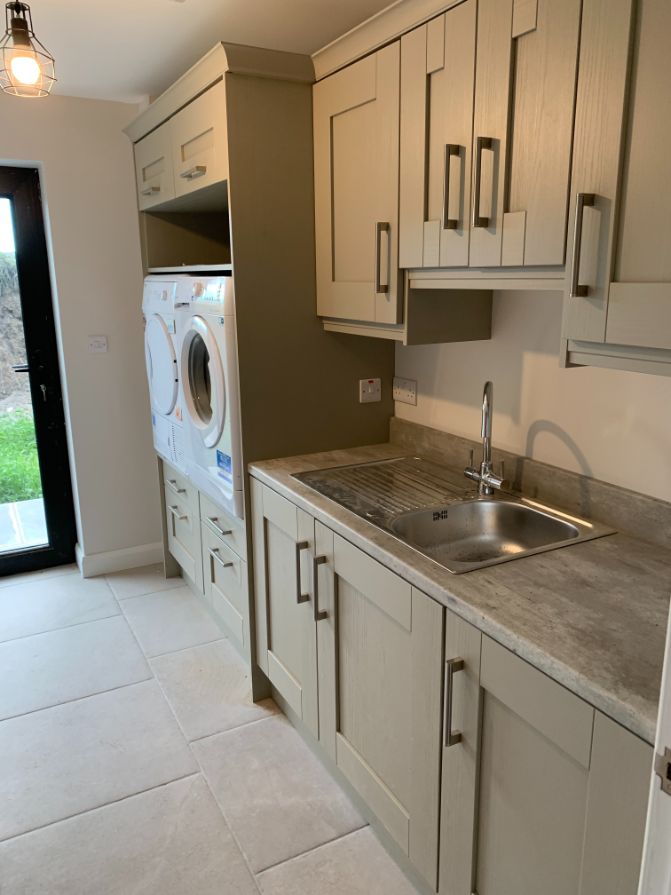
Living in the country with two dogs, a functional utility space with plenty of storage was a must. We didn’t want it to be a pokey room hidden away. To save time and make the process smoother, we approached a company that specialises in interiors. Having the one point of contact made it easier for coordination on site. An upside is these companies have the ability to give discounts on bigger contracts.

We put together our thoughts and ideas and arranged to meet Turlough, who was our contact. Initially we wanted to see if they could provide a solution for the kitchen and pantry, but after one appointment we knew that we had to have them design as much in the house as possible. Kitchen, utility, wardrobes
Originally, we had planned on sourcing each of these elements separately, but finding Turlough was a blessing during the build as this meant we had the one company dealing with the majority of the major interior work.
Space saving tips for kitchen and utility. We originally had planned to have an island in the kitchen however, due to space restrictions, Turlough suggested opting for a built in peninsula design. This allowed us to have more worktop and seating space, as well as creating a separate kitchen area which is perfect for hosting.
From the initial plans, we knew we wanted a built in pantry where we could store all our appliances and dried foods, but wanted to make sure we could close a door and hide everything away when needed. This freed up more cupboard space which is really helpful as we opted against any high cupboards to make sure the light wouldn’t be restricted. The built in fridge and freezer into the kitchen alcove also helped make the kitchen space feel larger as they were built flush with the wall. Having the benefit of light in the kitchen, we knew we had a bit more flexibility over colours meaning we could get the dark tint of our absolute dreams without making the space feel restricted. Sterling silver cooker and antique glass splashback also helped in opening up the space and again making the most of the light throughout.
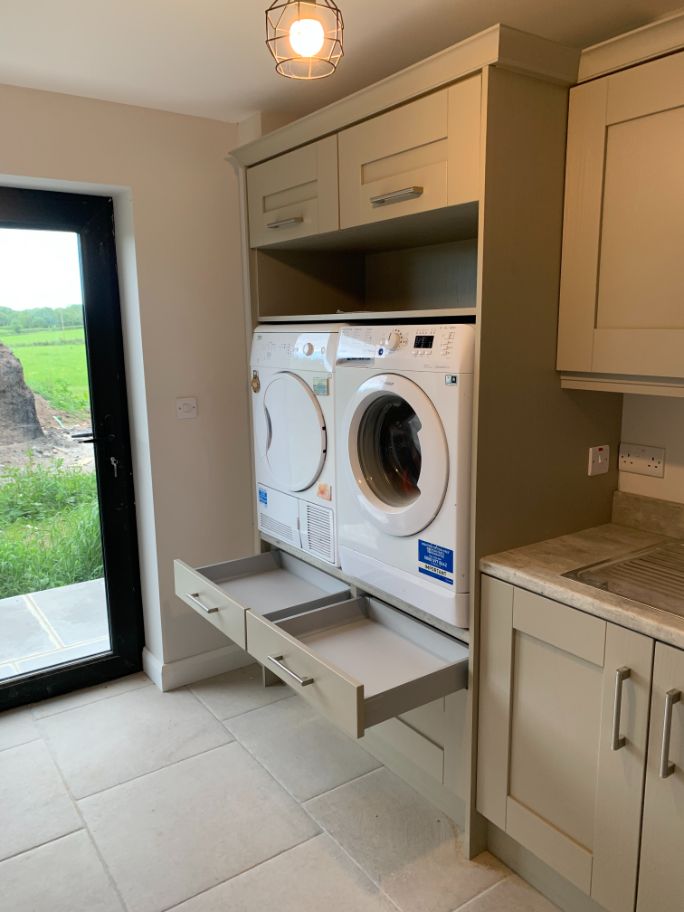
Turlough then turned his eye to our utility space. The brief was for him to design a functional space and so he designed a laundry area with raised washing machine and tumble platform along with basket storage underneath. Perfect for not having to bend and stretch through the never ending washing pile. We ended up with function and style, a far cry from being the hidden room. Spend money on things you won’t change.
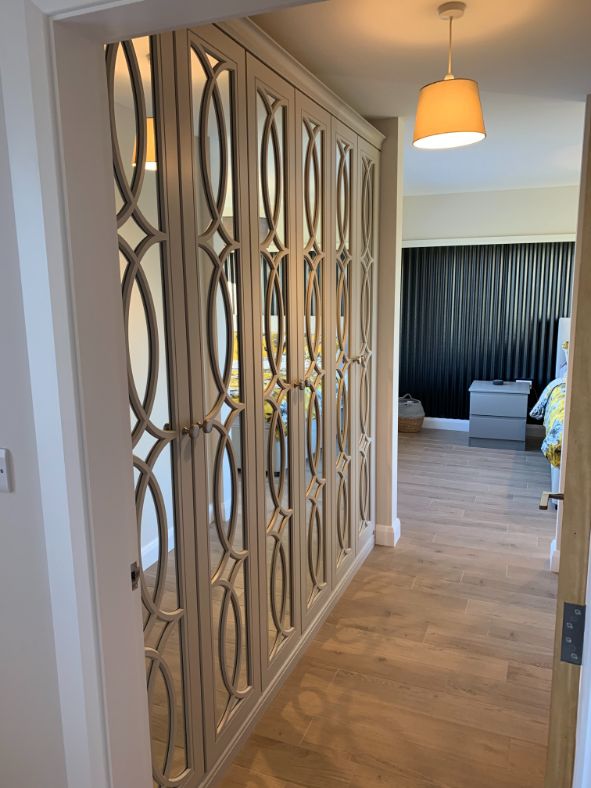
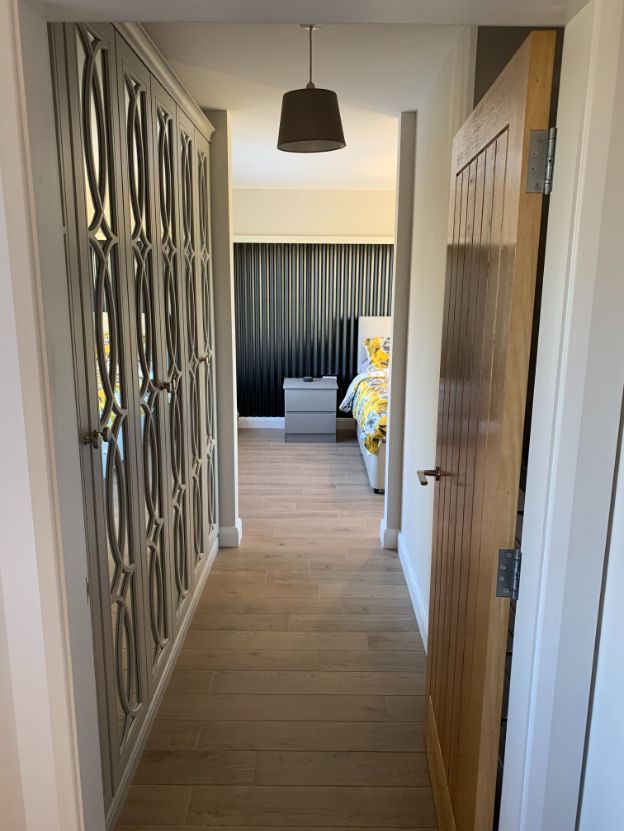
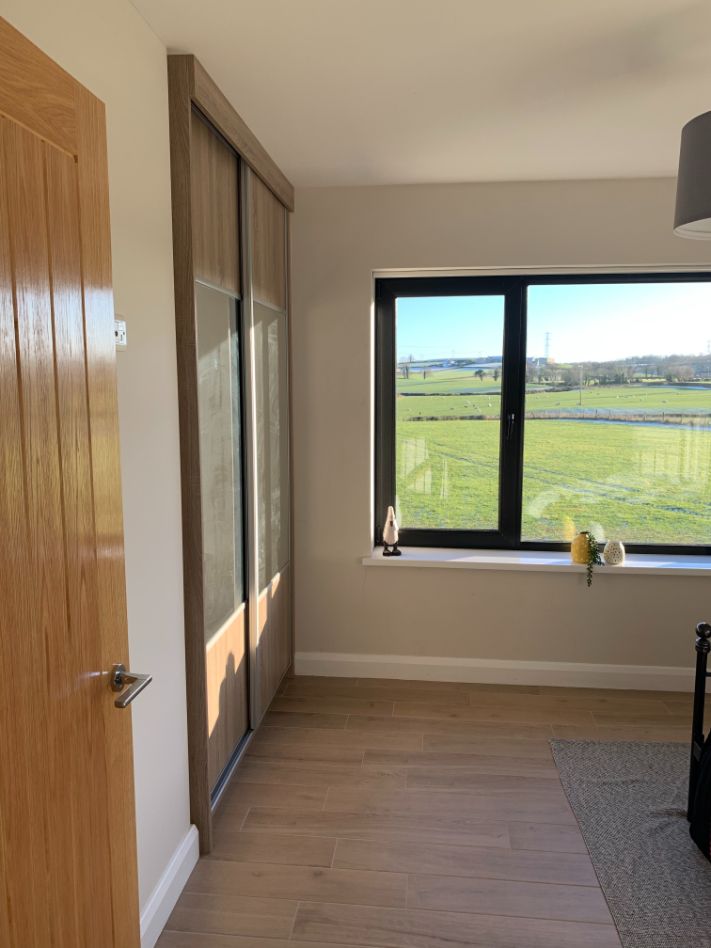
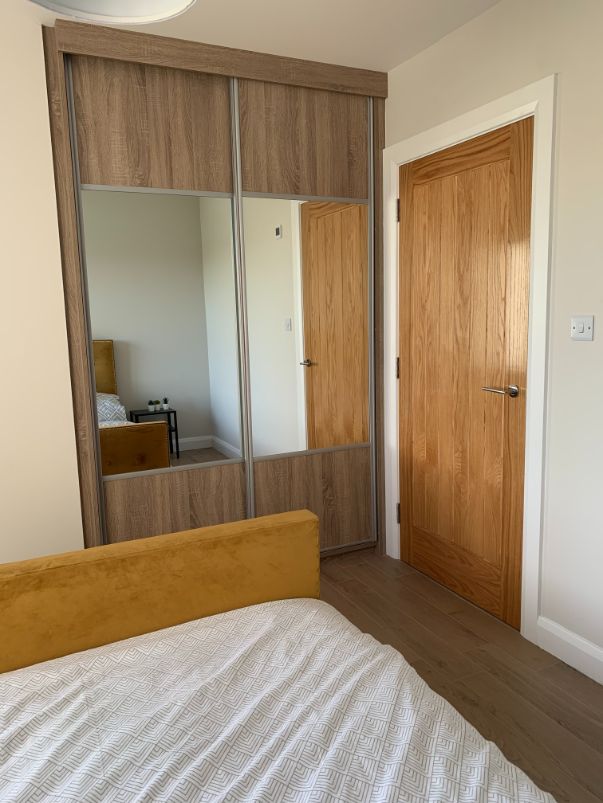
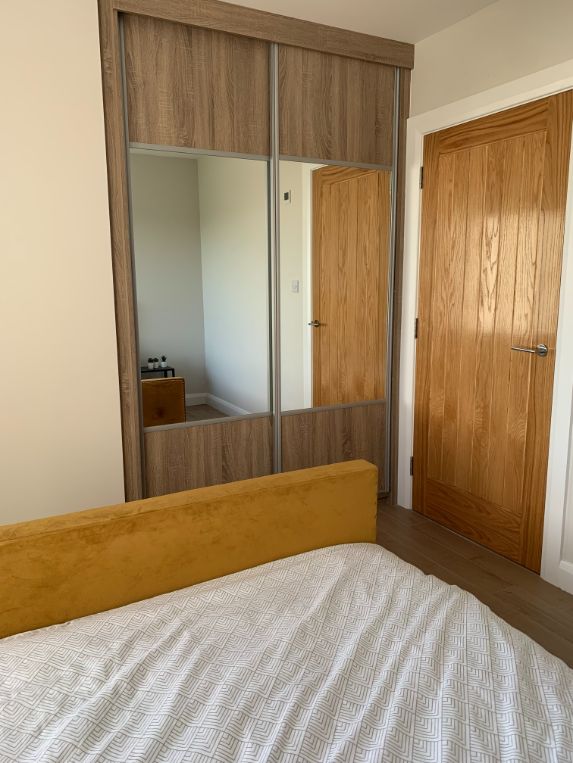
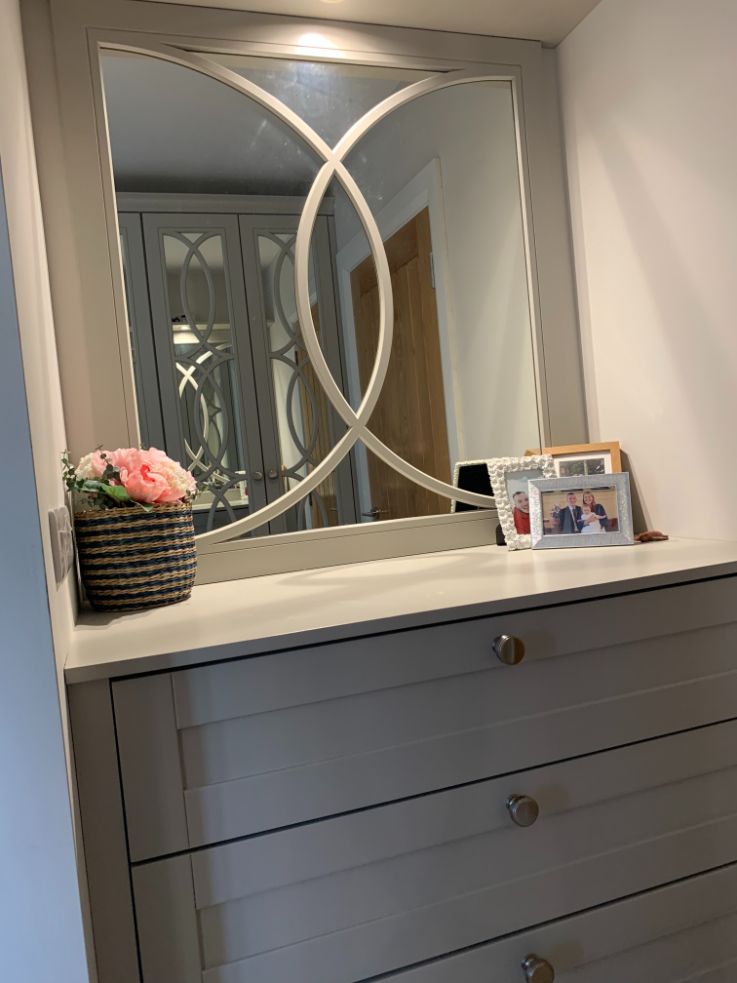
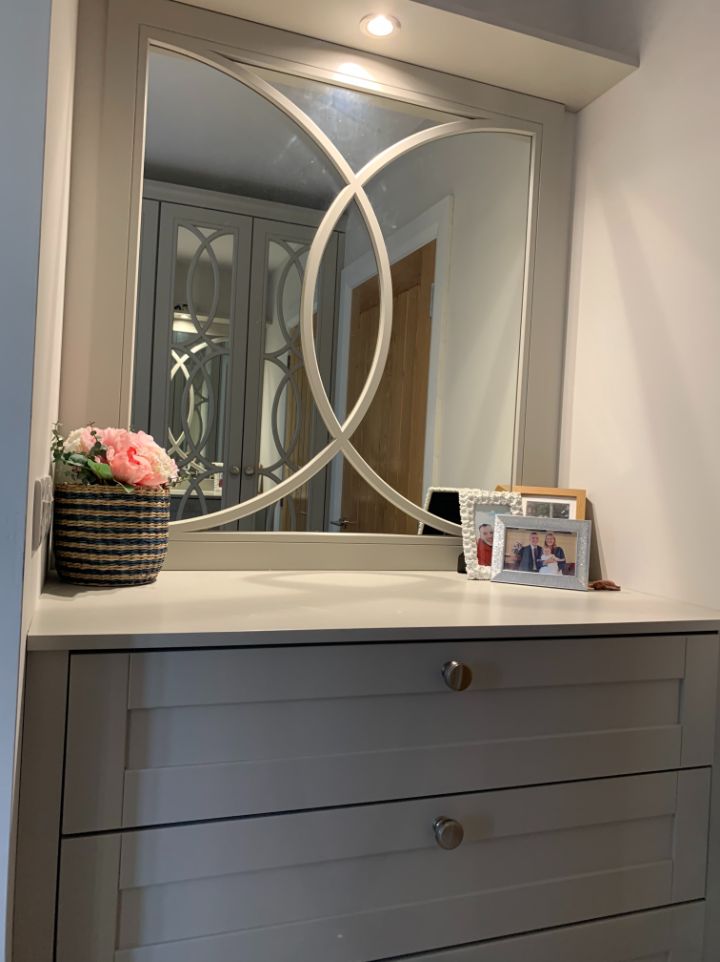
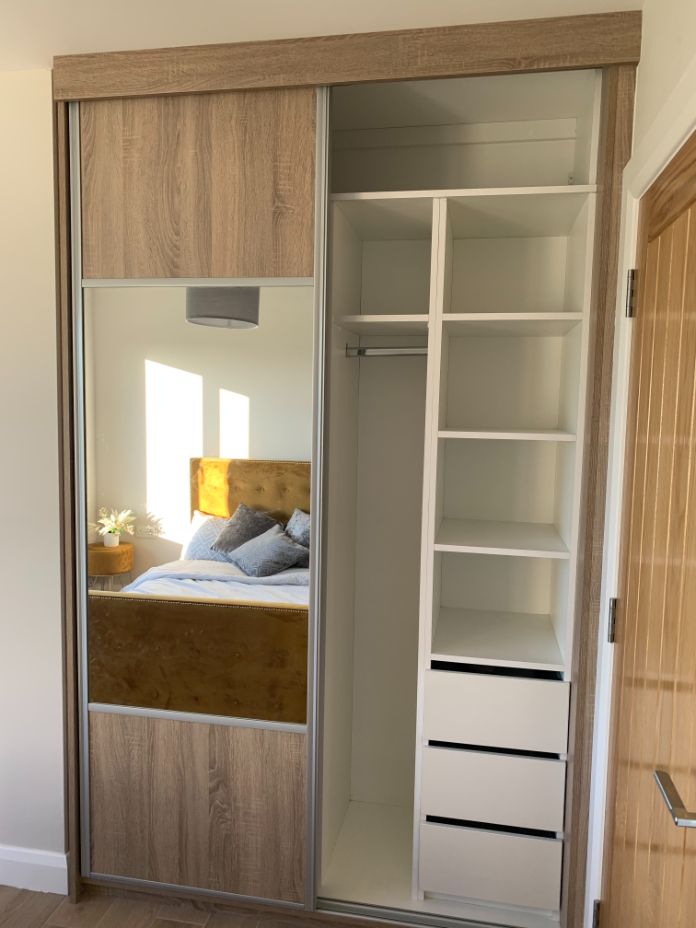
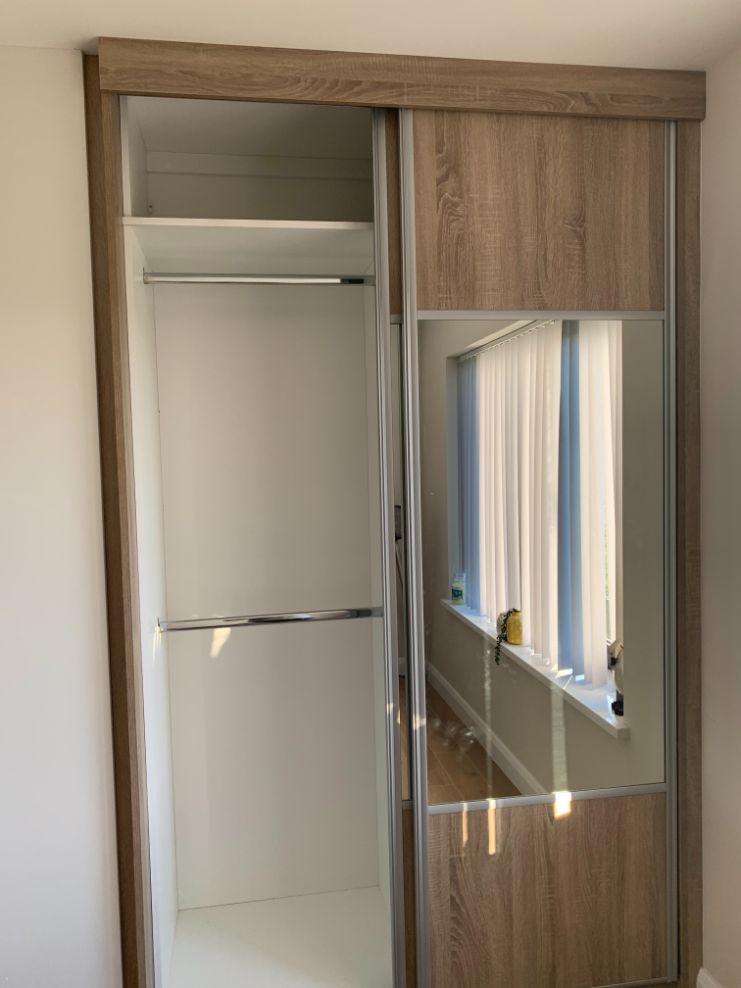
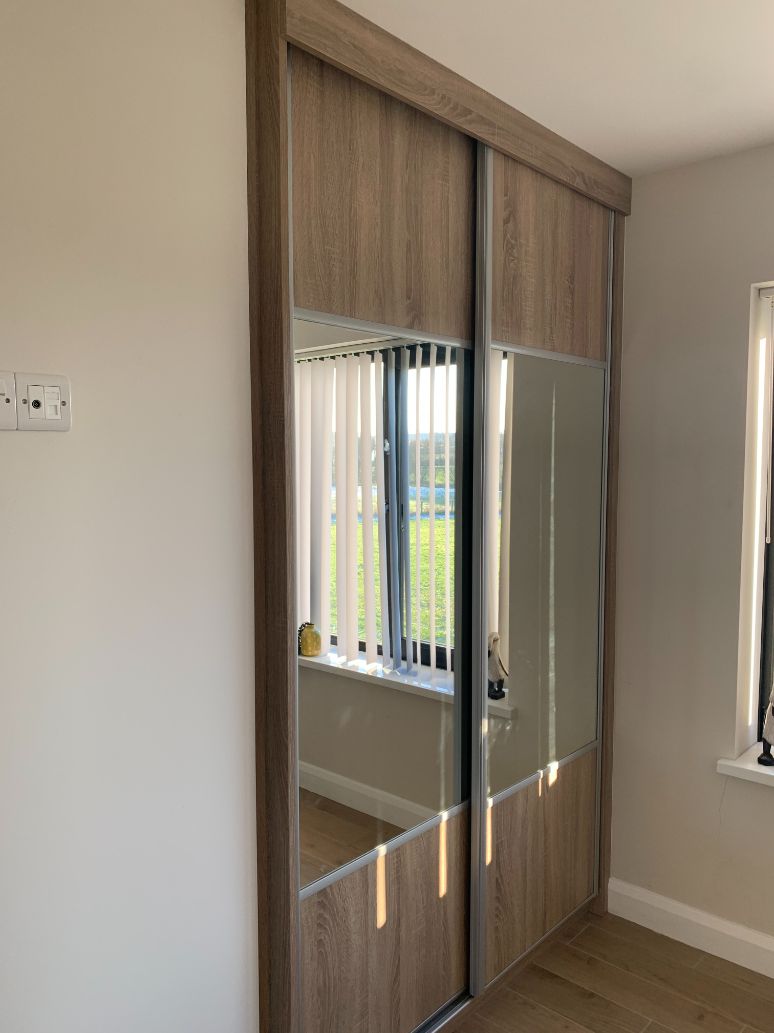
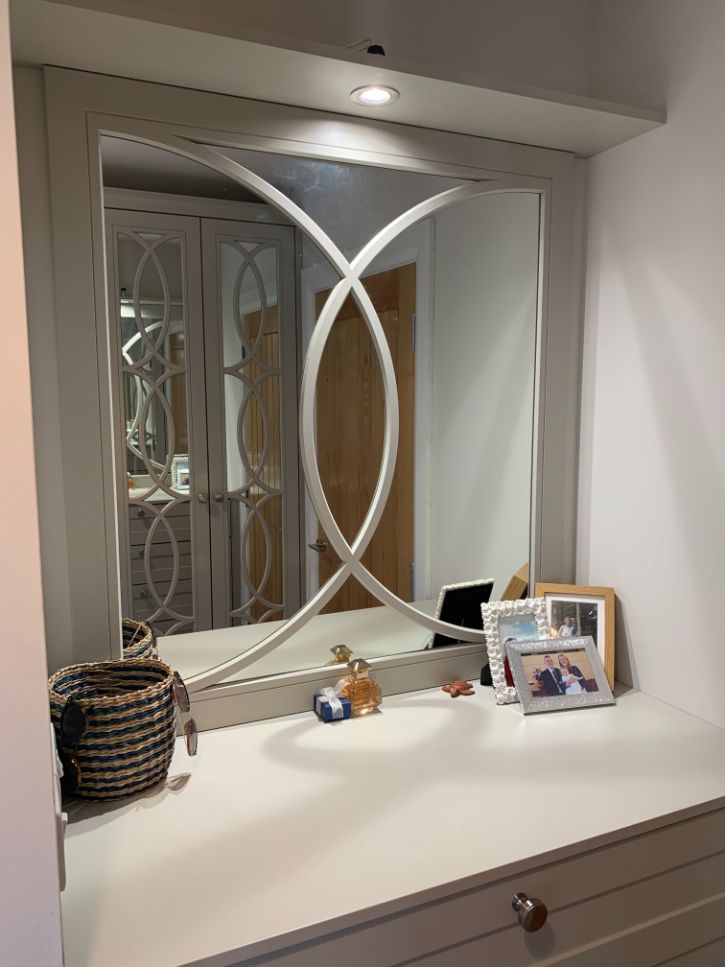
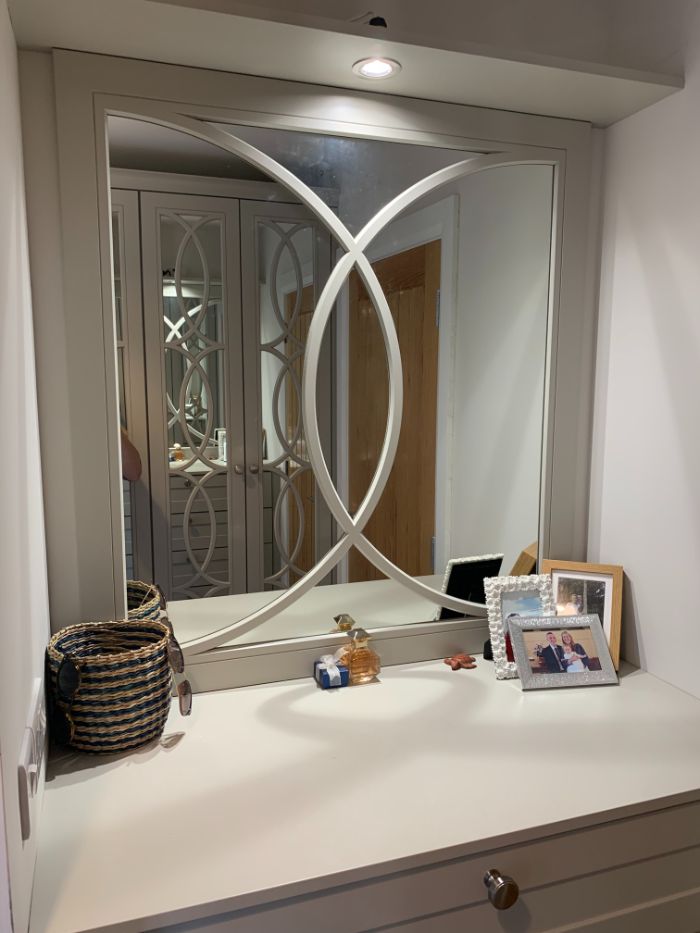
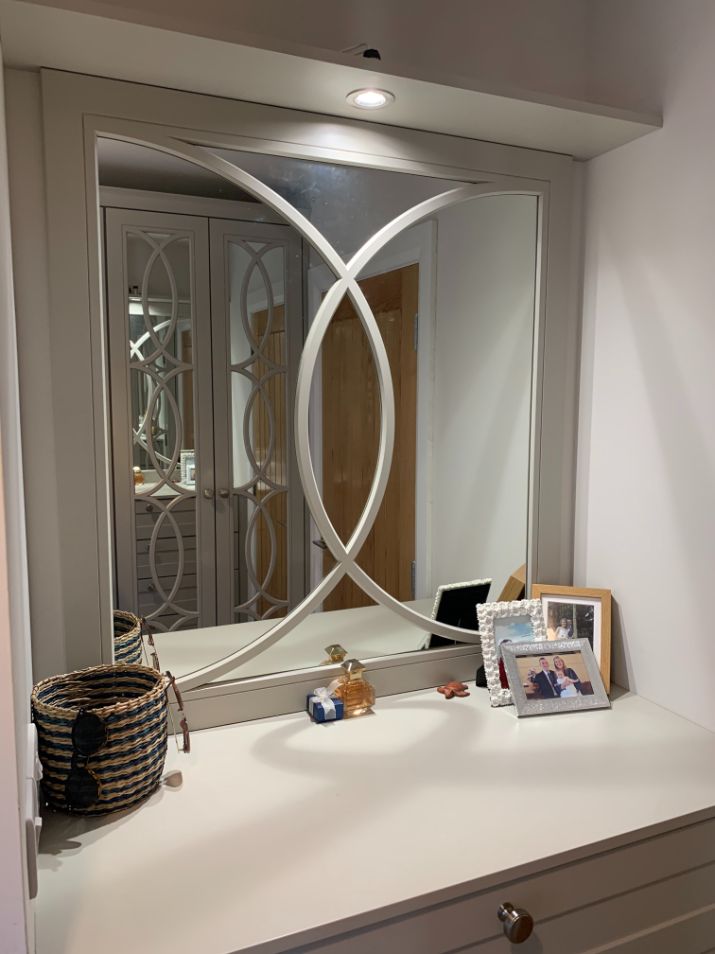
After all, you are more likely to change curtains than you are to change your windows. But the same holds true of permanent storage solutions. With our two upstairs bedrooms, we agreed to pay a bit extra to add a wall that split the rooms to create a mirror image. This created two equal alcoves which perfectly allowed mirror fronted sliderobes with a mixture of rails and storage. Making use of every millimetre of space, we ended up with lots of stylish storage spaces along with a matching built in vanity unit and mirror.

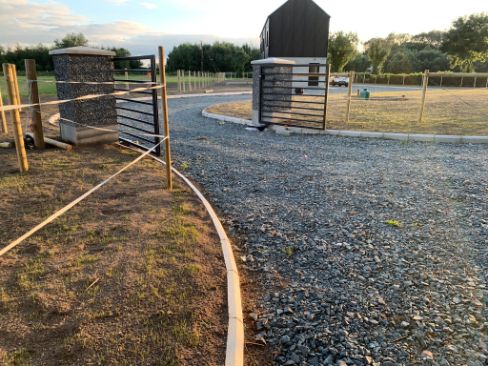
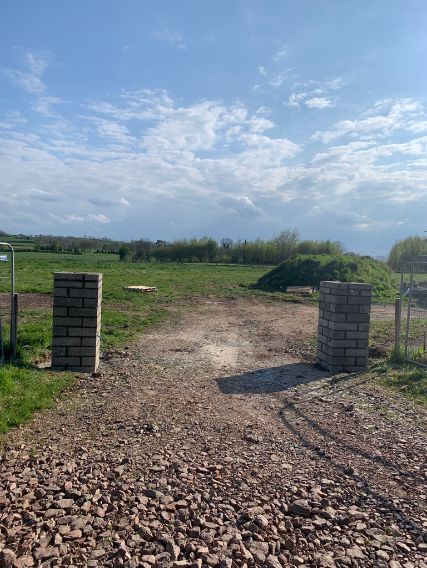
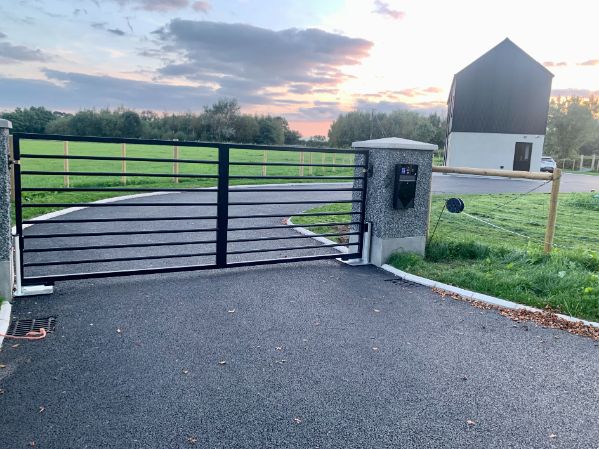
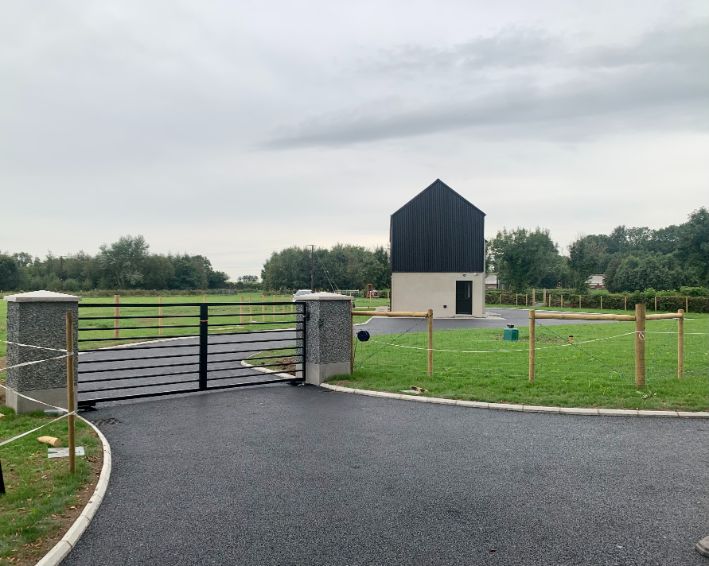
Laneways and gates. We didn’t want a long lane to our house, as we knew bringing the bins out every week would be a battle we wouldn’t win. But living on a relatively busy road with two dogs has its own challenges. As we wanted our entrance to fit in with the feel of the house, we wanted to find gates that could complement the overall design. After looking online for endless hours and not coming up with quite what we wanted, we approached a neighbour who is conveniently a blacksmith.
We had a vision in mind for simple plain black gates. Or as we described, a cattlegrid on its side. So without too much of our input, we ended up getting the most stunning entrance feature that complements our house perfectly. One of our luxury wants for the house was to have the gates automated, which really helps with security. Thankfully we had contacts in our local intercom manufacturer. The company took us through the full range of options, and based on our needs, we went with an intercom in our favourite colour – black!
The intercom has been amazing as it is all mobile app based, so meant no drilling into walls to install a receiver in the house. So, if a visitor arrives, we get a video call through to our mobiles, giving us stalling time to do some emergency cleaning. We splashed out on a system that opens the gates as we go down the drive. There’s a small plate with a sensor, screwed into the tarmac.
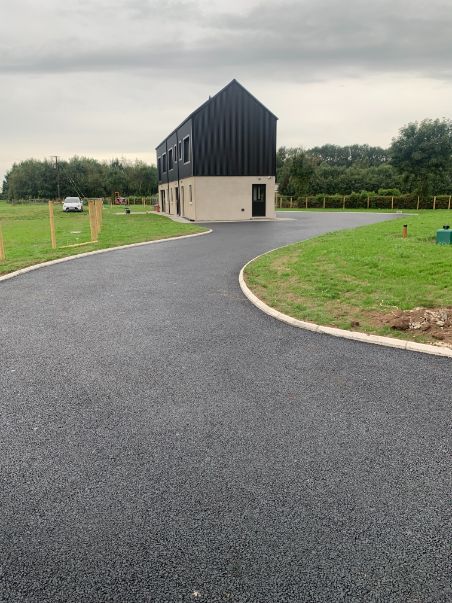
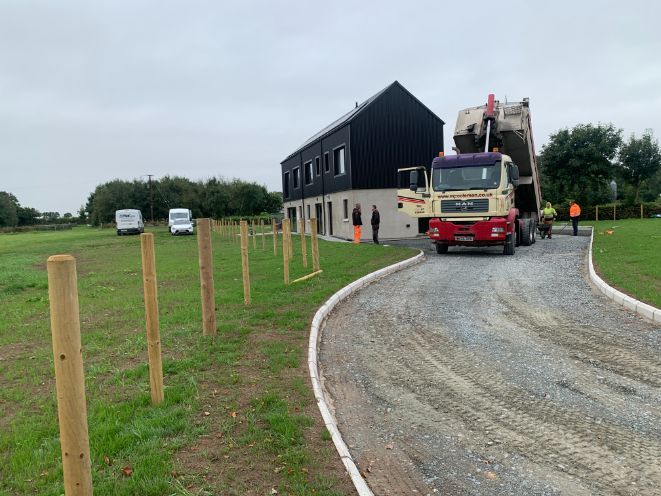
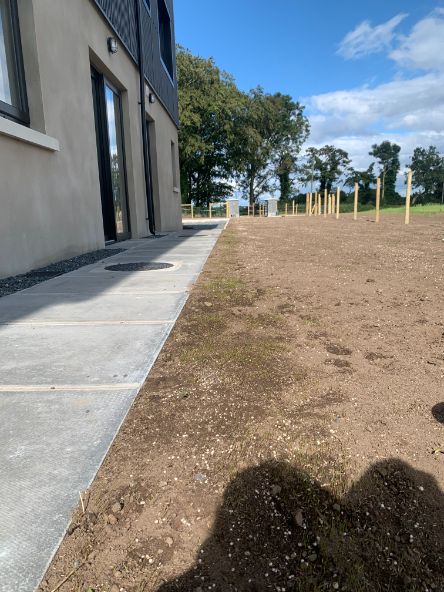
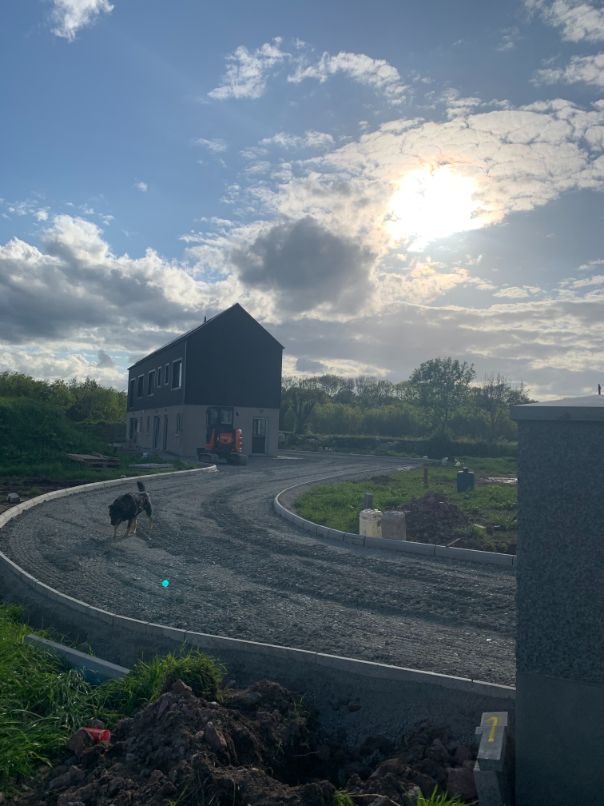
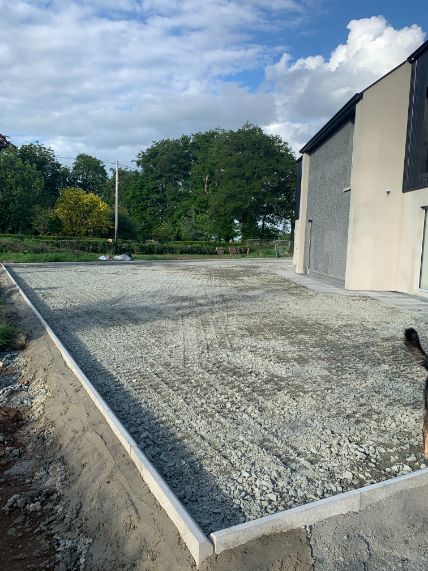
Budget for a turnkey finish. It is easier to get people on site when no one is living in the house, and there is less cost if you do things like the groundwork when the digger is there. In NI, the ability to claim back VAT is a massive advantage, so make the most of it by doing the big things during the build. In our case that meant doing the tarmac and kerbing. A family friend had recently built and had advised us to get our kerbing down as soon as we were closing in with finishing the build as it would save time and money. We originally had planned to do the tarmac sometime in the future, but the VAT saving was what convinced us to do it then. Before completion and before we filed out our VAT claim with HMRC.

The tarmac was the last thing to be done and this gave us time to make sure we had any cabling or piping under the ground. We ran some ducting across either side of the driveway in case we ever
need to run any further cabling. We used a local tarmac company Hannah’s father had used a few years
before so we knew we would be in good hands. We opted to go for 50mm of SMA10 which would allow us to have the best finish to the surface. After a day of prep (and about 17 tonnes of blinding) we
had the tarmac poured and finished in one full day. Although it was a somewhat unexpected thing to do, I think the tarmac really finishes off the build.
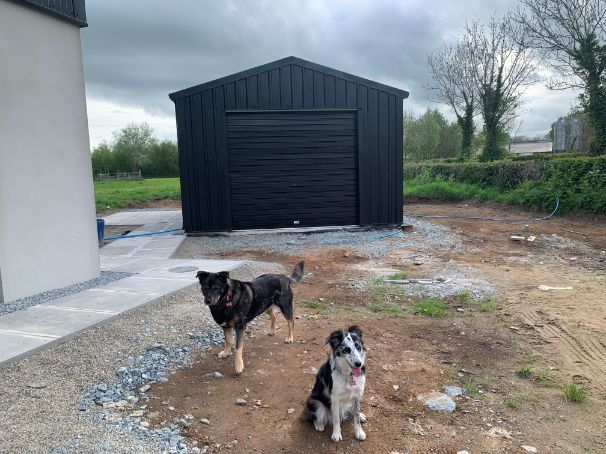
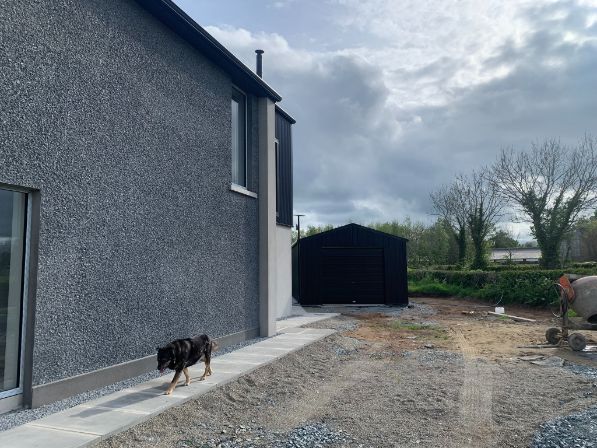
Last but not least, build a garage. Within our original plans we included a single storey garage but as soon as we broke ground, we made the decision that it wouldn’t be within our budget to build
it. Sure enough, we came to regret the decision as we found storage to be a real stumbling block. We started looking at cost effective alternatives to a block built garage that wouldn’t detract from our unique house design. We spoke to a local steel shed manufacturer and found that we could
get what we wanted with a price we could live with. After a design consultation we came away with a black tin look with black fixtures. The garage complements the house perfectly, mimicking the its design and style just on a much smaller scale.