How David and Christine Adams’ contemporary new build house came in £20k under budget.
In this article David and Christine Adams share their experience building their new home, including:
- Details of planning application under PPS21 – CTY10
- Change in house location based on planning requirements
- Working with their architectural designer and the barrel roof design
- Details of the build up of the three roof types
- Corner window details, sealing and insulating
- Practical design hacks including where to put the utility room
- Cost saving finishes, from corrugated metal cladding to finding alternatives for zinc
- Cost savings from direct labour, buying equipment and DIY
- Details of upside down design and how it works with the sloping site
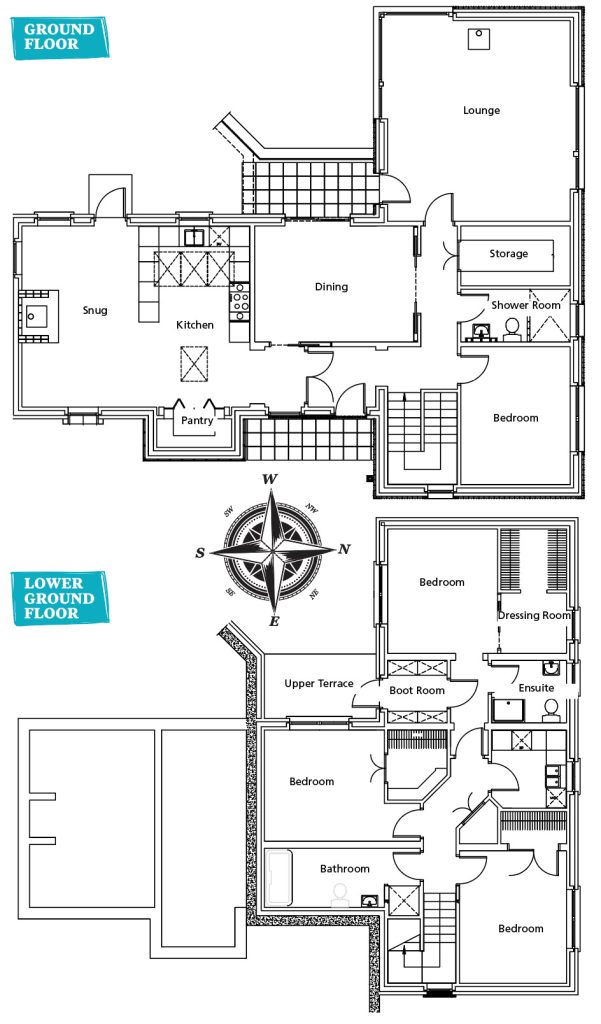
- Full floor plans and specification
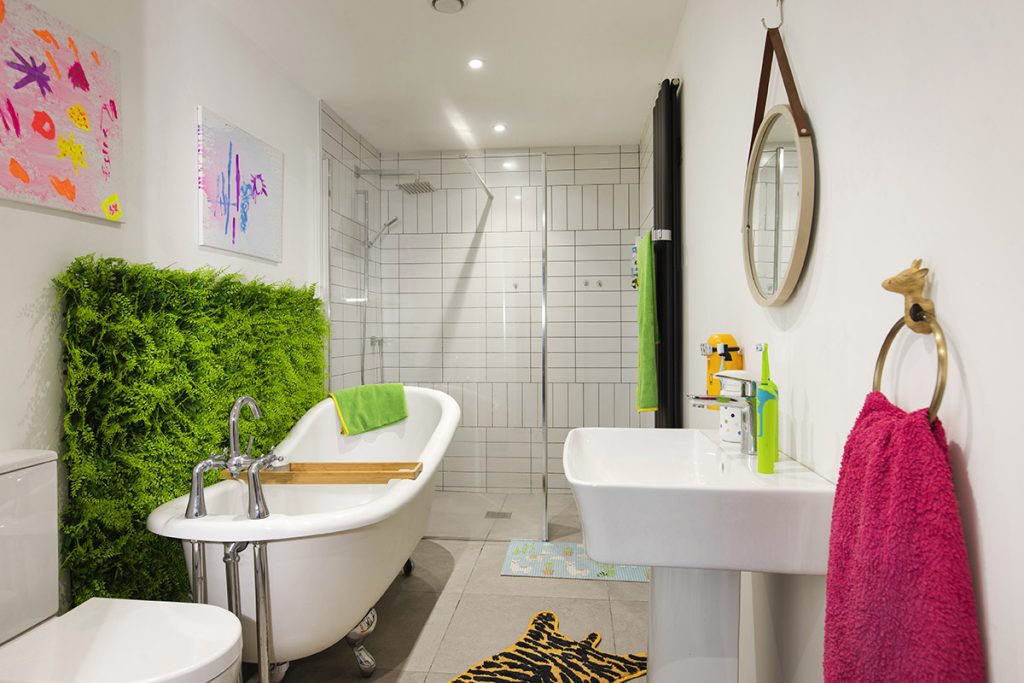
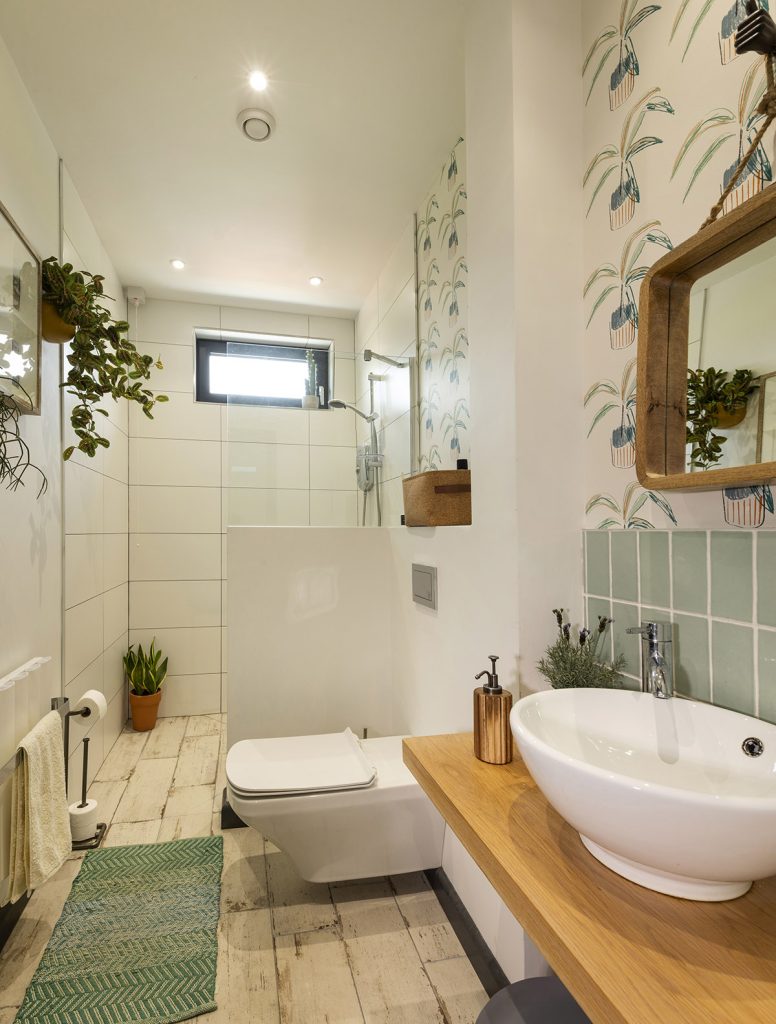
- Choice of low maintenance finishes including tiles
- Choice of oil fired boiler and underfloor heating
I grew up on the farm, and my plan was always to move back home,” says David. “A few years after Christine and I got married, the dream to self-build started to become more real. We had a few sites to pick from on the farm, and narrowed our choice down to two.”
House size: 2,500 sqft
Plot size: 0.65 acres
Bedrooms: 4
Project cost including furnishings, white goods: under £100/sqft
Construction: blockwork (cavity walls)
Heating and hot water: oil boiler
Ventilation: centralised mechanical with heat recovery
EPC (SAP): B (84)

“Both plots created a visual link with other buildings on the farm, and had views facing southeast. We applied under PPS21, specifically CTY10, which meant we were building a home on the farm that had to be visually clustered with the farm buildings.”
“But as it turned out, the planners had other ideas and suggested two other sites,” says Christine. “They wanted us to come forward, closer to the road. We had wanted the house to be hidden behind a hill but the planners had issues with the laneway scarring the landscape, and the roof breaking the skyline.”
“The benefit of building closer to the road, (which is not a main road but quite heavily trafficked), was that it would be a lot cheaper for the electricity and water connections, and for the laneway. Now our main view is north, overlooking the Sperrin Mountains.”
“We’re 1.5 miles from my parents but only one field away from the farm buildings,” says David. “I work part time on the farm so it’s very convenient to be close.”
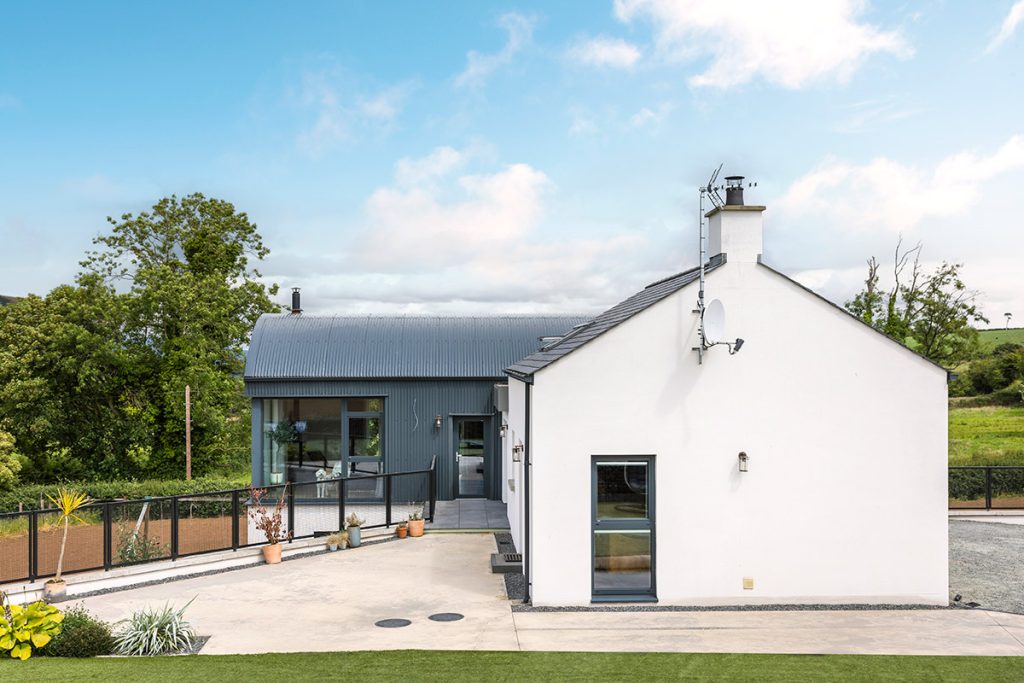
In fact, being so close to the farm inspired the design from the get go. “Our first idea was to go with a barn design with a tin cladding and round roof,” says David. “For inspiration we had social media accounts, online mood boards. Christine guided the vision for the interiors.”
“We knew Trevor, our architectural designer, and his style of architecture fitted in with what we wanted. He was fantastic. Really accommodating. He had loads of good ideas and dared to do something that bit different.”
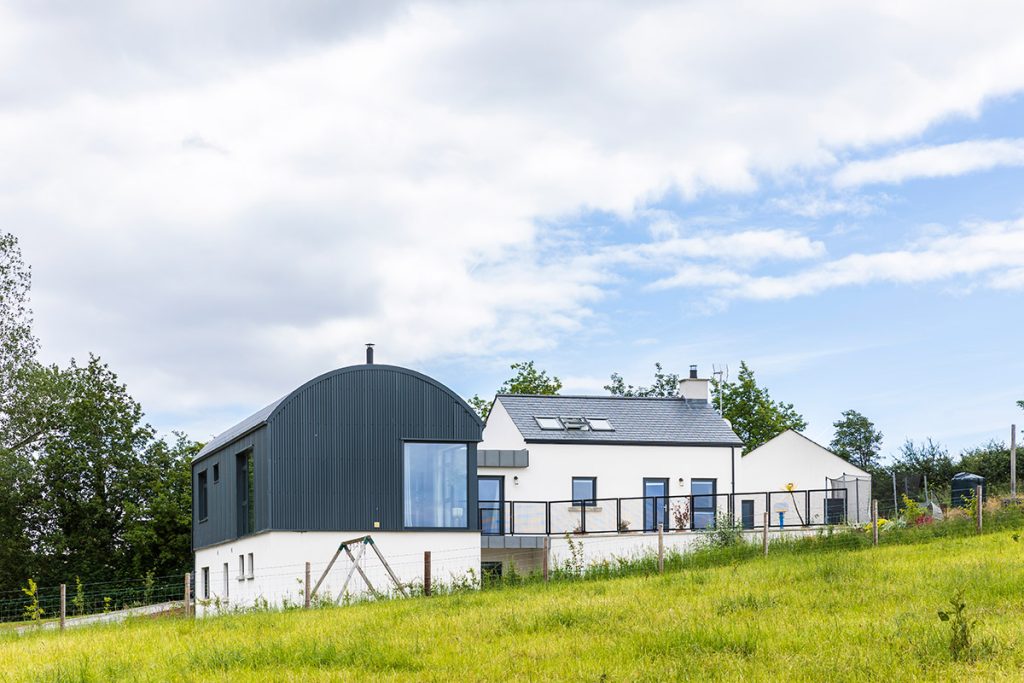
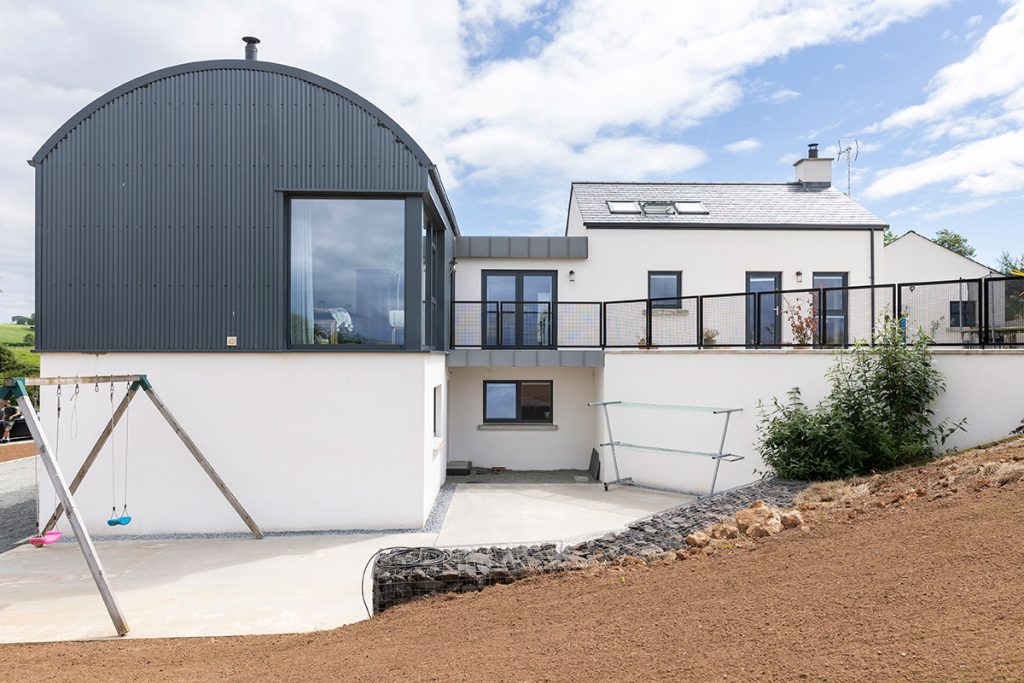
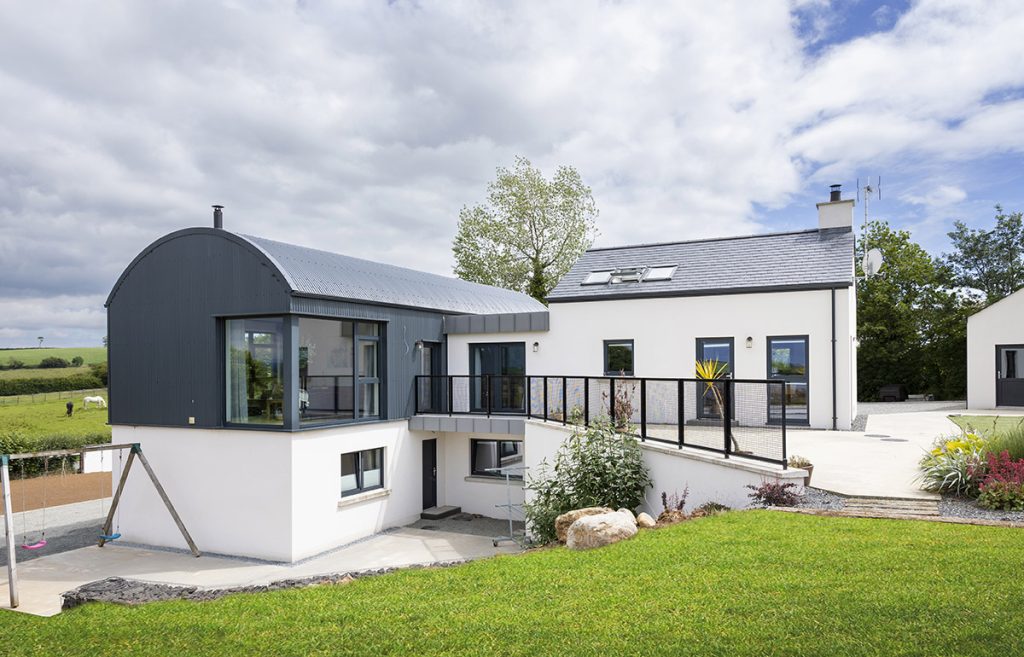
Upside down design in the budget new build
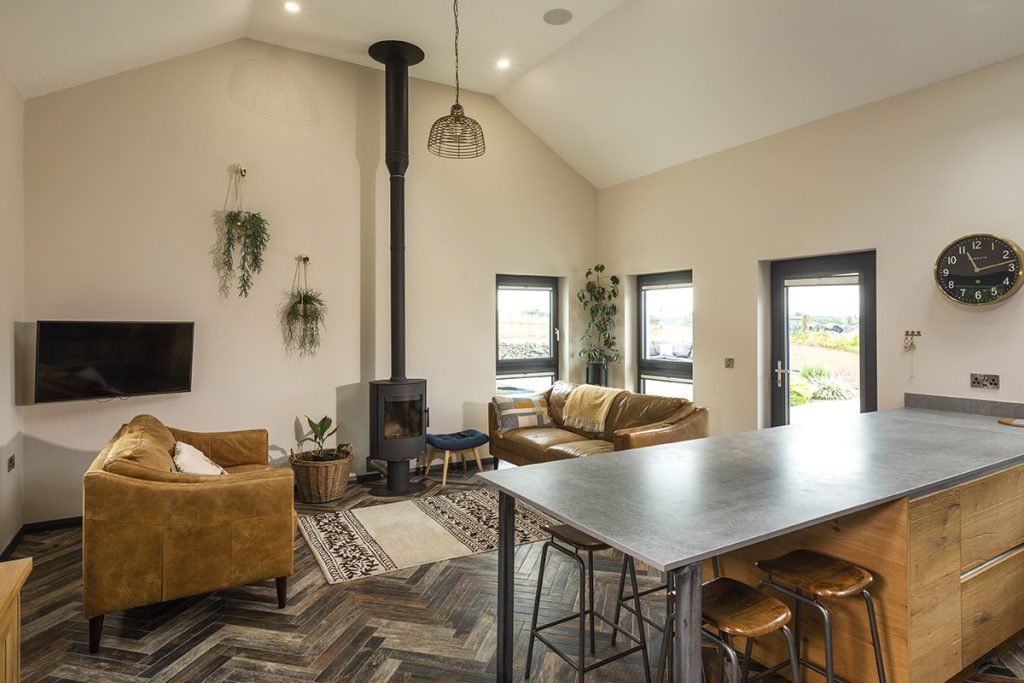
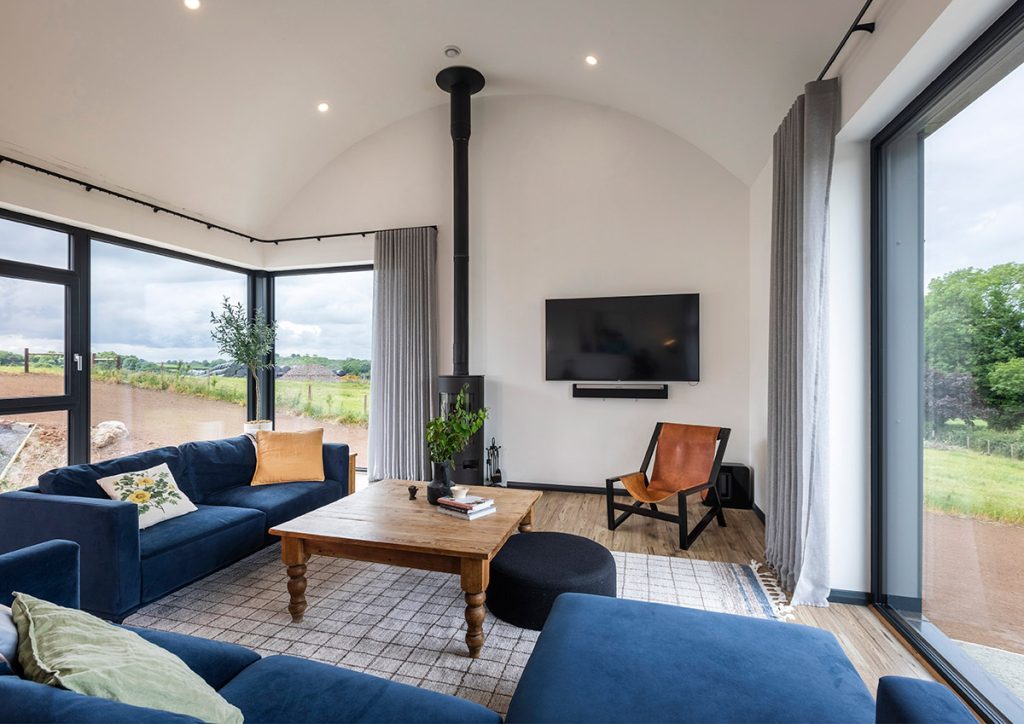
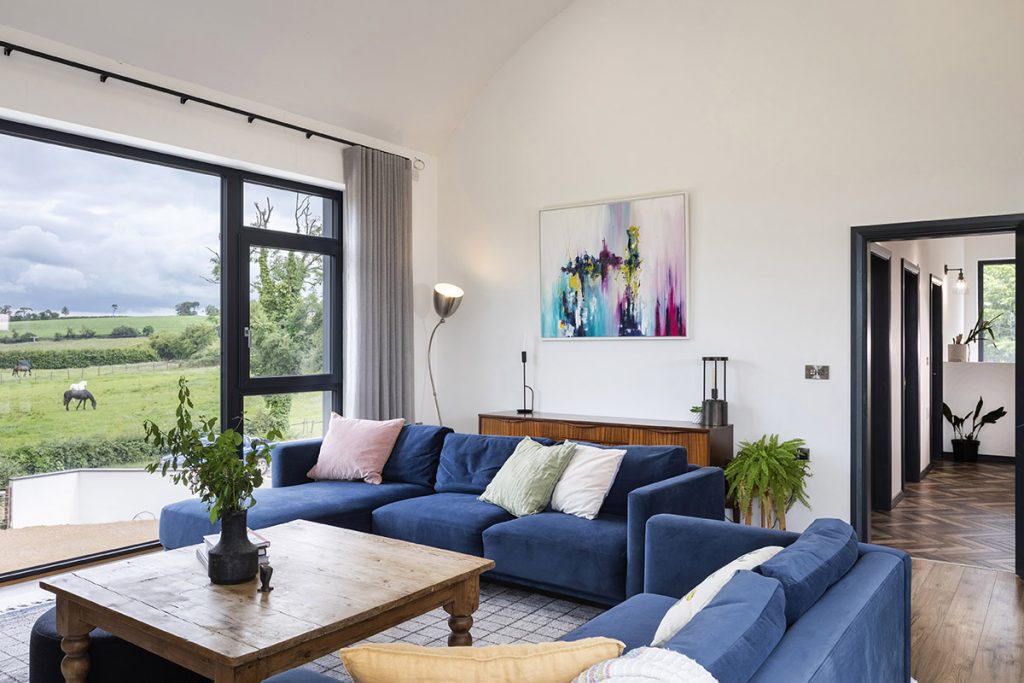
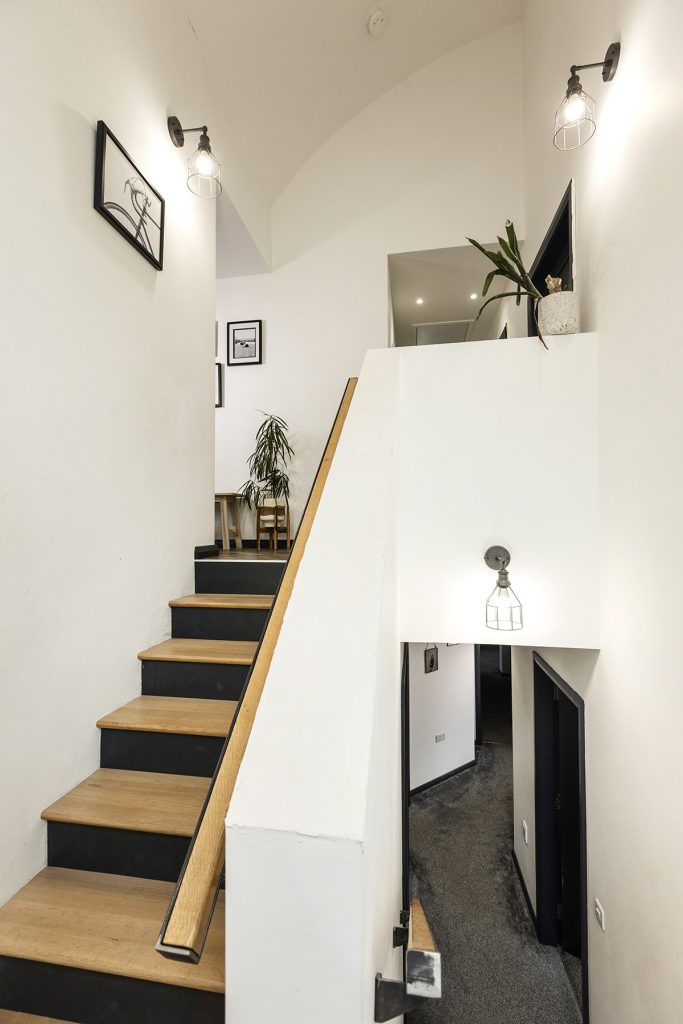
“We wanted the house to be as efficient as possible, and the simple design shape we chose helped,” says David. “We have a split level house with a shuttered concrete wall that acts as a thermal store for the downstairs where the bedrooms are, keeping the heat in winter and in summer. It keeps the sun out and the bedrooms cool.”
“Trevor came up with an upside down design because of the way the site slopes,” says David. “You come into the building at the upper level and that’s where the living areas are, plus a playroom / spare bedroom.”
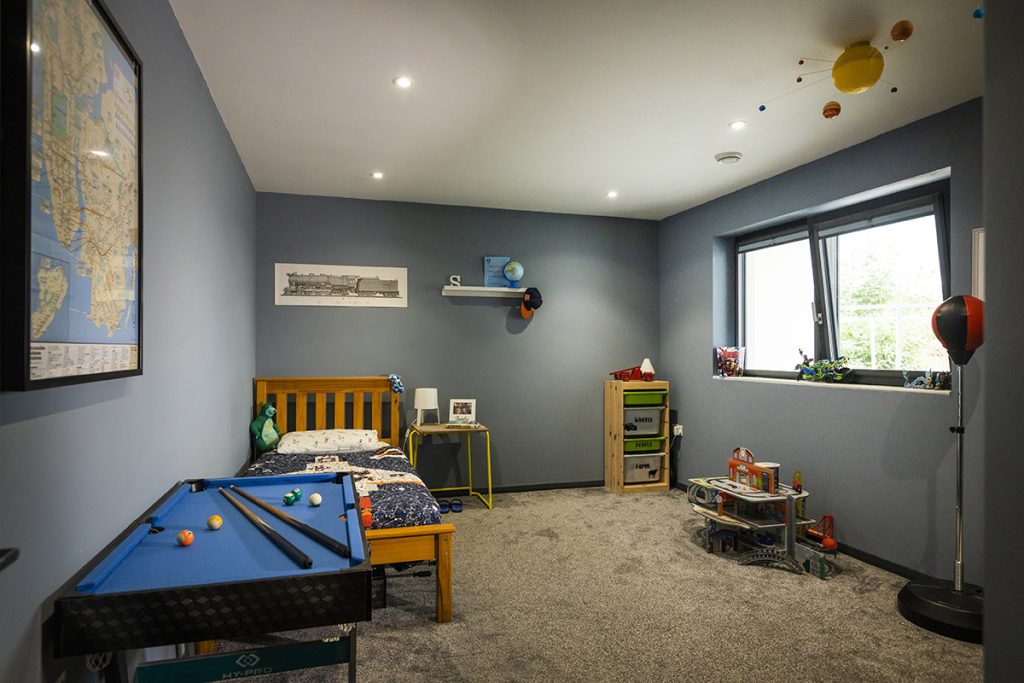
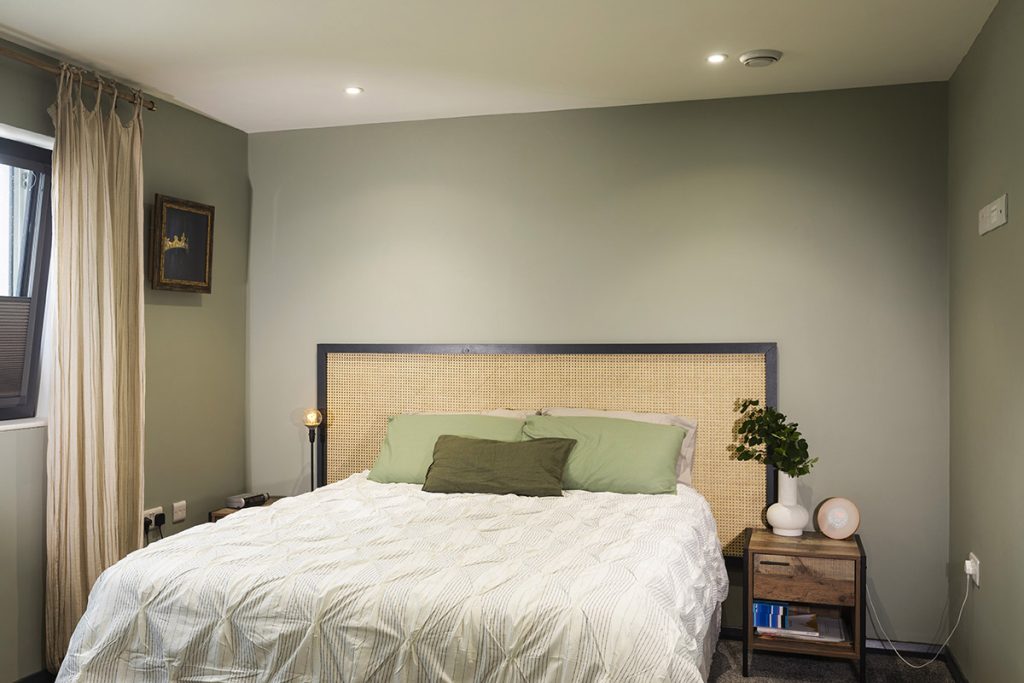
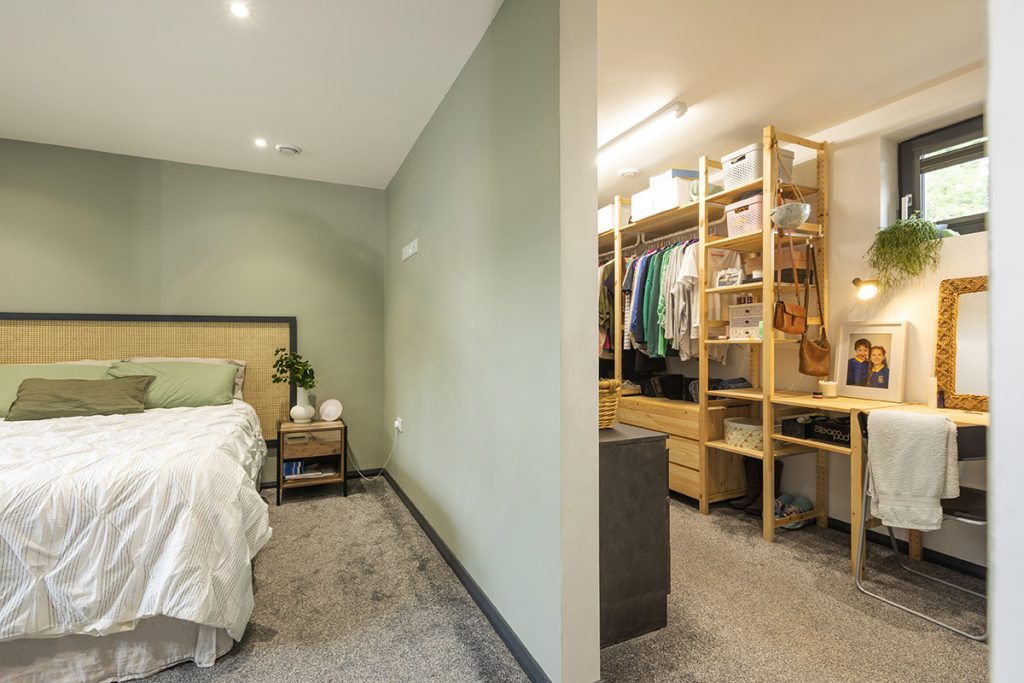
“Downstairs we have three bedrooms, one which is ensuite and the other two share a bathroom. It’s a fabulous design and the upside down living arrangement allows for beautiful views from the living room.”
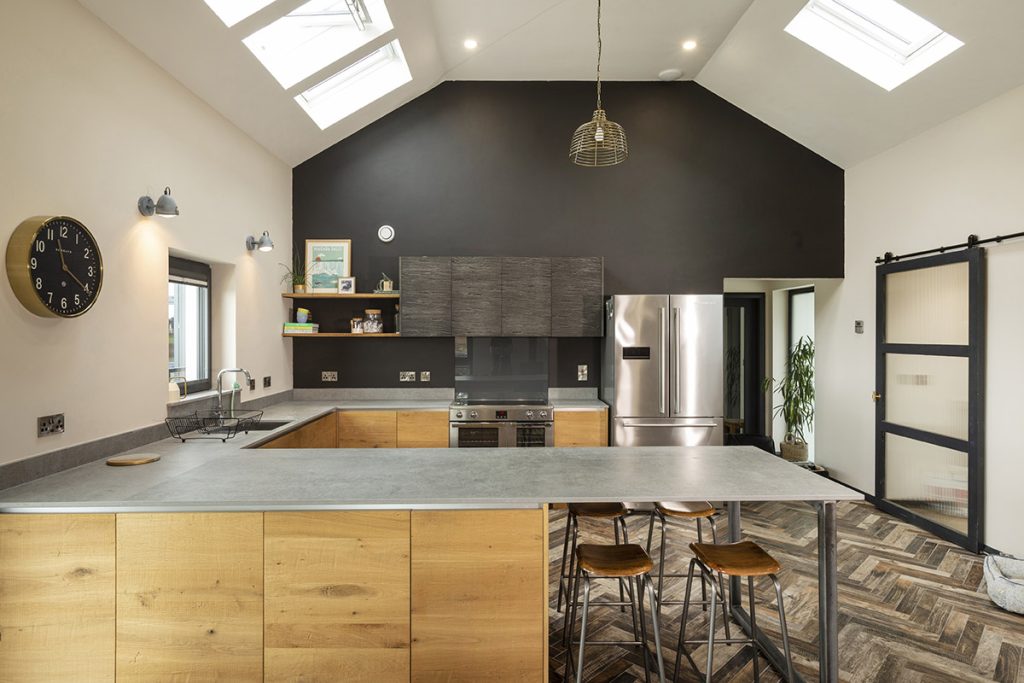
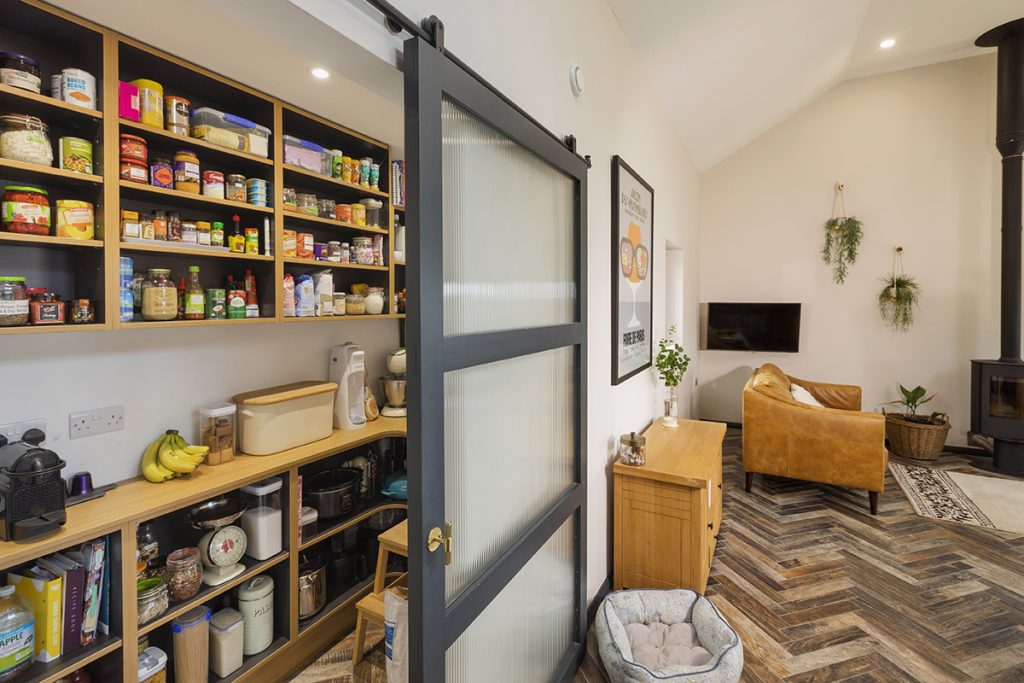
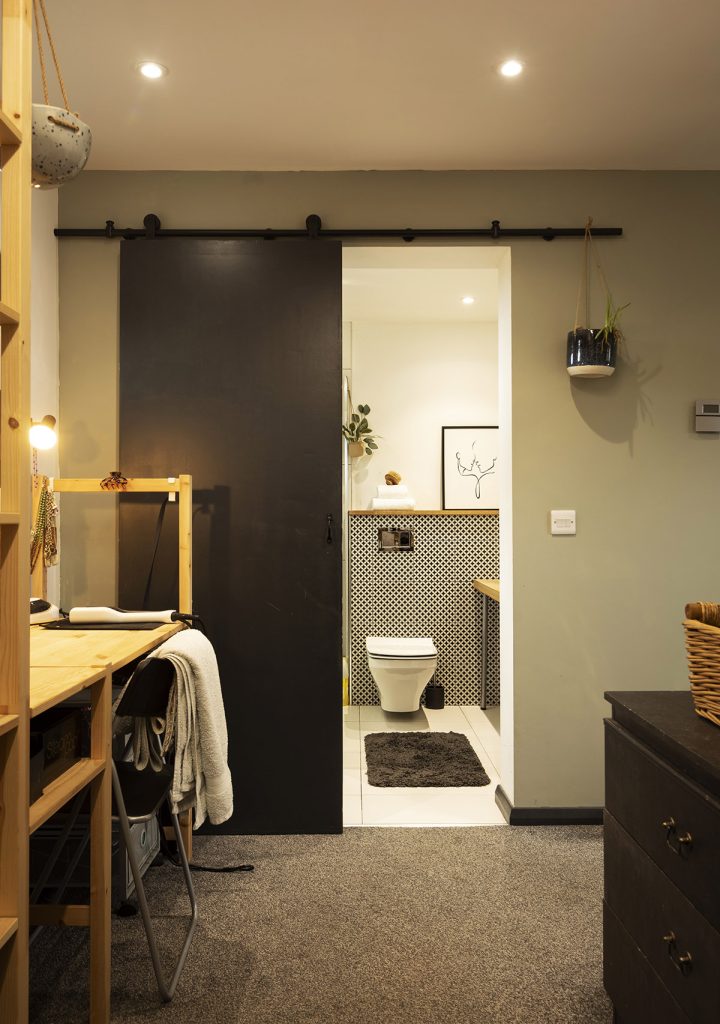
“A really practical design feature of Trevor’s was to put the utility near the bedrooms,” says Christine. “It is no more than a few steps away from any one of them. It was a genius idea of his as all laundry stays on the one floor. We went with a 2.3 x 2.5m footprint for it, to give us ample space.”

“We have no need for ironing, and hanging all the clothes means we never need to use the tumble drier. The mechanical ventilation with heat recovery circulates the air and keeps everything fresh.”
“For heating and hot water we chose to go with an oil fired burner, with underfloor heating throughout and towel radiators in the ensuite and bathrooms. We had talked about an air source heat pump but the payback and outlay at the time meant we just couldn’t justify it.”
“I’m kicking myself now with oil prices having gone up so much recently, but then so has electricity costs to run an air source pump,” says David. “You have to balance everything up and in reality, our consumption is low. The boiler heats up water every day, and the oil is off for heating from mid to late March until late October.”
“We also have two wood burning stoves which are lit in winter so that reduces oil usage quite drastically too. For example, the living spaces have underfloor heating but when the stove is lit the rooms don’t need to draw additional heat using oil.”
Secret to success
“When we applied for finance, the mortgage advisor said they’d never had a self-build that came in underbudget,” says David. “They said there was no way we could do it. I wouldn’t say I took that as a challenge but ours did come in £20k under budget.”
“A big part of it is that I project managed the build myself – I work for a civil engineering and building contractor and therefore have quite a bit of construction experience.”
“It’s not for everyone project managing the build, but you can surprise yourself how much you can do. Doing as much work as you can yourself will help cut costs considerably, and for a lot of people it’s worth it,” he says.
“David’s skillset lies in construction. If you’re unsure, it’s always best to get the input of someone who knows,” adds Christine.
So how did he do it? “I work part time on the farm, so during the build I was able to delegate some farm duties and dedicate that time to the house,” says David. “And we were lucky to have Christine’s dad on board. He’d worked in construction years ago and had just retired as we were about to start the build. Perfect timing!”
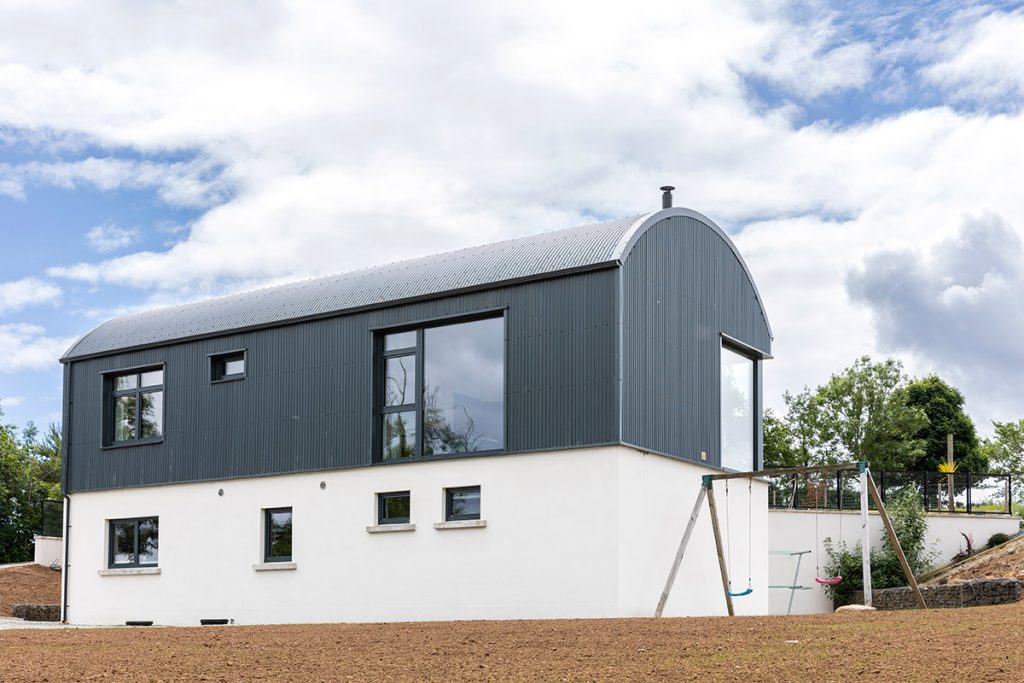
“A big job was to get all the costings done, I did this myself – that was as much work as all the labour I put in,” adds David. “At this early stage, we decided to eliminate some of the zinc cladding from the design, including a zinc clad dormer window, because of the cost.”
“We also bought a digger at the start and stripped the site, did the reduced dig and dug the foundations. We tied all the reinforced steel ourselves for the retaining wall foundation and poured the concrete for foundations. Building Control inspected and signed off the main phases.”
“After that I hired the individual trades. They are all local and live within about a 10 mile radius of our house. I already knew a lot of them, so it was easy for me to find good trades. I brought in the block layer after the foundations, and so on.”
“Plus, our builder’s merchant was one mile away for materials so we were able to get deliveries as and when we needed them. And in reality, we were very fortunate not to come up against major issues.”
“Even though we made small changes during the build, like taking out the door at the dining room and moving the ensuite door, there were no big design decisions made on site.”
Corrugated
David and Christine’s house has three different roof types – one is a standard pitched slate roof, which is at the back, with a standard roof build up. Another is the flat roof linking it and the main barrel roof.
“Our feature corrugated round roof was by far the most complex,” says David.“Because the corrugated metal needs to be ventilated to prevent condensation, it requires quite a bit of engineering. We had to get a condensation analysis done and we explored three scenarios – one failed, two worked.”
“We chose which worked best for cost and performance, this was a mix of timber beams with a dense wool insulation, a ply deck was then battened and counter battened, to allow for air flow, the underside of the beams had battens and then plasterboard around the curve. As we have no attic area the battened space was handy for service ducts as it meant we didn’t break the insulation.”
“Trevor worked with a company that supplies cladding and insulation that meets building regulations for this type of roof, so we had that sorted. But we couldn’t source the initially specified rafters in the UK and they would have had to be brought in from Germany, at an extra cost.”
“At that stage we redid the roof design calculations for different centres and timber profiles with the engineer, which probably saved us £3-4k.”
“Inside, we wanted to keep the curved form as a feature. I tried sourcing a proprietary alternative to standard 12.5mm plasterboard but couldn’t so I let the plasterboard acclimatise in the room, leaving it out for a while before starting on the job. And then the joiner started fixing it, slowly working around the curve. The plasterboard took the curved shape surprisingly well.”
Apart from the roof, the biggest challenge when it came to the build was getting the exterior cosmetic details right. “We had a corner window post that had to be sealed and insulated. We had the flashings around it but there were issues getting the detail of how to do that well,” says David.
“I spotted a mistake after it was done – the window supplier came back and resolved it no problem but it goes to show you have to keep an eye on things. Getting the flashing details around the windows and into the corrugated cladding wasn’t straightforward either.”
“Communication between the window and cladding companies to get the design finalised was crucial, and I was the go between,” says David. “Once the details were worked out, I installed the cladding and flashing with Christine’s dad and my dad’s help over a few weeks.”
Budget new build timeline
Mar 2015
Planning applied
Sep 2015
Planning granted
Feb 2016
Reserved matters
Apr 2016
Planning approved
Nov 2016
Building control approved
Mar 2017
Site work start
June 2017
Build start
June 2019
Move in
Feb 2020
Building control sign off
May 2020
Landscaping start
June 2022
Lawns sown, driveway surfacing
“We eventually moved in June 2019 with no kitchen – it was glamorous camping,” says Chrstine. “One toilet. No sink. We started to get everything put in quick succession after that and had it signed off by building control in February 2020 and got our VAT back after that.”
“We had previously been living in granny’s house and it couldn’t have been more different,” says Christine. “Between the style and glazing. We just couldn’t believe how warm a house could be even though it was an empty shell. That really spurred us on to get finished. We worked away at it after the kids had been put to bed.”
After all the effort and late nights, there was a nice reward at the end. “We bought our materials on a credit card,” says David. “I paid it off every other day using the mortgage. This gave us air miles and we’re off on holidays on the back of it!”
Budget new build Q&A
What are your favourite features?
David: I love the split level design, it really maximises the views. I love how contemporary designs incorporate plenty of glazing, much more than traditional builds.
Christine: The high ceilings and the utility being so close to the bedrooms.
What was the biggest splurge?
David: We went over on windows, double the budget in fact. It was worth spending money on though, as they are an important part of the building and design. We chose good quality triple glazed units. We tried a few local suppliers but they weren’t able to accommodate the size of our openings; their biggest being 2.6m high and 3.6m wide with a single pane being 2.6x2m.
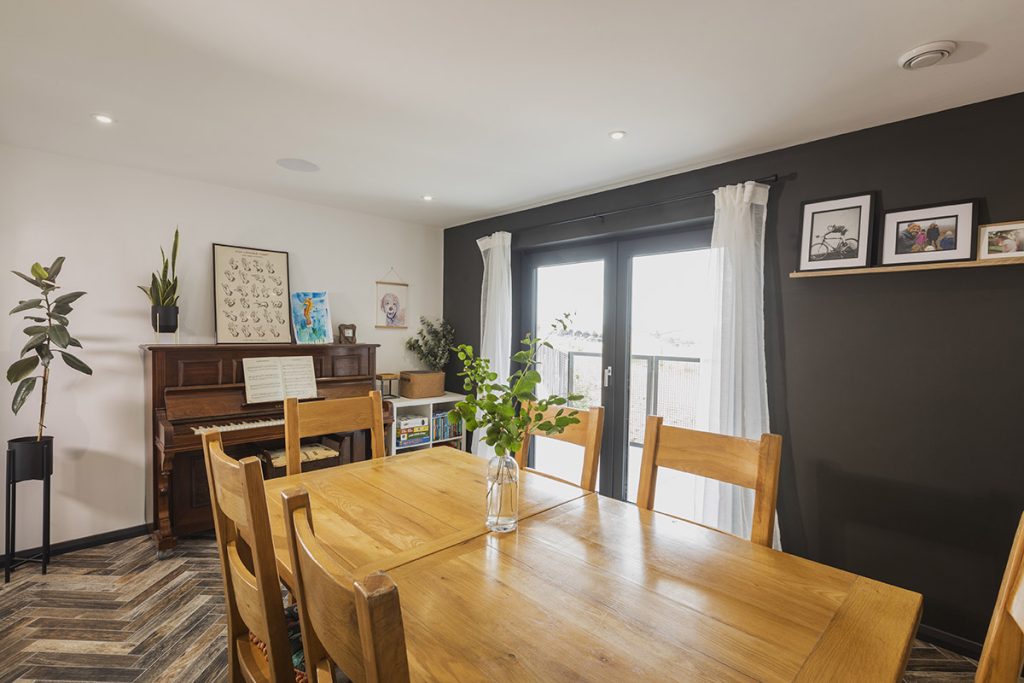
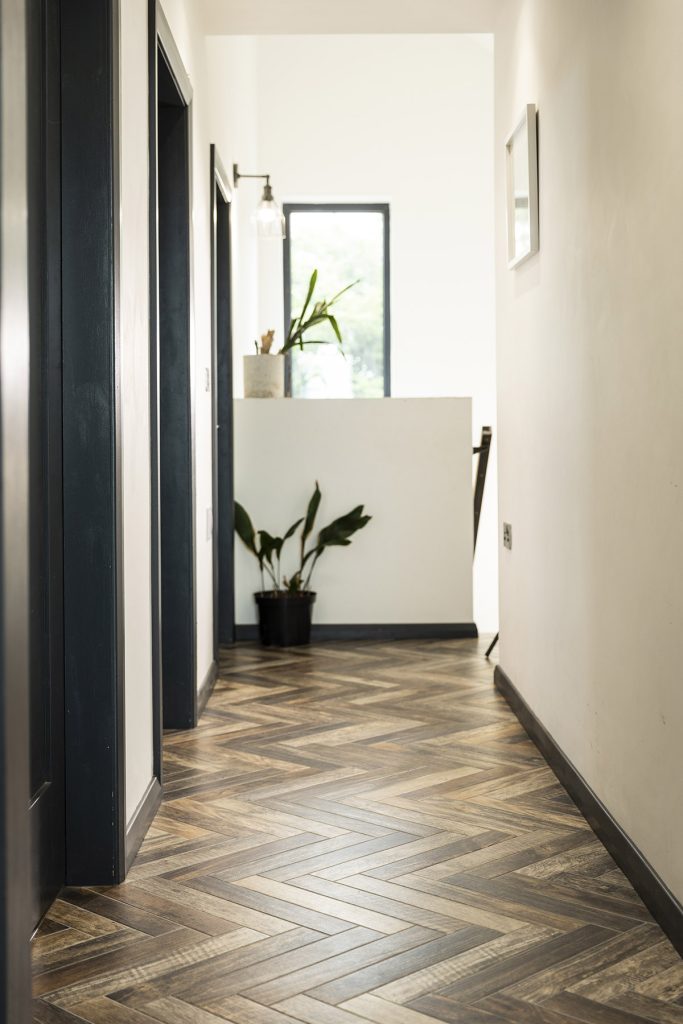
Christine: The wood effect tiles throughout the kitchen, snug, dining and hall. The tiles were within our budget but because of the size and intricacy of laying a herringbone pattern it was very time consuming and therefore cost more. Worth every penny as I think they look great and are easy to maintain.
What would you change?
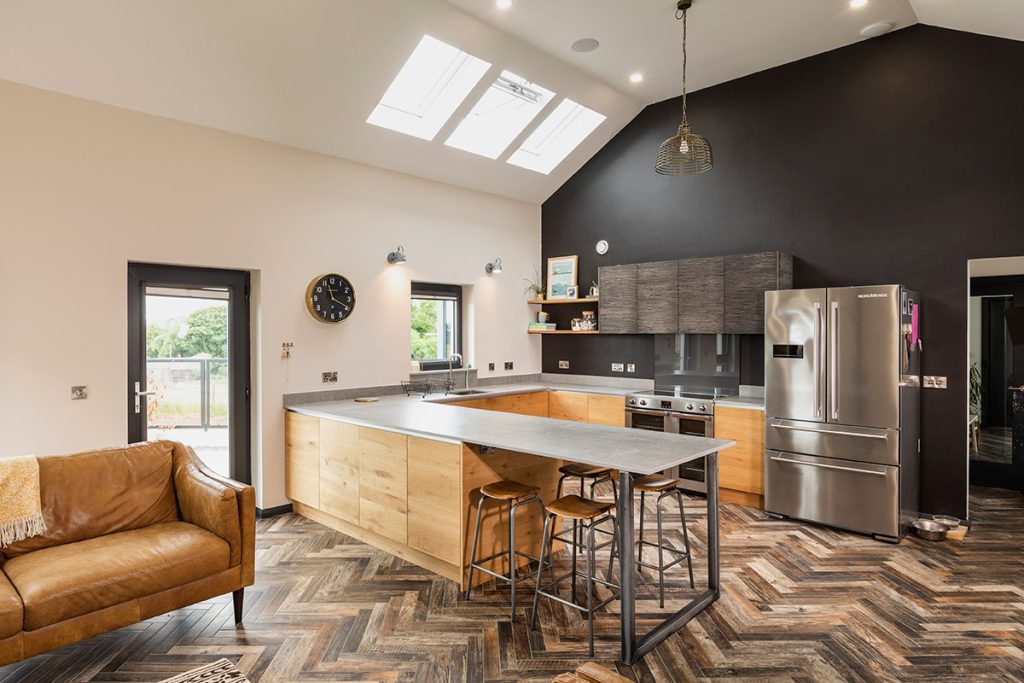
Christine: When we were building, I was adamant I didn’t want the dining table to be in the kitchen. But now living in the house, I wish we had gone for kitchen, living and dining as open plan. On the upside, it means you can’t see the dirty dishes in the kitchen from the dining table when you have guests over.
David: I do miss having a separate study. When we had to work from home during Covid, it would have been nice to have a study to separate myself from the hubbub of everyday activity. I have set up an office in the corner of the dining room which has been grand.
David & Christine’s tips
Decide your style. Pin styles from online mood boards. Then try to see a common thread. Is it the colour, textures, layout, general feel, that you like? Try to be specific.
Decide what you don’t like. Our focus was more on what we wanted but it can really help with the decision making to have some options ruled out early on.
Measure up. If you have an idea of what you want to go into the rooms at design stage, it will help determine the shape and size of the rooms. Trevor designed the rooms and flow around our needs, sun path and furniture, then draped the building envelope around the spaces.
Shop local. We used our local builder’s merchant; it meant it was quick and easy to drive in a collect a few items, preventing trades from waiting on us.
Keep on top of the schedule. On a daily basis, this is one of the biggest challenges of going direct labour. As soon as one trade is finished, the next trade needs to be ready to step in. So that means allowing for an overlap.
Spend time with your electrician. When we showed him where we wanted our lighting and power points, our electrician made some really good suggestions we brought on board.
Be patient. There will always be hold ups and delays, and you will have to work through them. Keeping a calm head will help you navigate.
Shop the sales. We bought our furniture in sales – the sofas were bought before we even had walls built. We were fortunate we had space to store them in the house we lived in while building.
Suppliers
Architect
Trevor Hutton of T4 Architects, t4architects.co.uk
Builder
Noel Ferry
Joinery
G Wilkinson Joinery and Tiling
Render
David Parke
Electrics
Anthony McNally
Plumbing
Booth Plumbing Ltd
Building materials
Sinclaire Hardware
Windows
Feneco, fenecosystems.com
Tiles
Tile Shed, tileshed.ie
Bathrooms
Bathe NI, batheni.com
Gates
Dallat Group, dallatgroup.co.uk
Landscaping
Michael Costelloe Landscaping, michaelcostelloelandscaping.com
Surfacing
MP Coleman, mpcoleman.co.uk
Photography
Paul Lindsay, paullindsayphoto.co.uk
Budget new build specification
Walls: 150mm full fill cavity pumped with graphite EPS beads, U-value
0.2W/sqmK.
Floor: 140mm PIR insulation, U-value 0.12W/sqmk.
Roofs: pitched roof with natural slates 200mm PIR insulation, U-value
0.14 W/sqmk; flat roof with EPDM rubber 150mm PIR insulation, U-value 0.14W/sqmK; barrel roof with corrugated metal 220mm rock mineral wool insulation, U-value 0.18W/sqmK.
Windows and doors: triple glazed low-e, U-value 0.5W/sqmK.