How Alanna and James Connolly made the most of the sloping site they bought with planning approved for a split level home.
In this article we cover:
- Taking the original plans and transforming them to a three level house
- Changing the design with architectural input
- Planning process and what conditions were imposed
- How the living areas are organised across levels
- Kitchen and lighting design with tips
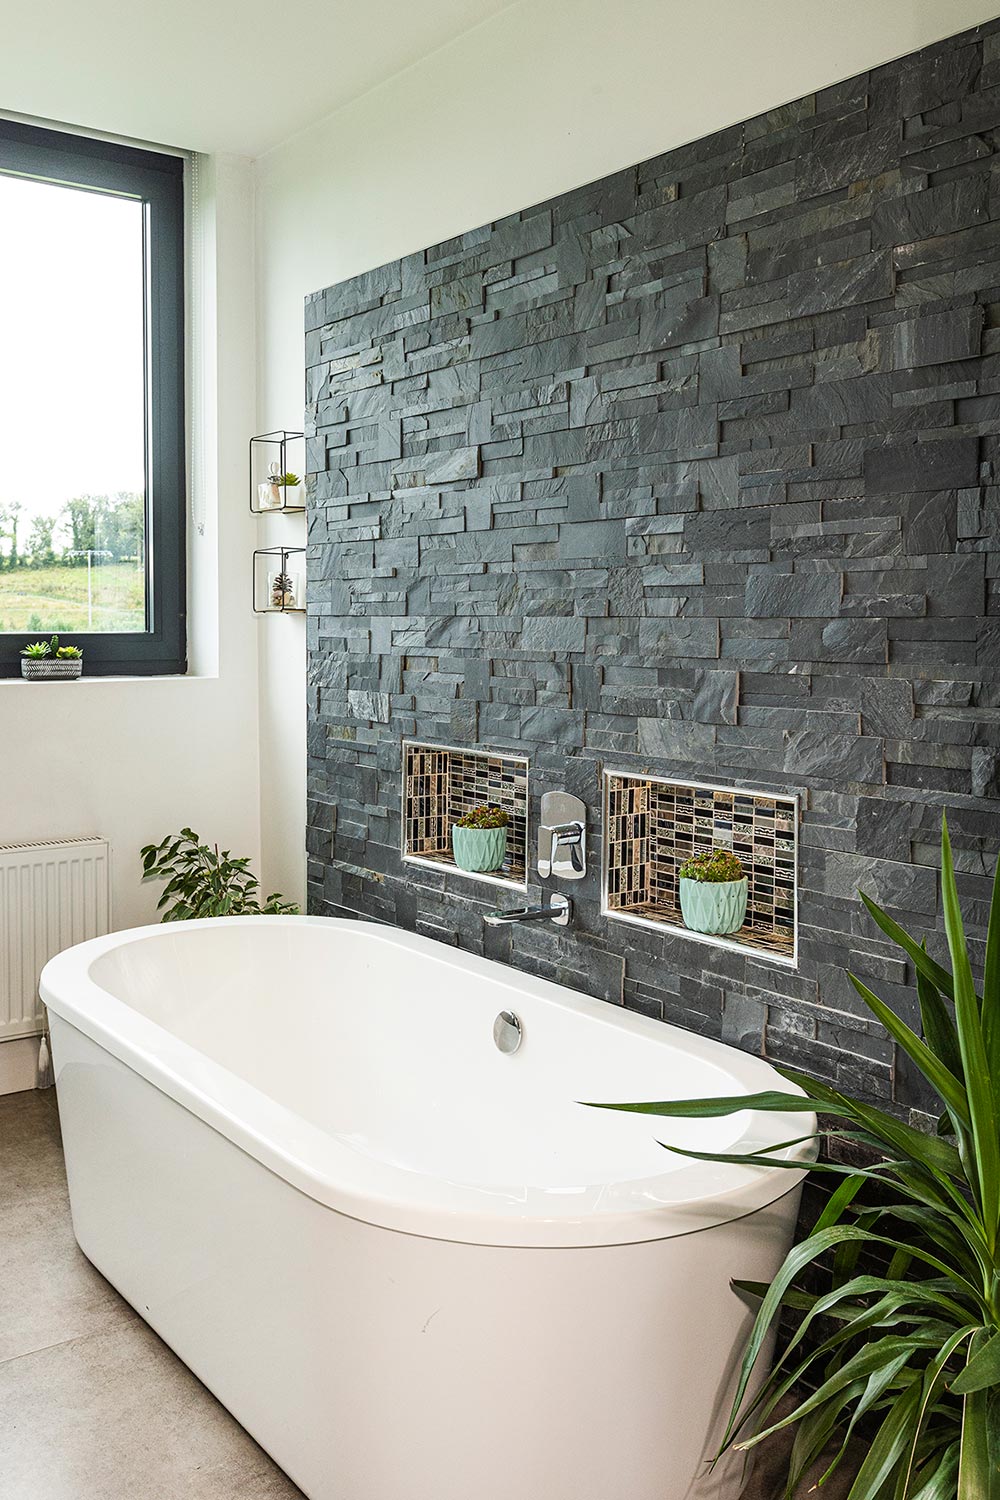
- Bathroom design and choice of sanitaryware including shower trays
- How they saved on floor finishes
- Thrifty interior design tips
- Budgeting tips and how they stayed on top of their budget
- Landscaping on a sloping site
- Floor plans, full specification and supplier list
- Professional photographs
“Our family was growing and we needed somewhere to live, but at that time, there weren’t many houses for sale locally,” says Alanna. “However, there was a site in town which had lain empty for a long time. Plans for a split level bungalow had previously been approved, but most people thought it was a really bad site as it was steeply sloping.”
“I studied and worked as an architectural technologist for a short while before the crash happened in 2007; that’s when I took a different route. But I still have a love for buildings and have a good vision for things and I could see the potential the site offered. So we bought it not long after James and I got married.”
House size: 3,000 sqft
Bedrooms: 4
Plot size: 1.5 acres
Heating and hot water: oil fired boiler
Ventilation: centralised mechanical with heat recovery
Build method: blockwork (cavity walls)

“The original plans weren’t to our taste – the whole house was bungalow style on the upper level and the basement would have been used as a store. We wanted a more modern style and a better use of the space we had, one that would take advantage of the slope.”
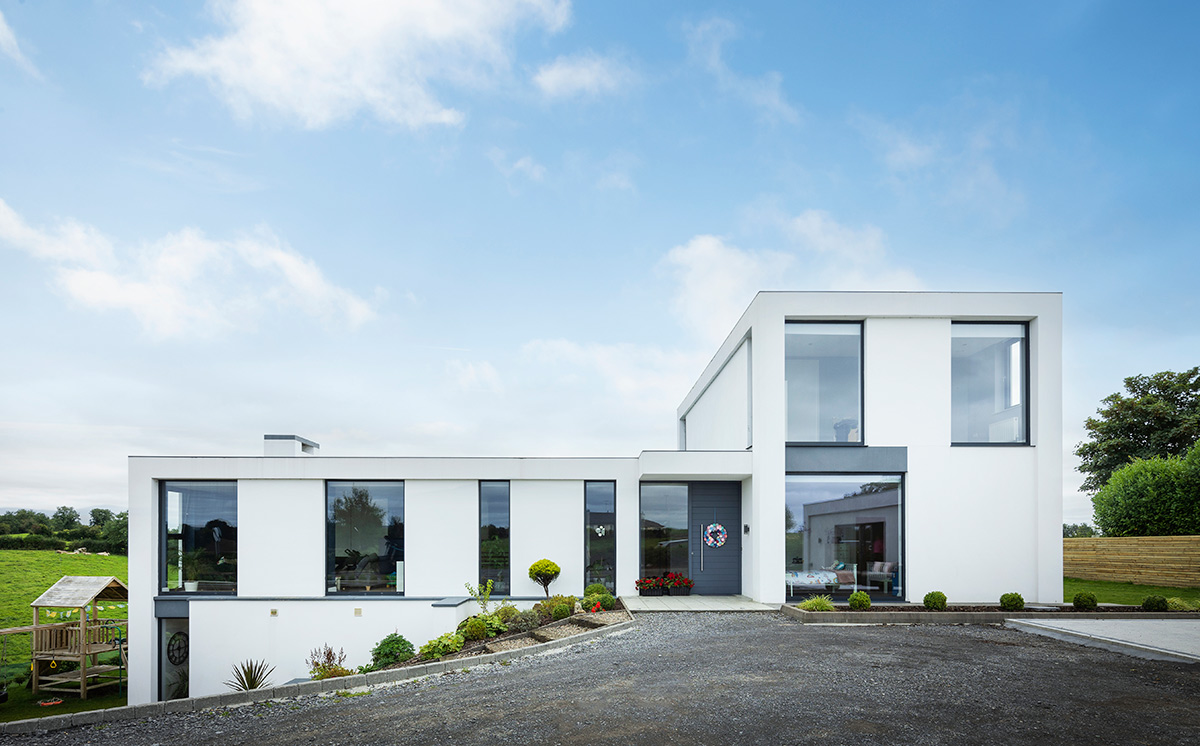
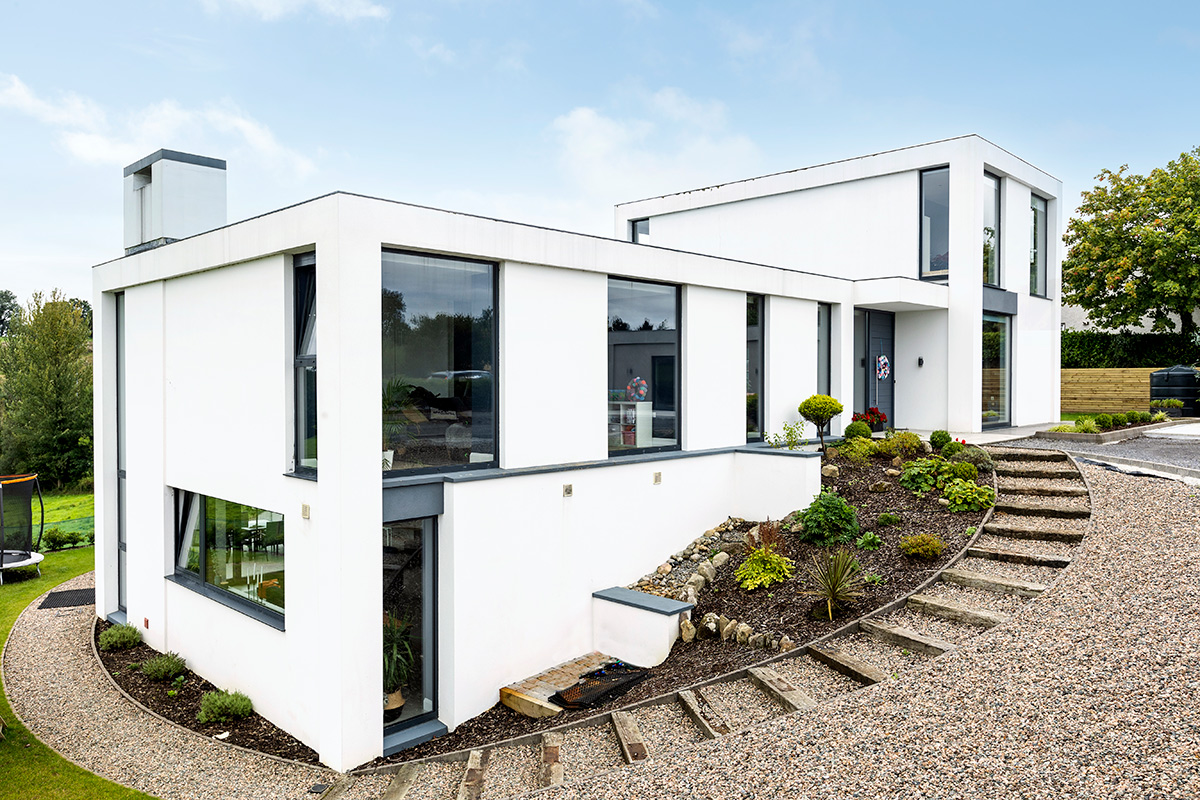
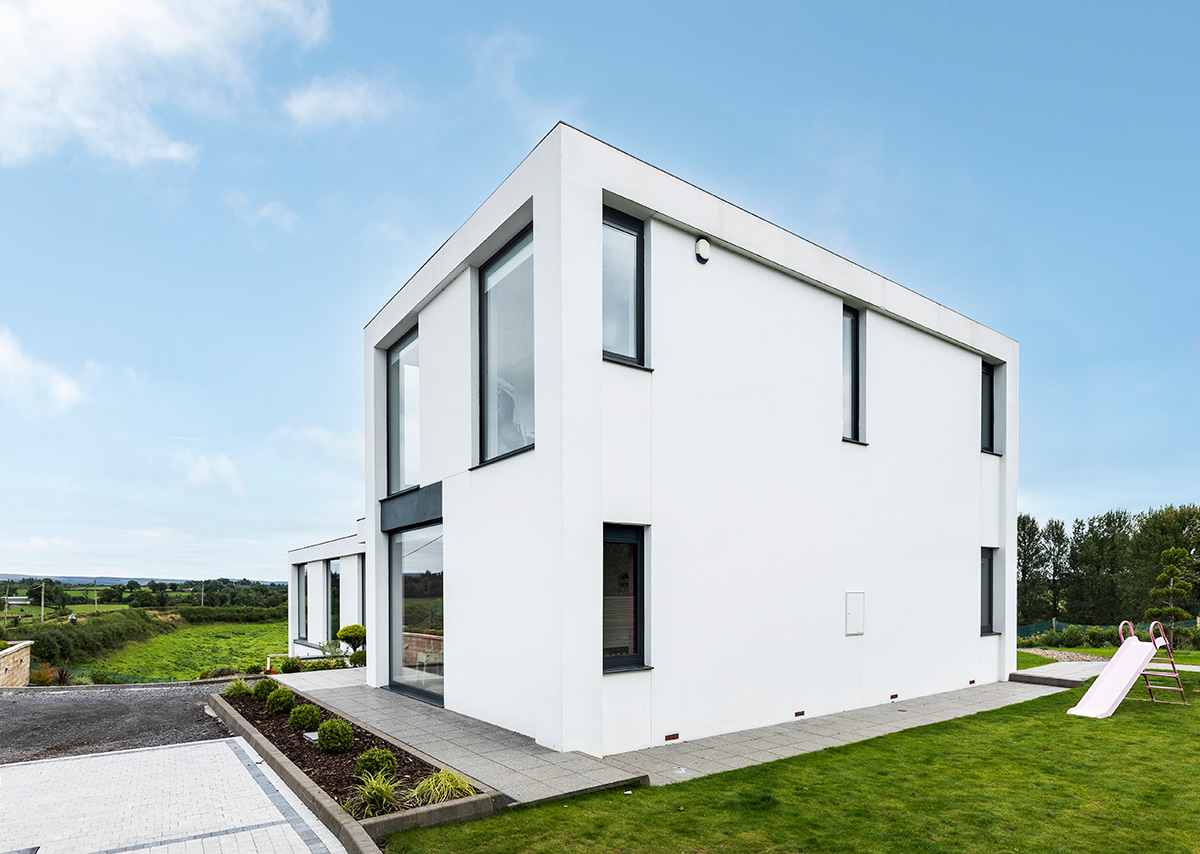
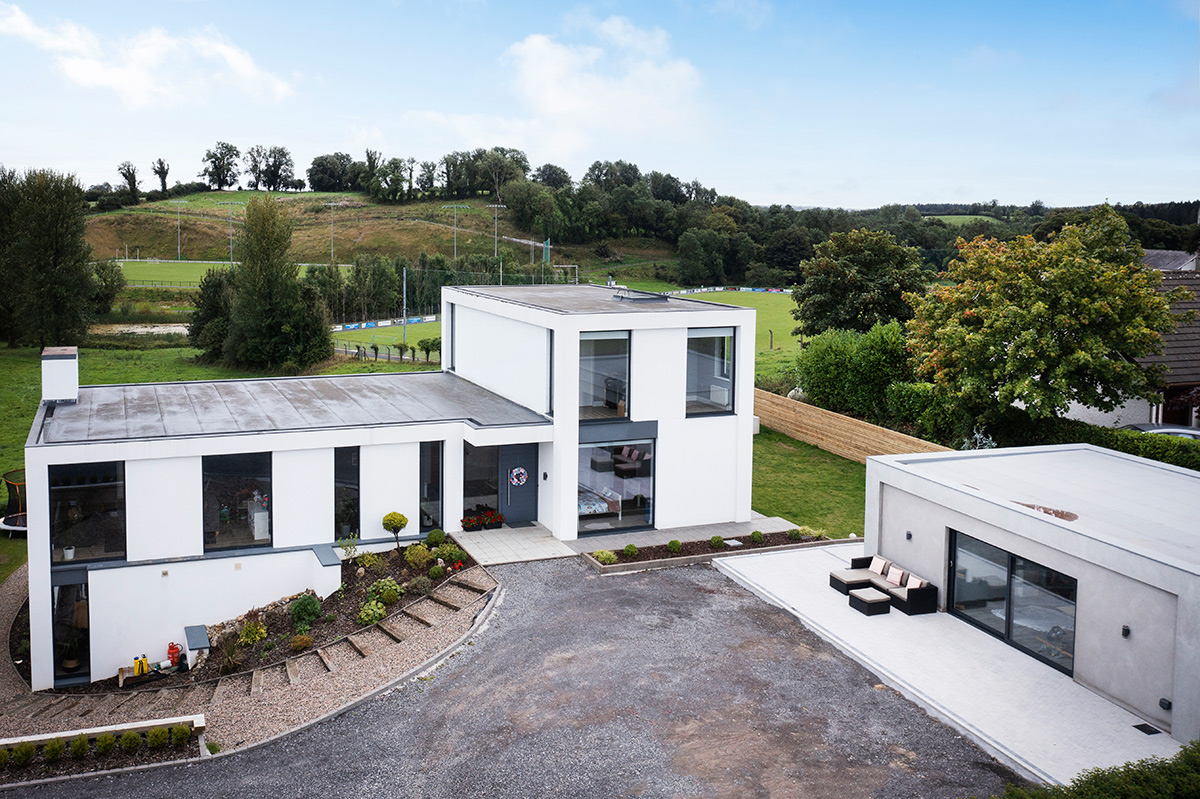
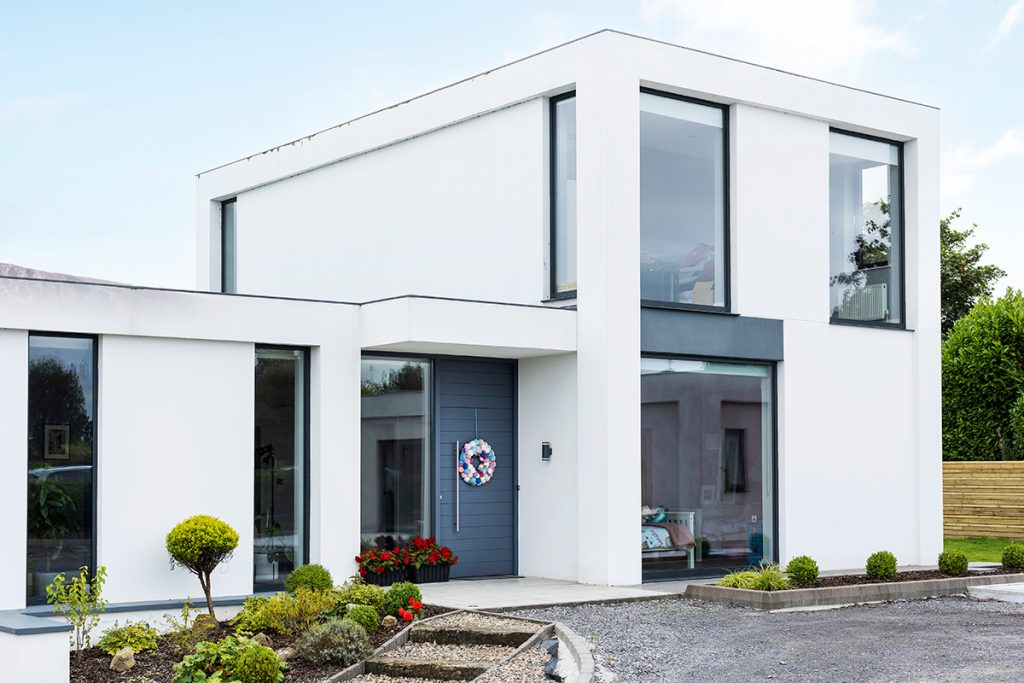
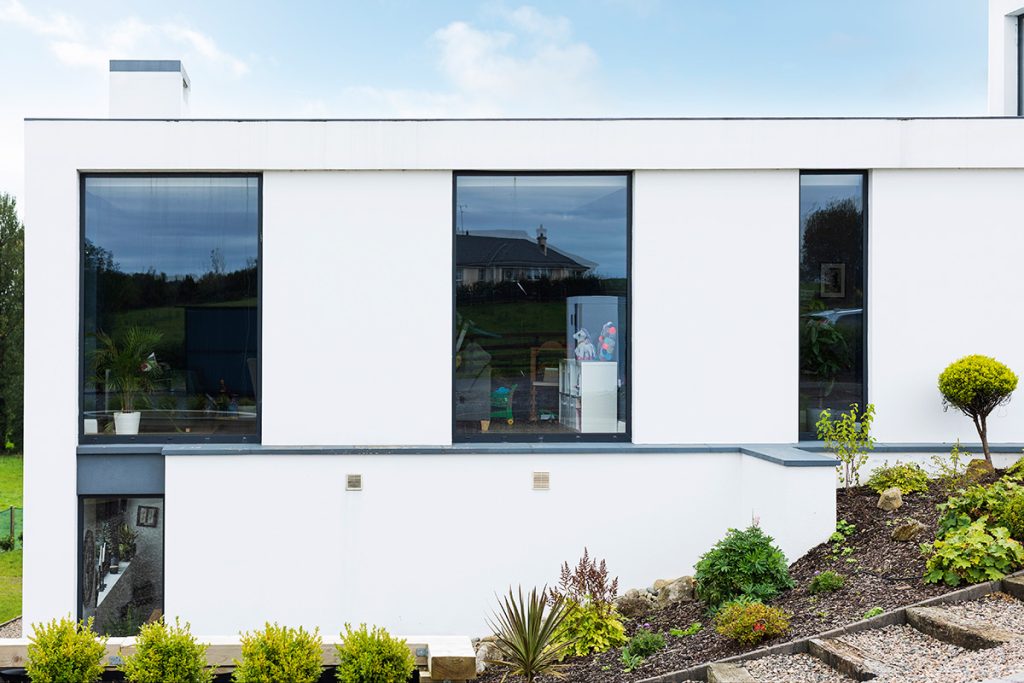
“I drew up a rough sketch for our own architect Donal, and he came back with a plan that was probably a safer option in planning terms, but we said no. The revised plan on three levels that he came back with was right on the button. It is very different, quite box like, modern in style. Living in a small village we’re probably best known as the ones with the flat roof house.”
Capturing views with split level design
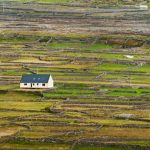
“So we ended up here because there was nowhere else to buy,” says Alanna. “But it is a great location, we’re still within the town boundary with the amenities within walking distance, yet we look out onto open countryside with spectacular views across to Carnmore Rock, Co Fermanagh and Bragan Mountain in Co Monaghan.”
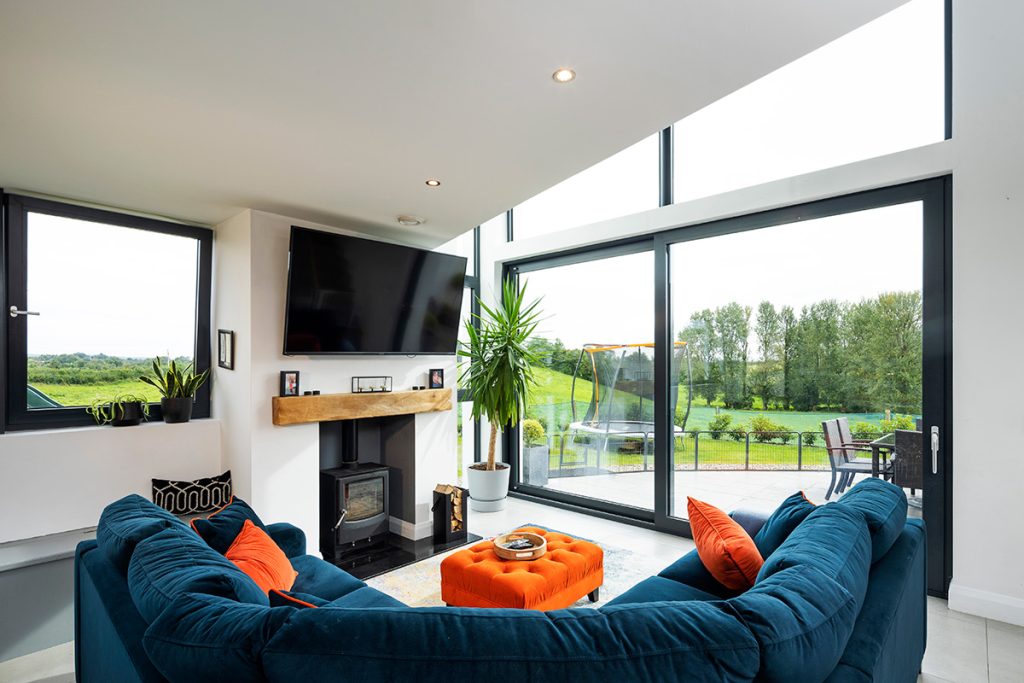
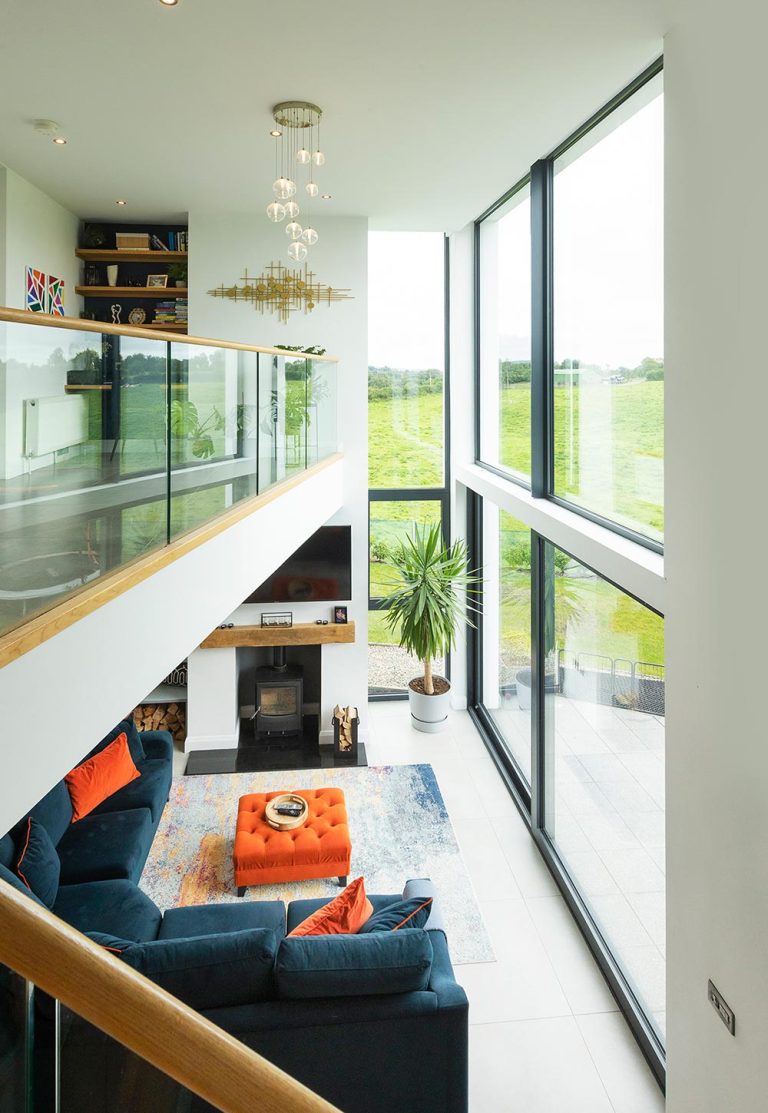
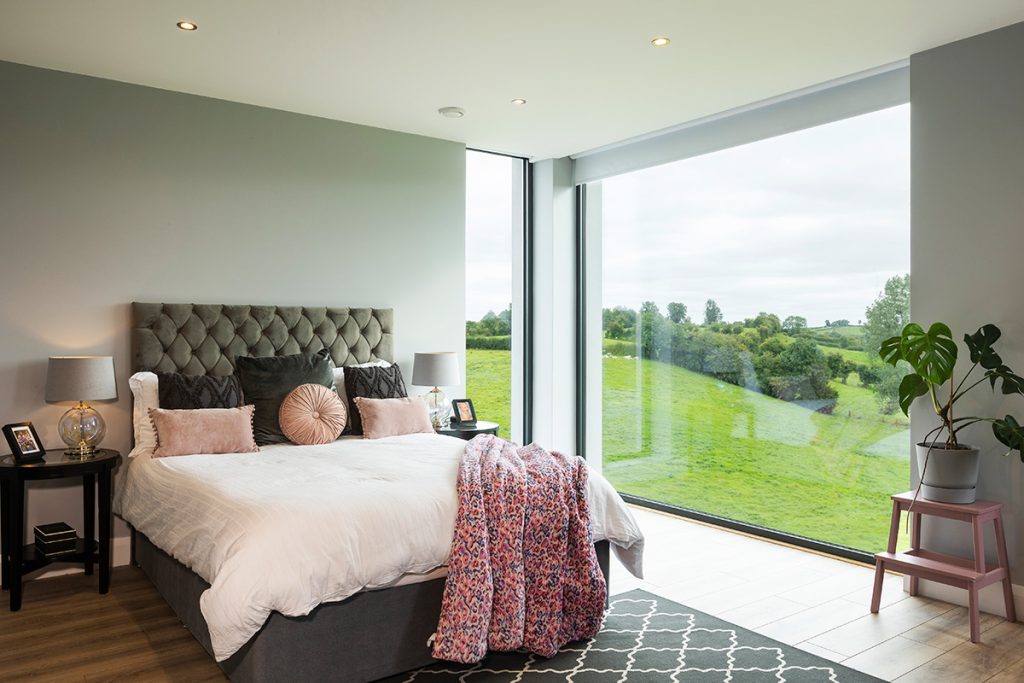
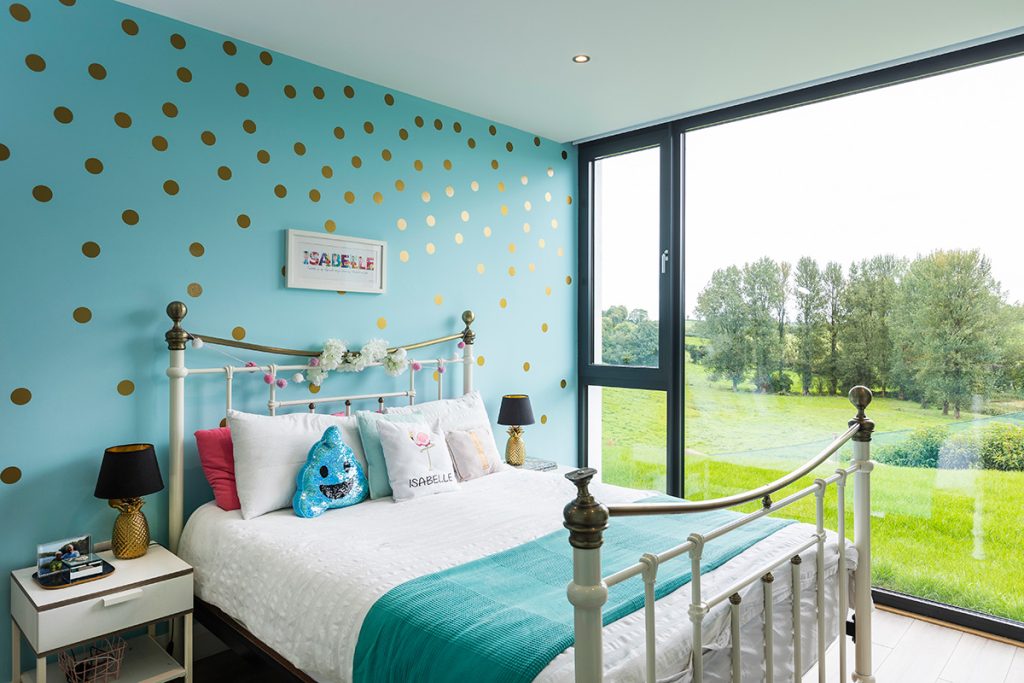
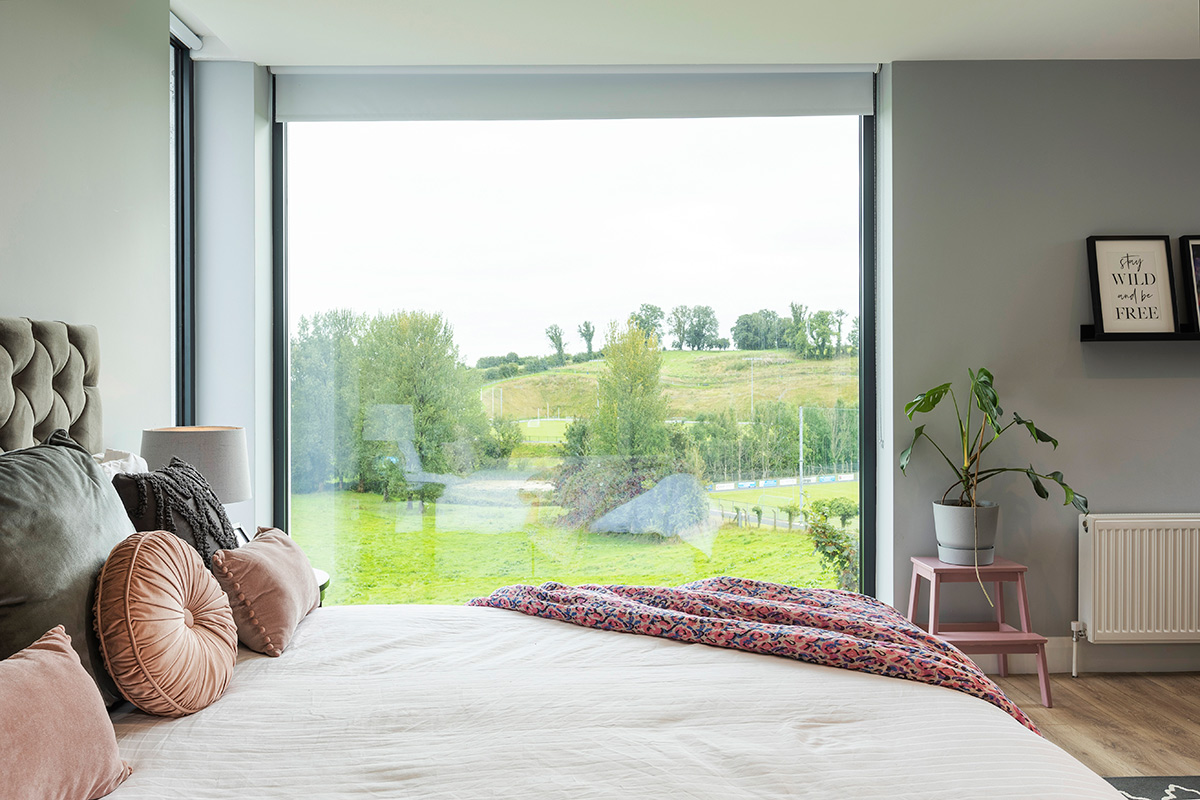
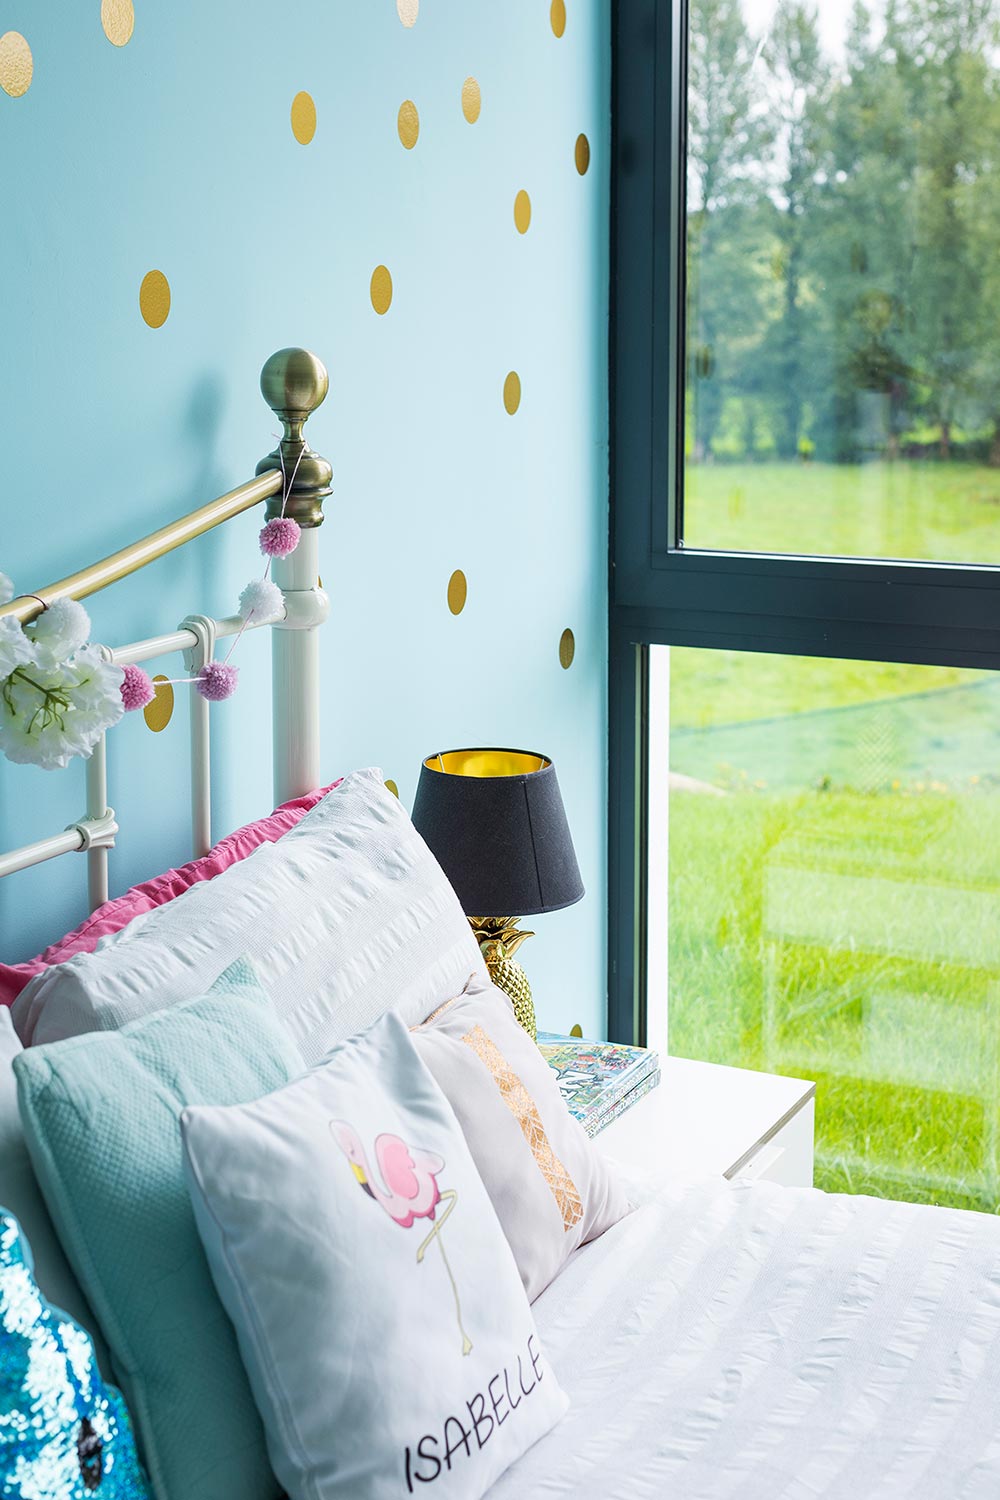
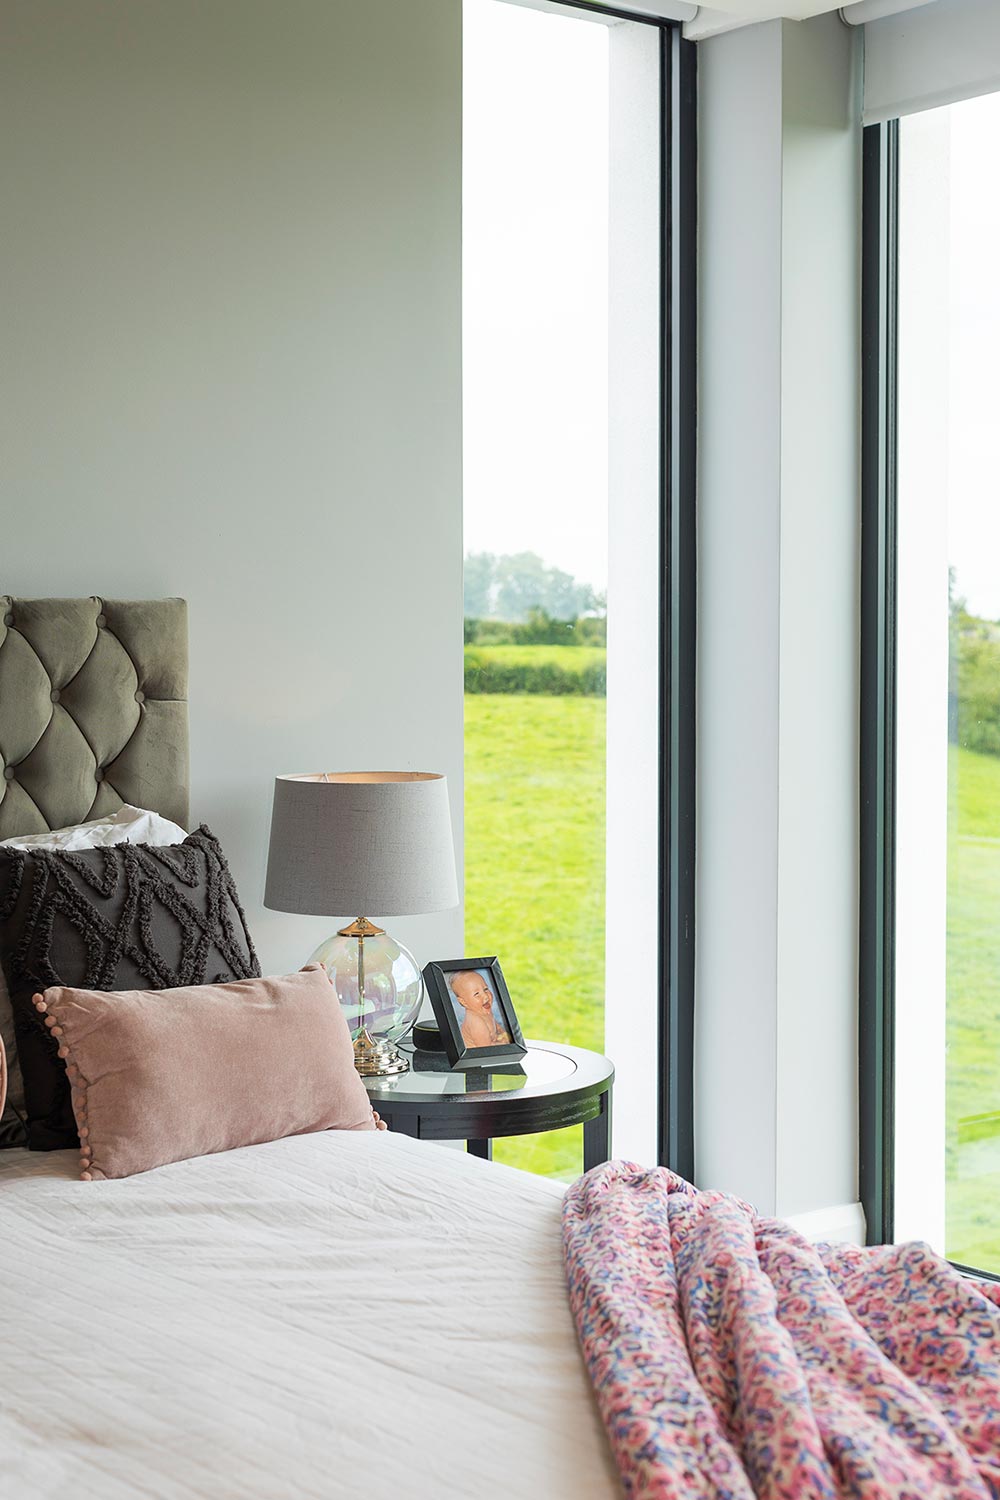
“We wanted to enjoy those split level views with large frame glazing. It drives me mad when I see new homes being built with small windows. That’s not my style. I like modern, strong lines and big windows, so that was always going to be the design no matter what house we built. We don’t get that much bright sunlight in Northern Ireland so you need to make the most of it when it comes.”
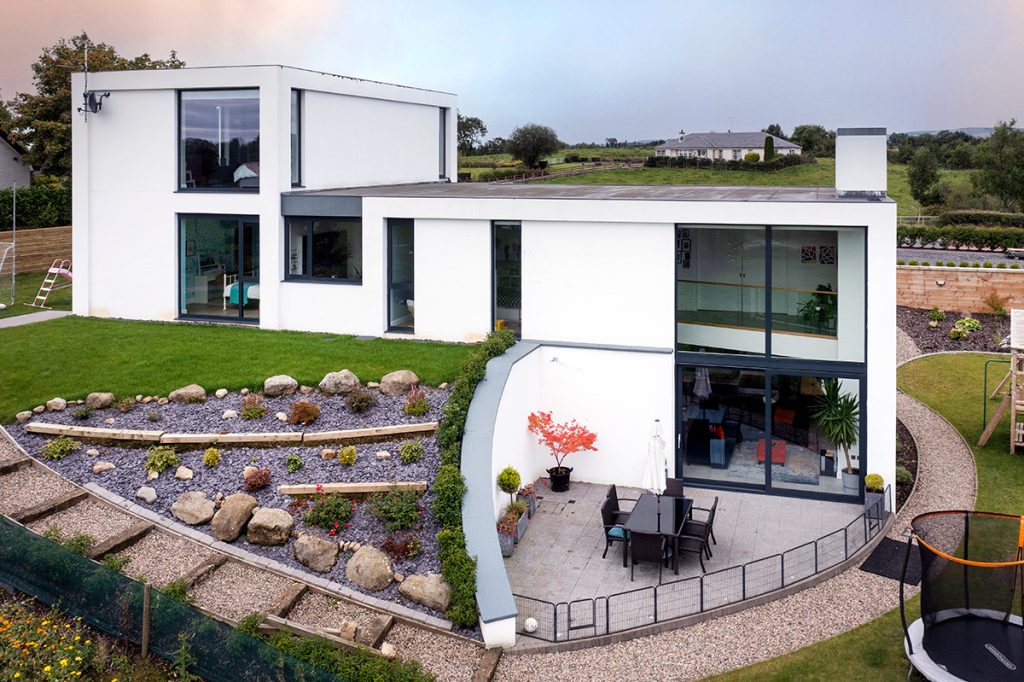
“We have a large grass bank sloping down onto the backfield, which we had landscaped over the past 18 months. We took loads of time thinking about what we should do with it because we didn’t want to waste money. But eventually, we decided to hedge it and plant trees and wildflowers.”
The planning process went through without objection. There was just an instruction regarding the sightlines. “The planners seemed to really like the design despite it being so different to the local architecture. We couldn’t believe it; it only took six weeks to get approval. It was very straightforward.”
“Our contractor lined up all the tradespeople and between us, we project managed the build. We were renting nearby and I had to drive past the site on school runs every weekday so it was easy for me to pop in and make decisions when the builder needed them.”
A home that works
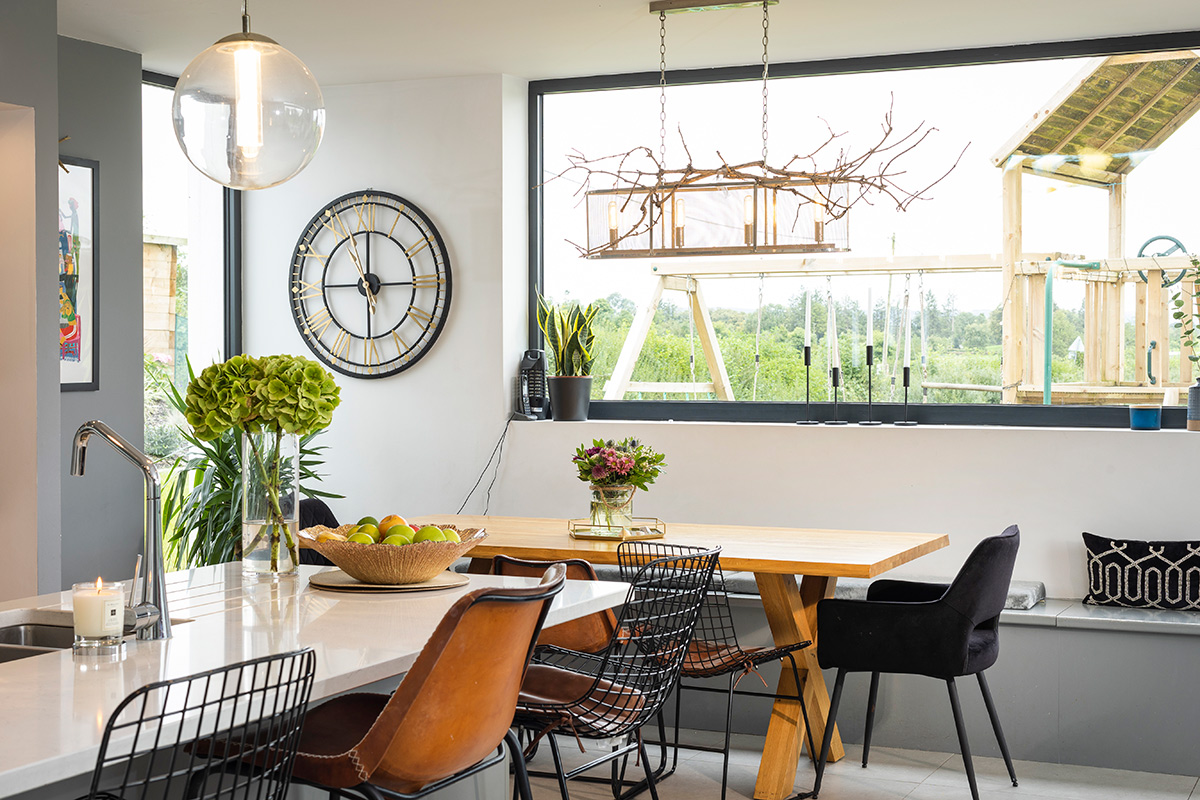
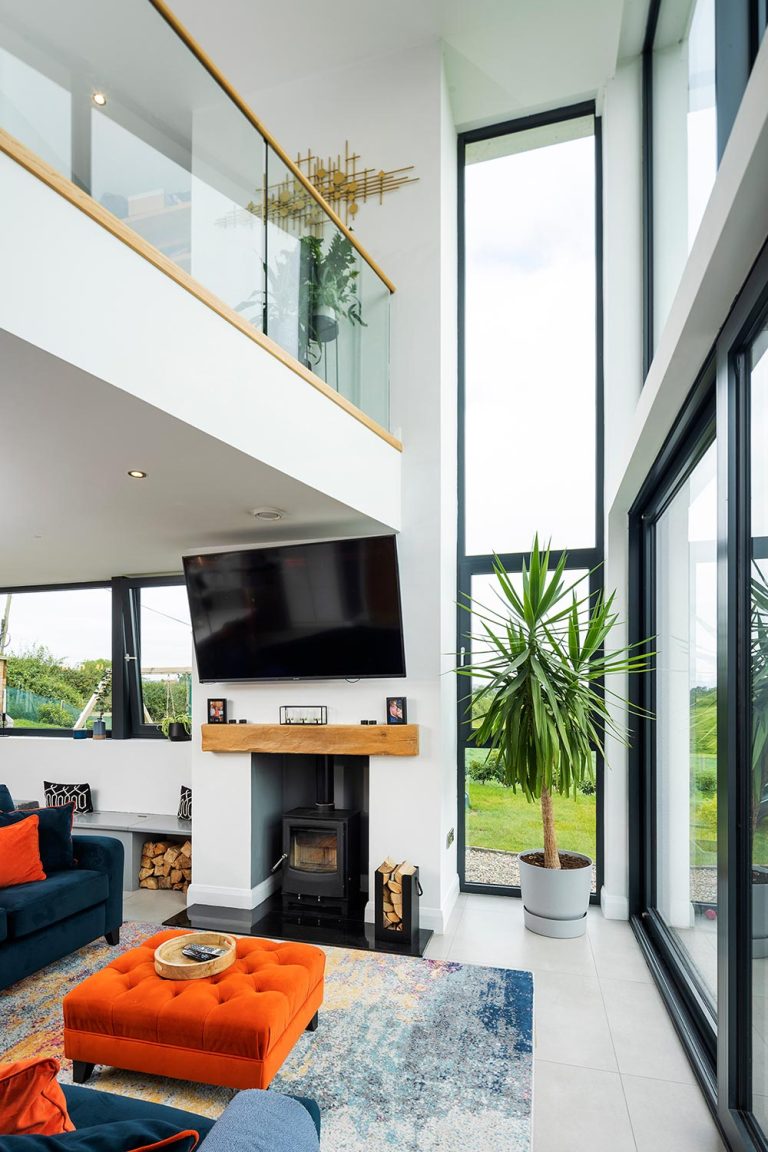
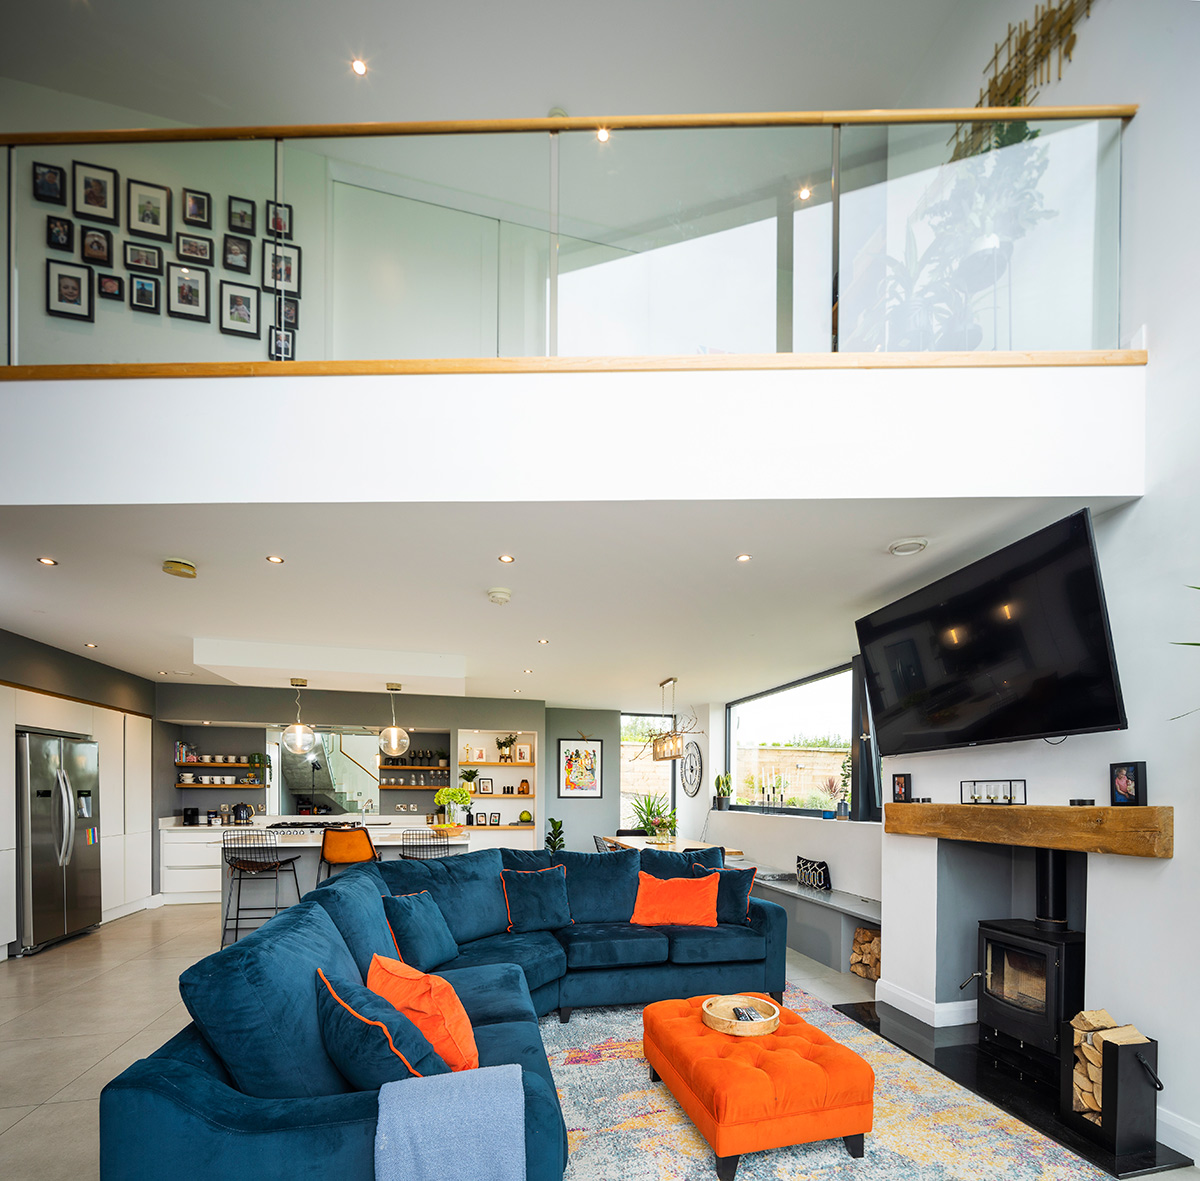
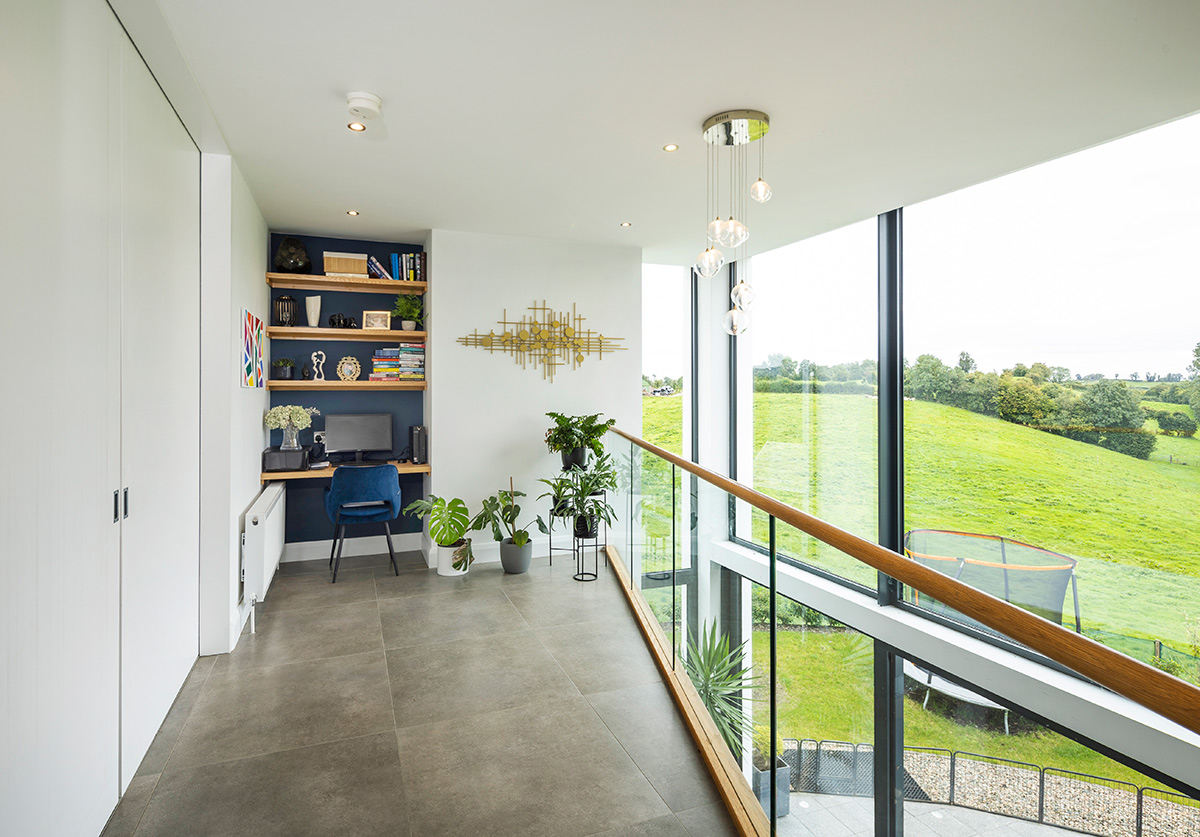
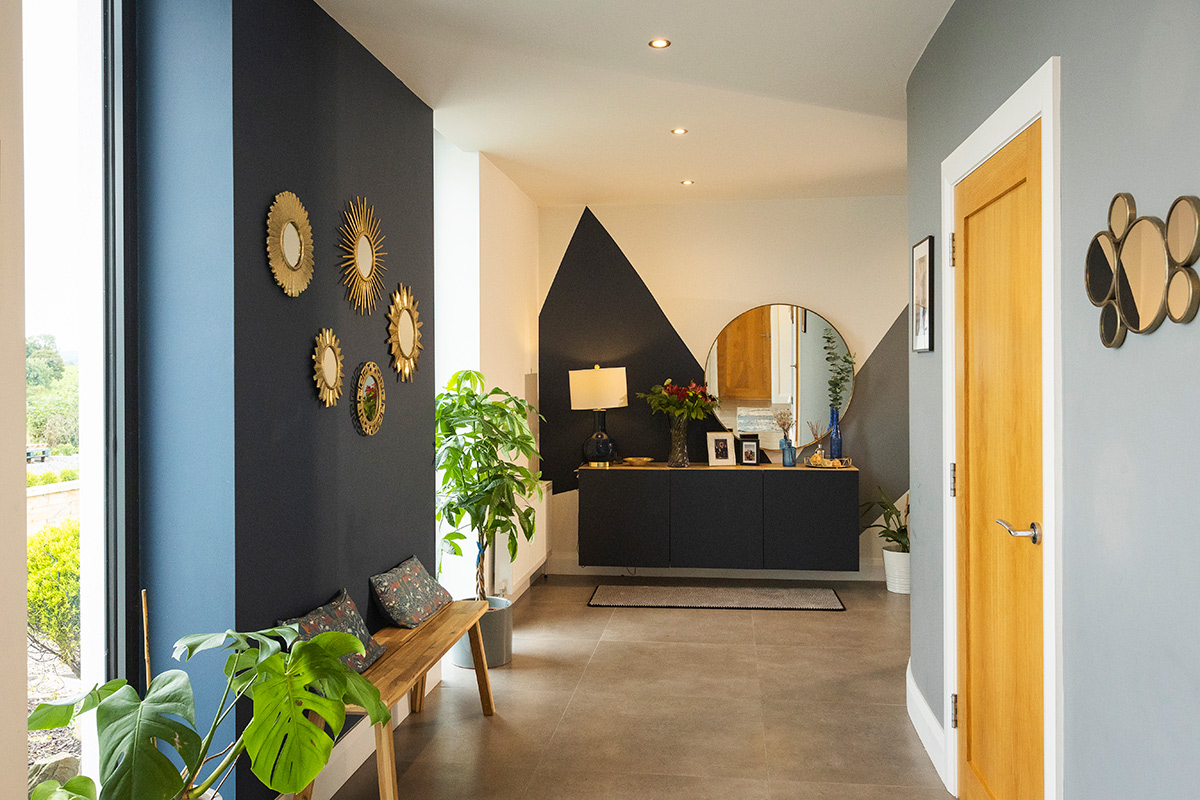
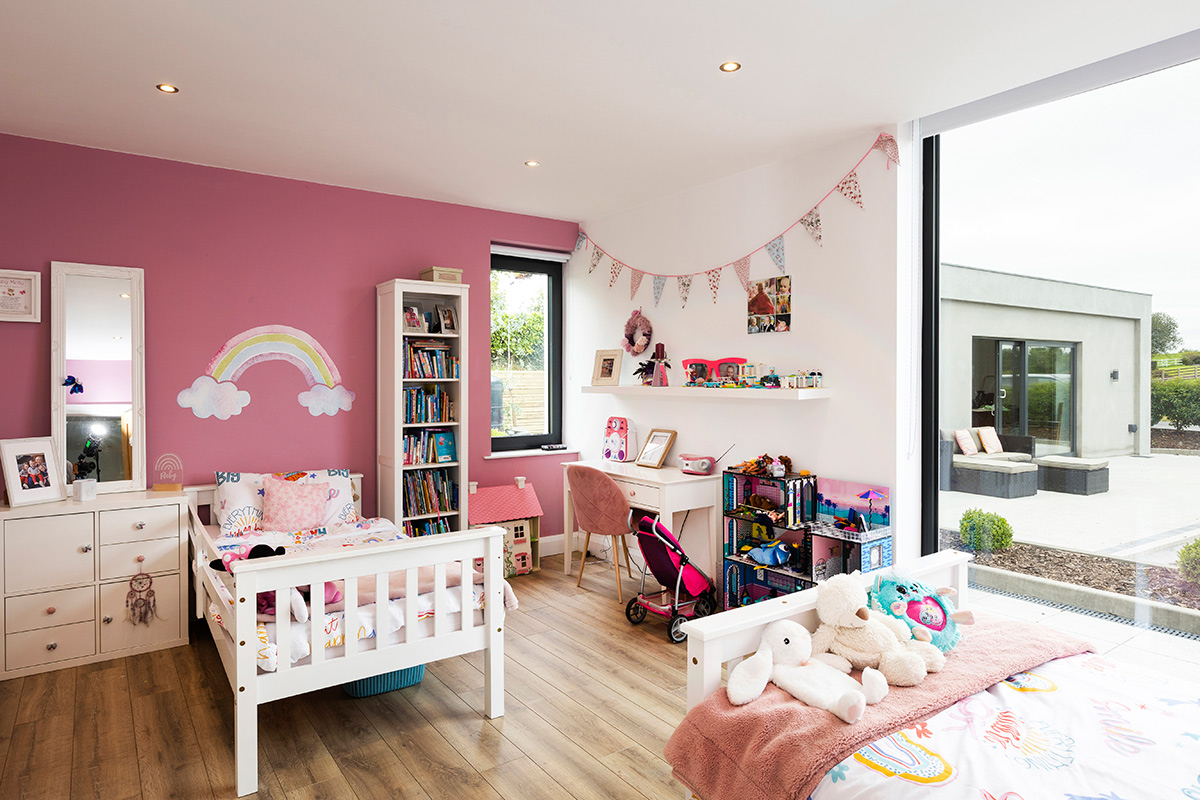
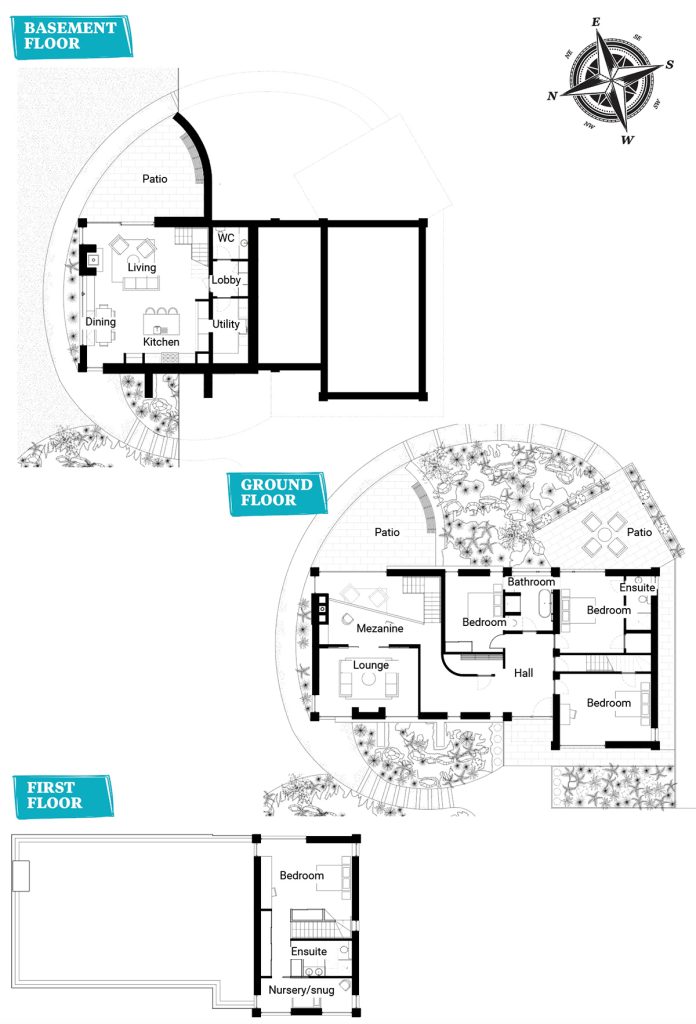
“We have an open plan kitchen and living dining area in the basement with full height glazing on two sides. The downstairs toilet and utility room are in the back of the basement and are windowless. Entering the house at ground level, you come into the hallway with three bedrooms in front of you and a bathroom. A doorway hides another staircase that brings you upstairs to our master bedroom. That’s the kind of box on top of the house. There is also a living room cum playroom on the ground floor and a landing with a glass mezzanine that looks down to the open plan area. You access the basement living area down a concrete staircase.”


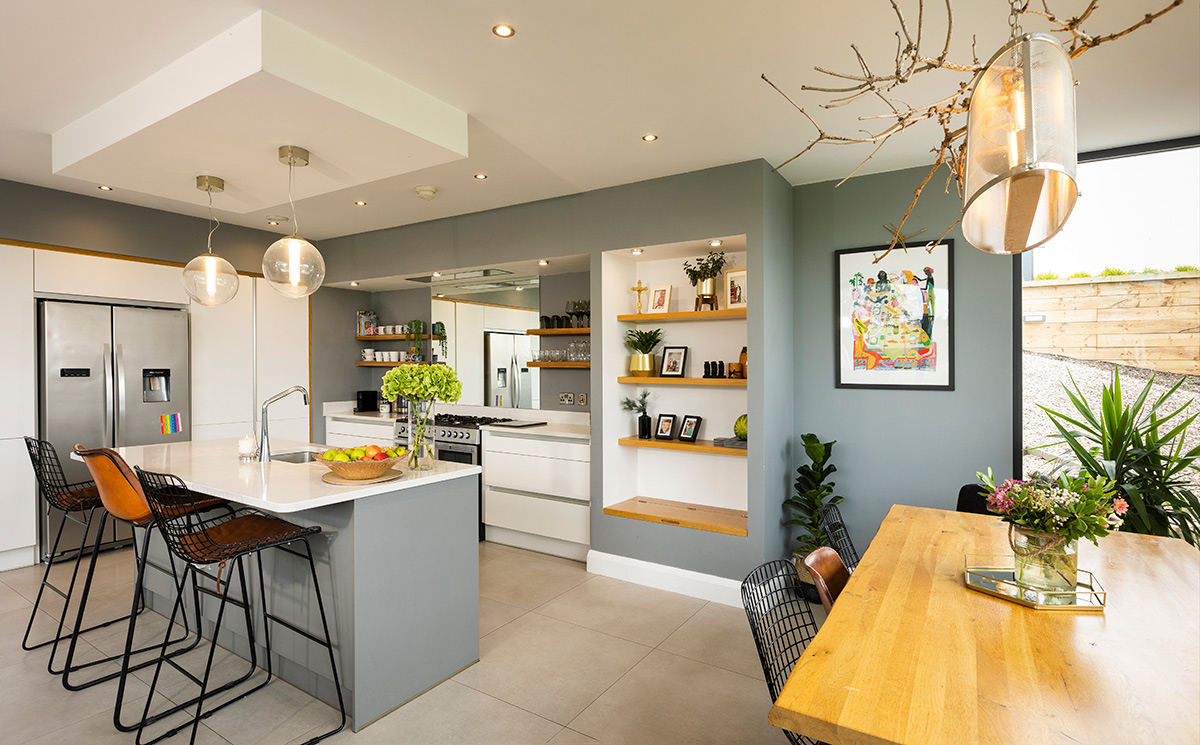
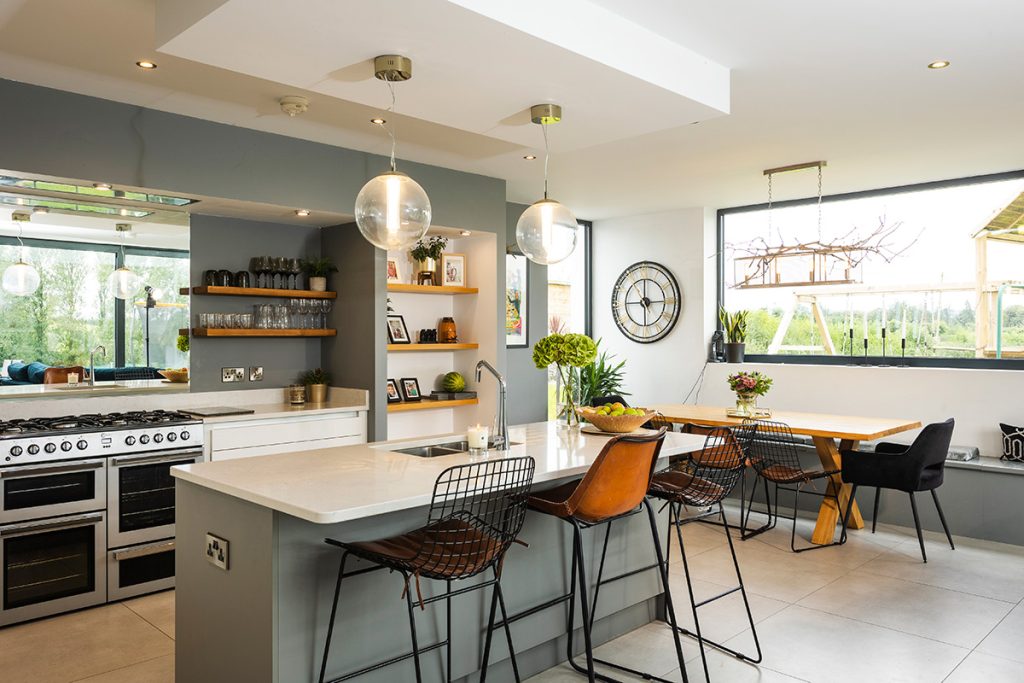
The kitchen design was driven by the overall modern house style. “We needed to continue the modern edge through all the rooms,” says Alanna. “I love shaker style kitchens but that wouldn’t work in our house. So instead, the kitchen is very minimalist with handleless, matt grey cupboards and drawers with a granite top island and countertops.”
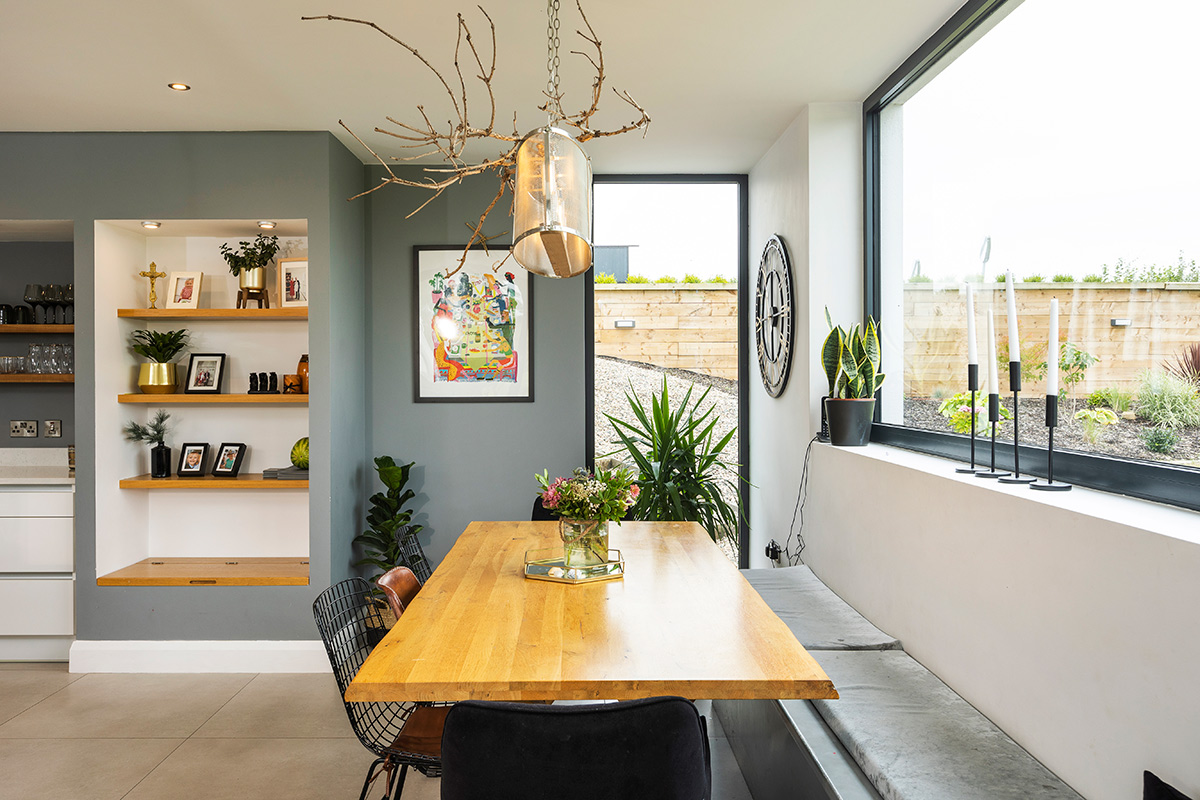
“Originally, there were cupboards on either side of the oven, but I’ve since taken them down, replacing them with open oak shelves which house our mugs and glasses.”
“In the living area, there is an open stove with an oak beam above it. On the suggestion of our architect we had a bench custom made to run the whole length of the large window in the dining area which is great, especially when you have small kids. You can fit six children in there, perfect for parties.”
The different zones are lit with differing lighting sources – spot lighting, a large glass orb over the island and a long light over the dining table.
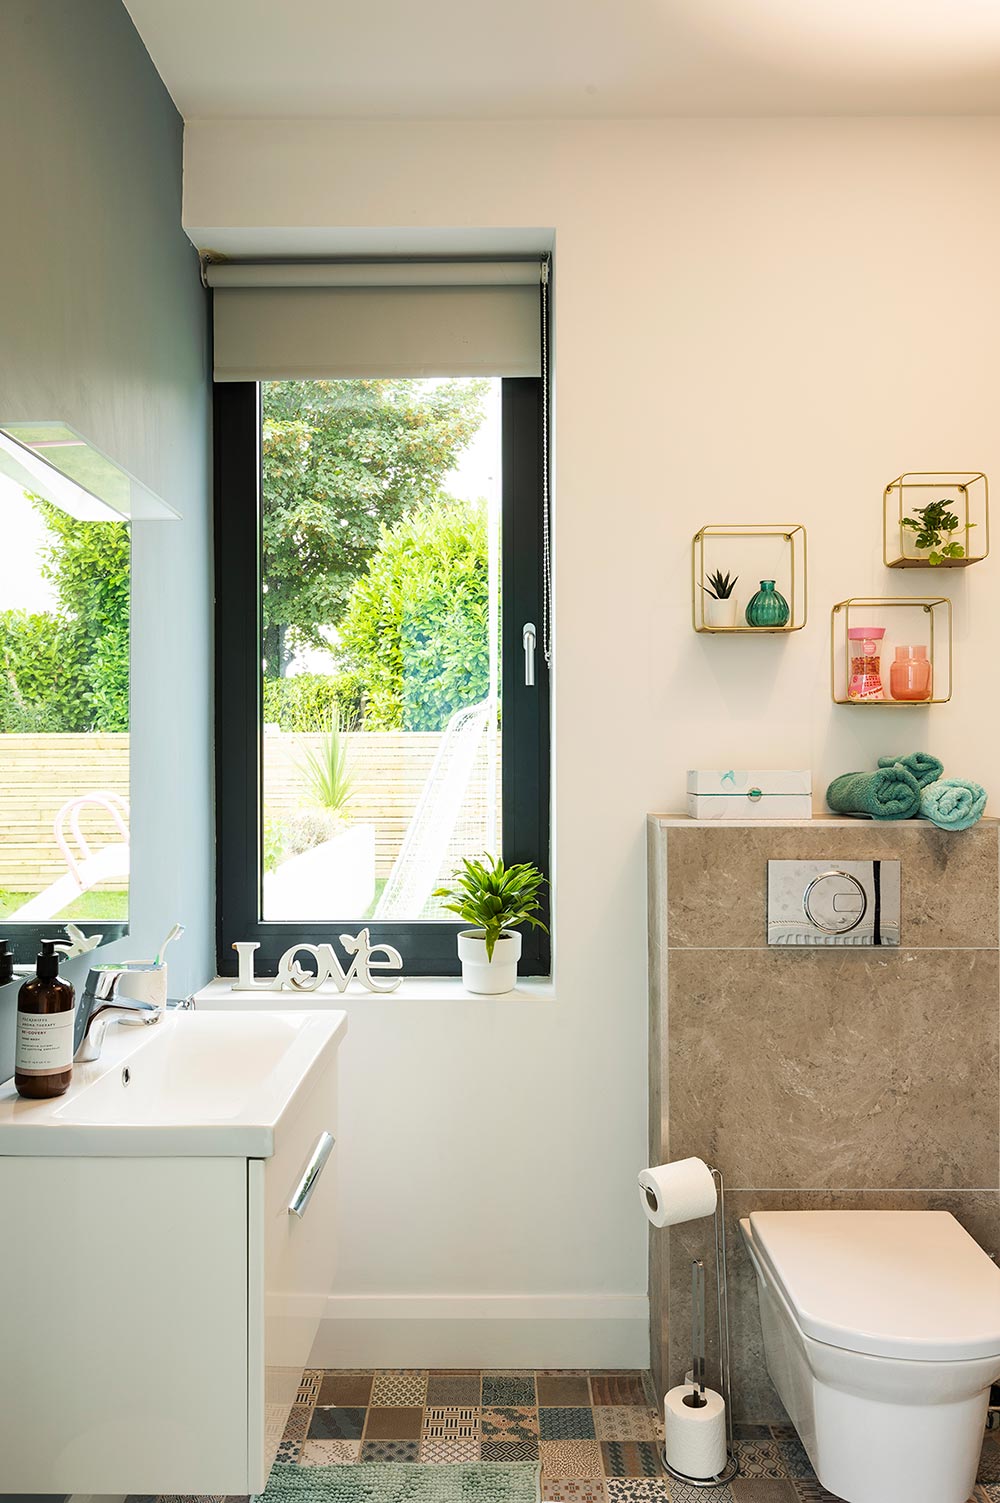
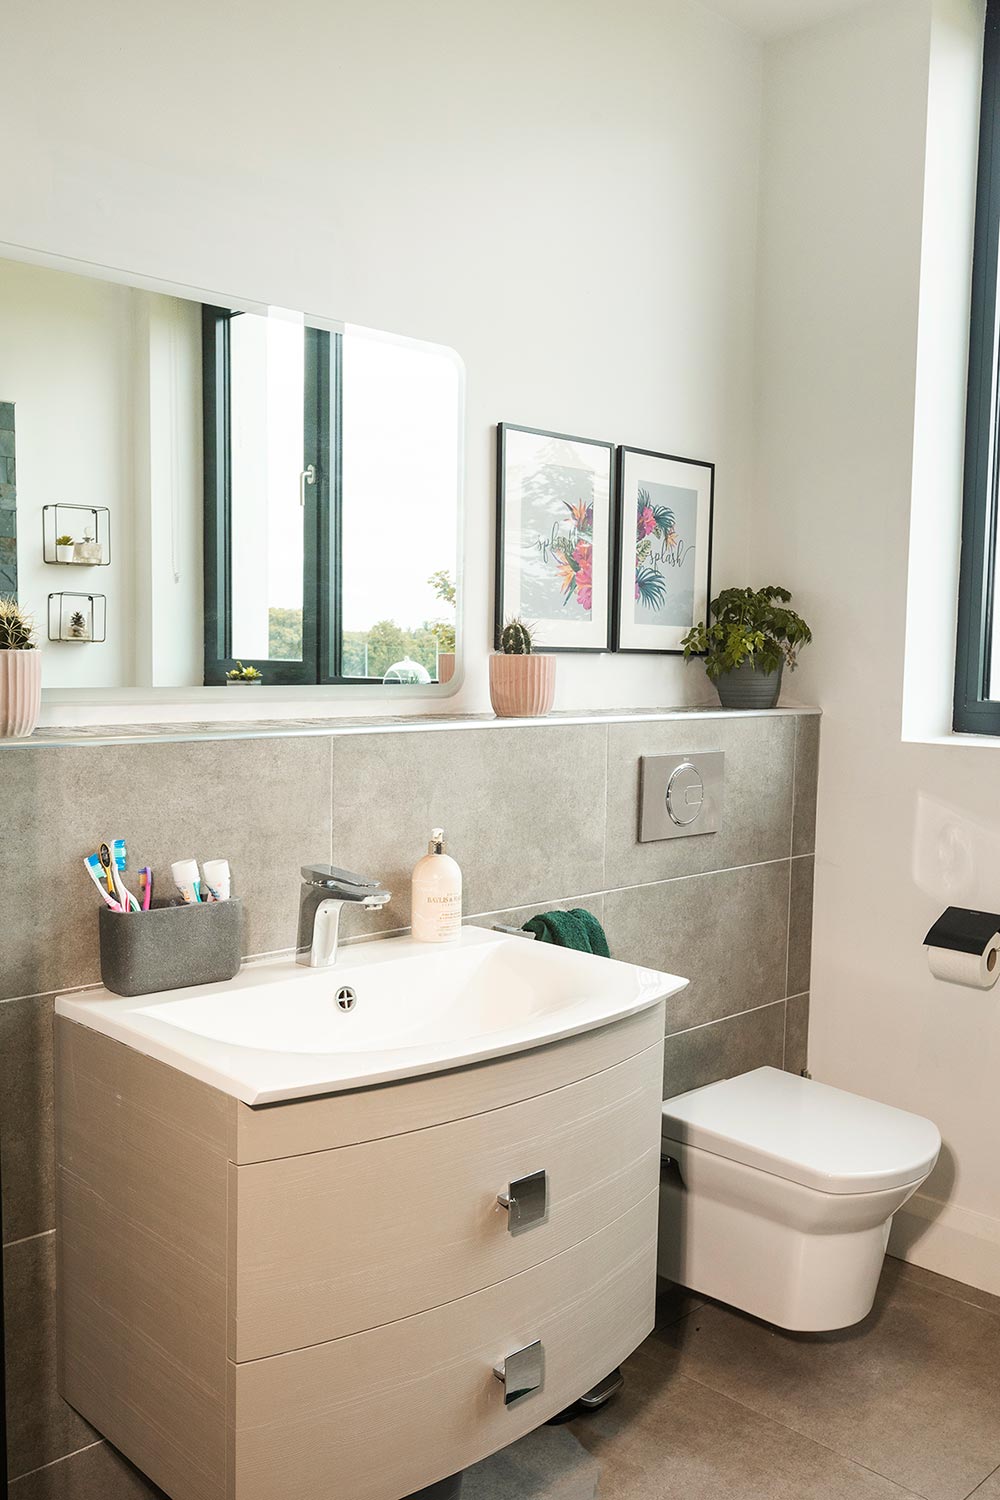
With such a clear modernist vision and some good advice, choosing sanitaryware was straightforward too. “We went to the bathroom showroom and showed them our plans. They made some great suggestions which helped improve the functionality of the family bathroom.”
“They encouraged us to go mad and make a style statement with the downstairs wc, which is most likely to be used by guests. We took their advice and chose a turquoise freestanding sink and gave the room a bit of a quirky look, which we love.”
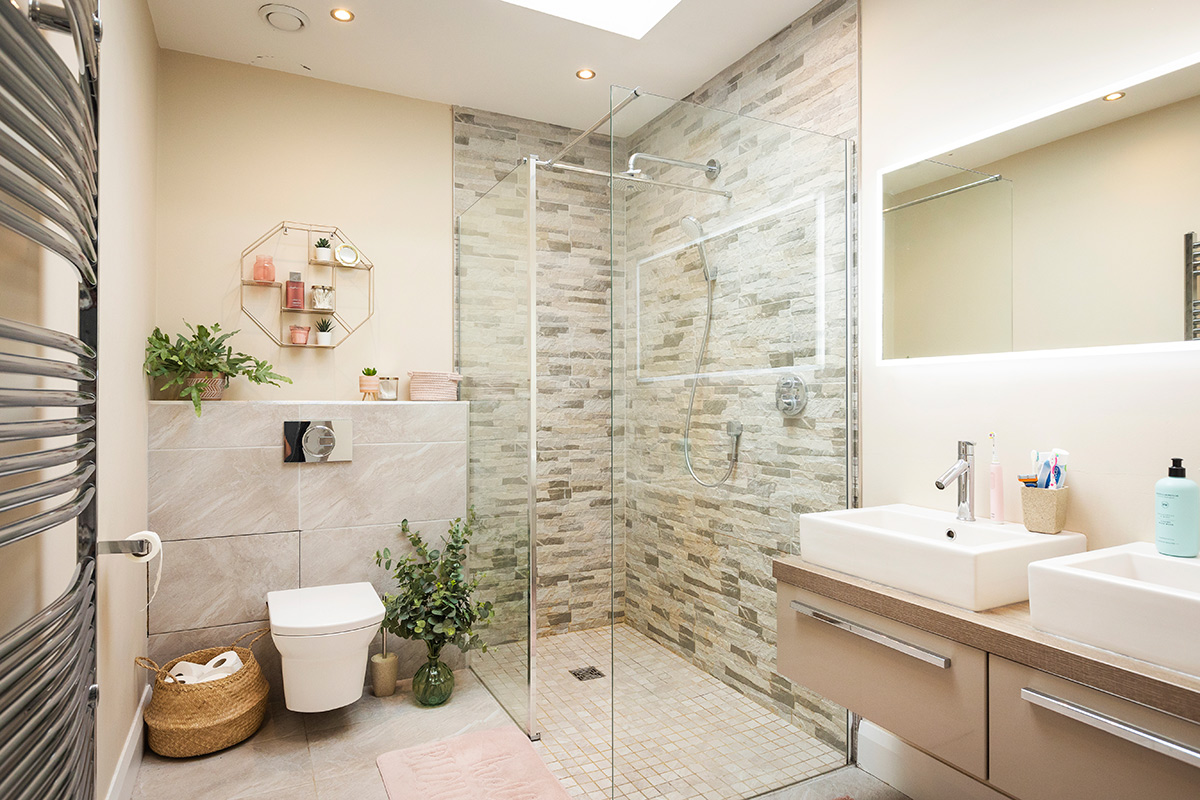
The family bathroom has a freestanding bath and a separate shower with a sunken tray. “They are so much easier to keep clean than the plastic shower trays,” says Alanna. “We have them in the two ensuite shower rooms also.”
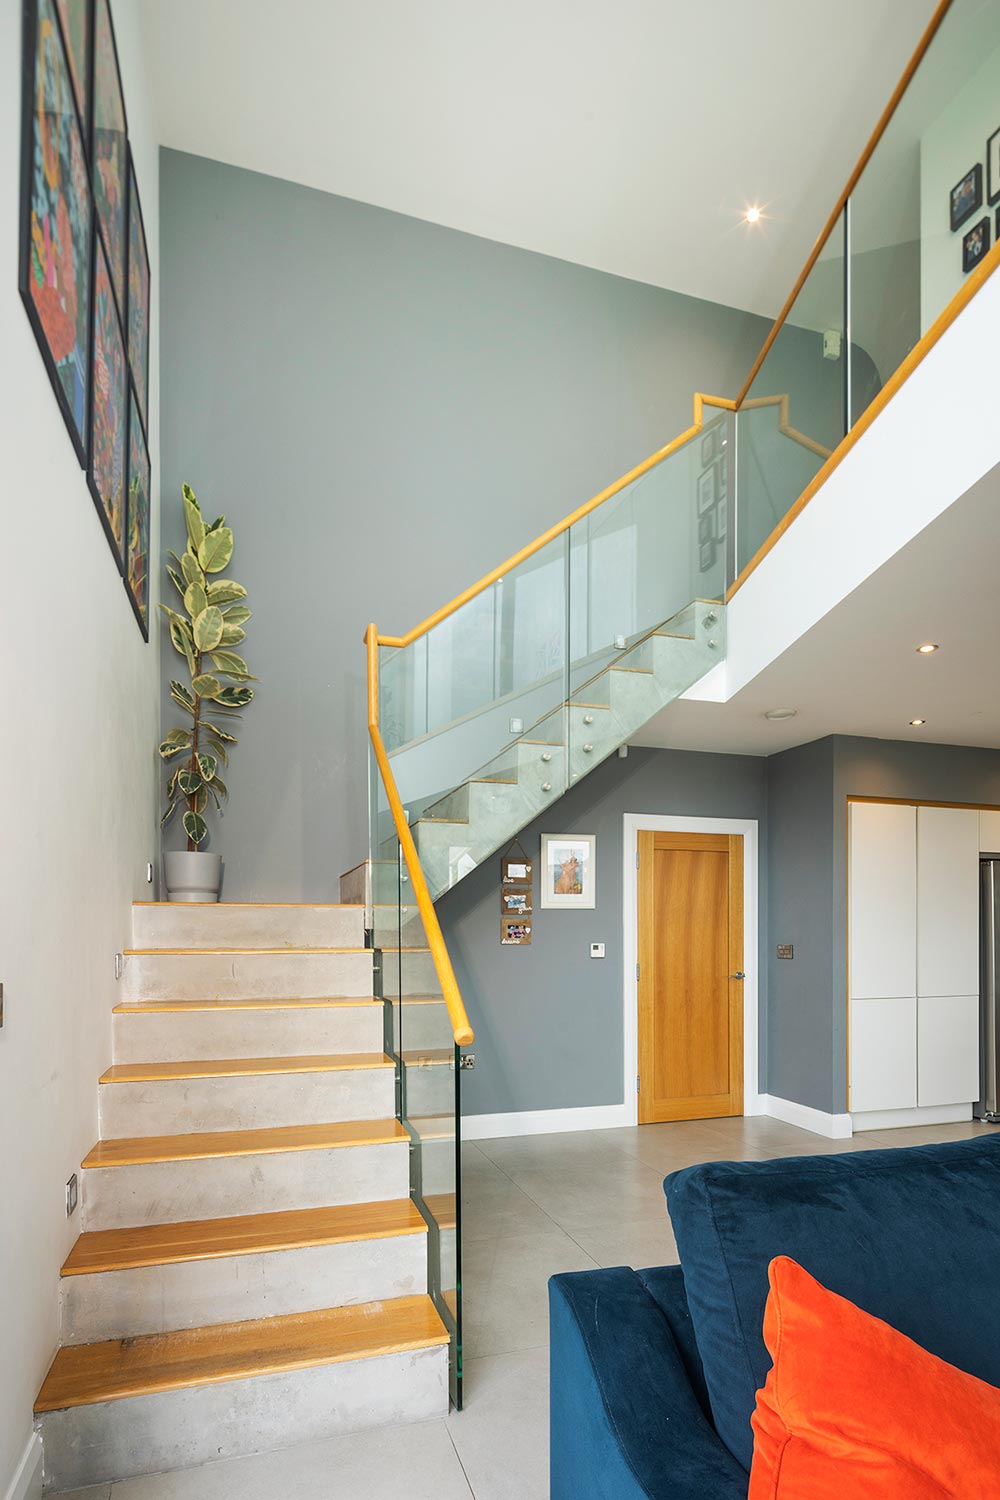
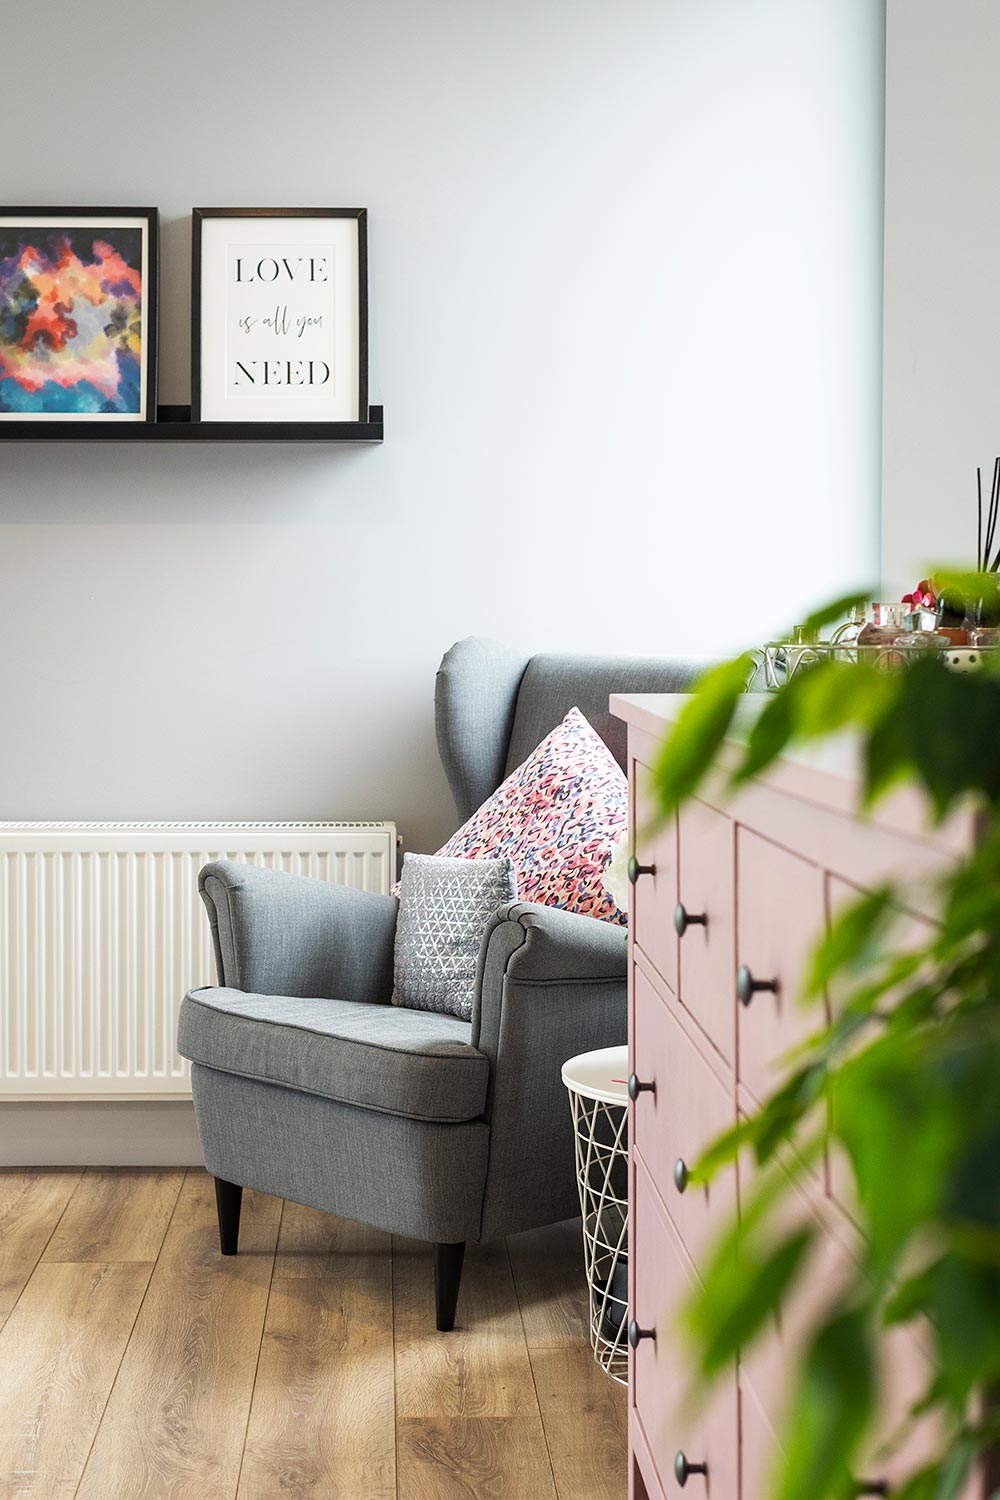
“I am quite conservative with my big purchase choices, and then I like to make my own stamp with individual touches like the pictures hanging on the wall going downstairs to the basement to the open plan area. They weren’t that expensive, and I can easily change them in years to come if we get bored of them. Whereas I wouldn’t buy a huge, madly coloured sofa because you’re never going to get rid of it and you will get tired of it. Styles change and trends change, so I like to keep the big ticket purchases very plain and simple.”
The Connollys originally wanted a polished concrete floor on the ground floor but were unable to source a contractor to carry out the work. “Instead, I chose a large, concrete effect tile in a light colour downstairs and a darker shade upstairs as you walk in from the front door. The stairs leading to the basement are exposed concrete with oak steps while the wooden staircase up to our master bedroom is painted white with a herringbone patterned stair runner. We chose a chalky grey coloured laminate flooring for the bedrooms for warmth and ease of upkeep.”
Split level design style counsellor
Alanna admits she was the main driver in the interior design process. “Luckily, James likes the same style as me so when I showed him my choices he was always on board. My mum was my sounding board if I was really unsure about some of my more unusual ideas. I got a lot of inspiration from online mood boards.”

“My friends sometimes ask me for interior design advice for their homes and I always tell them to go create an online board of styles and colours they like. Then we go through their choices and find a way to pull it all together. It can be scary and overwhelming when you have to translate what’s in your head into real purchases. That’s where these tools can help.”
“When you self-build you have to do your homework and know what you like and what you don’t like. It’s about being confident in what you’re choosing. I suppose that’s why interior designers are so popular; it’s easy to get overwhelmed by the amount of micro decisions you have to make.”
“Many self-builders are young with a fairly modest, fixed budget and they don’t realise how much things cost. When do you ever buy a toilet? You just don’t, unless you’re building. Then the reality hits, crikey, there’s five or six of them to buy!”

“Most of us are blind to costs when we start on the self-build journey. This is why it’s so important to be open and honest with your contractor at the start. They need to understand what scale of budget you have. You don’t want to come to the end of the project and find that you have a list of expensive extras that weren’t on the original costings, and you don’t have the money to pay for them.”
The construction process was without major issues. “The only frustration we had was how long it took. We were renting and towards the end, you start to wonder if you are ever going to move. But you do, and then your new build just becomes home.”
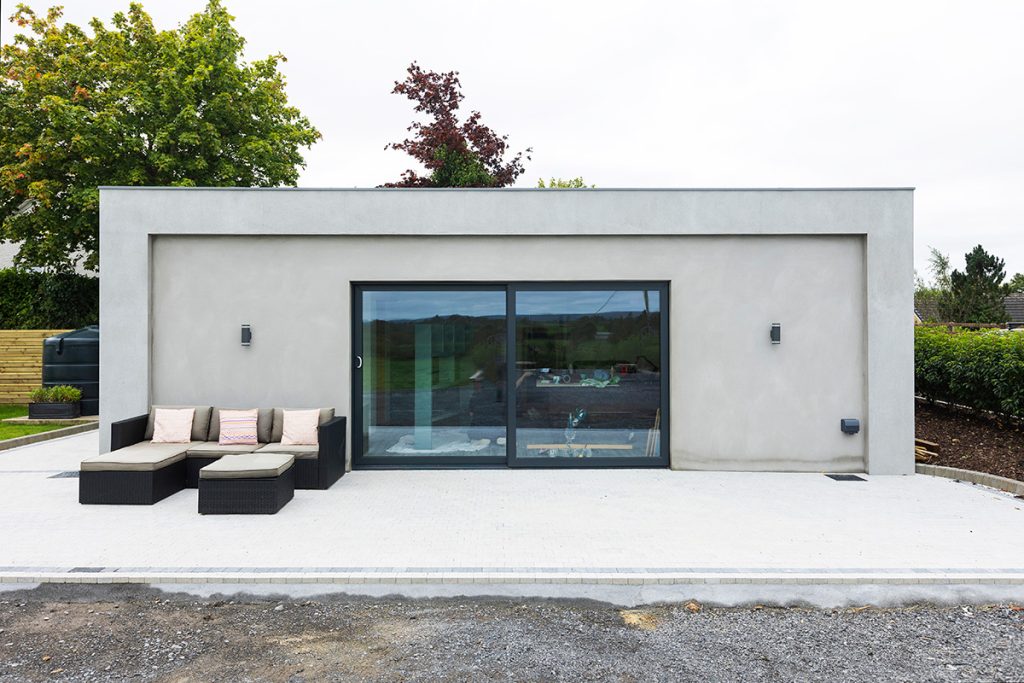
A final project has just been completed, the transformation of the garage into an entertainment/fitness room. “We’re big football fans and love to entertain so we have a bar in there with a big TV and sofa. It’s going to be a great place to sit and watch the matches. We’ll also have an area to put our gym equipment.”
Timeline
Early 2014
Site bought
Oct 2014
Planning applied
Nov 2014
Planning granted
Summer 2015
Build start
Dec 2017
Moved in
“We are really happy with the way the house works for us. Every room in the house is used. There’s no room that you’re like, ‘Oh, why did we do that?’ There’s no design decision made that isn’t a good one. Thankfully, it’s all worked out as we had hoped.”
“I suppose when you’ve been through the whole process, from the first days of planning out the project everything should be the way you want it. That’s why people are driven to build themselves – to get their dream home.”

Alanna and James’ tips for split level house
Decide where to get advice. If you struggle with colours, or visualising things get help from people you trust. Just don’t ask too many people because it can get confusing!
Don’t pick something when you’re not sure. Really think before you make a large purchase because chances are you’re going to have it for a long time.
Find a contractor that you can speak openly to, someone you can trust and someone who can be straight with you.
Q&A with Alanna and James
What is your favourite design feature / room?
I have favourite places all around the house where I can soak up the views. Sitting on the couch in the basement I can look up and see the full sky with birds flying overhead. At the dining table, you can see what weather is coming towards you. Then at sunset when you’re coming up the stairs, the long window frames the sun going down over Carnemore Rock.
Biggest splurge?
I suppose the biggest splurges so far were the large handmade sofa and refurbishing the garage into an entertainment room.
What would you change or do differently?
Probably the utility room was the biggest thing that I regret. There were so many decisions to be made near the end, that I didn’t take enough time to think about how it would work. In hindsight, I wish I had put more thought into it, maybe stacked my washing machine and made better use of the space.
What surprised you?
How full on it gets when you have so many decisions to make at once.
What single piece of advice would you give a budding self-builder?
The number of extras at the end can be a big shock. So make sure every decision that you make is included in your costings. We were pushed to the edge with our end cost and then we were pushed even further because there were huge extras. Our builder trusted us to pay off the extras in instalments, but others wouldn’t be as kind. Tell your builder at the start that if they’re making you pick something that isn’t in the costing, they have to tell you how much it will cost.
Would you do it again?
This is our forever home, so no we don’t plan on doing this again. If we did, though, we’d be going in with our eyes wide open.
Suppliers
Architect
Donal McPhillips Architecture, mcphillipsarchitecture.com
Design SAP and air test
QEL Air Energy Consultants, qelair.com
Windows
J&N Windows, interluxsystems.com
Roof
Sika-Trocal Type S single ply waterproof membrane, 150mm Sikatherm AL LPC/FM roofing board insulation, Sika-Trocal S-VAP 1000E E vapour barrier, Sika Primer 600
Insulation
Walls: 100mm Xtratherm Thin-R plus CavityTherm CT / PIR insulation, floors: 100mm Bally/Quinntherm insulation
Spec
Roof: Single ply waterproof membrane fitted by approved installer in accordance with manufacturer’s specification on 150mm roofing board insulation, on 1,000E E vapour barrier, on concrete screed to falls with primer applied to the surface of screed, on 200mm prestressed hollow core slabs to manufacturer’s layout, grout between all slabs with dryish C35 Newton concrete immediately after placing of units.
U-value 0.142W/sqmK
Walls: 150mm concrete block inner leaf with bonding and skim finish painted, 130mm cavity with 100mm PIR insulation held in place with s.s. wall ties located @ 450mm centres vertically and 750mm centres horizontally and staggered. 100mm concrete block outer leaf with 19mm smooth render finish consisting of 10mm scratch coat layer with 10mm topcoat rubbed smooth with float to achieve 19mm finished thickness with white painted finish.
Windows and front door: Windows double glazed dark grey aluminium windows installed in accordance with manufacturer’s details and spec. Overall U-value 0.14W/sqmK. Bespoke insulated and draughtproof front entrance door with timber clad finish painted grey to match window frames. U-value 1.0W/sqmK.
Floor type 1: Selected semisolid timber/ceramic tile finish, on 100mm concrete screed, on 100mm PIR insulation, on radon resisting membrane to equivalent of 2,000 gauge continuous polythene DPM lapped and bonded to DPC, on 100mm C30/20 newton concrete subfloor, on 150mm min. consolidated and blinded hardcore.
Floor type 2: Selected semisolid timber/ceramic tile finish, on 100mm concrete screed, on 200mm prestressed hollowcore slabs to manufacturer’s layout, grout between all slabs with dryish C35 Newton concrete immediately after installation.
Floor type 3: Selected semisolid timber/ceramic tile finish, on 100mm concrete screed, on 100mm insulation, on radon resisting membrane to equivalent of 2,000 gauge continuous polythene DPM lapped and bonded to DPC, on 150mm C30/20 Newton concrete subfloor, on 150mm min. consolidated and blinded hardcore.
Airtightness test result: 2.41 m3/h.sqm