In this article we cover:
- Carcase types including dimensions and how they’re made
- How the carcases are finished
- Choice of doors and ironmongery
- Drawers vs open shelves
- Door facings: choices with pros and cons
- How high you should go: design choices for top of units
- Pantries, cupboards, corner units: how to maximise their use
- Island design and how to make them work for you
How you plan to move around the space, where and how you store things, and at what height, will all have an impact on your design. Storage is the key to success – tidying up won’t take as long if everything has its place, and you won’t have to do it as often.
Carcase types
The carcase is the structure onto which, doors, drawers and countertops are connected, and it is the part of the kitchen into which all items are stored. It is generally constructed from chipboard at the lower end up to solid timber on the higher end of the financial scale. You can also find designs available in metal and other materials although these are less popular.
Within each material you will have further choices with some kitchens built with a carcase as thin as 10mm and others up to 12mm and even 15mm. The thicker the carcase, the stronger and more durable the kitchen will be on completion.
The carcase can be finished in veneer, laminate or it can be directly painted if made from MDF or solid timber.
The carcase will generally be produced into cabinets, generally 300mm, 450mm, 600mm, 750mm and 1000mm in width, although different manufacturers may operate different standard sizes and it is important that you check.
It is from this standard size of cabinets that most kitchen designs are developed. Any design that requires a purpose made unit will add to the final cost so try where possible to stick to standard sizes.
A carcase can then be finished with a single door (either a solid or glazed door), two or multiple doors, it can have a number of drawers inserted into it or it can be left open to receive an appliance or other item.
A single door will obviously cost less than two or more doors and a single door will also cost less than drawers, due mainly to the additional mechanisms required.

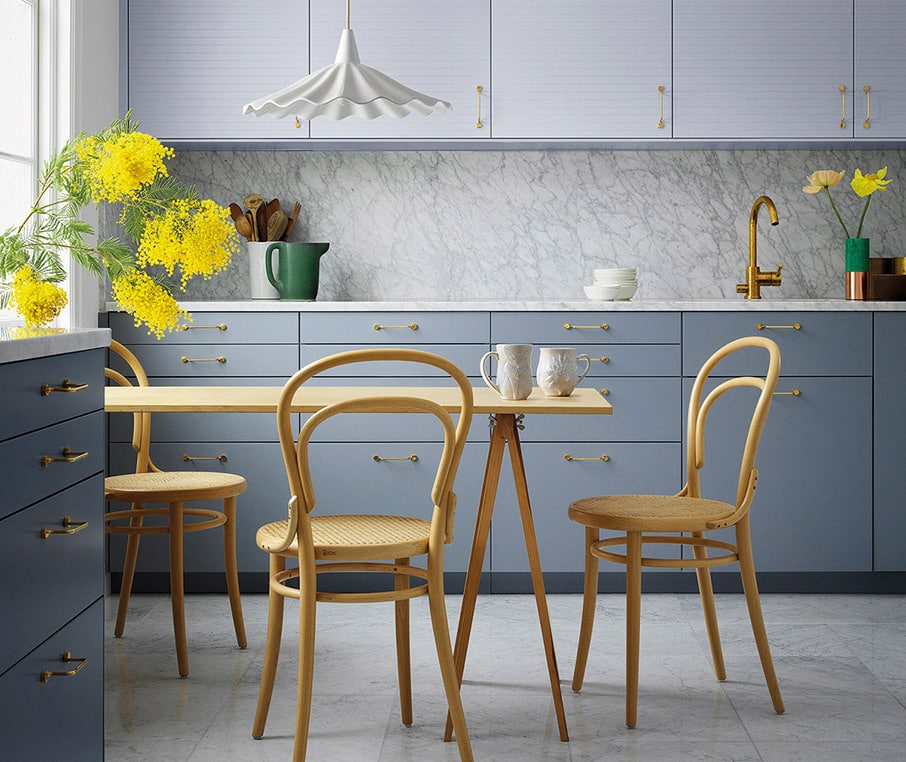
Doors and ironmongery
For doors, premium manmade composite materials are popular with either high gloss lacquered or heavy matt finishes. Flush doors with no panel mean they are practical and easy to clean. But some say these lack character.
Glossier styles can be demanding in terms of how often you have to wipe them down, with handprints showing up more readily. The wrapping can be made of vinyl but more durable is acrylic, which provides a higher gloss effect and is applied in layers. Some even have flecks of metal to reflect light.
Popular materials for traditional door styles, from shaker (plain door with a square solid frame and recessed inset panel) to large square panel doors, are solid timber (pine, oak, maple) sometimes with hand painted finishes (often from a palette of warm creams and greys).
Doors are generally constructed in MDF or solid timber (but again a variety of finishes in metal are also available) and are finished in laminate, paint or similar.
Each door or drawer will require a handle and fixing mechanism which will work towards the end cost. Indeed, advances in soft closing and anti slam devices, quick release hinges and the array of available finishes in handles, have resulted in an extensive amount of cost been taken up by ironmongery so don’t forget to factor these in.
Facings
At the base of the cabinets is a toe kick; it can be faced with a decorative or straight filler moulding to make it look flush with the finish above.
You can include a hoover outlet in this kickboard to allow you to sweep crumbs into. There are various types of inbuilt hoover systems, the cost of which can run from the low hundreds and up depending on the extent of the system selected. You could also replace the trusty broom with a chargeable vacuum cleaner; these are now just as light and easy to use.
Facings or filler panels are also used at the top of the cabinets and at the sides to make up for any measurement shortages. These small details will make a big difference when you are using the kitchen every day; they are available for both flatpack and bespoke kitchens.
How high should you go?
To make the house accessible to all, you should aim to make your finished worktops 900mm high. For comparison, a standard dining table is 750mm high. Ideally have some sections of worktop height adjustable or use a combination of fixed height worktops between 760mm and 900mm high.
For universal access, wall units shouldn’t be placed higher than 450mm above worktop level. Consider too that pull out drawers are easier to use than, say, deep shelves under your worktops.
Cabinets that go all the way up the ceiling, framed with or without a bulkhead or moulding, help prevent dust build up and can be more visually appealing than locker-like arrangements (where there is a gap between the ceiling and the presses).
Universal Design also factors in the fact that many people can find blank elevations to cupboards confusing. The methodology therefore suggests a mix of open shelving and glass fronted units to act as a reminder of what’s inside and to allow easy checking of contents.
That said, there is a design trend for a clean contemporary look with sleek, uncluttered lines.

Drawers
Drawers are most efficient at storing things you can access, especially if you kit them out with convenient wire baskets and inserts. Larger ones can take the weight of pots and pans. They come 600mm long to match standard appliance sizes but also 800mm for cutlery and pots and pans; depth is usually up to 500mm to fit in the standard 600mm carcase.
Note that if you have large drawers in a small space, and someone is standing in front of them, they will have to move for the drawers to open.
Internal fittings in drawers, but also cupboards, make for a super organised space. Your options include plate racks, peg boards, pull out spice racks, individual cutlery holders and saucepan dividers. A 500mm wide press can hold a full pull out bin system.
These add to the cost but are likely to be worth the investment to help keep everything in its place.
Pantries and cupboards
For some chefs a pantry is also a must have, with all items on view in a walk-in area, but for others kitchen cabinets provide sufficient food storage.
And so a large food cupboard and a large crockery cupboard can be a good place to start in tandem with convenient storage solutions, such as pull out racks and shelves.
But remember that if the pull out larder presses are too tall, the units can be heavy to open and difficult to access. Always check the mechanisms before buying.
It can be a good idea to combine a couple of systems in a double tall larder press, creating a complete centralised storage solution. You could take this a step further by incorporating back lighting, so that the back panel illuminates on opening.
Don’t forget to look beyond everyday items and think of where you are going to house glassware, saucepans, large bowls and platters. Everything needs a place. Would you prefer to shut these away or do you have a beloved collection that might merit glass display doors – with lighting? All options are open.

Corner units
In kitchens where corner units are required there are no perfect solutions: if left as shelving these can be tricky to get into and may result in lots of items stored at the back which may never see the light of day.
On the other hand, pull out shelves and carousels might be cumbersome and expensive. A diagonal corner unit (shelving with triangle at the back blocked off) might be the best compromise in such circumstances.
Magic corners incorporate two tiers of shelving, at front and back. The front set is attached to the door. As you open the door, the front row pulls out and the back row pulls forward, providing access to all four shelves.
Carousels feature two levels that spin around a centre bar. A Le Mans carousel has two kidney shaped tiers that manoeuvre out individually; these don’t tend to have the same storage capacity due to their shape.
Reputable brands are worth investing in when it comes to smart solutions and inserts, as they will stand the test of time and allow for changes as the family grows.
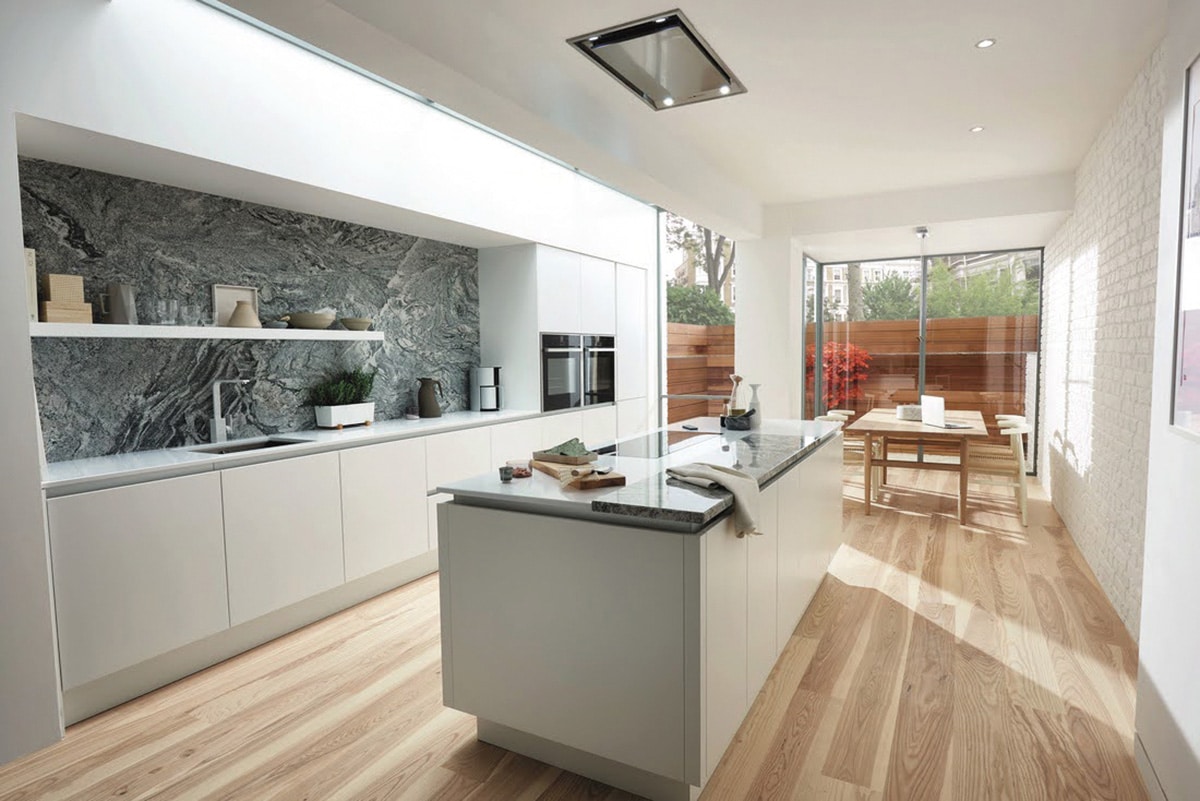
Islands
Islands are very fashionable but there is nothing worse than seeing a narrow, ill proportioned island shoehorned into the middle of a kitchen, with the bare minimum of space to walk around it.
You need at least one meter to get around comfortably, and only after other kitchen units on walls are factored in. Island sizes increase exponentially when functions like using it as a workspace or seating area are added. The width of island will need to be at the minimum 600mm but 90mm, 120mm or more will give you more breathing space.
Ideally, provide 1300mm between opposite work areas. This gives enough room to manoeuvre without being so great that unnecessary steps are taken.
If space is tight, a peninsular breakfast bar is sometimes a great alternative solution as it continues the flow of worktop space and can provide a useful partition to traffic for the central kitchen space.
Islands and peninsulas can have two heights: a standard counter height (600mm to 900mm) and a taller one for standing or eating (1100mm high). The double height can form a ledge which can hide the prepping activity from your guests.
Sink or hob at the island?
The first thing to do when you design your island is decide what you will use it for: prep, storage, seating.
So the answer boils down to how you will use the island and the kitchen itself. Some people choose not to have their hob on the island, to avoid splattering guests who might be sitting at it while the chef cooks.
But with downdraft extractors, and windows taking up a lot of wall space, it’s become a viable option and it’s now quite commonplace. It is also viewed as a more sociable and interactive alternative than cooking with your back turned to guests or family life.
Consider that with children in the house, it’s preferable to have a separate area dedicated to dining for mealtimes and only use the island as a breakfast bar.
The most compact set up, however, would be doing away with the dining area entirely – in that case an island that allows for seating in an L shape will be more conducive to a chat than seating on one side only. Where space is tight, you could also consider a drop down dining table arrangement from the island.
Multi generational living
Roughly every five years, your needs as a family will change. As the children grow up, and, eventually move out of the house, you’ll see a shift in how living areas are used and what is needed from them.

With toddlers and young children, the true open plan lifestyle is ideal. You can potter about while keeping an eye on what the kids are up to. Children this age will explore so give them access to some parts of the kitchen to help satiate this need, e.g. with easy to reach, hazard-free presses. Also be conscious of discouraging the use of items that pop in and out, e.g. concealed sockets, as they may quickly become a favourite toy!
As your children gain independence, their need to be in your company diminishes. To cater to this, segregate the open plan area with French or sliding doors. This will help break things up to achieve privacy in the living area, on demand.
In fact, in a typical semi-detached house from the 1960s or 1970s, knocking the front room through to the kitchen with a set of doors is the most straightforward way to create an open plan. With demolition work, the addition of French doors can set you back around 2k to 3k while sliding doors, due to the mechanism and need for second partition, will cost double that.
If you’re building new consider adding a small, separate sitting/tv room into your design. That’s an optimal set up, built to last. You will end up using this room as a teenager hangout – with social media so invasive nowadays it beats sending them to their room. It will be a place for you to get a break too.
It’s no harm thinking about the children fleeing the coop, how will the space work for you as a couple? That set of doors could come in very handy and the island, which is likely to double up as your dining table. Will some of the children continue living at home? That spare sitting room will be a godsend if they do.


