In this article we cover:
- How to maximise savings on a day to day basis
- Biggest investments and where it paid to spend
- Design process and securing planning permission
- Roof design and build details
- Glulam timber construction choice
- Innovative heating and ventilation system
- What the day to day on site was like
- Top tips to save on build costs
- Specification and suppliers list
- Floor plans and build costs
- Timeline and professional photographs
“Karen – my fiancée at the time – and I couldn’t find anything on the market that resonated with us,” says Brian.
“The properties we viewed needed substantial investment to meet the low energy standards we aspired to achieve. That’s when she had the idea of building our own home.” Determined to create a home that matched their vision, Brian and Karen sought out a suitable site. They were fortunate to find one quickly in the picturesque East Down area.
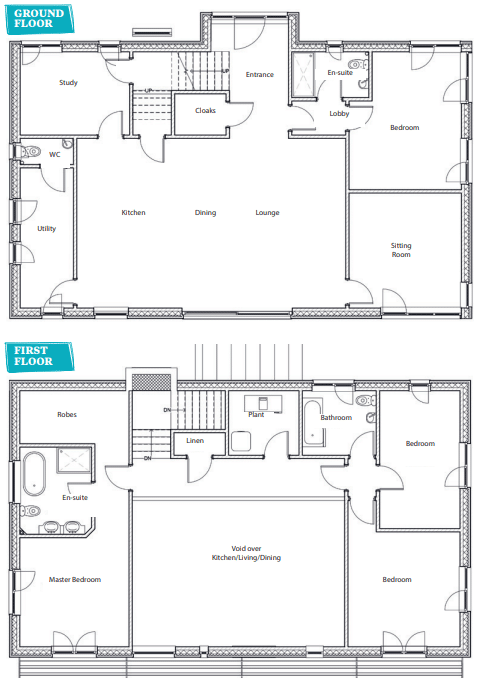
House size: 260sqm
Plot size: 8 acres
Bedrooms: 4
Site cost: £180k
Build cost: £420k all in
House value: £650k
EPC (SAP): A (93)
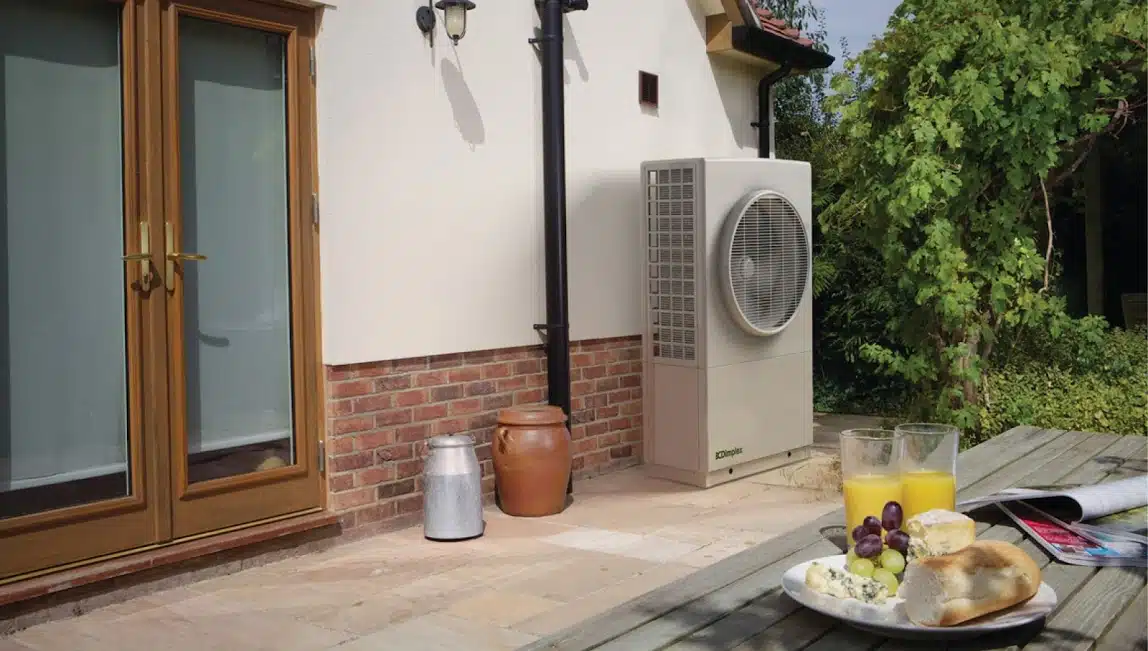
Heating & ventilation: centralised exhaust air heat pump
Build method: glulam timber
Design
With the site secured, the couple began envisioning their dream home. “We wanted to build something that was very space efficient; that wouldn’t be too big,” says Brian, mindful of not going overboard with extra rooms and circulation spaces.
“It’s easy to get carried away when you have a blank sheet. There is a huge temptation to add in unnecessary reception rooms and games rooms, cinema rooms and so forth, and in the end, they often don’t get used” he says.
Instead, Brian and Karen’s vision entailed creating a comfortable and manageable space that would adapt to their needs over time. “There’s no point building something that is so big that, once your children have flown the nest, you’re rattling around in it, paying huge energy bills and dealing with lots of maintenance and cleaning.” Striking the right balance, they aimed for a comfortable family sized house that prioritised liveability.
Part of their remit was to address the shortcomings of Brian’s previous townhouse, which was dark and cramped. To do so, they drew inspiration from a friend’s well executed and practical room layout. “I thought if we had the opportunity to build our own home let’s try to replicate that and obviously add in our own design choices,” says Brian. Their friend’s layout was their inspiration for their free flowing, open plan kitchen and living area.


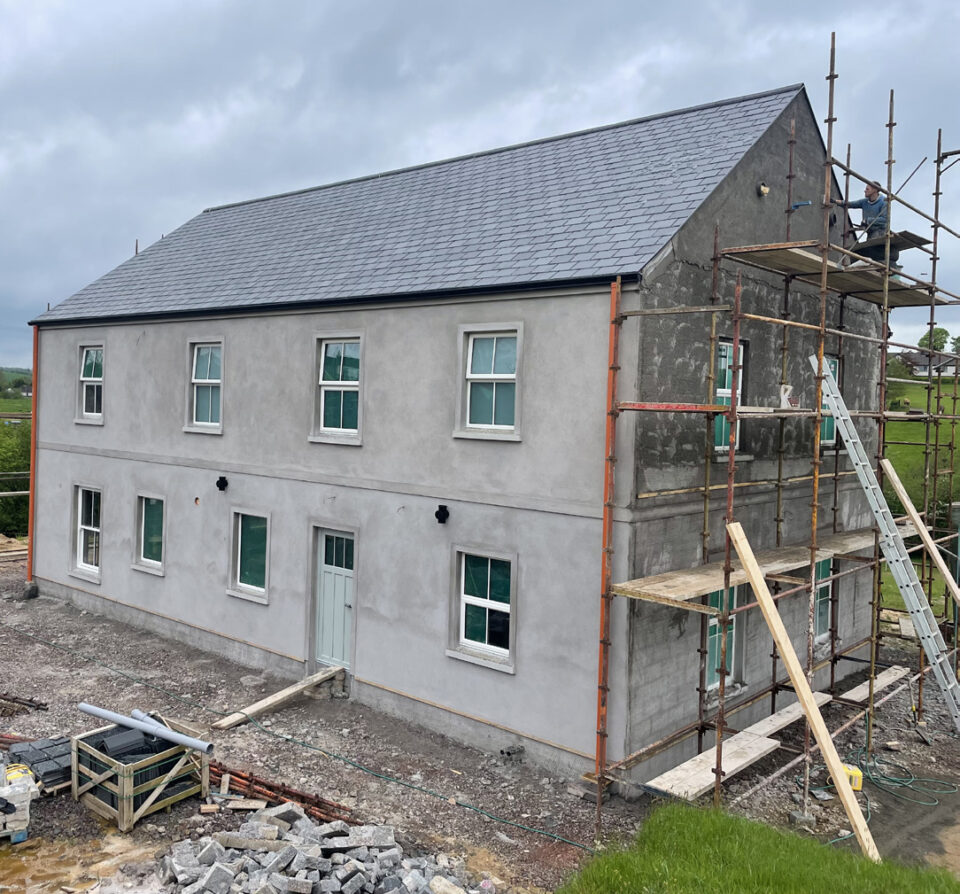
Drumlin roof
Ensuring their home would seamlessly blend into its surroundings, Brian and Karen balanced planning regulations and architectural considerations. “Where we have the site, there are quite a few restrictions in the planning regulations, for ridge heights, for example,” says
Brian.
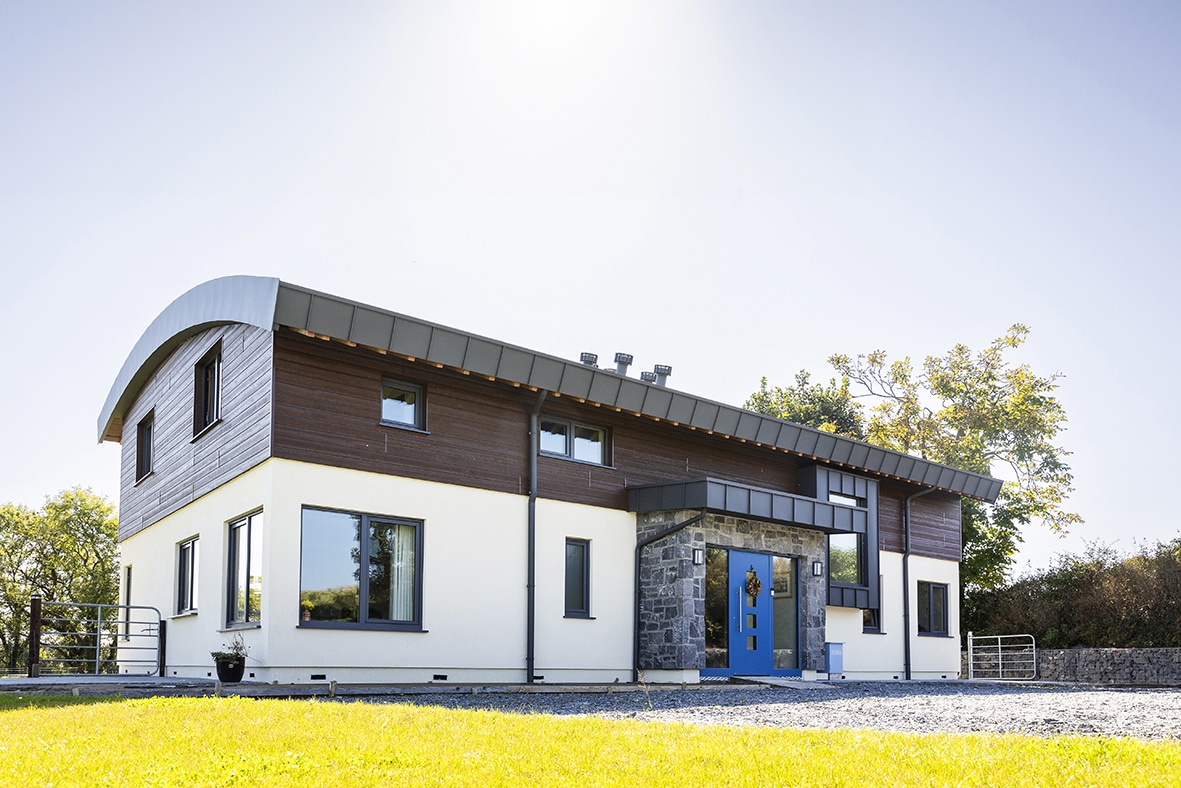
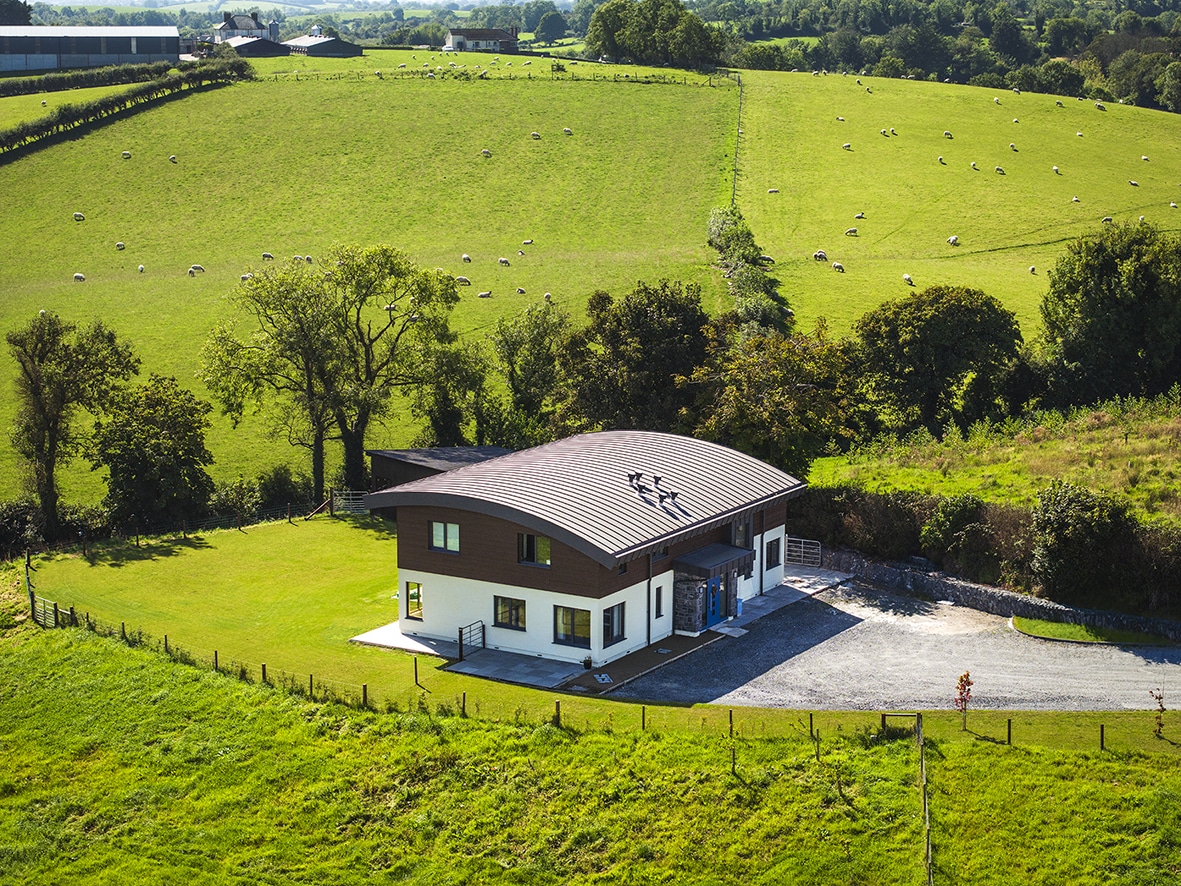
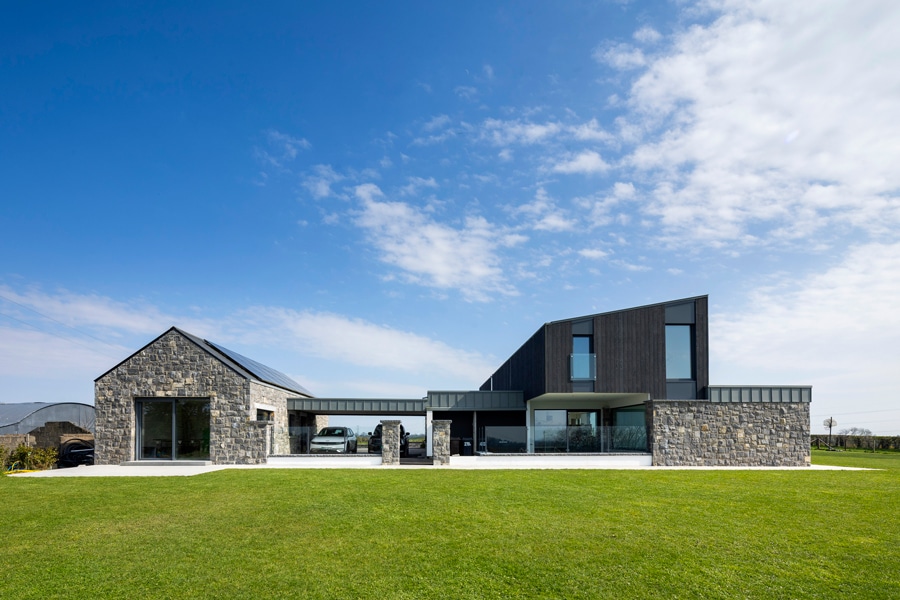
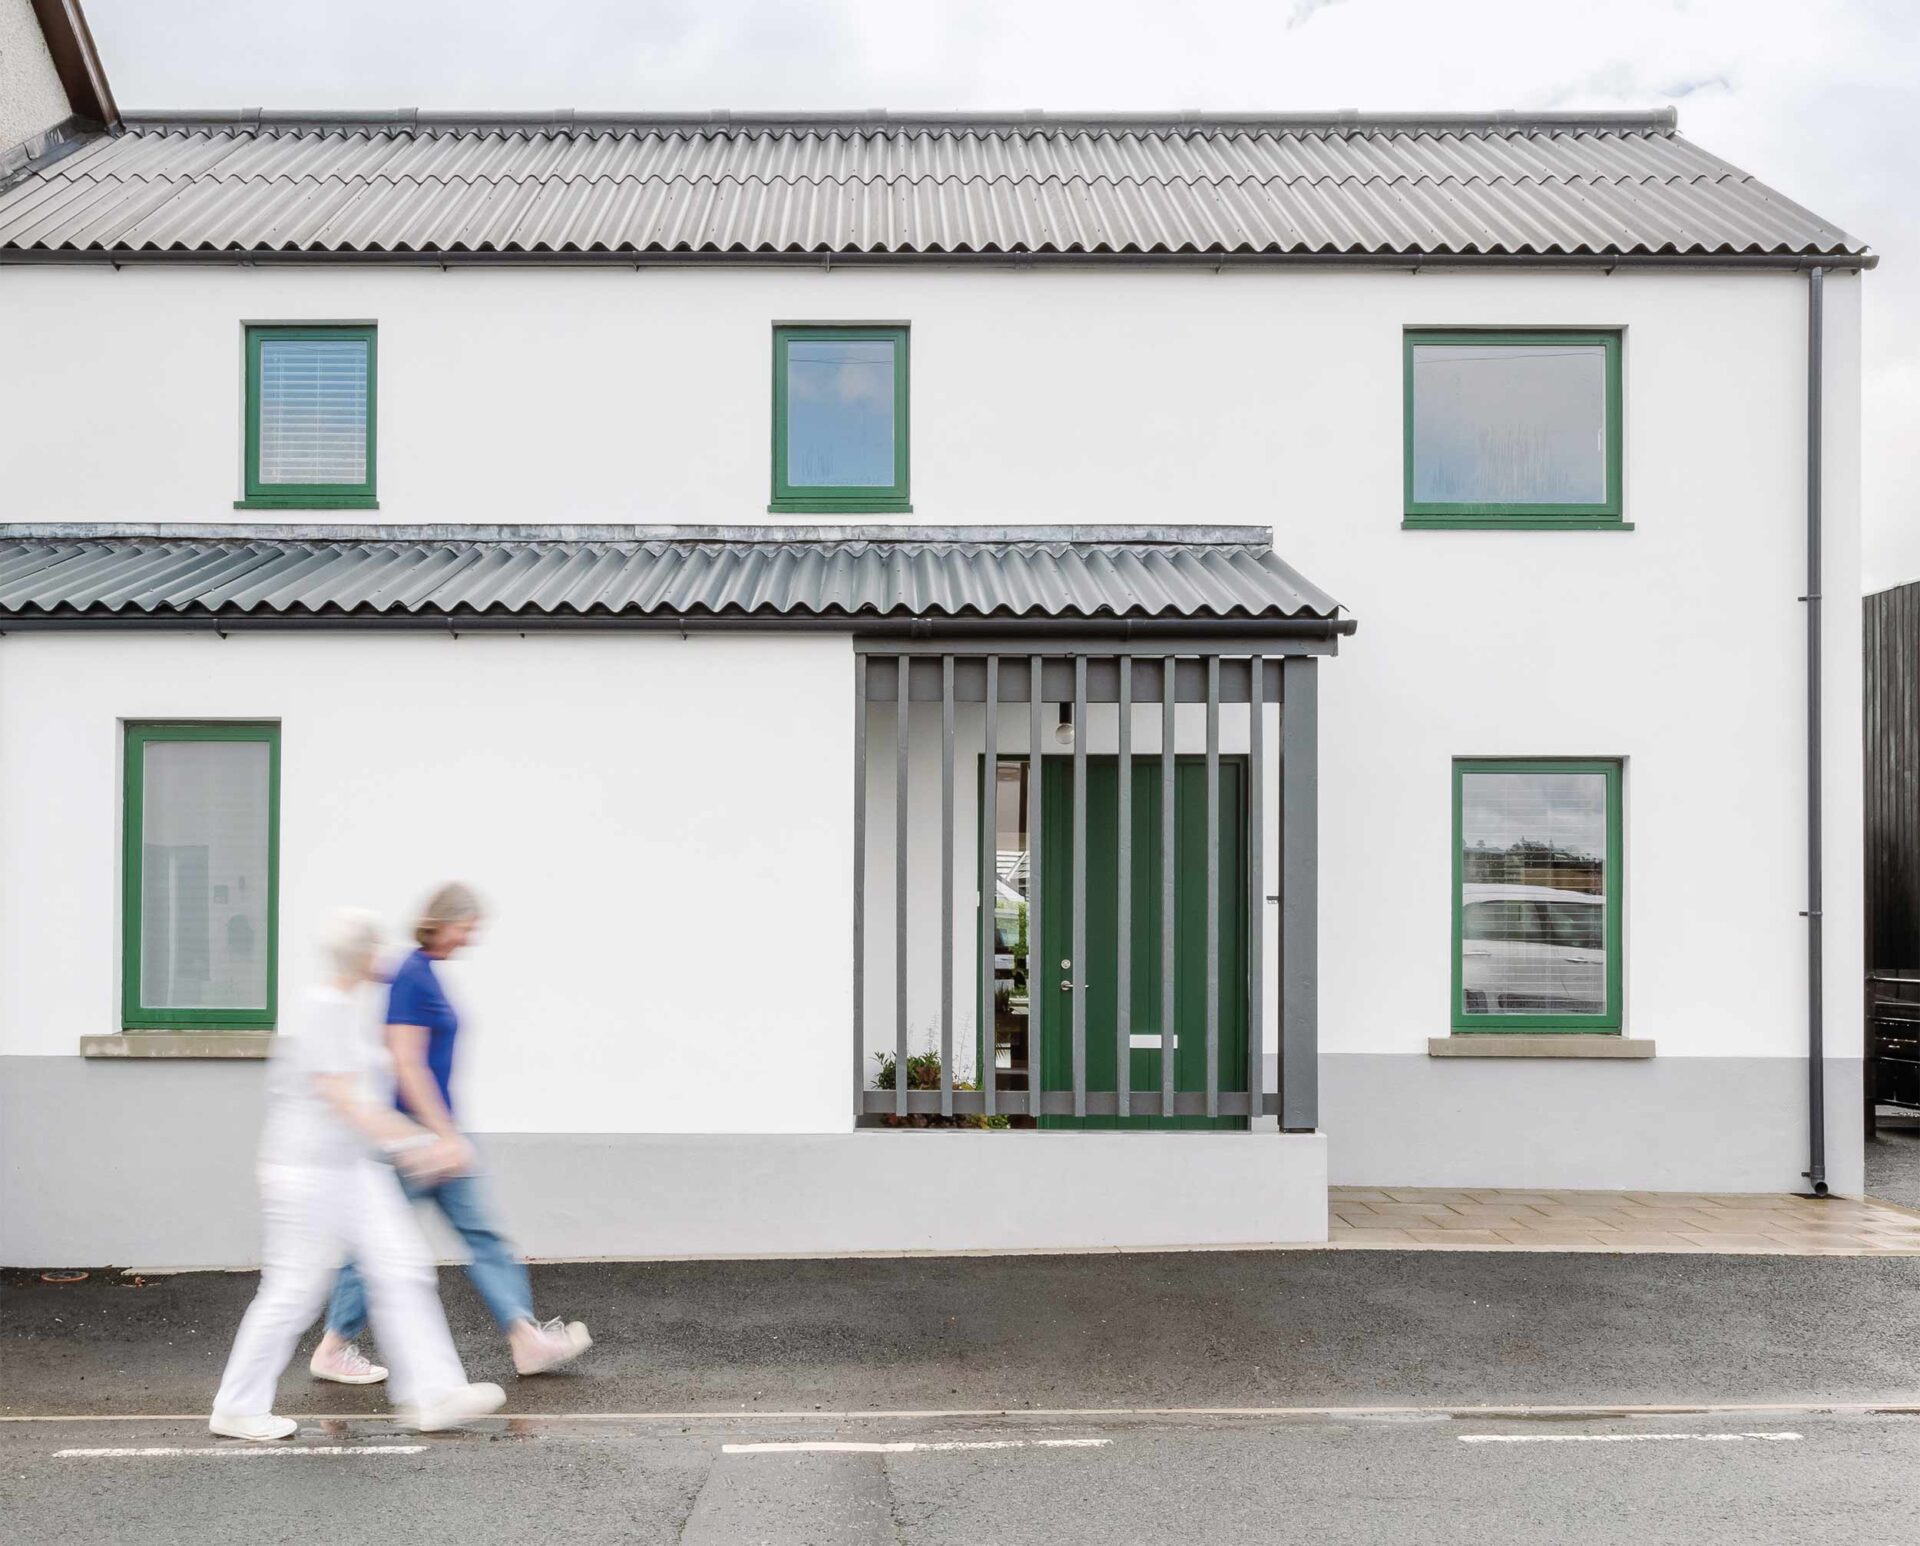
Their goal was to create a space efficient home that would stand the test of time, both in terms of functionality and aesthetics. To achieve this, they embraced a roof design that went beyond meeting building regulations, showcasing a graceful curve, resembling the nearby drumlin hills. “We didn’t want a barn style roof,” says Brian.
This thoughtful touch allowed them to have a full two storey build while maintaining compliance with ridge height requirements. Navigating the planning process successfully, they obtained the necessary approvals within a few months.
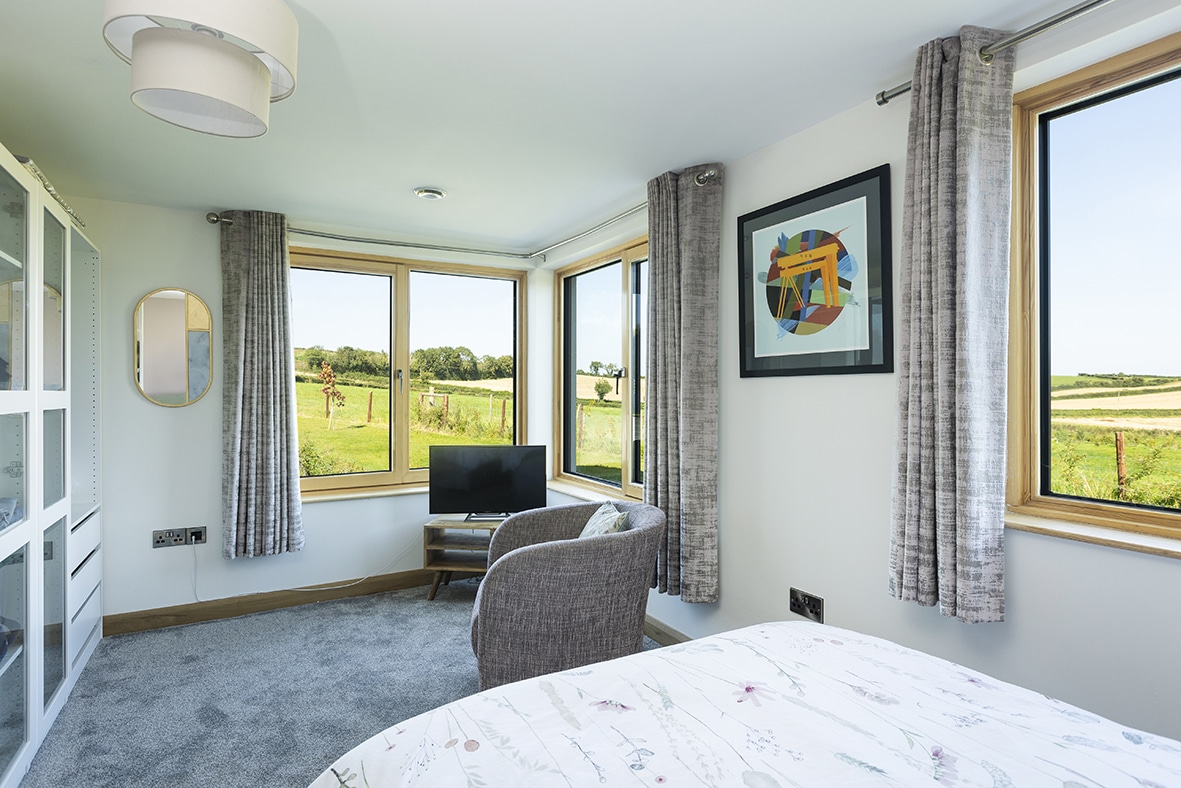
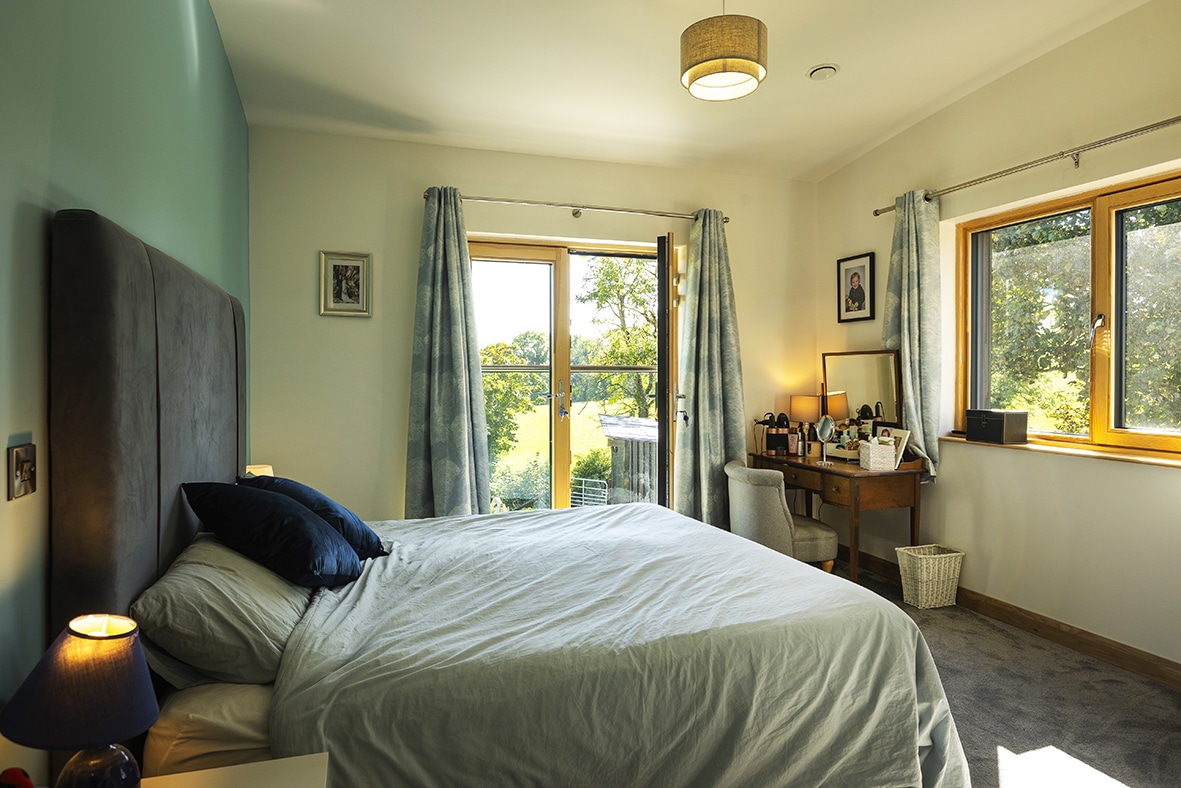
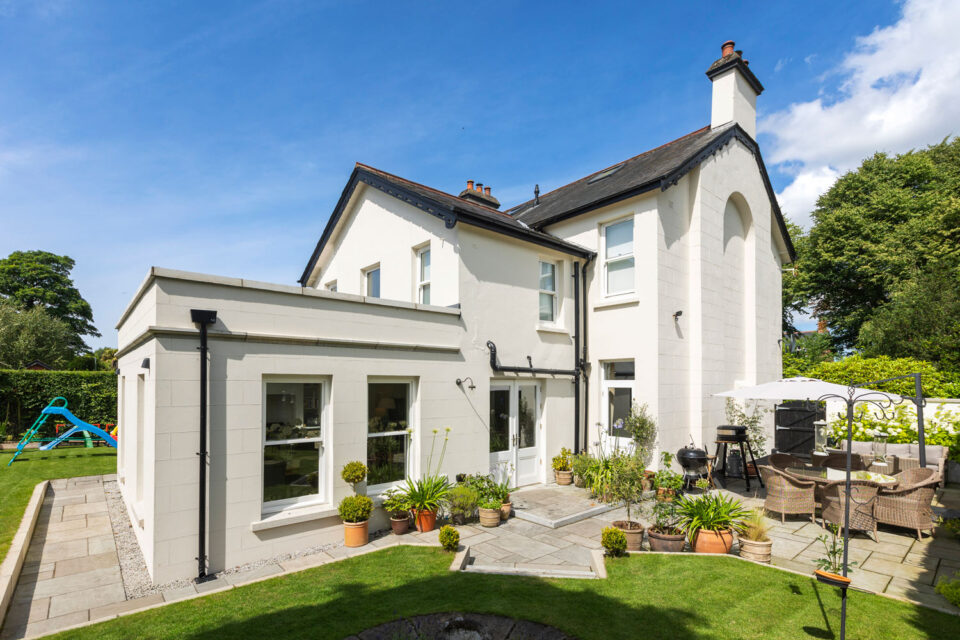
With Brian’s previous townhouse lacking natural light and adequate space, the now married couple wanted to optimise natural light and energy efficiency in their new family home. “The townhouse was so dark because there was a limited number of windows, which just didn’t work for us,” Brian explains. They sought to rectify this, incorporating generous glazing throughout.
Mindful of heat loss calculations and the potential for solar gain, or a greenhouse effect because of the many windows, Brian ensured provisions were made in the house plans. “The house obviously warms up with solar gain, but not to the point that it’s uncomfortable,” he says.
“We moved in during a mini heatwave, and noticed how the roof overhang shaded the upper storeys from the sun. We designed in the possibility of installing further shading in the form of a brise-soleil later, if required, but given how the house has performed so far it’s not something that I think we need to do.”
Brian’s attention to insulation, the wood cladding’s thermal mass and design choices that minimise overheating, all ensure the temperature inside the house remains comfortable and consistent.


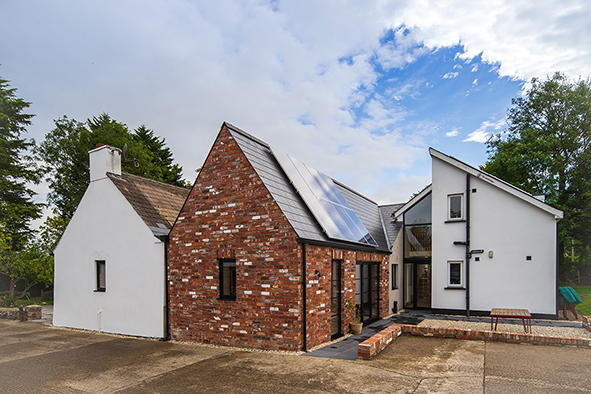
LEGO house
Driven by their desire for a personalised and well-built home, Brian took on the role of project manager and builder. Having encountered a laminated timber construction system at Selfbuild Live Belfast, Brian saw its potential and embraced its eco friendliness and ease of assembly. “It was carbon neutral, or negative in fact, because it captures carbon embodied in the wood and there is wood fibre insulation screwed directly to it,” he says.
With the help of an architect and Computer Aided Design (CAD) software, they designed the house to precise specifications, ensuring all the timber panels were factory cut for easy assembly – similar to building with vertical LEGO blocks.
Reflecting on the construction process, Brian says it was surprisingly easy to assemble: “Everything is glued and screwed together.” New to this type of construction, he enlisted the expertise of his Welsh suppliers’ team of builders who guided him through the initial stages. “In the first week, we built the whole ground floor,” he adds.
Following their lead, Brian and his team continued the construction process, adhering to the precise instructions provided. The meticulous labelling and numbering system ensured a smooth and error-free assembly.
While Brian and his two unskilled labourers took charge of most aspects of the build, he recognised the need for specialised expertise. He enlisted the help of professionals for tasks such as electrical work, glazing installation, scaffolding, and drylining amongst others.


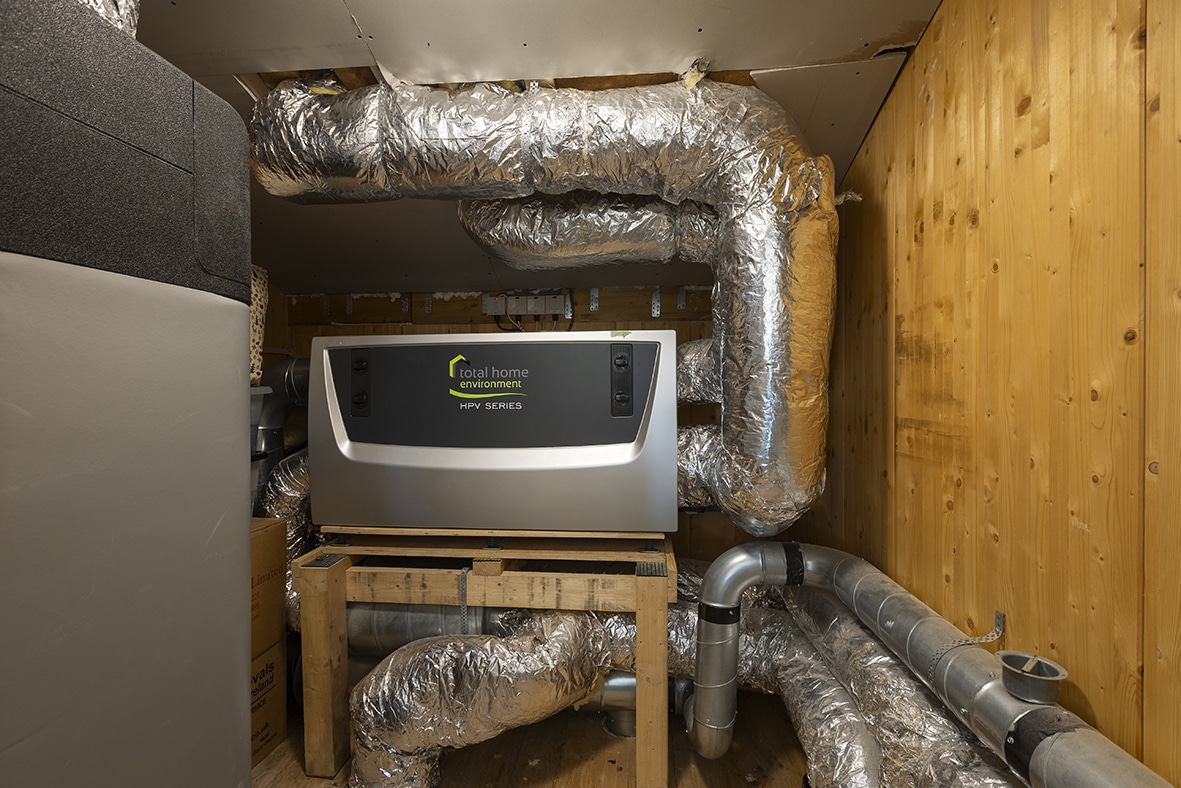
“I installed the heat recovery ventilation system, including the ducting, but I got a plumber to do the final hookup with the hot water cylinder and things like the safety valves, and then it was commissioned by the heat recovery ventilation company representatives.”
“Also, the final roof finish and guttering was done by a contracting company, because then it would be covered by warranty.”
Brian emphasises the importance of making cost effective choices. “A contractor will price a job, but often they don’t really have an incentive to go and find the lowest possible material prices. On the other hand I would ring around my builder’s merchant’s sales contacts and get two or three prices for everything.”
By shopping around for the bathroom fixtures he was able to get high quality products at a fraction of the cost of some other suppliers.
Brian and Karen also sought professional assistance for lighting design. “Initially I was quite sceptical about paying somebody for lighting advice, because I thought I could just do it myself. Actually, it turned out to be a really good investment. I would have bought and installed way too many downlighters, which wouldn’t have been very effective,” says Brian. “So as a result of her advice, we ended up with a lightning plan that, having lived here for over a year, we’re very happy with. It works really well. Her understanding of the type of light that is needed in different places was invaluable.”
“Lighting is so important, and it’s often overlooked. Having a professional’s advice really made a difference in how our home feels and functions.”


Sustainable choices
In terms of heating and energy efficiency, Brian and Karen achieved high levels of airtightness in their home – an impressive n50 score of 0.5. This means the house surpasses the requirements of a passive house, ensuring minimal heat loss and energy consumption.
They incorporated a heat recovery ventilation system, which not only ensured fresh air but also had the option to add a small amount of heat through a heat pump and infrared panels for particularly cool days.
Their well insulated house guarantees comfortable temperatures throughout the winter all the while minimising energy consumption.
There’s also a provision for future rainwater harvesting. “We planned the drain system with underground pipes laid out in such a configuration that we could divert rainwater from the roof into an underground storage system,” says Brian. They also installed storm water attenuation measures to ensure responsible water management.
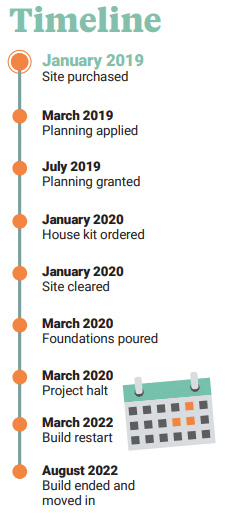
That said, the self-build journey was not without its challenges. “We were interrupted by the Covid lockdowns,” says Brian. “We were due to begin the project in the spring of 2020, so obviously we had to put things on hold. But at that stage we had already ordered the house kit. I had to store the house, in the warehouse at work for up to two years before we were able to start.”


“I then tried to order everything I could, as early as I could, once we knew the project was going to get underway. So that we had it so we didn’t have any delays waiting for materials.”
Brian also faced a difficult situation with a painter who didn’t meet the agreed upon quote. However, he quickly resolved the issue with the help of his quantity surveyor who reassured him on costings. Brian’s time keeping records of when the painting contractor was on site meant he could argue his case. “It was frustrating, but it taught me the importance of being diligent and having proper documentation in place,” says Brian.
Building a house while raising a young family also posed its own set of challenges. While Brian dedicated his spare time to being on site to build the house, Karen had the lion’s share of juggling looking after their toddler son and her demanding job as a nurse.
They’re currently in the process of finishing off the landscaping. “We did eventually run out of money,” admits Brian. “We laid the lawn, because we wanted to be able to enjoy it during the summer, but we didn’t have the budget we needed to build the patio. I’m working on it now, a year later.”
Reflecting on their self-build journey, Brian says: “Building our own home was an incredible experience. It allowed us to create a space that truly reflects our lifestyle and values. We were able to incorporate low-energy practices, maximise space efficiency and prioritise natural light. It’s a house that we can grow into and enjoy for years to come.”


Q&A with Brian
What is your favourite room?
Personally, I would say the kitchen living area. It’s a fantastic family space where I can keep an eye on my toddler while preparing dinner. It’s a very social and inviting space.
Biggest splurge?
The largest expense was the actual structure of the house. The kit cost £70k. After that, the combined heat recovery ventilation system and hot water system was a significant investment at £20k. We opted for aluclad windows instead of the uPVC, which added to the cost but turned out to be a great decision. The aluminium cladding with the wooden interior looks fantastic. The windows and doors amounted to about £28k.
What would you change or do differently?
I can confidently say that we have achieved the comfortable and safe living space we had hoped for. The only minor adjustment I would have liked is a slightly wider utility room. But overall, after living here for over a year, we are thrilled that there’s nothing major we would change. The kitchen layout is perfect for our needs, addressing the challenges we faced in our previous house.
What surprised you?
Not being able to find tradesmen when we needed them. It was difficult to even secure a plumber for the two days of work we required. Despite that, I thoroughly enjoyed the process. While many people find it stressful, I found it immensely satisfying. Even now, a year later, I love being in the house. It’s a relaxing and comfortable environment to be in. Unlike our previous house, where we could never truly settle, this home allows us to unwind and truly feel at ease.
What single piece of advice would you give a budding selfbuilder?
Take care to only build the rooms that you really need as this will help keep costs down.
Would you do it again?
I certainly wouldn’t be deterred by the idea of another self-build project having enjoyed this one so much. However, I can’t think of any major improvements we could make to our current home.
Brian’s Tips
Speak with as many self-builders as possible, gathering inspiration from their experiences. Incorporating small details from what they’ve learnt can make a significant difference. For example, we strategically positioned the plant room in the centre of the house to minimise pipe runs and keep the hot water cylinder close to all the baths and showers. This means we don’t have to wait long for hot water.
Hire a lighting consultant. This saved me overspending on lights and labour costs for the electrician to wire unnecessary fittings. For example, in the bedrooms, I was considering installing six to eight downlighters in each room, but the lighting consultant explained all we needed was a single pendant and reading lamps beside the bed.
Hire a quantity surveyor. That was another positive investment for us. I could confirm material quantities with him when I was ordering which really helped reduce waste, and money. We were very tight on all the materials, we had almost no wastage of anything.
Keep a record of your VAT invoices. Self-builders in NI can reclaim VAT at the end of their build, so in NI make sure you record your VAT invoices as you go. I scanned and saved each invoice as it came in and put it in a spreadsheet. Then when it came to actually submitting our VAT claim, it went through without a quibble. I knew everything was in order. It will take you forever to hunt around, find and request copies of invoices if you leave it to the end.
Spec
Walls: vertical timber cladding fixed with stainless fixings to horizontal treated batten, membrane, 60mm wood fibre insulation board, 140mm wood fibre insulation board, membrane, glulam structural timber, plasterboard drylined, U-value 0.16 W/ sqmK
Floor: EPS insulated, precast concrete floor, U-value 0.12 W/sqmK
Roof: EPDM with standing seam laid over ply substrate and membrane, two layesr of 12mm WBP ply, 40mm fibreboard insulation, curved glulam beam, membrane, sealing gask, three layers of 100mm fibreboard insulation, plasterboard drylined, U-value 0.14 W/ sqmK
Openings: Passive aluclad windows triple glazed, low e, soft coating, average U-value 0.83 W/sqmK
Airtightness: 0.75m3/h.sqm at 50 Pa
Suppliers
Architectural design
Ian Crockard of Crockard Building Design
HBE design
Ian Foster of IAF Design
Insulated foundations
Creagh Concrete
Timber
Glulam House Building Elements (HBE) and Glulam roof beams from Mayr-Melnhof-Holz (Germany), Ireland supplier idomus.eco
Wood fibre insulation
Steico wood fibre insulation from Commons House Design
Windows and doors
Windows and Sliding Pation door from Munster Joinery/Baskil; front Door from Rodo Group
Roof
Armourplan EPDM with standing seam from Contract Services NI
Hot water/heating/ventilation
Total Home Environment
Dry lining
Berko Pod
Bathrooms
Bathshack
Flooring
Wood Innovations
External finishes
External Render: Baumit via Back to Earth
Weatherboarding: Vulcan Cladding Systems
Stone cladding: Stone Solutions


