How to waterproof your bathroom, be it a wetroom or a standard bathroom with shower, and how to splash proof the rest of the space.

In this article we cover:
- What is a wetroom
- How to build a wetroom
- How to waterproof the shower area
- How to waterproof the floor and walls
- Splash protection
- Types of drains for tanking
- How much does it cost to waterproof the bathroom
- Wheelchair accessible design
Wetrooms
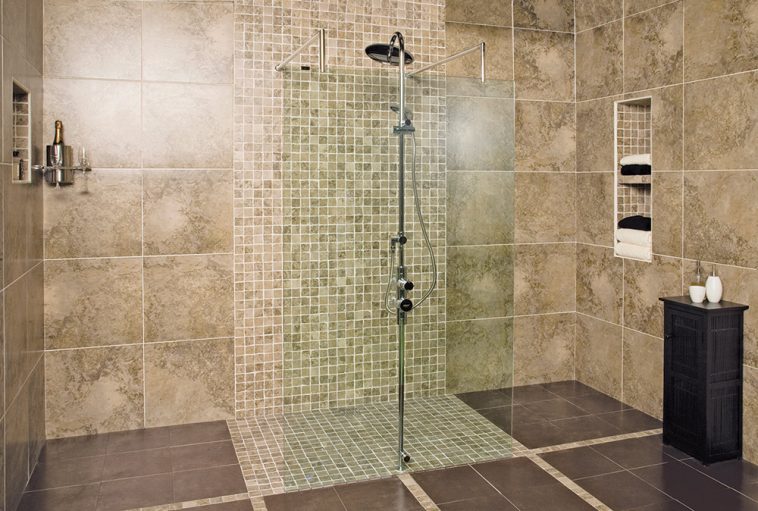
A wetroom is a bathroom dedicated to showering, but has no visible shower tray, whose walls and floor have been tanked like a swimming pool. If you plan to have one, or a condensed version in the form of a walk in shower, you’ll need to plan well ahead.
The construction of a typical wetroom includes multiple components: a shower tray former, tanking materials, drainage parts, underfloor heating where using, the shower itself, screening, tiles and labour (two people will take about five days to create the average wetroom).
The most important features are the strong, waterproof tray onto which a special base is laid and a central, or offset, fast draining outlet set into it.
The surface is then further waterproofed and tiled so it looks like a continuation of the rest of the flooring in the bathroom. Waterproofing of the walls and an area of about half a meter outside the immediate shower area is topped off with tiles, to create a pleasing, watertight, easily cleaned shower area.
Floor preparation
Concrete floors need no preparation for a wetroom but a timber floor must be perfectly rigid. The drains will also have to match up with the joist layout. Floorboards should be screwed down and reinforced with cement board, plywood panels or replaced with water resistant 22mm thick chipboard with PVA glue along the tongue and groove joints.
In the shower area you have two options: either profile the floor in that vicinity so that water drains towards the waste outlet. It is possible to do this by carefully shaving off a wooden floor or chipping /casting a concrete one to create the appropriate falls, and then inventing an ingenious method of incorporating a suitable trap.
The most common option is to use a shower floor former. This is effectively a shallow shower tray, approximately 25mm thick with the correct gradient of 1:40, that has been subtly profiled to drain towards the outlet and can be easily recessed into the existing/future floor.
Some shower trays are made for a wetroom look, sitting flush in the floor, and come in a number of finishes. These are considered walk in showers as opposed to wetrooms.
Most wetroom tanking systems with preformed trays will dictate a wetroom the size of 120mm x 900mm (the size of a bath) although many people go for wetrooms that are about 2m x 2m. Anything more than this becomes a real luxury and will often be part of a much larger bathroom.
Although an experienced bathroom fitter could install one of these trays, larger tanking projects should be undertaken by a specialist company or an experienced builder.
Once installed, the tray is ready to be protected with waterproofing.
Waterproofing
The waterproofing requirement for a wetroom is in fact very similar to that for the standard shower tray approach.
The difference is that in a bathroom with a shower tray, the waterproofing is only installed to the shower walls area. In a wetroom you will have to extend it well beyond the shower area, and there is no margin for error or shortcuts.
The floor of the bathroom and at least the lower 75mm of wall must be waterproofed or tanked using waterproof boards, mastic and joint seal tape.
Depending on the system you choose, a waterproof membrane will be glued over the tray and up the walls as well as out into the general bathroom. This membrane is flexible by nature.
Then the junctions of the membrane are sealed with a flexible tape and tar like adhesive – all of which can tolerate some movement without leaking. It’s only then that the tiles are added on top.
Any good tiler will try to ensure that the tiles themselves do their job and create a waterproof barrier, but if the junction then cracks, the tanking system provides a further line of defence.
The important thing is to make sure that your installer is using a recognised tanking system (it’s best to avoid DIY installations that use water resistant ply as the base tray). Ask your contractor what tanking system they are proposing to use and insist that it be from a reputable brand.
If you are going to do it yourself, it’s crucial to take your time, read the instructions and do exactly as instructed.
Drains
When choosing a tanking system you need to be clear on the type of drain you are installing – is it a channel or linear drain on one side, or a central drain which will require an envelope? This will determine the shape of the preformed tray you select.
Linear drains are helpful where there are joist position problems as water can usually be drained from any one of the three locations along its length.
Also consider that the correct positioning of the wetroom waste pipe is essential to give it a free flow of air. This usually involves running an independent wetroom waste outlet.
Cost
The drain alone will cost in the low hundreds, but with the preformed tray tanking kit you need to budget over 1k. The cost of the waterproofing (whether it be for a regular shower tray configuration or for a wetroom set up with preformed tray) will then be in the region of €/£30-40 per sqm installed.
Overall, if starting from scratch, the cost of installing a wetroom style shower is about 20 per cent more than a conventional, high quality shower tray.
This all adds up to about 5k for a 2m x 2m wet room. This figure includes tiling, a cost that also applies to conventional shower tray installations. If you intend to build a whole new room from scratch, then costs will be higher.
In the case of a renovation project, there are some government supports available in the form of adaptation grants.
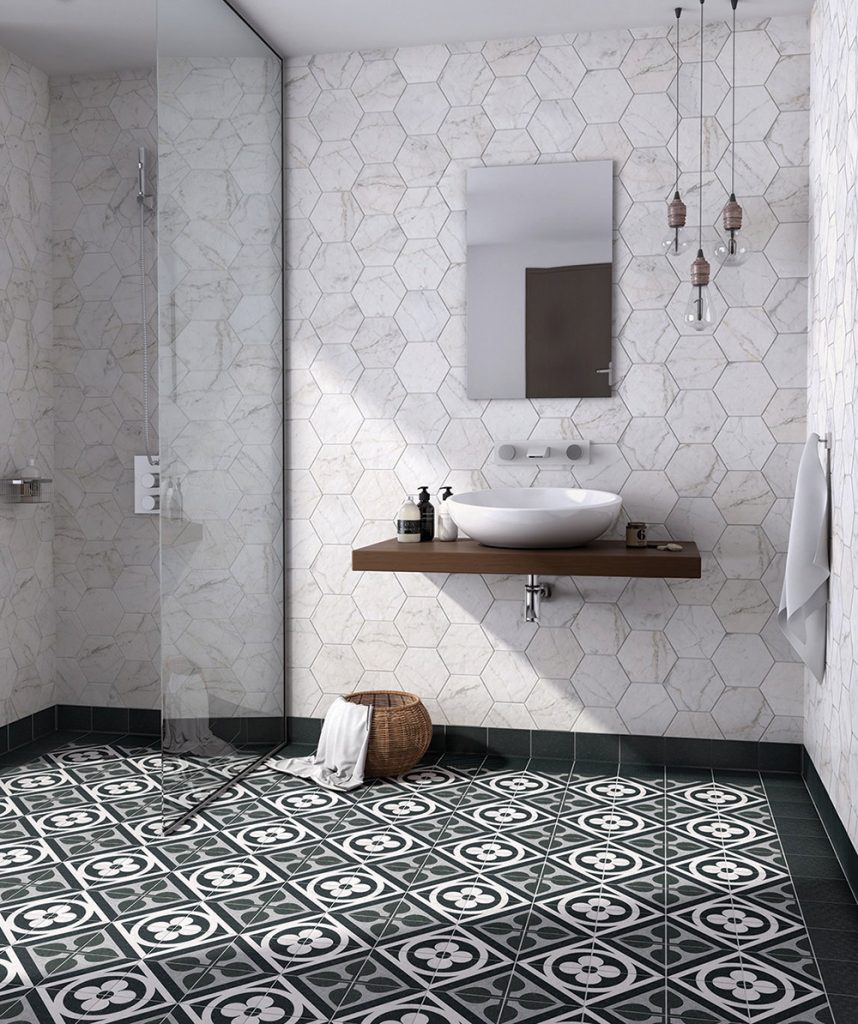
Splash protection
Think about how far the water might splash as you shower and the need to provide protection for keeping towels and toilet paper dry. The water from a shower is also going to contain soap and other materials so, if it lands on any surfaces such as mirrors, windows or sanitaryware, it will leave marks.
As an intermediate step, look for a single clear panel that shields sensitive areas. And don’t forget to take account of the water that lands on the rest of the floor; you may find searching for a dry spot after your shower mildly inconvenient, but what about the other bathroom users who may be following after you?
You may also wish to divide the basin and/or wc from the wet area with a glass screen. These can be recessed into the floor or surface fixed, curved or straight 6mm glass. Wall mounted wc and basins help keep the floor clean.
Futureproofing
Wet rooms are a stylish addition to the home, but also a very practical one. To futureproof it, plan to have plenty of space so a wheelchair can be safely manoeuvred, and a carer can do their work comfortably and safely.
The critical thing when creating a wetroom for wheelchair users is to be certain that the deck is constructed of very sturdy materials that can be guaranteed to take the weight. There can be formidable point loads where the wheels meet the floor and the underlying structures must be strong enough to cope.
And plan for, or actually install, grab rails now. Also place the shower controls at a level that could be used easily by someone in a wheelchair, and take advice on loadings for support bars, so they’re good and strong right from the start.