In this article we cover:
- Headline build costs including plumbing, kitchen, windows
- Ways to keep costs under control
- How the build was financed
- QS cost and how much they went overbudget
- Finding the site and tips to others
- Planning restrictions
- Decision to go direct labour
- Tips to others considering managing the build themselves
- Insulation strategy
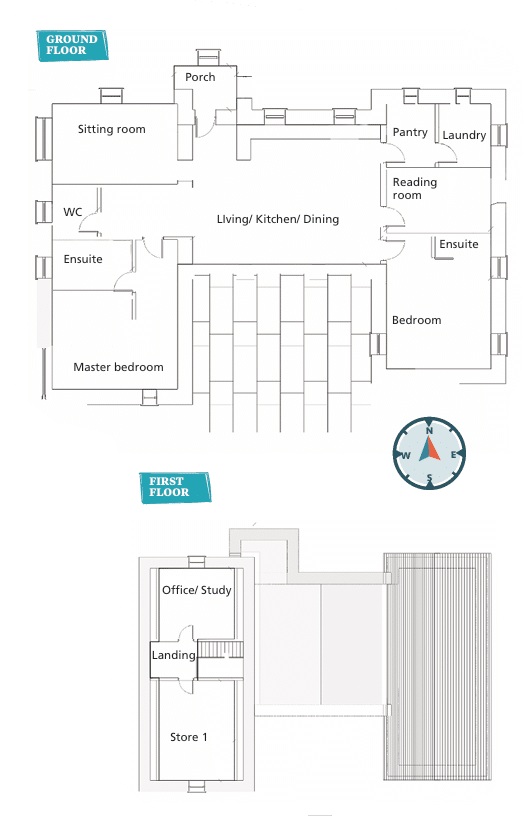
- Floor plans, supplier list and specifications
- Sequence of works on site
- Drainage and services
- Precast concrete slabs
- Insulated liquid screed
- Top tips to get it right on site
- Electrical points
- Second fix
- Site checklist
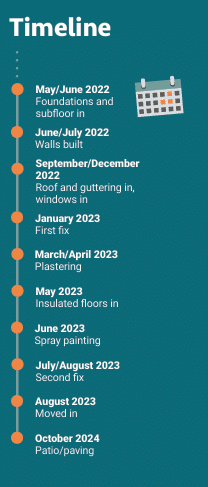
- Timeline
- Progress photos
Contents
Part 1: Pre Design and Design – Jump to Part 1
Part 2: Getting Started on Site – Jump to Part 2
Part 3: On site – Jump to Part 3 – Jump to Part 3
Suppliers, floorplans, timeline and specification
Part 1: Pre Design and Design
Site hunting was the starting point. And it took a while. We had five or six sales fall through before this one came up in 2019, through our local estate agent.
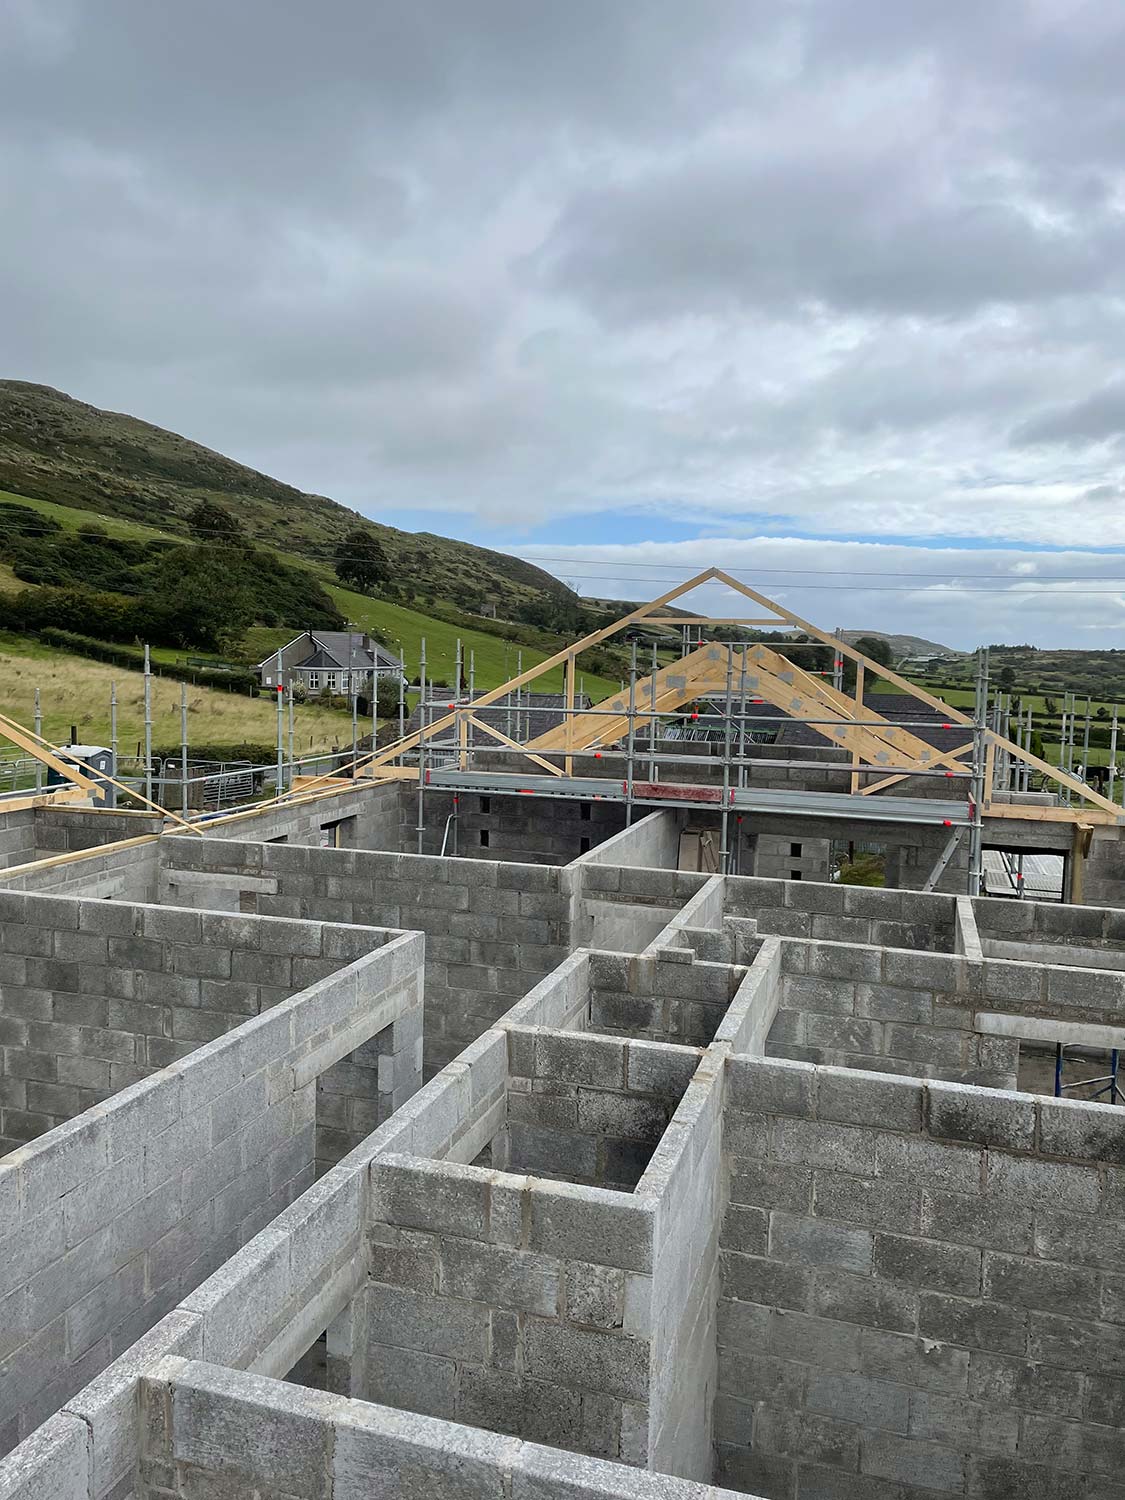
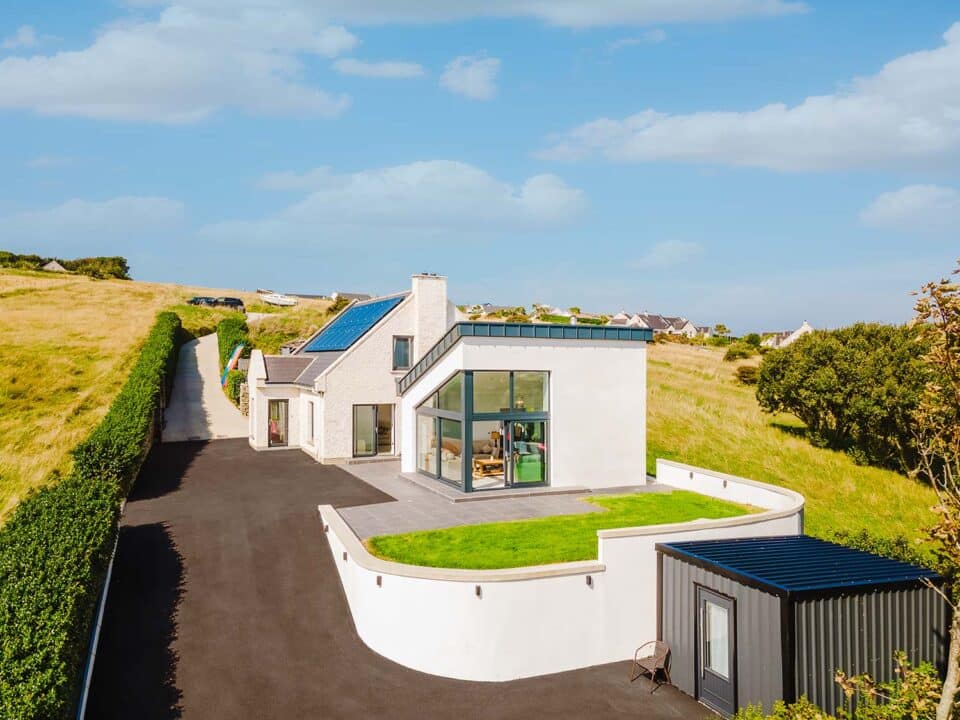
The site was in an area we liked, with a view of the Mourne Mountains. A peaceful and quiet location. The estate agent told us it was coming up and as soon as it came on the market, we offered over the asking price. Thankfully, that sealed the deal.
For services we were able to connect to electricity with a mains cable at the front of the site. NIE removed existing overhead cables which spanned the site and put them underground. NIE removed the overhead cables free of charge as they were too low for the roof level of the house. The only thing I had to do was dig a trench across the front of the site for the cable to be laid in which is where my new connection came off. Water was a mains connection too.


Early stages
The site we bought already had outline planning permission for a bungalow and garage, and we knew we’d only need to tweak the internal layout. The size of the house at 200sqm was fine for us and even though there are two storey houses nearby, we didn’t feel a need to change the design.
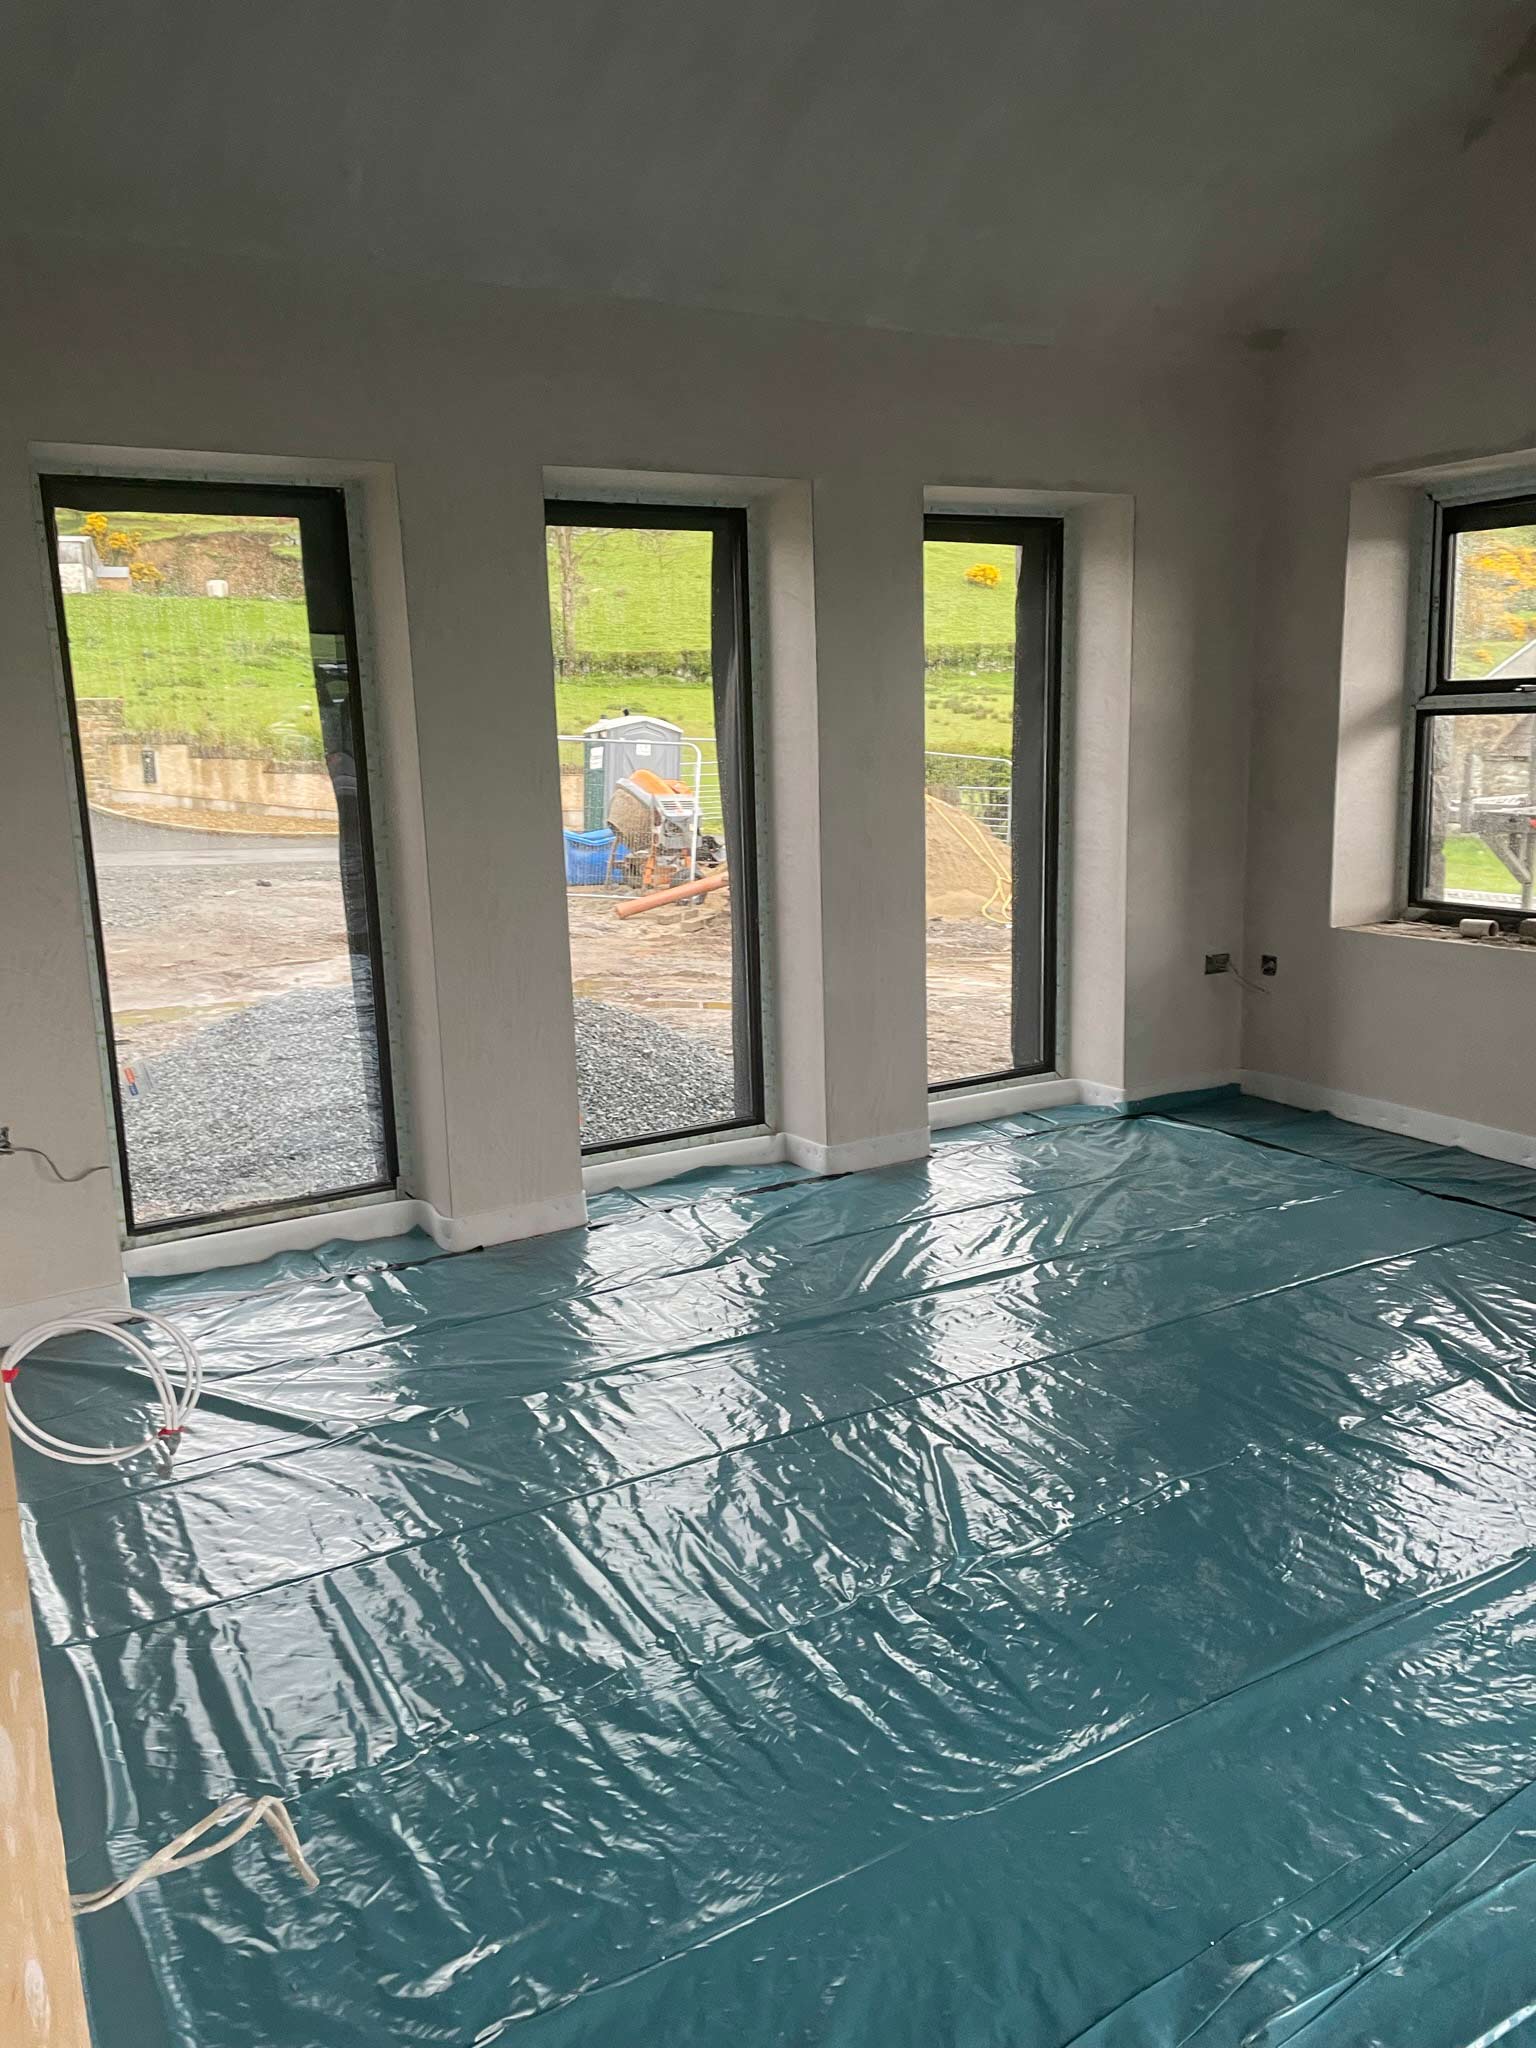
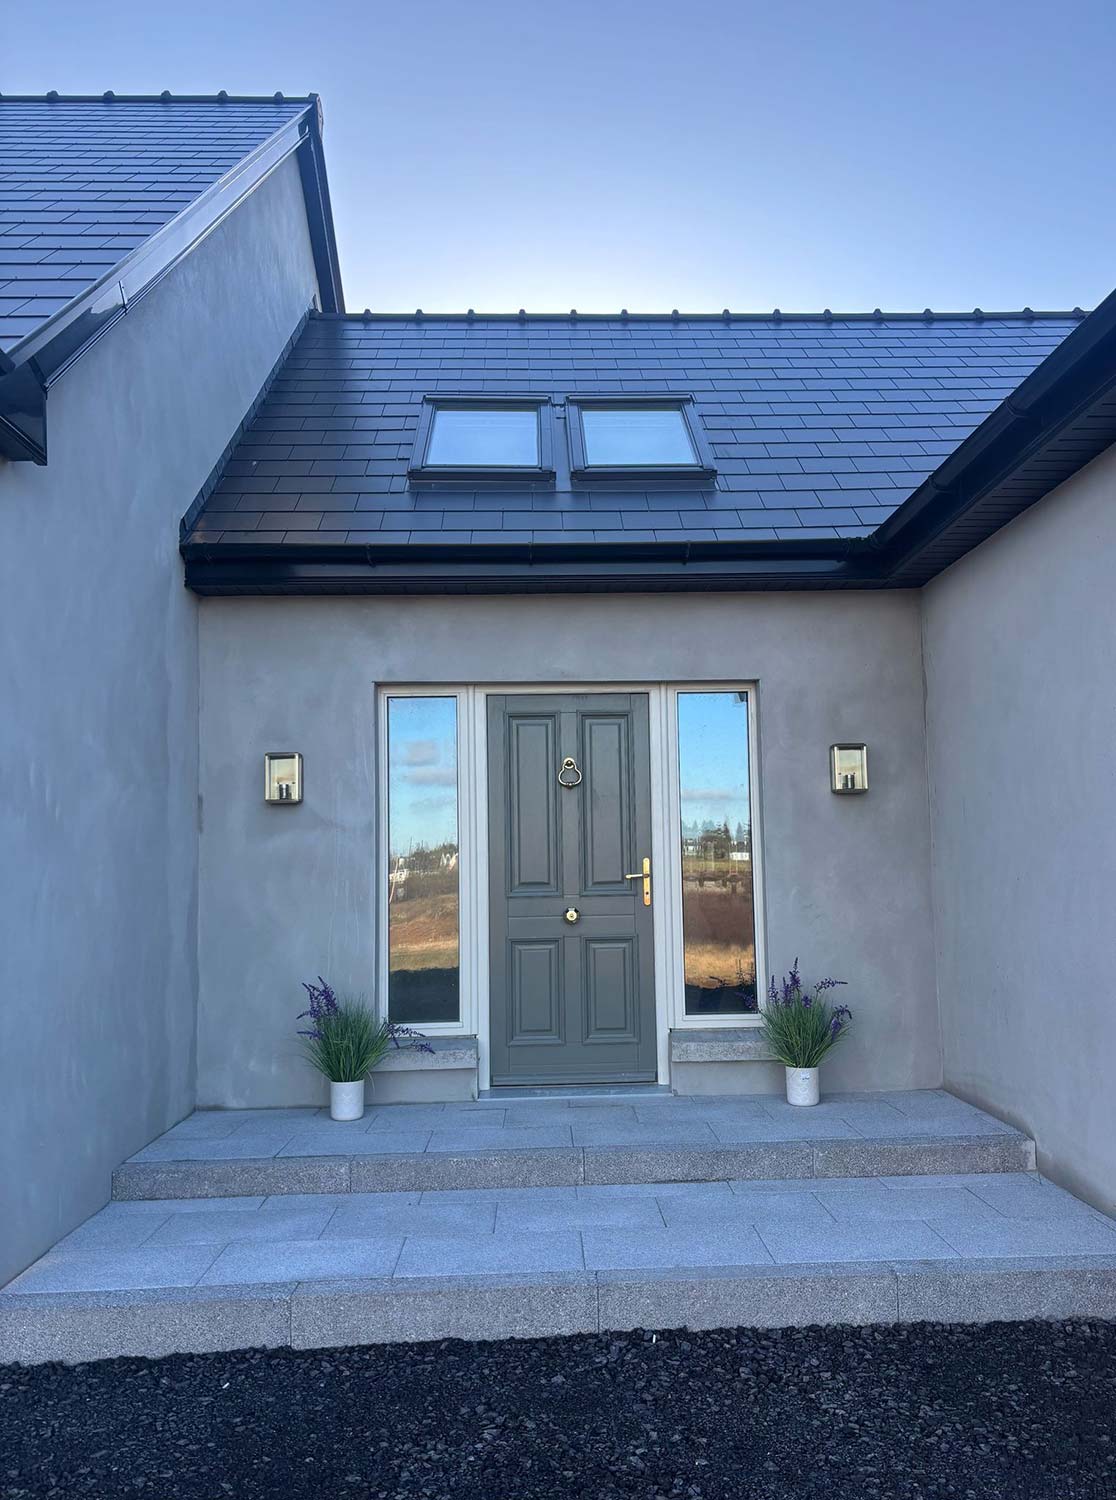
There were few restrictions, mostly a ridge height of 5.5m. We knew a bungalow was suitable so went down the reserved matters route to apply for full planning permission. As for our wants and needs, we knew we didn’t want a back door into the kitchen as is so common in Irish homes. But we did want a front porch and a big utility room. We also wanted a sunroom, preferably with bifold doors.
We chose our architect based on the fact that he’s local and was the person who got the initial plans passed for outline planning permission. He knew what way the site was. I drew up initial plans and sent it on to our architect to draw up. We also kept him on to apply for planning permission and for building control
approval.
Decision to go direct labour
I work in construction so I knew it would cost me £30-40k on top to bring a contractor on. That’s why I decided to take on the roleof project manager.
With a main contractor, you have one point of contact versus having to hire and coordinate the individual trades yourself. The way I saw it, this was going to be a time consuming project anyway and I’d have to be making the same decisions whether I went with a contractor or direct labour. So I went all in. This meant clearing up, tidying up for the next trade, organise materials, and get the trades on site when they were needed.
If I didn’t know the person I hired, they had to come recommended. I knew who I was going to need next, so I’d give a heads up to that person to let them know we’d need them on site soon. I told all of the people who worked on the project that I didn’t care when they did it, as long as they didn’t go past the deadline. I basically treated it like any other project at work. And I did as much as I could, inside and out. I’d be there evenings and most Saturdays.
Energy efficiency and the environment
We decided to invest in insulation only insofar as we needed to; we went with an insulated floor screed which was expensive. For the rest we went with standard build ups and plaster for airtightness.
We paid attention to key details like having the insulated walls meet the subfloor before we laid the insulated screed.
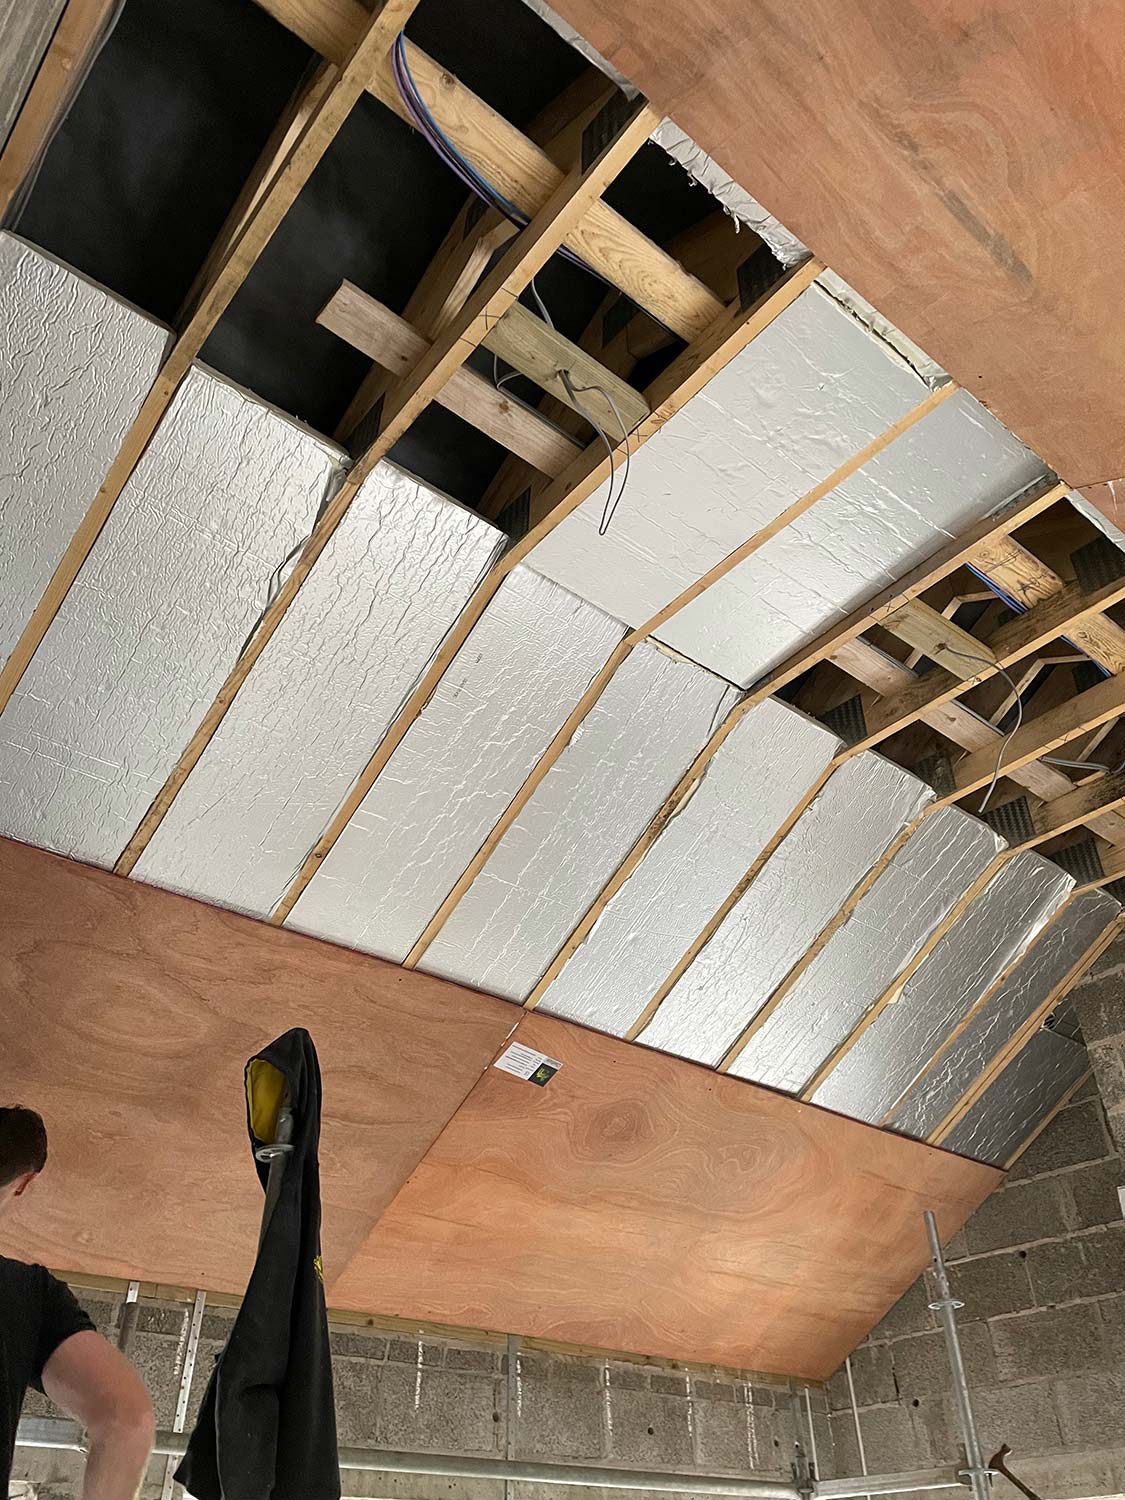
We considered spray foam for insulation but needed a 50mm air break so just went with a standard build up instead, insulating with mineral wool between joists and rigid PIR board across the joists.
We considered an air source heat pump early on but heard mixed reviews on operating costs and we wanted to get a blast of heat. So we went with an oil fired boiler with underfloor heating and a multifuel stove.
Photovoltaics (PV) and rainwater harvesting we didn’t do because of cost, the budget wouldn’t have stretched. PV we may look at in future; we have the hot water tank in the attic ready to tap into and the back of the house is south facing and therefore a perfect orientation for solar panels.
Budget and Financing
I got a friend of mine to do the costings for me to get the mortgage, and his bill of quantities was £2-3k within the lender’s assessment. We got our self-build mortgage approved in April/May 2022 and interest rates increased pretty much straight after that.
There were other cost increases during the build, from labour to the cost of plant hire (because of the mandatory move from red diesel to more expensive but less polluting white diesel), and we had to request an additional drawdown. In the end, we went 10 to 15 per cent over budget.
Headline Costs
Plumbing and heating: £18k
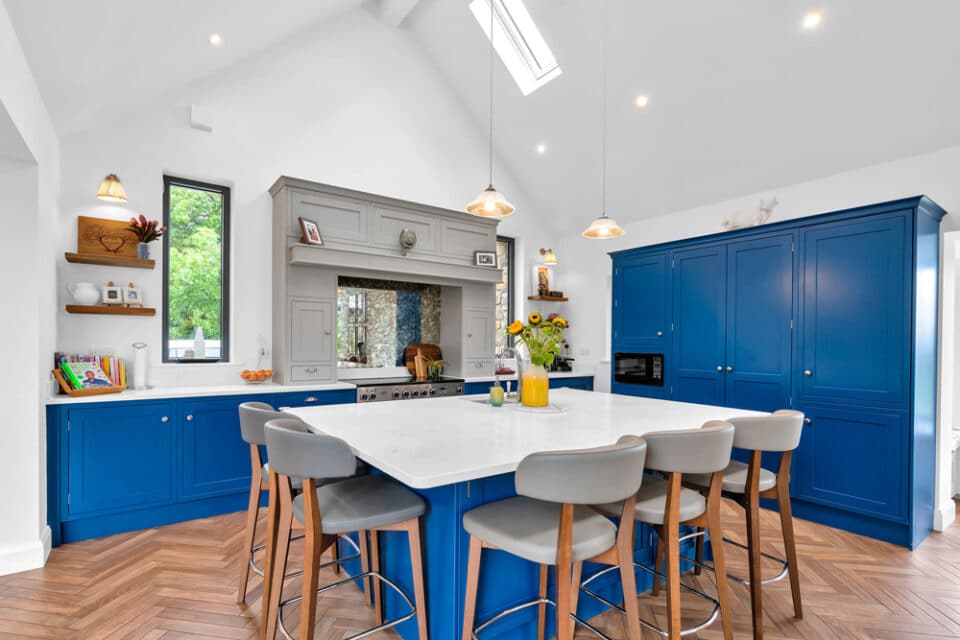
Kitchen (incl, appliances & utility room): £16k
Windows and doors: £10k
Insulated floor screed & screed: £9k

Ways to keep build costs under control
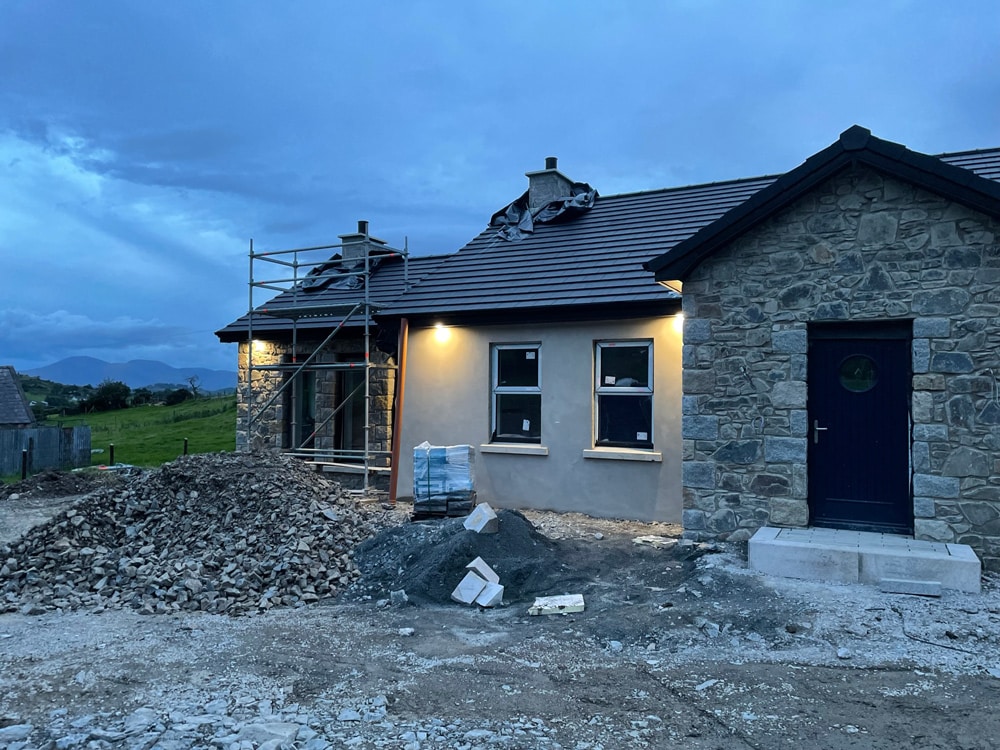
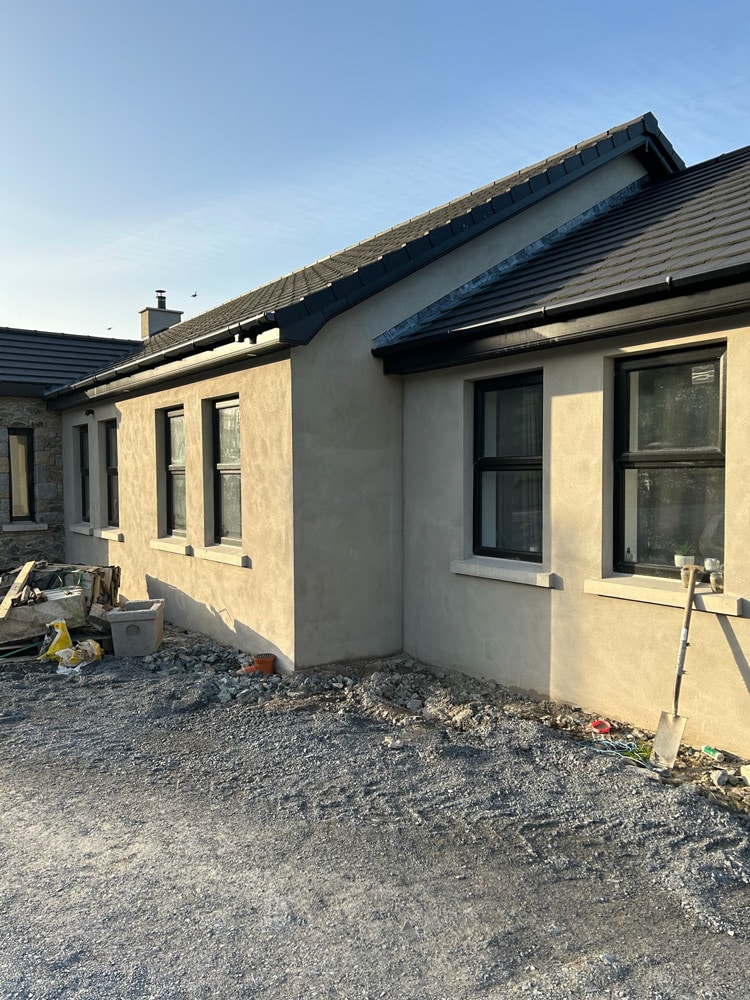
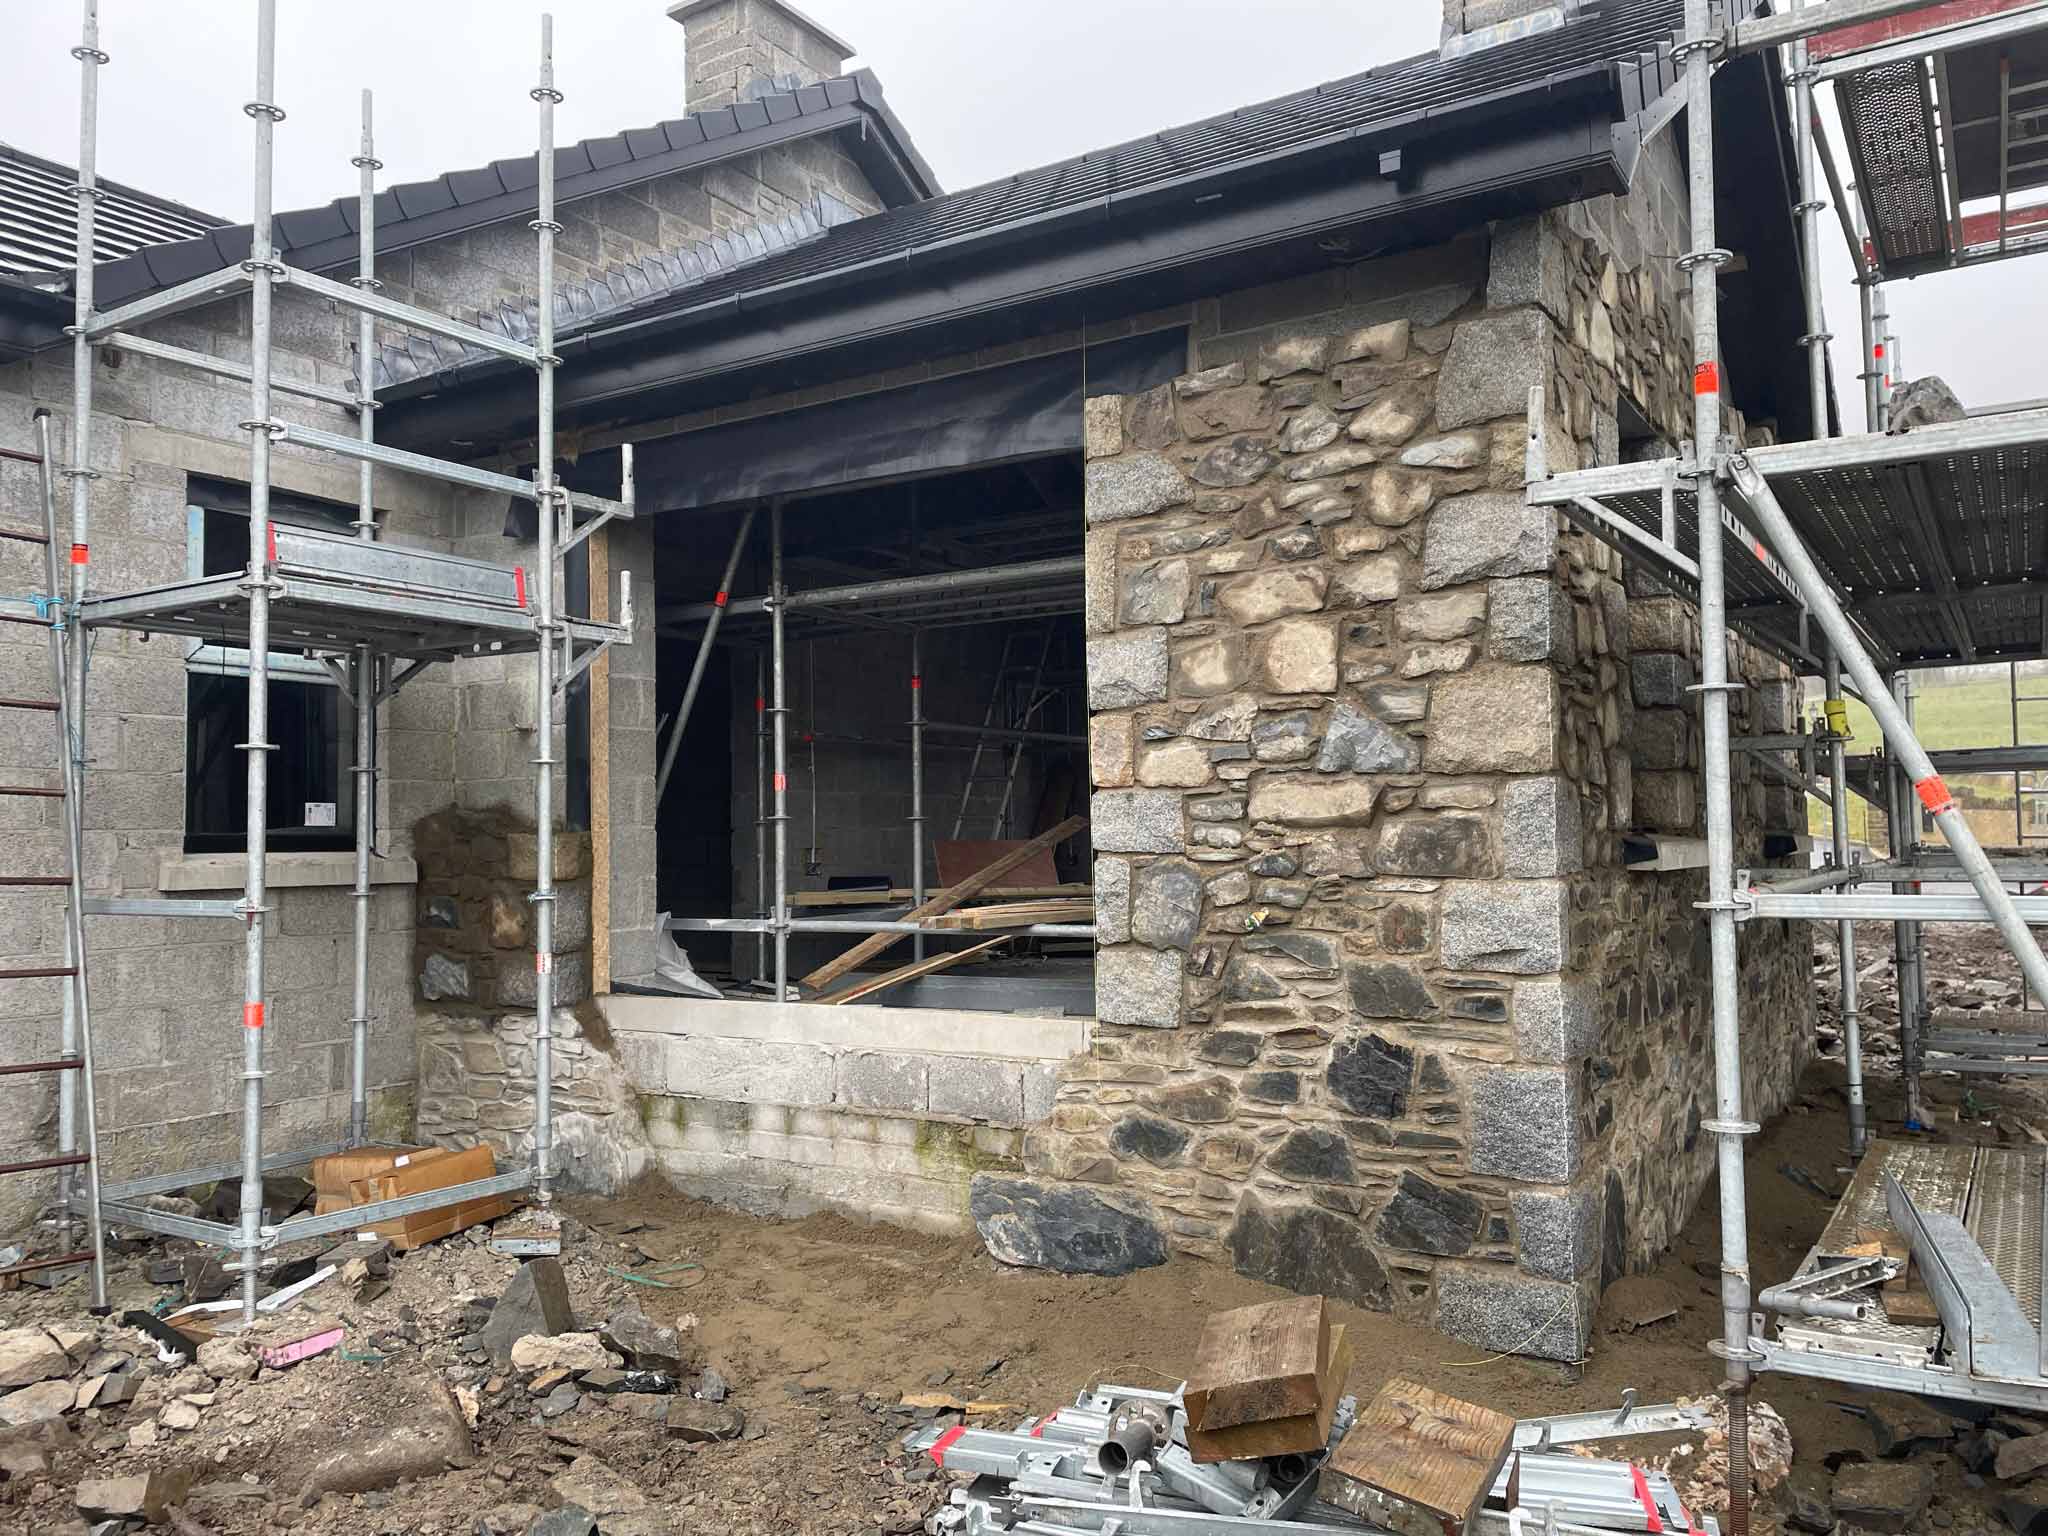
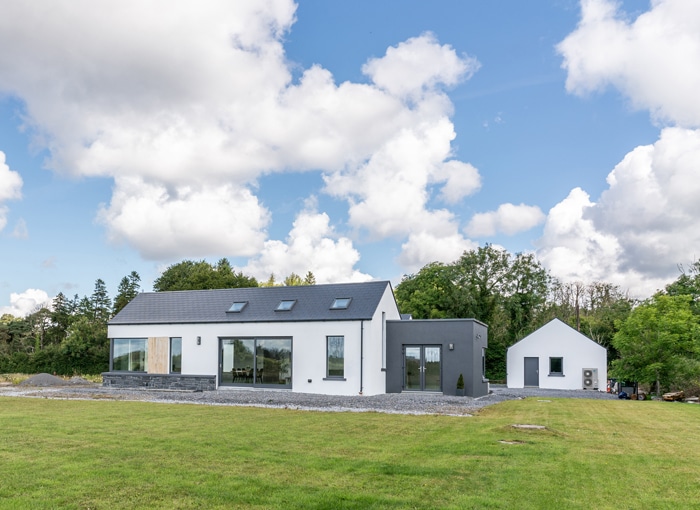
Stick to standard specifications. We knew from the outset that we wanted a traditional build and one that was in keeping with the houses around us. We weren’t drawn to the new technologies. We wanted stonework at the front, a front porch and a sunroom.
Choose standard finishes. We went with basic flat black tiles, uPVC fascia and soffit, double glazed uPVC windows. All very straightforward and cost effective.
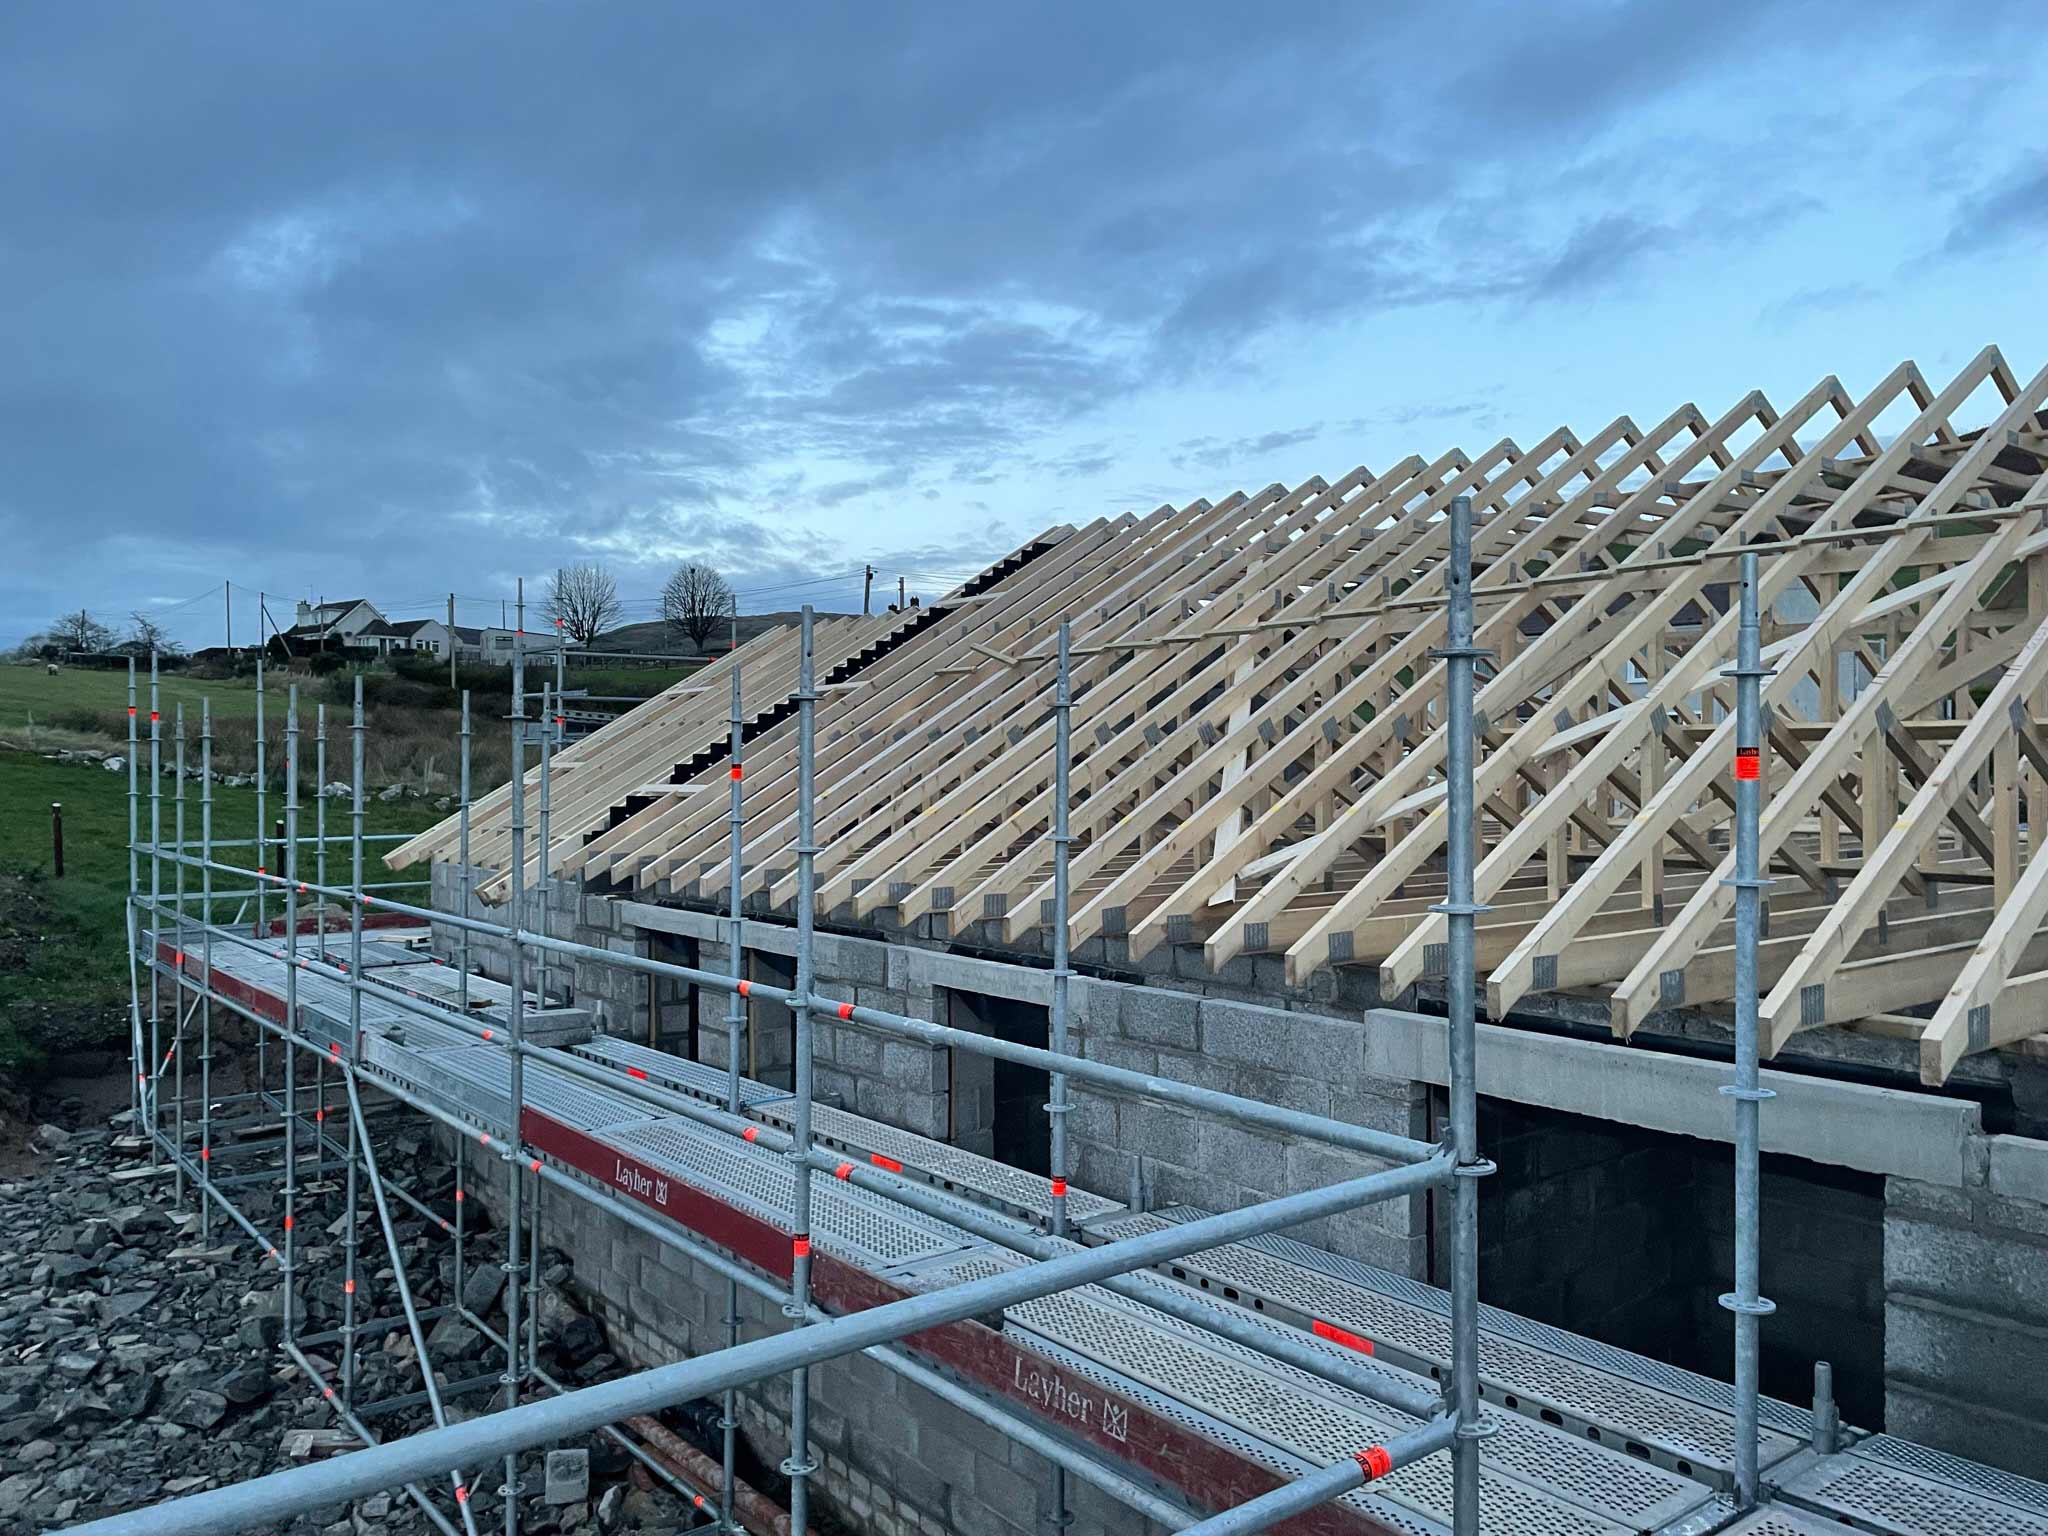
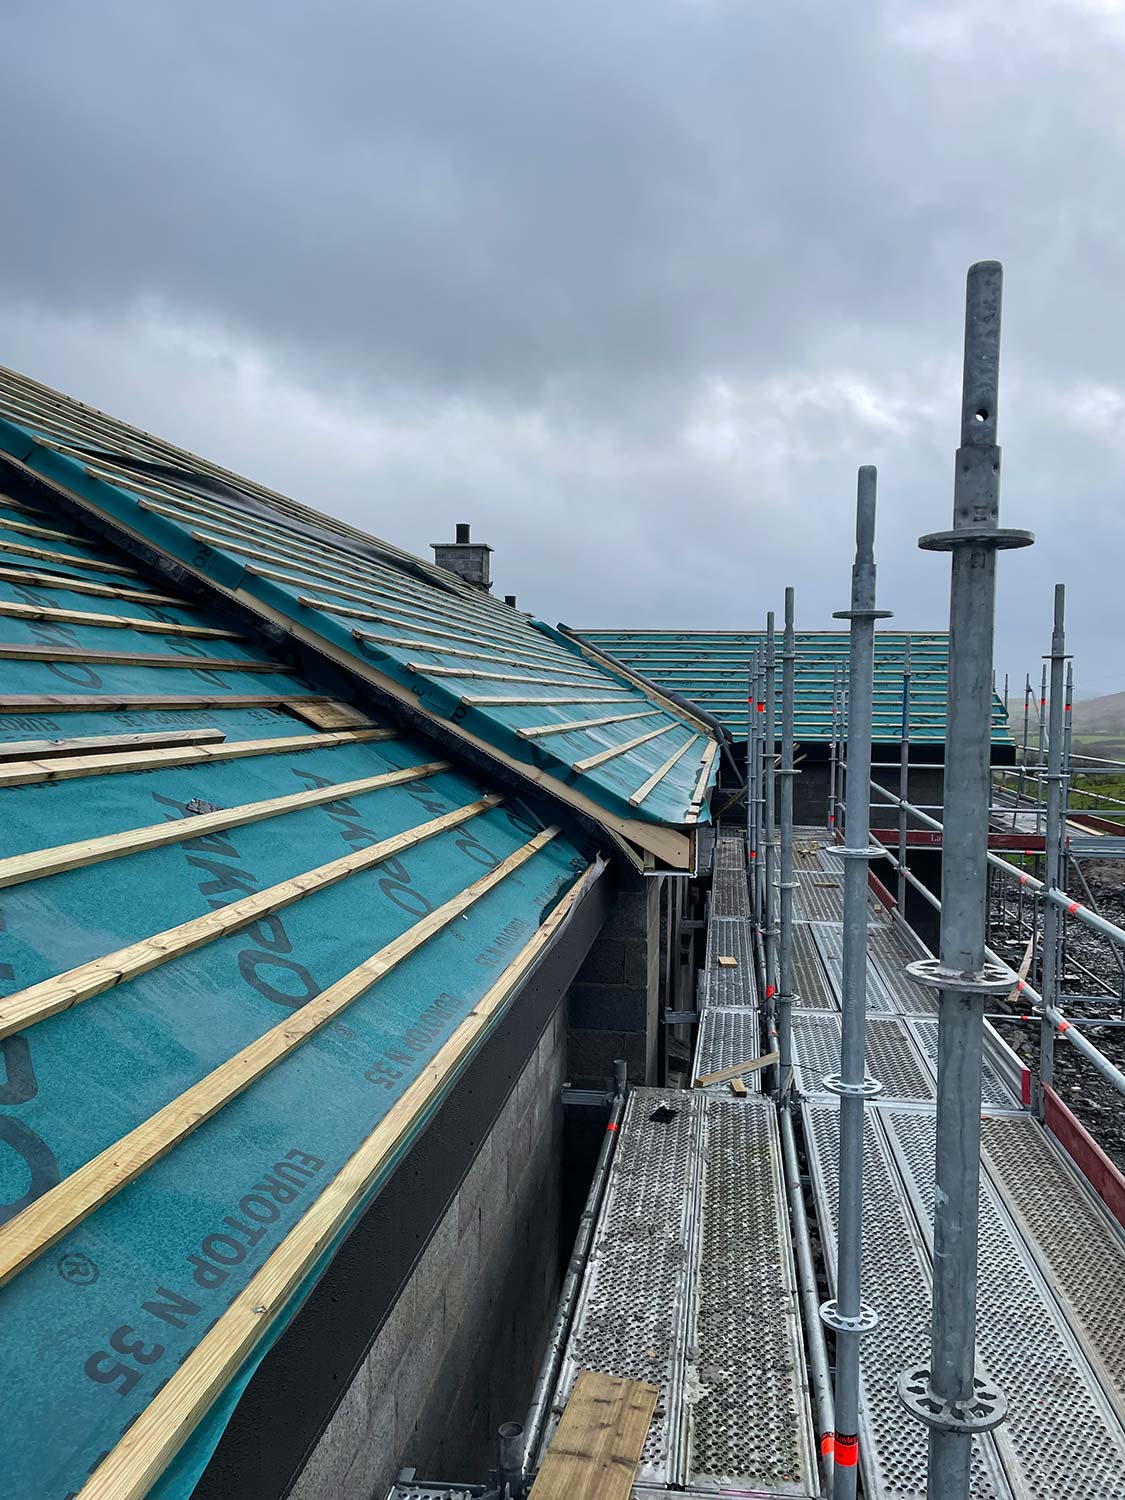
Go with a trussed roof. As for the roof, we went with prefabricated trussed joists to allow for storage, and in the sunroom a vaulted truss, where we doubled up on the insulation.

Part 2: Getting Started on Site
Building control application
After we got planning permission approved in December 2021, we went back to our architect to progress the technical drawings for Building Control submission. Planning essentially got us the physical size of the house, a bungalow, and where it was to be situated on the site.
We needed to submit the detailed designs (construction drawings) to Building Control. Going through this process finalised the internal layout, finishes and specifications. We had already started fine tuning this in the background as we were waiting for planning approval, which saved some time.
We discussed options for floor slabs, requirement for steel beams etc. with the architect and structural engineer to reduce the amount of steelwork required to try and keep the costs down.
Once we finalised the construction drawings, we got the Building Control applications submitted, and we were approved within a few weeks. This meant we were on schedule to start the build as planned for Easter 2022.
Electricity
We had overhead wires going across our site, which terminated at a pole at the other side of the fence on the neighbour’s land. We knew from the start that the lines were going to be too low and there wouldn’t be enough clearance to build the sunroom area of the house.
I got in touch with NIE Networks very early on when we were awaiting planning permission, and they said once the planning permission was through, they could take it further.
Once our planning permission was approved I then got the application made for the removal of the overhead wires and the application for my own new connection.
NIE Networks came out for an assessment and ended up removing the overhead cables and undergrounding the cable fairly quickly. I had to excavate a trench for them to lay the cable across the front of the site. The same cable was then used for our connection. I found NIE good to deal with throughout.
Percolation
Alongside finalising the planning drawings, I was doing test holes on site and checking for percolation for the septic tank. We didn’t have to do this as part of the planning application per se as we had applied for our Consent to Discharge from NIEA and had it approved early.
It turns out that this approval was vital for the first mortgage drawdown. The Consent to Discharge was one of the things the mortgage company’s solicitor asked for. If I hadn’t had that in place I wouldn’t have got my first drawdown in time to start on schedule which would have had a massive impact on our programme.
Other services
While I was waiting to hear back on the Building Control approval, I wasn’t able to do much else apart from getting in touch with the other service providers. The likes of NIE Networks to give them an update, the broadband providers, water connection, and talking to DFI roads about what bonds were needed to take away the verge and open up the site.
Having all that in place meant making a lot of phone calls and follow up with emails. A lot of money spent at the same time, but it ensured everything was in order for commencing on site.
For fibre/broadband I didn’t have much choice, as there is only one supplier down where we are. This was another potential issue that I luckily had looked into early. The timeframe for getting through the process was 8-10 weeks and the connection was made a few weeks before we moved in which was great as it gave us connectivity for finalising the last of the works on site.
Securing the site and providing access
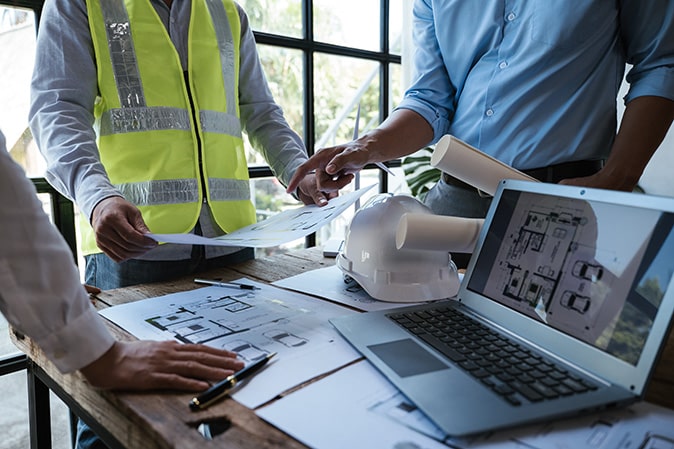
I project managed my house build and as I work in the construction industry, I treated our build like any other project I manage. To ensure the site would be a safe place to work and everything would
run smoothly, I only hired people I knew or had come recommended by people I trusted.
I had the site secured off with fencing and also made sure to have traffic cones and road signage, warning signs; even though it’s a back country road, it still needed to be highlighted that it was a construction site.
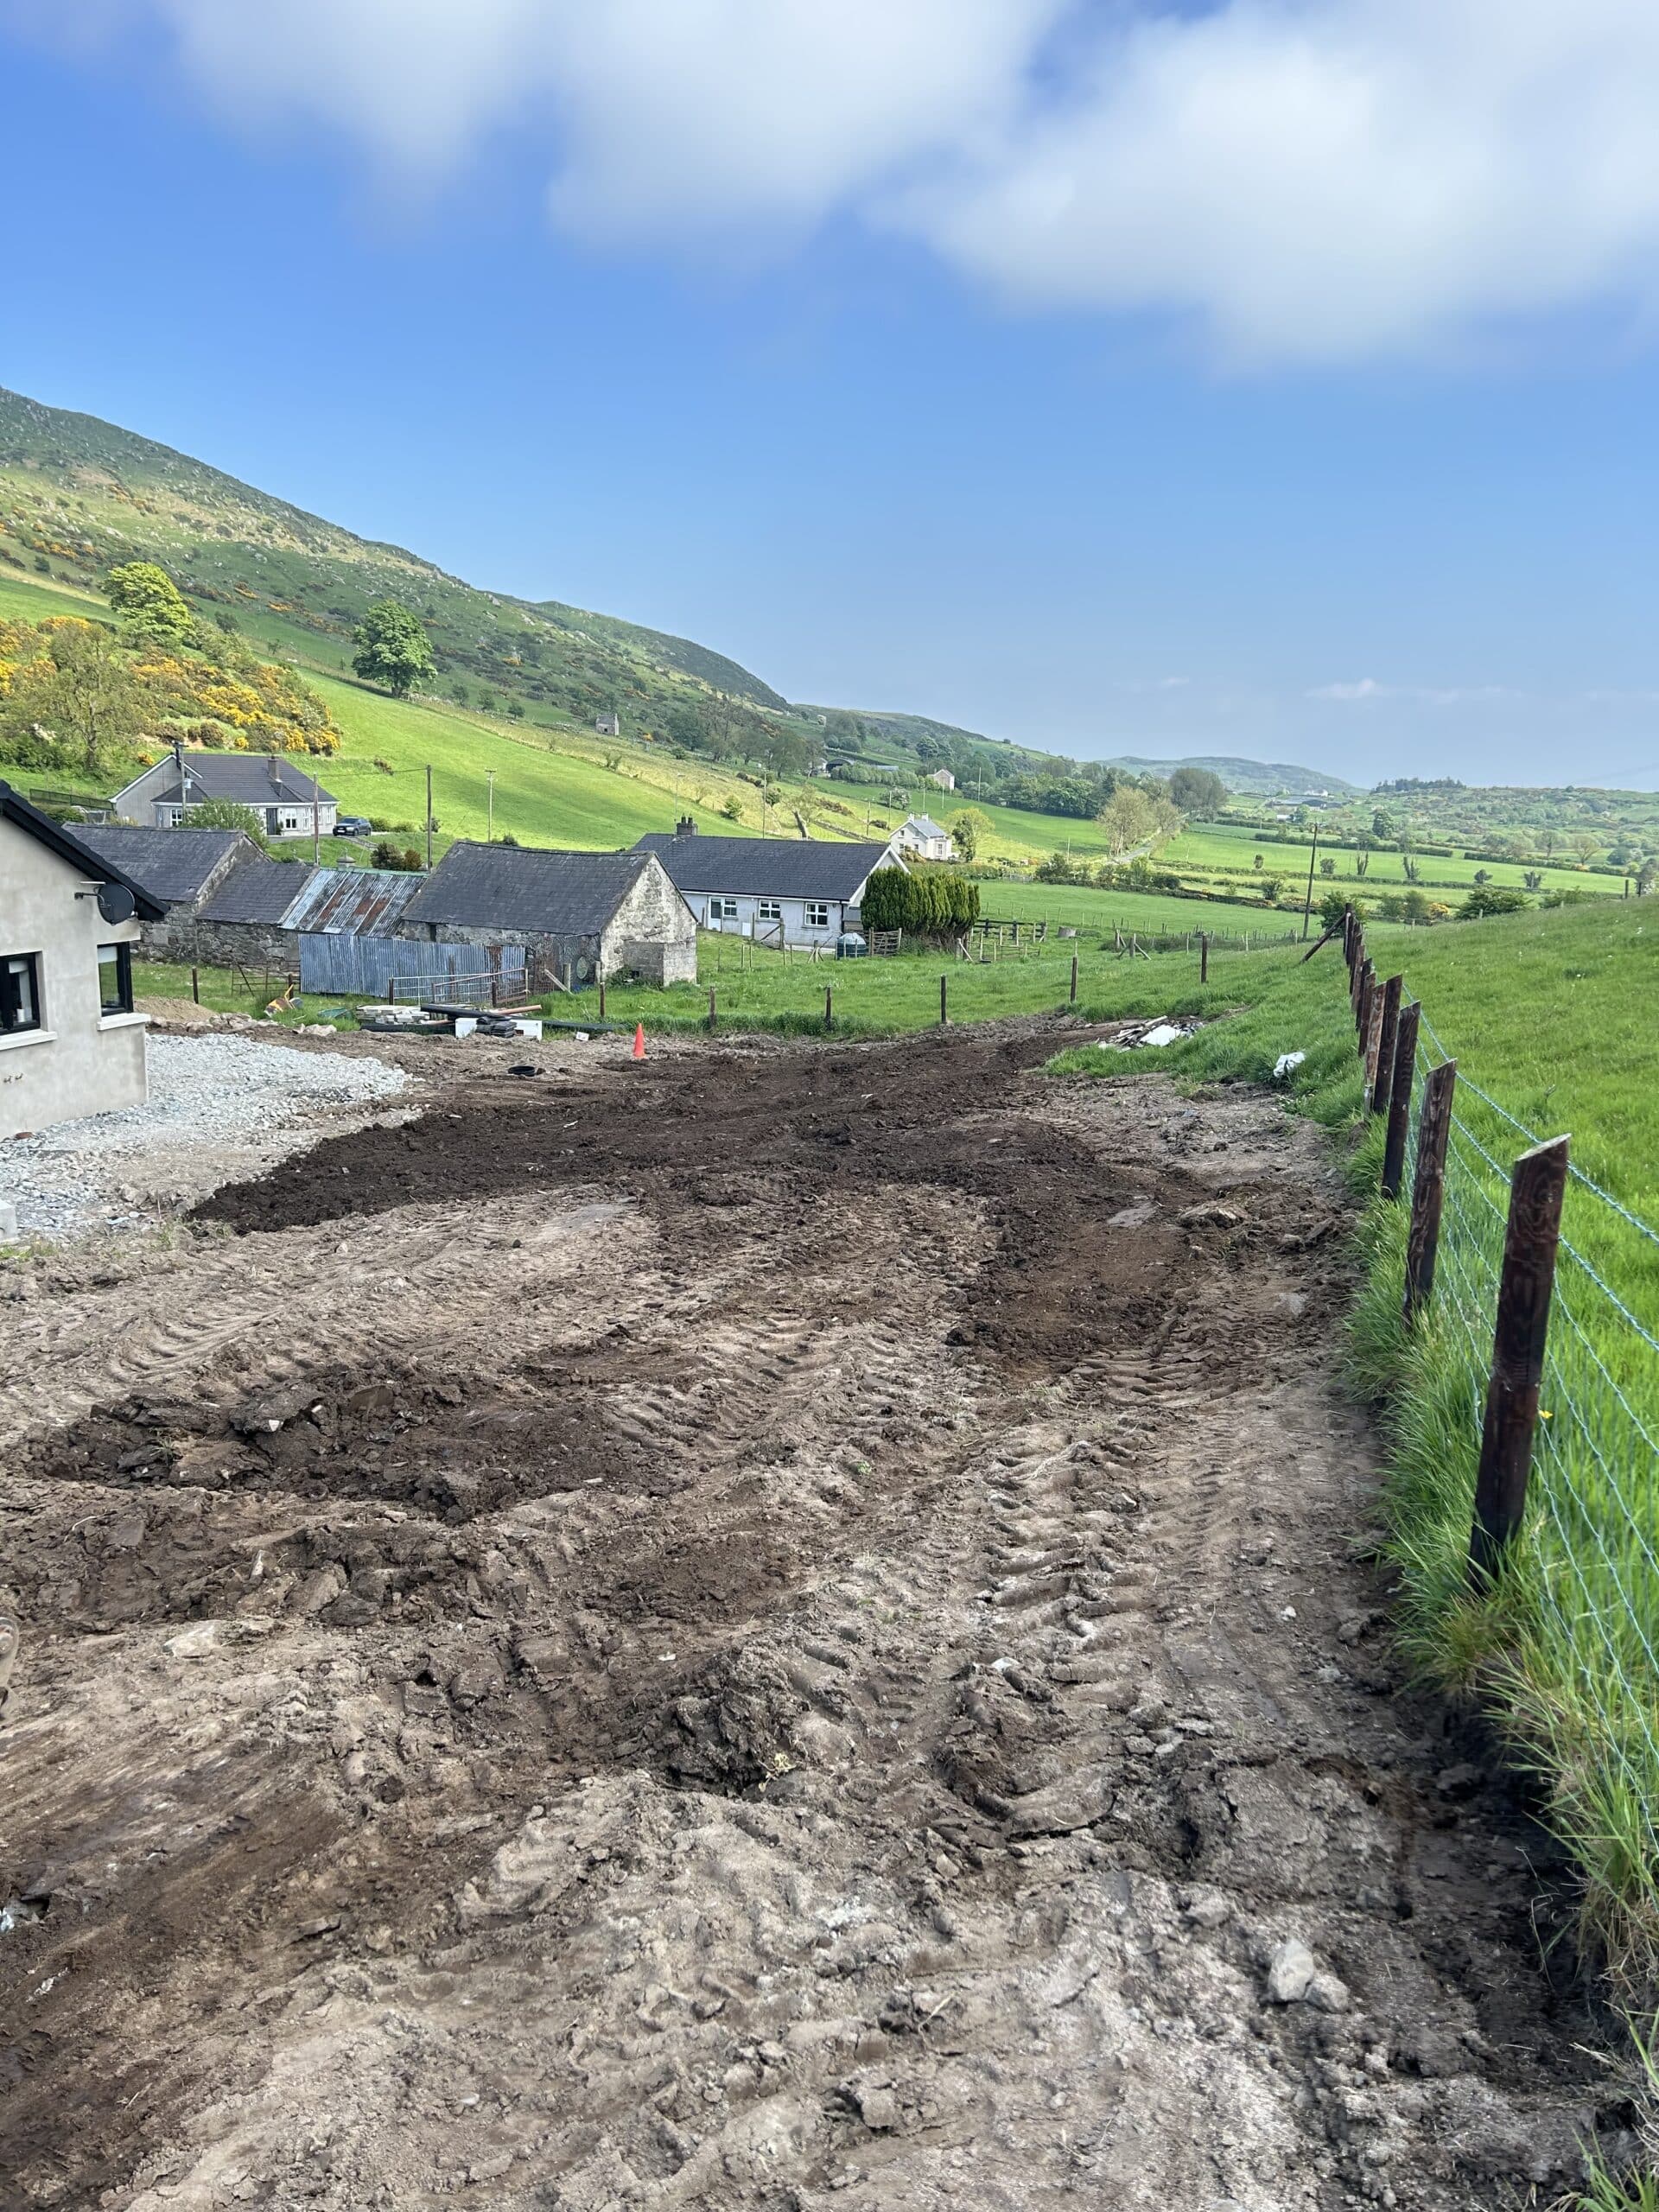
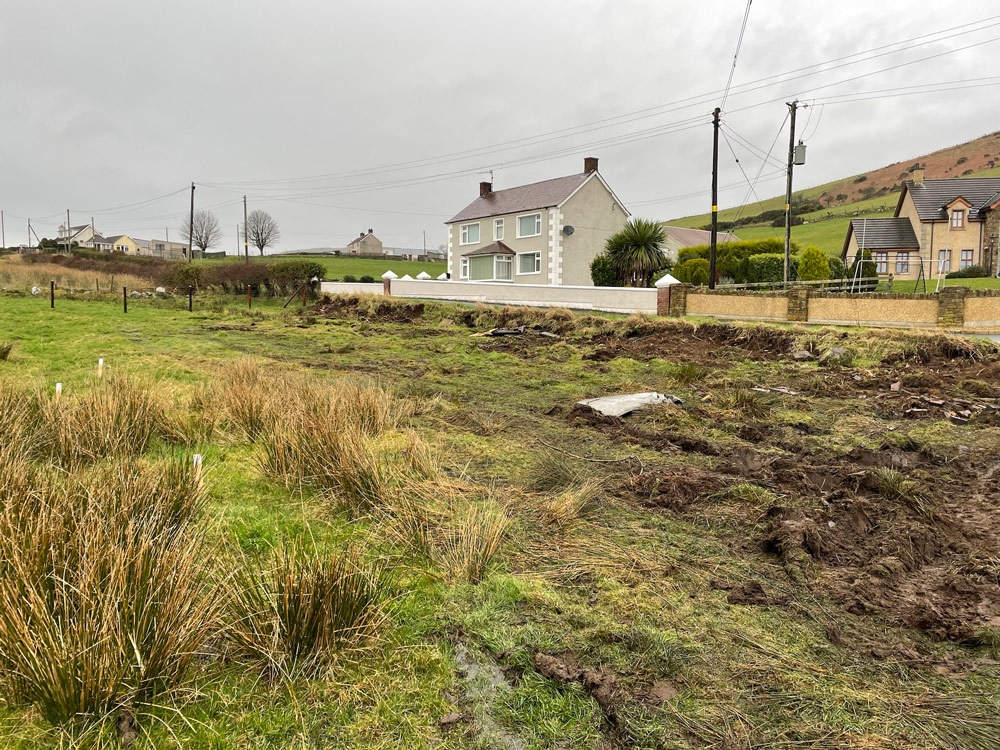
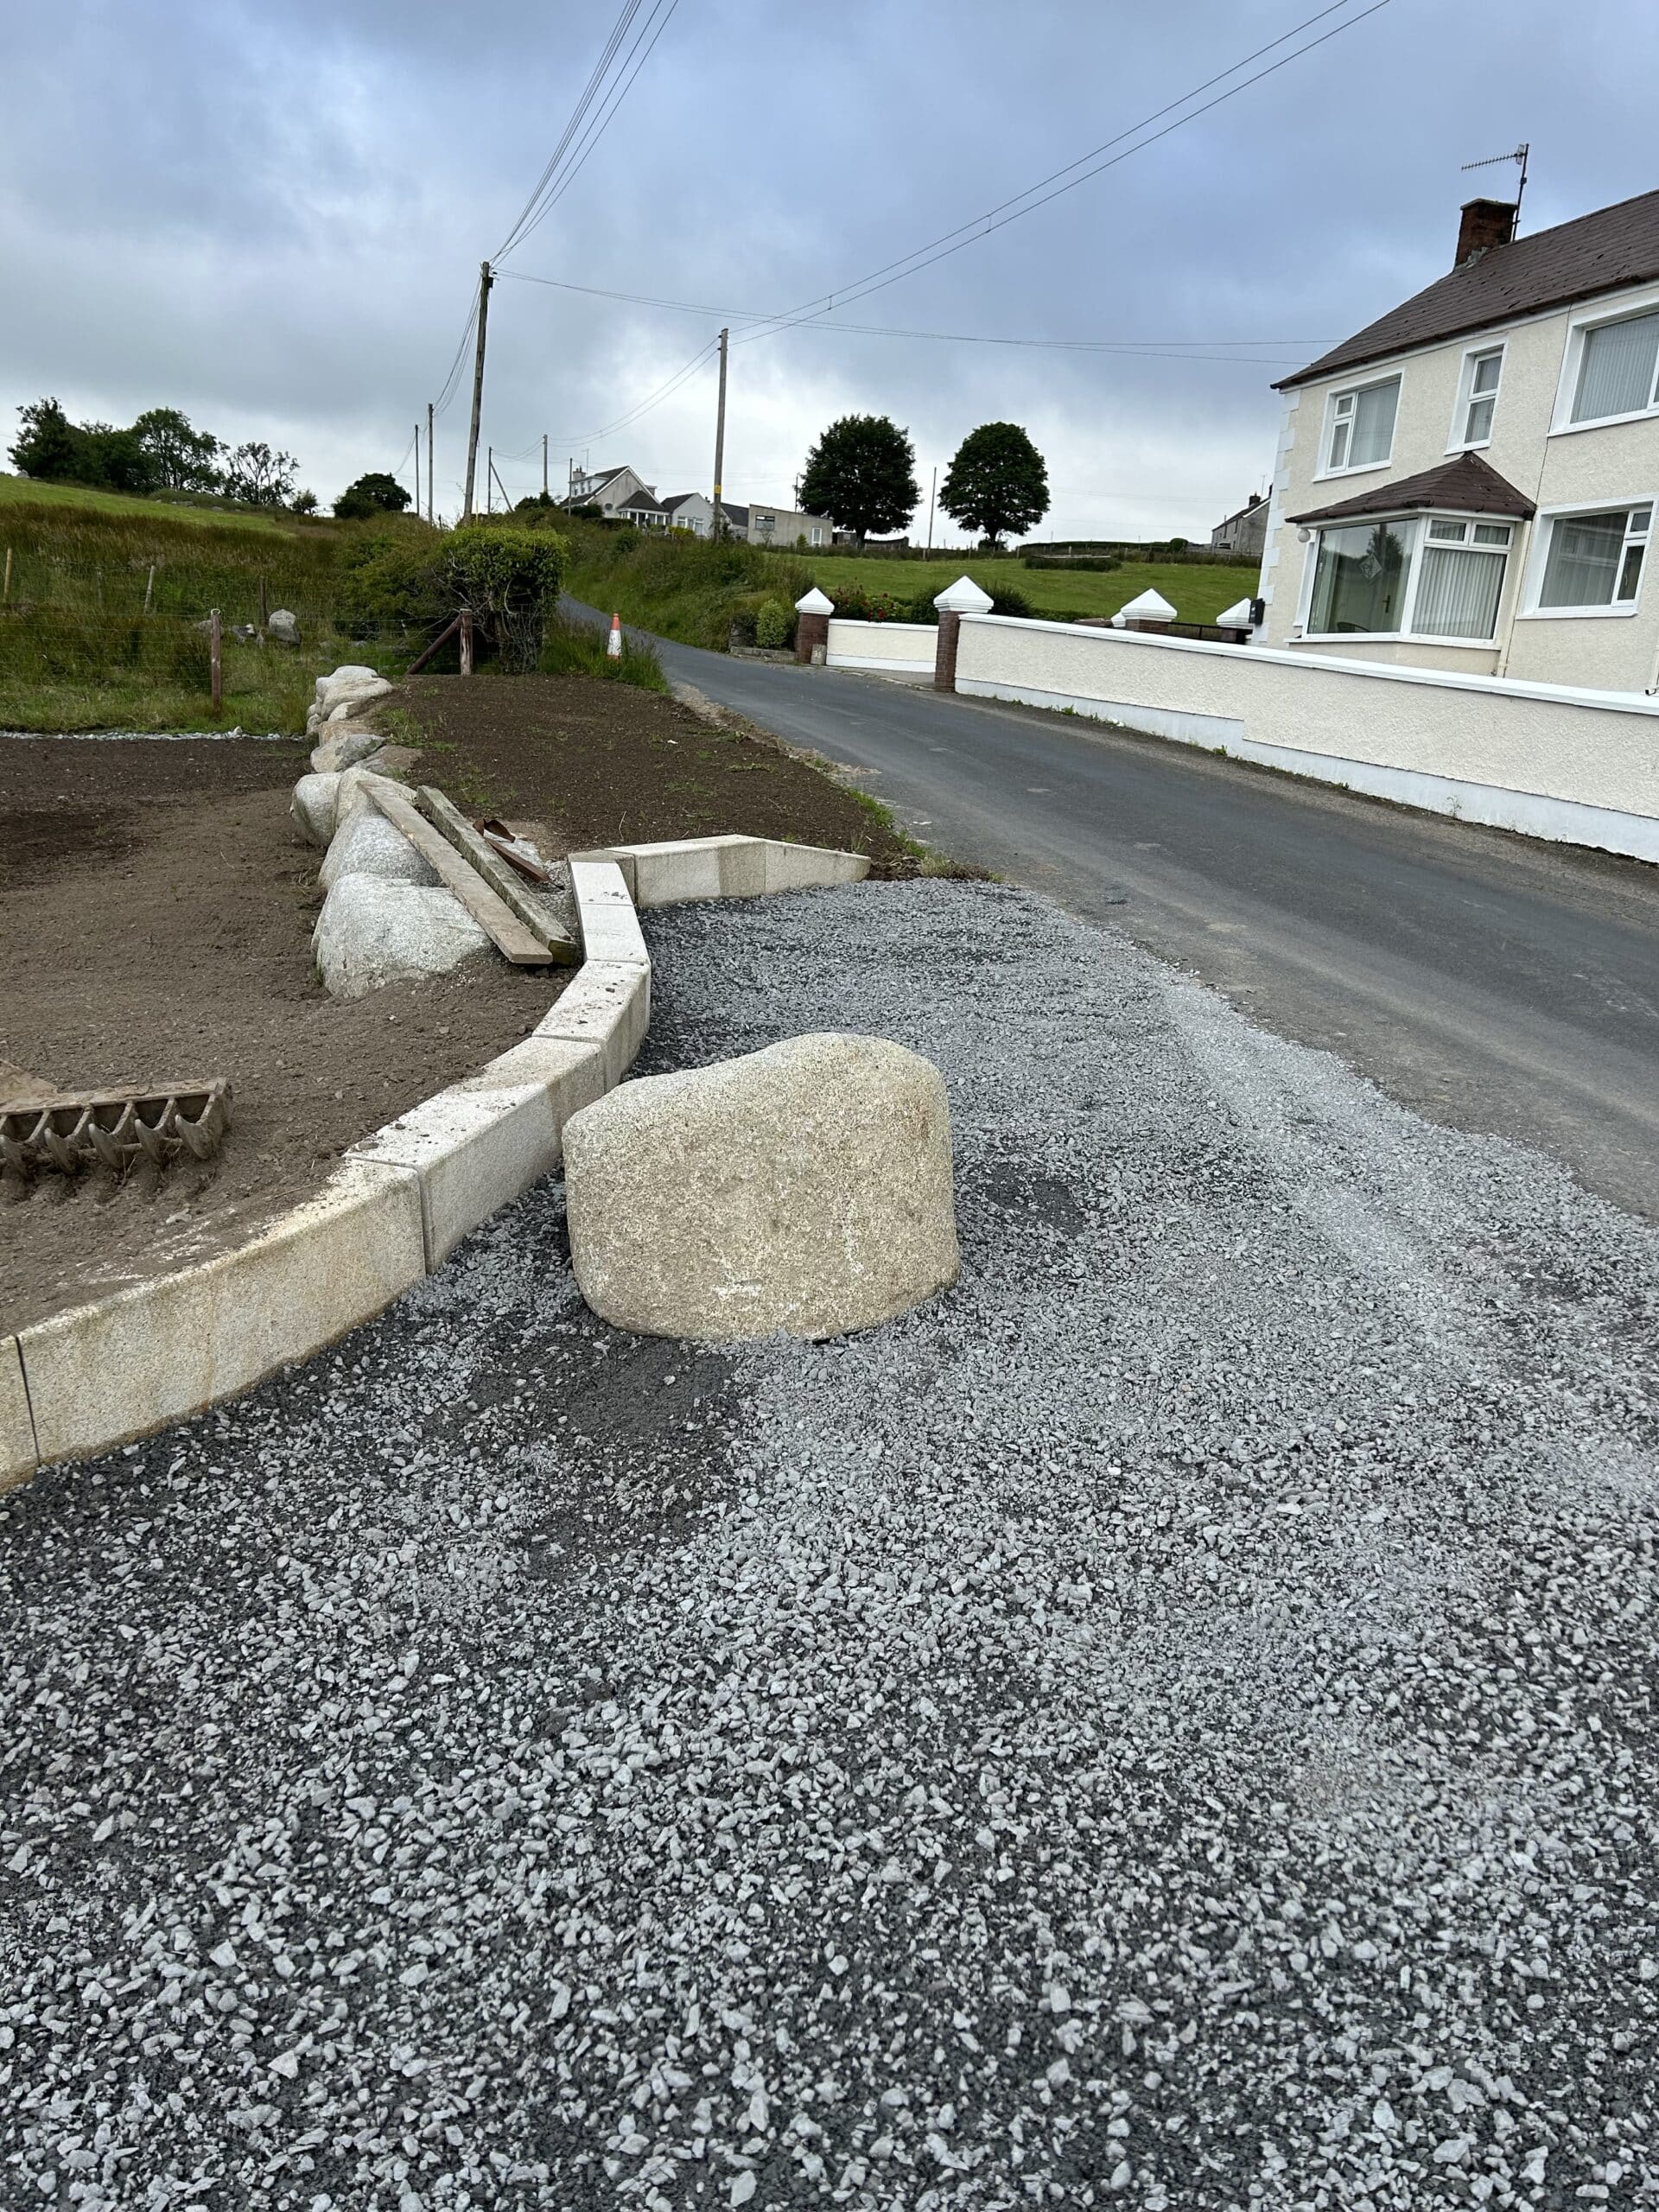
When we bought the site, the folio clearly defined the boundaries and these had been laid out with stockproof fencing. The front of my site just had a hedgerow, there was no actual access to that part of the field. It was off the adjacent land, so I had to make an entrance in. It slopes away, high at one side and falls away with approximately a metre to a metre and half depth between the road and the field which required a lot of fill material.
I took the hedge and verge out and basically filled the front of my site up with heavy material; 30 or 50 loads of heavy rock at the front of the site to give us a platform. I had to secure that off from Day 1. Once I got the initial hedging out of the way and got a strip of stone, I could put in the fencing then, to make the site secure on all four sides.
Site water and electricity
We started building and were without water for about a week; the connection came the second week. I had a water cube that my neighbour across the road was able to fill for me a couple of times. Once the water connection was made, it gave us a great supply pressure for the remainder of the build.
We didn’t need power until the house was well up; our bricklayers had a diesel mixer, the joiners had battery drills and the like. I got a temporary electricity hookup once the building was watertight, before plastering, floors and the subsequent fitting out.
Site management
There was no site office, simply because I didn’t need one as I lived 15 minutes away, and there was no mobile reception at the site which meant no internet. But I did have a secure storage container to lock away deliveries and store tools.
I put in a chemical toilet on site for the guys; it was there for the entire build. It was cleaned out on a weekly basis which is a very important part of the Construction Design Management regulations.
Information management and design information communication was vital due to the lack of phone reception. Plans were emailed and Whatsapped to all trades and laminated copies were left on site. Regular evening calls with the trades ensured any issues were picked up and resolved.
For waste, any masonry overspill was used as fill. Other stuff like plastic and insulation I let it pile up and got a skip. Anything that was recyclable went to the recycling centre on the back of my trailer.
Managing the schedule
When I was waiting on Building Control, I had every initial trade programmed in when they would need to start. I gave everyone a couple months’ notice of when they were needed.
Then when I got started, I started talking to anybody with a long lead in time; trusses, things like that. Then I was always talking to people, getting prices. Yes it might be months down the line, but once I had Building Control passed I gave the suppliers the details and specifications.
I was getting enquiries out to relevant places and getting prices back and giving them a heads up where I was, what stage I was at, and then I’d firm up prices and call off closer to the time.
It was a question of getting as much done early on as I could; that meant I was able to call materials off as they were needed. This ensured minimal delays on site and reduced any possible standing time which would have led to cost overruns.
I had a main builder’s merchant; I could have had any pick of suppliers through work, but I ended up going with local merchant. I wanted to support local suppliers as much as I could. He priced things for me and he gave me very competitive rates. He also delivered materials when I needed them, sometimes at the last minute.
Managing material call-offs was second nature but I knew the early work was done and it was just a matter of keeping on top of things.
With the big ticket items, when I was maybe six or eight weeks away, the suppliers would ring every couple weeks, you ready for us? Keeping everyone in the loop in terms of timelines meant it was streamlined and delays were minimal.

Budgeting tips
I used a spreadsheet for costs, with tabs for each element, specified and tracked in there. Come towards the end of the build, it was hot and heavy and the spreadsheet wasn’t as up to date as it should be but it still gave a fair idea of what was going out and to whom.
In terms of keeping track of money spent, there were incidental things you couldn’t budget for fully. Things like screws, nails, tools, stuff like that, gloves. Stuff you need and use up, but don’t allow for at the start.
In general, it’s worth doing your research. For example we used a local quarry for the stone, which I organised early on. With concrete block prices skyrocketing, I got prices agreed and stuff sitting on site before the massive increases came in.
Early stage pricing pays off, as does shopping around. A lot of people go to the first person they find, or go with what they know, which isn’t the most cost effective way to go about it. We also had so much support from friend and family alike – when they visited the site I told them to expect to be handed a brush or shovel. It really was a team effort.
Insurance
It was my financial advisor who’d asked if I had self-build insurance sorted; to be honest I hadn’t even thought about it. He got it for me, it was £150 a month for 12 or 18 months. I went for 12 and extended each month after that.
The self-build insurance covered me for public liability, fire loss and theft. It was fairly comprehensive, and I didn’t mind paying for it because it covered me if anyone got hurt, for malicious damage, and it also covered me for plant I had on site, the tradesmen’s equipment – and if it got stolen. Luckily I didn’t need to use it but looking back, it was worthwhile.
Equipment
I had most of the basic tools I needed and if I didn’t, family members did. After that, most tradesmen had their own equipment; I did have a forklift for the guys installing the roof trusses and tiles, that’s all I had to really provide.
What I would advise is to get your builder or trades to supply their own equipment; if they’re paying for it they won’t have it on site for longer than needed. If you’re paying for it directly, they might not say it’s not needed and you’re left with unnecessary hire costs, repairs, etc.
I would advise anyone on the self-build journey doing direct labour to ensure the terms and conditions with your trades are clearly set out as to who supplies what.
I was very lucky and a few favours worked out for plant that I did need. I also had a very good support network with family members.
Living arrangements
We were lucky enough to get living with my wife’s parents; we moved in with them about six to seven months before we broke ground. We had sold our previous house to fund buying the site and we ended up staying with them for the best part of 2.5 years until we moved into our new build in August 2023.
How to budget for utilities
Since I started my consultancy in November 2023, which is centred around advising other self- builders, I’ve been allocating high provisional sums for utility connections. It might seem excessive but until you have a conversation with each of the utility providers you won’t know how much the connection will cost you. You may have to upgrade a piece of their apparatus to get you connected or have to go across third party ground.
If you don’t allow for it now, you’ll end up paying for it down the line. It’s better to find it’ll be a lot less than what you allocated and have spare money sitting there to spend on something else.
It’s a good idea to have your connection contracts sitting in the background where possible. Yes, for the likes of NIE Networks, their quotes expire after 45 or 90 days. But you can always update them and they’re unlikely to change an awful lot.
At least you’re talking to the service providers, telling them what stage you’re at. Get all of the service providers on board because their normal timeframe can be anything from 10 to 12 weeks, so you need to plan for that.
Because I work in the industry I knew what to do, what to fill out, what information to give the utility providers to speed up the process.
All too often self-builders fall off their seat when they realise they have to pay 10 or 15 grand to upgrade a transformer. Those initial, informal conversations can be started whilst you are in the planning process or Building Control application phase.
If I had found out that I needed to upgrade a transformer or something like that I would have value engineered other elements of the build to compensate for it – I would have reduced the size of the house or done something to cover the additional cost of what the power connection would have been.
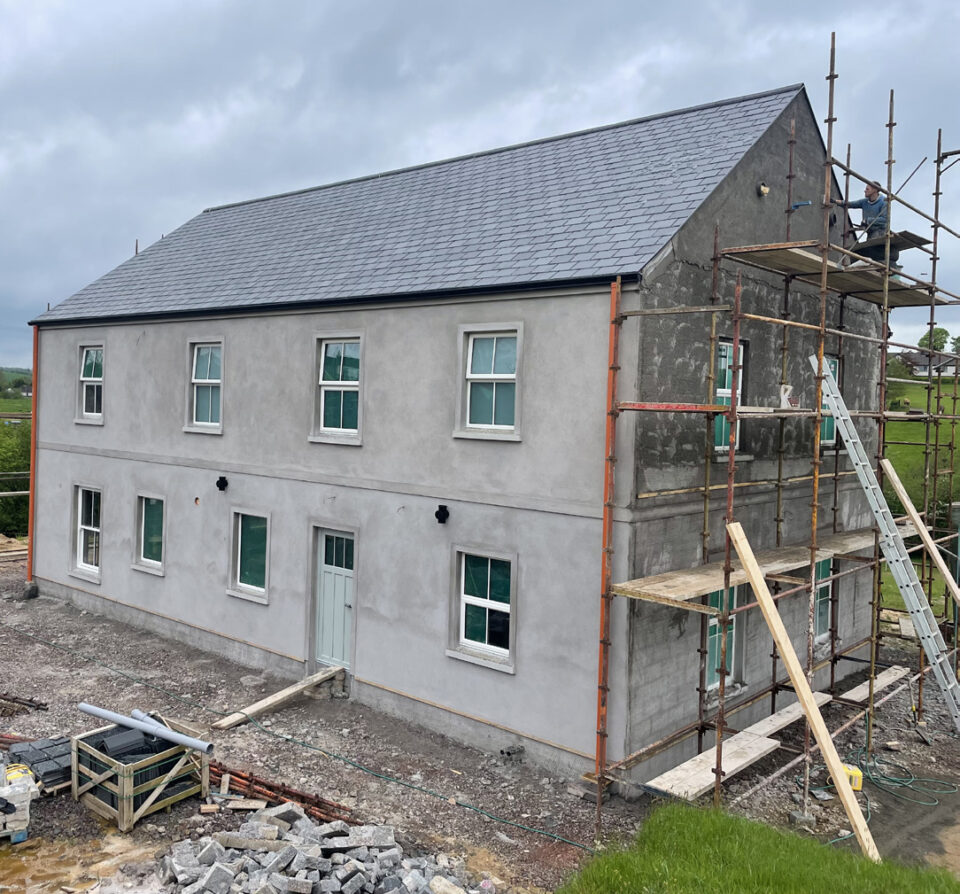
Part 3: On site
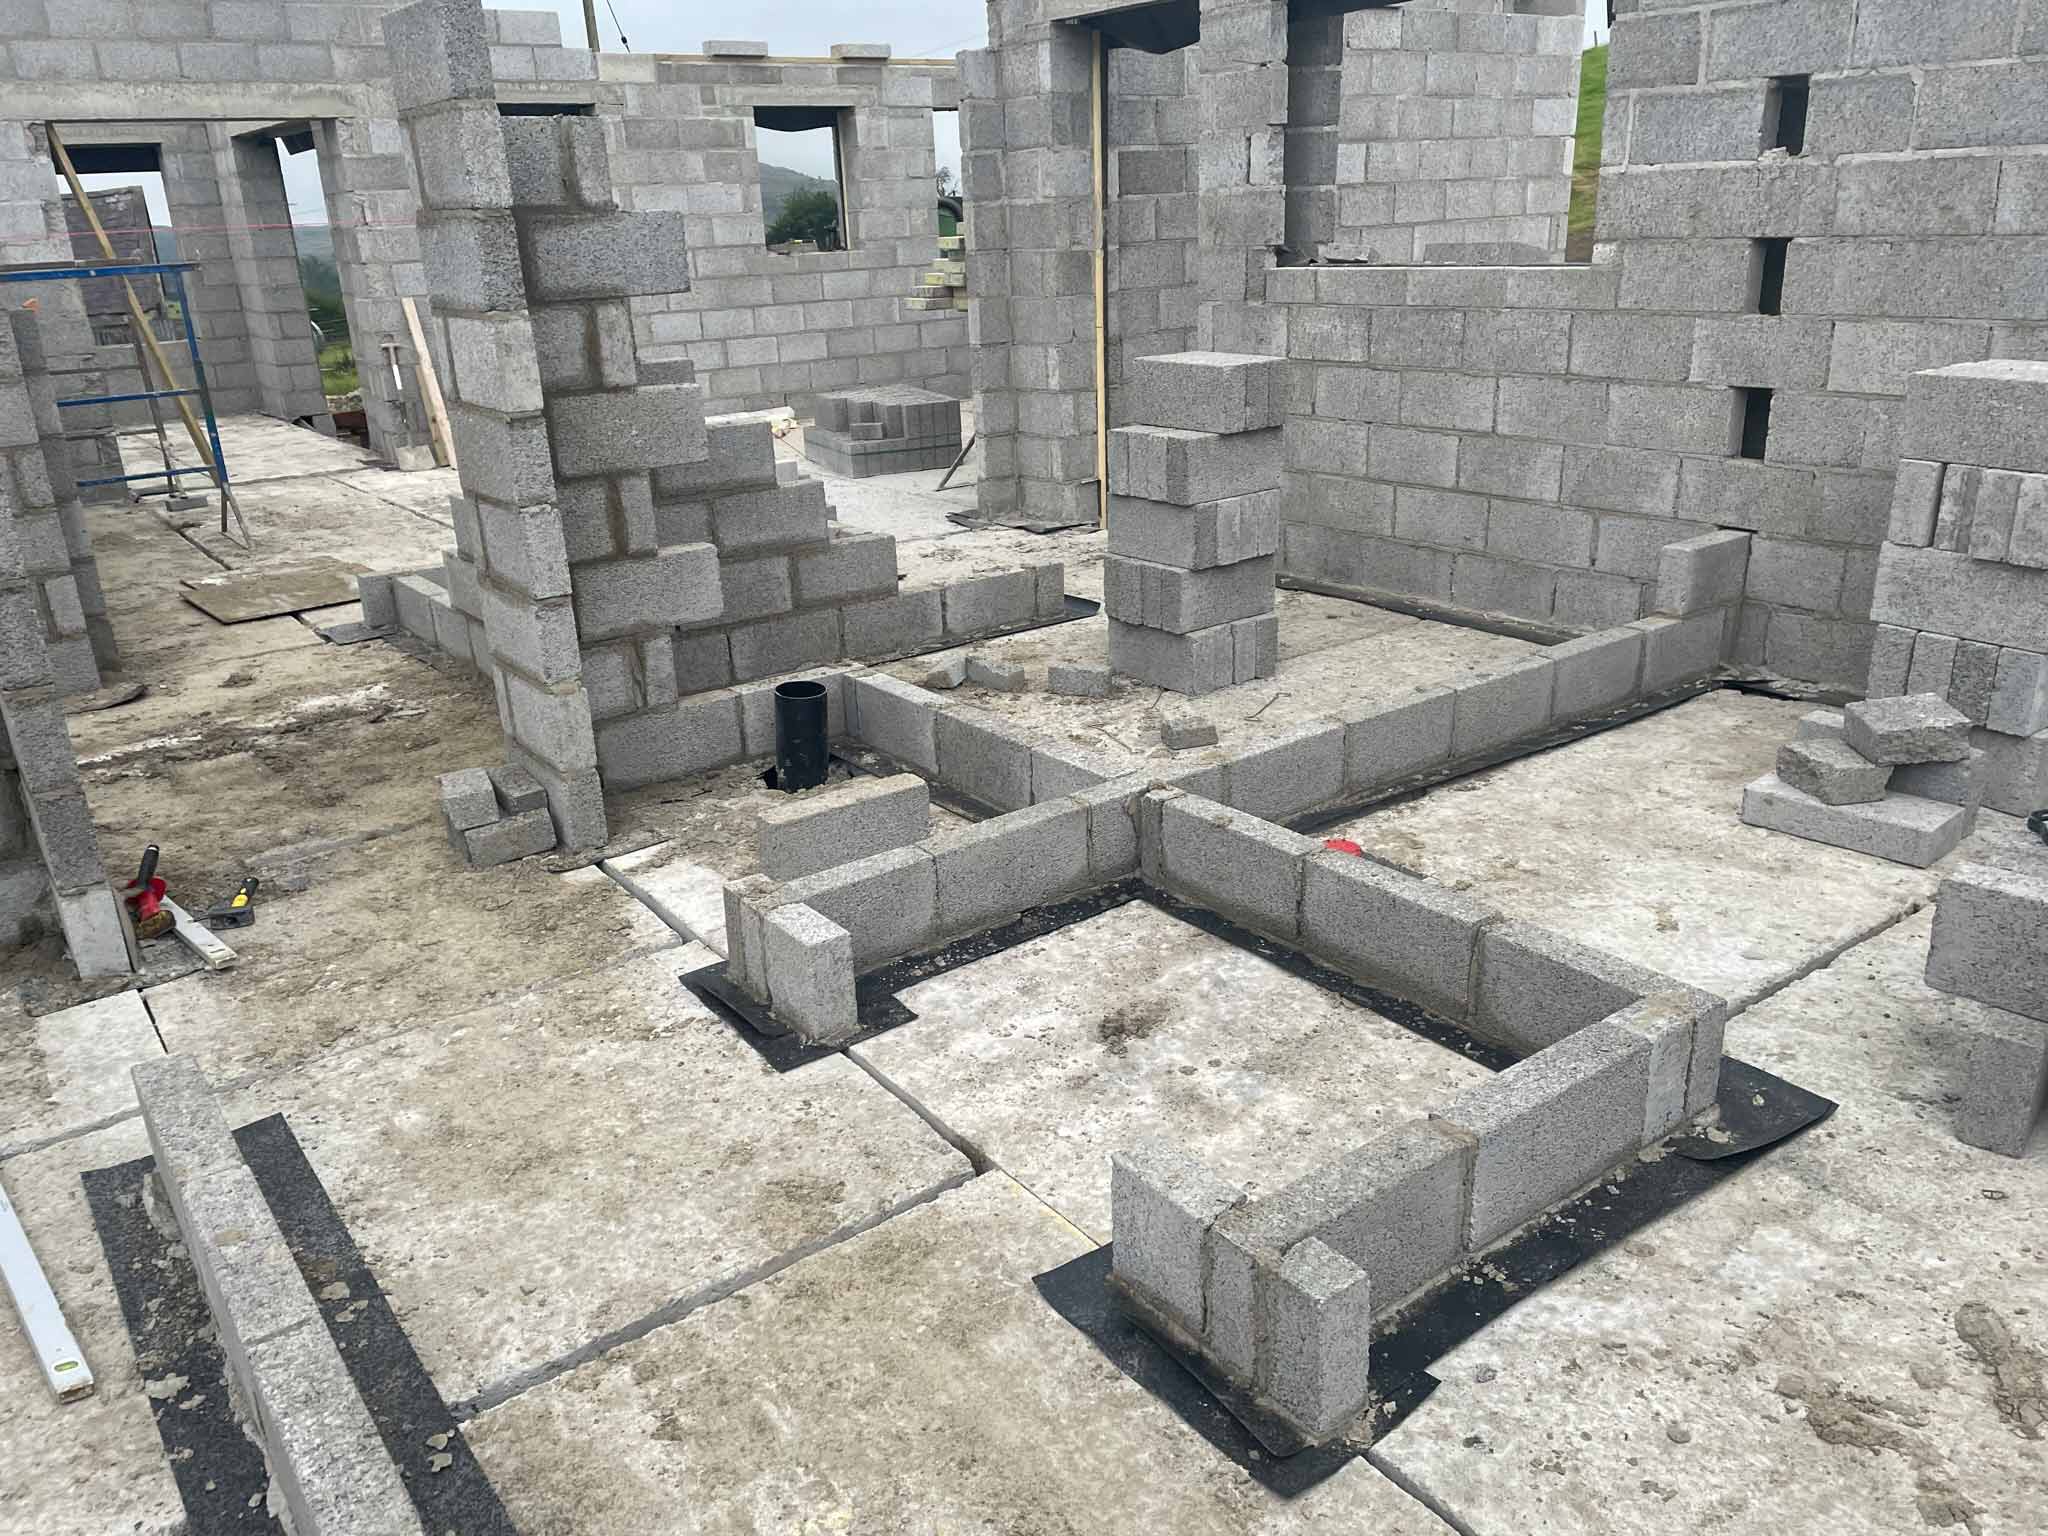
Starting off, the drawings had everything set out and I was able to make sure everything was done as per the plans. I did the engineering side of things myself, marked out everything in the right place, made sure
that everything was square. Making sure that the footings are right is essential.
It went very quickly once we got the house watertight, from January to August. Even second fix electrics was done within a couple of weeks. There were no delays because everything was sequenced; I had my suppliers lined up well in advance and had the commercial side of things sorted.
Having all of the specifics organised before we were on site made things so much easier. The people and supplies were in when we needed them. We used local suppliers which means stuff was there when we needed it and if anything was missing, I could run down the road to get it.
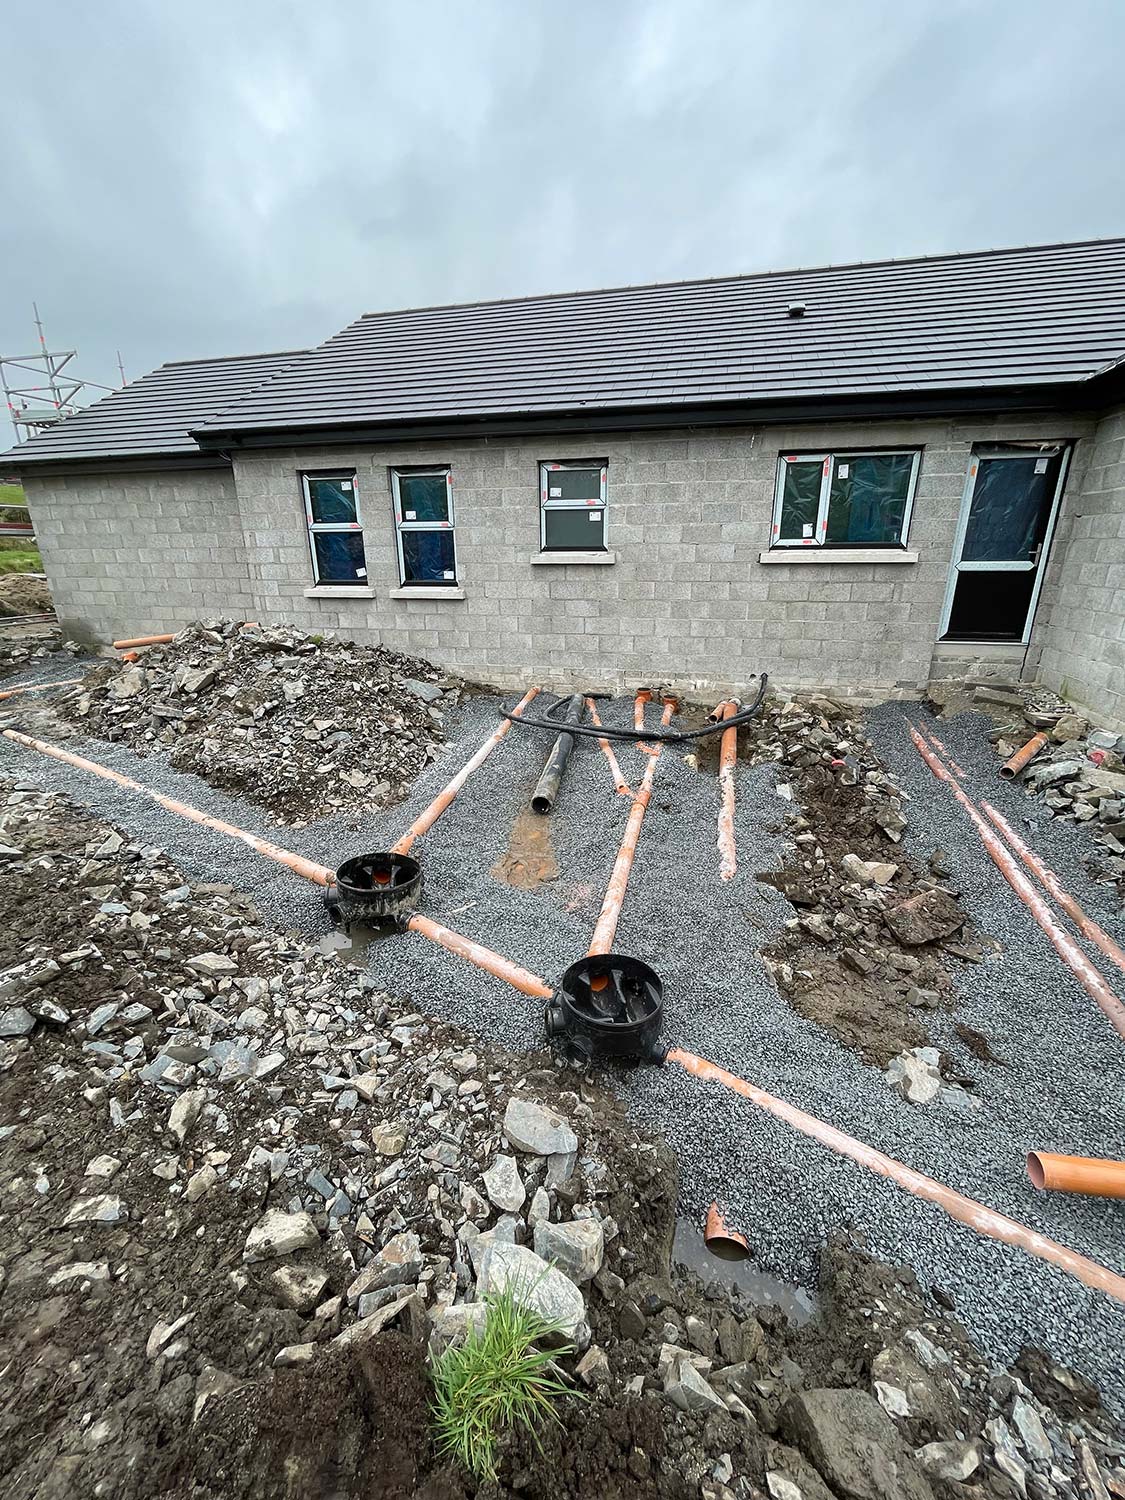
Drainage and services
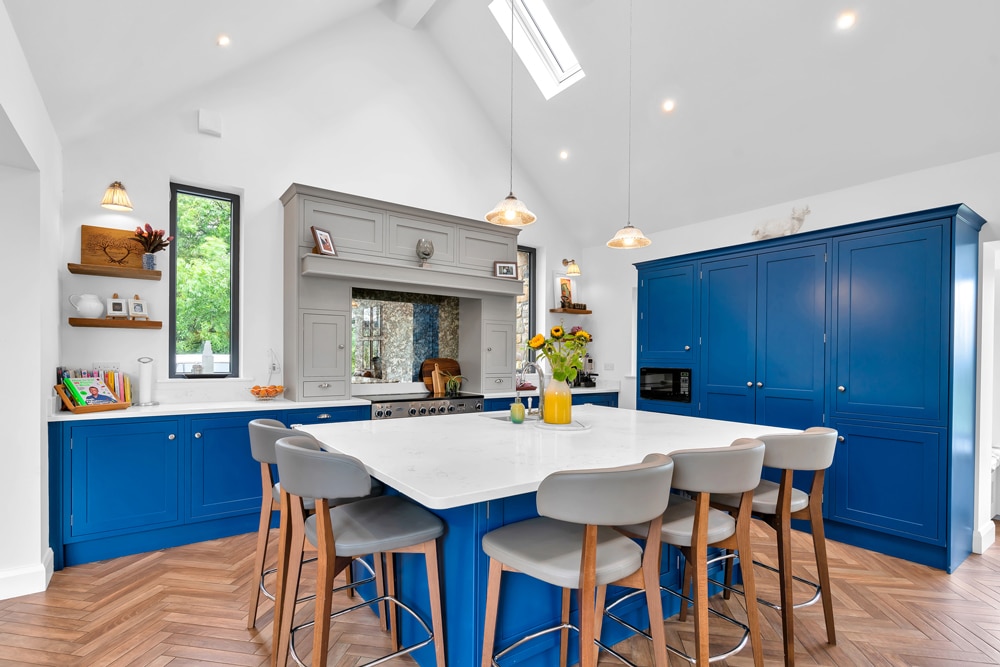
Your internal layout will have an impact on your drainage popups. For example you’d traditionally have the sink at the window but if you want it in an island, you need the drainage, water connections there, and power if there’s a cooker going in too.
To a certain extent, you can add more sockets around an external wall retrospectively, prior to plastering, but if things are in the middle of a floor, if they’re not in first time you’re not going to get them in. Or it’ll be costly to put them in.
It all comes down to planning. Planning what you want, planning what to do, planning ahead, that’s what’s important. Whether you bring in a contractor or go direct labour, you have the same decisions to make. If you don’t think of what you want ahead of time, you’ll be adding cost and time which can get out of control very quickly.
There’s always something to be thinking about; six months down the line doesn’t take long coming around. It’s all about having things lined up and having things right. If it’s something you haven’t thought about, it might be too late in the process to put it in. Question your own decisions, have I thought this through? Is there something I’m missing? Computer generated images are good for this.
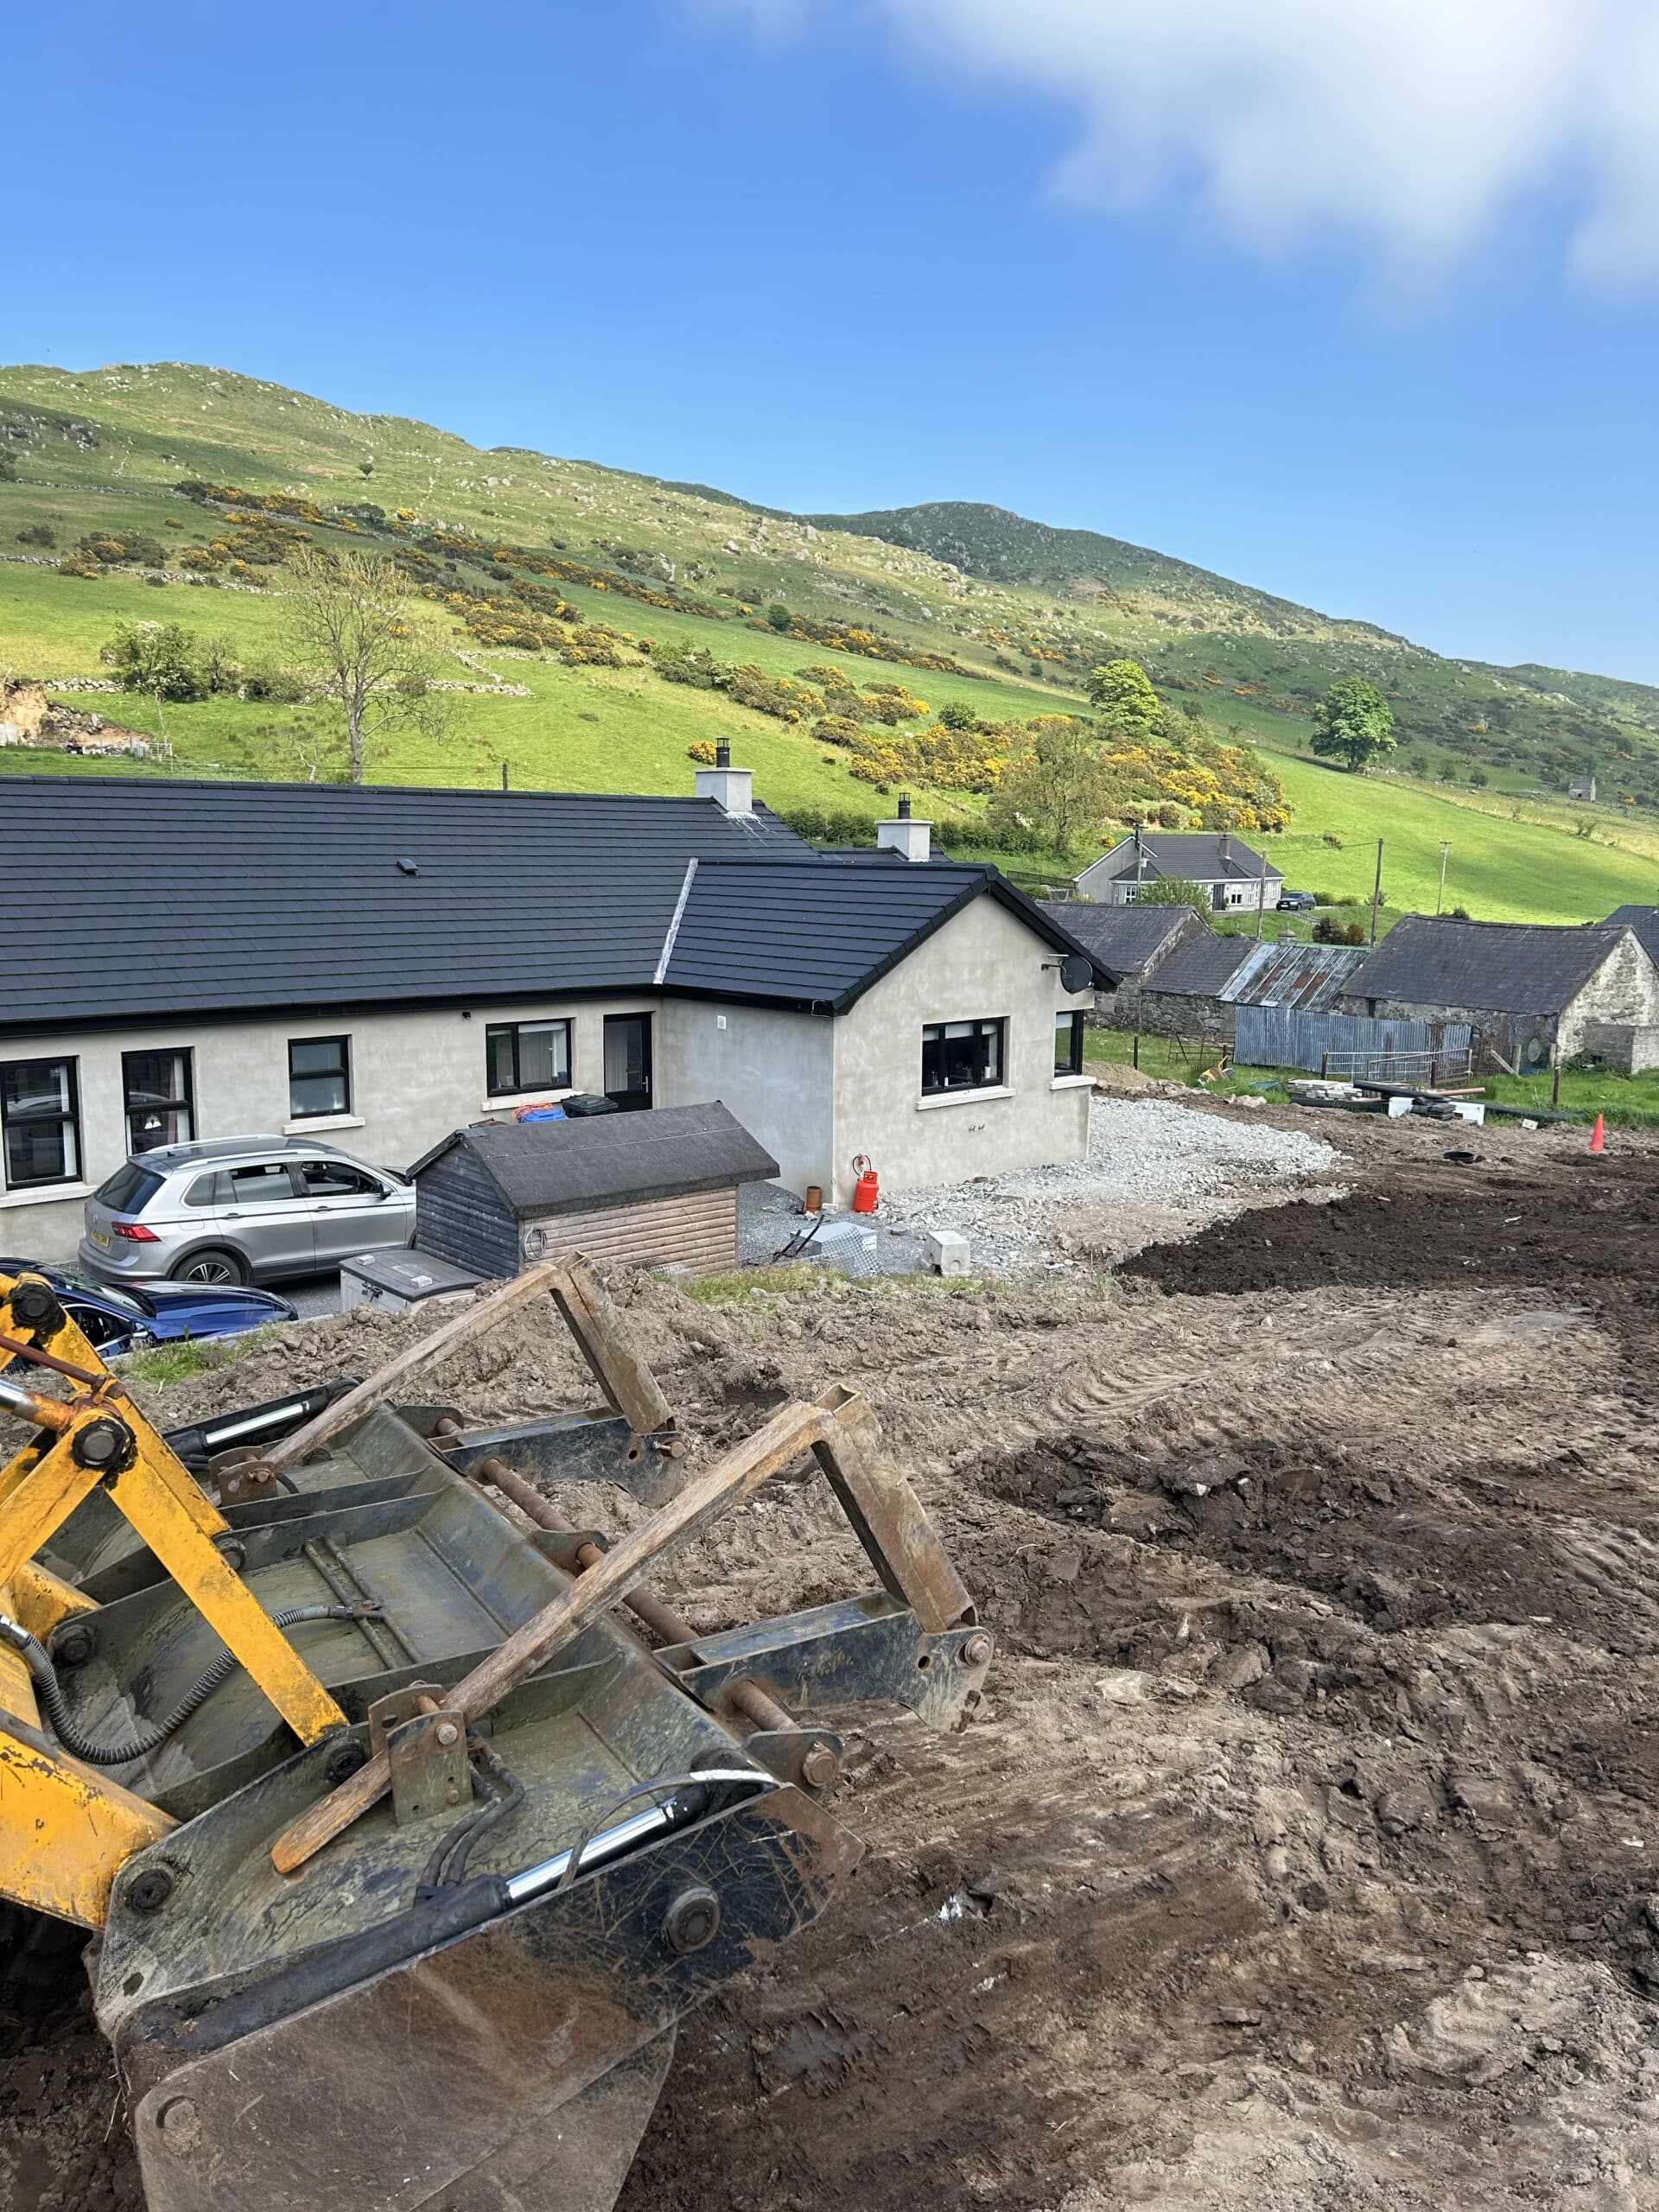
Precast concrete slabs
Even though we built a traditional house, in that we used blockwork, I managed to speed up the schedule with some new technologies.
The first thing that sped up the build was going for precast concrete slabs for the subfloor, which we organised before breaking ground and got measured right after we got the foundations poured, the
substructure built, and had all of our drainage pop ups through the slab.
I had very little to do with the subfloor other than get the damp proof membrane (DPM) down below the precast slabs the day before they arrived. We were building on top of it within a couple of days. This worked for us, others may have different views.
The reason to go down this route was to save time and not having to look for people to put concrete in. The cost wasn’t that much more than going with a standard, poured-in subfloor.
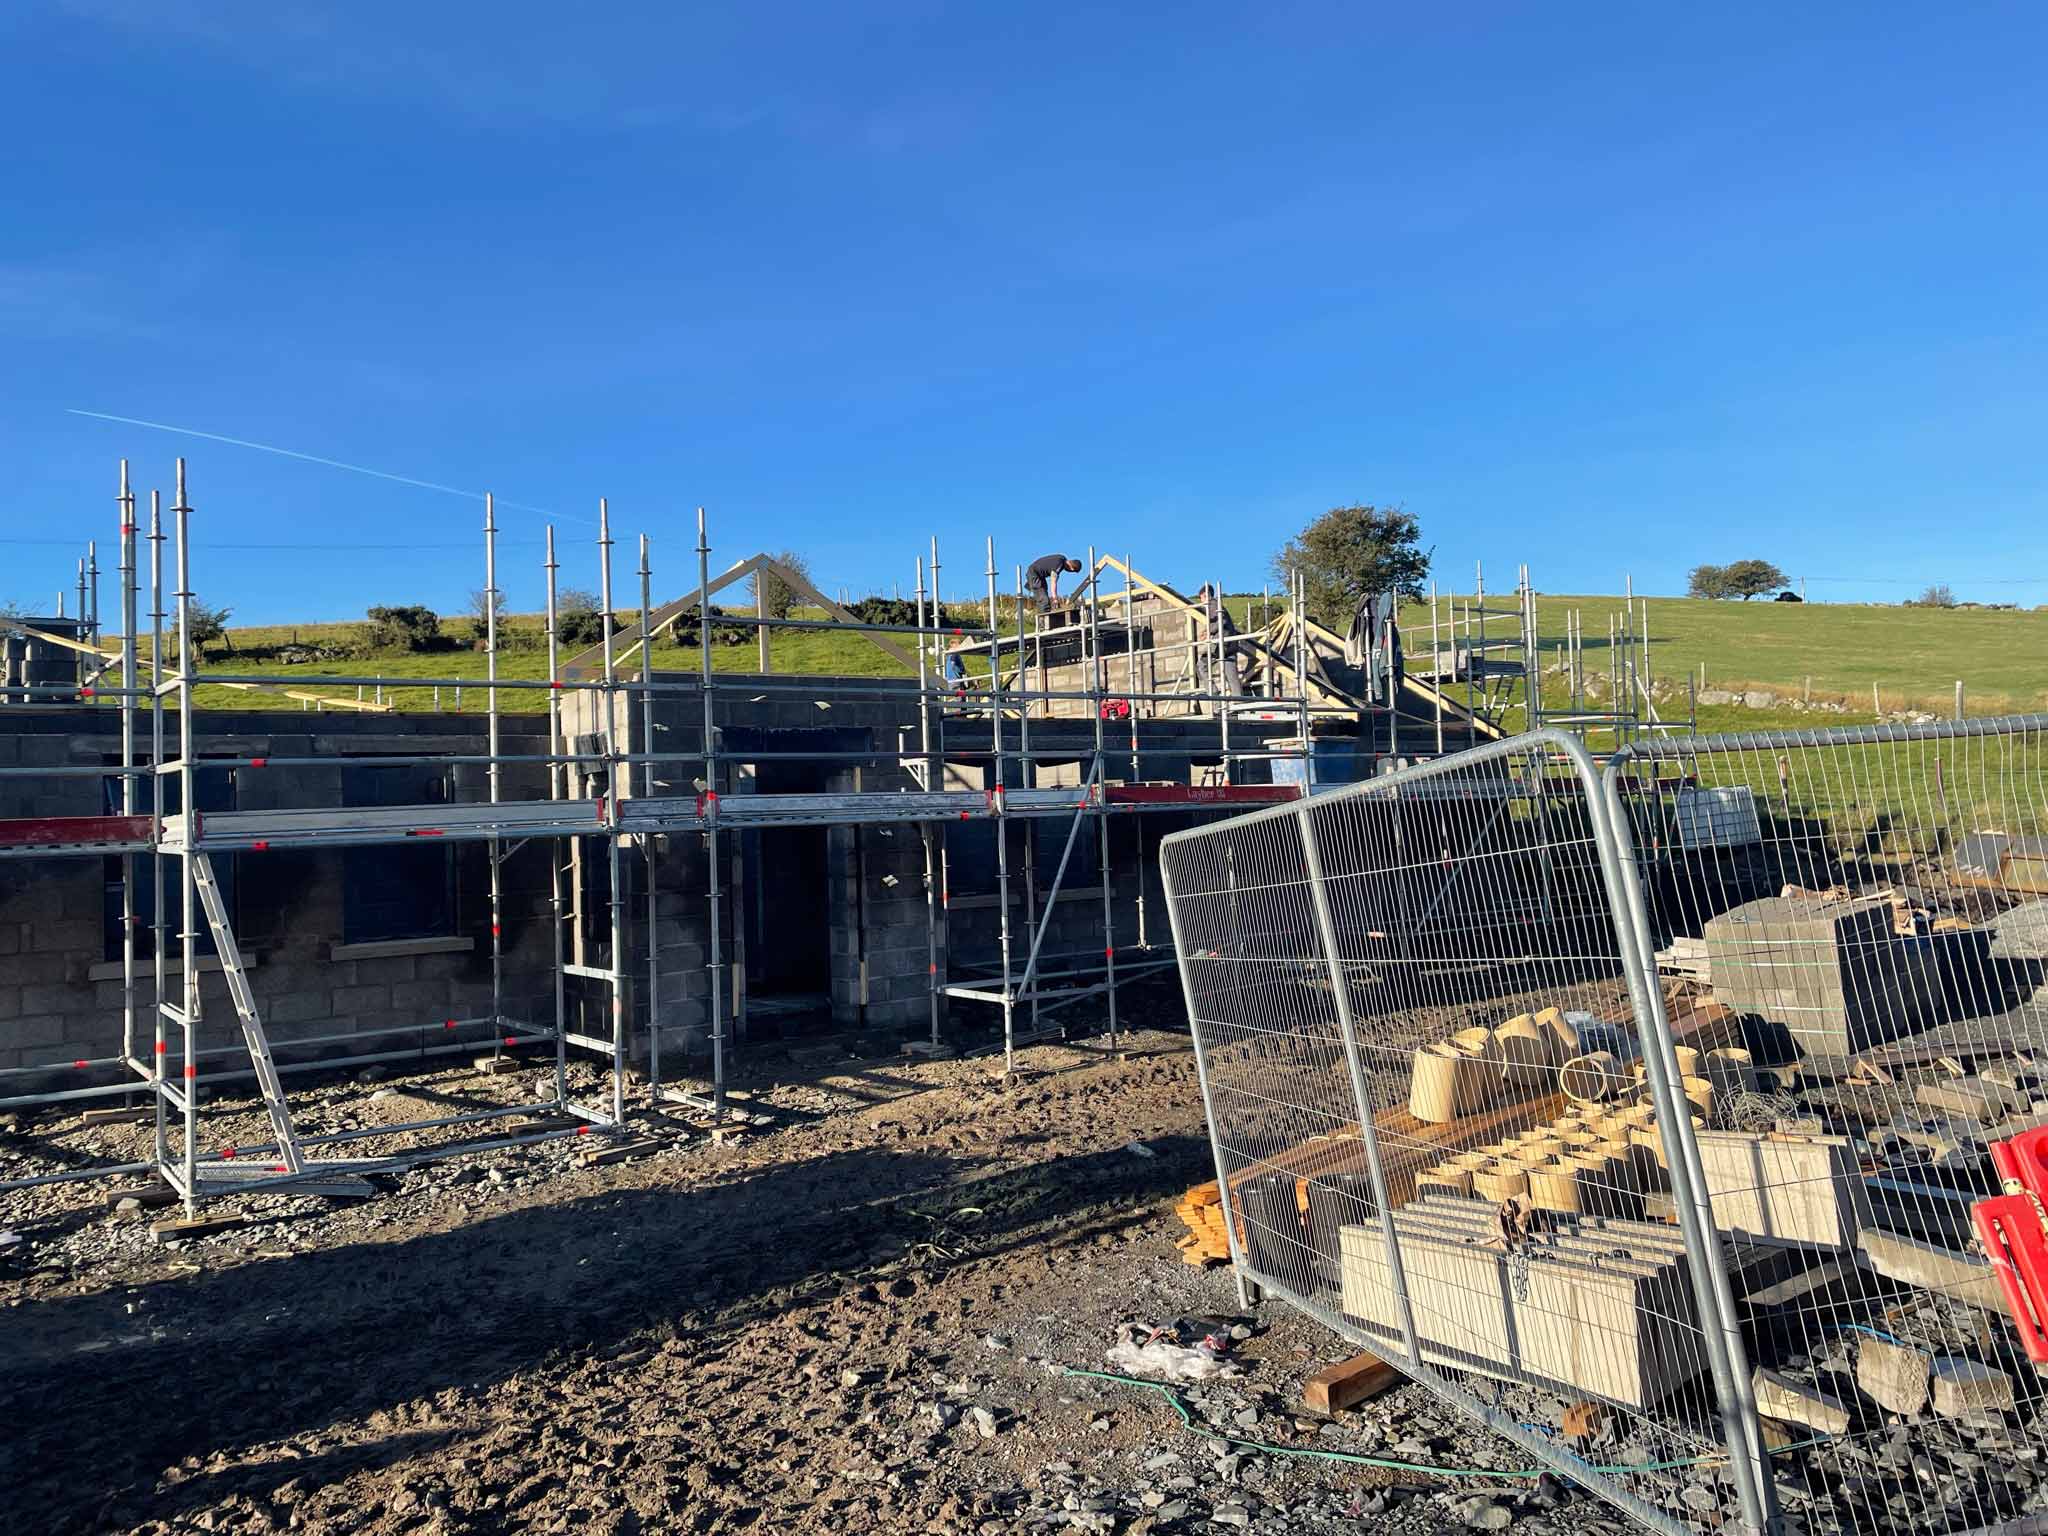
The walls took six to seven weeks after that, and at wall plate level we got the truss supplier to confirm the measurements of the roof structure. I got the windows and doors, which were on order from six weeks into the build, measured at this point too – the manufacturer came to confirm measurements to get them made.
Then the trusses arrived within two weeks. We had a crane and they were set on within a day. The roofing guys worked away after that. They put up the fascia boards and backing boards, felted and lathed, the lead and valley boards. They put in all the dry verges and ventilated tiles in place, guttering, then they tiled it at the end.
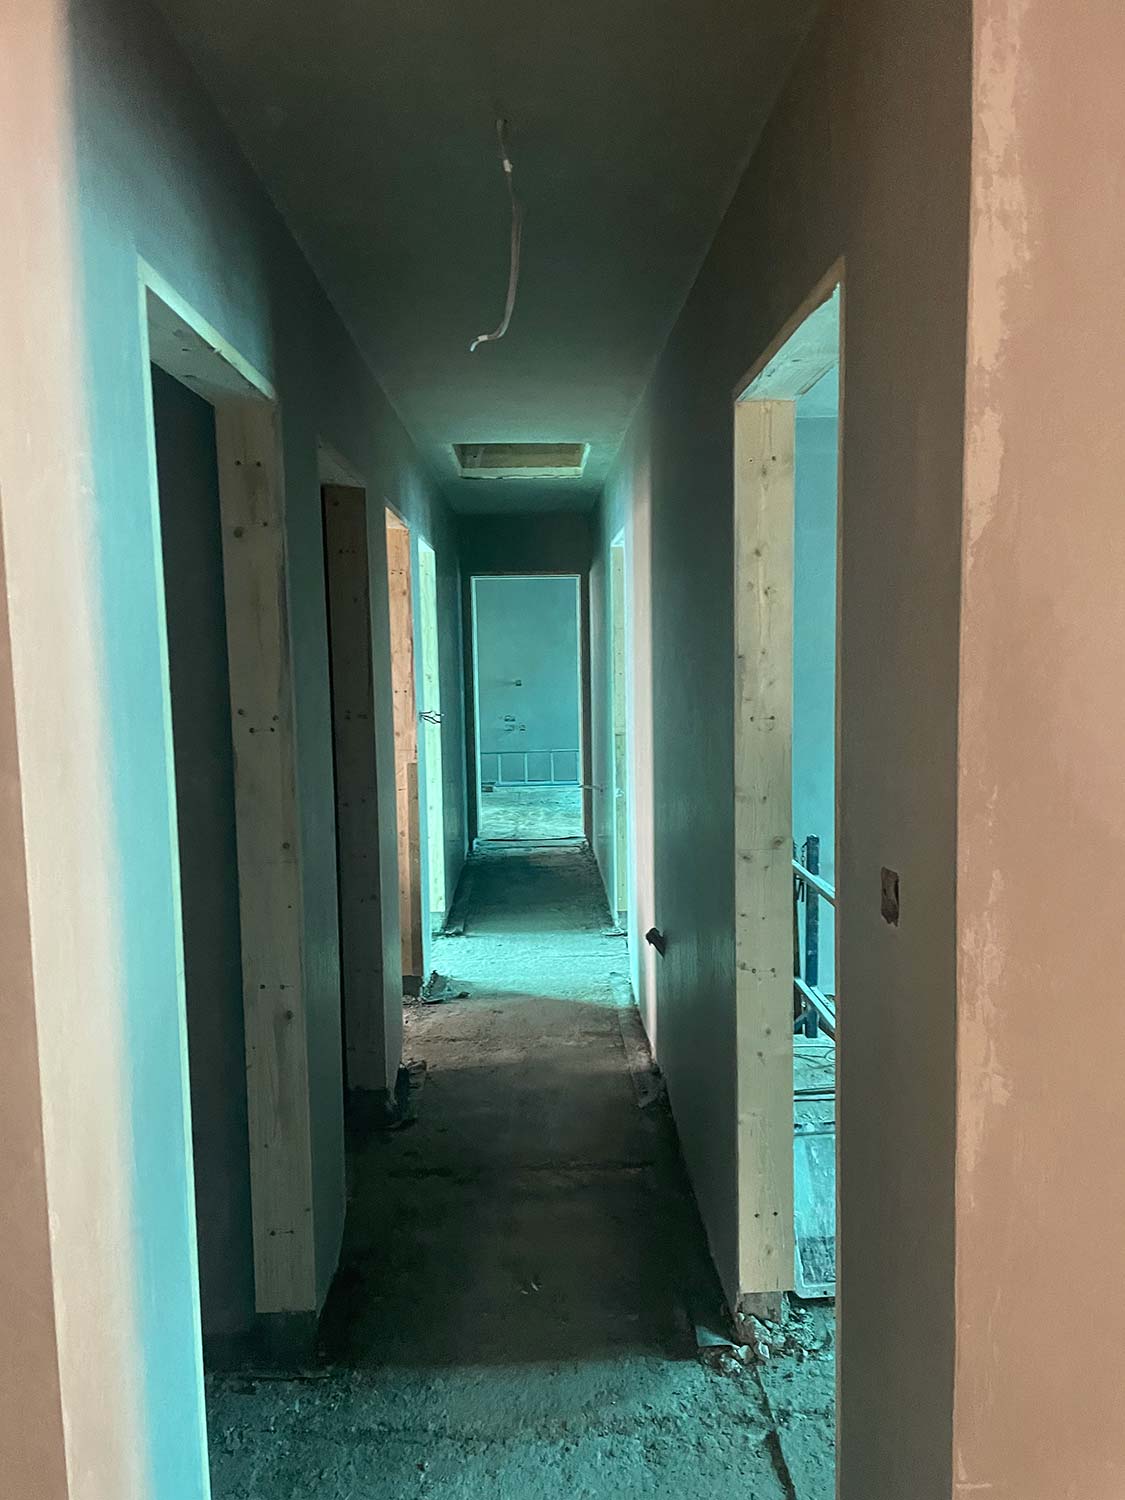
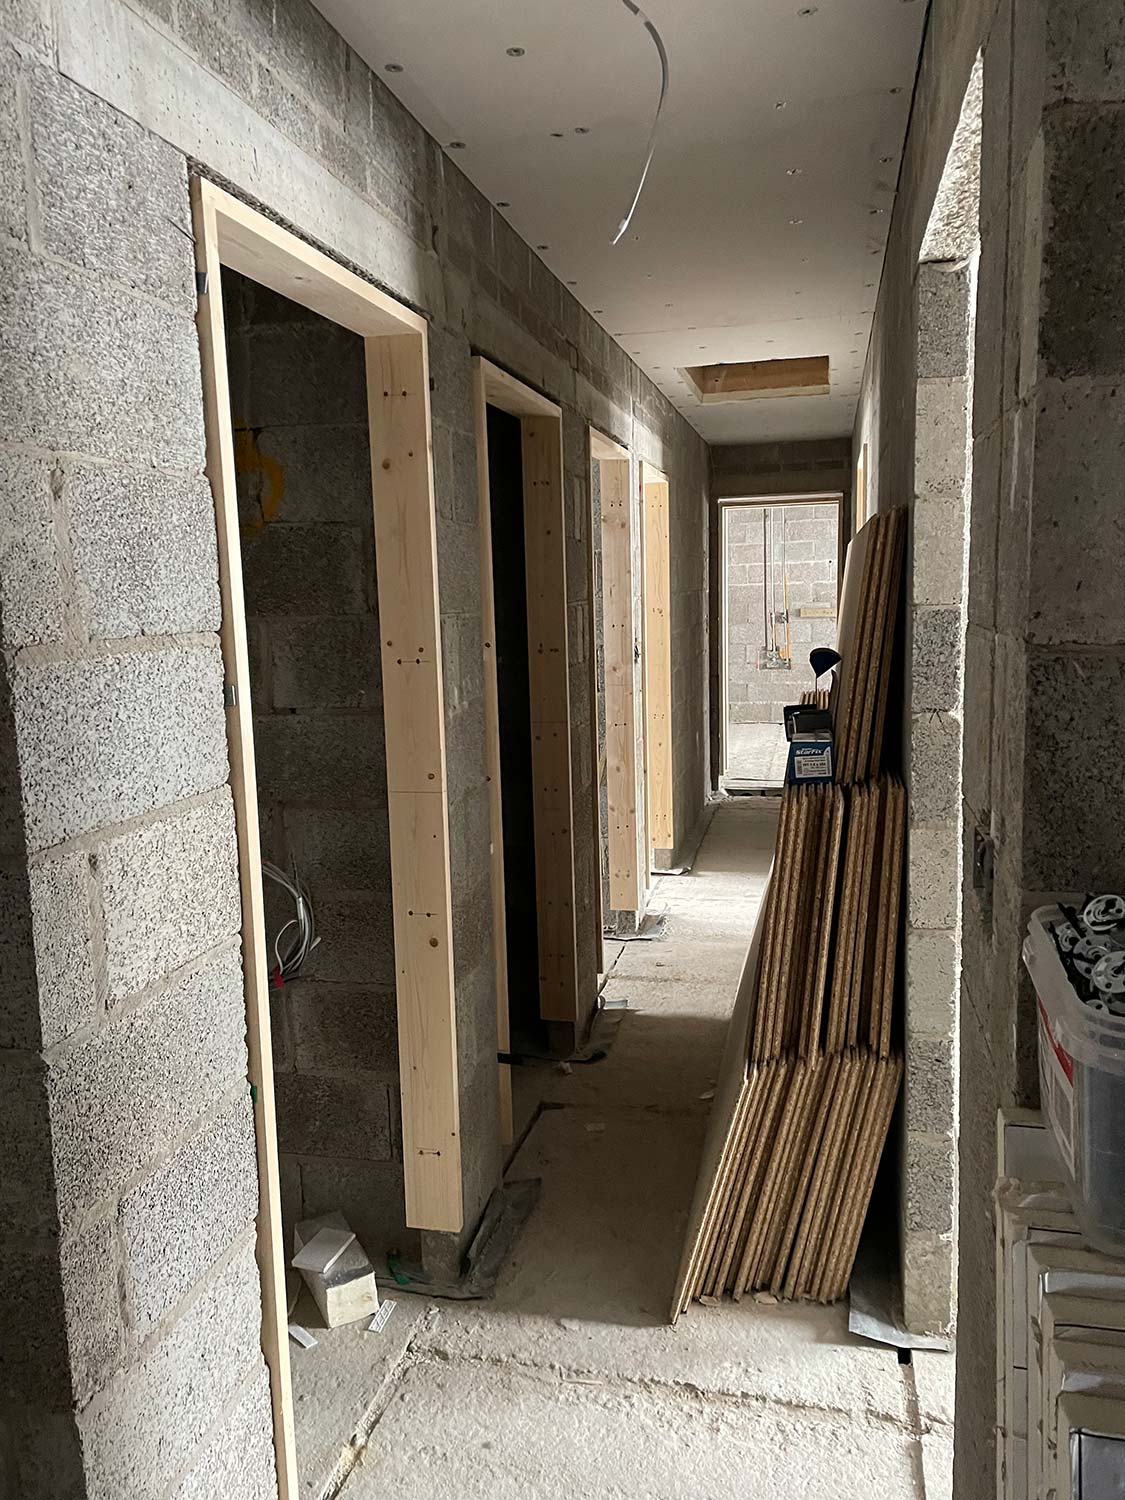
Once the roof was on, the windows went in. We were watertight for the Christmas of 2022, which was a date I had in my head as being a milestone. The stonemason was on site October, November, December, getting the stonework built in parallel. All this while I had the first f ix trades ready to go, having kept them in the loop of my progress and when I would need them. In the new year started with getting door
frames on, first fix electrics in, plumbing, plastering and floors.
Top tips
Critique your plans. At end of day, your architectural designer is working for you. Critique your own plans, what is the end product going to be? Do this before you start on site. Architectural designers will design but they’ll make it fit with what they think will work. That might not fit with what you need or want.
Avail of 3D imaging services. It’ll allow you to see furniture in place, where the TV goes, how things fit in the room, how big your rooms are. A lot of people get caught out because they think they want big sofas and media walls. Then once you put the stuff in, you realise the room isn’t really that big. That’s where you’ll see where to put a socket on the wall for that wall hung TV. If the containment isn’t in, it’s hard to do retrospectively.
Chat to people who have built or are currently building. You’ll always pick up tips from them, telling you things they’d wished they had of done or wish they’d known before starting. That’s where you get ideas. We looked at multiple sites and took bits and pieces of plans from other
houses into ours, e.g. the bedrooms and ensuite layouts, walk-in wardrobes, also we knew we’d get good light with sliding glazed doors and long windows in the sunroom and we wanted a good size utility, as well as a front and back porch.
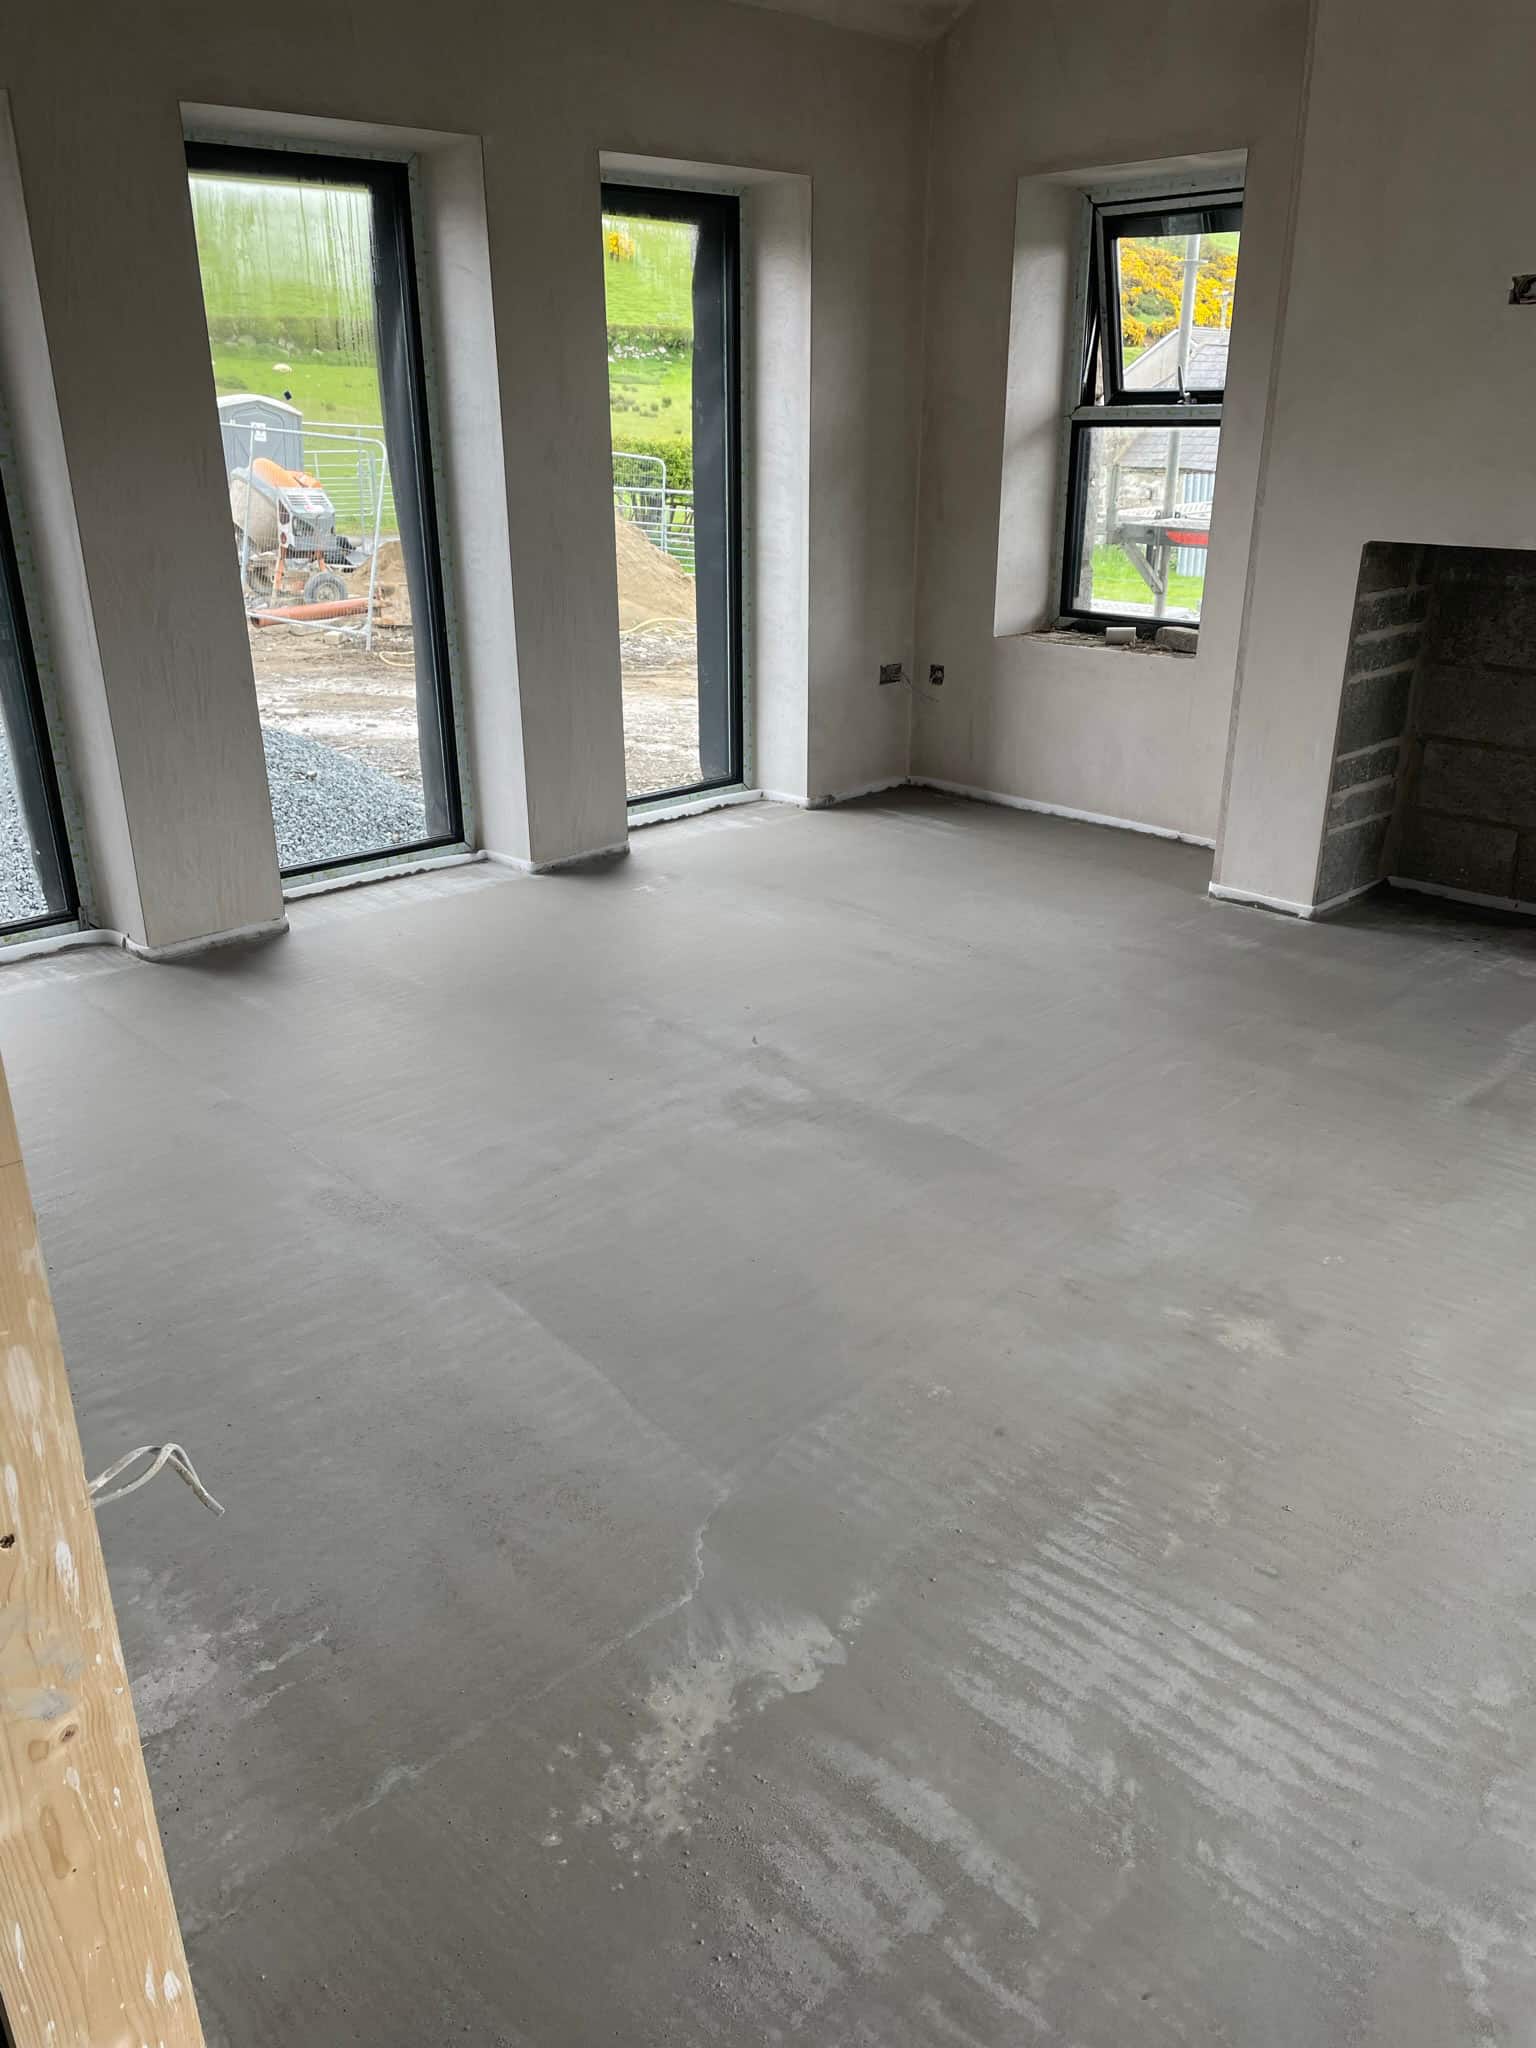
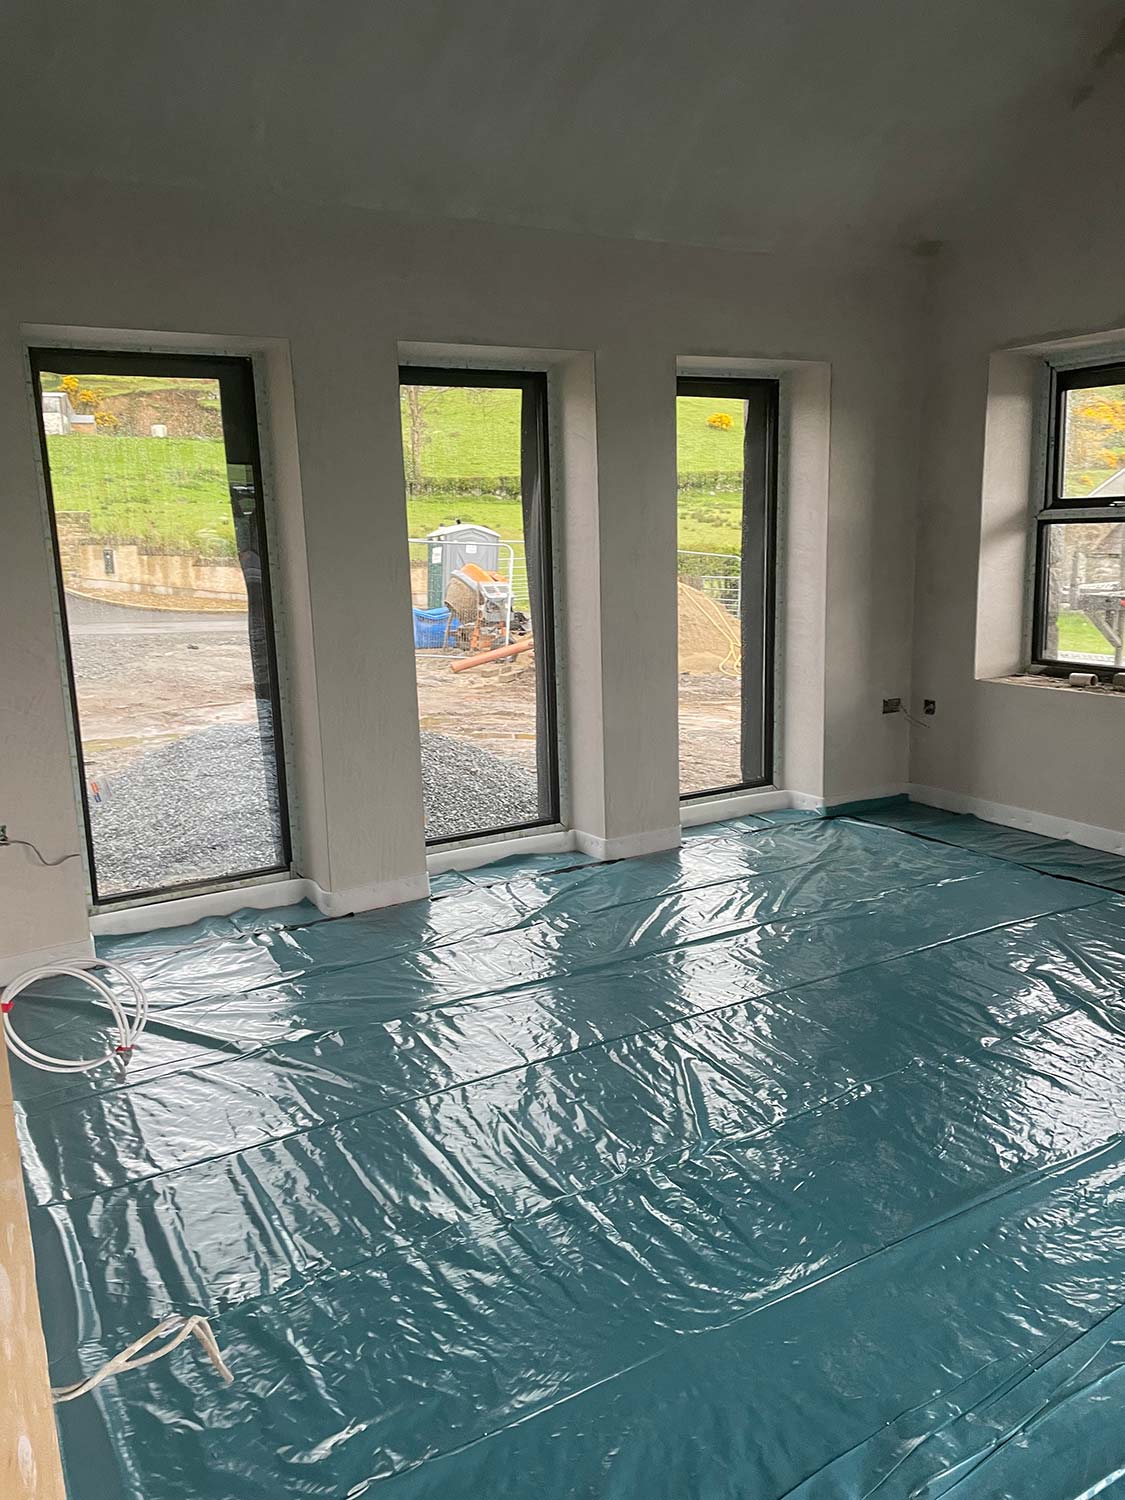
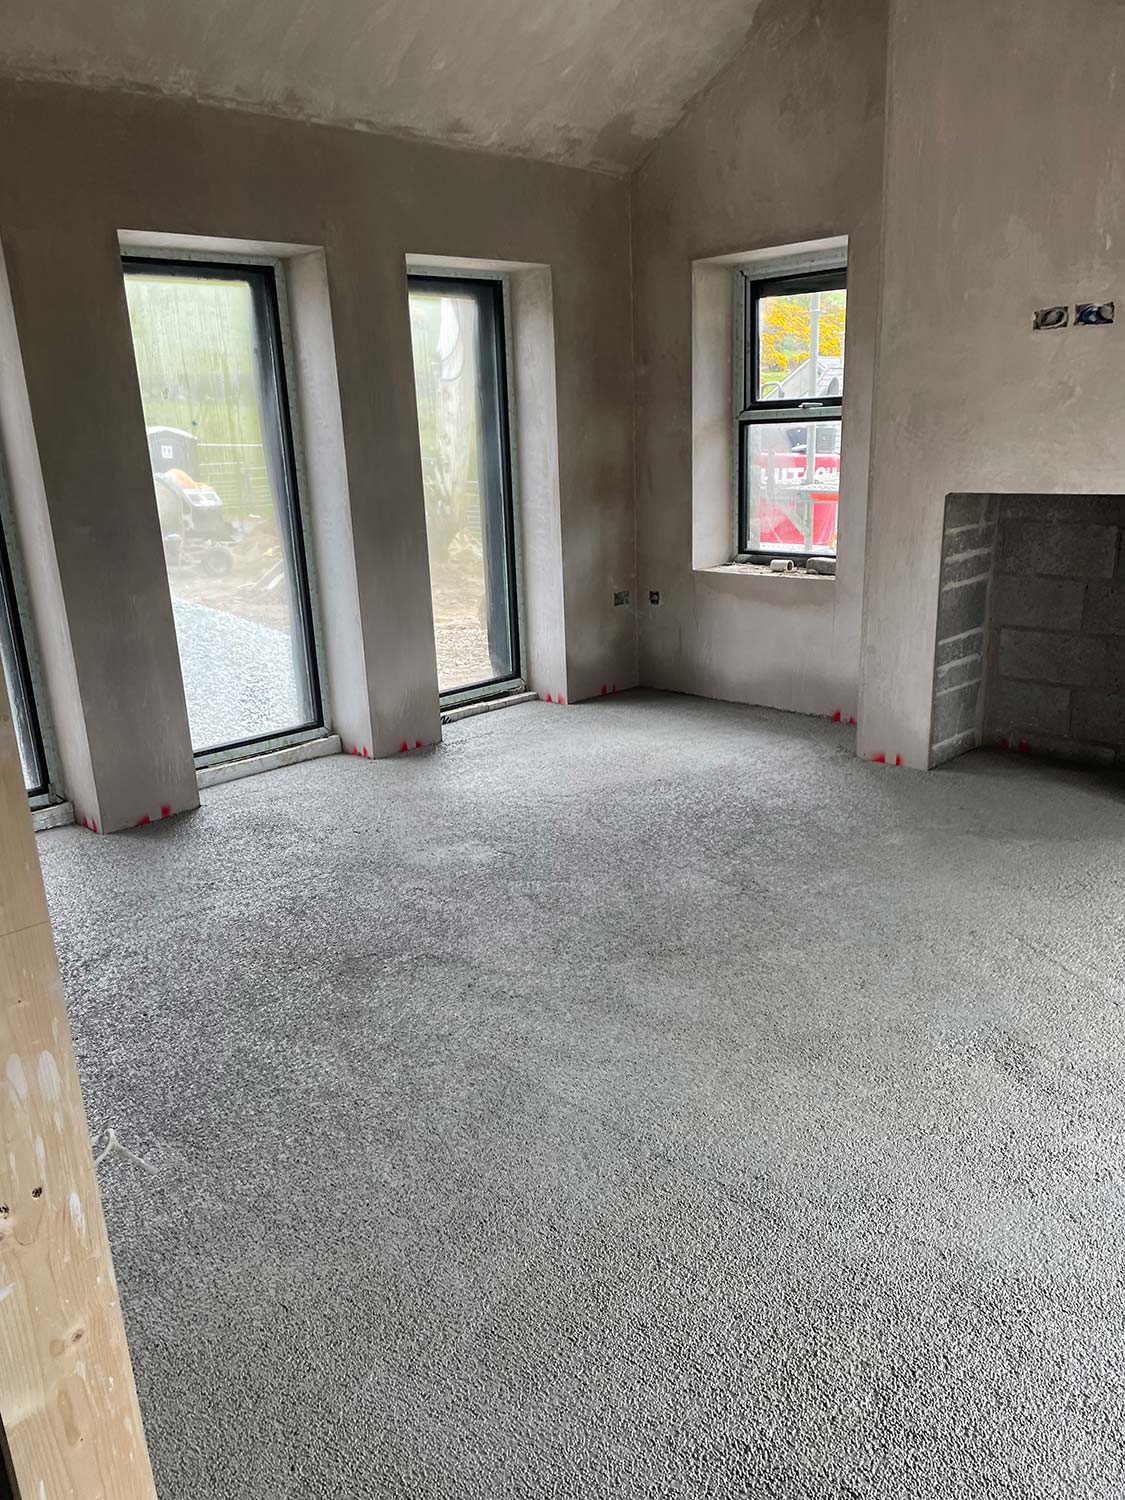
Insulated liquid screed
We went with the liquid screed and liquid insulation to the floor. I’d been dealing with the supplier for around 18 months prior, getting specifications. At first to get the details right, we went back and forth making sure the product would deliver the right U-values. Once the architectural designer was happy, that was sitting ready to go as we’d agreed on price.
My contact with them after that was about the programme, keeping them updated on the timeline from January to May. We were on schedule so I booked them in for the first week of May and had the plasterer working around that.
We did the inside plastering first, got it ready for the floors to be laid. We made sure we had first fix electrics and plumbing sorted, making sure there were no issues with pipework prior to the floors going in.
They came in one morning and had the insulation layer poured, then came back the following week to pour the top layer. It was a very quick process. They arrived at 7:30am and were gone by 11am.
The benefits are not just speed but also the fact that there is no waste in comparison to conventional insulation sheets, and it’s not labour intensive. It’s a wee bit dearer but when weighing the pros/ cons for sequencing and not needing massive manpower and time, it worked better for us.
There wasn’t much we could do while the floors dried out in May so that’s when I got the next bits lined up, which was spray painting. We’d been monitoring moisture levels, from the plastering and floors, to make sure he’d come in at the right time. He came in early June and it took him a couple days to apply two coats of white paint, including walls and ceilings.
We put in a positive input ventilation system and had to get that ducted; the installer came in just after first fix to get the ducting in. Then before we started painting, they came back to finish it off and they
commissioned it just before we moved in.
Electrical points
For the electrical layout, we’d been talking to our electrician prior to Christmas. He’d given us what he’d normally do with a house, and that helped a lot. Spotlights in most rooms and some ceiling roses that’ll take fancier lights down the line.
We had the tracking in the walls done and made sure we were happy with the outside power supply; we double checked it was all worked through before the floors were poured in. We got
cables in for future CCTV cameras and we had our satellite TV cable left out so it’s fairly well futureproofed.
I was always going to hardwire the house for internet as we’ve no phone signal here, so we put in CAT6 cables and access points into all rooms. Appliances and TVs were hardwired in so they wouldn’t be eating into the wifi. We also added wifi boosters, and now have great internet speed throughout the house with no dead zones.
Each socket and switch costs you money, and this is a common budget buster so plan ahead and get it all costed early. We put plugs everywhere, for Christmas decorations, not to mention the tree, for the hoover. With plugs, you’ll always use them if they’re there. As a rule of thumb we put in a double socket in every wall, and a high level double socket in every room plus a CAT 6 point.
In the master bedroom we also have double sockets beside the bed for phone charging and tablets; it saves on having trailing sockets.
Second fix
We moved on then to second fix electrics, plumbing and joinery. We got the tiling and flooring down June/July time, then we were into kitchens and bathrooms.
We had the layout for the kitchen agreed in advance back when we were doing drainage pop ups and prior to the floors going in.

Most of the house is tiled, only the bedrooms have carpet which were put in one week before we moved in (give the supplier accurate room sizes and they need to know if the carpet is meeting tiles or a wooden floor, as the joints are different for each).
We got a tiler who both supplied and fitted all in one go, so if there were any issues it was on him – he got everything down to the grout and adhesive and we didn’t have any leftover tiles. We didn’t know him and went on recommendations and photos of his previous work. We invested in good tiles for the main areas, it was worth it in my opinion.
Once we’d tiling finished, the bathroom fit-out was one of last things to do. We’d been to pick out our bathroom, it was just a case of getting it fitted. Basic checks are that the waterproofing is in, the mastic is
down around shower doors and sinks, everything fits well and is tested.
After that we put in the skirting boards, architraves, and the last thing we did was get the doors hung. We got our stove in, hearths, inserts for stoves then too. We only got it lit for the first time at Christmas (2024).
We wanted to be in mid to late August, for our son starting primary school in September. We moved in on a Sunday and he started school on a Friday so it was pretty much down to the wire in the end.
Site Checklist
Make sure the walls are plumb. I walked around with a spirit level checking the walls were plumb and lined through.
Check the cavity walls. The wall ties must be clean (no mortar on them), the bottom of the cavity needs to be cleaned out, there can be no mortar on the damp-proof course (DPC). The DPC needs to be in right, and not torn, make sure there’s an overlap between the insulation and DPC.
Prior to Floors. Make sure you have the pipework for heating and water in, that there are no leaks or damage (it can happen from people walking in and out over them), that you have any ducting in for incoming services or for those outside lights, garage and shed supplies.
Make sure your floors are set from one datum point and that they work in with your door thresholds giving consideration to floor coverings, e.g. tiling, for your finished floor level (FFL).
At wall plate level. The bricklayer will make sure it’s the right height, set off datum levels. The wall plate needs to be level all the way around with laser level.
Window openings. They need to be square, i.e. not wide at the top and narrow at the bottom or vice versa. They can’t be off level either. Visual checks go a long way with windows; if it doesn’t look right, ask.
Trusses. The measurements for the trusses have to be checked and double checked; they’re made to measure so they need to be right. On site make sure the bracing is put in on the trusses, that the felt above is overlapping and fixed down properly and tied in.
Roof tiles. Tiles are often installed to overlap, sometimes they hang off each other and are only nailed every other row. Our roofing contractor, a friend of mine, put nails and fixings in every row of tiles; it’s been a big topic over the winter storms as quite a few people lost tiles. Ours are all fixed and secured properly.
Timeline
Overview
House size: 205sqm
Bedrooms: 4
Plot size: 1/2 acre
Site cost: £72k
Build cost: £250k
Construction: Cavity wall
Heating: Oil fired boiler
Ventilation: Positive input ventilation
EPC (SAP): B (84)
Suppliers
Architect: Fletcher Architects Ltd
Financial: Financial Directions Ltd
Legal: Andrea Reid Solicitors
Plant Hire: Kelly Point Hire, Down Hire, Beattie Crane Hire, John Rodgers PLant Hire, Bann Hire
Fuel: James Fitzpatrick Fuels
Concrete, quarry aggregates, blocks & sand: CES Quarry Products Ltd
General Building Materials: John Shilliday Ltd, Castlewellan
Precast Products: Mackin Concrete, Newry
Roof Trusses: ATS Trusses
Roof Tiles: Breedon Roof Tiles
Special Lintels: Steel Lintels Ireland
Door Frames: Executive Wood Products, Mayobridge
Internal Doors, Ironmongery: The Door Store
Granite: Shanlieve Stone, Newry
Retaining Wall: Maccaferri Ltd
Treatment Tank: Viltra Wasterwater Technology
Windows & Doors: M.McAvoy, Holltown
Precast Flooring: Emecast
Floor Insulation & finished scred: Alpha Flow Screed
Kitchen & Utility: AB Interiors
Quartz Worktops & Splashback: AR Robinson, Annalong
Heating, Plumbing, Bathrooms: PM Plumbing
Electrical: C O’Hare Electrical
Tiling: Equisite Tiling
Carpets: Martin Phillips
Stoves: Woodstoves Ireland
Cavity Insulation, Pumped Energy Store Roof Insulation: Northern Loft Insulation
Mechanical Ventilation: Beam Vacuum & Ventilation
Blockwork: M&M Bricklaying
Roofing: Martin Cunningham
Plastering: Laurence Tumelty & Donagh Steele
Stonework: Mick Fitzpatrick


