In this article we cover:
- Build cost overview
- Designing the extension
- Choosing a supplier and what other options they considered
- Working with a timber frame supplier
- Groundwork
- What the kit looked like and how it was put up
- Heating and ventilation system choices
- Cost comparison for timber frame vs blockwork
- DIY fit-out including costs
- Roof and external wall coverings
- DIY electrics and plumbing
- Full details on the PV system
- DIY insulation and drylining
- DIY tiling
- Top tips
- Timeline and supplier list
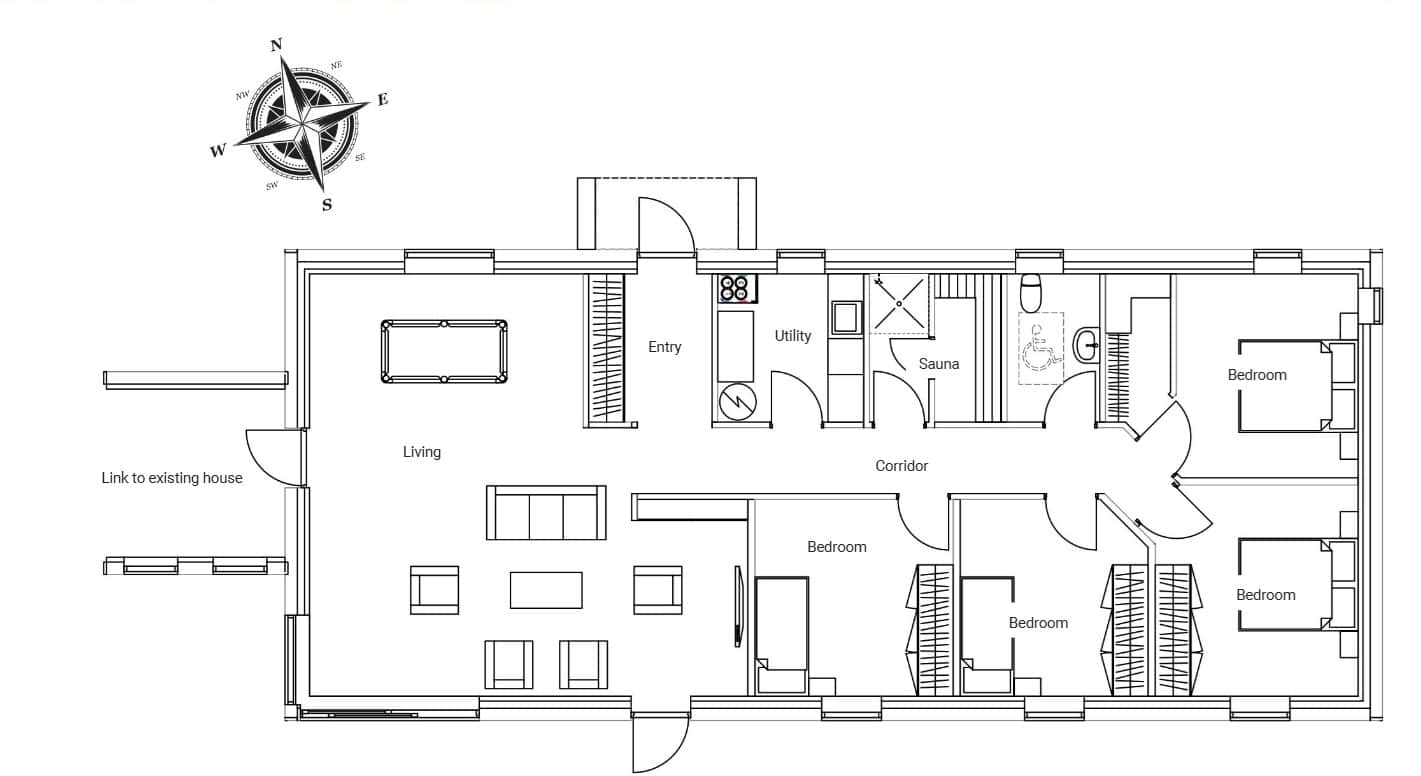
- Floor plans
Contents

Part 1 – Getting the timber frame built – Skip to Part 1
Part 2 – DIY fit-out -April 2025 update – Skip to Part 2
Floor plans, suppliers & cost overview – Skip here
Part 1 – Getting the timber frame built
House size before: 104sqm
House size after: 248sqm
Plot size: 1.2 acres
Heat and hot water (whole house): oil combi boiler
Ventilation (extension): centralised mechanical with heat recovery
Build method (extension): timber frame
How did the project get started?
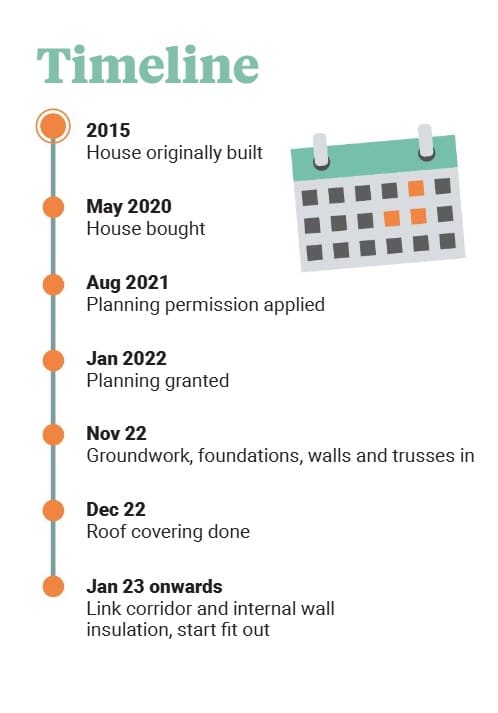
It was always our plan to move out here to the countryside near Fiona’s family. The house we bought had been originally built through a locals only provision. hen we purchased it from a relative, it came with a planning condition to be living in it for at least another seven years. And we had to prove that we had lived around here for at least 10 years. Being from the area, Fiona proved that we had.
The house was a blank slate inside and needed the electrics and plumbing done, along with the septic tank, and internal decorating so we did that and moved in thereafter.
Why did you decide to build a timber frame extension?
It was only a one bedroom house. And with two children, we needed more space. But we didn’t want to rush into a decision. We took our time figuring out what we wanted exactly from the addition.
What options did you consider?
We researched our options and chose to go timber frame. Mostly because it would be quick to put up – the house was to roof level within a week including foundations. And also to get a good standard of insulation and airtightness. The company we chose included the windows and internal and external doors and the internal stud wall timber in the package. So when it came to have the house erected the windows were already fitted into the walls.
The thing that took us the longest to decide on was what we would be building. We looked at two storey designs, different shapes and sizes. We changed our minds quite a few times. We just didn’t want a storey and a half.
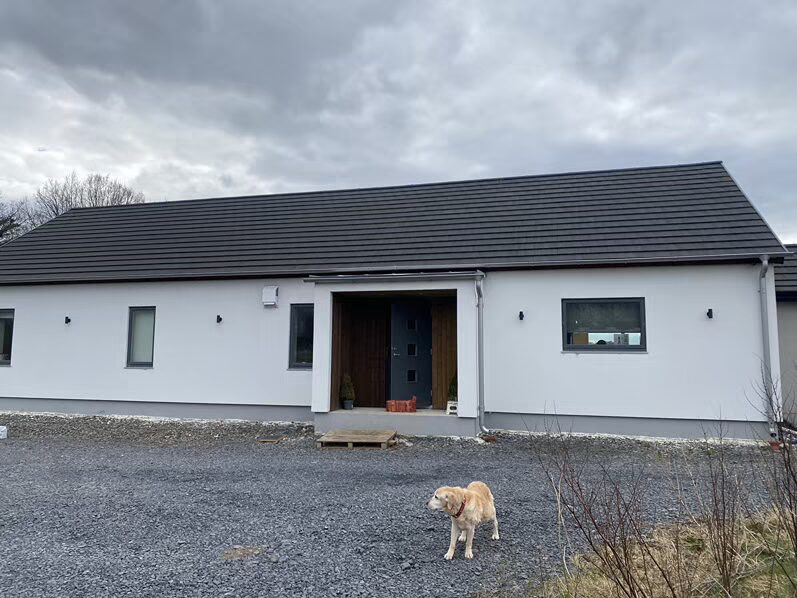
In the end, we chose a bungalow layout because we felt an upper storey would result in too much wasted space between landings and hallways. And as this is our home for life, we figured we might not want to be climbing stairs as we get older.
The timber frame company had plans off the shelf and we reorganised them for our purposes. The design we chose was of a full house, 18.4m by 7.9m, but we didn’t need a kitchen for example. Or an ensuite in the bedroom, but we did want a walk in wardrobe.
The bungalow is separate from the main house. In that we are building a corridor to link the old and new. The wall in the corridor that faces the view will be completely glazed, and we are going with a pitched roof as we didn’t want to risk going with the more common flat roof. I’ve heard too many stories of them leaking.

Walk us through the process, from having signed off on the design to construction.
Once we had the design signed off on, we tried to lock in the price of the build. The timber frame company normally would let you do that with a six month lead but, because the way material prices
were going, they’d only commit one month before building the house in their factory.
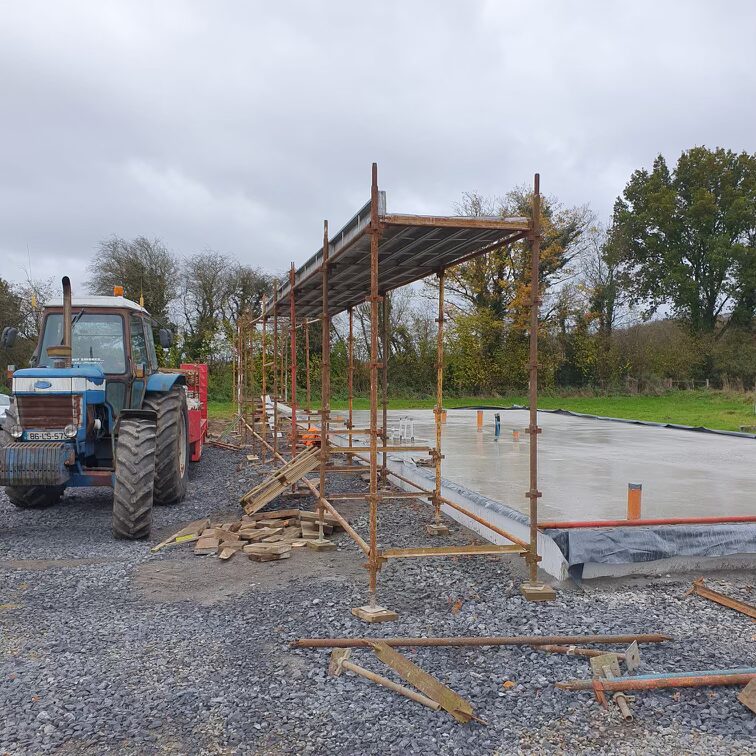
Then we had to get the groundwork organised. This proved to be more complicated than we anticipated as we had to source very specific blinding. Two layers of certified stone, and a third layer which had to be clean stone 19mm in size. We found it hard to source. It would have been a whole lot easier if they could have organised the groundwork for us as they requested +/- of 5mm over the entire ground level.
After that a crew came to build the insulated raft foundation. Because we couldn’t get the exact specification they’d asked for with the stone, they had to spend time sorting it out. Which was an extra cost and we were charged a penalty for not laying exactly what had been specified.
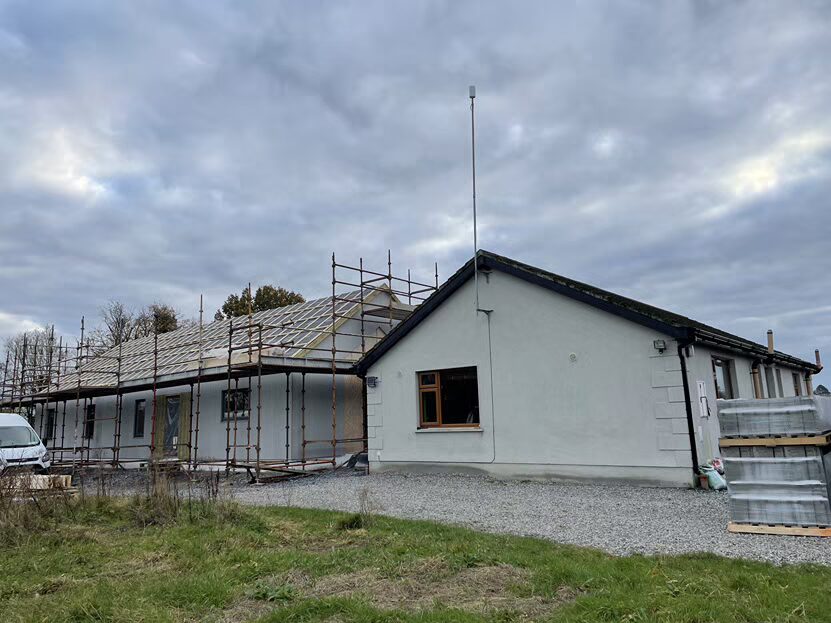
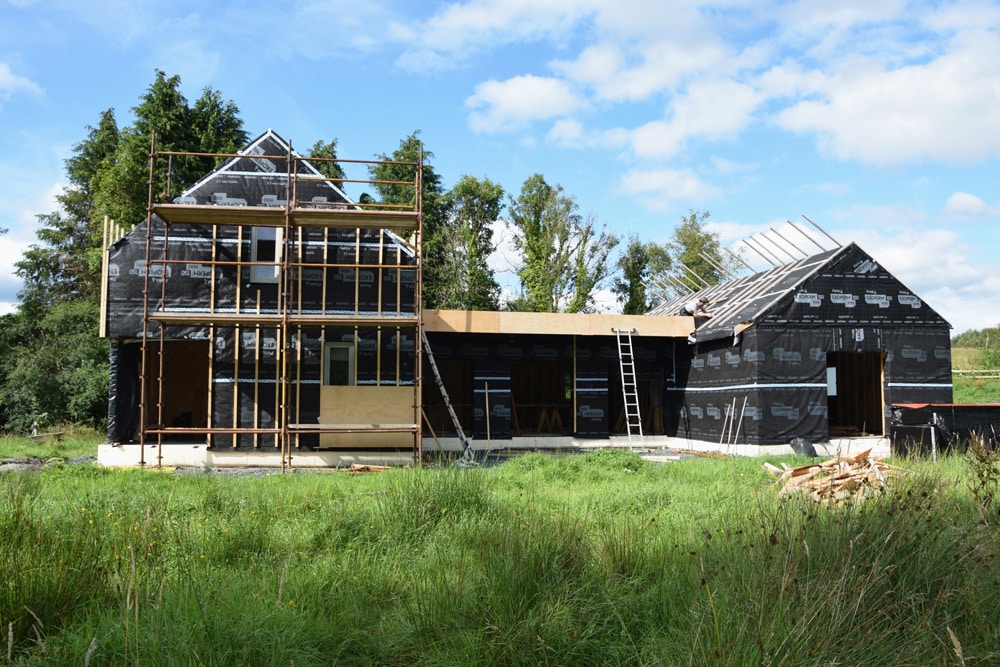
Once the foundations were ready, another crew came to put up the walls, roof and windows. The roofer came straight after to make the house fully weather tight. Apart from the door linking to the corridor to the main house, which hasn’t been delivered. We will be getting the plumber and electrician in to start first fix.
We might have considered getting the timber frame company to finish the house for us but they don’t offer that service outside their immediate area. Next steps are for us to do the internal insulation including vapour permeable membrane, jointing and taping. We’ll be drylining the walls as in we won’t put a skim coat on the plasterboard. It should save us a bit and if done well it can look just as good.
We’re glad to be doing it ourselves, to get stuck in. There’s a sense of achievement and control we wouldn’t have gotten with hiring trades by the day.

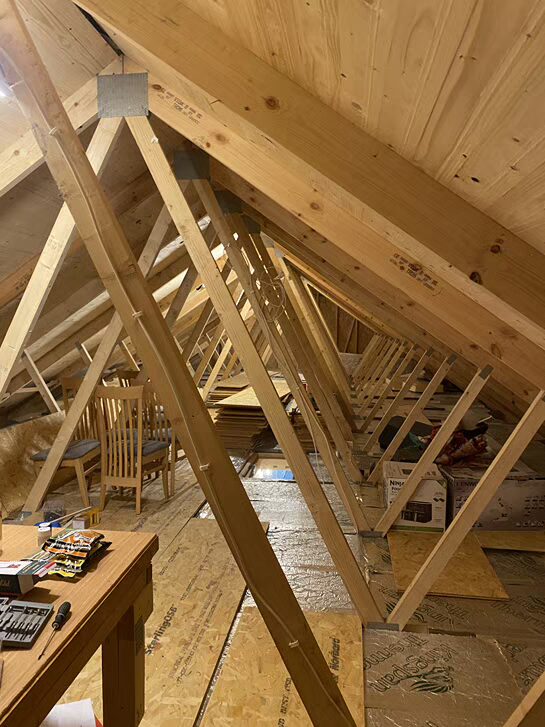
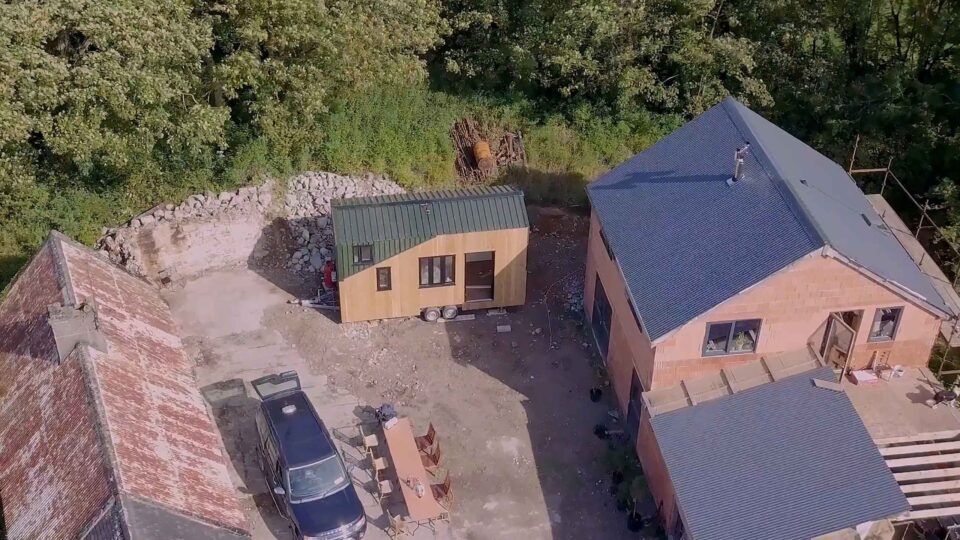
What did the kit look like and how long did it take to put up?
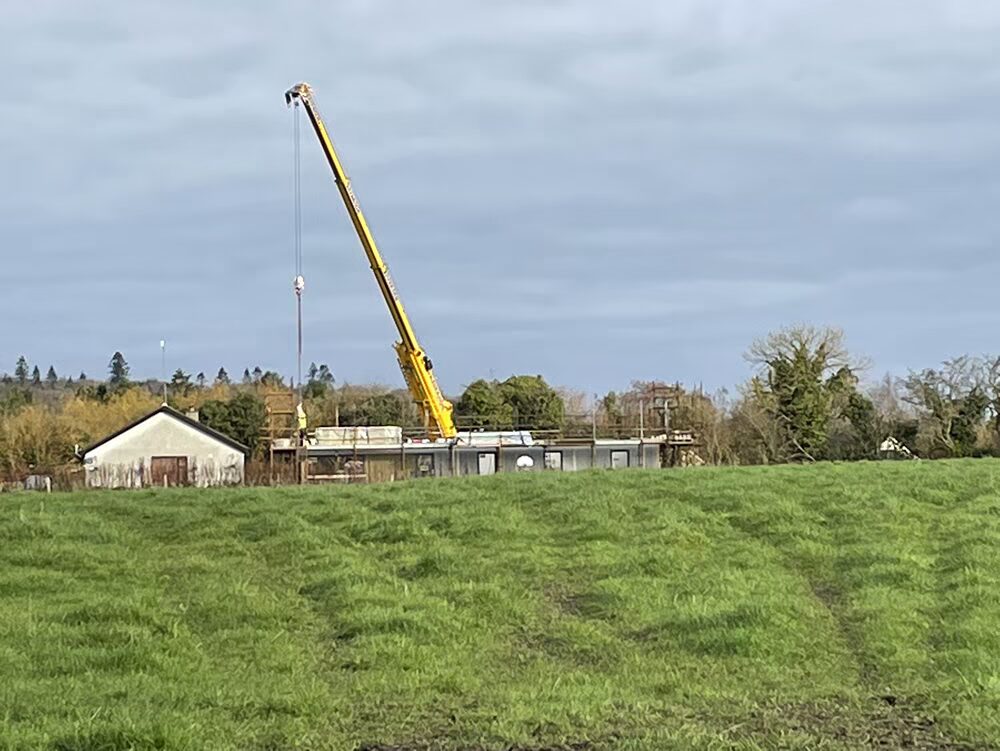
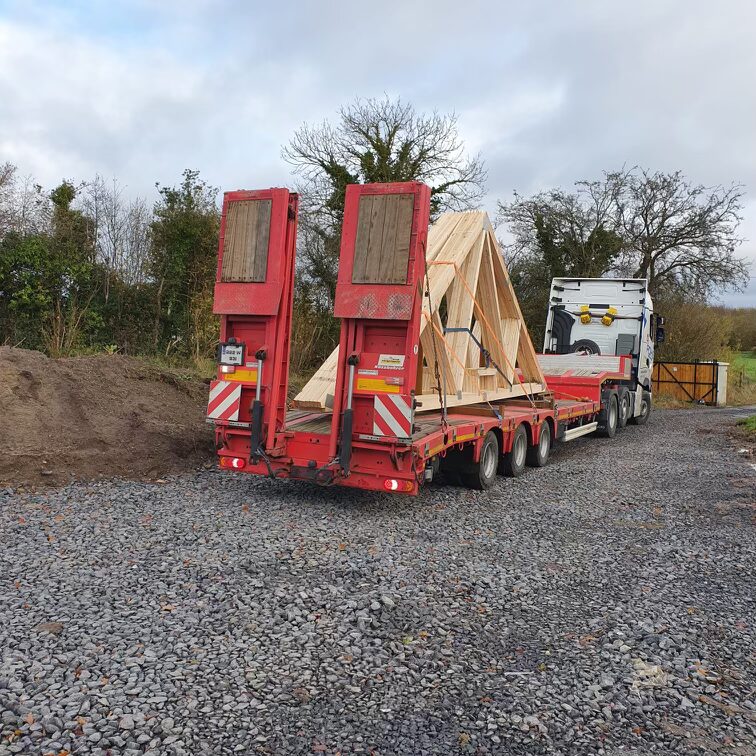
It came in just eight pieces. Because it’s a rectangle, it was a simple enough installation. It took them two days to get it up and ready – it could have been a day if we’d built in summer, with more daylight to play with.
The joists took three men to take off the articulated truck. We had to rope in Fiona’s nephew to help unload them. On the Monday they brought their equipment, Tuesday the crane came at the crack of dawn and it was all done and dusted by Thursday morning.
What did you do for space heating and hot water?
We wanted to future proof the original house so we added compatible radiators and a new hot water tank system that would work well with a heat pump.
When we first moved into the original house, we had toyed with the idea of getting a company to rout into the concrete floor to add pipes for underfloor heating but decided against it. We went ahead and installed an oil boiler because it was more cost efficient. But we may switch to a heat pump in due course as we’re plumbed in for it now.
In the extension we put two types of underfloor heating – pipework for the wet system if it gets installed, and also electric mats.
We will be adding 16 solar photovoltaic (PV) panels too. We got conflicting advice as to whether or not we should install a battery and had a chat with three different suppliers. We chose the one based on a recommendation that included a battery system, and they were reasonably priced too.
Was it more expensive to choose timber frame over blockwork? How much did it cost?
It is dearer but the speed of construction and the levels of insulation (we went with the super passive option) make up for that in our book. We don’t have the final cost yet, and there might be some haggling at the end. An extra we hadn’t factored in was the crew’s accommodation cost for the days they were on site, as they had to travel to us. Between foundations and the kit, it was an extra €2k.
As for the groundworks, we knew from experience dealing with the septic tank on the original house and building the gates that we’d be looking at the crux of €20k and that’s what it turned out to be.
We might have considered getting the timber frame company to finish the house for us but they don’t offer that service outside their immediate area. Next steps are for us to do the internal insulation including vapour permeable membrane, jointing and taping. We’ll be drylining the walls as in we won’t put a skim coat on the plasterboard. It should save us a bit and if done well it can look just as good.
We’re glad to be doing it ourselves, to get stuck in. There’s a sense of achievement and control we wouldn’t have gotten with hiring trades by the day.
What did the kit look like and how long did it take to put up?
It came in just eight pieces. Because it’s a rectangle, it was a simple enough installation. It took them two days to get it up and ready – it could have been a day if we’d built in summer, with more daylight to play with.
The joists took three men to take off the articulated truck. We had to rope in Fiona’s nephew to help unload them. On the Monday they brought their equipment, Tuesday the crane came at the crack of dawn and it was all done and dusted by Thursday morning.
What did you do for space heating and hot water?
We wanted to future proof the original house so we added compatible radiators and a new hot water tank system that would work well with a heat pump.
When we first moved into the original house, we had toyed with the idea of getting a company to rout into the concrete floor to add pipes for underfloor heating but decided against it. We went ahead and installed an oil boiler because it was more cost efficient. But we may switch to a heat pump in due course as we’re plumbed in for it now.
In the extension we put two types of underfloor heating – pipework for the wet system if it gets installed, and also electric mats.
We will be adding 16 solar photovoltaic (PV) panels too. We got conflicting advice as to whether or not we should install a battery and had a chat with three different suppliers. We chose the one based on a recommendation that included a battery system, and they were reasonably priced too.
Was it more expensive to choose timber frame over blockwork? How much did it cost?
It is dearer but the speed of construction and the levels of insulation (we went with the super passive option) make up for that in our book. We don’t have the final cost yet, and there might be some haggling at the end. An extra we hadn’t factored in was the crew’s accommodation cost for the days they were on site, as they had to travel to us. Between foundations and the kit, it was an extra €2k.
As for the groundworks, we knew from experience dealing with the septic tank on the original house and building the gates that we’d be looking at the crux of €20k and that’s what it turned out to be.

Second fix complete
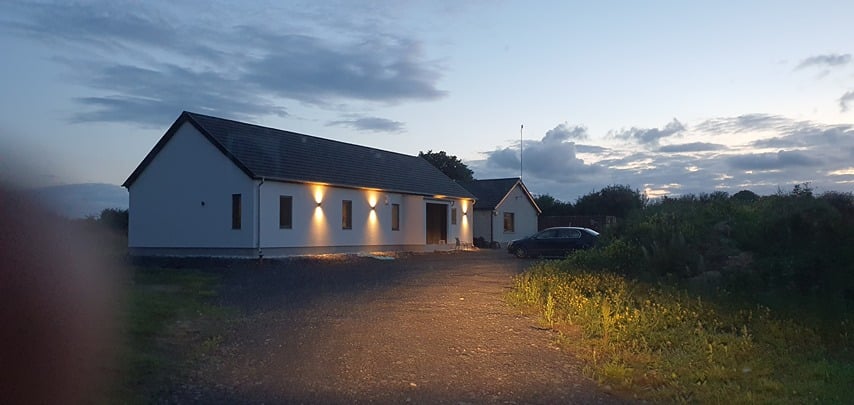
The electrician has just a few sockets and wall lights to install so basically the second fix is completed. Big moment here having the power and lights on the house. That was completed Saturday 8th of July, 2023.
We have the rendering completed and also 130m of French drains installed. Really pleased with the rending and we also put down some stone for the driveway.
We have all the plasterboards up apart for the bathroom, shower and sauna. We even have five doors up as well and the plan is to move into the bedrooms this weekend, in time for my son’s birthday.
We still have the tiling, painting and taping and jointing to do. The heat recovery/air system ducting is in place. Just waiting to confirm a date for the unit install.
The solar panel installation is very neat and we are now just waiting to confirm the date of the battery and solar system. The plan is to start the tiling in two weeks’ time and then the taping and jointing after that (drylining).
Part 2 – DIY fit-out – April 2025
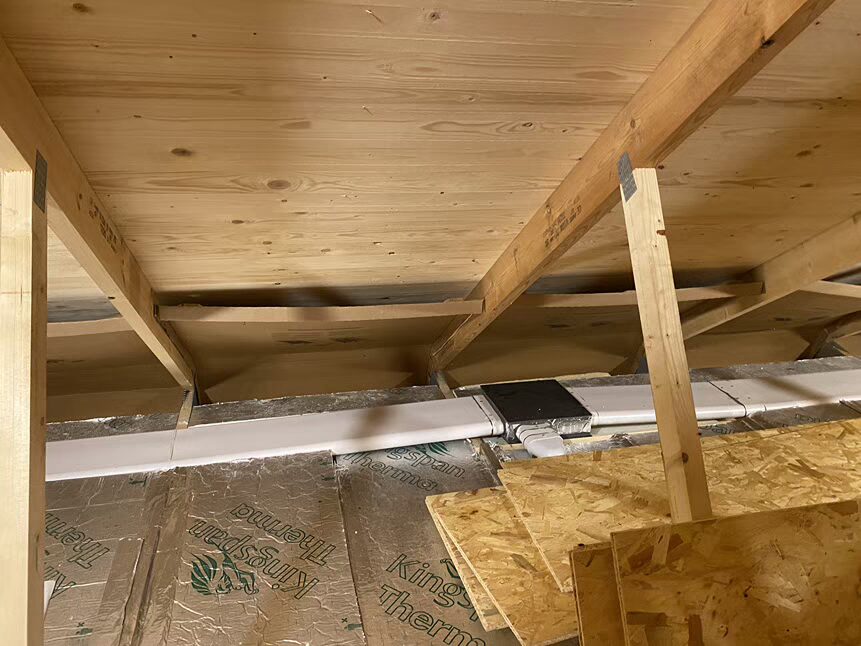
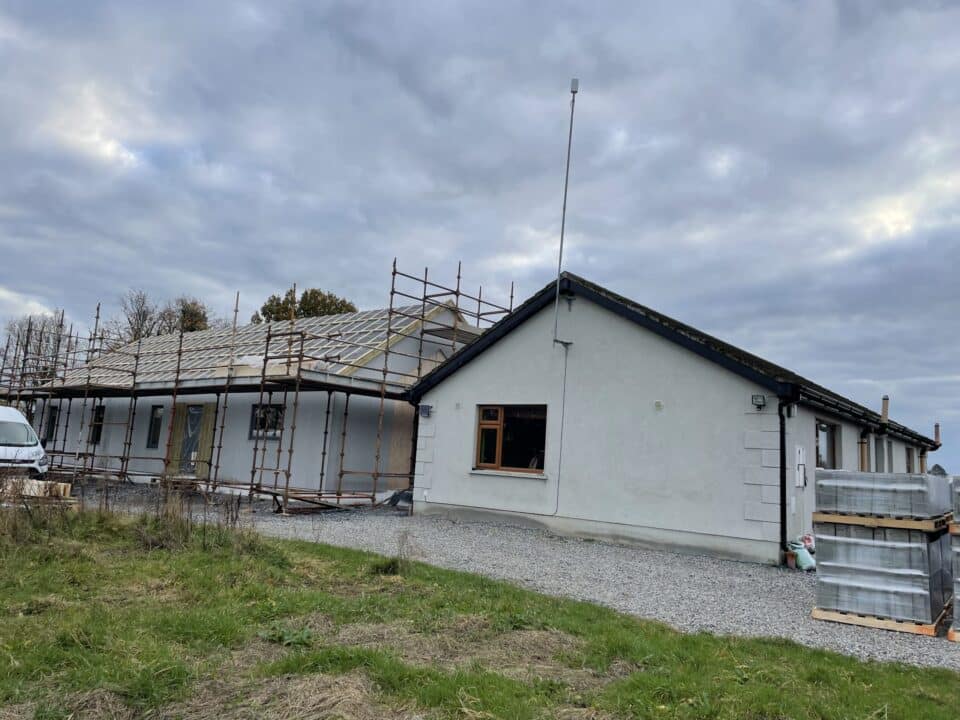
In July 2023, our timber frame extension was weathertight. We had the timber frame supplier build the house up to the point of felting the roof. At this stage they’d put up the timber frame, and we had to fit the insulation ourselves, including vapour permeable membrane, jointing and taping.
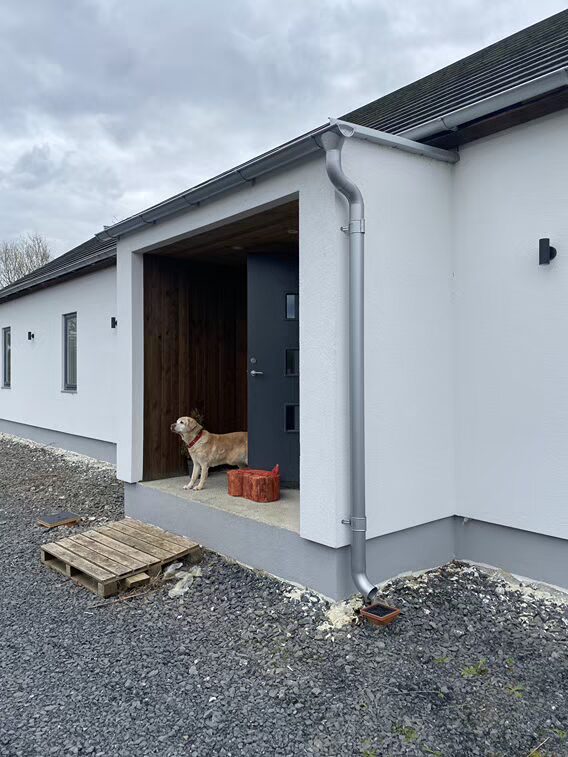
The house drawings which were issued to the subcontractors that were contracted by the timber frame suppliers, did not have the porch on them. This meant that after the house was erected, they had to come back and pour the foundations for the porch.
Unfortunately, the roof structure the timber frame company supplied was not the right size and we only realised this when four of us manually lifted the roof into place after building the porch walls. We were able to adjust the beams of the roof ourselves and on the second lift, the roof fitted into place.
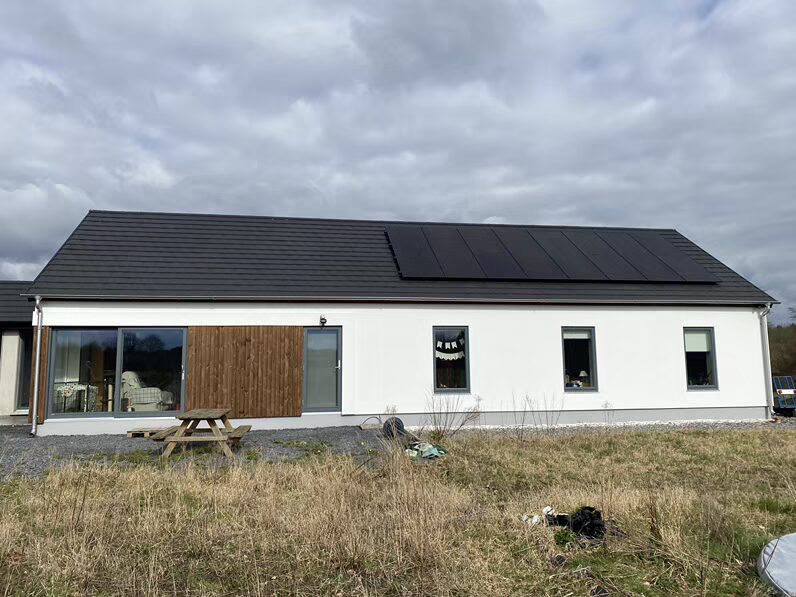
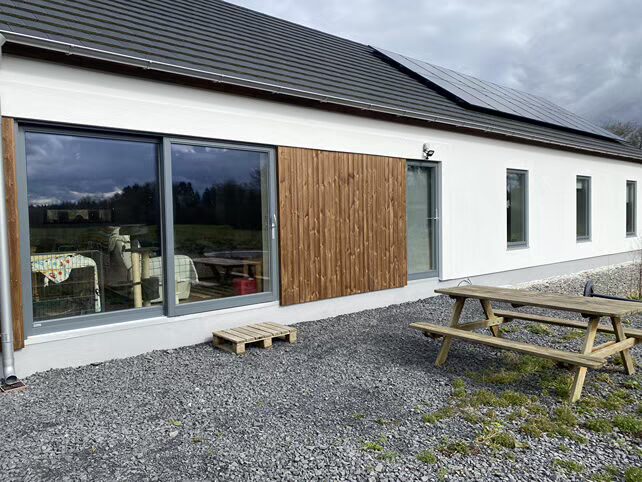
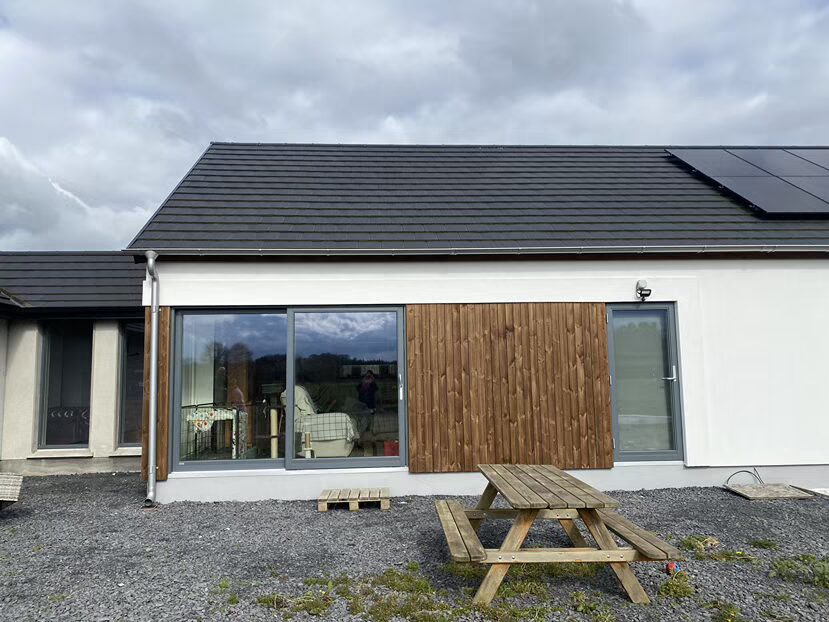
Between the existing house and the extension we have a link room; the timber frame supplier had left an opening in the wall for it and also supplied the door which we fitted ourselves. We got the windows from them to match the rest of the extension.
Our builder entirely built the link corridor, including the window install. This link corridor is actually a lovely space, it’s wide enough to include a seating area and thanks to the floor to ceiling windows it offers beautiful views of the countryside. We’ve scaffolding boards left over from the build and will be using those as shelving, to create a library feel in there.
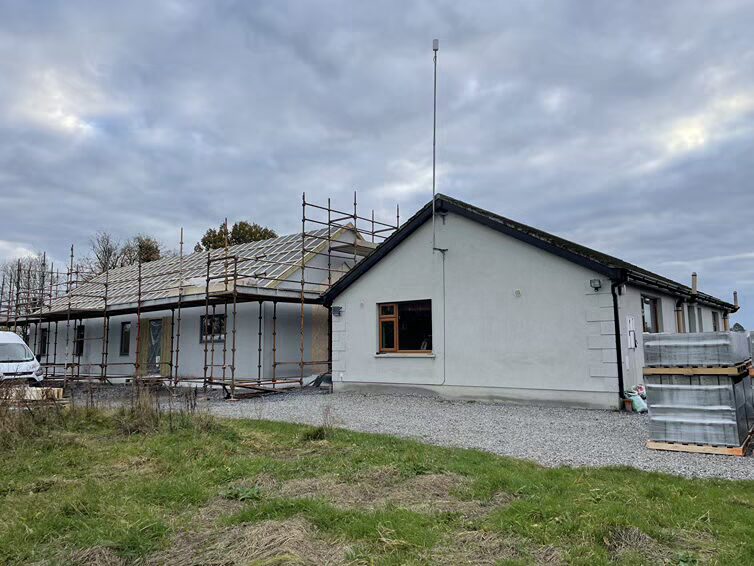
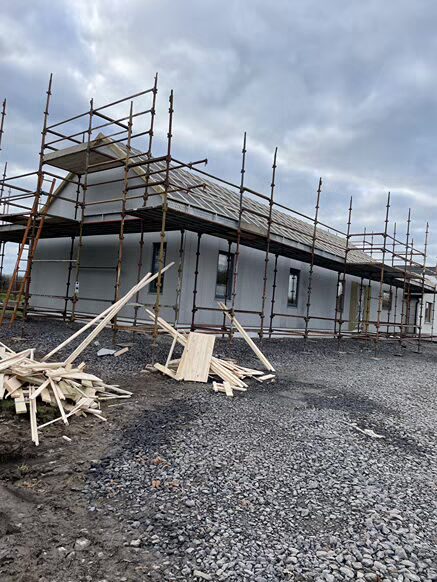
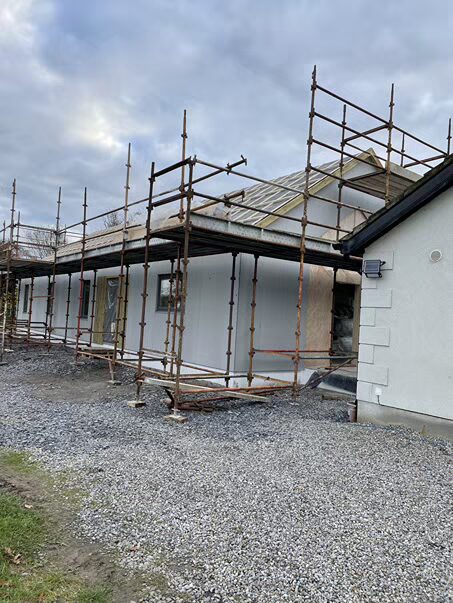
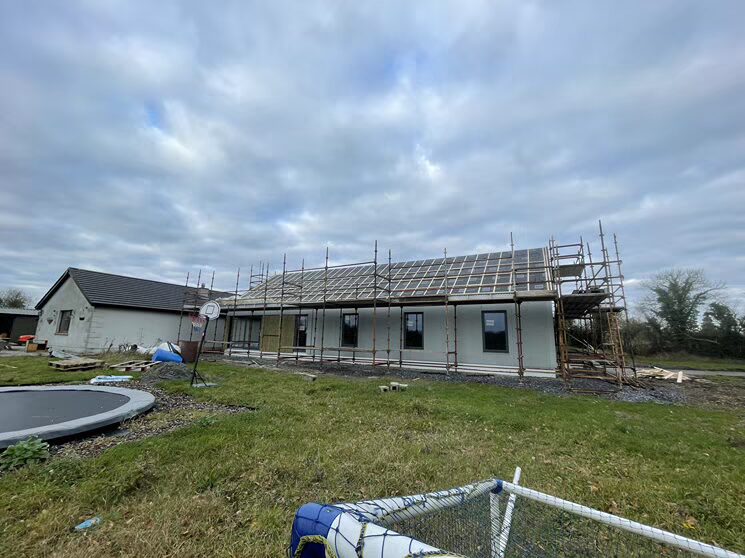
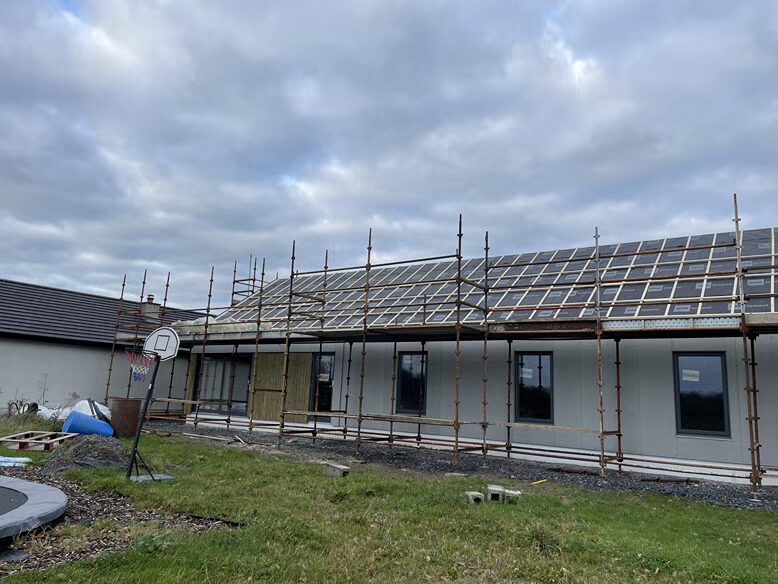
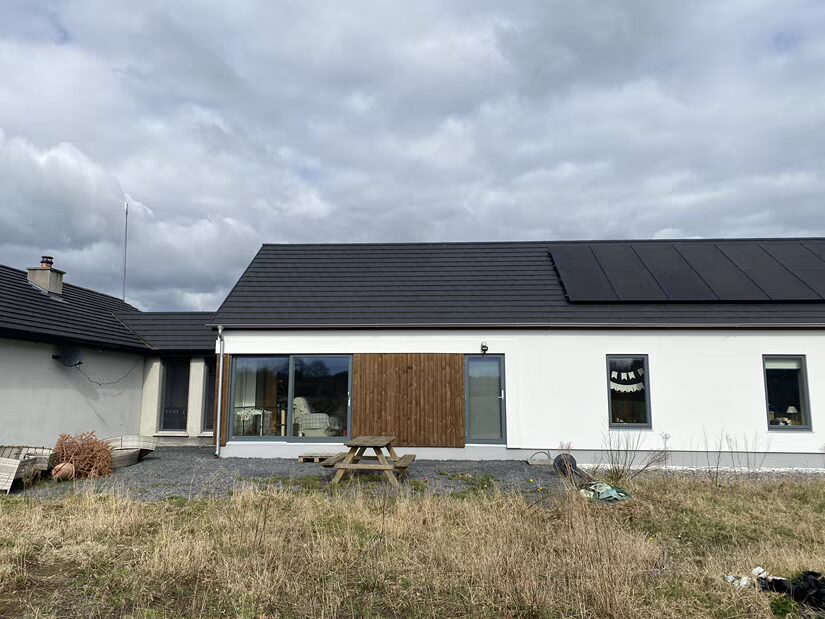
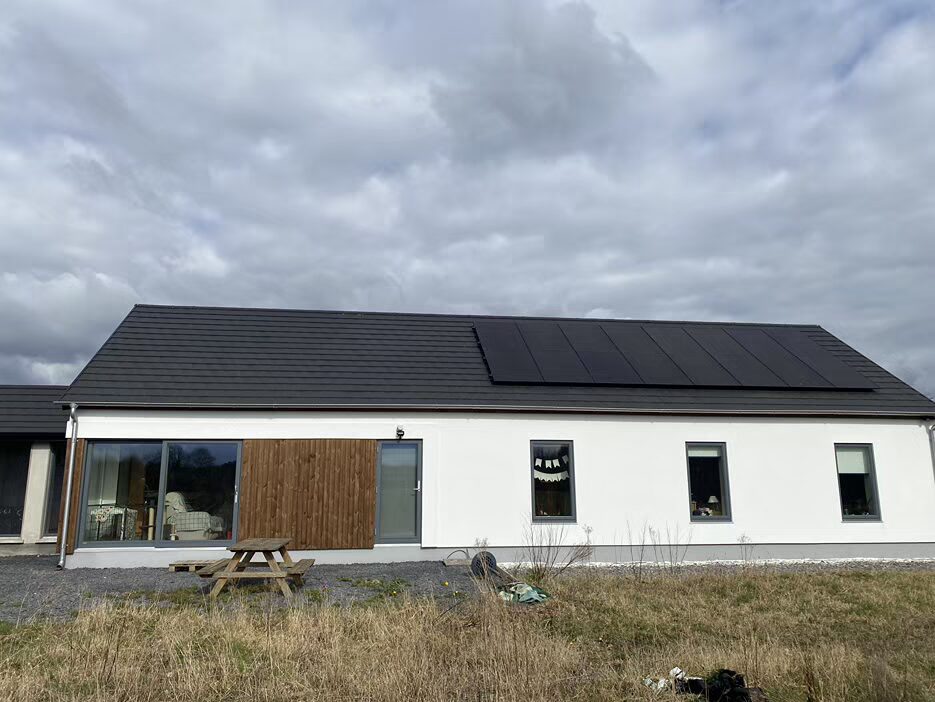
Roof and external wall coverings
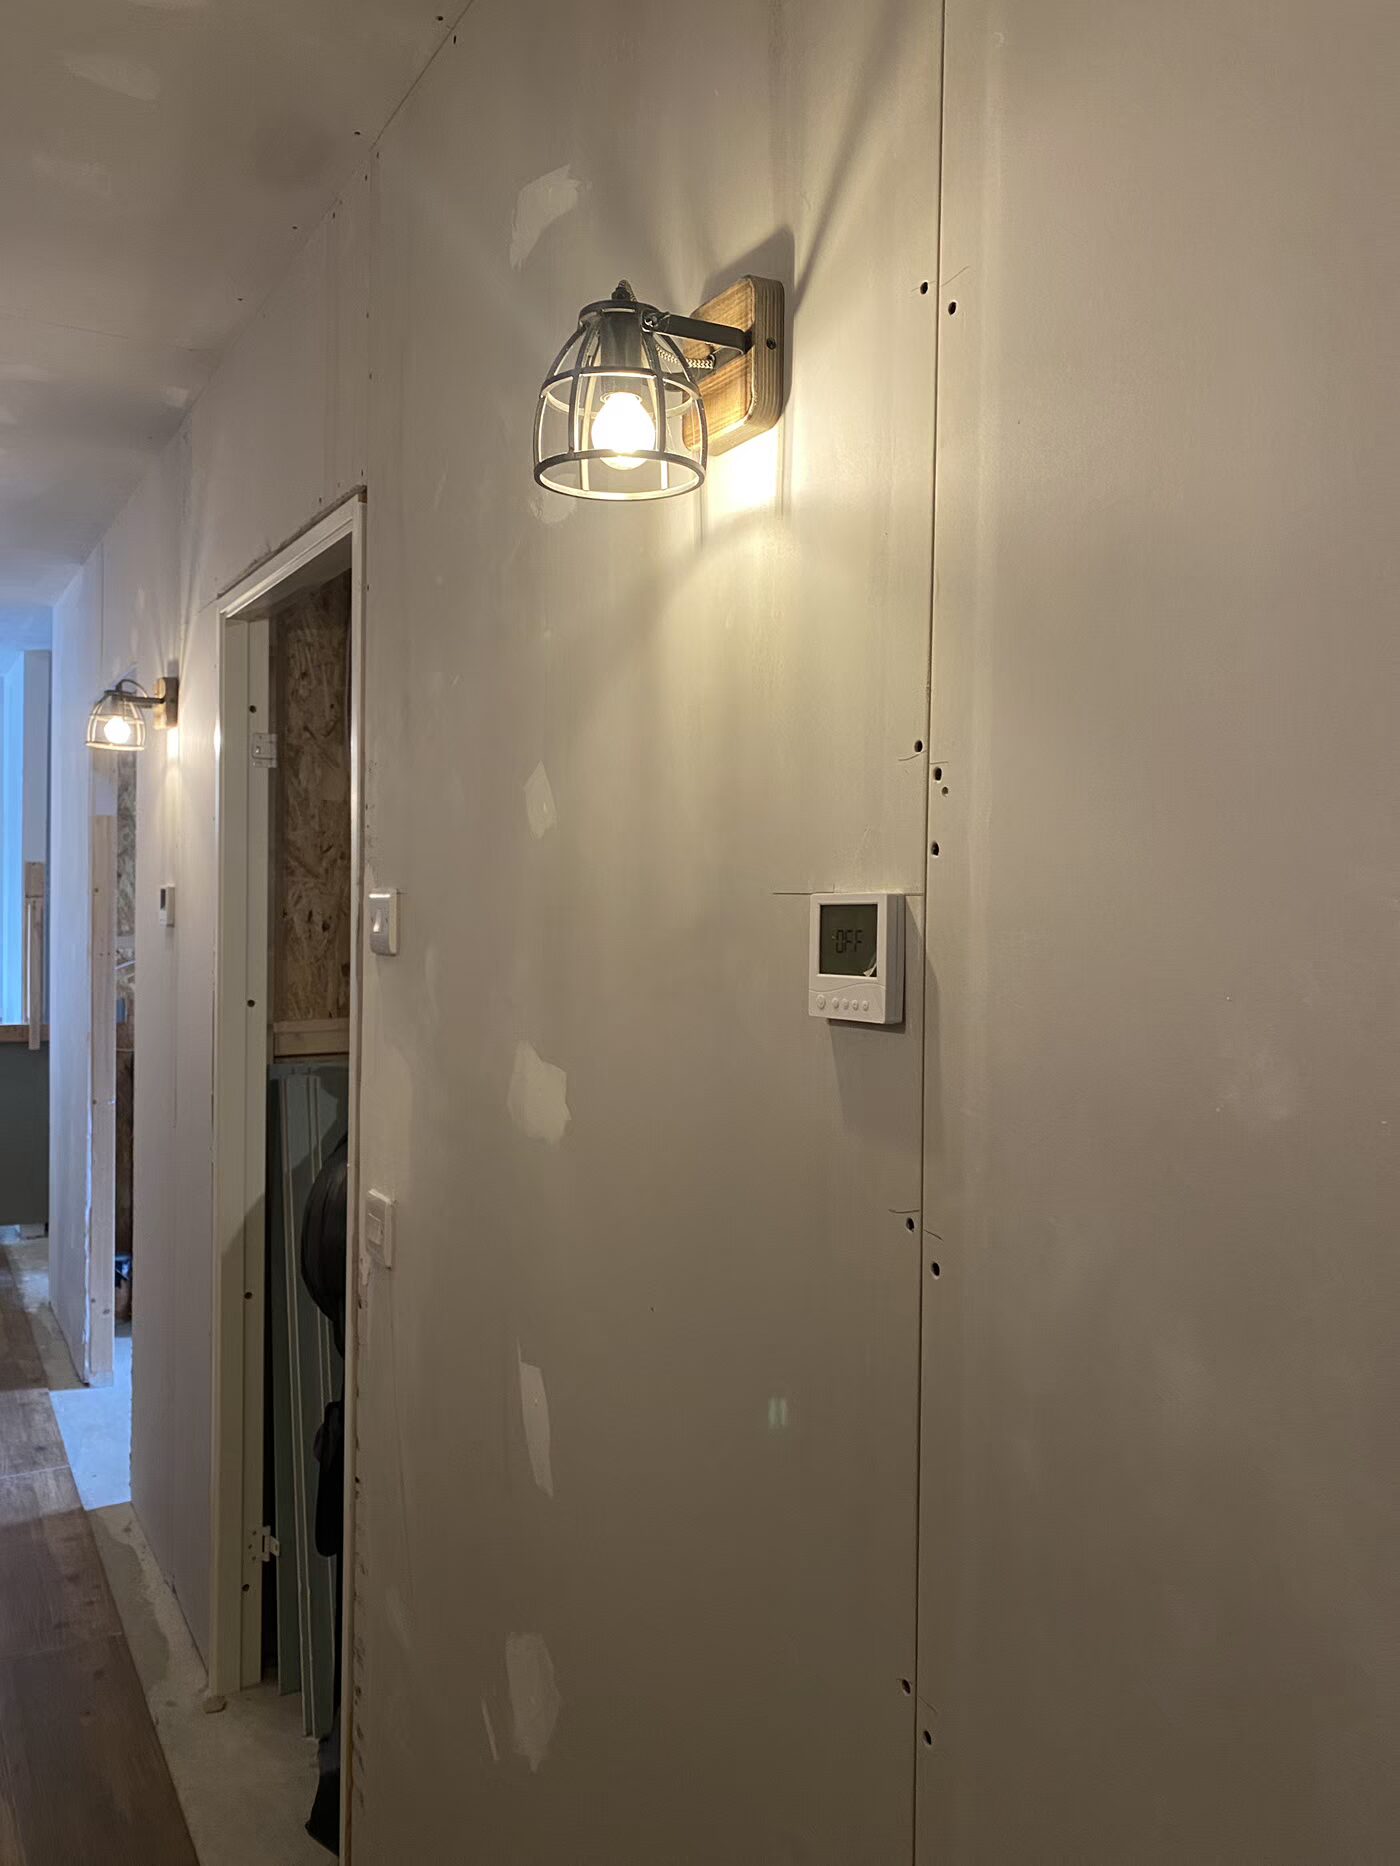
The laths on the back of the house were installed in the factory before the eight sections of the house were shipped. The timber frame company supplied the laths for the porch area and around the front door, which we put on ourselves when we built the porch. We love the warmth the timber brings, and added some more laths to the back of the extension.
The catch here was the amount of wood preservative they supplied – you need to apply two coats to get a lovely colour and good protection from the elements. They didn’t supply enough of the stuff so we’ll need to get more; for a 5 litre can it’s €170. Small things like this are a bit of a headache, having to order more and getting it here even though we expected the calculation had been made to give us enough.
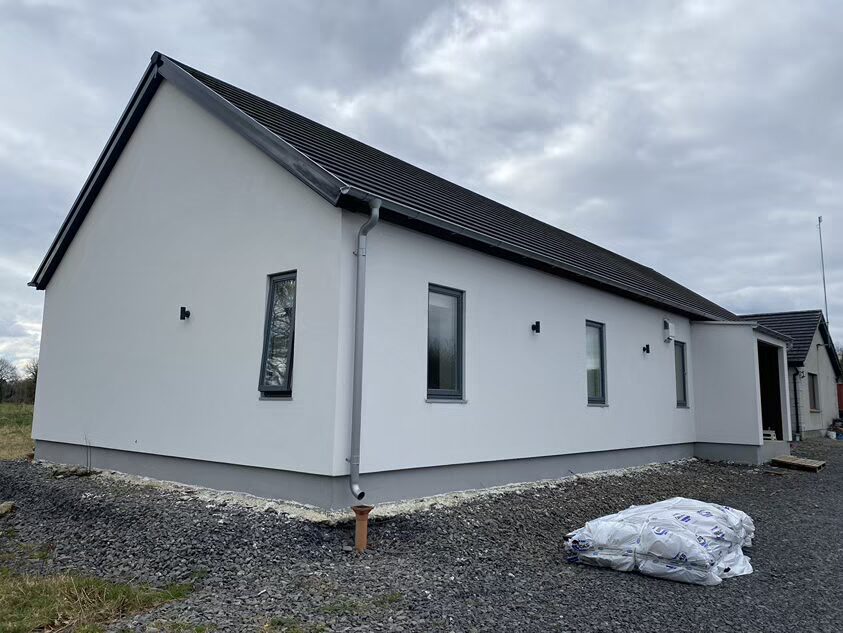
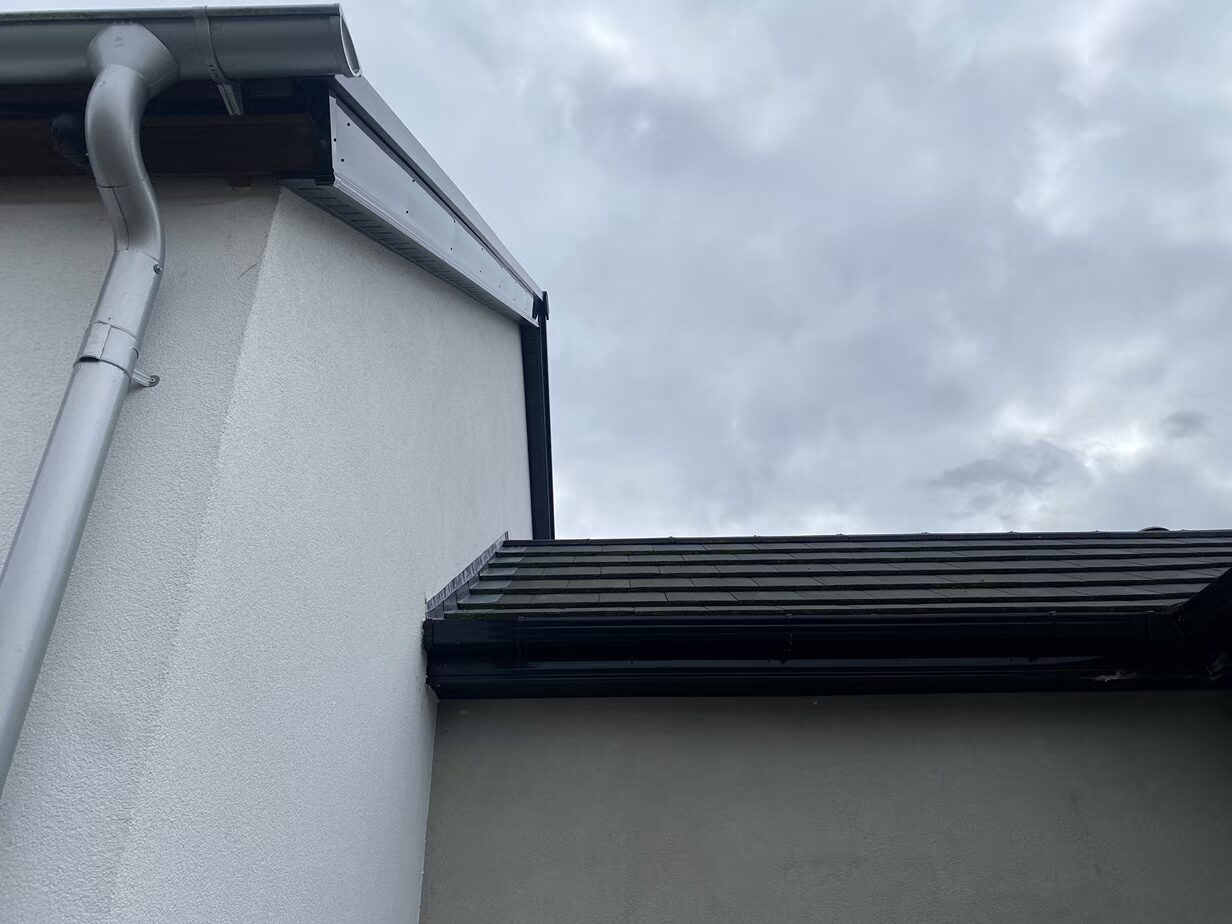
The fascia boards are all of the same wood, which lends a cohesive feel. We prioritised treating those boards first while we had the scaffolding. On both gable ends we clad the fascia board with uPVC, on the very high part of the roof that’s hard to reach simply because the wooden fascia boards require maintenance.
For the roof covering, we sourced the roof tiles through our builder, who was also the one to build the link from the existing house to the extension. The builder calculated how many concrete roof tiles we
would need and as it turns out, he overbought so we’ve loads left. They’re so heavy there’s no point sending them back for a refund, so my plan is to reuse them as paving slabs.
Electrics and plumbing
Our builder recommended the electrician we used, a young guy starting his business, he worked weekends to get it done. It was a total wiring job and we’re very happy with the result. For heating, the extension has electrical underfloor heating mats, there is no wet system.
Despite the cold winter we just had, we haven’t had to use it yet. My wife Fiona has had to put on an extra jumper on some days, but the boys and I thought the temperature was comfortable – it never fell below
18 degrees.
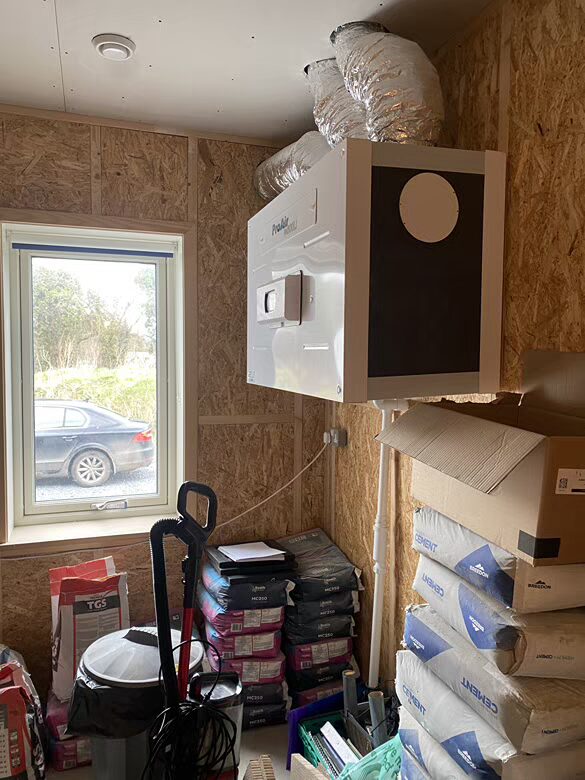
We do have a centralised mechanical ventilation system with heat recovery (MVHR) which helps retain heat and keep the air inside the house fresh. We had to install MVHR as the house is so airtight and
energy efficient.
For the existing portion of the house, we have radiators fed by a high efficiency oil boiler we installed not long ago and have the thermostats set at a balmy 21 degrees. Our yearly oil bill for heating the cottage, and for hot water, is approximately €1k.
Because the heating in the extension is electric, all we need to plumb for now is the taps, and we’re likely to do that ourselves via the service routes in the roofs.
The main issue we had was that the timber frame company put the waste pipe in the wrong location when they built the extension. Despite the right location being clearly indicated on the plans. I had the sewage pipe in a specific place to get the right falls.
Their opening is further away from the septic tank so I had to dig a new trench, and I’m hoping the fall will be enough now.
Liam’s top tips
Futureproof your build. For us, futureproofing the house meant building a passive house so that our energy bills would be very low. It also meant building an extension that would be single storey, so we can continue using it into old age.
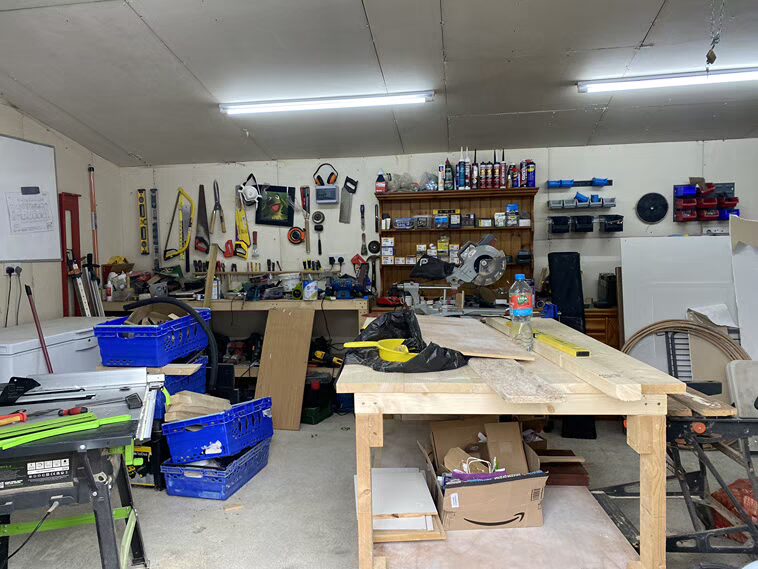
Buy secondhand furniture and tools. We bought most of the furniture for the extension online. I even got the cement mixer from someone who’d bought it for one small outdoor project and it’s virtually brand new. Not only is this a way to get great value items but you also get to meet people all around the country. I have to say we’ve only had good experiences; the only thing is
you need to take the time to search the websites and you have to travel to pick up the items.
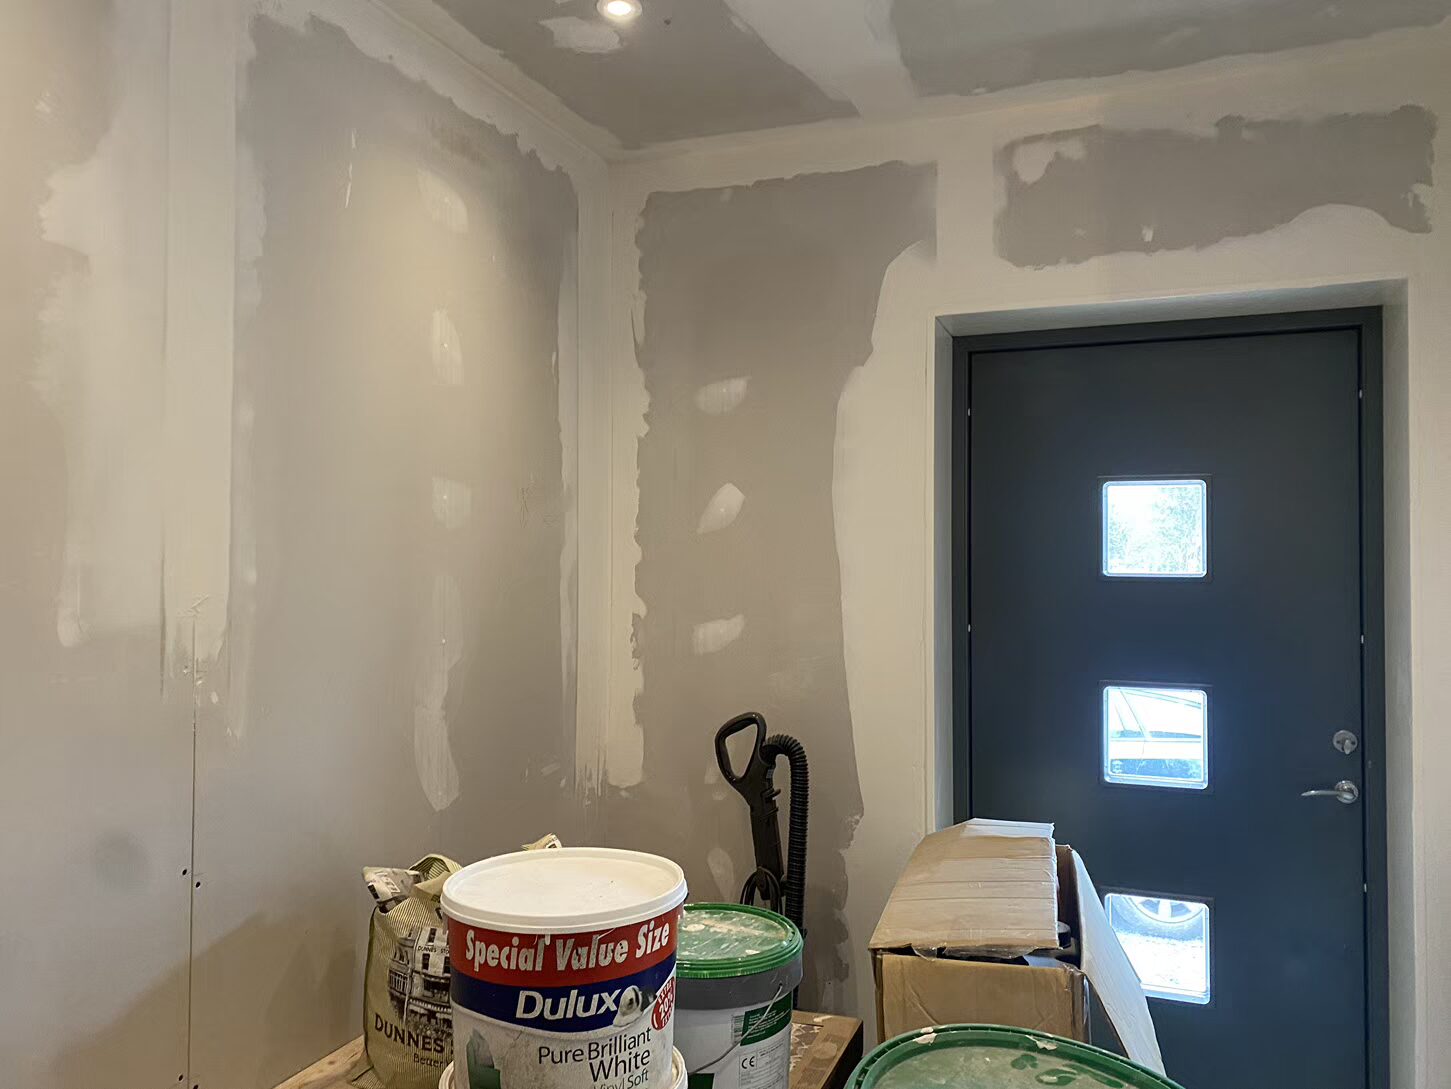
Insulation and drylining
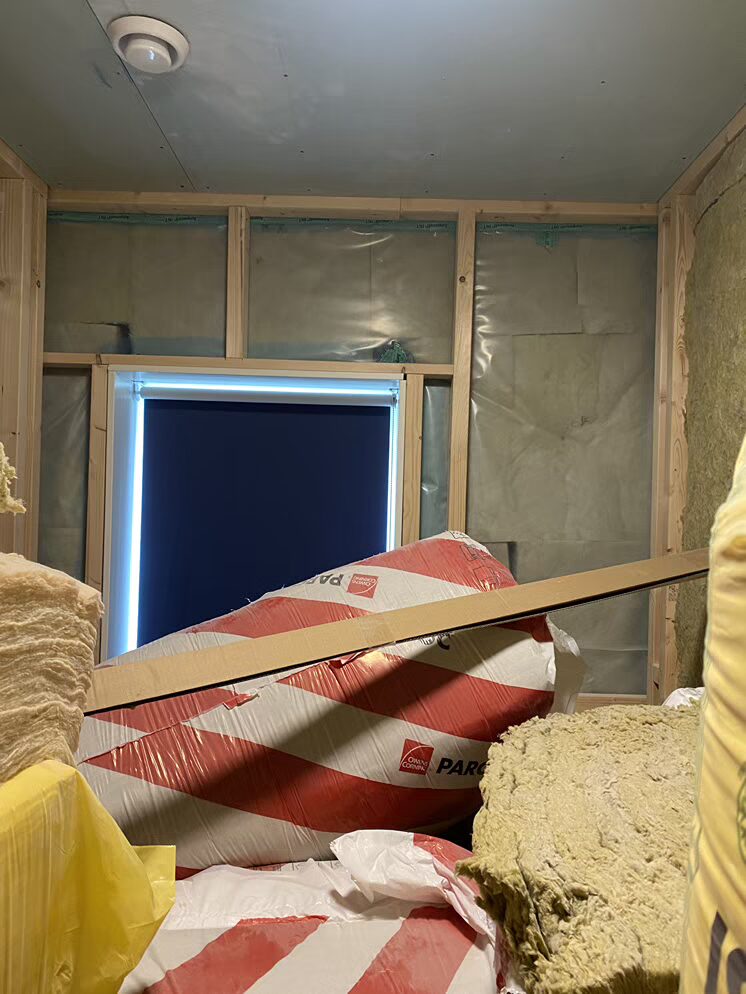
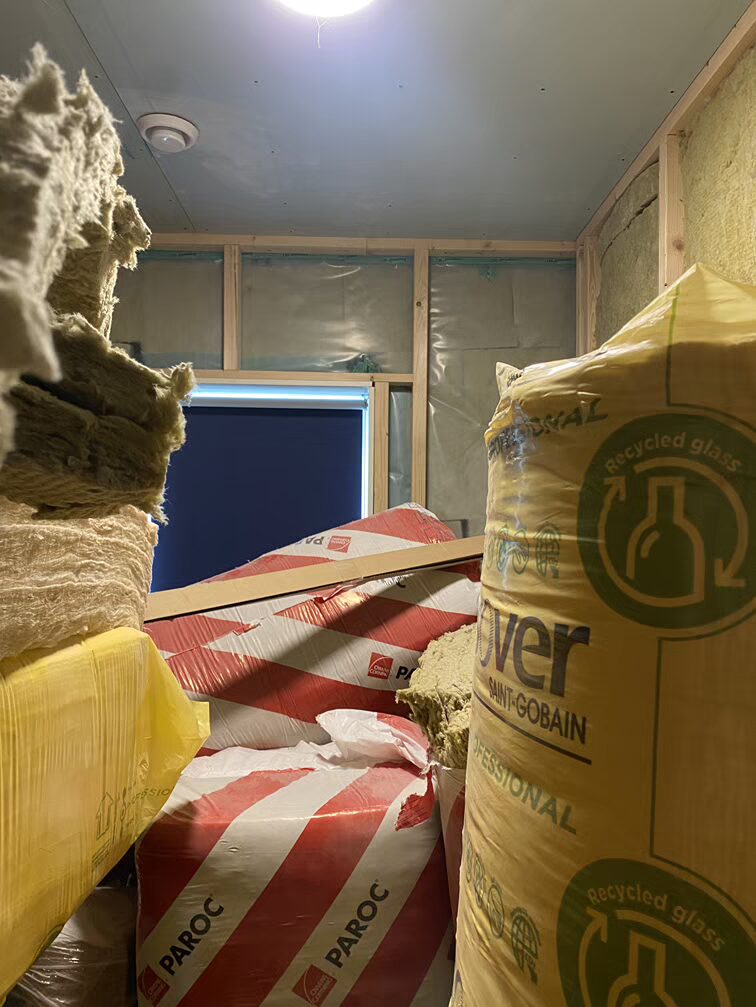
Myself and my brother in law did a lot of DIY work on the house. We insulated the walls and roof. For the walls we used products supplied by the timber frame company – mineral wool over two layers plus vapour control barrier.
We also did all of the drylining. I calculated the wall area and ordered the sheets of plasterboard and tape; we only had one and a half sheets left over so very little waste.
The drylining job simply involves taping and jointing. Taping between the plasterboard sheets then jointing which involves applying two coats of a proprietary compound. The only thing is you have to sand the wall between coats and it’s very dusty. I have an orbital sander with integrated hoover and that works really well but then when it comes to the corners, I have to go at it by hand.
This is still a work in progress, but the main living area is done now. We went for an industrial style for the plant room which I quite like, with the chipboard walls and industrial fittings.

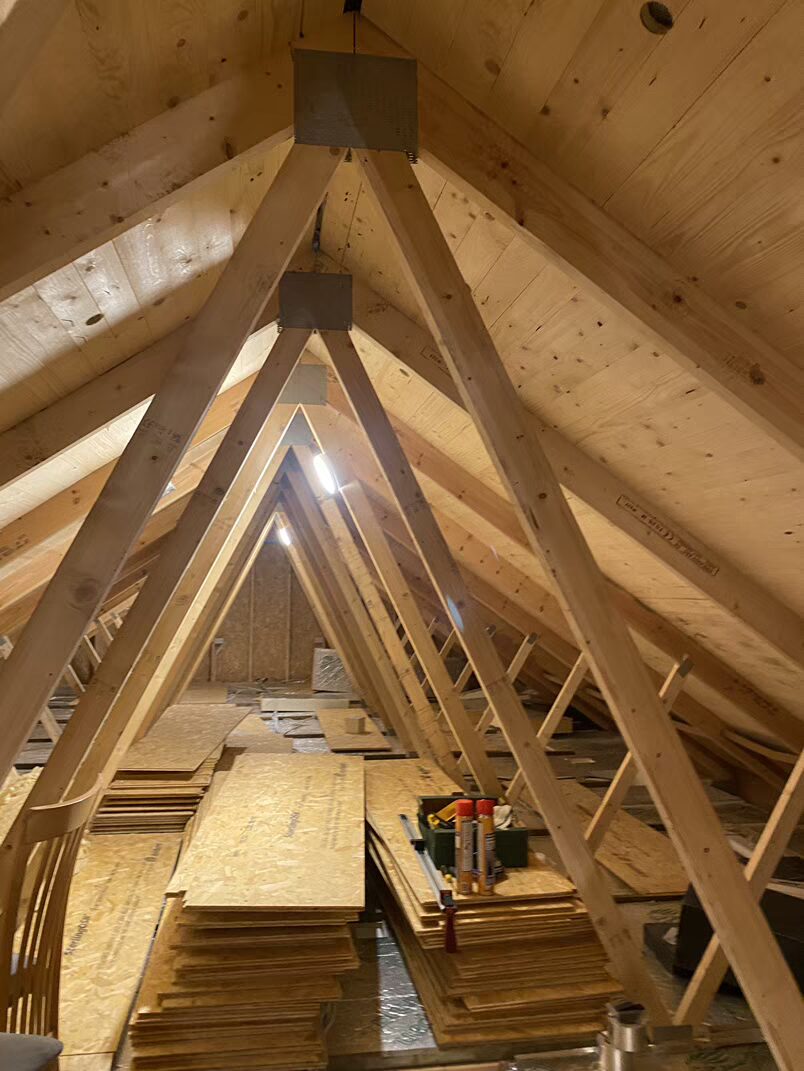
We’ve a cold roof design meaning the insulation in the attic is at floor level instead of in the roof rafters. We did this ourselves and got quotes from various suppliers; one option we looked at was 300mm recycled newspaper but that came in at €9k. Instead I went with phenolic board to make sure we’d retain the ceiling height; this was fitted between the floor joists as the boards are 150mm thick for the same insulation value.
With the help of my brother in law we did have to cut each one to size which wasn’t easy but at least we didn’t didn’t have to raise the floor in the attic and the outlay was €4k for the materials. We fitted it ourselves so saved on labour.
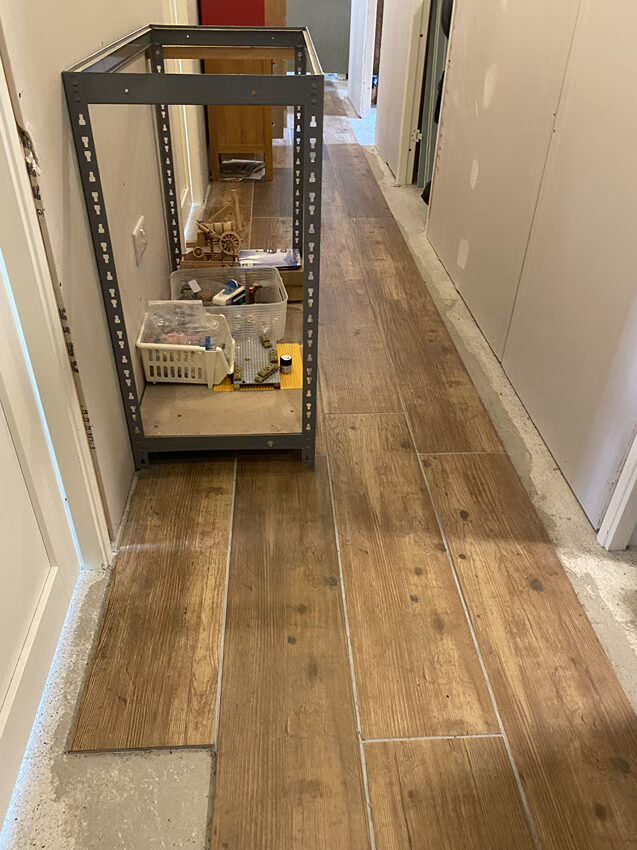
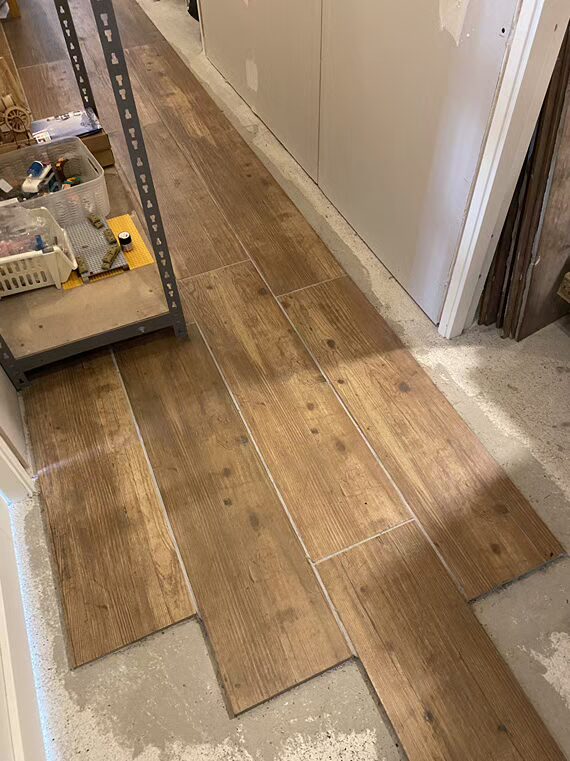
Tiling
The timber frame company was also in charge of pouring the concrete floor. Because the timings were so tight, the person laying the floor had to rush the job late into the night which in turn means the finish gets patchier toward the end of the house.
This had a knock on effect for me laying the floor tiles, which we’re putting in every part of the extension bar the bathroom, sauna and plant room. Even though the tile adhesive makes up for the uneven surface, it makes the job much more fiddly. On one tile, it took me three goes to get it level. It’s still a work in progress.
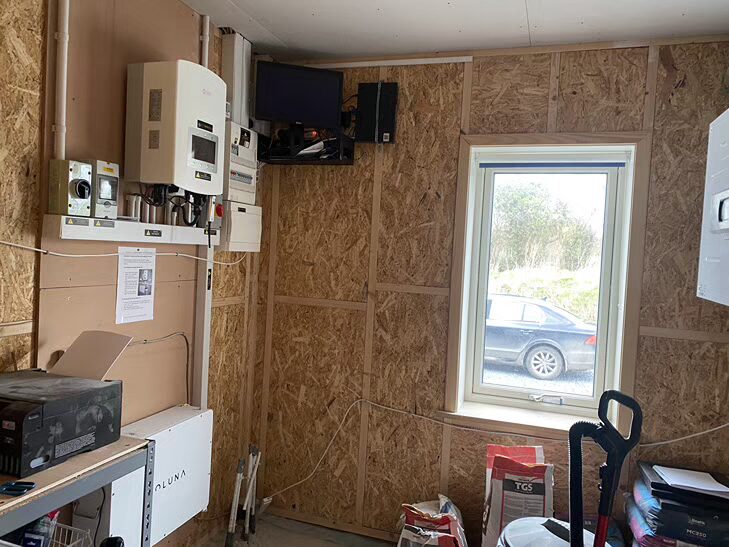
PV system
We knew from the very beginning that we wanted to get photovoltaic (PV) panels installed and we got that done at the end of 2022. We paid €14.5k for 16 panels and a battery, and got €2.5 back in the form of the Sustainable Energy Authority of Ireland grant.
For six months of the year we have no electricity bills. The way it works is the battery charges up at the cheaper night electricity rate, and during the day the panels cover our use and we export electricity back to the grid.
It’s a smart system in that the solar company can see remotely if there’s a problem with the battery; I got a call once and they told me what to do to sort it and that was that.
When we lost power in the storm we couldn’t use our solar panels; the only way we could have would have been to install a switch but we’re not considering that as the solar panels wouldn’t be enough to supply the amount of electricity we would need for the house in winter, which is the time of year we get the storms.
As we do get power cuts from time to time, we are going to be investing in a 5.5kW backup generator instead, just to keep the fridge/freezer running and basic electrics.
Floor plans, suppliers and cost overview
Suppliers
Timber frame
Scandihomes
PV system
Ecohorizon
Builder’s merchant
McMahon’s Portarlington
Drylining compound
Knauf Fill + Finish
Wall insulation
PAROC stone wool insulation in two layers
MVHR
ProAir
How much did it cost?
To get to the point of having the windows and floors in and the roof felted and battened (i.e. to builder’s finish; the wall insulation was supplied but we had to install it ourselves) we were quoted €150k but we added some extras, from the external timber finish to windows for the link corridor, and in the end it came to €190k. On top of that we had the tiling, drylining and fit out to add on to the cost. We’re still in talks with them over the final payment, there’s €1.5k outstanding as there are some details we’re still disputing.


