[adrotate banner=”43″]
In this article, we cover the stages of choosing and installing your windows including:
- Design and shop around: when to start choosing the windows and how, where to find the best value to money windows
- Get quotations: what’s involved in getting a quotation and what the cost elements are, what’s included and what the process is, how to compare quotes and what to check for
- Place the order: how it works
- Delivery: what to expect and when, how to take receipt of the windows
- Fitting: what to expect from the process and watchpoints
- Sign off: process of testing the installation and final payment
- Protection during the build: How to shield your windows from builders and machinery
- Maintenance: How to keep your windows looking like new
Step 1: Design and shop around for your windows
The planning stage is the best time to get a window specialist involved and to get to grips with the subject with your architectural designer.
Most of us building our own place want to do something that little bit better. So the first step to buying windows is to have a look around. Get on the web, look through magazines, talk to friends, listen to professionals, keep your eyes open wherever you go and allow plenty of time for the buying process. Visit shows like Selfbuild Live.
Simplest and cheapest is to buy off the shelf from a builder’s merchant. The best offer a huge range of styles and sizes. Then there are companies that specialise in windows and doors; these tend to either import or make the units in Ireland, in a factory controlled environment.
Factory finished windows and doors have become the norm, and for good reason. Making anything in a factory is quality controlled and the possibility of damage through damp, which can include painting timber when wet. Cut ends may not be properly painted with preservative, timber can be left on site uncovered and suffer damage from UV light, coatings applied too thinly and perhaps only once which is not sufficient protection, non visible areas cannot be coated (especially important in windows to help prevent rot).
Made to measure and installed by a specialist company or joiner may or may not be more expensive. You may go down this route with a local joiner for replacement windows, but if things go wrong, or anything arrives damaged they could take another two months to replace.
‘When you receive the quotation, shut yourself away somewhere you won’t be disturbed and go through it with a fine toothed comb. There is always the possibility of mistakes.’

Step 2: Get quotations
Most companies will look at your plans, talk to your architectural designer and then produce a schedule (list) containing details of each window. The specification should include: format, glazing pattern, size, opening, price, cleaning, frame colours inside and out, safety issues, energy efficiency, lifetime, hardware, fire escape needs, etc.
You can usually expect a quotation within a week. Price is a hotly contested issue because it is affected by so many factors and therefore might be misleading. For example, the hardware (handles, locks, etc.) may be solid brass and therefore expensive, or you may have chosen a design that is unusual which will also put up the cost. Make sure you know what the cost of the windows includes so you can compare like with like.
When you receive the quotation, shut yourself away somewhere you won’t be disturbed and go through it with a fine toothed comb. There is always the possibility of mistakes. It could be a window marked as opening the wrong way, an incorrect measurement, windows missed out, etc. You may find it takes several revisions to get it correct. This task is hugely important as you are responsible for any errors, even if they originated with the supplier. Double check what warranties and guarantees apply to frames, glazing units and furniture.
To help you select your windows, when there are so many factors to take into account, draft a simple spreadsheet to score each manufacturer and quotation on the key points that matter to you. These points may be along the lines of; design, performance, quality, thermal value, installation methods, maintenance, value for money, warranties and manufacturer backup/service, material, overall sustainability, etc.
Step 3: Place the windows order and pay deposit
Some suppliers like to see and measure the actual openings before they manufacture the windows, having learned from bitter experience that what is shown on the drawings often doesn’t get built that way. This is a good route to go if you are planning to use a company that’ll not only supply but also install. They then take complete responsibility for getting it right.
You will be required to make a substantial deposit with your order, often half the final amount, which makes doing your homework on your intended supplier all the more critical. Is your deposit protected? A useful process is to put your payment in escrow. When you put money in escrow it is held by a neutral third party, (called an escrow agent), who works for both you and your supplier, and is often a solicitor. Their role is to carry out the instructions agreed upon by both parties. The money is released when all the terms of the agreement are met. Remember that until the windows are literally secure on your site they can be repossessed.
Step 4: Windows delivery
Windows are notorious for delaying build schedules.
The rule of thumb is to allow up to 12 weeks for delivery from the date of order. The delivery date will be quoted at the point of order and given in weeks, but this doesn’t allow for holidays. Some European manufacturers close for a month in the summer so check this.
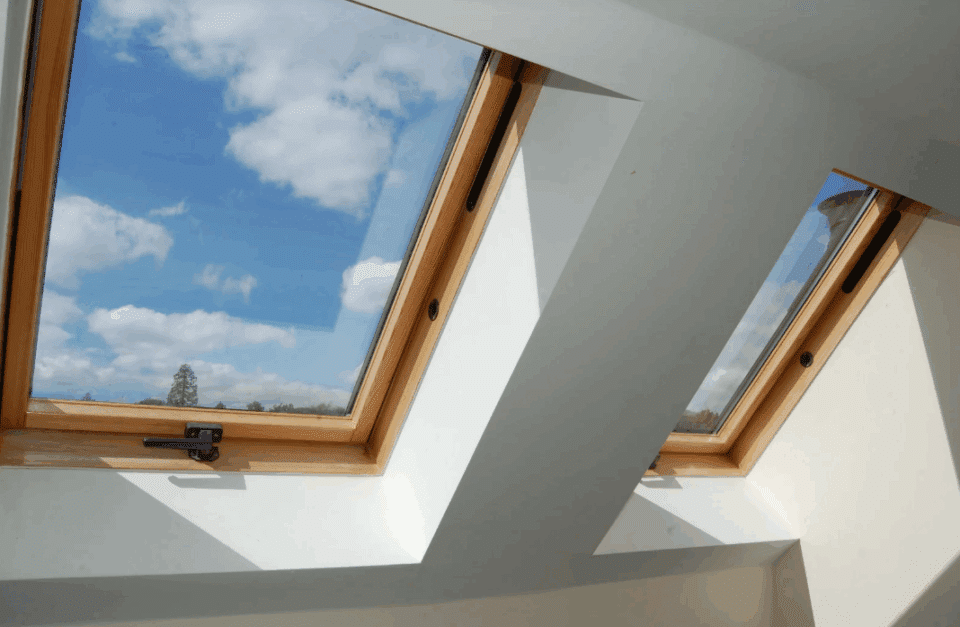
Step 5: Windows fitting
The final part of the whole process is naturally critical and often included in the contract with the supplier because, understandably, they do not wish to be accused of supplying faulty windows when in fact it is the fitting that is not exact.
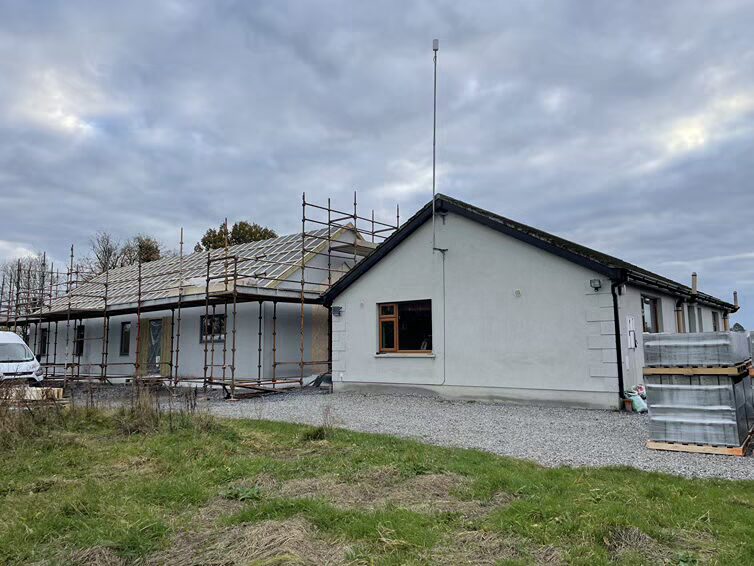
Installation is absolutely critical to the performance and longevity of both windows and dwelling. Having expended a great deal of time and effort in making the selection, it’s easy to slacken your attention just at the time when it’s most needed.
Remember that buying windows that are manufactured to excellent standards does not guarantee that such standards will be met. Correct installation is the key; in particular, good taping is essential. It’s of little benefit having a window manufactured to achieve a thermal performance of 0.8 W/sqm or less, if it is leaking air at its fixing points.
As installation cannot be factory controlled in the way that production can, you are reliant on your installer to use the method best suited to the windows you have selected and the type of construction.
For peace of mind, installation by your supplier is the route to go, but if you are a competent DIY builder and are willing to accept the responsibility, full instructions are given with each unit for self assembly. Beware that the majority of complaints regarding uPVC windows relate not to the materials, but to poor installation.
Your windows will sit on a window sill and some windows come with an integrated one, or you may need to buy your sills separately. If you are building a cavity wall and have a concrete sill, the sill needs to be thermally separated from any interior concrete/plaster by a strip of insulation and proprietary insulated cavity closers can be used to support it.
If you are using partial fill insulation batts then you need to ensure that the insulation is firmly secured against the inner leaf of the cavity wall. The sill must not cross the cavity and should not rest on the inner leaf.
Similarly, all gaps between two concrete lintels (supports above the window opening) needs to be tightly filled with insulation or better yet with a purpose made insulated cavity closer. In the case of steel lintels, the steel plates should be separated to create the thermal break and the area between should be filled with insulation. Proprietary insulated steel lintels are a best practice alternative.
The days of ‘expanding foam and hope for the best’ should be long gone and as seen above, installation in cavity blockwork construction will not be the same as that for timber frame. In the case of a bespoke building method, e.g. offsite construction, check with the manufacturer.
‘Installation is absolutely critical to the performance and longevity of both windows and dwelling…’

Step 6: Testing pay the balance
Whoever is signing off on your build must be present for the installation. This is because you will have to pay the balance for your windows once the installation is complete and will have little recourse if your architectural designer, engineer, warranty provider or building control officer notices something wrong at a later date.
The frame must fit the cavity without distorting, the sash should run smoothly without friction, the windows should open smoothly. Reputable manufacturers will include correct installation and testing (water hose test and air test), for each element as part of the contract but do not assume this, include it in your order specification.
Any windows failing these tests should be removed and reinstalled correctly. Above all, high performance seal design and attention to detail during installation will pay dividends.
Once you’re satisfied all is in order and the installation is correct, you will have to pay the balance, on the day the windows were fitted and signed off on.
Step 7: Protect the windows during the rest of the build
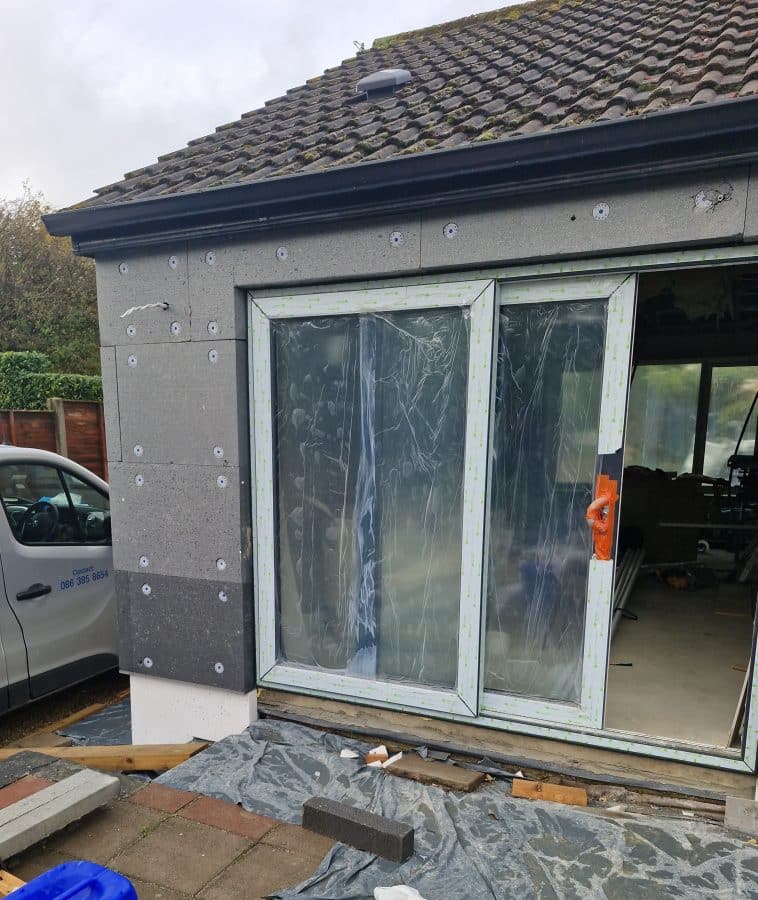
The windows and doors go in quite early on in the build process when there is still a lot of action and mess on site. It’s therefore a good idea to protect them with a polythene cover for as long as you possibly can, both inside and out. There are specialist services to do this for you.
Some windows come pre coated with a protective film and it should be left on until the external render has been applied. But don’t wait too long to remove them after that, to avoid sticky residues.
Step 8: Maintenance
Good quality coatings are essential to achieve the wear from your doors and windows, simply staining with a base does not provide the necessary depth of film to ensure that the timber is not damaged by sunlight and moisture ingress. Once you take the wrappers off, applying another finishing coat might be recommended; ask your supplier.
Looking after your new windows and doors will help to keep them at peak performance. Don’t paint over seals, clean using recommended products and procedures and, if damage occurs, repair immediately so that it, and any cost, can be kept to a minimum.


