Most of us building our own home will use either a main contractor, or hire tradesmen ourselves (often referred to as direct labour).
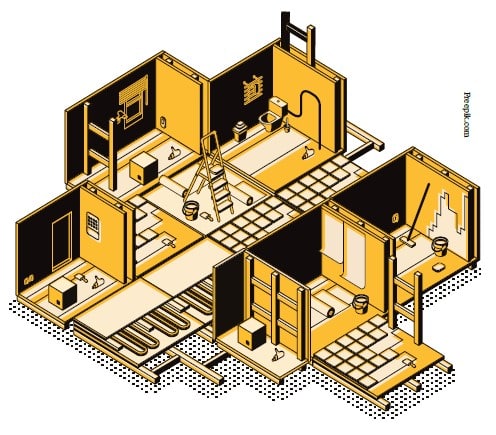
Whichever route you take it’s helpful to have a roadmap everyone can understand so you know how advanced the project is at any one time. In general, the concept of first and second fixes is helpful in that many trades cannot do all their work at once.
They have to create an ‘infrastructure’ first, then return at a later date to complete their tasks. Unfortunately, the terms first and second fix are not set down in any legal way and are open to considerable interpretation.
In general, first fix applies to the construction of a building from foundation up to plastering the internal walls. This involves a huge number of tasks including making walls, ceilings and floors, and installing cabling and pipework for future connections.
At the end of this phase the building isn’t anywhere near habitable. Some people define first fix as starting once the shell of a building is complete.
Second fix entails all the work needed to complete the house ready to live in once the plastering has been done. Electrical fittings are connected to the cables, sinks and baths connected to pipework, doors fitted into their frames and so on.
In very modern homes there can also be a third fix when high tech equipment is installed after everyone else has done their (dirty) work. This because so much high tech kit is sensitive to even small amounts of dust and dirt in the atmosphere.
Most general contractors do both the first and second fix but there are specialist joiners/carpenters, for example, that do only second fix.
Thinking of this particular sort of work, if it is planed, smooth timber that would normally be painted or stained, it is second fix work. Anything involving timber before this is first fix.
It will probably help if before you start out you have a clear set of definitions of what first and second fix will entail on your specific build. This can then avoid later conflict when your builder says he expected to get paid to second fix. But is this up to when second fix starts or when it is complete? Project managers are good at navigating these grey areas.
In this sea of uncertainty what really matters is whether things are done as they should be, whatever order they are done in. The following internal finishes checklists are the minimum things to check for.
Internal doors
● Check doors are as specified before installing.
● Look at each door for flatness and blemishes (especially with pre-finished doors).
● Check door lining dimensions and strength before fitting.
● Doors should hang in place and neither open nor shut on their own.
● See that there are enough hinges per door (three or even four for fire doors).
● Are all screws in every hinge?
● Hinges should not squeak or bind.
● Door edges shouldn’t bind to the frame. There should be an even gap of 3mm to 5mm all round.
● Be careful how much clearance you leave under each door. Allow for the thickness of the finished floor surface so you won’t have to remove the door and rehang it.
● Test all locks, latches and keys.
● See each door fits snugly into its stops and that stops are the correct size for fire doors.
● Architrave should be accurately mitred at corners and fixed tightly to the wall.
Walls and ceilings
● No crack in plaster should be wider than 2mm. If it is, seek professional advice.
● Look in a good, oblique light to see that plastering is smooth.
● Ceilings should be flat and smooth, with no signs of the underlying plasterboard joints and fixings.
● Coving / skirting / dado should be fitted so joints are all but invisible.
● There should be no ridges of paint where roller edges have been.
● All paintwork should look ‘solid’, with no show through of underlying coats.
Electrical
● Employ a properly registered contractor and rely on them to get it right; this is a legal obligation. In NI Building Control will also help ensure quality is correct.
● Check every light switch faceplate and 13amp socket plate is horizontal and at the same level all around the room.
● Go round every electrical appliance / fitting and see that it works as it should.
● Go round the house with a small lamp or other electrical item and plug it into each socket to check that it works.
● With light bulbs in every ceiling fitting, ensure all the lighting works including dimmers, where fitted.
● Use a lit cigarette to test smoke detectors are working. Use a hairdryer to see if heat detectors are working.
● Test the house alarm system.
Floors and tiling
● Check every floor is flat. Over a distance of 6m it should not be more than 6mm
out of flat. In all circumstances the floor surface should be smooth.
● Timber products should be left in the house at room temperature to dry out. Then once installed timber floors should not squeak, boards should be tight against one another and there should be a gap of at least 15mm around the edge (under the skirting) of the flooring. This allows for expansion.
● Ensure tiles are as specified before fitting.
● Check that no cracked, chipped or blemished tiles have been installed.
● Some ceramics need to be installed in a particular orientation. Check this before it’s too late.
● Grout lines should be straight and true and of equal width.
● There should be no thin slivers of tile at the edges of floors or walls. Better
‘planning’ can almost always make these redundant.
● All tiled surfaces should be completely smooth and flat when viewed in an oblique light.
● Check vertical grout lines for plumb and others for level before grouting.
● External corners should have special beads, or tiles should be mitred, to give an attractive edge.
● Floor tiles must be laid on a sand and cement screed or, if on timber, on marine ply very securely fitted to strong immobile subfloor.
● All junctions between ceramics and sanitaryware should be sealed with bathroom quality mastic.
Stairs
● Check all risers are the same height (including that from the finished ground floor surface to the top of the first tread).
● Ensure all newel posts, banisters and handrails are secure and feel ‘solid’.
● No gap anywhere in balustrades or between spindles should be more than 100mm.
● Check that the headroom going upstairs is at least 2m.
● Do everything you can to remove squeaks.
Kitchen
● Check all appliances work properly.
● Look under the sink for leaks after filling, then emptying, the sink.
● Ensure all worktops are fitted securely and the joins are carefully done.
● Check cabinets are plumb and level.
● Check all doors open properly and close flat.
● Are door fronts to integrated appliances fixed firmly to them?
● Check that door hinges have all their screws in them.
● Check all drawers for smooth running / closing.
● Check the kickboard is in place and fitted securely to cabinet legs.
● Check tiling quality around faceplates and fittings.
● There should be silicone sealant at the junction between tiling and worktop.
● Check the extractor fan works by tearing off a sliver of kitchen paper and seeing how strong the suction is.

