[adrotate banner=”40″]
In this article, we cover:
- Who you will need on site and what each trade will do and won’t do
- Cost indicators for each trade
- Average cost of a small bathroom
- Running order of designing and fitting out a new bathroom
- Top 3 budgeting tips to keep costs under control
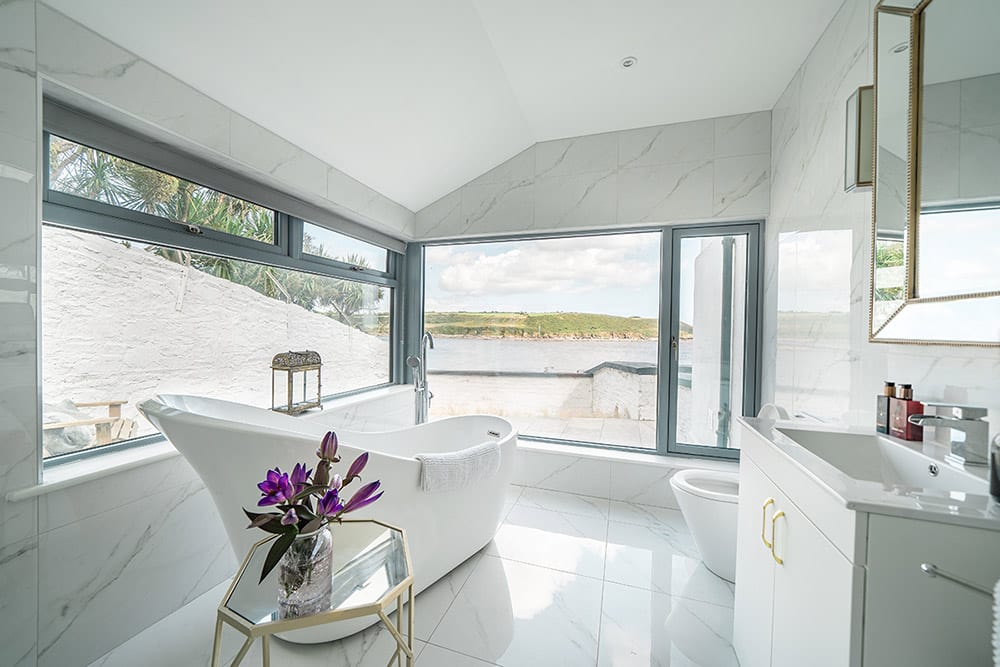
It seems odd that a room where you spend so little time when you’re at home can involve so much expense per square metre and frustration in the building phase. But that’s often the case for bathrooms.
When a builder is pricing a job they’ll give you a keen price, which will often mean they are assuming the most straightforward of installations. A move away from those assumptions after the price is fixed can be costly – either in terms of relationship with your builder or your pocket.
If you go direct labour and hire the trades yourself, you will need to line them all up – general labour but also carpenters/joiners, plumbers, electricians, tilers, plasterers, decorators, and make sure they all know what is being asked of them and that they agree with your plans and choice of fittings.
As with your builder, make sure you agree in advance what each of the trades will and will not do – not all plumbers will run the soil pipes, for example.
Bear in mind some plumbers may be used to certain fixtures/fittings and may not be comfortable fitting certain types of gullies or shower trays for example. This could have to do with the type of warranty or backup service they provide.
So even though you won’t be buying your sanitaryware straight away, show your plumber the specifications of the products you want. For their advice, and to see if they are happy to do the installation – before you sign them up for the job.

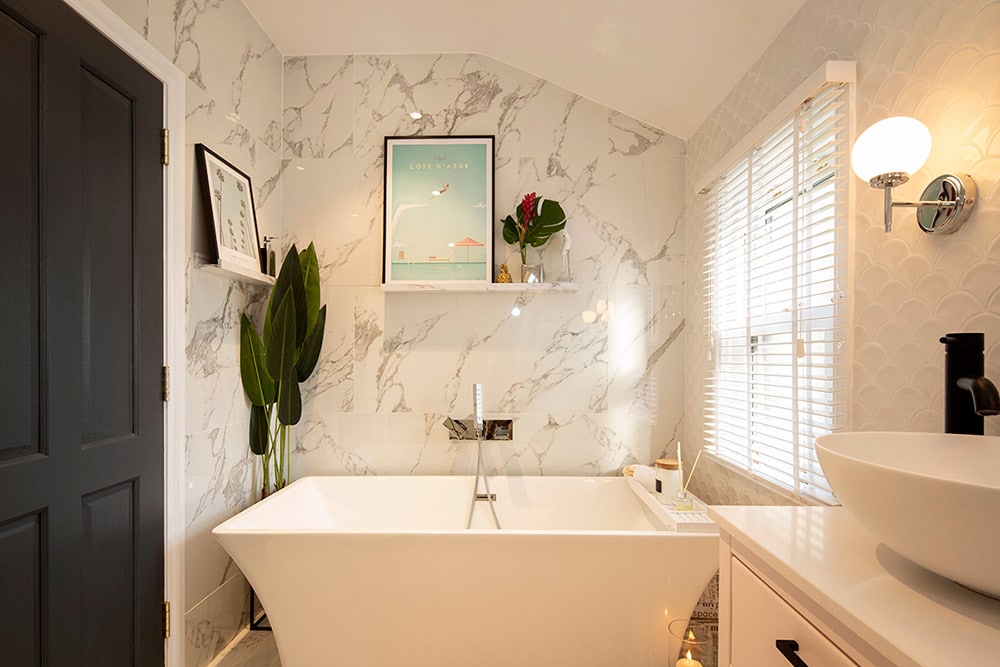
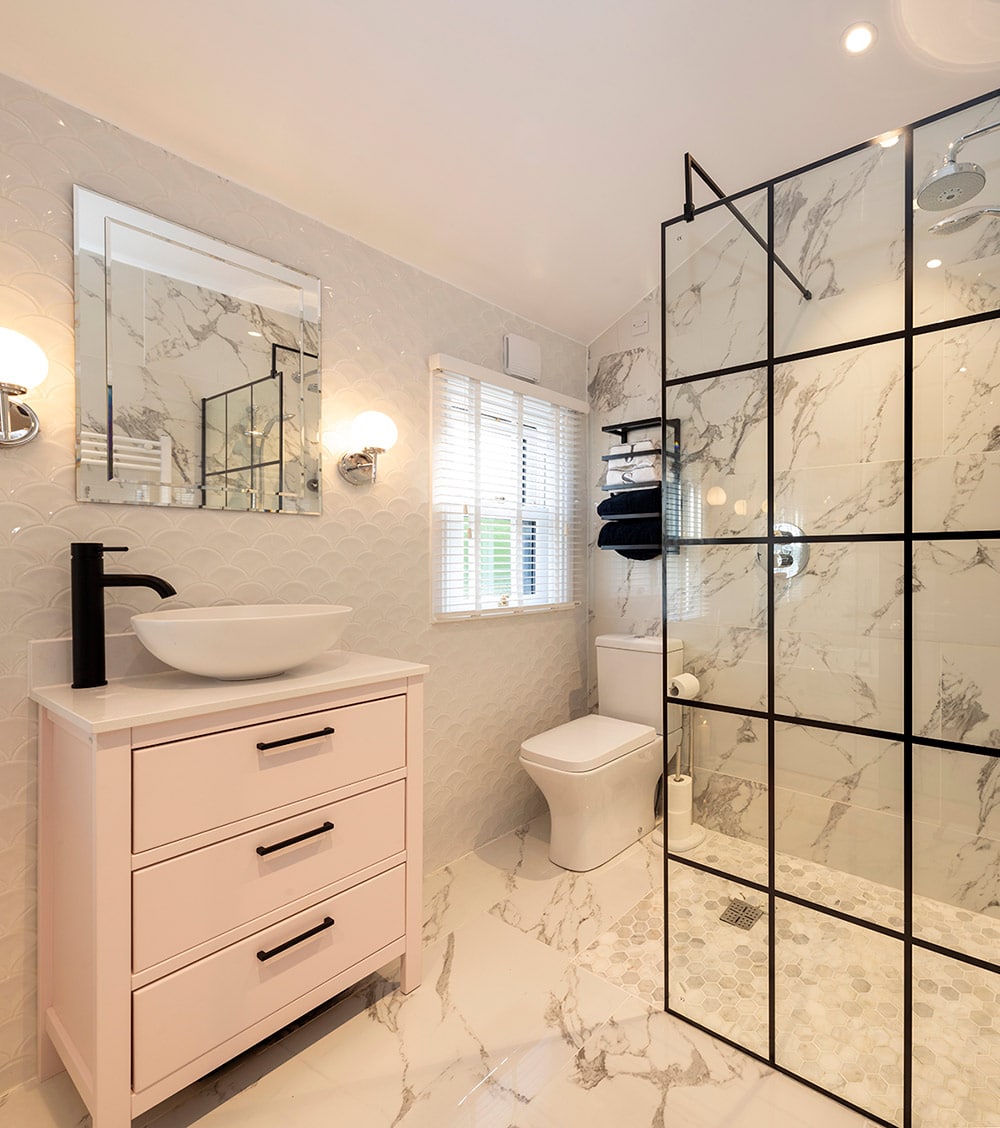
Plumbers may charge upwards of €/£3-4k for a standard bathroom suite in a new build. Then there is the cost of your electrician, upwards of €/£2k, to wire items like lighting, mirrors, and extractors, and that of your tiler and carpenter/builder if you’re not doing it yourself. Tilers often charge per sqm, ranging from €30/£20 per sqm to up to €60/£50 depending on location and style/design. For a renovation project the cost will be lower if nothing has to be moved.
In fact, the labour costs and time associated with a bathroom will vary significantly depending on size and the type of fittings and fixtures that you specify. Some plumbers will charge extra for tanking while tilers may charge more to lay small and patterned, or very large format, tiles.
Add all of that up and the average cost of fitting out a small bathroom will start around €/£5k.
One thing is for sure, good tradesmen are worth their weight in gold and tilers especially can make or break the look. So, if you get someone recommended, go and see their work and stick with them. Talk to them, book them in advance and keep talking to them until it’s time to bring them on board. Same goes for the painter if you plan to paint part of the bathroom.
The running order of getting your bathroom designed and installed.
Design stage with architectural designer
When you design your home with your architectural designer, take the time to discuss the bathroom positions and dimensions, including window placement. For the design stage see p104.
Showroom visits
This is the fun part. Armed with a rough idea of the dimensions of your intended bathroom, you can go window shopping and brochure browsing for your various bits and pieces – but don’t dream of buying anything yet! Get the brochures and make sure they have detailed measurements with them.
While you’re out, get some old fashioned graph paper as well so that when you get home, you can draw out your bathroom to scale, including the doors and windows. Having chosen your pieces, draw them on another sheet to the same scale and cut them out. You can then shuffle the sanitary ware and other items around to your delight. Don’t forget that doors usually open into the bathroom so allow sufficient space for it to swing and for you to manoeuvre yourself around it.
Many bathroom showrooms will provide you with a computerised version of this, and will even advise you on appropriate clearances. The disadvantage is that if you change your mind later it means another trip back to the shop to see what it might look like and, if you’re considering using items not on their stocklist, it can be tricky. However, there are software packages and even some internet based design utilities that will help you to a point.
With this done, the next step is to find a big floor space and draw out everything in life size to see how a normal human being will interact with the layout. Use chalk as you will invariably realise that something isn’t right.
Final design
When you’re happy with the arrangement of the major pieces you can now refine things further. With most Irish bathrooms, you really do need to measure down to the last millimetre.
And, at that level, you must make sure to include seemingly trivial measurements like tile thickness, tile adhesive thickness, plasterboard, plasterboard adhesive and plaster thickness. It might seem fanatical, but if you don’t, it won’t fit properly and certainly won’t look right.
Organise trades and place order
In this tiny room, every trade will have to pitch in, from general labour to plumbers. Remember that sanitaryware and tiles can have lead times; make sure they are not only chosen but on site before the work begins to avoid delays. The key timing issue is likely to be the availability of all those fittings you’ve chosen.
If everyone is in agreement with the plan, make sure they can all meet your dates. In bathrooms it can be very awkward as, if one person doesn’t turn up on time, it means that everyone else will probably have to be delayed. Each trade also needs to leave the site ready for the next trade – good communication, clarifying who is responsible for what, is essential.
You will need to have the first fix items to get started, but in reality, most people order all of their bathroom supplies (sanitaryware and furniture) at the same time. Once you’ve placed the order it usually takes about one week to 10 days for delivery, and shouldn’t take more than four weeks.
Demolition and waste disposal
In the case of a renovation project, make sure it’s clear who is going to rip out the old bathroom fittings and tiles, what’s staying and going, and who is bringing the waste to the recycling facility. And at what cost.
As long as there are no structural issues, the cheapest way to go about it will be for you to remove the old bathroom and cart if off to your local recycling centre yourself.
Then during the construction there will be waste products from tiles, excess grout, plasterboard and so on. This will have to be disposed of as well, and it’s likely that your builder will expect you to do it. In a new build, you should have a waste management system in place already to deal with this.
Delivery
It is usually best to wait until all the parts you’ve ordered have arrived and been checked before calling in the help. Some suppliers are notorious for delivering 95 per cent of what you’ve ordered only to have a vital component missing – which you don’t discover until after everyone has arrived on site. Crucially, insist on checking the contents upon delivery to make sure everything is in order.
If possible, have the order boxed up not by item but organised by room, i.e. for the family bathroom, master ensuite, etc. Do this yourself if the supplier hasn’t organised the delivery that way.
Then, to make sure your plumber fits the correct items in the correct rooms, make sure to have the right fixtures/fittings in each bathroom ready for them. Same with the other elements, e.g. furniture, tiles, etc.
Floor build up
In the majority of bathroom installations, the starting point is the floor structure. In the case of precast slabs, holes in the floor will have been preformed during manufacture to accommodate your pipes.
If you’re laying a concrete floor or screed and plan to bury the waste pipes in it, you will need to locate the wastes as accurately as possible. Ideally put them in a duct of some kind if possible – this will provide you with a little wriggle room which is critical when it comes to fitting your shower tray in particular.
Precise placement can be an issue if you are trying to take measurements off bare concrete walls and floors as you will have to include the thickness of the appropriate finishes in your calculations. A wooden floor is a lot more forgiving but do try for accurate placement nevertheless.
If you’re planning to run the water supply pipes through the floor as well, now is the time to place them. See p114 for more about pipe runs in concrete and timber, and p104 for sanitaryware placement.
Wall build up
If you’re starting with bare concrete walls, you will have to choose between plasterboarding them, or plastering directly onto them.
Drylining might feel like you are squandering a precious few inches of your space, but it will allow you to bring supply pipework and cables to the sanitaryware throughout the bathroom. A gap behind the plasterboard can be a very useful channel in which to hide them.
Unlike wet plastering, plasterboard is an almost instant surface that you can paint or tile onto but in most cases, plasterboard on its own will take very little weight if you’re planning on hanging items like wash hand basins from it.
In that case you will need to build in sufficient grounds (usually timber reinforcement running perpendicular across the stud walls). When locating these grounds, don’t forget to make allowances for finished floor and wall levels.
Any supply pipes and cables you are planning to bury inside the walls, (and above behind the ceiling, which will often require one or more electrical points, for lights and sensors), must be laid before plastering/plasterboarding commences.
Test the pipes
When you have all the pipework laid out and are almost ready to cover up, test it! It doesn’t take long and avoids the much more troublesome experience of discovering a leak after the bathroom is finished. Take measurements from specific points or photograph where they are before you cover them up as you don’t want to put a nail through them later.
You will have to blank off the pipework anyway before anything else happens to prevent dust and bits of tiles or concrete getting into it, so go the extra step to at least connect up a hosepipe to the pipework and check it all over for leaks. If you’re slightly more diligent, rent a pressure test pump and make sure the pipework will hold the pressure for a while.
Boarding up
In circumstances where the floor is a concrete floor, a levelling compound may well be the only item required ahead of installing the floor finish.
For a timber joist structure, the selection of the floor covering is particularly important. In the case of a tiled finish, for many years a 9mm plywood board (or, according to best practice, at least 12mm) was screw fixed to the tongue and groove floorboards in order to allow for a clean, flat surface that would not move under the tiles.
It is now more common to have a cement board installed on the floorboards instead of the plywood, costing in the region of €/£15-20 per sqm. In addition to the cement board, and depending on the selection of shower setup, the majority of bathrooms will now also have a waterproofing material installed, whether in the shower area only or throughout the bathroom if it’s a wetroom (see p112).
While this may upset your floor levels at the doorway, you need that extra layer to strengthen and level the floor. The doorway floor level issue can usually be solved by cutting the saddle board in half lengthways. Getting your floor levels right from the start will save you the hassle.
If you choose wet plastering straight onto a concrete wall, it will need those extra few days to dry before you can attack it with tiles or paint.
Fixing the plasterboard to your ceiling and stud wall should be straightforward. In the shower area, rather than using ordinary plasterboard, use concrete board, marine plywood or green (i.e. water resistant) plasterboard. On top of these, and also if your shower is against solid walls, use an appropriate tanking or waterproofing layer before fixing the tiles or other finish.
Make sure the appropriate wall sheeting is used around the shower and that, in the area of the shower tray and around the bath, corners are kept to 90 degrees.
Second fix
You’ve now completed all the really hard work – planning and getting the bathroom to the stage where you have finished walls and floors with the supplies appropriately placed.
You should now have a nice smooth room with the occasional pipe and cable putting in an appearance in (to the casual observer), random locations. Your next step is, unless you are installing a free standing one, to fix the bath in position.
Get this right and make sure it’s perfectly level. When you’re in a hurry, it’s very easy to think that a bath that’s a few millimetres out of level isn’t going to be important. Depending on the design of bath, it might not be but, for most baths, those few millimetres amount to a bath that doesn’t drain completely and always has a little pond just to the side of the plughole.
Also, make sure it is set at the correct height for the bath panel (if you’re fitting one), not forgetting to take the floor finish into account. Bath panels can be incredibly tricky to deal with and the bane of many a bathroom fitter’s life.
Once the bath is very securely in place (do everything recommended and more to ensure this as they take a lot of weight and abuse!), you can now put an initial seal around it.
This is also the time to fit the shower tray. You may need to treat the shower area at this stage with your chosen waterproofing layer, or you may be able to wait until after the tray has been fitted. Again take great care setting the tray as, just like the bath, it needs to be exactly level. However, unlike the bath, any moderate indiscretions with the levelling of the tray will be punished as soon as you start fixing the shower enclosure in place.
Make sure you follow the manufacturer’s instructions exactly on how to fix the tray to the floor. Most trays need to be bedded in concrete (even some plastic ones), and bedding them in silicon can still allow some movement that you absolutely do not want. Once the tray is set in position, seal around it as appropriate for now.
Most baths and shower trays come well packed to avoid cracks and scratches. They also usually come with a thin, clear plastic protective layer that is often hard to spot. If present, at this stage only peel back this layer as far as you need for sealing purposes – you’ll realise why after the tilers and painters have gone.
Before the tilers/painters/floor layers arrive, make sure you cover the shower tray and bath with blankets and/or cardboard to protect against the occasional dropped tile or hammer.
Tilers will wipe down the grout as they go – if grout is let dry on the tiles, it will be very difficult to remove. Now you are very much on the home straight.
With the tiles and the floors done, all that remains in most bathrooms is to fit the basin, wc, heaters and similar items. It’s the moment of truth for your layout, and to find out if you’ve positioned the plumbing and electrics correctly.
The shower enclosure, bath screen and other accessories are usually the last bits. Fitting shower enclosures can be shockingly complex and, the sight of that medium-sized sack of different screws, washers, nuts and odd plastic bits tumbling out of the box is enough to send a cold shiver up many people’s spines.
Final check, clean and polish
After checking that everything is correctly sealed, doesn’t leak and works as expected, the final task is a thorough clean and polish to get rid of all the dust and grime. Clean the dust off your tiles with a dry cloth first; using a wet cloth will just push it around.
Maintenance
Don’t forget to look after your surfaces and regularly clean them, preferably with soapy water. With time, bleach and other abrasive cleaning products will do damage.
Wipe off water splashes (and condensation if you don’t have a strong enough fan) from your bathroom furniture to extend their lifetime. To avoid rusty radiators, avoid placing wet towels on them when they’re cold.
Then there’s what you shouldn’t pour down the drains, depending on your wastewater treatment system. Check that with your installer (for example, a single pint of beer poured down the drains can be harmful to the functioning of your septic tank because it has the same organic loading as sewage for one day).
Mains sewage is less particular but always read the labels, e.g. paint thinners shouldn’t be washed down the drains.
Top Tips
How can I keep the budget under control at the design stage?
Let your supplier know your budget. It’s easy to get carried away by what’s on offer in the showroom but if you only have a certain amount to spend on each bathroom, communicate that to your supplier. They will give you options to make savings, whether it’s a question of changing the shower door (there are different glass thicknesses, runners, heights), type of valve, etc. Sometimes you are paying extra just for the brand.

Secure the best deals early in the new year. Manufacturers tend to increase their prices once a year around February/March. For bathroom suppliers, the quiet period is December/January so that’s a good time to get bargains and secure a good price ahead of the yearly increase. Look out for tile sales too, which tend to run multiple times a year, as big savings can be made.
Chrome is standard. Anything non-standard tends to add to the cost, or cause delays. Shower doors come in a chrome finish, including the handle, as do most taps, wastes and overflow rings. If you want a black or gold finish, or brass or nickel, shop around early. It’s possible for you to spray them but that may not provide as robust a finish.
Bredgeen Harkin of McDaids Bathroom Plumbing Tiles, pjmcdaid.com


