You don’t have to spend a fortune to make your home airtight; here we look at airtightness installation tips and what common mistakes to avoid.
In this article we cover:
- Common reasons for failing the airtightness test
- The most cost effective ways to make your home airtight
- How to make blockwork walls airtight
- How to make wall to floor junctions airtight
- How to make windows and doors airtight
- Pros and cons of using plaster
- Experience using airtightness paints
- What is thermal imaging and why use it
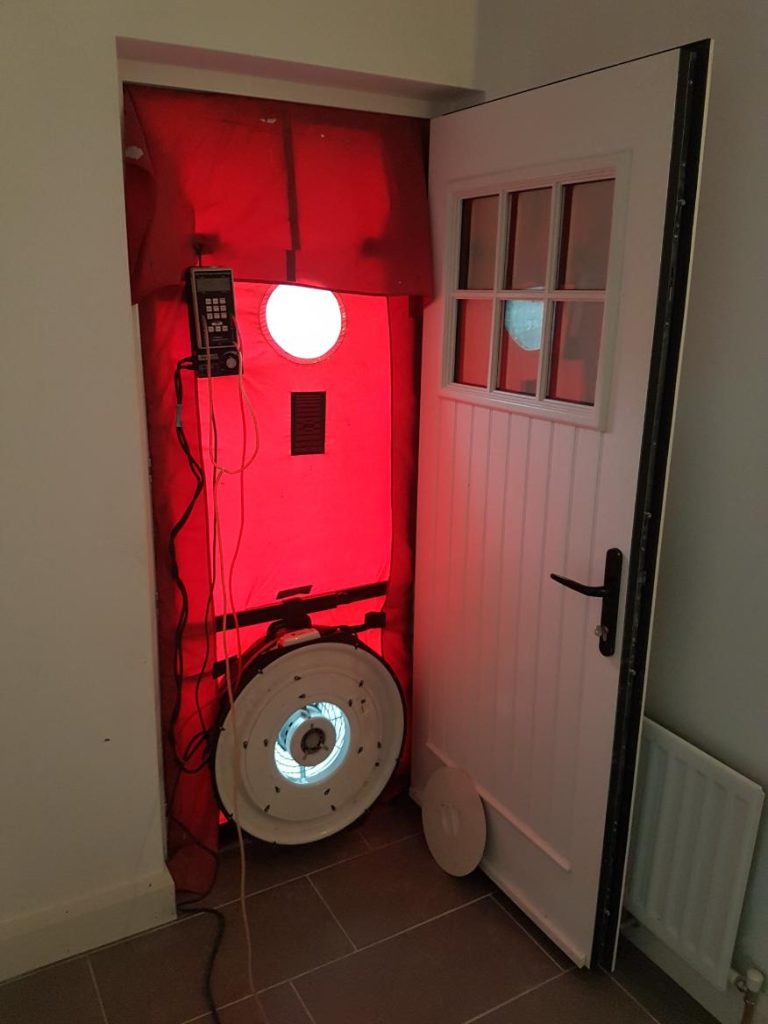
Sealing up your house to make it airtight, and to prevent any air leakages, is the key to building a home that retains heat in winter. Here’s what self-builders need to know about getting the airtightness right on site.
In your experience, what is the most common reason for poor airtightness test results?
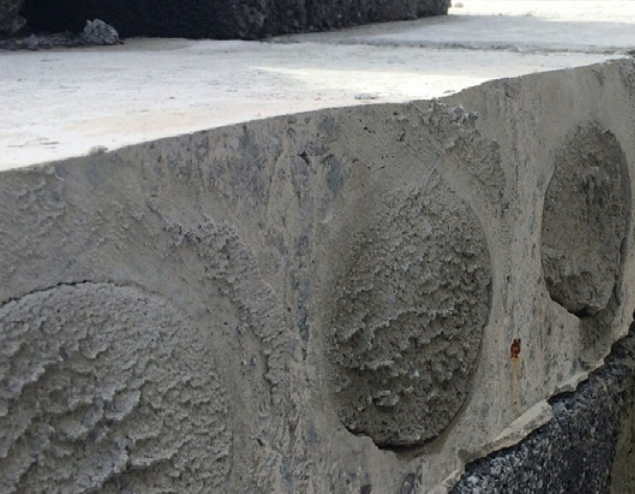
The biggest problem is the junction where the upper floor penetrates the cavity wall, where it sits on the internal skin of the cavity wall. That’s the biggest leakage point. It’s the one self-builders and contractors tend to forget about or don’t realise was going to be a problem.
It’s tricky to get right. Some use an airtight membrane around the concrete slab but it tends to rip as works take place.
You could seal the holes of the concrete slab with mortar or expanding foam, and the joints between the slabs with flexible mortar or expanding foam, but in practice that’s not foolproof. That’s why we developed our own proprietary system to deal with that junction.
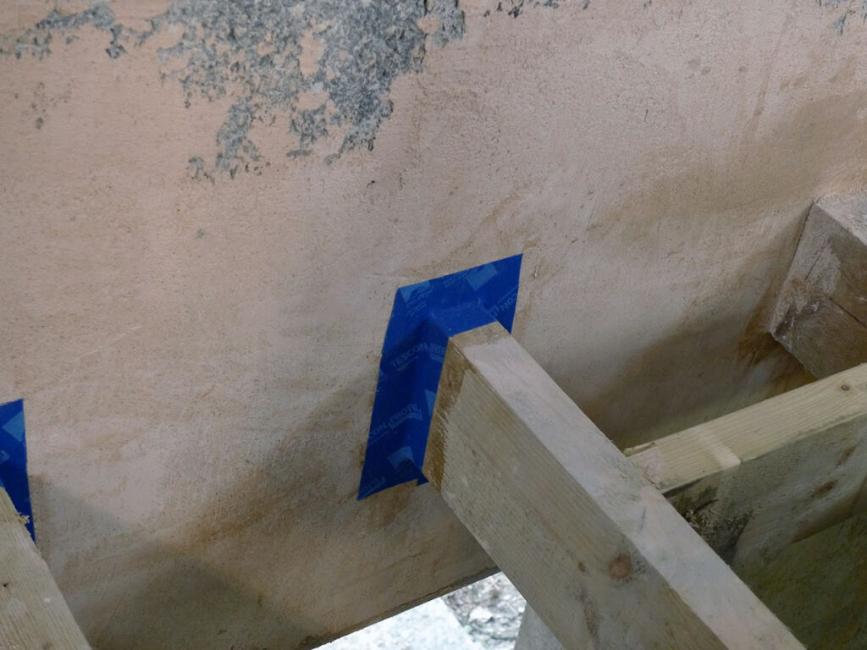
Timber joists can be sealed more easily, taping around each one and scratch coating between each joist, but it’s a time consuming job and equally prone to human error.
What’s the most cost effective way to make my home airtight?
On a block build, it’s not necessary to go through the expense of installing airtight membranes. You can achieve very good airtightness test results with gypsum plaster and standard sand/cement mortar, and get a result under 3 m3/hr/ sqm which is the threshold for an energy efficient home. I’ve seen homes sealed this way and achieving airtightness results of lower than 1 m3/hr/sqm.
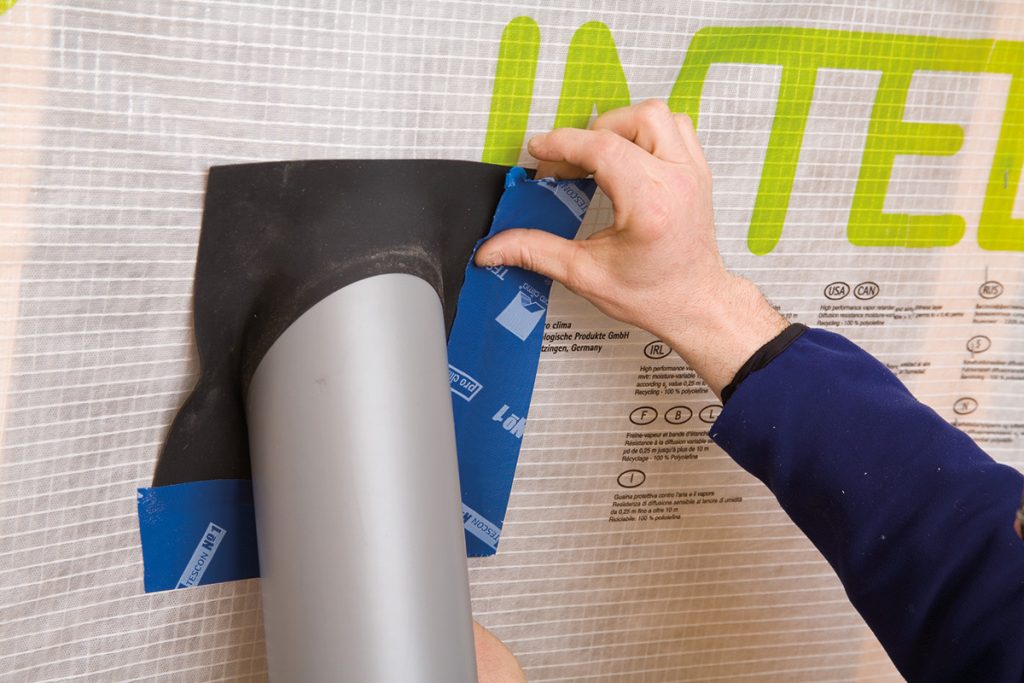
Many self-builders buy rolls of airtightness membranes and tapes to seal up their home, but buying the material alone doesn’t guarantee a result. Architectural designers don’t necessarily provide details of how to install them.
For membranes to work, they need to be continuous, any penetrations made in the membrane render it useless. All building services should remain within the airtight envelope, if at all possible e.g. a service void between the plasterboard ceiling and the underside of the airtight membrane.
For a timber frame house, a service batten is considered good design so the membranes work really well. We test a lot of near zero energy buildings (NZEB) and passive houses, and most builders go for timber frame because it’s easier to get them airtight prior to plasterboard and plaster.
An ICF house is inherently airtight so there are no additional measures to take apart from at the openings for things like windows or vents.
What’s the best way to make blockwork walls airtight?
Best practice is to scratch coat the internal leaf of the blockwork before you skim or dryline it. Then make sure all sockets, and anything else that’s chased into the wall, are bedded in mortar.
The scratch coat is important to seal the pores in the blockwork, which would otherwise allow air to pass through the cavity during the blower door test and come out at skirting board level and through switches.
Bedding all conduits in mortar (as they enter the attic) is good practice and prevents air from the cold roof space travelling down the track in the blockwork and entering the building via electric sockets. The plastic face covers won’t stop this air from getting through. Bedding the socket box in mortar is also useful for stopping fine air leakage through the blockwork directly behind.
If you’re planning to install plasterboard (insulated or not) on the internal leaf of your external cavity wall, make sure to put up the plasterboard for the ceiling first. It’s usually done the other way around. If you put plasterboard on the wall first, air from the cold roof space will come down behind it and during the test you’ll feel it coming into the room via gaps around the skirting board or sockets/ switches.
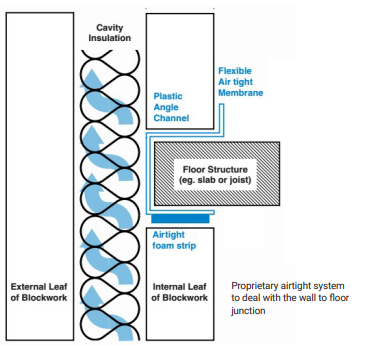
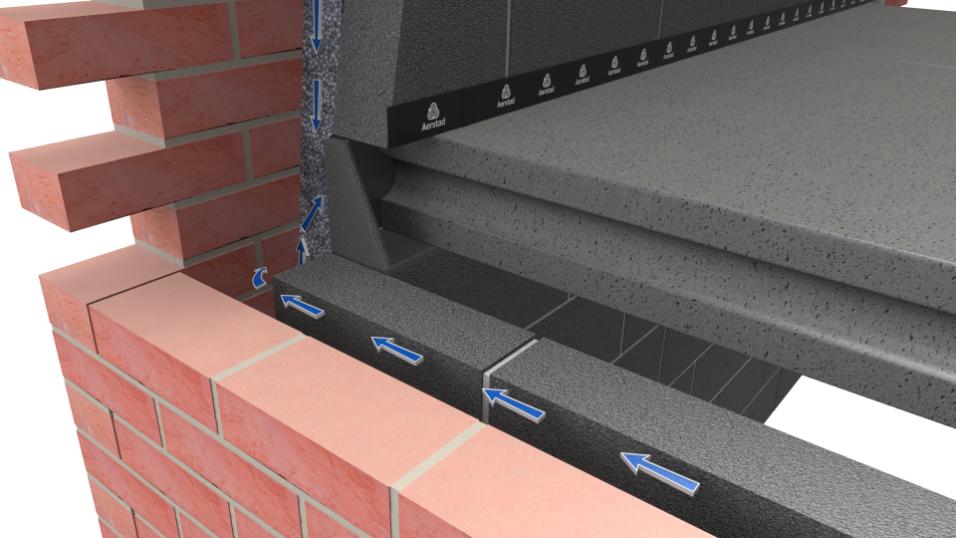
Where the cavity wall meets the upper floor
Poor airtightness test results are often due to the junction where the upper floor penetrates the cavity wall. Here are three ways of dealing with this tricky junction:
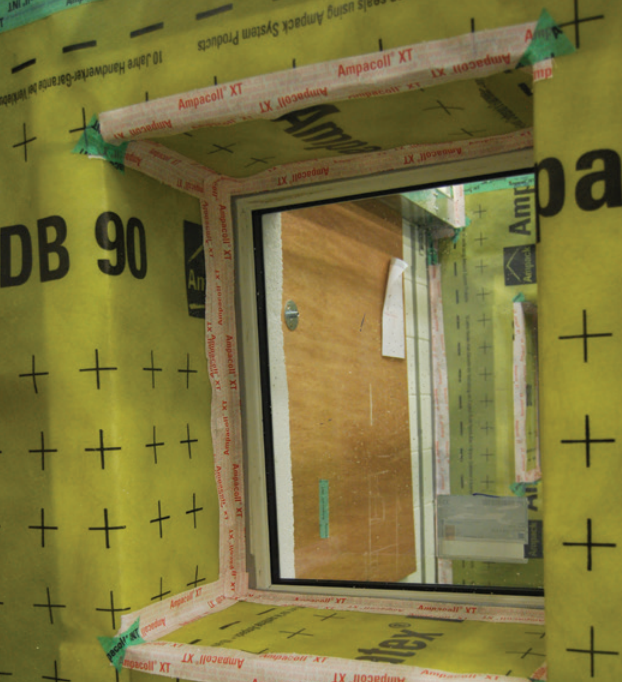
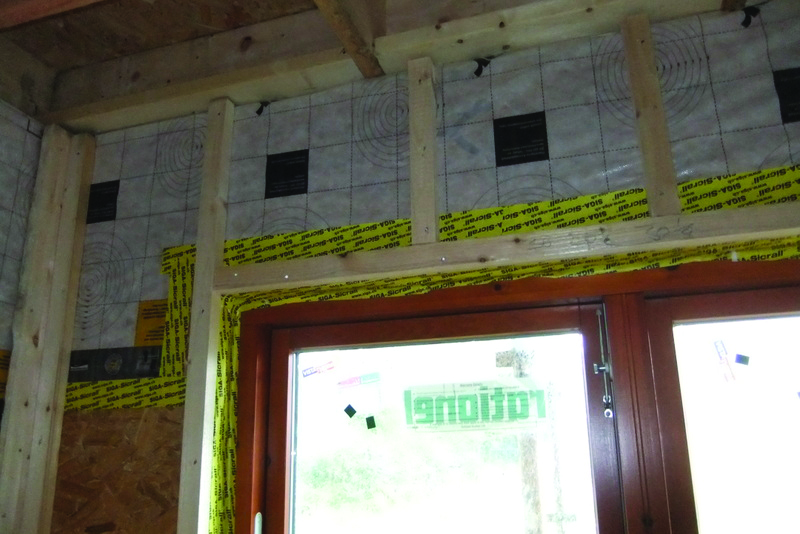
What’s best practice around windows and doors?
If you’re looking for a really good airtightness result, for a passive house I’d advise to tape around all four reveals of the windows, making sure your plaster is coming in tight to the tape so you seal that joint completely. If you’re looking to hit an airtightness of 3 m3/hr/ sqm, using the tape around the windows isn’t really necessary. Just seal all four reveals with plaster/ skim.
How about at attic ceiling level?
The same principles apply, you can either go with the airtight membrane method or rely on the plaster/ skim finish. A plasterboard ceiling that’s properly drylined or skimmed, is going to be airtight. Any penetrations in the plasterboard can be sealed from above e.g. for spotlights, it’s good practice to install proprietary airtight hoods above the light in the attic. There is no need for airtight membranes when you install properly sealed plasterboard.
Many builders and self-builders put an airtight membrane on the underside of their ceiling joists and put a board directly onto that membrane. Then they’ll cut out holes for spotlights or cables and destroy the integrity of the membrane. If that’s the way they’re going to do it, they’re better off not putting it in.
Again, if you’re going to use an airtight membrane, you must incorporate a service void beneath the ceiling / within the walls, so you’re not penetrating the membrane. If you go with a membrane you don’t need to make the plasterboard airtight, i.e. no need to install hoods.
If the airtightness installation relies on plaster, won’t it eventually crack?
Yes, but if you allow the house to dry out slowly the cracking should be minimal and can be easily repaired. Unless there is a underlying issue like subsidence.
So yes, for testing purposes and proven longevity, the airtight tape is the best solution. But in most cases the plaster won’t crack around windows more than a millimeter, which is minimal. Therefore I don’t believe you’re ever going to get the payback from the membrane, in terms of material cost and the time it took to install it.
How have airtightness paints performed in your airtightness tests?
They’re certified so there’s no reason for them not to work. But in my experience, just brushing the paint onto a wall doesn’t do the job. It seems the way to do it is to spray it on, and to apply the correct quantity. To make sure it will work, I’d advise using a contractor who’s qualified to apply the product.
Additional information: Aerstad, aerstad.com for the junction between floor and wall; Thermahood, thermahood.com for downlight covers.
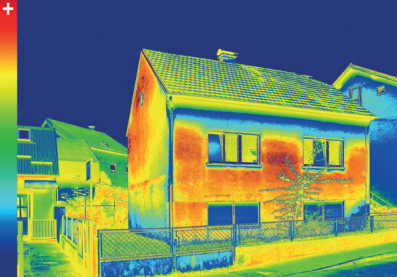
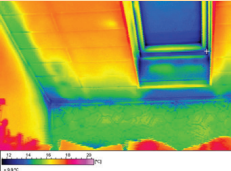
What about thermal imaging?
It’s a thermal photograph of your home that checks for air leaks, meaning it shows up weak points for insulation and airtightness. It’s a way to check the insulation that a contractor has put in, say expanded polystyrene (EPS) beads in a cavity wall, has been done correctly.
But building control and assigned certifiers don’t require a thermal image so most people don’t bother going to the expense of getting one done. As a result, there aren’t that many companies that supply that service anymore. The only thing with it is you need to do the test in winter, to get your 10degC temperature difference between inside and outside. That could be why it’s not mandatory; it can’t be done for parts of the year so they’d have to wait on the test to sign off.