
In this article we cover:
- Renovation process from start to finish, over a period of three years
- How the project was managed and budget kept in check
- Planning process because it is a listed building
- Design process and furniture choice to maximise feeling of space within small footprint
- Insulation strategy
- Dealing with differences in floor levels
- Demolition work
- Plumbing and rewiring
- Angled kitchen design with flatpack DIY installation
- Thrifty staircase design
- Dealing with asbestos
- Choice of heating, ventilation systems
- Full specification, floor plans and supplier list
- Before photos and Professional photographs of the transformation
When Ian bought a rundown property in the midlands, all he could think of was its potential. “I wanted to do something for myself and this seemed like the perfect opportunity,” he says. Ian had learned how to draw and design houses in school – he was in the second stage of his architectural studies at the time – so the beginning of the journey was much more exciting than it was daunting.
It even had a bit of magic to it: “There’s a parallel with Newgrange, the front faces south and the first floor windows provide the most direct sunlight which goes deep into the house and joins the rear garden.” But Ian had actually learned how to carry out most of the DIY tasks he needed for this very special project during his childhood.
Overview
House size: 95 sqm
Site size: 193 sqm
Build cost: €35,000
House value: €250,000
“Dad was a carpenter and we were always working on something at home, he showed me all his tips and tricks,” he recounts.
“My dad is now a construction manager and during the build he kept me aligned with the plans and most importantly the budget. He helped from start to finish – the build itself lasted just over three years then more time to put the finishing touches.”
Historic building
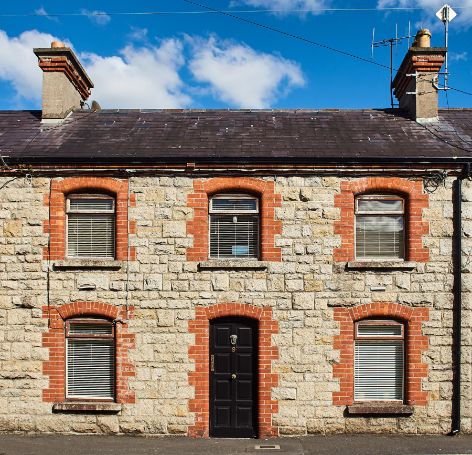
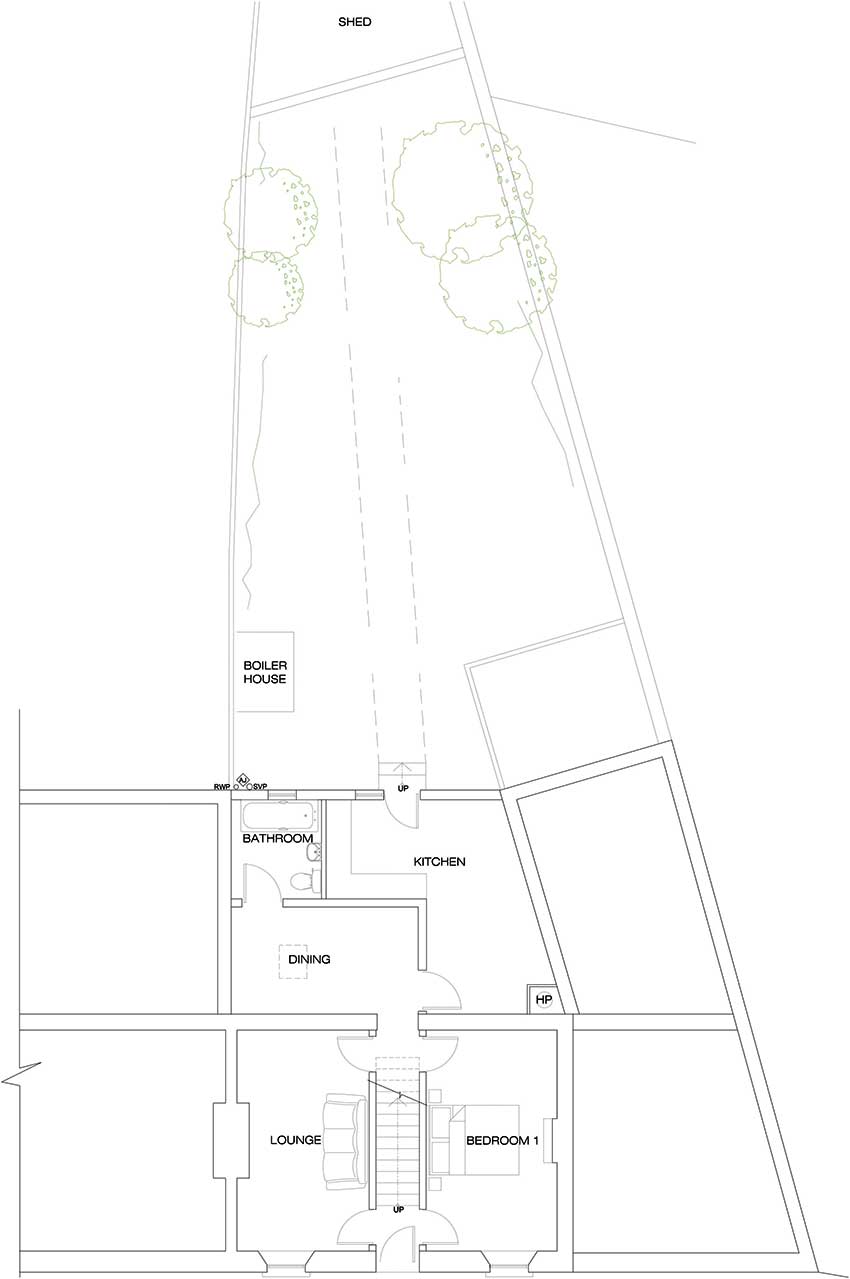
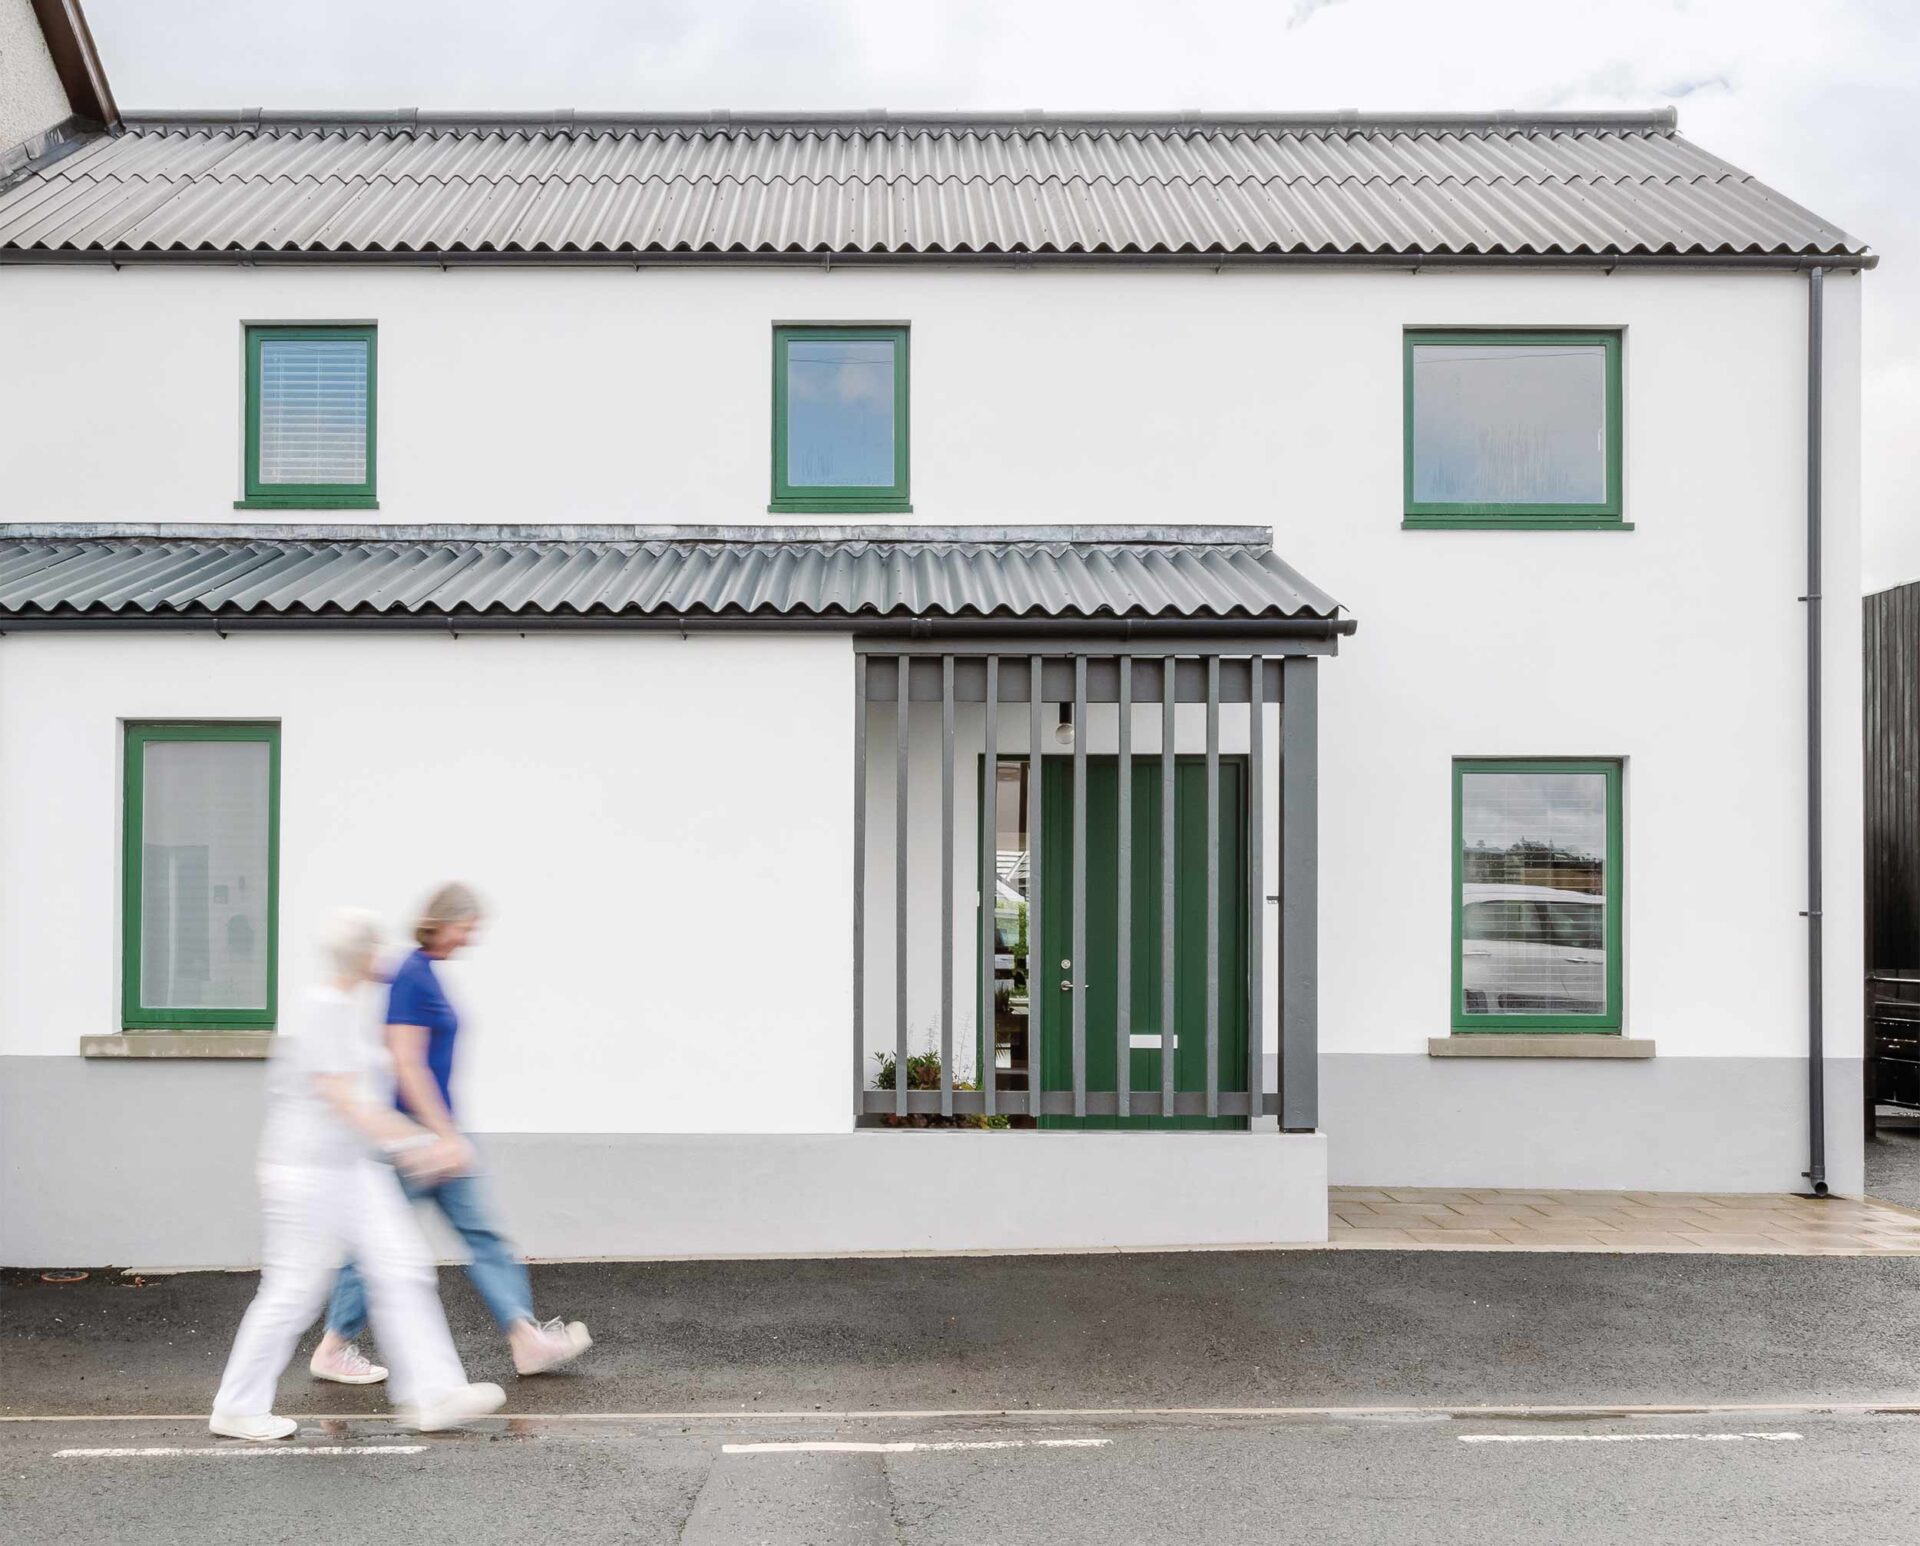
The front façade is listed to retain the integrity of the streetscape. Built in 1897, the granite and limestone walls contained a relatively simple two up, two down layout. “There are nine terraced houses on the street which are all protected buildings so I had to file a Section 57 notifying the local authority of the works I planned to carry out; they responded with a letter outlining what was permissible.”
Ian met with planners, then the neighbours to tell them what he was up to. “There were no issues with overlooking or over shadowing but I wanted to let them know I’d be working on the house; the only real disappointment in terms of planning was not being allowed to add a conservation roof light at the front of the house, which is south facing.”
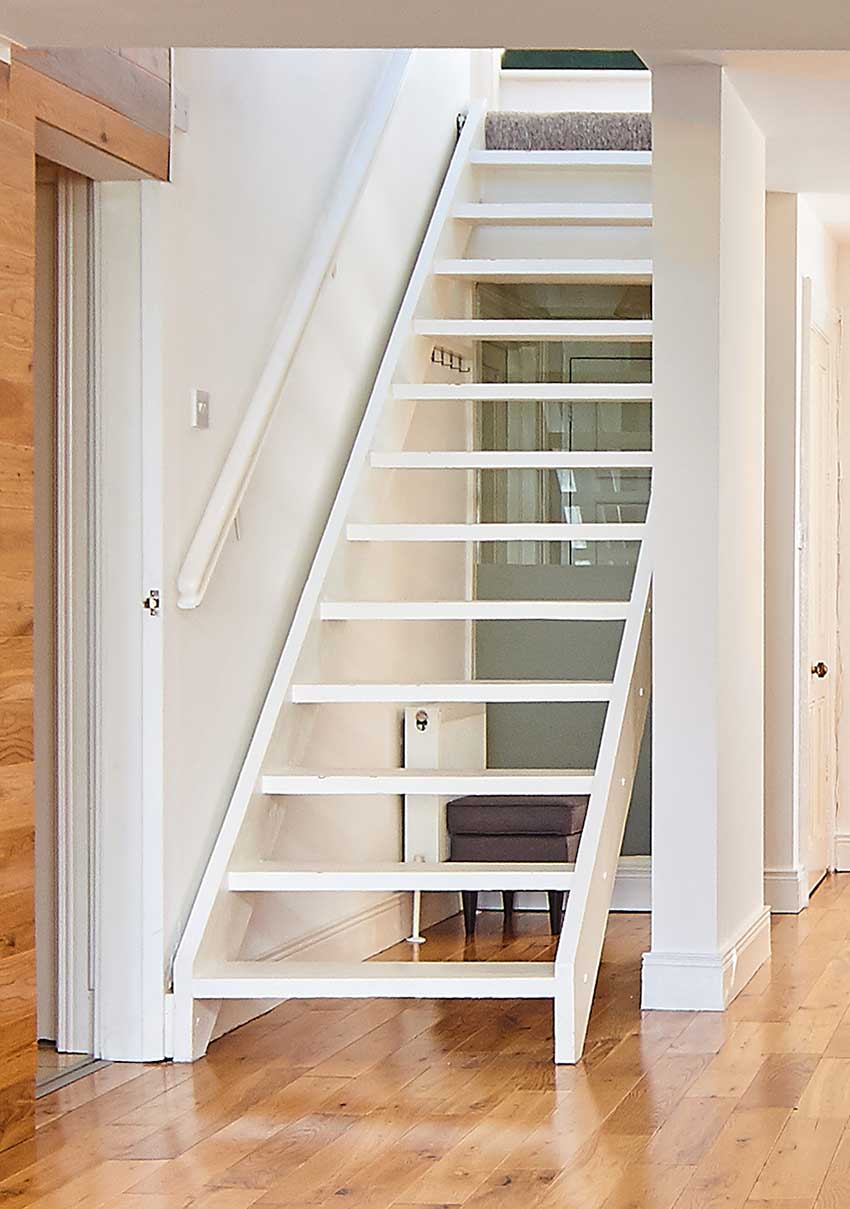
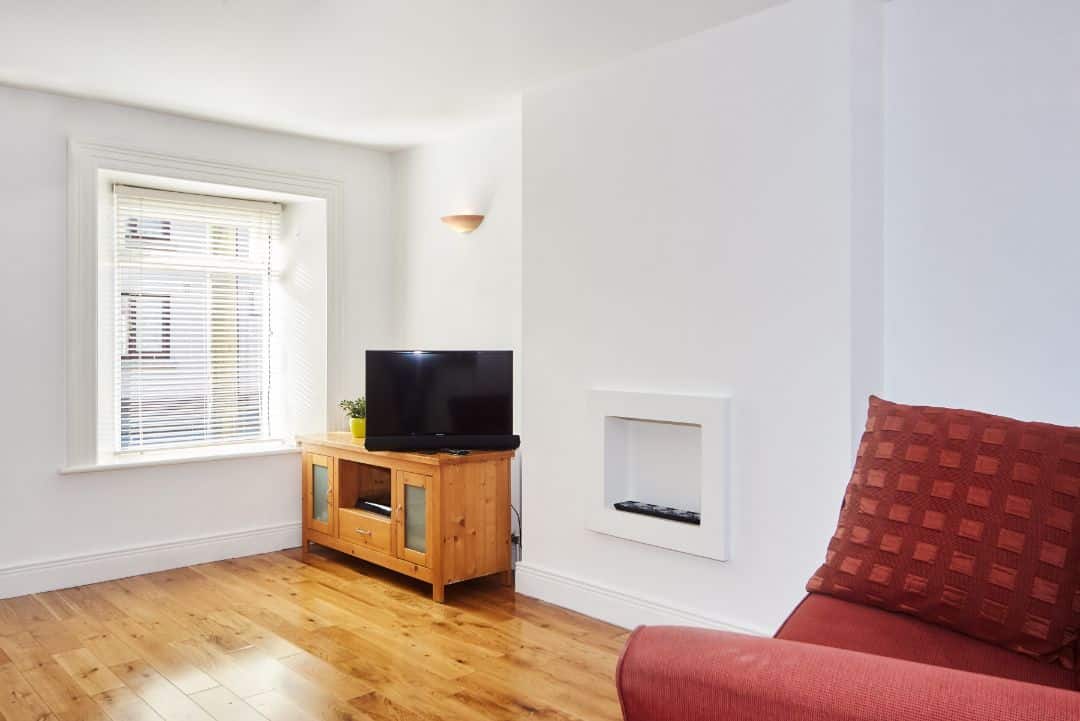
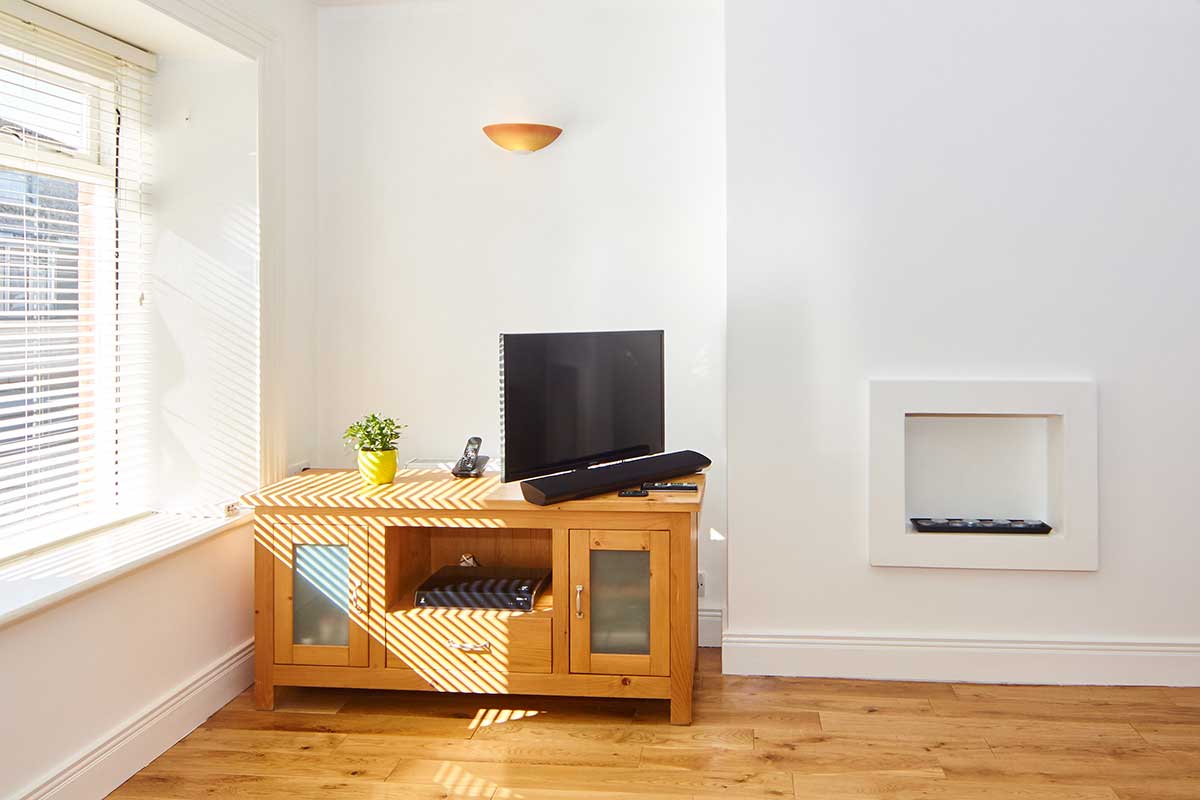
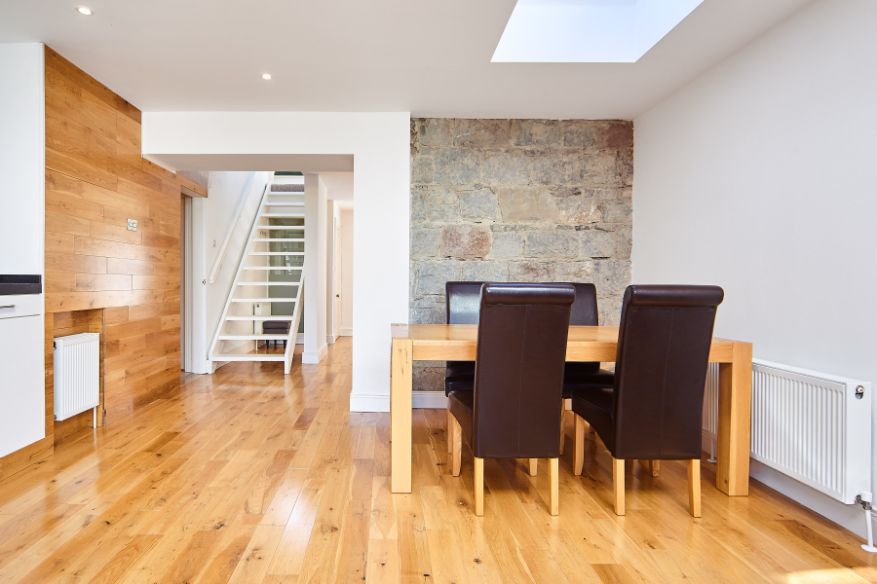
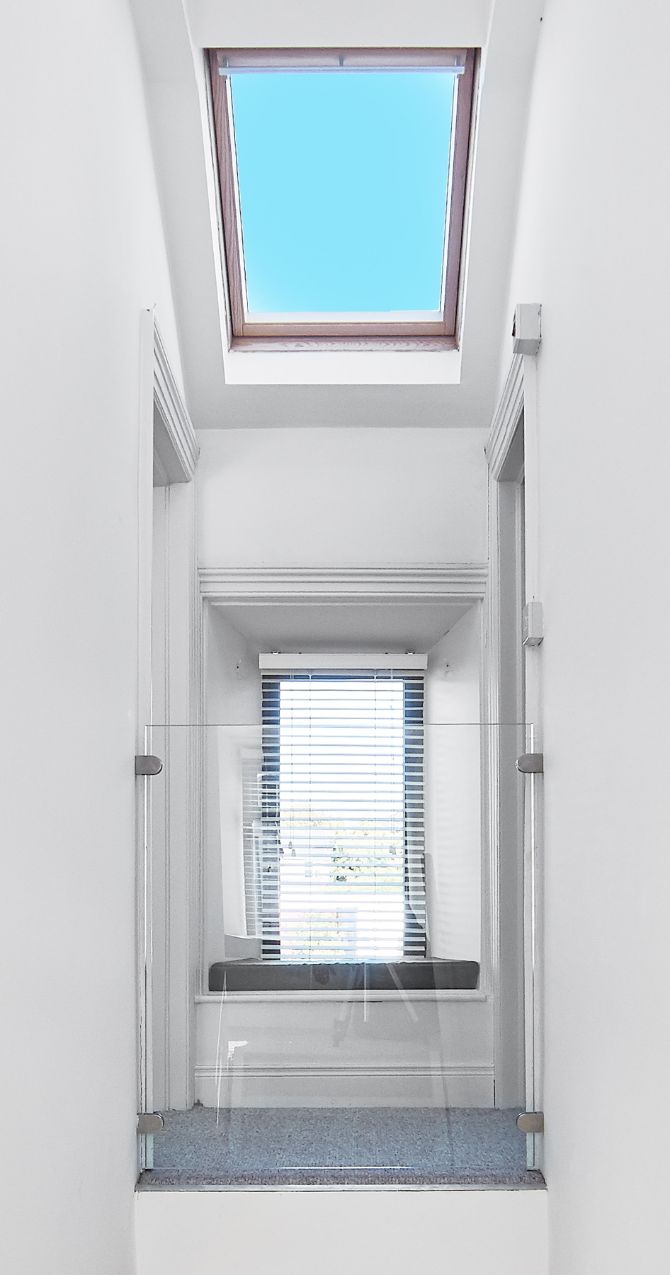
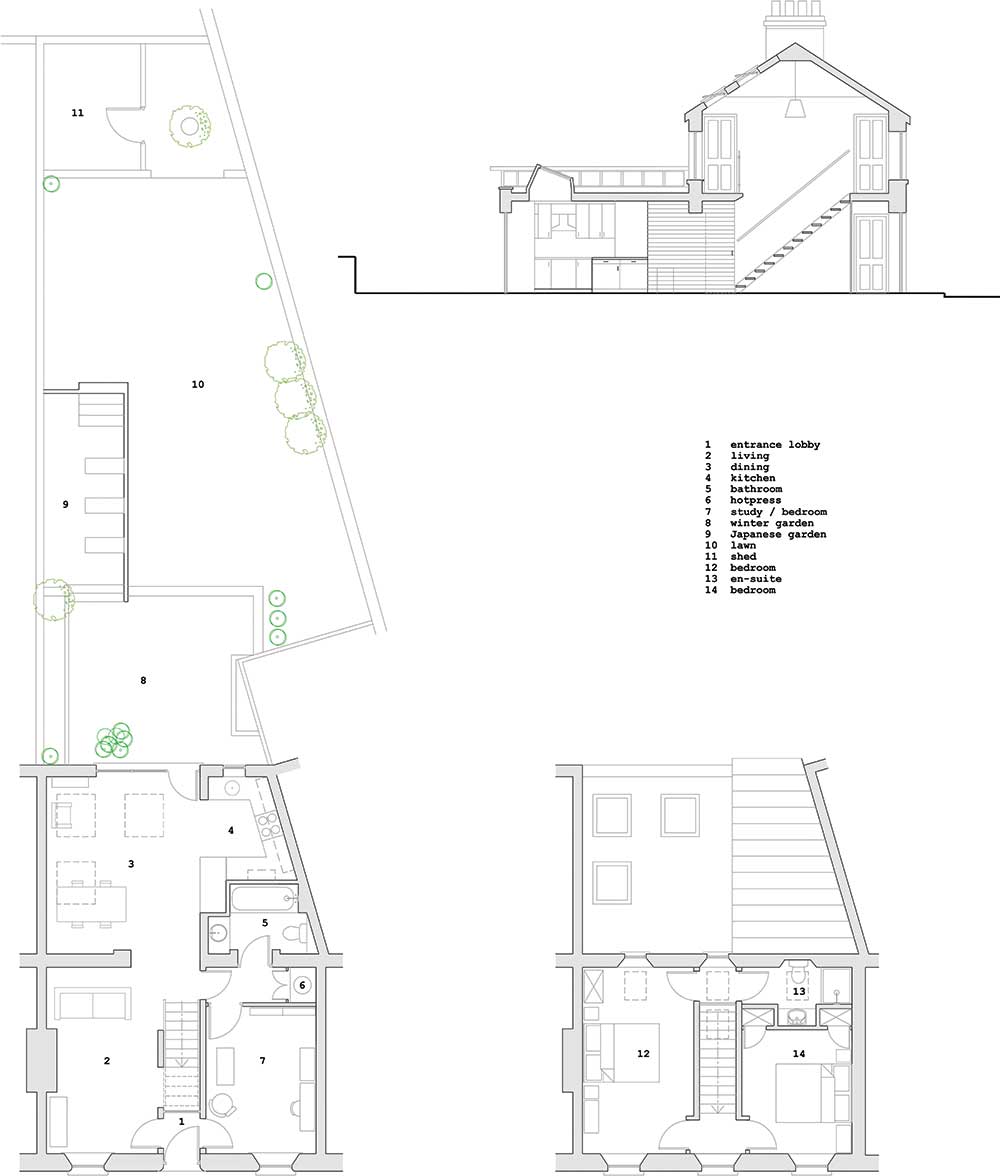
To maximise the amount of direct sunlight he could get into the house, Ian decided to flip the stairs – accessing them from the open plan area instead of at the front door. “We were then able to add roof lights on the garden facing side of the pitched roof,” he explains. To achieve this a new landing had to be created on the upper storey, which not surprisingly formed part of the bigger picture.
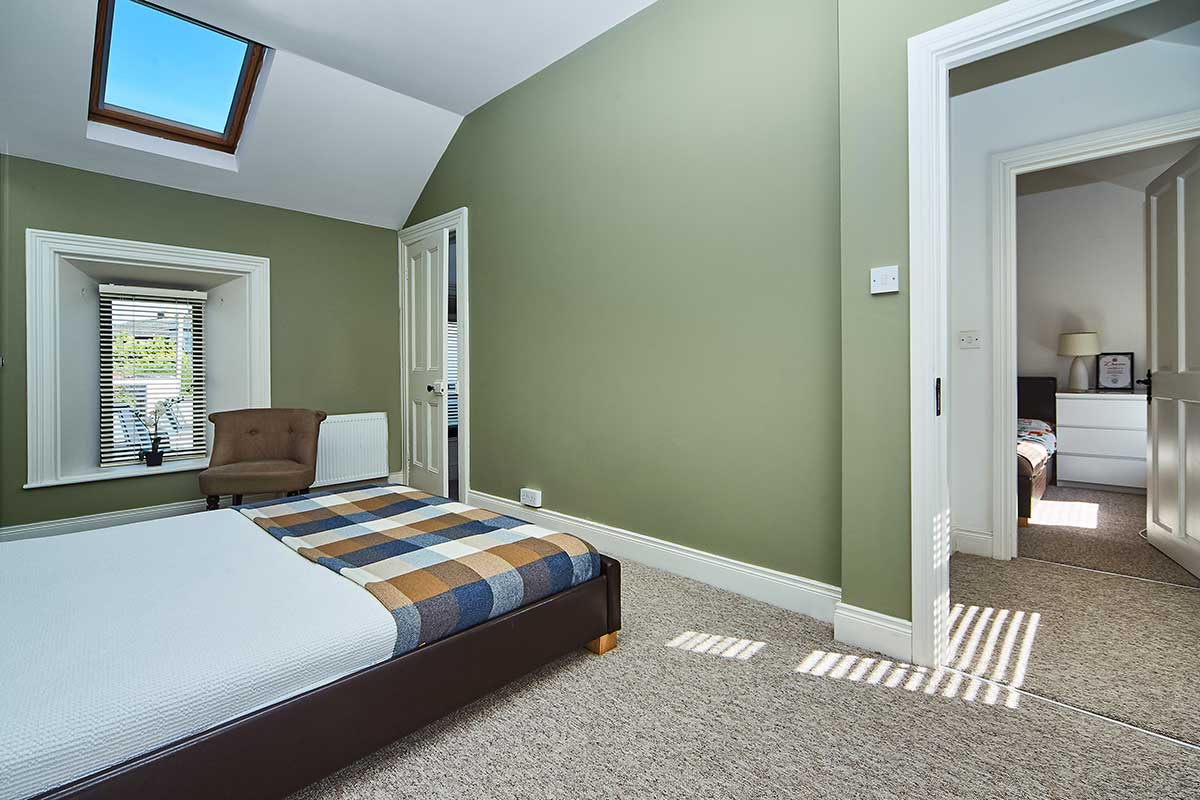
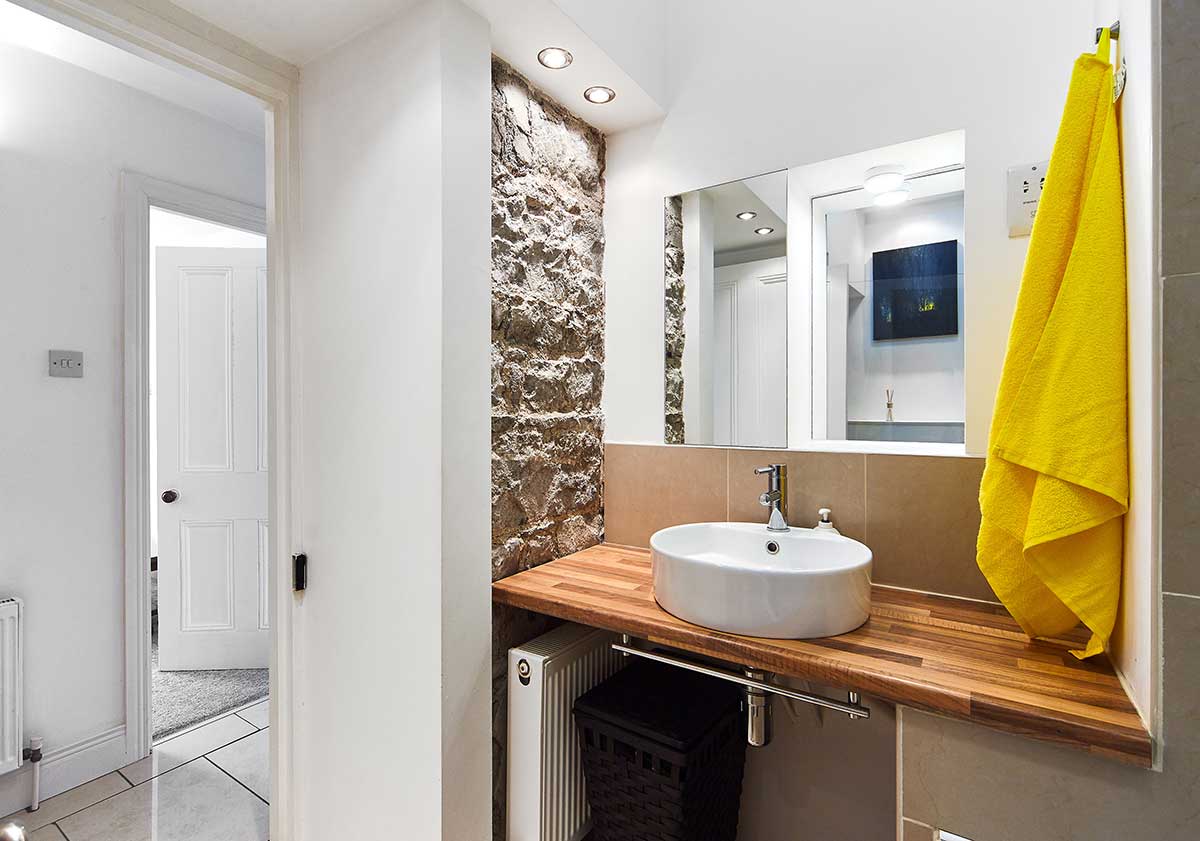
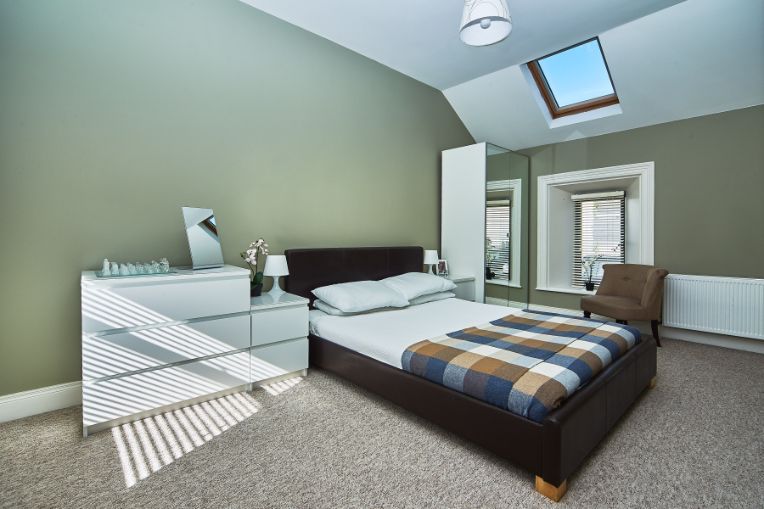
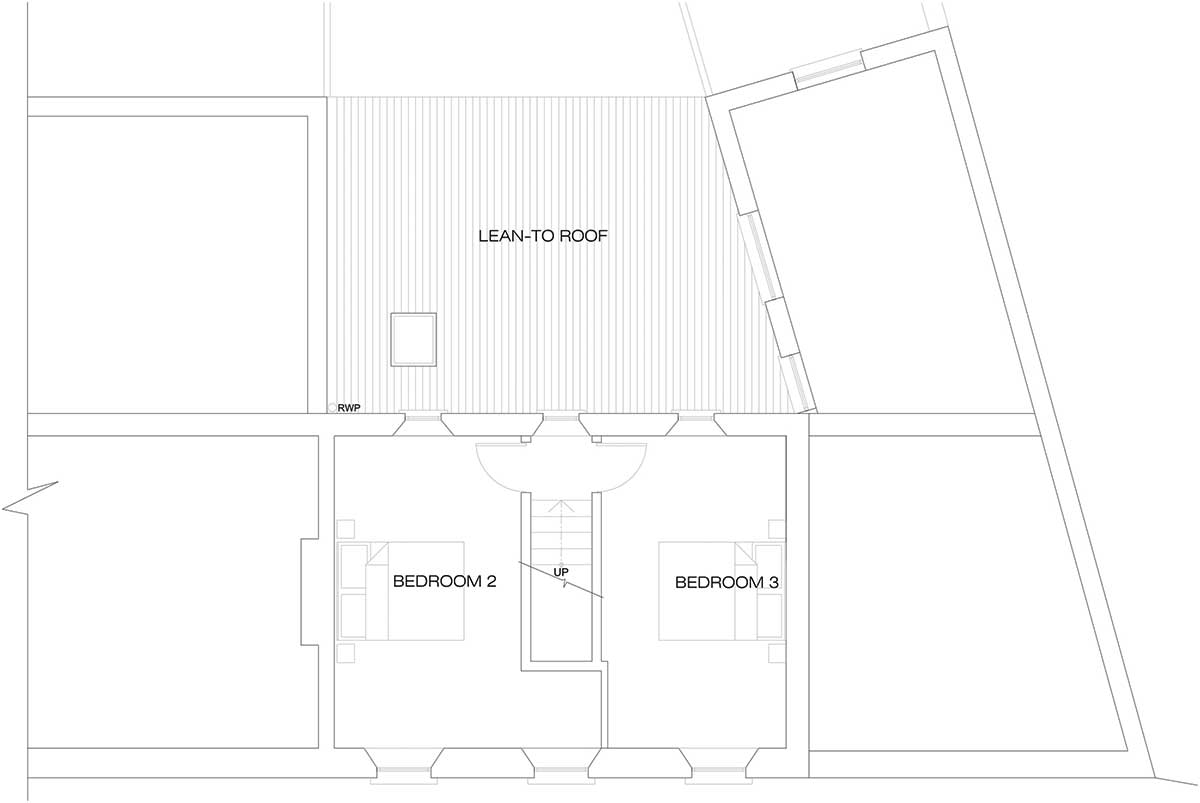
“A great method to increase the sense of space in small areas is to add height; we used a portion of the extension to add more head room and lifted the ceiling in the kitchen and bathroom giving the opportunity to introduce a string of high level windows and infill between the lower level roof.” Upstairs the raked ceiling was maintained which lends intimacy to the bedrooms and ensuite.
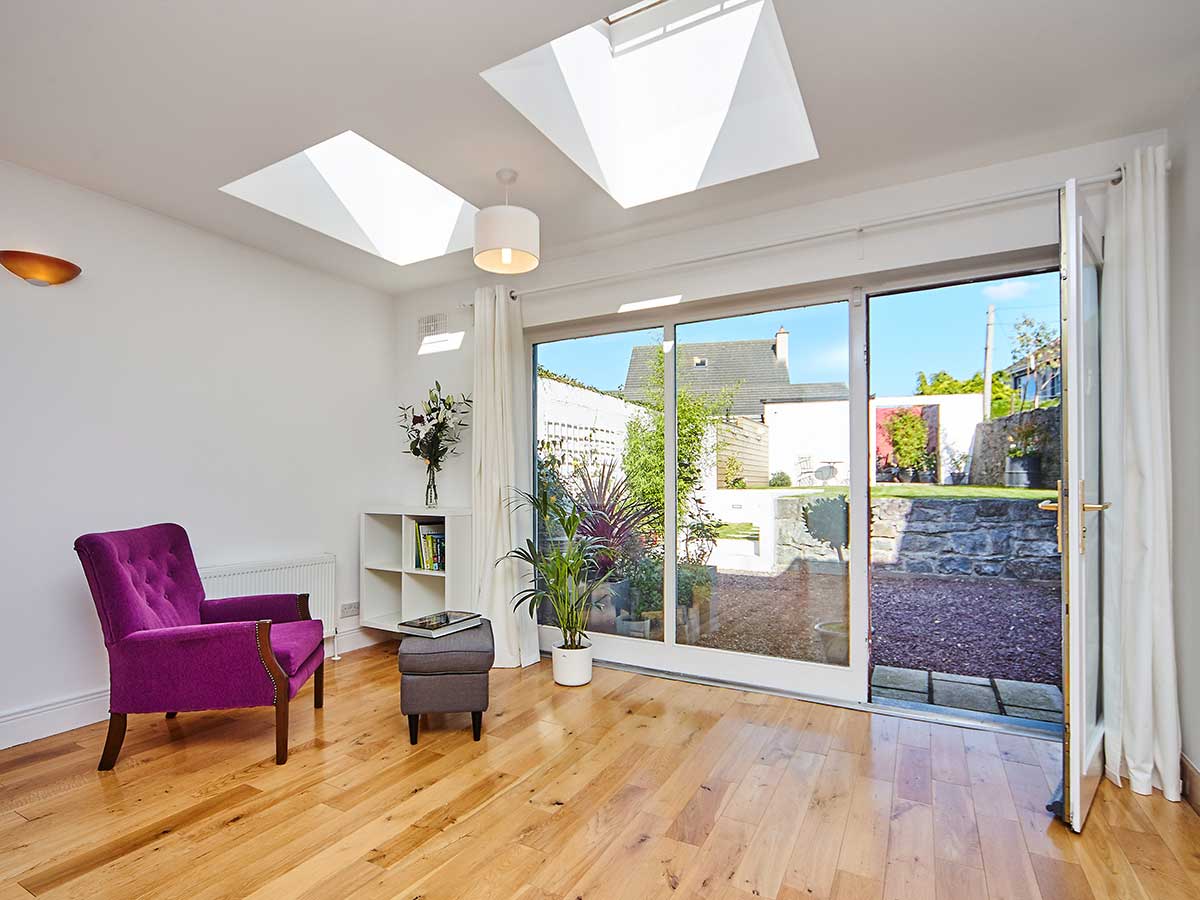
Despite not being allowed to bring as much light as he wanted to the front of the house, Ian made up for it at the back, adding three roof lights to a flat roof extension.
One of the challenges to adding an extension was the difference in floor levels. “There was a big dip from the front to the back of the house so we did some work to make sure the ground floor was level throughout.” “To achieve this we retained the existing slab at the front of house and used that as our benchmark, (allowing for the thickness of timber battens and timber floor), then we excavated the existing concrete slab at the back down about 400mm and installed a new floor with insulation.”
A different kind of challenge came in the form of finding asbestos. “We recognised it straight away, having worked on farms, so it was quite straightforward to deal with even though it was a big cost to get it taken away. It’s an expense you just have to resign yourself to paying, it’s too dangerous to go near that stuff,” says Ian.
“A great method to increase the sense of space in small areas is to add height; we used a portion of the extension to add more head room…”
DIY renovation
“I bought the house in 2006, at the time I was working in Dublin and houses there were expensive, I searched around and this house in Carlow was within my mortgage approval budget. I was lucky enough to find a job in Kilkenny and move down there. In my mind this was my only way of getting onto the property ladder and becoming a homeowner,” adds Ian.
“I was living in the house during the whole process – it was very dusty, especially in winter when I was less inclined to open the windows.” The old walls they removed to build the extension and reconfigure the house were lime plaster and lath, which also created large volumes of rubble.
The building work was done during his spare time; first the demolition and stripping out on his long weekends and holidays with his dad and then the building work which only required the assistance of a small number of trades such as a block layer, plumber, plasterer, and second fix electrician.
Ian also enlisted day labourers to help him load the many skips that needed filling. “I was lucky in that the new extension consisted of infilling between two houses, living in a terraced house we have party walls on either side.”
“It’s actually very energy efficient and I think we benefit from having adjoining neighbours, also being south facing at the front, we now get plenty of solar gain thanks to the internal reconfiguration.”
During the construction phase, this also meant there was no rear access point. “The house fronts directly to the street and the existing staircase leading to the upstairs bedroom had to be demolished to help speed up the delivery of materials and equipment to the back of the house where the extension was being built.”
“We needed a straight route,” explains Ian. He used a ladder to get to bed every night, until the decision was made to build a moveable, temporary staircase which could quickly be taken out of the way, as required, with minimal effort. It was positioned with the reconfiguration in mind.
“That was one of the first jobs we started, and worked really well, it only took two people to move the staircase.” Once sanded and painted, this temporary access was eventually kept as a permanent solution. And so, in 2008 they had demolished the back of the house, built and sealed the new extension.
“Around that stage I was made redundant and spent eight months unemployed at the height of the recession. This is when I did the majority of the work on the house. Achieving the balance was challenging – it’s either time you have, or money but seldom both.”
“It’s a very energy efficient house and I think we benefit from having adjoining neighbours, also being south facing at the front, we now get plenty of solar gain thanks to the internal reconfiguration.”
His next move, to Canada for two years, wasn’t about to detract him from his task. “I returned twice a year, a couple of weeks at a time, and even though progress was slow I was reluctant to rent out the house.” Next up was Kazakhstan.
“I got a job on an infrastructure project in the oil and gas sector, it was a rotation based contract. I was six weeks there and two weeks home; I’d do work on the house on my visits.” At this stage he had received his Part 2 Architecture diploma and by the year 2013, he’d moved back to Ireland to put the finished touches to the house, and put down roots.
Small and spacious
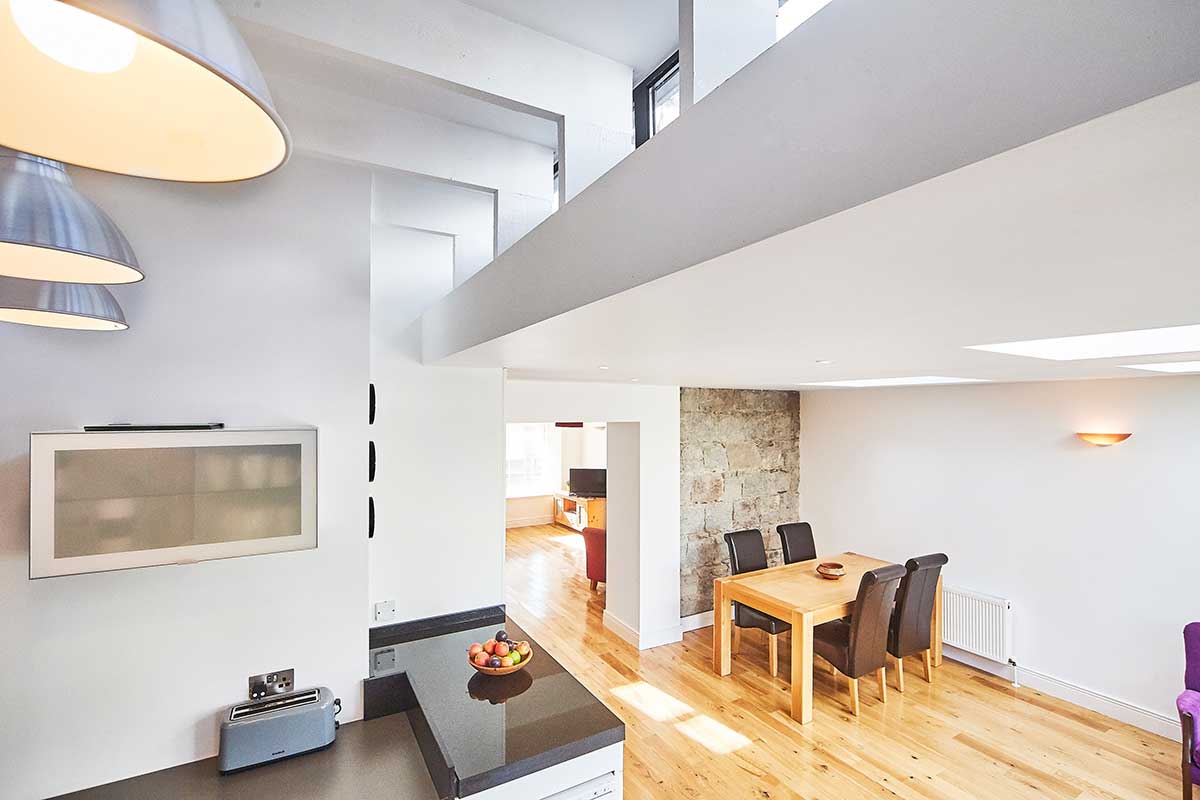
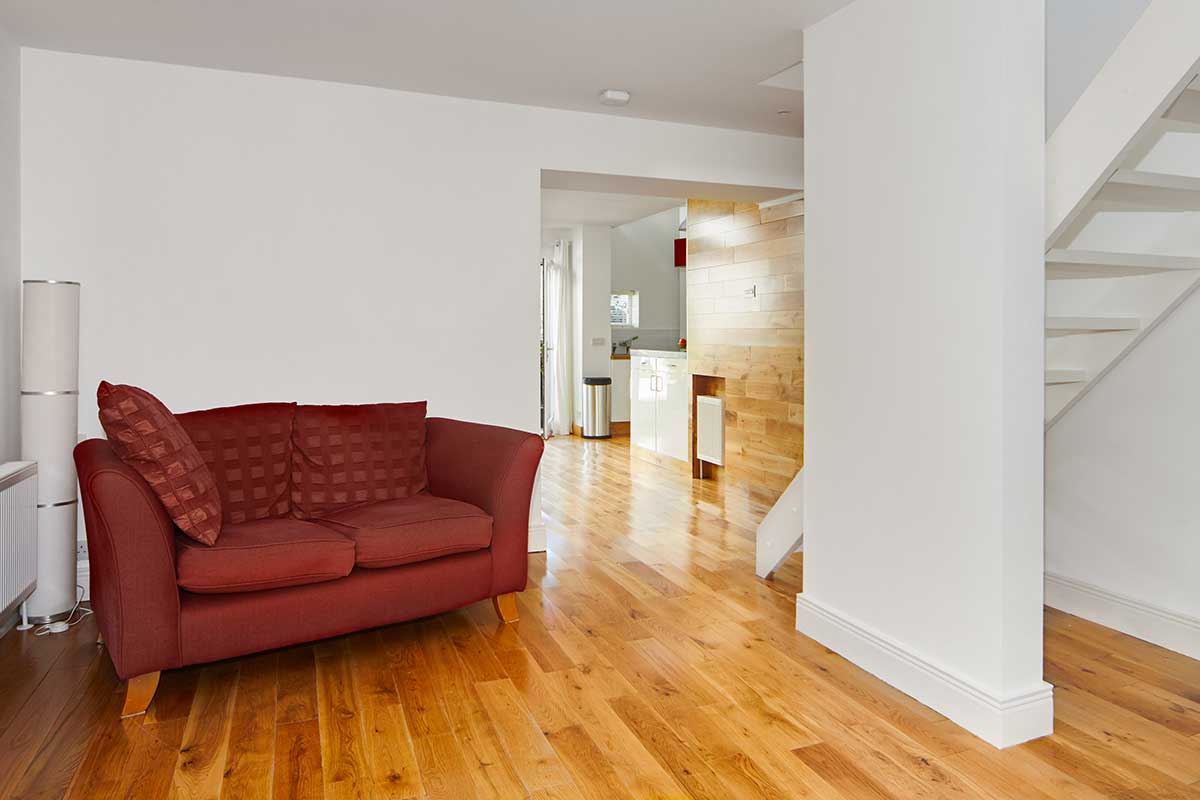
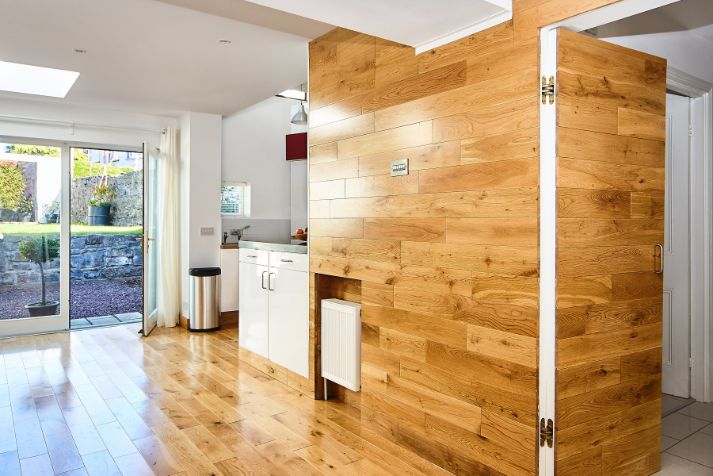
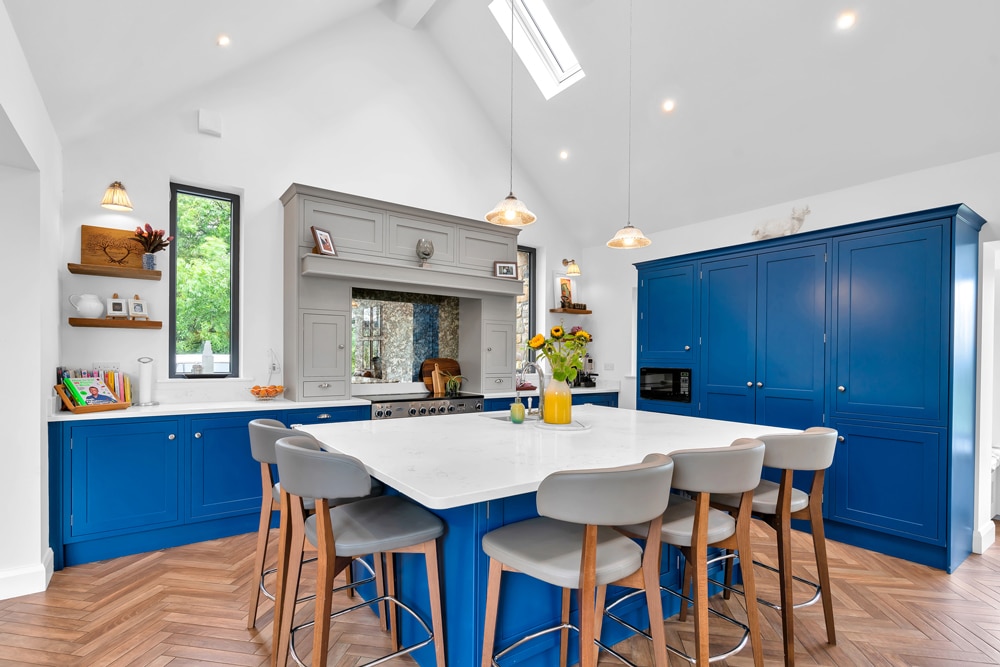
“It’s a small house so the aim was to increase the feeling of space, flexibility and novelty which was the reasoning behind the big open plan area. I wanted to create a flow,” explains Ian. And yet the open space also provides comfort and an element of fun, enclosed as it is with textures that are used in a somewhat unconventional way.
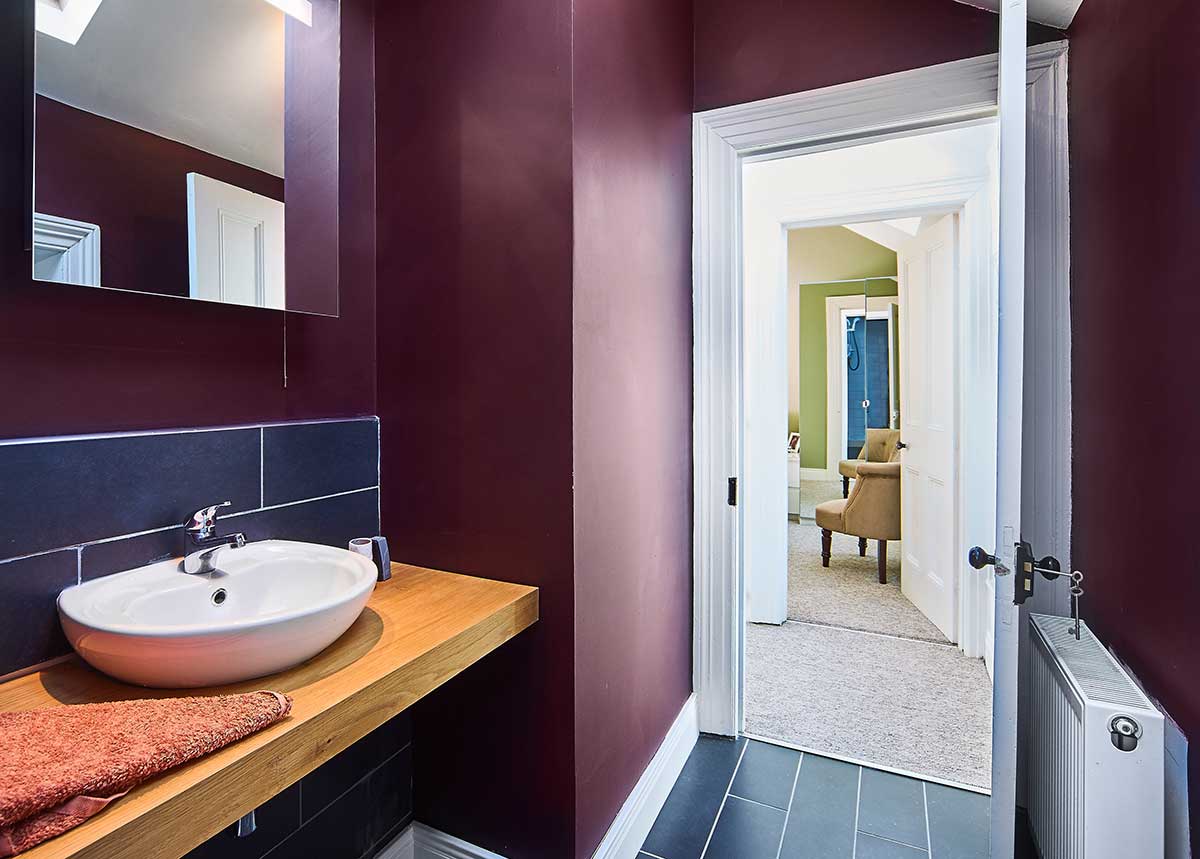
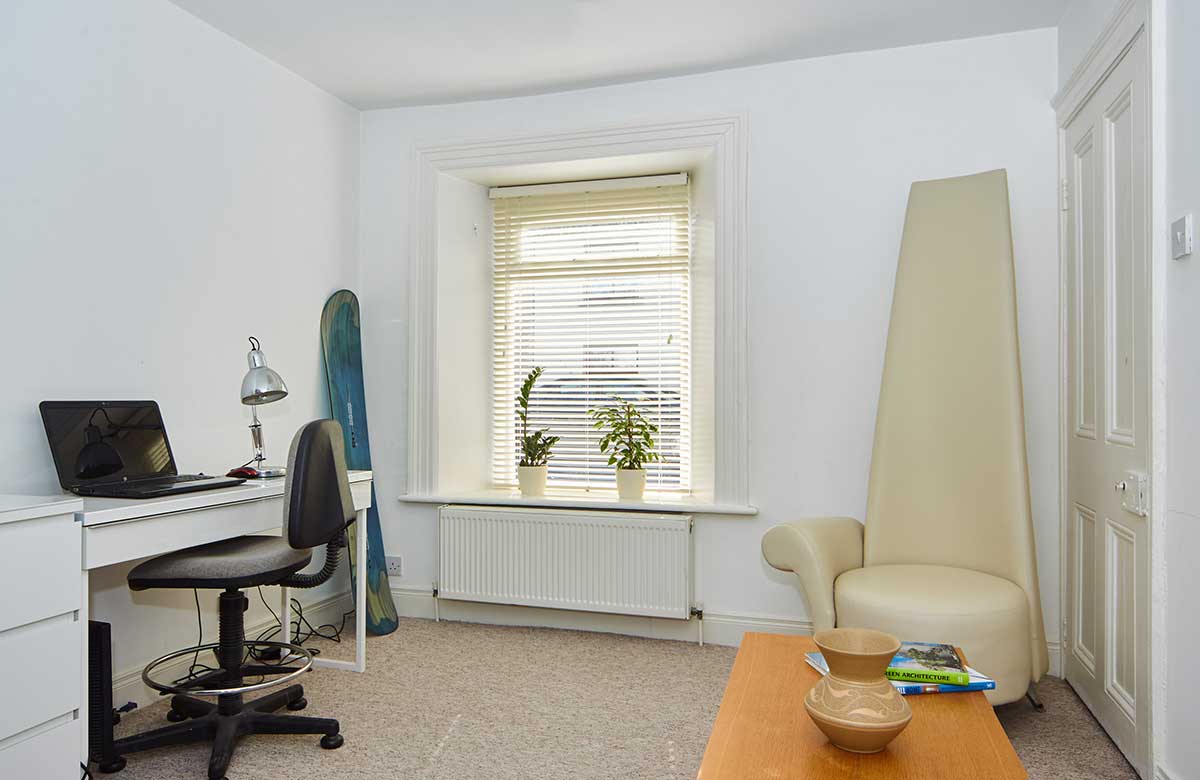
“I wanted to layer the rooms with materials, provide details and interest. The solid oak flooring was wrapped up the wall; there’s also a secret door to the study/bathroom space. Most visitors like this idea and are tricked into further rooms within the house.”
“With small spaces it’s all about adaptability, and the dining table we have is what’s working best for me at the moment as it can be positioned in three different locations.
“During winter we tend to locate it close to the exposed stone wall and in the summertime we move it next to the window. Although I do now wish I’d added another roof light to the extension, just for symmetry.”
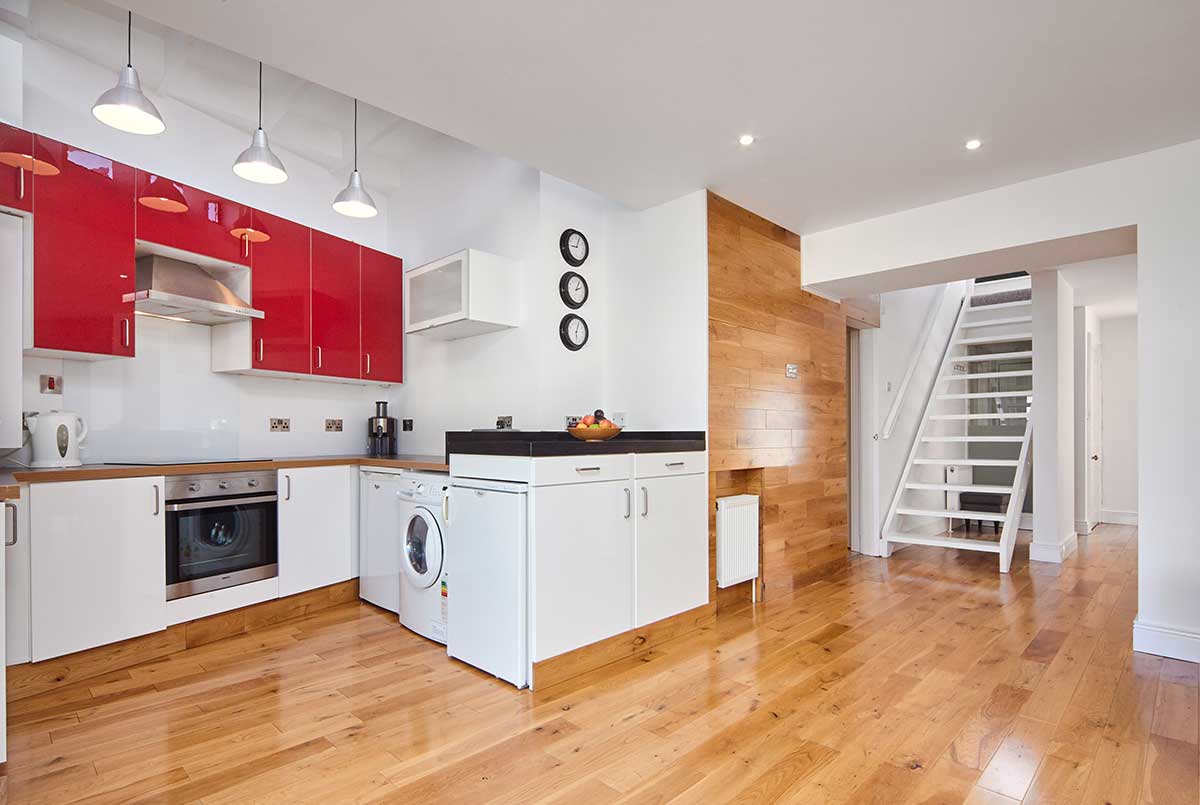
The kitchen is at an angle, following the boundary with the house next door. “It tapers in so the idea was to get the cooker in first and then try to squeeze in all the appliances. It did take some tweaking, I actually used a kitchen handbook to get started and put it all into a computer modelling software.”
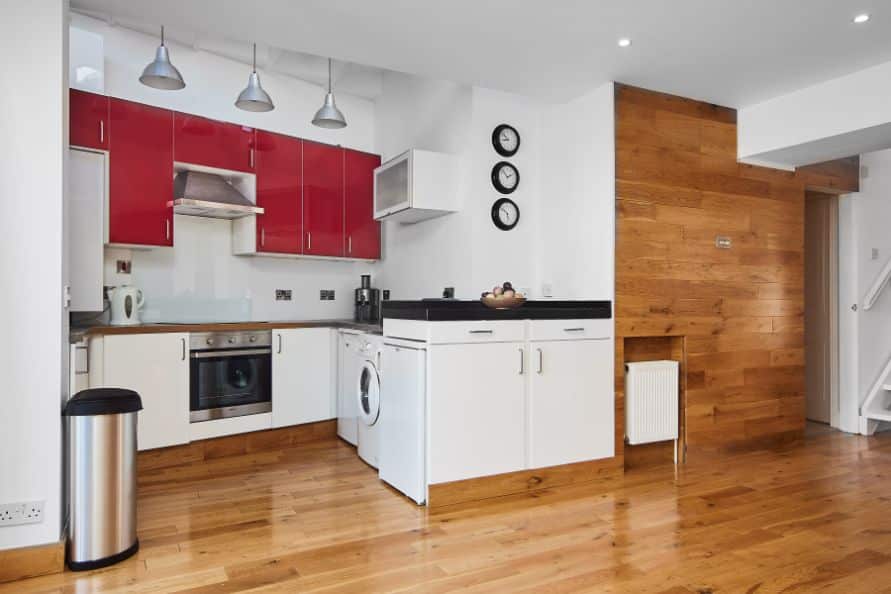
“I had the dimensions but the angle threw everything off, so I put the cooker in the centre to allow for a 600mm countertop as I was told it’s important to leave plenty of space to work on. With the slimline dishwasher I managed to get in plenty of storage too.”
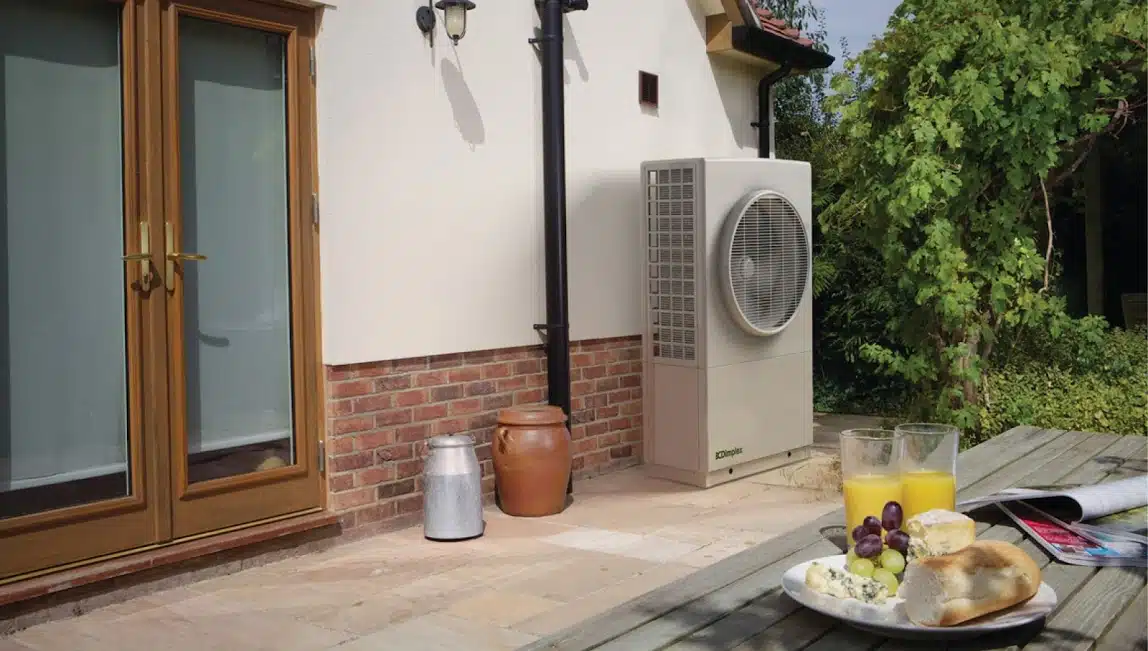
The cooker is ready for gas but his hob is currently electric; heating and hot water is supplied by an oil boiler located in the back garden.
“The pipes were all run in the house during the works. We had to replumb and rewire the entire building.” For fresh air, the stairwell acts as a passive ventilation system with the roof light above providing a chimney stack effect.
The rooms are also ventilated with traditional hole in the wall vents, covered in cast iron plates. The walls were insulated on the inside with PIR backed plasterboard; Ian put the sheets on a batten frame to provide ventilation behind, allowing the walls to breathe.
Outdoor haven
Outside Ian also had to deal with differences in level. “The garden was originally sloping, three foot higher at the back. Instead of keeping the incline I thought it would be a good idea to create a platforms and zone it out,” he says. A block layer built a 500mm thick retaining wall with the leftover limestone from the internal demolition work. This created a sunken courtyard level with the ground floor. The white section at the end of the garden was a later addition, completed in the past two years. “I started that project really with just a hand sketch and without knowing exactly the construction details,” expounds Ian.
“I started by hand digging and pouring foundations, building the walls and then I decided to go with a smooth plastered finish, painted white. I wanted simplicity, to create a clean impression. The aim was to have an outside room where I could put a couch and relax.”
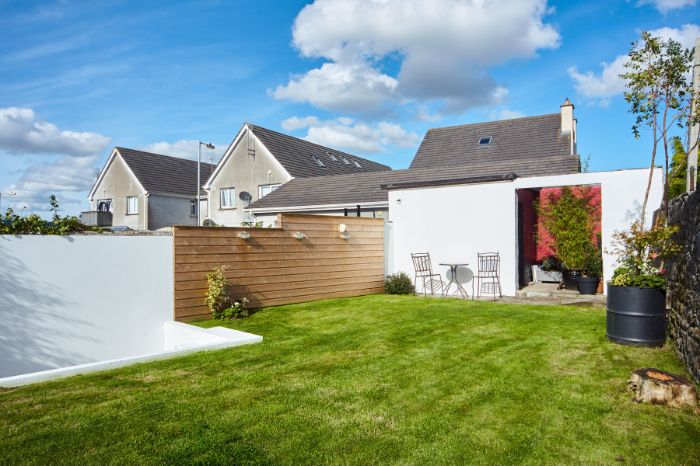

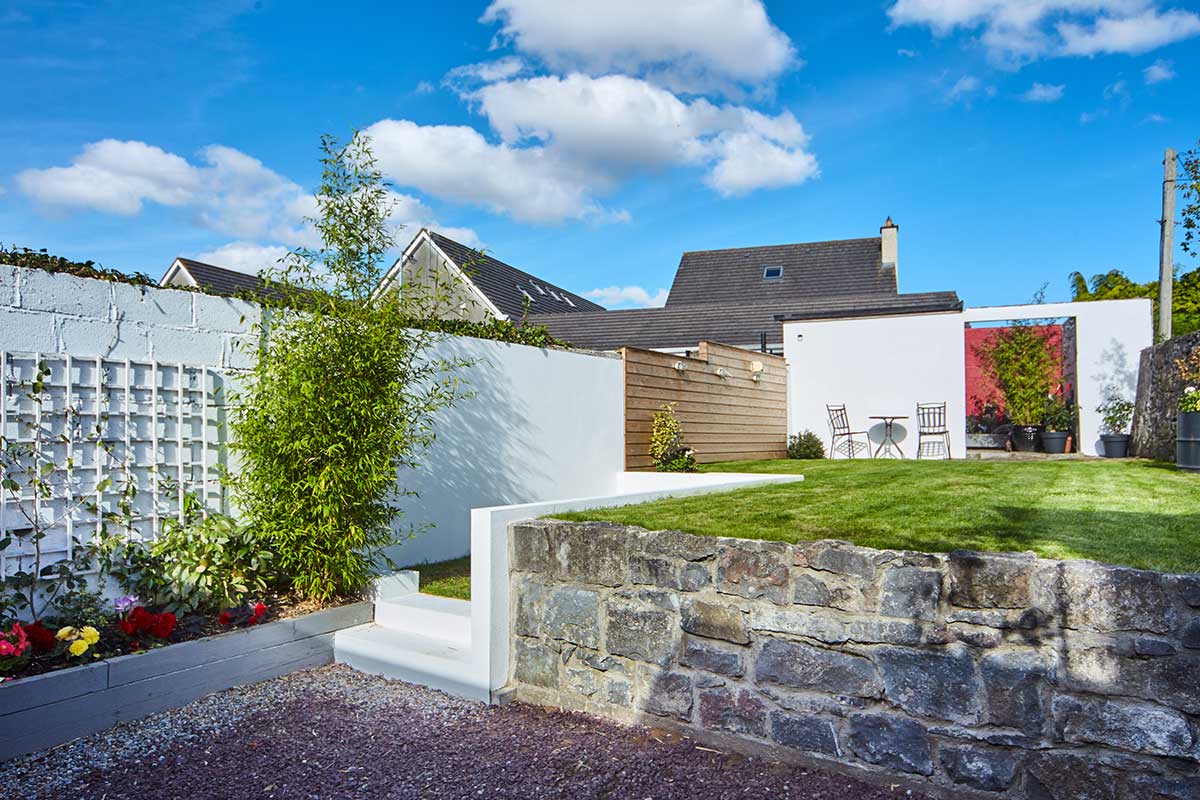
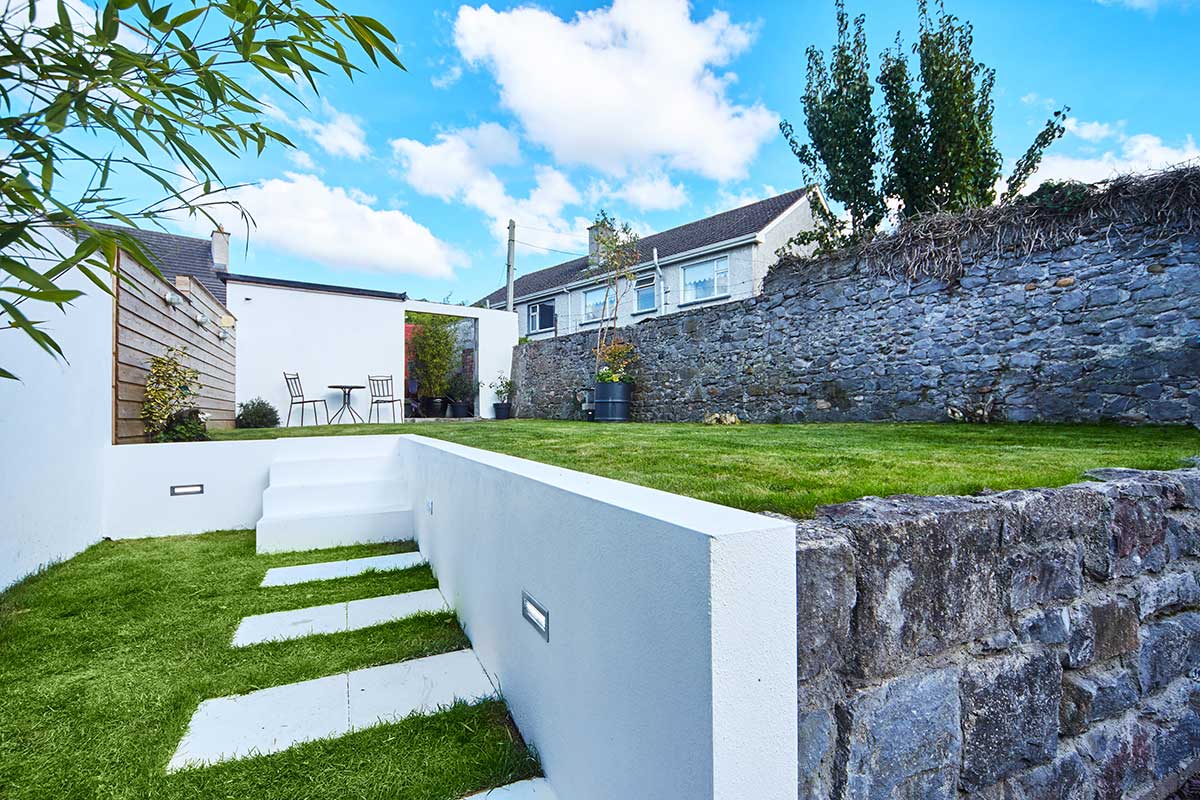
“Incorporating three recessed LED lights, when switched on at night adds a lovely intriguing glow especially with the blue hue emanating from one of the fixtures.” The shed that’s hidden by the white wall originally ran the full width of the site. “I didn’t need much storage so decided to cut the shed in half and create a focal point with the bamboo,” explains Ian.
“My partner also had great ideas about what kind of planting to introduce; she helped define and create zones to maximise colour throughout the seasons. I do not think there is any time of the year where there is not some vibrancy that draws your attention.” “The curtains are always open to enjoy the view,” continues Ian. “The sun manages to break through into different parts of the garden. We get to use all of it depending on time of day and season.”
And, looking back, Ian says selective naivety is not a bad thing. “During the build phase, a lot of people would ask me whether I’d finished ‘that house’ yet, implying it was taking me ages but the question never bothered me because I knew in my mind what it would be like, I retained that vision and that’s what kept me focused on the end goal.”
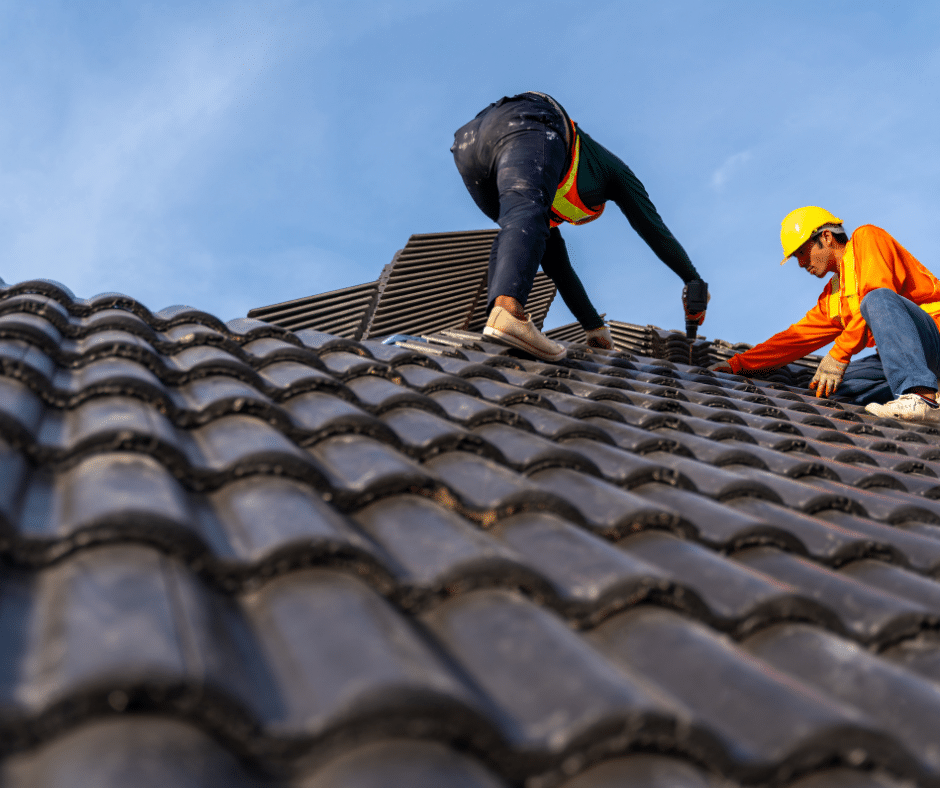
“I believe as long as you have that drive and you fully commit yourself to it, you will get the best results. In my case life’s challenges and changes slowed things down at times but now I am finally getting to enjoy living in this very special house, and I am quite proud of how it’s turned out.” There is just one element that was put on the back burner. “The roof is in relativity good shape but the slates are original and in those days they did not felt the battens to waterproof the structure.
Instead they installed a plaster type skim under the slates and this is beginning to deteriorate with the high winds,” he says, not too upset at the thought of doing more work on the house.
Co Carlow DIY renovation specification
Floor: rigid phenolic insulation, 150mm concrete slab, 50×50 timber battens, prefinished 22mm oak tongue and groove flooring.
Walls: insulated plasterboard, treated timber battens on existing/new hollow block walls.
Roofs: existing roof 150mm mineral wool insulation with continuous 50mm airgap, new extension roof consists of two portions – warm roof build up of fibreglass covered on 12mm marine ply on rigid phenolic insulation on 18mm marine ply on 50mm rigid phenolic insulation on 12.5mm foil backed plasterboard; cold roof build up of fibreglass on 18mm marine ply on tilting fillet on 175mm rigid insulation between joists on foil backed plasterboard.
Suppliers
Structural Engineer: Michael Browne, Delgany, Co Wicklow
Electrical (second fix): Eamonn Nolan & Sons Limited, Graigue, Carlow
Painting & Decorating: Enda Hynes, Carlow Town
Kitchen: Ikea Dublin, www.ikea.ie
Insulation: Kingspan Insulation, floor Kooltherm K3 Floorboard, walls: Kooltherm K18 insulated plasterboard, roof Kooltherm K11
Roofboard: Rockwool on existing roof, www.rockwool.com
Windows: Munster Joinery, www.munsterjoinery.ie Window Warehouse Ltd (England), www.window-warehouse.co.uk
Local builder’s merchants: Lamberts Hardware Limited, Hacketstown, Co Carlow, James Dempsey Hardware Ltd, Carlow town, Doyles of the Shamrock, Graiguecullen, Co Carlow
Planting: Arboretum Garden Centre, Leighlinbridge, Co Carlow, www.arboretum.ie
Photographer: Ger Lawlor, Kilcarraig House Park Wexford, www.gerlawlor.com
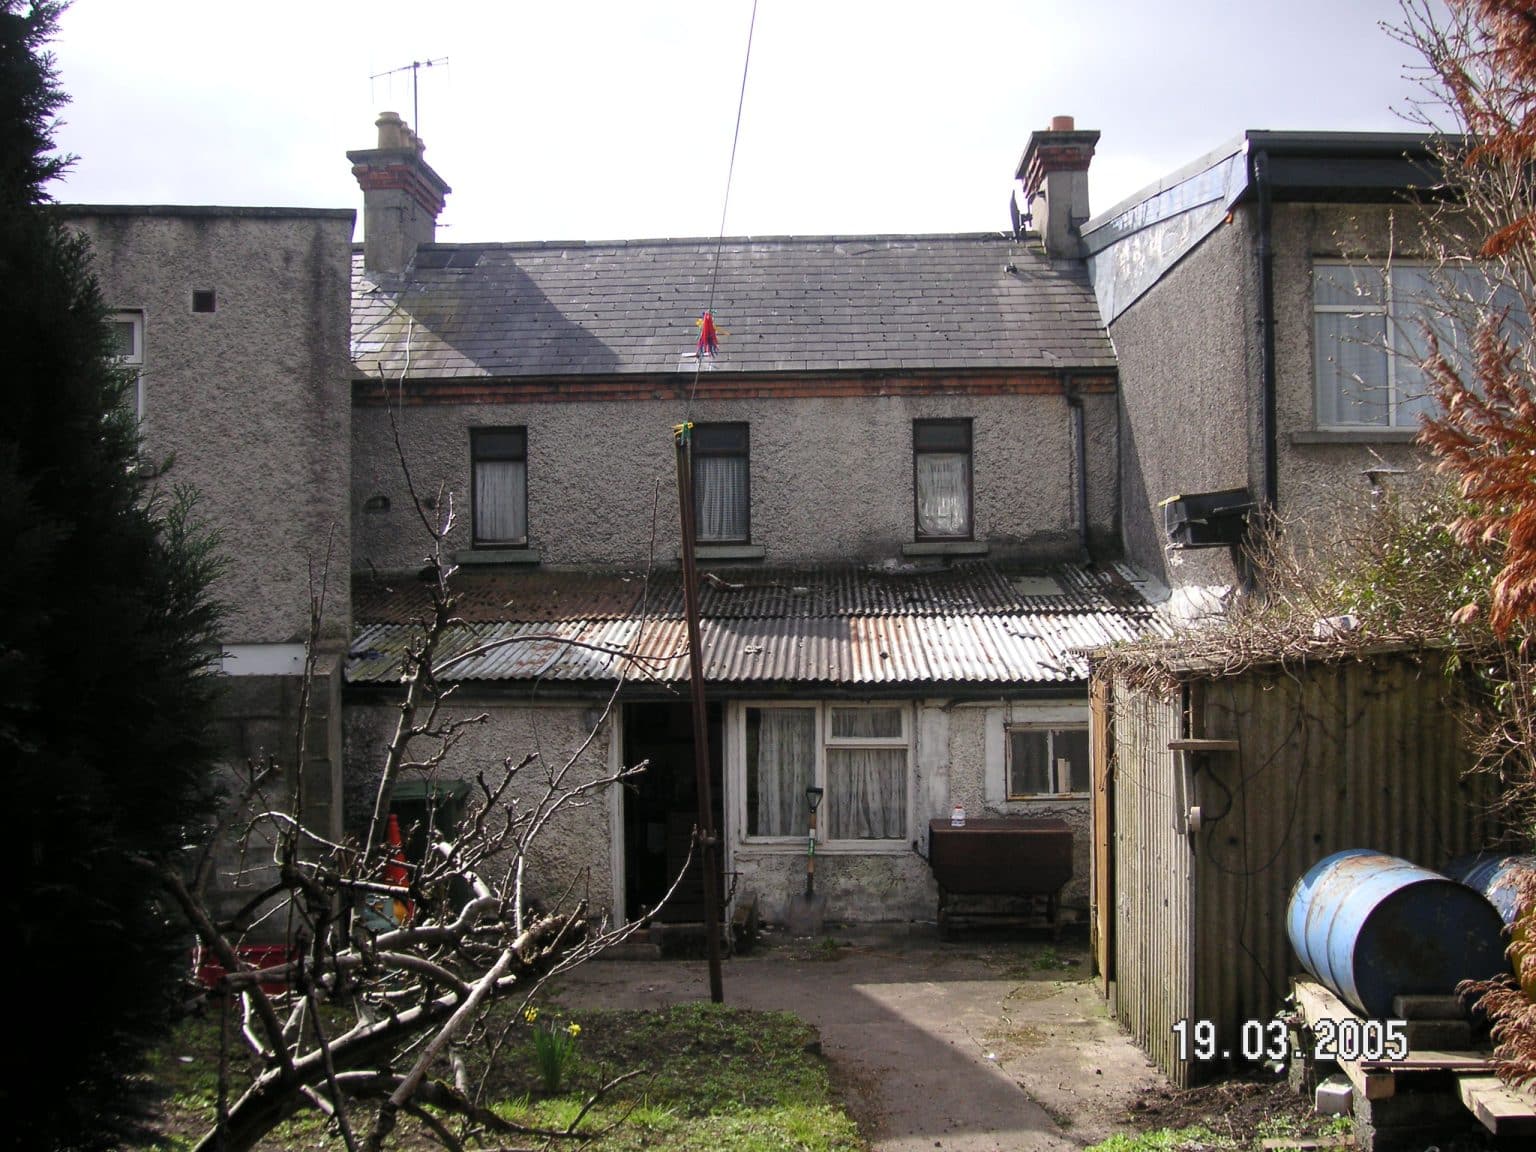
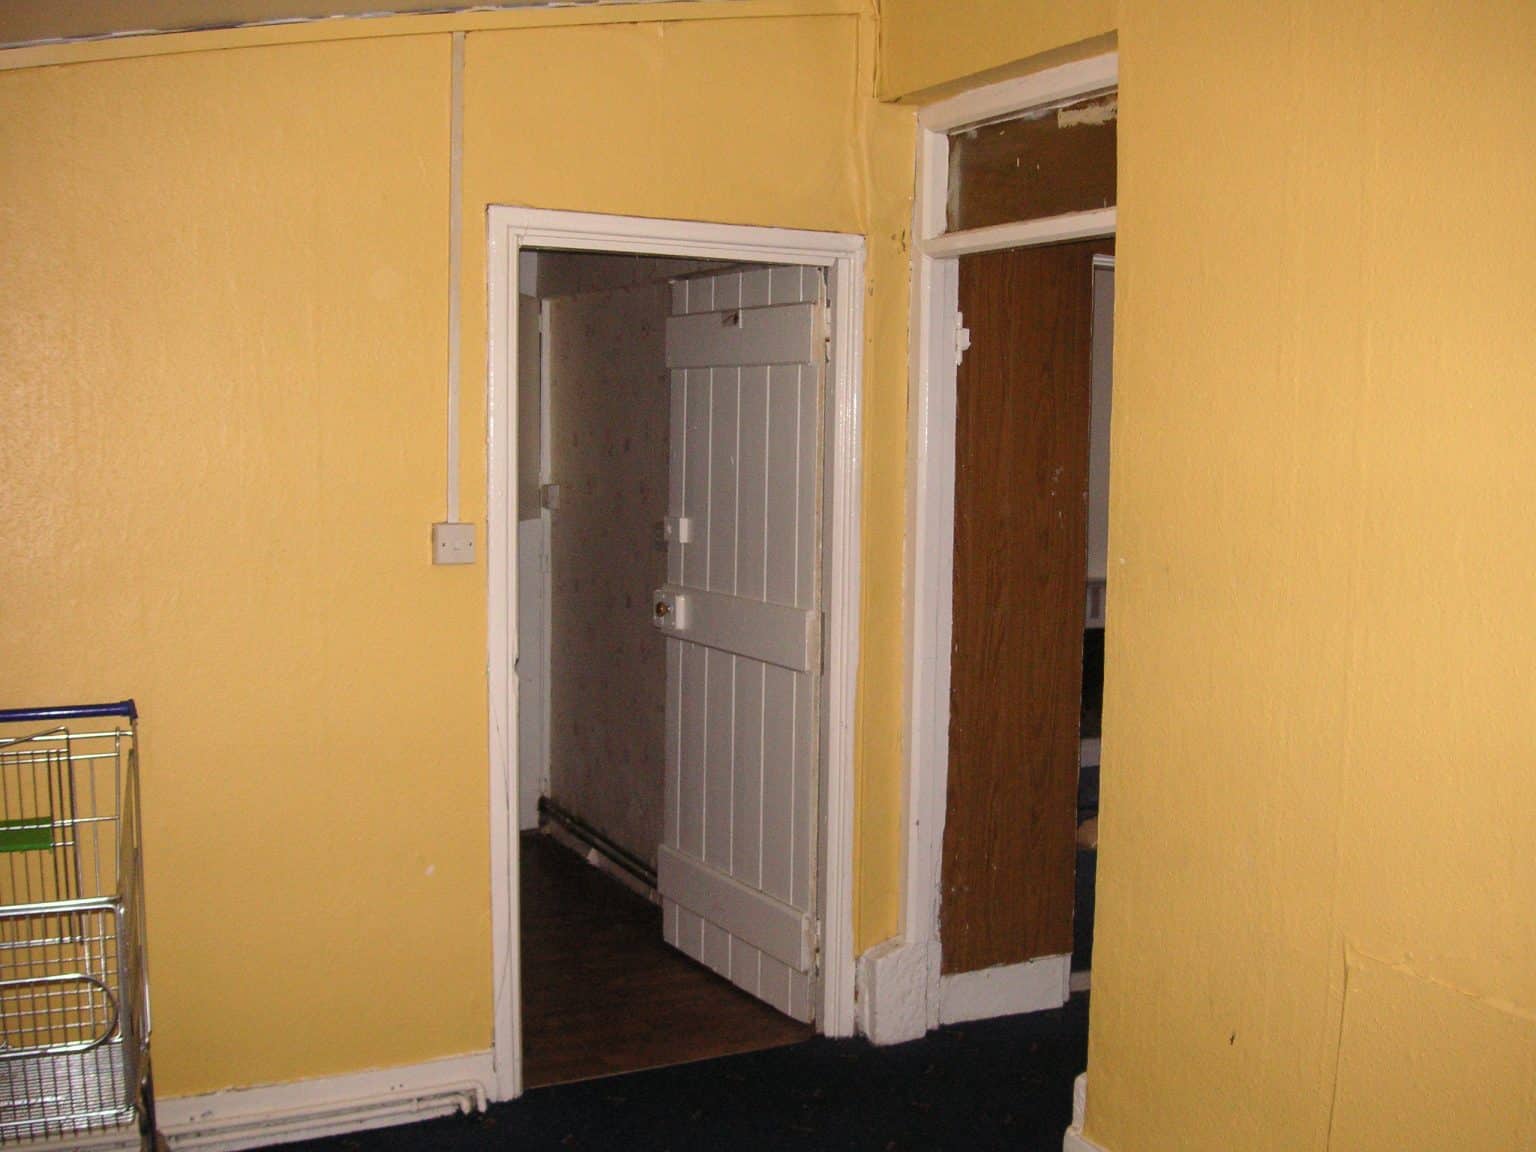
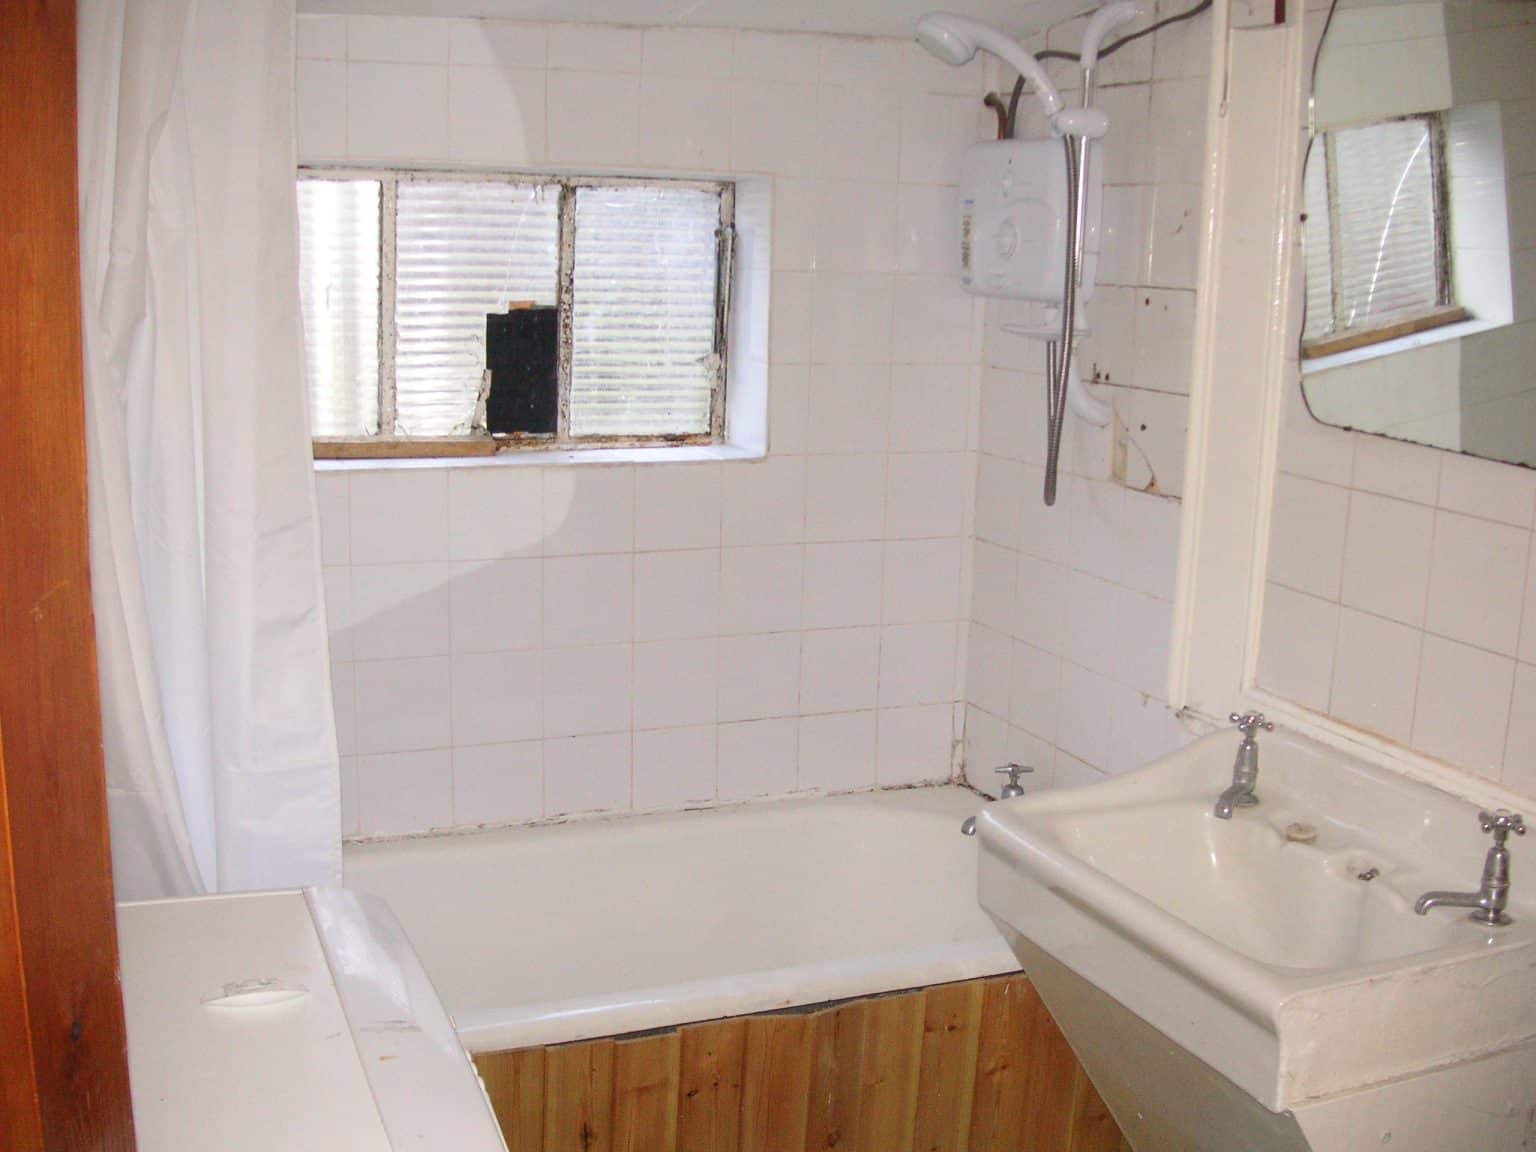
House and garden before the DIY renovation


