
In this article we cover:
- Reasons for self-building, process of finding and buying a site to build on
- Cost of applying for planning: Environmental Impact Statement
- Locals needs requirement and how they fulfilled it
- Finding an architect and going through the design process
- Appointing an Assigned Certifier
- How they sought out prices, tendering to five builders
- Choice of builder and contract
- Staircase design with architect
- Ventilation and heating choices
- Tips for picking out kitchen and bathrooms
- Full supplier list
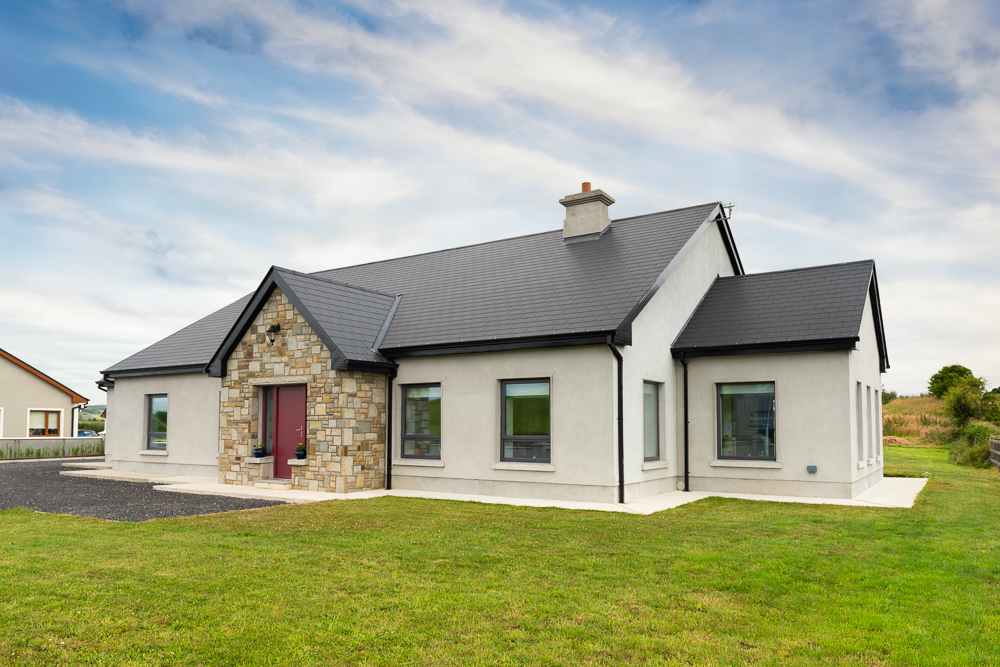
“When we decided to build we were living in a three bed semi detached house; with two children space was getting tight,” says Keith. “We also wanted to move closer to my home village so we started looking at second hand homes but soon realised that we’d have to do work on them and that the money would be a lot better spent on a new build. So a self-build seemed like the best and most cost effective way to get what we wanted.”
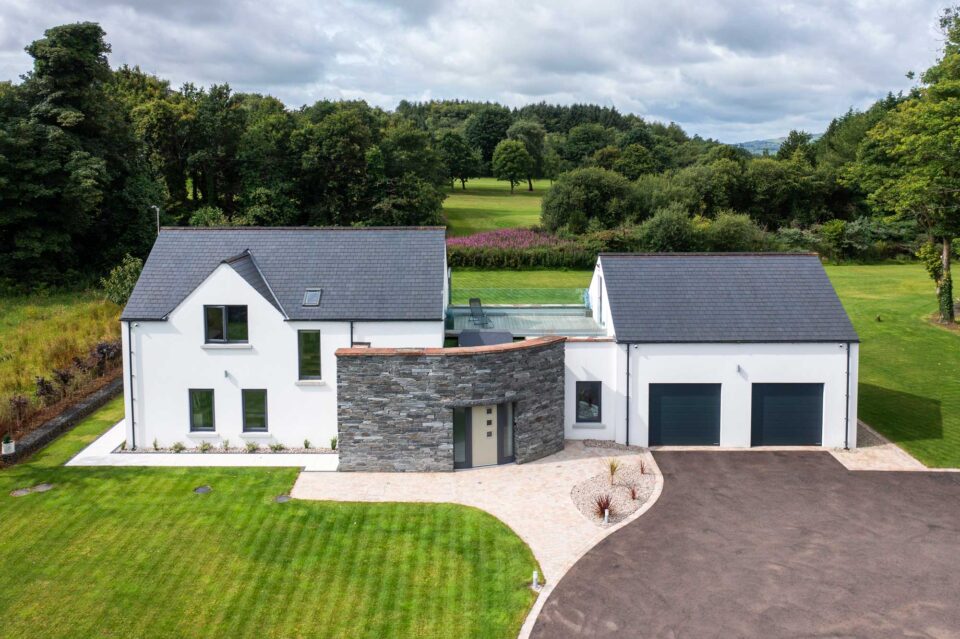
Walls: 400mm cavity wall build up with 200mm cavity pumped with EPS graphite coated beads
Roofs: 225mm mineral wool with insulated plasterboard (50mm PIR) and 12mm plasterboard
Windows: Triple glazed uPVC throughout
Building Energy Rating: A3
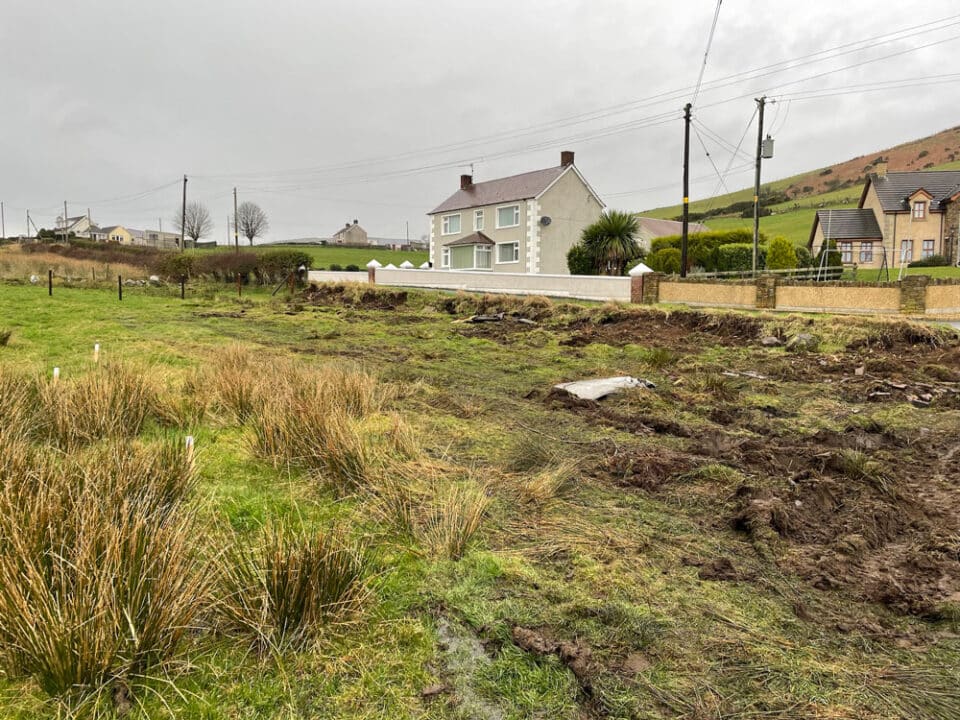
“A piece of agricultural land then came up for sale within my home village and had two acres so we asked the estate agent if we could apply for planning permission on it but the owner turned us down initially because he didn’t want the time constraints of the application holding up the sale.”
Environmental Impact Statement
“When we saw the field was still on the market a year later we asked again and this time the seller said yes, this was in 2015,” continues Keith. “My brother is a civil engineer and he’d worked on residential projects before so he helped us with the planning and design from the outset. He knew the potential pitfalls, and which designs the planners were more likely to
accept.”
“The initial planning application came back with a request for additional information including an Environmental Impact Statement. The site lies in a Special Area of Conservation as the local river which runs at the back is a tributary of the Moy, famous for salmon fishing.”


“I work in the area of safety and environmental so was able to draw on the expertise of a colleague to prepare the report for me. We were able to demonstrate no environmental impact by carrying out a flora and fauna assessment on the site.”
“We also developed a plan for pollution mitigation measures. This included keeping the house to the front of the site, away from the river which was towards the back of the two acres and with a large hill in between.” “The plan also included minimising excavation during wet weather to avoid runoff and safe re-fuelling of any machinery on site. There was also some consultation with the Fisheries Board and National Parks and Wildlife Service that confirmed they had no concerns about the build.”
‘We started looking at second hand homes but soon realised that we’d have to do work on them and that the money would be better spent on a new build…’
“For the local needs criteria we also had to put together a file. The folio referenced how my parents didn’t own any land locally.”
“We had to show that I was from the village so we also asked the school, church and local football team to write letters on our behalf and I put in a submission to explain I was from the area and wanted to move back. We also quoted a section from the County Development Plan that stated the local authority wanted to keep people in their communities.”

“Thankfully the site has good drainage so that wasn’t an issue for the planners. We passed the percolation tests no problem, we were ok for a standard septic tank with percolation area,” says Keith.
“As for water we were able to connect to the local group water scheme and this was done very promptly for us which was important when starting up on site” In total the planning process took about five months and cost approximately €1,500.
When planning permission was granted, Keith and Romina finally bought the site and went about looking for an architect to help them with the internal layout.
Devil in the detail
“What we put in for planning wasn’t the final configuration inside, we had a rough idea of internals but we wanted an architectural input into the finished product,” explains Keith.
“We started looking for an architect and found Mark Stephens via an internet search; we read his blog and liked his honesty. He also appeared to specialise in self-builds whereas other architects seemed to be more commercial leaning.” “He helped us immensely by changing the internal layout, especially with regards to the bathroom and kitchen and the open plan layout, and it was money well spent,” adds Keith.
“We also hadn’t factored in having an upstairs in the house but as we went through the plans we decided to include a staircase and incorporate it into the living space. My brother suggested the idea of a mezzanine over the kitchen and did a drawing; Mark worked it into the build.”


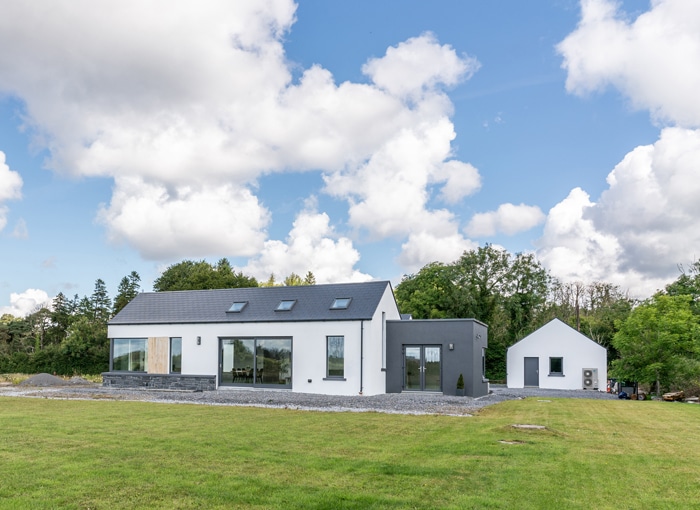
“The site layout was perfect for a south facing living area, with the bedrooms predominantly north, north-east and west. The house is open plan in nature and we asked for as much storage as possible, that was a necessity from our experience living in a three-bed semi.”
“We knew it would be nice to keep the kids close when we were in the kitchen, so a sunroom/toy room that would be close by was on the wish list too,” continues Keith. Keith’s cousin had recently self-built his home and provided plenty more advice.
‘Take the time on site to measure where the socket points should actually go instead of going with a theoretical measurement…’
“He told us to think about doing daily chores and routines and how they work in terms of layout, and laundry quickly came to mind. If we were to come from the bedroom we’d have to bring our clothes through the hallway into the kitchen and out to the utility. It seemed like a trek through the house.” “We could have added a door in the hallway but that would have removed precious wall space in the utility. I’d heard of gravity fed laundry chutes but we needed a horizontal one as the main bathroom shared a wall with the utility.”

“So we ended up installing a drawer between the two rooms with a simple set of rails. It works a treat because the main bathroom is near all of the bedrooms.”
“As this was planned for, it was easy to install, we just slabbed out part of the wall, formed the opening and built a cupboard on runners underneath the countertop. You can pull through each side; it’s a very practical feature. As any family knows there is always plenty of laundry to be done.” When they were redesigning the internal layout Mark suggested some changes that would have required them to resubmit for planning because they would have had a knock-on effect on the exterior look of the house.
“We didn’t want to go through another planning application,” says Keith. “Some of the suggestions would also have pushed up the cost of the build, such as larger sections of glazing in the sunroom and a reconfigured L shape.”


“We had a boxy layout which we felt would be easier and cheaper to build as well as easier to heat (and keep cool). We initially regretted not adding the extra glass, but after living in the house for a year, and with the heat we had this past summer we’re glad we didn’t.”
The staircase also benefited from Mark’s input. “We were looking at what was out there online, and visited loads of our friends’ houses. We realised we didn’t like open rails and liked the stairs we saw on another build that were fully closed.” “Mark designed it for us, he suggested adding a 90 degree angle based on the size of the hallway and we plasterboarded the sides and then plastered with a skim coat. It blends in with the rest of the build.”
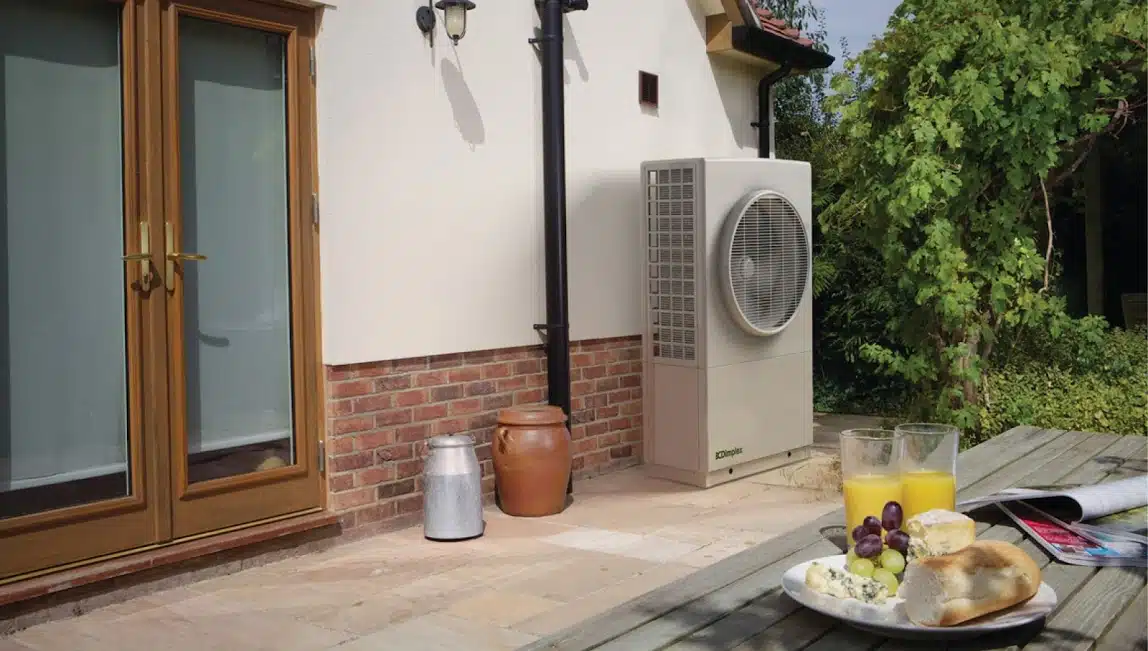
“We also stuck to our guns for the heating and hot water system. Mark suggested we look into an air to water heat pump but we had a fair idea from speaking with friends who had self-built in the area that we wanted a geothermal heat pump because it seemed to perform better and more consistently and we had the room to install a horizontal bed for it.”
“The heating is switched off in April and the heat pump just runs during the summer months for hot water. In terms of capital cost, geothermal probably cost a couple thousand more than air to water but it’s a long-term investment and will pay for itself over its lifespan.”
“We have the geothermal loops in a horizontal bed at the back of the house. And even though we have two acres, the hill in the centre of the site left us with just enough available space once the septic tank and percolation area were factored in. The geothermal pipes need to run in 35m loops that have to fit into a defined area rather than running in a long narrow strip.”
“Once we’d agreed on the internals we went to tender, and Mark gave us the options, we’d never done this before so his guidance was invaluable,” comments Keith.

Construction process
“We tendered to five builders and four came back, this was before things started to pick up again. We got in at a good time before prices began to rise and builders became hard to get. My brother gave me a contact, a builder he knew from the area and Mark suggested some others.”
“There was a huge variance in price. We picked out two builders based on price initially and also went to see work they had done previously and spoke to their clients. In the end we went with the recommendation from my brother.”
‘The initial airtightness test was handy to ensure we were doing it right before we progressed any further.’
“We were surprised there was such a difference in tender prices because, even though we didn’t hire a quantity surveyor, we had supplied a very detailed specification which Mark helped us with, everything was itemised down to the electrical points. One builder who didn’t tender said he’d only seen that level of detail on a commercial build.”
“We put in PC Sums [estimated cost] for sanitaryware and the kitchen so those were set, and we included the specification for kerbing, spreading of topsoil and the garage construction. We had the names of suppliers we wanted to use and factored that in to the build, e.g. for tiles, geothermal system, sanitaryware, we arranged it so the contractor paid them but we put in the
order.”


“The build started at the end of June 2016 and we needed an assigned certifier, the opt out option for self-builders hadn’t been introduced yet, and Mark did that work for us. From our point of view it was just an additional cost as all the paperwork was handled by Mark.”
Keith kept an eye on the build as he was living a short 15 minute drive away. “I would pass the site on my way to work, checked on things every day taking pictures, any question I had I’d ring Mark who would either call out or work things out over the phone.”
“There were two unforeseens for us during the construction phase. We had to hire a structural engineer which was an unexpected additional cost, he had to sign off as part of the assigned certifier process on both the roof and the foundations.”
“For the mezzanine we had to add an additional row of blocks to take the weight of the cantilever so that added to the cost too.” “We also went with extra insulation in the roof as we needed to put in a bigger rafter than originally specified due to the structural span of the roof but again extra investment in insulation is never a bad thing if you can lower your heating bills.”
“We worked with the Building Energy Rating consultant on this detail to see what our savings would be so this worked out favourably.”


“The other aspect had to do with the first airtightness test we did at first fix, before we did the internal plastering, the builder hadn’t done an airtight build before and the tape around the windows wasn’t sticking properly.” “It was a learning curve for us and the builder; Mark went through it all with him on site. Mark did the inspections and the airtightness test company pointed to the areas we needed to improve on.”
“It was just a matter of applying more glue on the tape and ensuring all our sockets and pipes were properly sealed and the airtightness membrane was wrapped properly around the concrete hollow core initially.”
“The initial airtightness test was handy to ensure we were doing it right before we progressed any further” adds Keith. Overall the experience was one that Keith and Romina found they enjoyed. “I think once you build a house you will always find things you could have done differently, you’re always learning. We were lucky to get loads of advice and inspiration from friends and family and that we had a very good builder and architect. We would definitely do it again.”


Q&A
What would you change?
The downside to the mezzanine is the high ceiling which can filter up noise from the kitchen and living room to the rest of the house but it’s not a big issue and something that will change as we get more soft furnishings in the house to absorb some of the sound. It’s still a lovely feature and has really opened up the space and light in the house.
What would you tell someone with a young family embarking on a self-build?
Have a babysitter to hand – there are a lot of decisions to make, trying to go see stuff at the weekend can be tricky. Picking out sanitaryware with the children at your side playing in the baths and showers is pretty much impossible without rushing into a decision. We had to arrange going in our own time, it can take a couple of hours to make the right choice. Having kids also means being realistic about buying new furniture and other furnishings – we kept the same couches from our previous house because with a five and three year old, new ones would not have lasted very long.
What surprised you?
The speed of the build, even our neighbours couldn’t believe how quickly we got it all done. It took 13 months overall, the builder had predicted nine but we had a few delays towards the end of the build getting some of the trades to finish up and move out. For what we got I think it was still quick.
What’s your favourite part of the house?
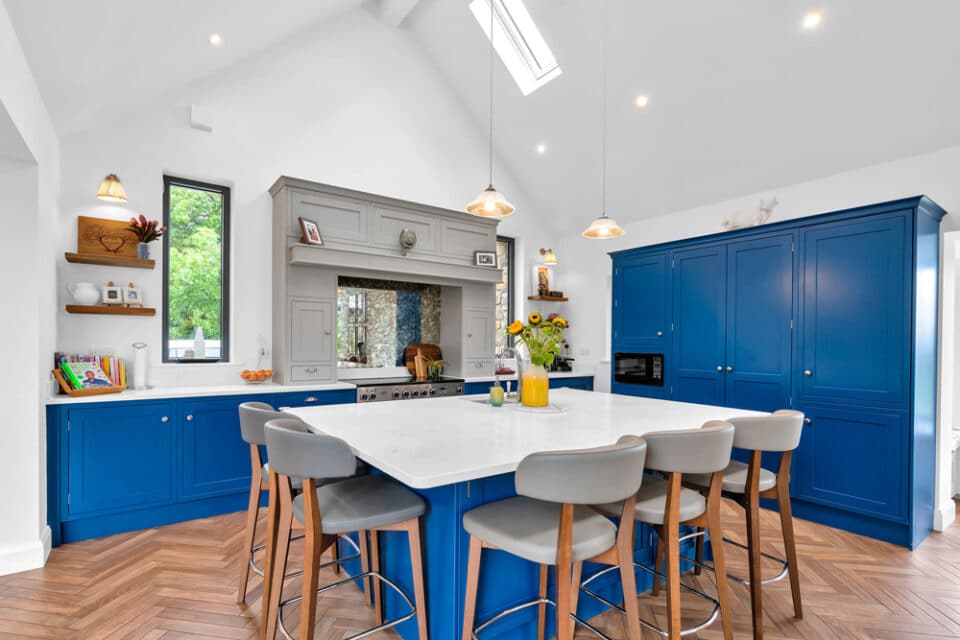
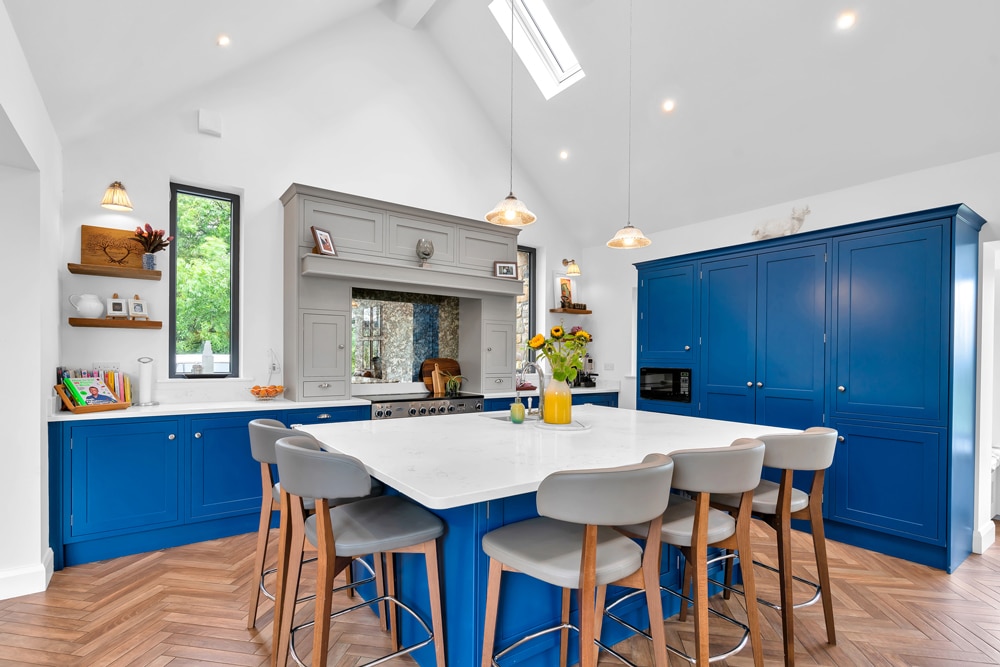
We love the kitchen, we both cook, Romina is Italian so loves her cooking, and we are delighted with the amount of work surfaces we have and the flow of the kitchen setup. Meal times are great, the big table with bench is very inviting and we get lovely natural light throughout the day. The fact that it’s open to the playroom and that the mezzanine is overlooking it makes it all that more special and there are lovely views over towards the village.
Bungalow tips
Measure on site. At the end of the project the decision making tempo increased dramatically and as a result I’d suggest getting as much as you can picked out upfront but I’d also recommend taking the time on site to measure the size of the beds and where the socket points should actually go instead of going with a theoretical measurement on paper. Some things are hard to visualise on a drawing. We picked out the wall colours with the painter which helped us a lot too.
Listen to the advice of the expert trades that you are dealing with and don’t be afraid to ask for their opinion. Think of how you will live in the house. It needs to be a functional house also so think about the simple daily routines that you do and try and optimise the design around them. Romina’s ideas around the kitchen and utility layouts in consultation with the kitchen company paid dividends in the end. Also a simple thing like adding extra sockets in various locations, including outside, really helps. It’s great to have that level of detail before you start.
Research your ventilation options as it’s vital in an airtight home. Heat recovery ventilation is a great option as you are using your waste heat to heat up the incoming clean air but also make sure that it has a bypass feature, so you can use the external night time air in the summer to help freshen up the house (there is no active cooling function). We found the house very warm during the summer months initially until we figured out all the settings on the heat recovery system and supplemented the ventilation by opening windows and doors as needed.
Visit people’s houses. We went to people’s houses for inspiration, and again don’t be afraid to ask questions about how they went about their self-build. In essence have your homework done!
Co Mayo bungalow suppliers
Architect: Mark Stephens Architects, Swinford, Co Mayo, markstephensarchitects.com
Builder: Noel Morrison Construction Ltd, Enniscrone, Co Sligo,
Geothermal system: Climate Control, Tuam, Co Galway, climatecontrol.ie
Windows: Grady Joinery, Charlestown, Co Mayo, gradyjoinery.com
Kitchen: Klassic Kitchens, Castlebar, Co Mayo, klassickitchens.ie
Builder’s merchant: Topline Archers, Ballina, Co Mayo, toplinearchers.ie
Furniture: Retro West Furniture, Swinford, Co Mayo, retrowest.ie and Rabbettes Furniture, Castlebar, Co Mayo, rabbettesfurniture.ie
Lighting: Mid West Lights, Castlebar, Co Mayo, midwestlights.ie
Bathroom: Crean Ceramic City, Castlebar, Co Mayo and Hurst Heating & Plumbing Supplies Ltd, Castlebar, Co Mayo, hurst.ie
Flooring: Master Carpets and Flooring Ltd, Castlebar, Co Mayo, mastercarpets. goldenpages.ie
Airtightness test and BER: Hession Energy, hessionenergy.ie
Photography: John Mee, johnmeephotography.com


