
Did you consider alternatives to charred timber cladding, such as slate?
We had initially considered a couple of different options including corrugated metal sheets and fibre cement slates, but as the design of the house is very simple, we wanted a material which would add both texture and warmth. And timber ticks both those boxes.
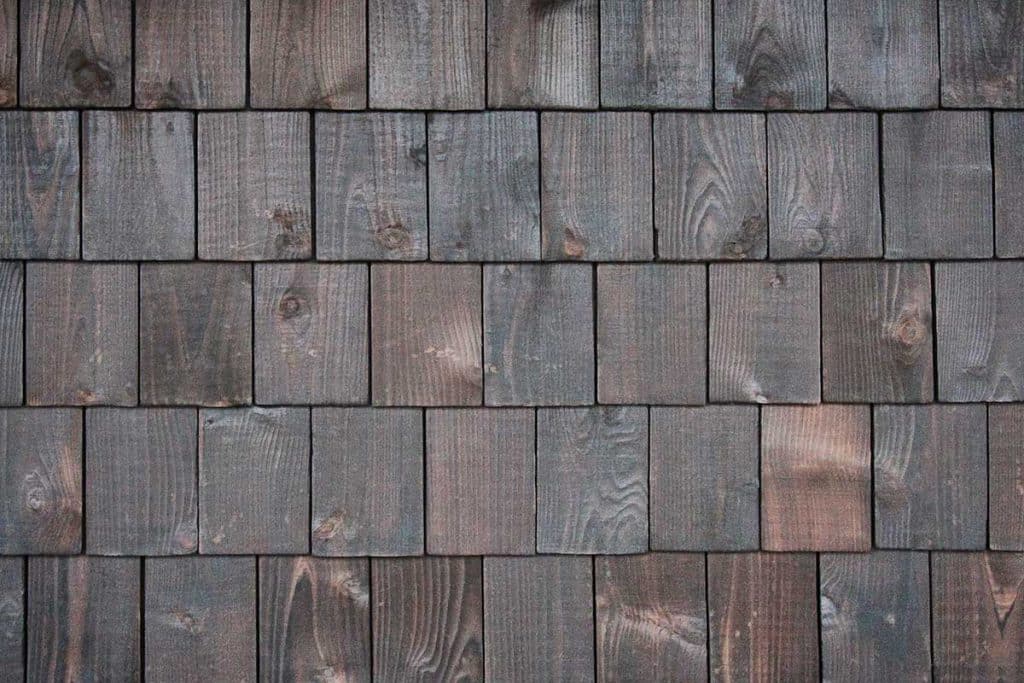
Cedar will last a long time, even if left untreated and can look beautiful once it has silvered down, but this process can take a number of years and typically different parts of the building will weather at different rates.
Why did you decide to char the shingles?
We really like the aesthetics of untreated cedar but the uneven weathering made us look at alternative ways to get what we wanted right from the start and for years to come, without constant maintenance. The charred shingles will slowly fade and lighten over time, but at a much more gradual and controlled rate, which we don’t mind at all. Even though the main reason was aesthetics, the fact that burning the shingles will significantly extend their lifetime is definitely a bonus.

How did you learn to do it?
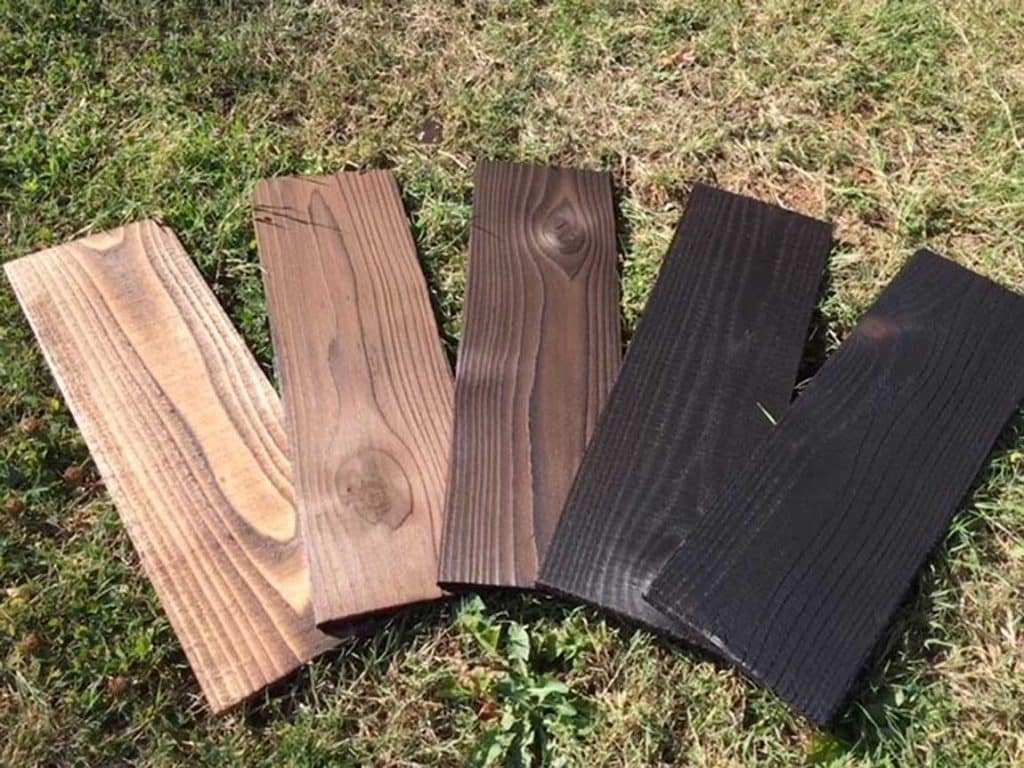
I had worked closely with Toasted on a couple of projects through 2020 Architects and was familiar with the fantastic work they do. As it was a process I was very interested in, I wanted to try burning the timber myself to experiment with the different colours and finishes that could be achieved. Sasha from Toasted was kind enough to give me a few lessons and tips on how to get the look I wanted, showing me each stage of her process and preparing a number of samples for me.
What was the process?
There are many steps to follow, which can be simplified down to burning, brushing and sealing. The technique for each can vary greatly and needs to be repeated in the same way to get a consistent finish.
How long did it take you per shingle and how many shingles in total?
As timber is a natural material, each shingle varied in the amount of time it took to burn. They all seemed to burn at a slightly different rate, depending on the grain and other factors. They ended up with different levels of charring, which then required a varying amount of brushing.
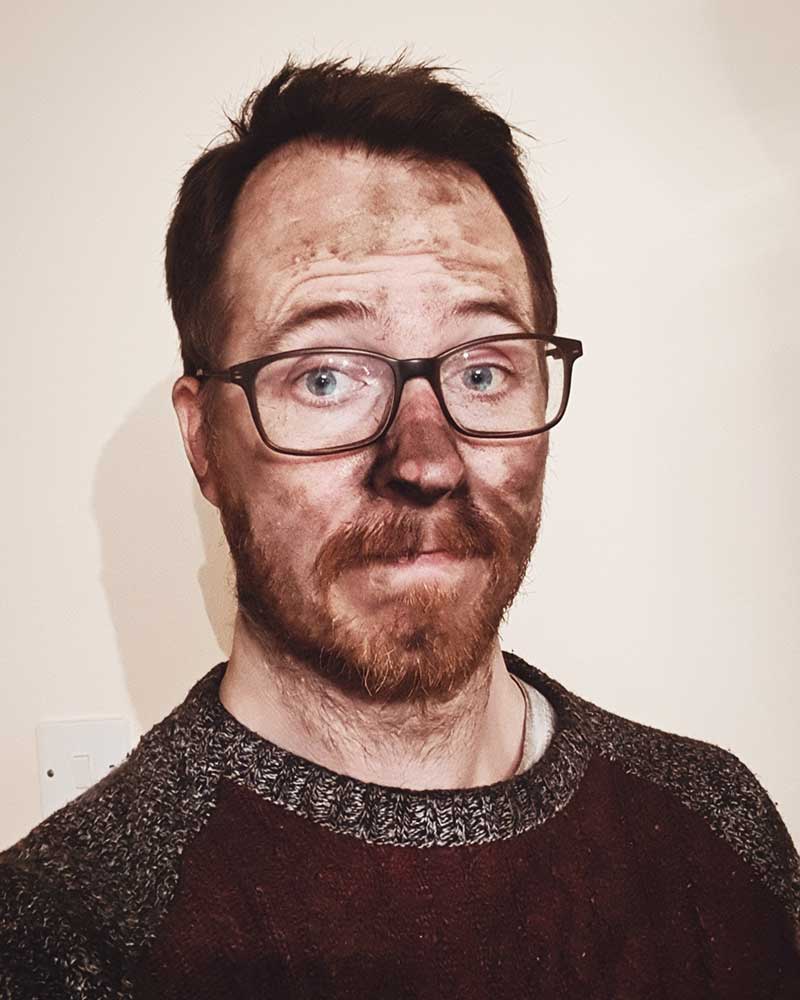
It’s difficult to put an exact figure on how long it actually took for each one, but it took a lot longer than we first thought. There were roughly 10,000 shingles needed and when we did the initial samples, it didn’t seem to take that long, but we didn’t account for the logistics of working with such large numbers… lifting, stacking and transporting that amount of shingles takes up a lot of time.
At a guess, I’d say it took three to four minutes for each shingle from start to finish, which equates to roughly 15 weeks if a single person was working at them full time! Thankfully we have had a lot of help from family and friends, but as we only get to work at them in the evenings and weekends, it has taken a number of months and we’re not quite finished yet.
What did you seal them with?
We once again looked to Sasha at Toasted for her expertise. She imports and mixes her own sealant, adding pigment where required, to get the desired effect. This sealant not only prolongs the life of the timber, but also stops everything that touches the wood getting covered in charcoal.

Did you fix them onto the roof yourself?
There are a lot of things I’m doing myself but I’m definitely not a skilled tradesmen and know my limits. With the amount of time and money spent on preparing the shingles, I wanted to make sure that they were installed with the same care and attention, so I brought a team of skilled joiners on board. Their previous knowledge and expertise have proved invaluable, helping resolve any installation and detailing issues that cropped up.
What ridge tile / guttering did you use?
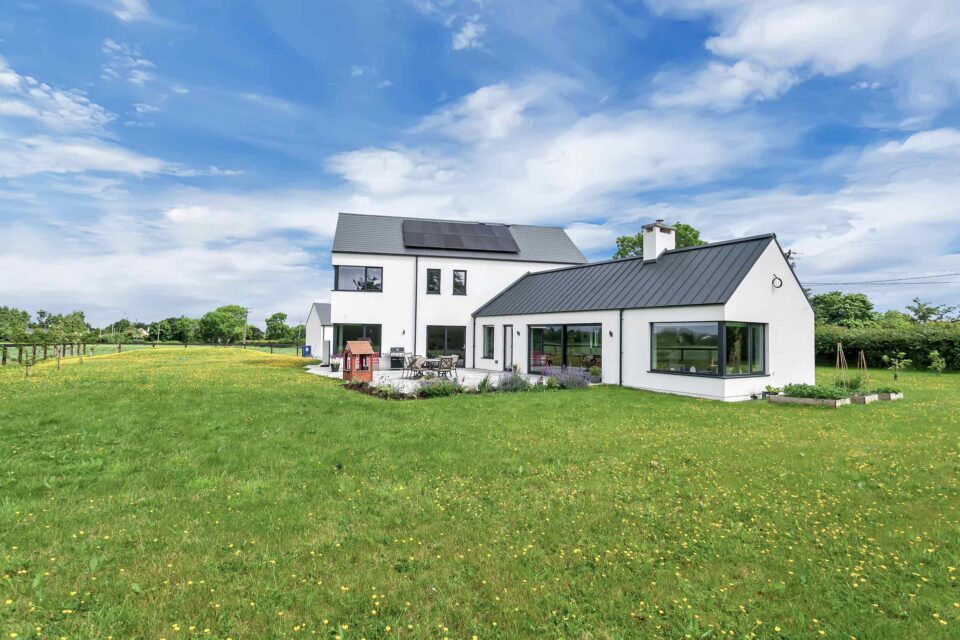
I had initially planned to use a completely concealed gutter system, but due to going with a scissor truss roof instead of an on-site cut roof, I didn’t have the required depth to conceal the gutter. Instead we went for a black powder coated aluminium gutter, which sits almost flush with the shingles on the walls. Although it wasn’t what we had originally planned, the change of
direction saved us thousands of pounds in construction costs and the gutter actually complements the shingles beautifully.

Traditionally on a shingled roof the ridge would be made using V-shaped shingles, overlapped on top of each other, all the way down the roof. However, as we wanted quite a contemporary look, we decided to go for the black powder coated aluminium ridge, which sits flat against the shingles and blends in seamlessly.
Would you do it again? What were the highs/lows?
Honestly, no. I would definitely use the material again, but I wouldn’t attempt to do it all ourselves. The process has basically taken over our lives, and our families’ lives! For the past four months heading to the shed to work on them three to four hours every night and every weekend has been a real struggle. Having said that, there were definitely some highs along the way, seeing the first samples in the flesh and the roof actually started on site were fantastic.
With hindsight what would you do differently?
I definitely wouldn’t tackle such a monumental task again. The biggest issue is not the actual work itself, it’s the fact that spending the time working on the shingles meant that other parts of the build got delayed.
Our electrician and plumber are almost ready to start the first fix, but we haven’t actually got around to choosing the fixtures and fittings yet, so the process has had a bit of a knock-on effect. Having said that, we do love the finish we have achieved and the look of the shingles on the house so far, so I do think all the hard work will have been worth it…but next time, I’ll leave it to the professionals.
You can keep an eye on Gareth’s progress on his Instagram profile here.


