Watchpoints at this potentially budget-busting stage of the build: foundations, floors and screeds.
In this article we cover:
- What are foundations, footings, subfloors and screeds?
- Foundations watchpoints including rules of thumb for depth, shape and fill, water issues, soil conditions and what to check before pouring
- Footings watchpoints including composition and services
- Subfloors and screeds watchpoints including radon barrier and insulated concrete rafts
The best tip for installing products in wall cavities, under floors or in roof voids, is to remember that you are not likely to want to go back in there any time soon to fix deteriorating products. So buy the best quality to suit the purpose.
Things like cracking or crumbling plastics or composites, slumping or decaying insulation, corroding metal components and badly fitting pipe joints are a nightmare to remedy if they are
in inaccessible or hard to reach places.
No one likes to be given unpleasant or odoriferous repair work (think foul water drains), but whoever does it will charge accordingly.
Walls should be built in stages to avoid premature collapse and no portion of the work should be built more than 1.2m above another at any time.
Additionally, do not carry up one leaf more than 1.5m high in any one day. Bring both leaves of cavity walls to the same level at every course containing rigid wall ties and any rigid rod type ties left protruding must be capped to avoid injury.
Masonry cavity walls should be protected whenever work stops overnight or for inclement weather by securing plastic sheeting over the tops of both leaves, the cavity and any insulation.
The courses of bricks or blocks should be carefully planned to match the storey heights and the heads of wall openings. All courses should be level and all vertical joints should be in line and plumb. A gauge rod is handy to check the heights of windows, doors and floors.
If using different products in the inner and outer leaves of cavity walls, carefully plan the positions of courses, mortar joints and wall ties. Avoid the use of dissimilar materials in any one wall, such as a clay brick course in a blockwork wall.
Copings on walls will require damp proof courses (DPCs)and if near a roof line (such as at parapet gables), will also require flashings and soakers to be fitted. Copings, whether stone, concrete or composite products, need to be securely fixed to the wall head. Allow for differential movement where
the inner and outer faces of the walls are of different materials. Check the drawing details.
Radon barriers and DPC
The DPC in the external cavity wall should be at least 150mm above finished ground level and the bottoms of the cavities should start at least 225mm below the level of the lowest damp proof course.
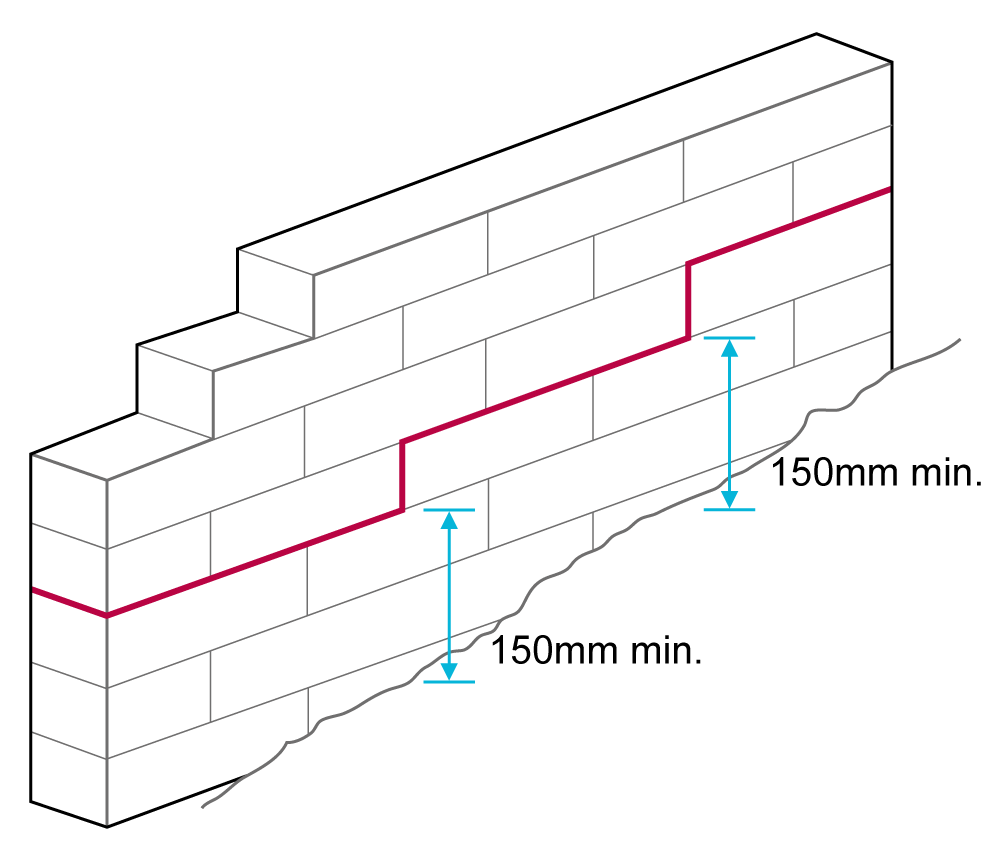
If the wall is built directly off a raft foundation, ground beam or similar supporting structure and it is impractical to continue the cavity down 225mm, pre formed cavity trays should be built in along with external weep holes.
If an exposed radon barrier membrane crosses through walls at the bottoms of door openings, the radon barrier must be permanently protected against damage from the frequent movement of workers and their equipment passing through.
Check that DPCs and flashings are properly fitted at any junctions between them.
Wall ties and other structural components
Cavity wall ties must be fit for purpose and fitted at the correct vertical and horizontal cross-centres. There are some unapproved ties, especially some of the wire types, on the market, so double check the
certification.
Alternatives, such as basalt fibre and resin wall ties, will permit significantly less heat transfer out through the walls than the metal types.
Additional numbers of wall ties are installed at the sides of openings, vertical unreturned edges, sloping unreturned edges (e.g. roof verges) and adjacent to vertical movement joints.
Check tie installation for orientation, fall to the outer leaf, embedment depth in each leaf and that they are clear of mortar droppings.
“Some site workers seem to have been taught that the humble shovel is an excellent tool for measuring volumes or weights of different materials, whereas sadly, the opposite is true…”
Differential movement cracks in walls are very often found where the ends of lintels and sills meet the adjacent blockwork, so it is good practice to install bed joint reinforcement at these positions.
The stainless steel mesh or rods should be provided in the first and second courses above and below all openings, out to no less than 600mm either side of the opening. Bed joint reinforcement can also be used to provide additional strength in parapet walls.
Joist hangers are often used in order to avoid joists penetrating wall cavities and allowing air leakage. External walls will require lateral restraint from upper floors and the roof structure. Where restraint straps are installed, ensure that they are fitted in accordance with the drawing details.
Timber wallplates will also be tied down to the walls using steel straps. Some council areas will also permit the use of flexible steel straps to act as diagonal wind bracing between roof trusses.
With any straps, ensure that they are not damaged or distorted and that they are fixed with the correct number and type of nails or screws.
Steel wind posts are used in external walls to stiffen the wall against horizontal loads. Where needed, they must be designed by a structural engineer. Wind posts should be made from austenitic stainless steel if they are to come in contact with the external leaf of an external cavity wall or if they are used in aggressive environments such as coastal locations. Check before using any other type.
Use only steel plate for shims if they are needed for height adjustment where steel beams bear on concrete padstones in walls.
The drawings should have identified all other concentrated load points such as under girder trusses or at sides of wide openings, etc. and given suitable solutions for spreading or supporting the loads.
Fire
Cavity fire barriers may have been specified and should be clearly detailed on your drawings as a means of interrupting fire spread in cavities. They are typically fitted at the edges of cavities including around openings or where the wall cavity abuts compartment walls and floors (i.e. if the house is not a fully detached single dwelling).
The dimensions of barriers which are manufactured to stay in position under compression must exactly match the width of cavity for which they are designed and vice versa. Also check for the protection of
concealed spaces around and behind external wall cladding. Compartment walls, such as the dividing wall between two semi detached houses, should stop 25mm below the top of the roof framing and a soft fire-stopping material inserted in the gap.
Fire stopping is required above and below the roof underlay and at the eaves. Check the details on the
drawings.
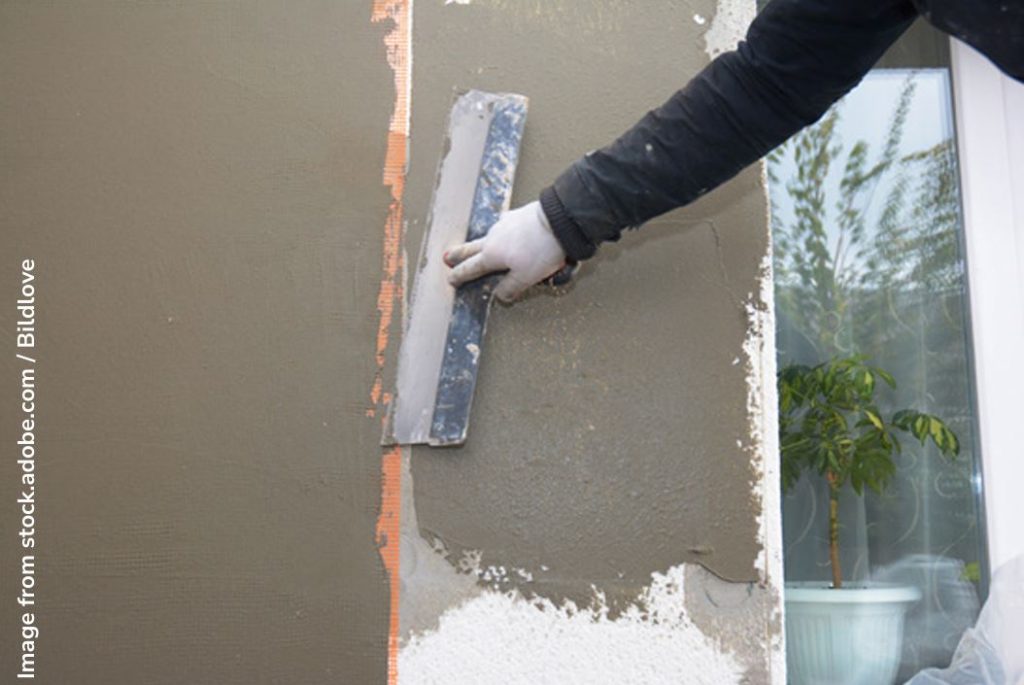
Mortar, plaster and render
Mortar, plaster and render should be mixed in accordance with the specifications, or bought in wet or dry pre-mixed forms from an approved supplier. Keep an eye on site mixed mortar to make sure that
all mixes are consistent and that each mix ratio is correct for each batch.
Check your drawings to find the recommended mixes for each part of the building. To obtain accurate ratios, it is best to gauge the dry materials by weight-batching them, but if you choose to gauge them
by volume, then gauge boxes should be used. Some site workers seem to have been taught that the humble shovel is an excellent tool for measuring volumes or weights of different materials, whereas
sadly, the opposite is true.
Chemical admixtures can be used in small quantities to modify the properties of the mortar and can also be pigmented to the correct colour for facing brick. Air entraining admixtures may be introduced to reduce the risk of frost damage, however the mix ratio will need to be adjusted to allow for any
resulting reduction in strength.
Cold weather tips
When the air temperature on site falls, or is likely to fall, below 5degC, then the use of mortar, plaster or render should cease and all work should be protected. Overdosing the mix with admixtures will be very likely to have a detrimental effect.
Precast products
Check the quality of all precast concrete products including bricks and blocks. Delivery should be accompanied by a Declaration of Performance (DoP) and comply with the relevant standards. The thickness, density and compressive strength of blocks may differ in different parts of the building to account not only for strength but also acoustic and thermal performance in certain areas.
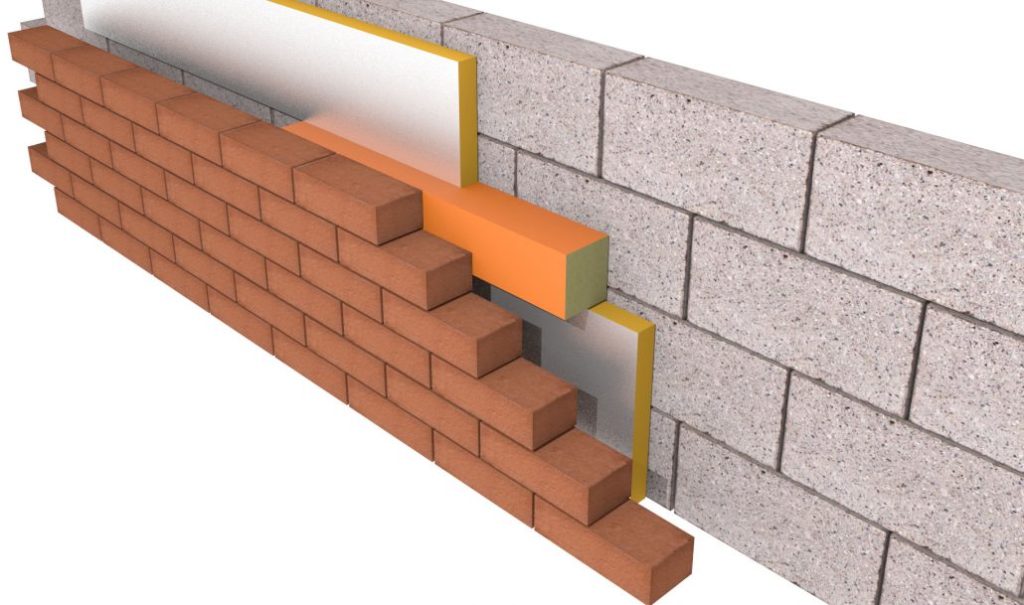
Wall insulation
Insulation is expensive stuff, so install it right. Insulation boards will be fitted as the blockwork rises, but although relatively easy to monitor, is not so easy to remedy, especially if beyond easy reach.
Injected bonded bead insulation products will need voids and wall penetrations sealed before installation, so the cavities can usually only be checked by the installer using an endoscope or borescope camera during installation.
Any doubts about the insulation can be double checked by a thermal imaging survey after the house is sealed and the heating system is functioning. The use of soft insulation such as quilts or blown fibres in a cavity is not recommended due to the risk of settlement over time.
Examine the insulation at junctions where floors and ceilings meet walls, or where the internal leaf of a cavity wall meets the external leaf around wall openings. These areas will also require airtight seals
to achieve the as-designed air permeability rate in the building.

Check that board type insulation in cavities is fitted snugly against the inner leaf of the wall, that all joints are accurately cut and properly taped. Cold air looping between the boards and the inner surface of the wall cavity will severely reduce the efficiency of the insulation.
It is imperative that the wall ties and the cavity side faces of the wall are all kept entirely free of mortar and droppings. If insulation boards are to fully fill the cavity, seek evidence that they have been manufactured to do this.
It is all too easy to damage strips of board type insulation as they are built in around openings. Insulation should be fitted under the sloping DPCs between lintels and over wall openings.
When windows and doors are installed, these areas can easily be missed, which will be very difficult to remedy. Take care that soft insulation such as glass fibre quilt is not stuffed into these voids. Any compressed insulation will be less efficient so use cut to-shape insulation batts or boards.
Wall tracking watchpoints
Tracks or chases are cut into the surfaces of walls in order to install cables and small
diameter services, but if badly done will weaken a wall.
Watch out for:
- All chases should be neat, precise and not be cut with impact power tools.
- Vertical chases should be not deeper than one third of the thickness of the wall, or of the leaf if it is a cavity wall.
- Horizontal chases should be not deeper than one sixth of the thickness of the leaf or wall.
- Chases should be positioned so as not to impair the stability of the wall.
- Consult the block manufacturer before cutting chases in hollow blocks.
- Do not make chases back-to back on the opposing faces of any wall.
- Only cut chases that are straight and true, vertical or horizontal; not at angles or curves.
Junctions of new and existing walls
New walls should be ‘toothed in’ to existing walls at every alternate course of blocks when the new wall is built as a continuation of the existing one, on or near the same plane.
A good quality of mortar bond between old and new work is essential. Where the new wall is perpendicular to the existing one and meets it a sufficient distance away from a corner, it can be
connected using an approved stainless steel wall tie starter system.
When trying to create continuity of insulation between new and existing cavities, take care that the structural integrity of the existing wall is not compromised. Consult your designer if in doubt.
Certification
Your windows and doors should come with certification including datasheets, operations and maintenance manual and confirmation of CE marking. Ensure that your datasheet includes the U-value of the window, along with the solar transmittance. This will ensure that your building energy rating (BER) reflects the true benefit of your new energy efficient windows
and doors.
Timber frame watchpoints
The timber frame elements of the construction should be manufactured to BS or Eurocode standards by a registered Structural Timber Association (STA) or Irish Timber Frame Manufacturers’ Association (ITFMA) member.
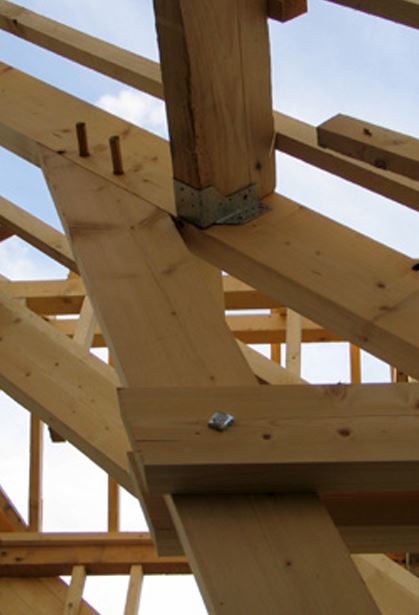
Many timber frame buildings are erected by contractors, so check those works which may be beyond the direct control of the manufacturer.
A checklist may include:
- Evidence of the installer’s conformance with a suitable quality assurance scheme.
- The moisture content of solid timber members and wood based panels for internal use, after delivery and after erection when protected from the weather.
- Proper handling and storage on site and protection from inclement weather.
- All dimensions should match the drawings.
- Perpend vents of the correct size and spacing in the external blockwork at the top and bottom of each storey in all external walls.
- Wall ties of correct quality, at the correct spacings and positions.
- All wall ties should be fixed to studs, not sheathing.
- Vapour Control Layer (VCL) fitted on the warm side of external wall panels.
- Services cavity of sufficient width, if specified.
- Measures for differential movement, including at openings, services penetrations and flues.
- Ensure that any sealant has been manufactured to meet movement gap requirements.
- Breather membranes on the outside faces of the timberframe wall panels.
- Suitability of spandrel panels in terms of structural stability, fire resistance and acoustics.