What it takes to build a tiny house on wheels, by a self-builder in Co Down who’s been through the process.
In this article Michael Rauch describes his tiny house building project, including:
- Building a home for under £20k
- How he and his partner Alex tackled the project as novice
- How they built the tiny house step by step, including full insulation details
- How they tackled the design phase to maximise space and light
- What they did for water, heating, electricity and sewage
- Full details on the solar photovoltaic (PV) panels
- Their top tips for a successful build
- Full supplier list and images of the process
My partner Alex and I dream of buying our own land to build an eco home, and the choice to live in a tiny house was a step in that direction. The cost – in our case between £15,000 and £20,000 depending on how much off-grid technology we incorporate – gave us the opportunity to save. And being on wheels, we’d be able to move the house around as needs be.
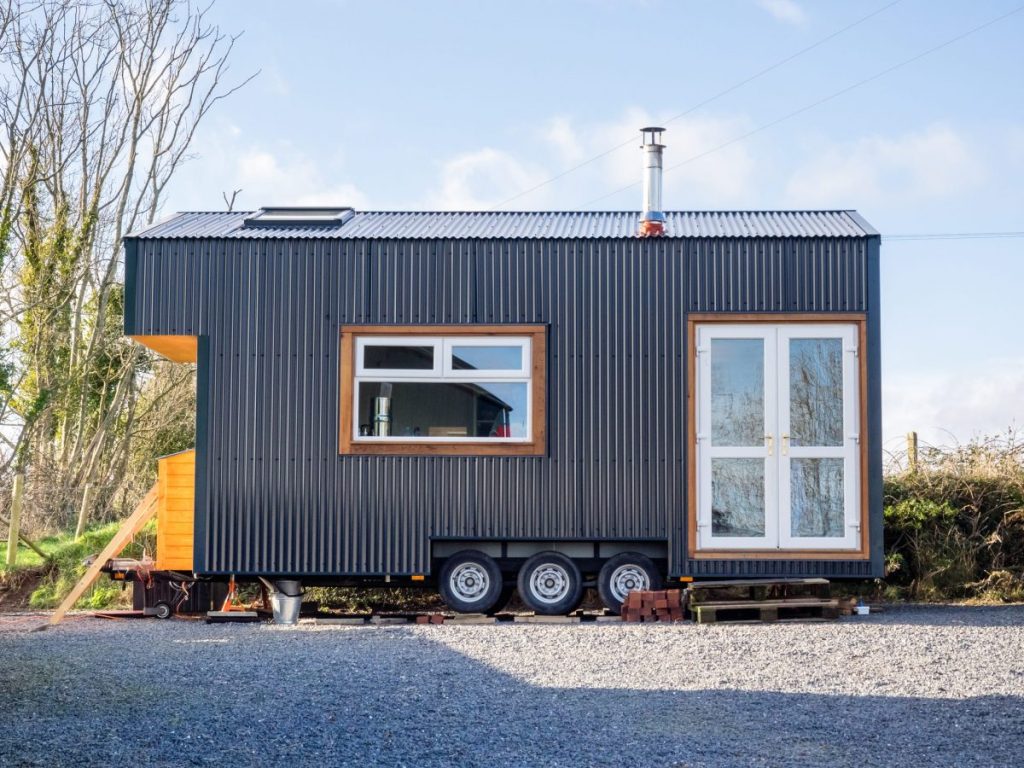
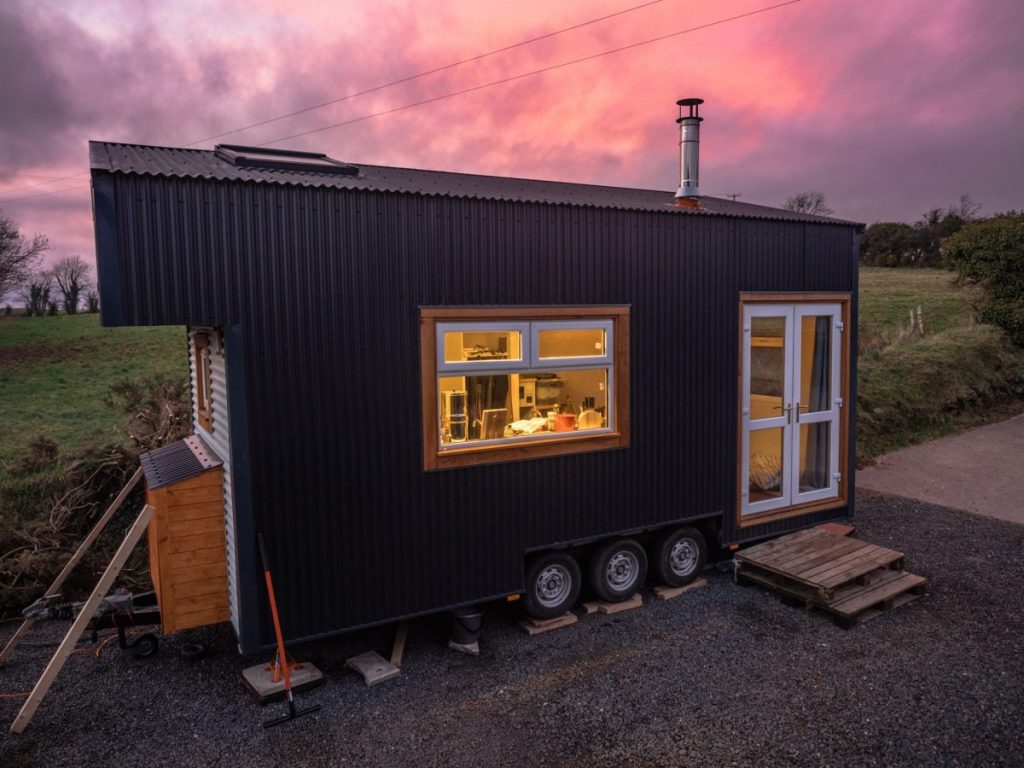
In 2019 the first step was to buy a second hand 6.2mx2.4m trailer frame which had a low deck height, so that we would have enough room for a mezzanine loft inside but without making the whole structure too tall for towing. To transport the house with a large 4×4 we had to factor in size and overall weight of 3.5 tonnes.

Design phase
Neither of us had any building experience before starting the project so I researched the topic like crazy, watching endless videos of how others built theirs online which helped me understand the steps involved and the reasoning behind each decision.

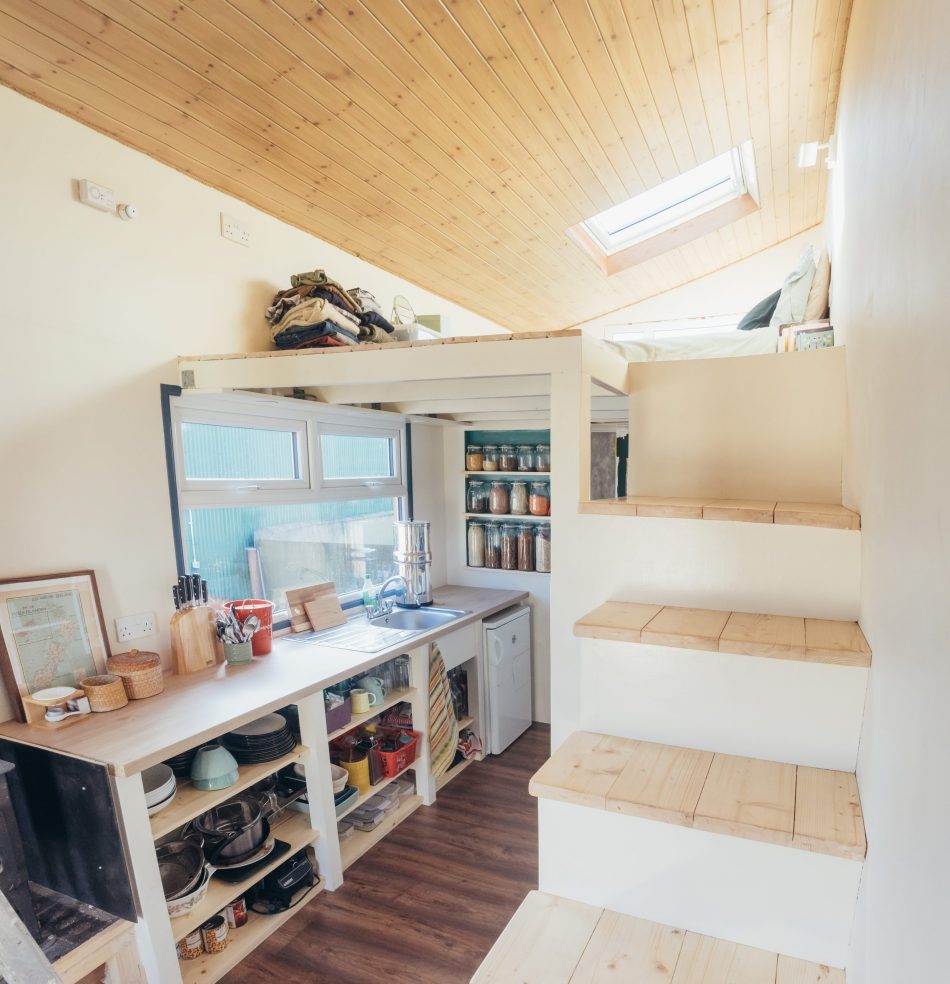
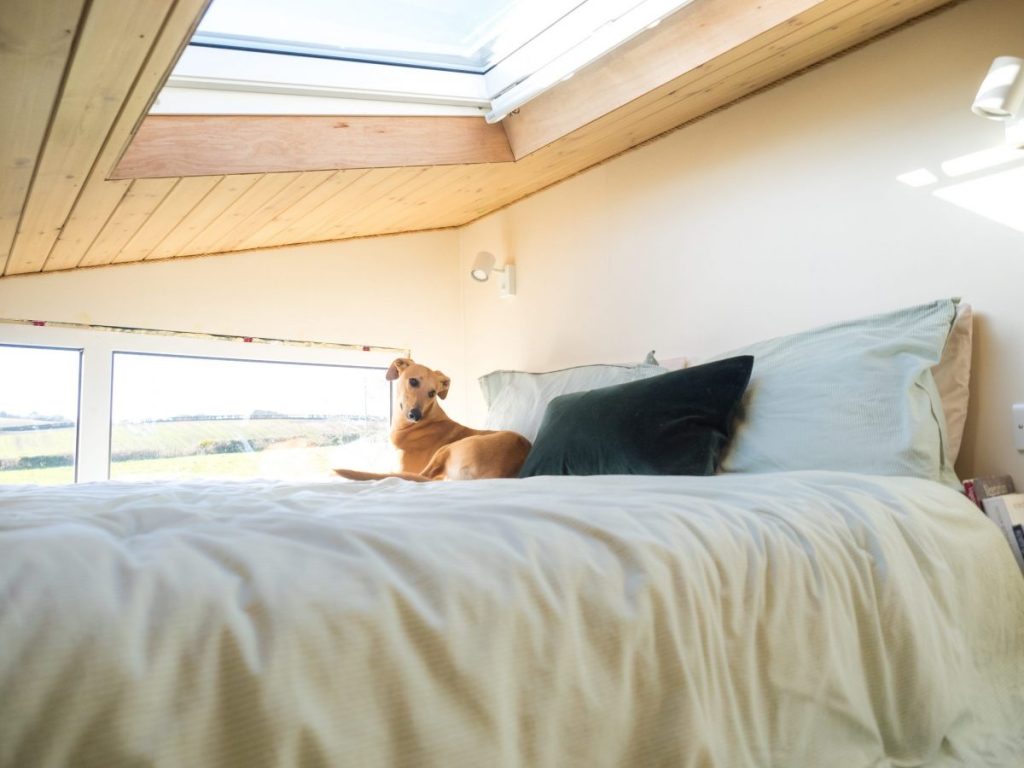
I then set about modelling my design up on 3D software. The great part about building it ourselves is that we have been able to custom make it for us. The kitchen area is large and the bathroom smaller as we really love to cook and bake. Building an overhang to extend the loft means we can easily fit in a king size bed.
Currently the sleeping loft is located above the kitchen, giving the living room area a full height ceiling; with hindsight I would swap it around and put the living area below the loft. The extra height would be more useful in the kitchen for storage, and you tend to stand in a kitchen and sit in a living area.
In general I chose techniques and materials which made the most sense to me and which were manageable for a novice builder. For example even though you can build with light weight structural materials such as steel frames, timber was a lot easier to work with and easier to make changes with down the line.
Because we couldn’t really afford all new windows we started collecting secondhand ones and designed the wall construction around them. They actually weren’t too bad to install, even though I was convinced I was going to break one!
Some of the higher windows and the roof window were a challenge because we had no stairs at the time of installation so it involved a lot of lifting and holding while standing on a ladder. The double French doors were also a bit tricky to adjust, to get them to close correctly. Just because I had never done it before, it took a bit of guesswork.
Project management
We didn’t have anyone advising us, which can be a bit daunting and a lot of pressure to be honest, but it forced us to really learn everything for ourselves and from our own mistakes.
I had a quick read through the build code but decided that there wasn’t any point in trying to follow it. The structure is more of a boat than a house so going out of my way to try and meet it didn’t make sense to me although I took a few things from it like alternative escape routes and fire safety.
In terms planning permission, I haven’t approached the council. I’m no expert but from what I have read you need planning permission for anything that you will live in full time (even a caravan). I have no idea what their reaction would be to something like this. They may grant temporary permission for it, it depends how they see it I guess.
In the future, if/when we build a more permanent house, we will be able to get temporary permission to live in it on site for the duration of the build easily enough (like a lot of people do in mobile homes). In the US homes are built on trailers to get around planning laws, but this makes no difference over here. We are just doing it for flexibility and because we have no land to build on and wanted to start straight away.
The envelope
We got the trailer reconditioned, then built the timber framing onto it.
The buildup for the floor consisted of a twin-walled polypropylene plastic sheeting on the bottom to protect from water/ debris, a waterproof breathable membrane for extra protection, 70mmx45mm timber framing laid over trailer joists, 70mm PIR rigid foam insulation, 18mm OSB on top as subfloor.
At this stage I realised the insulation boards were difficult to cut to exact sizes so chose the more malleable option of insulation that comes in rolls for the walls and roof.
The timber framed walls sit on top of this (each one was built and raised up individually) and are bolted down through to the bottom of the trailer. The wall framing is 70mmx45mm rough sawn timber, screwed as opposed to nailed to give a better hold when subject to vibrations in transit with diagonal metal strapping bands.

When we ordered the timber we didn’t get treated stuff, we bought a few tins of low VOC (volatile organic compound) wood preserver and applied it to the frames when we built them.
The internal walls are lined with tongue and groove plywood, glued to the wall framing to give the whole structure more strength when moving. For the insulation we preferred to use something natural as air quality was a concern in such a small space and basic wall construction. Our choice was between hemp and sheep’s wool insulation; we chose the former which was a bit cheaper.
The roof has 100mm quilt insulation made from recycled plastic bottles – it’s cheap and light weight to keep the centre of gravity low.
The roof rafters are tied down to the walls with brackets so there is an unbroken connect from the trailer to the roof. The external cladding is corrugated steel – this was mainly a practical choice due to its light weight, low cost and ease of installation. However we really like the look of it now that it’s on.
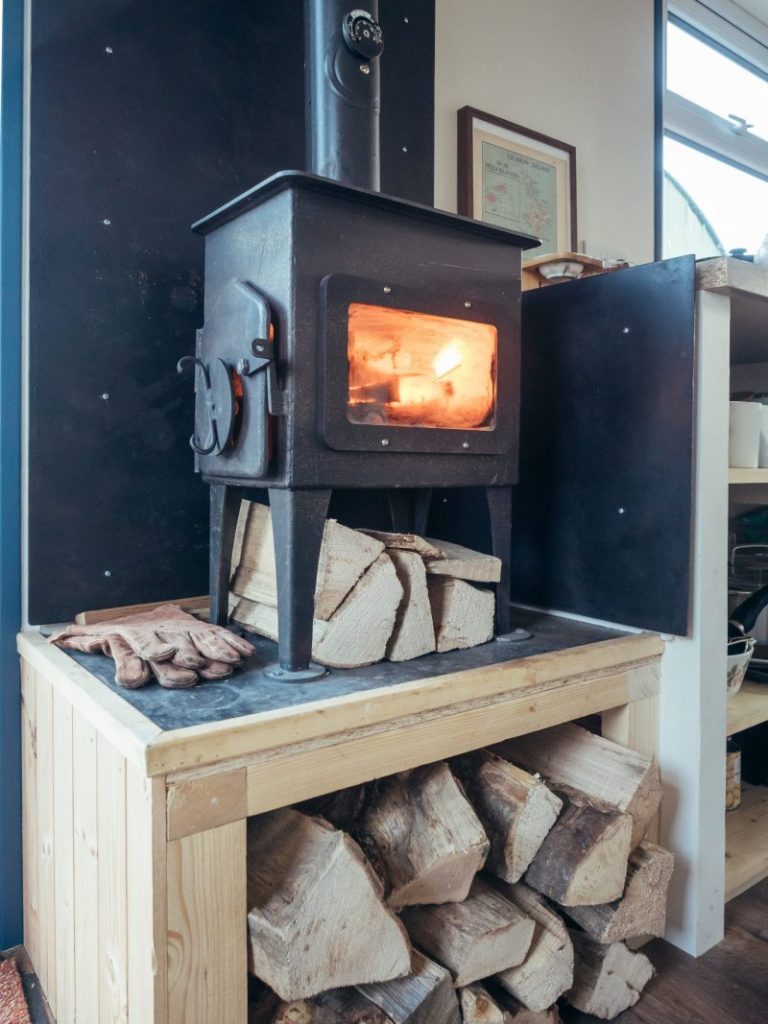
Heating and hot water
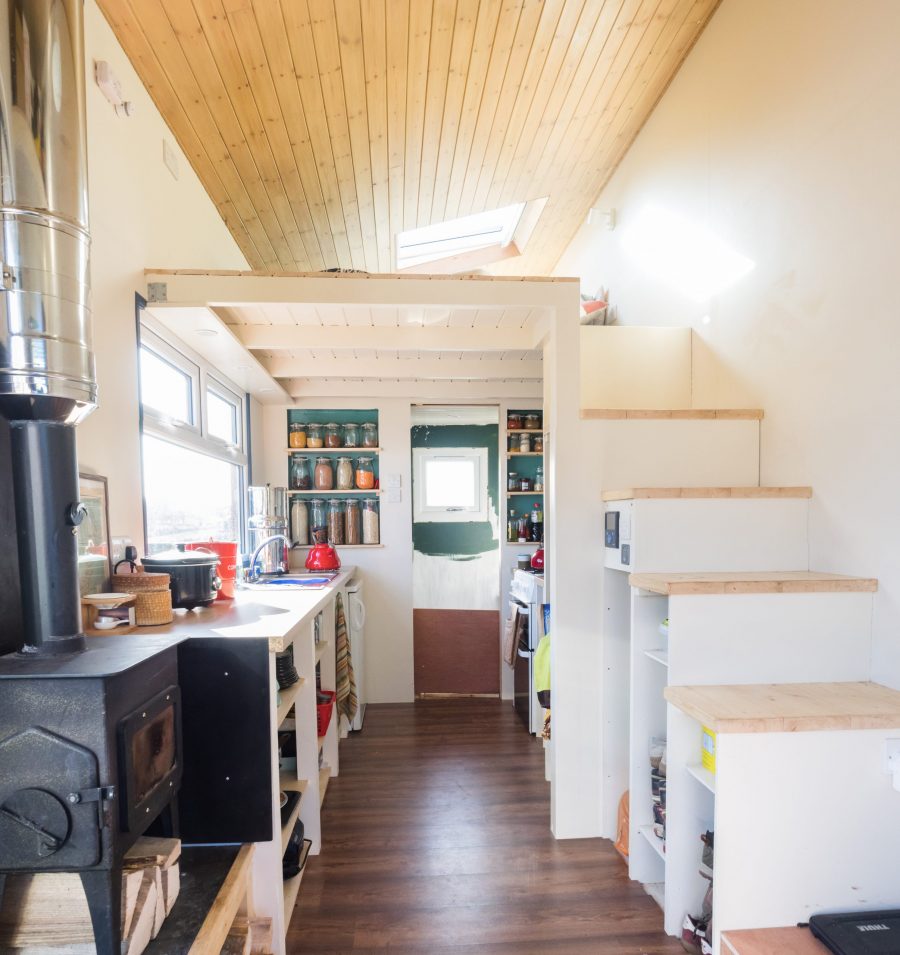
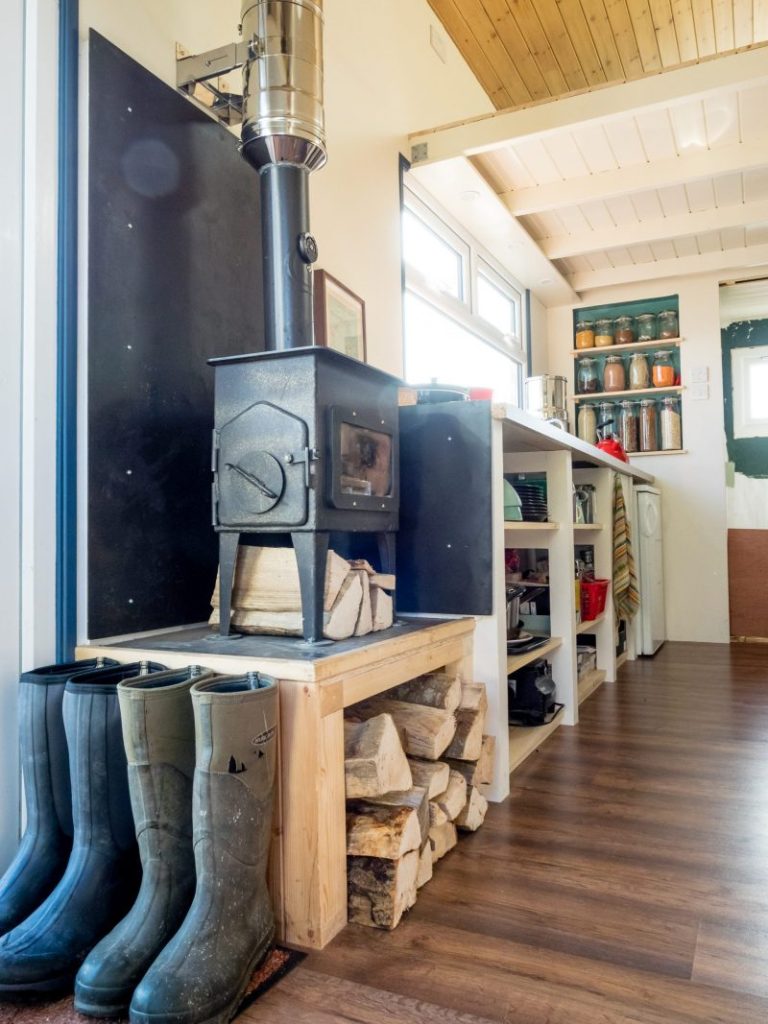
The tiny house is very easy to heat with the wood burning stove and we both love the homely feeling a fire gives. In the depths of winter having it on for a few hours
provides enough heat for the day; having it on all the time would make the space too hot.
We usually light the fire for a few hours in the morning and sometimes a few hours in the evening. Probably on average we only used about six to eight logs a day (the standard sized ones you see in the nets at garages) at the height of winter. Most of the time it’s warmer here than at our parents’ houses!
I thought it would get very cold at night in wet and windy weather and had expected it to heat up and cool down quickly and easily, but it’s actually easy to keep warm and toasty.
We chose a twin wall flue for the stove (better draw as it keeps the flue gases hotter) but even though it is an insulated flue it still gets quite hot so the hole in the roof is quite a bit bigger than the flue to allow for the required clearances.
The flue is sealed to the roof with flexible flashing which was pretty easy to install by following the manufacturer’s instructions. For ease of transport I made sure the last join in the flue was at about roof level so when we are moving it I can just climb up and disconnect the top part and then nothing really sticks up to get hit by low trees etc.
To get us moved in we bought ourselves a little gas camping cooker but we actually do a lot of cooking on top of the stove, which I didn’t expect. We light the stove in the morning anyway so we just make our porridge on top to save gas. For hot water we boil it in kettles on the stove (and gas cooker sometimes), but we shower in the main house. We haven’t kitted out the bathroom yet so even if we had running hot water we’d have to use the one in the house.
Eventually our hot water will come from a tankless instant gas boiler so we are only heating the water we need. We will install the gas bottle(s) outside and a gas regulator will be mounted directly to the side of the house. So when we move we just have to disconnect the bottles and move them to the new location. The gas line will run straight into the water heater nearby, and also under the house and up into the kitchen for the cooker.
Running water is contained in the house currently so there are no exposed pipes but I am a little concerned about the gas boiler which will be mounted inside the ‘utility box’ at the front of the house. That said, it is insulated so there should be no issue with frost damage.
There is a system which I have seen another couple use for a tiny house which is a home biogas generator. Your food scraps and toilet waste go into it and it digests them and produces cooking gas and liquid fertiliser. It’s a pretty small system and I really like the idea of it. It has a minimum operating temperature though and the climate here is a bit cold so you would have to build a little greenhouse round it and maybe a heat source…it could be more hassle than it’s worth!
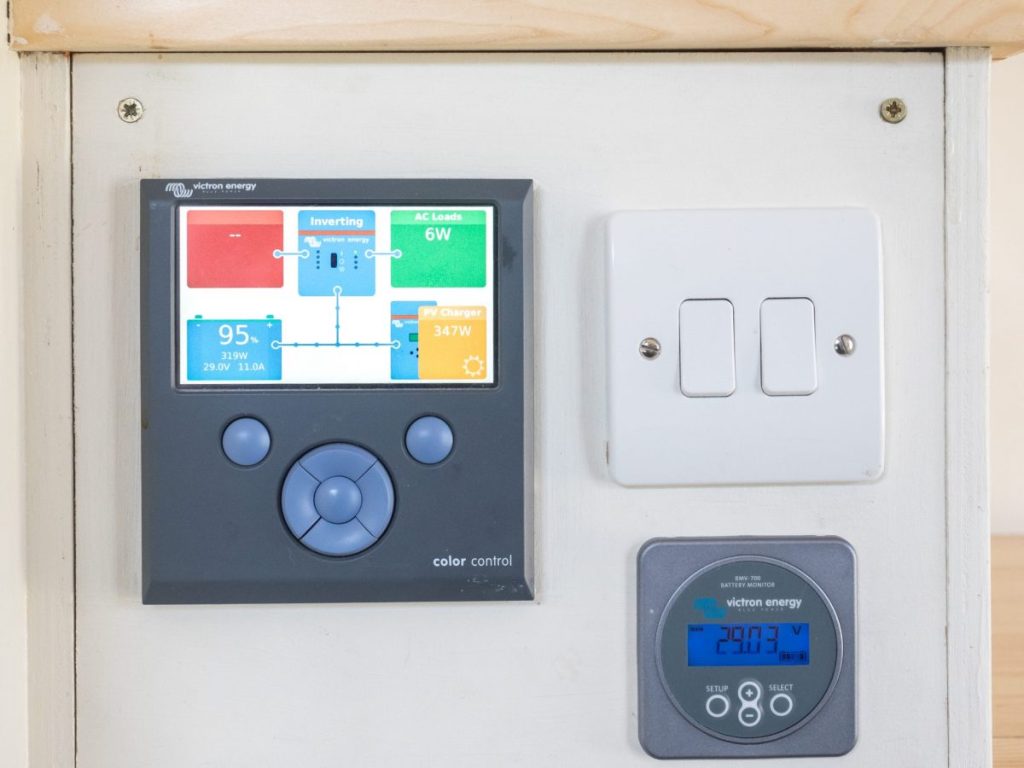
Electricity
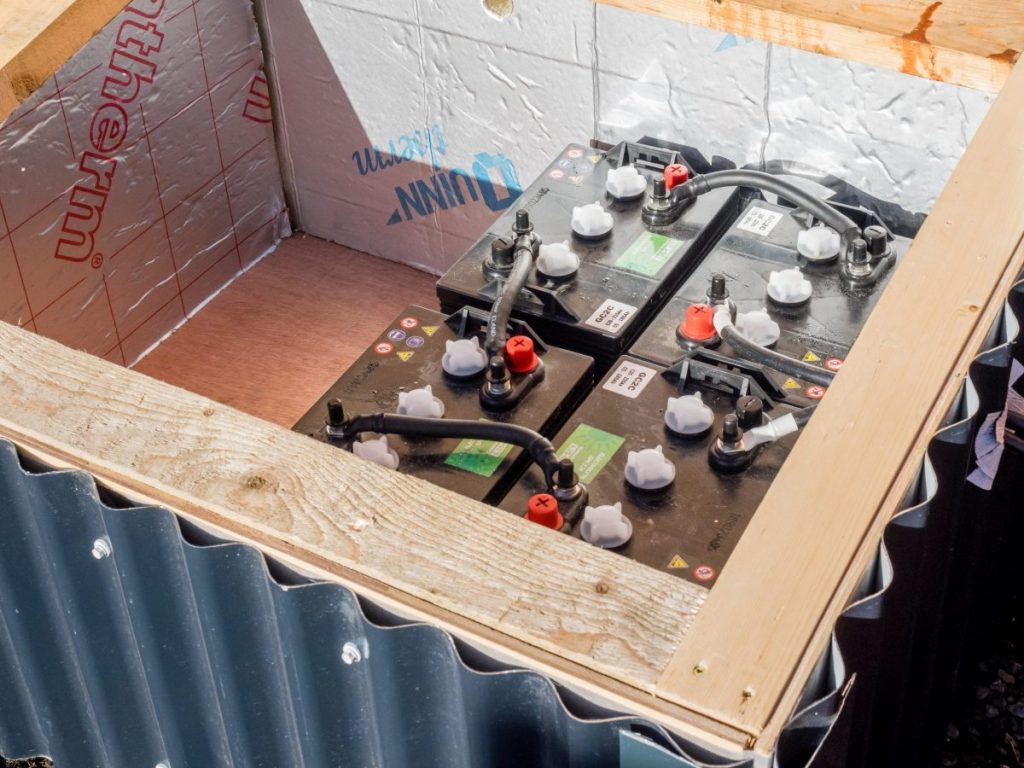
Power is provided by a 1.2kW solar panel array which consists of four 300W panels, each roughly 1mx1.5m in size. We have 225Ah of battery storage at 24V but as the whole house is wired to 240V like a regular house, all the power from the batteries runs through a 1600W inverter. We specifically chose a small inverter to avoid drawing loads of power, since it will be on most of the time. The batteries are in an insulated box to prevent damage.
There is enough space on the roof for the panels but having them on the ground gives us more flexibility for positioning them and makes cleaning easier. Once the house is moved into a more permanent location I will probably build a better mount for the panels, hopefully on its own trailer, which can be tilted to adjust to the sun’s location in different seasons.
Unfortunately this setup was not quite enough for the long dark weeks we had in winter, from about November to January, when we were connecting to the mains once or twice a week. The only things running on solar are a small fridge, a few fans, LED lights, and charging devices as well as running the odd appliance and eventually the pump for rainwater. That said by the time February rolled around, despite the snow, the longer days meant more sun and that is proving enough to supply us with electricity. We will definitely have far more energy than we can use in summer!
Next winter we will have to decide how to handle the dark weeks: either increase the solar setup, have a backup generator hooked up, or try to reduce our demand more. The fridge is by far the biggest draw, and ours is a pretty old one, so we could maybe buy a new efficient one.
Water
We plan to have the house set up for an off-grid situation by collecting rainwater and storing it in a large tank, then pumping it through a series of filters before entering the house. If we end up parking it somewhere near a water outlet we will probably just connect into that instead. At the moment the system is set up for hooking up to the mains but we don’t have it connected as the horses in the yard we are in would step on the hose line.
So we just have a big container we manually fill with water and a large countertop water filter for drinking. It’s a bit basic but it will seem like luxury when we get running water! Rationing makes you appreciate how much you use.
Grey water will flow into a small soak away style bed where it will be naturally cleaned and allowed to percolate. At the moment the only grey water coming from the house is from the kitchen sink; it just drains into a container under the house and we empty it into the compost pile from the horse stables. We are careful to use eco friendly and natural cleaning products that will not harm the environment.
We will also most likely install a composting toilet which will save us water and also eliminate the need to deal with wastewater. We are currently using the toilet in the main house.
Tiny house on wheels: Top 5 tips
Get stuck in. My design (and pretty much everyone else’s I have talked to who has done one) is quite different from the initial model I created. Things just change as the build progresses, so don’t get caught up on spending a lifetime designing every detail. Be open to adjustments throughout the build.
Don’t fret. If you are doing a DIY self-build, don’t be overwhelmed or worried that you don’t know all the skills which go into building a home. I had never built anything before this, and each job was the first time I had done it. The internet is an amazing resource for learning; if you have a specific question ask on dedicated Facebook groups or reach out to people who have documented their builds on social media. I got a lot of great knowledge and ideas this way. Expect some things to go wrong and for there to be some headaches, because there will be!
Invest in the tools you will need. I would invest in more tools at the start of the process; things like a table saw, planer/thicknesser, more wood working tools etc. would have sped the build up a lot and made certain parts much easier. It would also have allowed me to repurpose salvaged materials more, which would have compensated for the cost of the tools and maybe given the interior some more character with older materials.
Buy a new trailer. We used a second hand trailer for our base and got it refurbished to try and save a little money as the trailer is usually the biggest cost of a tiny house on wheels. However by the end of it, the refurbishment cost brought it up to the cost of a new purpose built trailer which is about £4k+. So if I were to do it again I would just start with a new trailer as there are a few suppliers of purpose built tiny house trailers in the UK. Or if I was on a very tight budget I would get a used trailer and do all the work to it myself. If I had the budget I would also have bought new windows specific to my design instead of working around second hand ones I picked up. Although I’m pretty happy with how the windows turned out.
Know the road towing restrictions. If you follow a design from the US, it is likely to be too heavy. New Zealand has very similar towing restrictions for size and weight as the UK, which is a maximum of 7m long and 3.5t weight, and since the tiny house movement is quite large over there, it’s a good place to look for design inspiration. There isn’t really a maximum height, just suggestions, but no more than 4m is recommended. Also in the UK the trailer needs to be ‘type approved’ if it’s custom made. Since we bought a used one it already was. Some people have said you are probably meant to get it type approved again once you build on it, but I don’t think we will bother as it will only be moved a few times.
Suppliers
3D free design software: SketchUp, sketchup.com
Trailer: Secondhand trailer from Facebook group approx. £2k. Repurporposing by DF Engineering in Saintfield, Co Down, includes wax and lights plus labour, approx. £2.2k
Openings: windows bought on gumtree.com and other secondhand sources; total including trims approx. £1k
Structure: Correx sheeting, cordek.com from NI Plastics niplastics.com, Xtratherm floor insulation, xtratherm.ie; wall insulation Thermafleece Natrahemp; roof insulation Thermafleece Supasoft, thermafleece.com from Celtic Renewables, celticrenewables.com; all timber from S G Jones & Son, Lisburn, sgjonesandson.business.site; steel cladding from Befab, befab.com; total cost for structure approx.£4k
Electrics: Victron Easysolar inverter, victronenergy. com, solar panels, four 225Ah 6V batteriesplus cabling and switches; total electrics approx. £3k
Interiors and plumbing: secondhand kitchen, paint, bathroom; total approx. £2k
Stove: Custom-made by The Fireweaver, thefireweaver.com (£380)
Flue: full system including Dektite flexible flashing, deks.co.uk, from glowing-embers.co.uk at cost of £390
Tools and supplies: Ray Graham’s, B&Q, Screwfix and others, approx. £1.2k