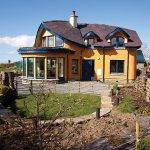
When Mike Harris and Jo Lewis decided to renovate a traditional three-room cottage in County Leitrim, they knew it would be a challenge, especially considering that Mike had no prior experience and intended to do all the work himself, including building straw bale walls. What they didn’t expect was that it would take them six and a half years!
“We were really naive when we moved here,” says Mike, who sold his vegetarian restaurant business in London before moving to the Leitrim countryside with Jo and their two young children. “We lived in a mobile home during the entire build and towards the end we got extremely tired of it! But memories fade, the kids barely remember what it was like. We arrived with a toddler and a baby, and a third child was born while we were living there. The eldest is now 12 and the youngest eight and a half.” Having lived in the house for three and a half years, even Mike can hardly remember how hard it was. “Now we’re in a nice house and that makes up for everything.”
As is often the case, the major challenge on this build was funding. When Mike took on the project, they only had enough for the materials, which meant he had to do all of the building work himself. “Once we got the frame up and the roof done, the money ran out,” says Mike. “We only had enough for two to three years. At that stage we hadn’t the time or the money to carry on, it would have been too stressful. So I went back to work part time and we had to wait to get financing to complete the build.”
The site used to be a farm, and the house is at least 150 years old. “We initially thought of building a new house made of timber frame and straw infill near the existing cottage,” says Jo. “But the site occupied by the cottage was the nicest on the land and was tucked under the hillside to protect it from the prevailing winds. We briefly considered knocking it down but couldn’t face destroying the heritage and history of the place so we opted for the lengthier and costlier route of extending the cottage via sustainable methods.”
“When we started we didn’t know who to ask,” says Mike. “The internet in 2002 didn’t have information as readily available as it is now. For the lime render I got information from England, and for the straw bale, America. Little did I know there was a lime expert in Manorhamilton, just 10 miles away!”

This was the motivation behind Jo’s Inspirational Homes initiative, a network of self-builders and home improvers willing to share their experience with others. Every year homeowners in Leitrim open their doors to the public during a weekend; the website also offers information on the builds and encourages networking, as well as the sharing of skills and resources, including courses on sustainable building methods.
“It’s a way to bring people together and sharing information,” adds Mike. “If we had that when we moved here, it would have made our lives a whole lot easier! Getting access to local information is invaluable. There’s a timber frame builder in another nearby town I could have used, but I didn’t know he existed back then.”
Their architect, while a good source for leads on who to contact, wasn’t always working with local people. “It was a bit mad at the time, people were throwing up block houses, and when we could find someone involved in alternative methods of building, they were very busy. They just didn’t have time for you. But we still scraped through!”
Timber envelope
Mike adopted the Walter Segal method, which relies on simple timber frame construction, making building accessible to novices. “We found an architect who is very experienced in this type of build and he advised us throughout,” says Mike. “He initially sent in some sketches and then made cardboard models. It was a joint effort as I was clearly very hands on. Even though I have a little background in engineering, I’d never done anything like it, so his help and advice throughout were invaluable.”

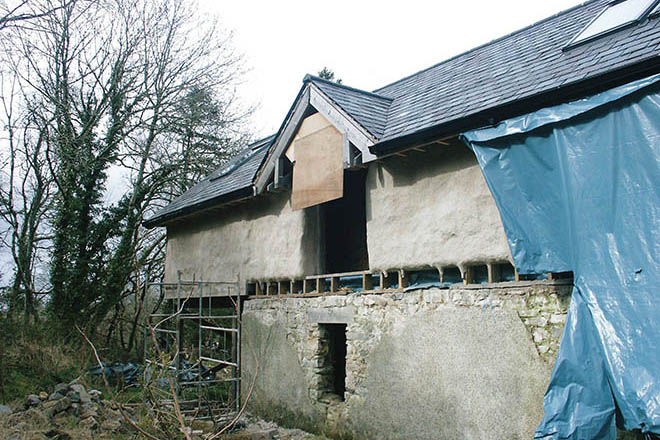
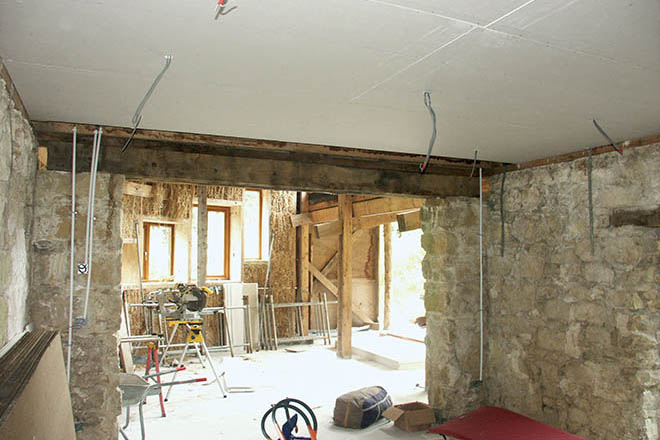
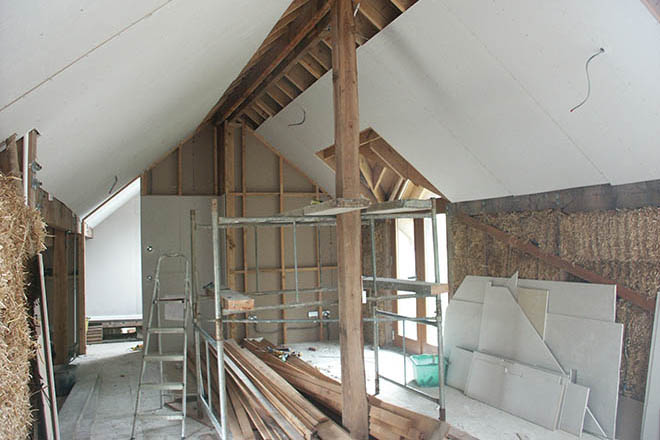
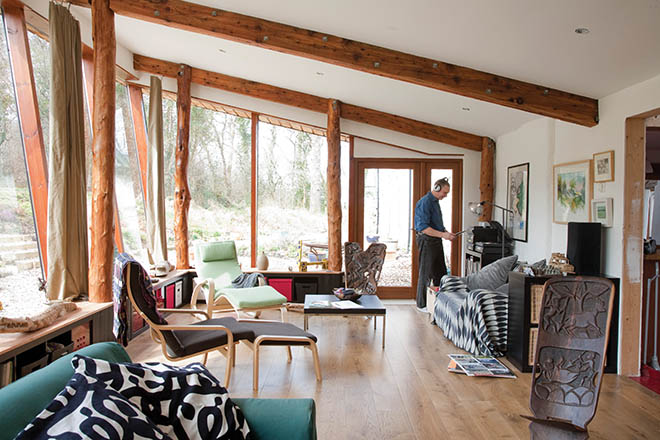
They decided to envelope the original home in a post and beam timber frame structure; the only original wall left exposed on the cottage was the south facing one. “The timber frame walls are half a metre thick and insulated with straw,” says Mike. On the north west corner of the cottage, the new build portion was added, including the ground floor living room and kitchen, and another storey was built on top of the existing masonry to incorporate two additional bedrooms. “The house had a low roof, so we put a wall plate across the top to form the first floor level.”
“It was surprisingly cheap to put the frame up; the timber, straw and roof all came in at less than €30,000.” And it’s not due to scrimping on materials, but rather savings on the labour costs.
“I just got the wood and started putting it up, based on the architect’s plans, which were checked by an engineer. It was not that complicated, the main thing was to make sure the measurements were correct. I used a laser level.”
“We have 150 mm2 posts supporting the frame along with 75x225mm beams supporting the roof,” adds Mike. “On the first floor level I had the studs placed every metre to support the beams.” Some of the trickier elements were vetted by the engineer, including how to support the 5m span in the living room. “We used a composite beam with a steel plate.”
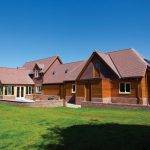
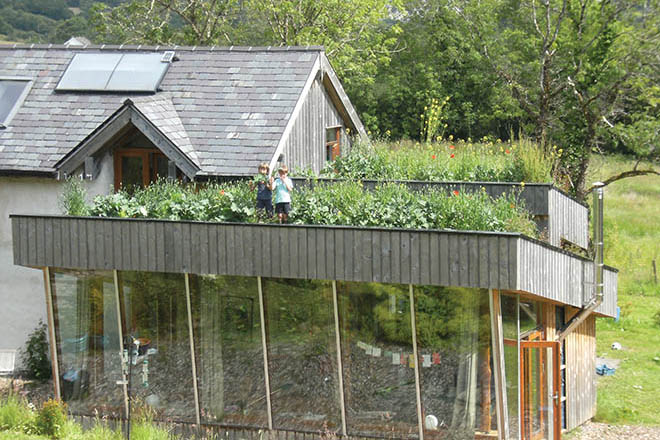
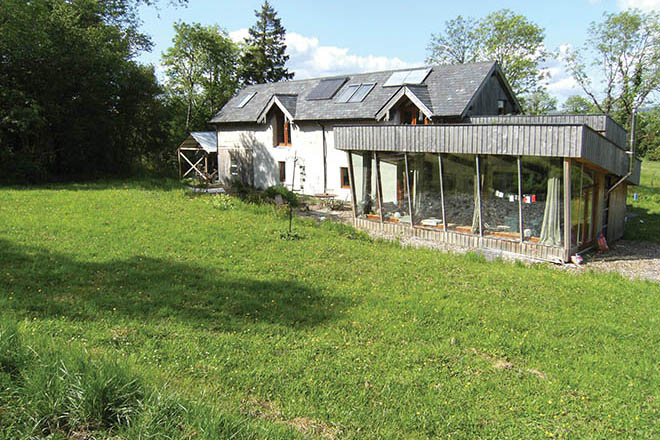
As for the roof, it was slated with reclaimed Welsh slate as the old roof was cement fibre tiles which couldn’t be re-used. The extension, meanwhile, was covered by a 12 degree sloping green roof. “The first layer consists of an industrial grade rubber membrane sourced from Italy via County Laois! It’s a very impressive material, only 1.2mm thick and it can be left exposed. Industrial buildings install it without ever covering it. It’s cut to size so there are no overlaps, the joints are made in the factory so it comes in one piece, and it’s guaranteed 20 years. We topped it up with soil a year after moving in — now there’s cabbage growing on it. The kids can go pick their dinner on the roof!”
Straw filling
“We were both very taken by the straw bale buildings in Athena and Bill Steen’s The Straw Bale House,” says Jo. Mike also read up on stone buildings in Pat McAfee’s books and took courses to brush up on basic concepts.
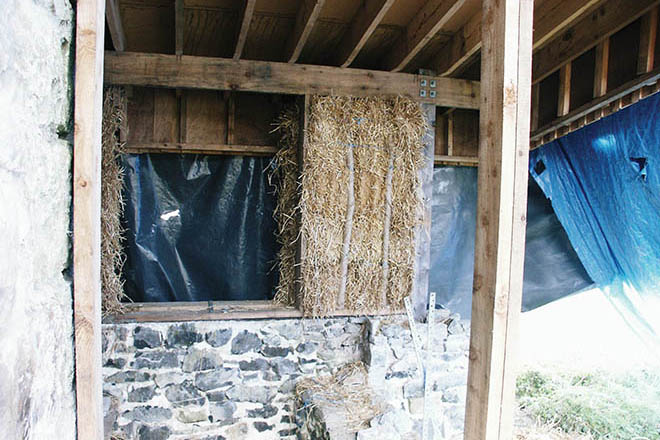
“We used the straw bale as an infill instead of using it as a supporting structure,” he says. “In 1998 I took a course about straw bale building, having bought the land in Leitrim at that stage. It was a taster course over a long weekend, led by Barbara Jones of Amazon Nails. There were a lot of people at it and together we erected a 7m diameter straw bale wall, which was load bearing. It’s a different construction to what I ended up doing — with Irish weather I wanted the bare bones up before we put in the bales! Also I thought it would be too difficult so I chose to build the timber frame and roof beforehand.”
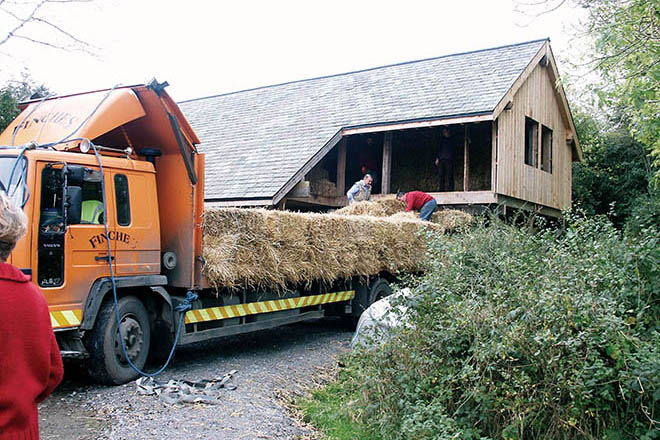
Once in Ireland, Mike found it difficult to source the straw bale. “I ended up going to the south east of Ireland, I figured out that’s where a lot of the straw suitable for building could be found.” He asked around and found a supplier though a dealer in the Farmer’s Journal.
“Reputable dealers are meant to store the straw well,” he says. “I had to take the chance that they did. We were lucky in that the dealer agreed to only deliver 400 bales, as most will only deliver 700 to 800. A truck loaded with that much cargo wouldn’t get up our lane anyway, so there wasn’t much choice!” Mike only needed 320 bales in total.
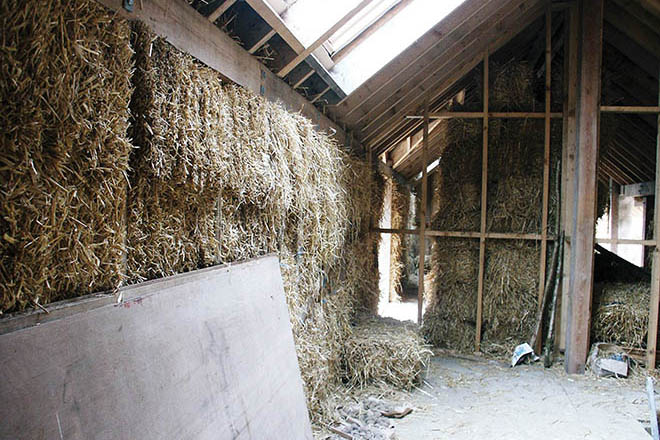
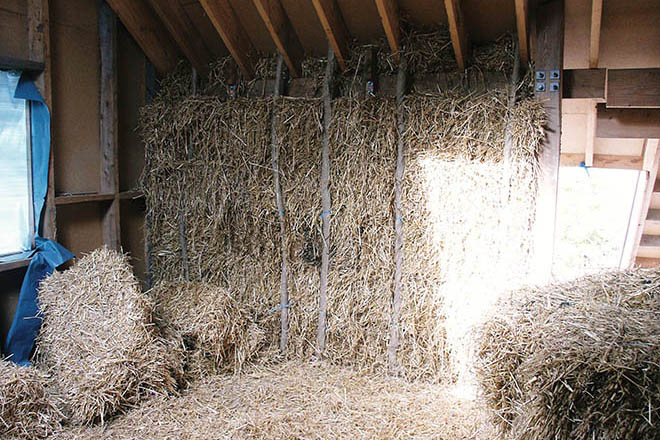
“The straw came in really dry, and we stored it upstairs until we did the walls,” he adds. “When the bales were actually inserted into the timber frame walls, I put up a plastic sheeting to protect them. There’s an overhang on the eaves, of about one metre where the prevailing winds drive the rain. The water that did get in dried up quickly.”
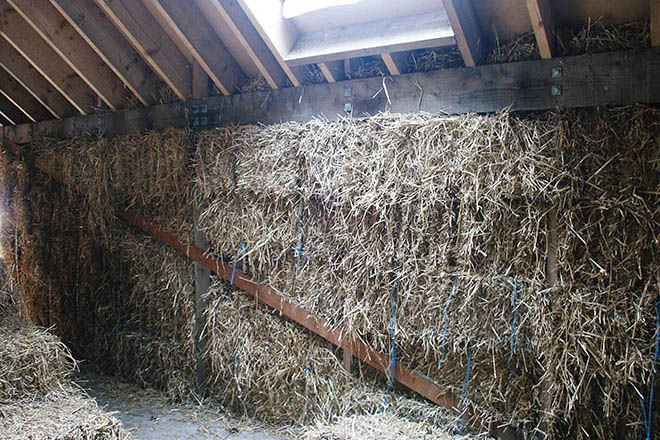
The straw came in variable tension and sizes, and Mike took extra precautions before installing it. “The bales weren’t exactly the same size so I built a press. This allowed me to add between a 1/10th to a 1/3rd extra to each bale, giving me a more consistent size and density. We jammed them in stacks of five or six to build up the wall. The last bale was very tight, so we used a hydraulic jack to make room, and then let it spring up. Then I pegged the bales together, front and back, with hazel rods sourced on site. I was making sure that there wouldn’t be any inward or outward movement, as a safety measure. Thinking about it now, it probably wasn’t necessary considering how tightly they were packed.”
Lime: the amateur’s friend
Both the stone structure and the straw bale extension are made of ‘breathable’ materials, which means air can get through the building fabric. This doesn’t lead to draughts but rather ventilates the structure, making it less vulnerable to problems relating to moisture. “We couldn’t use a cement render as that would have let humidity to get into the structure and then not allowed it out, which is the last thing you want to do,” says Mike. “So there’s a lime render inside and out to allow the house to breathe.”
Lime has the added advantage of being very easy to use. “It’s a pleasure to work with,” he adds. “It is very forgiving, which makes it the perfect material for amateurs. It also allows for a variety of finishes. With a cement render, you can’t come back the next day and patch it up. If it’s messed up, you have to take it off and start again. With lime, you can correct it. Even the mix can be used the next day as it doesn’t harden quickly. The drawback of course is that you have to give it a bit more time to dry, but not much.”
He agrees that you do have to take precautions when using lime, but that they’re in the realm of common sense. “You have to wear gloves when you’re using it, and be careful. But I’d hardly call it dangerous!”
“The render on the outside was one of quickest things to do,” adds Mike. “Talking to our lime suppliers, they suggested we connect a hopper to a compressor to spray it on. It goes quite quickly — the hopper was emptied in about five seconds! So it’s best to have three people working on it, one to mix, one to feed the hopper and the other to spray. We put up three coats, the first was a spatter coat to key in to the straw, the second was the heaviest at about 25mm thick and the third one was applied by hand to give a finish about 35mm thick. I used a ball of rough woven cloth (hessian/burlap) to give it a swirly finish. That stops the rain from running down your wall too quickly, which stops the lime from getting washed off.”
Other components
The foundations are all limestone with lime mortar, built to keep the bales off the ground. “The ground floor sub-floor is a 100mm concrete slab poured over the underfloor heating pipes that lie on top of 100mm foam insulation,” says Mike. “This was half the cost of the lime and hemp insulation mix, which was estimated at €6,000. I’m glad we chose the alternative route, as I know people nearby who used a lime hemp mix for their foundations and they weren’t happy with it, apparently it’s not as good insulation and it takes months to dry.” At the time eco-friendly concrete was too expensive, but he says it’s now comparable. “If I were to do it again I’d definitely use the low carbon concrete.”
Another example of products that have significantly come down in price since Mike and Jo built their home are windows. “Triple glazing nowadays is affordable – that’s something we really wanted but we would have had to wait for another six years for prices to come down!”
In fact, finding the right suppliers for the curtain wall in the living room was one of the biggest challenges. “Window suppliers wanted to put in a dividing bar between the panes, which we didn’t want, and they would’ve charged us four times more than what we ended up paying. So we went ahead and built it ourselves by getting double glazed units sealed with weather strips. It’s a commercial system that ended up costing us €5,000.” The rest of the windows in the house cost €17,000.
Of course, there were some bits of the project that were done by others, including the plumbing and electricity. “The electrician is a friend of mine so I helped him do the work, but the plumber worked on his own. The plastering on the stud walls and ceilings was also done by a local guy, and the wood flooring was professionally installed. It was the same price to buy the wood and get it installed as buying the wood only. As for the linseed floor covering, we didn’t have much choice as it requires specialist installation. That actually turned out to be one of the most expensive parts of the build, costing €6,000, but we love it. It’s beautiful!”
Living the dream?
Sustainability is about making as little an impact as possible, and in the case of houses, that includes how they’re heated. As a result Jo and Mike were intent on sourcing their fuel from their property. “When we got here we planted six acres of coppice,” says Mike. “In eight more years we’ll be self-sufficient. For now, we buy the wood to fuel our log burner, which we put in a boiler house. It’s manually fed, so we have to light and stoke it. There’s a 1,500 litre buffer tank and a separate hot water tank.”
They have since added a log burner in the living room. “We spent two winters with -16°C, and the underfloor heating in the living room was struggling due to all the glass,” he says. “But it’s mostly a visual thing, it’s so nice to have in winter. It may not always be necessary for heat, but it’s always aesthetic.”
Another aesthetic consideration was installing underfloor heating both upstairs and down, which cost them €10,000. “I have a problem with radiators, they always seem to get in the way of where you want to put the furniture! So even though upstairs the underfloor heating doesn’t get used very often, only occasionally during cold spells, I’m glad we spent the extra money to put it in.” Downstairs the pipes are encased in a four inch concrete slab on top of 100mm thick rigid insulation board.
Of course for most, living the sustainable dream has a lot to do with being self-sufficient. In fact Jo and Mike had an interest in permaculture before they even thought of moving to Ireland. “In the early 1990s permaculture was sprouting in England, and we were both drawn to that,” says Mike. “When we moved here we added fruit trees and a polytunnel. This year we’re planting more of what we love and what’s easy to grow…. broadbeans, beetroot, tomato and beans. Onions aren’t that productive and they’re much cheaper to buy in shops!” They also have a well for their water needs, collect rainwater, and even compost their humanure.
With hindsight, Mike says that if they had spent part of the budget on labour it would certainly have been a quicker build, but it would have put them under more of a financial strain. “Something has to give,” he says. “For example, we’re now both busy working so there isn’t much time. We originally had the idea of being self-sufficient but with a young family a lot has gone out the window! I suppose if we didn’t have a mortgage one of us could go part time and take care of the land. Life is full of compromises.”
House size: 3,000 sqft
Site size: 13 acres
Total cost: €200,000
Build spec
Build type: timber frame with straw bale infill, and original masonry (stone and lime)
U-values: not available
Insulation: walls: 500mm straw, floor: 100mm PIR board, roof: 225mm recycled newspaper. For the south facing external wall of original stone building, 50mm wood wool panels with lime render.
Windows: wood frame, double glazed, argon filled